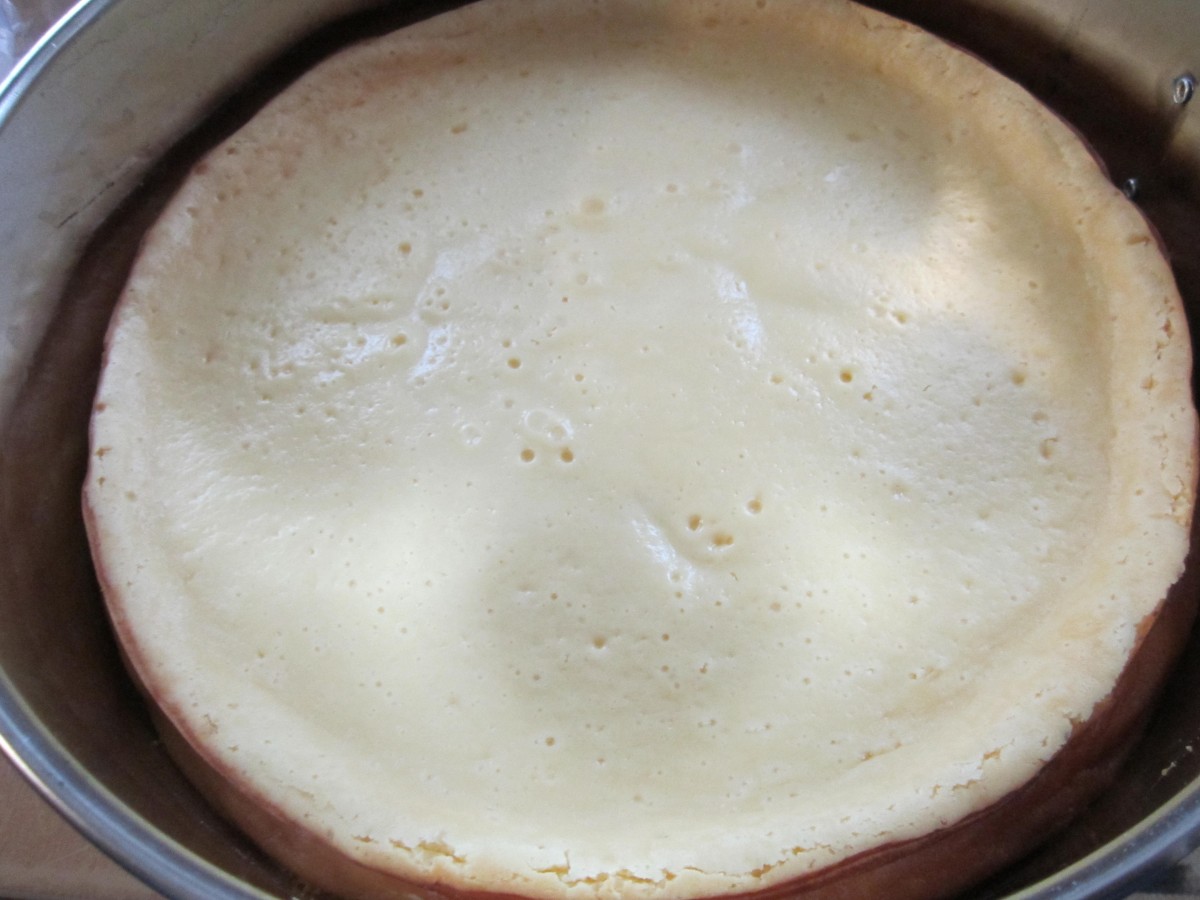
Classic Cheesecake
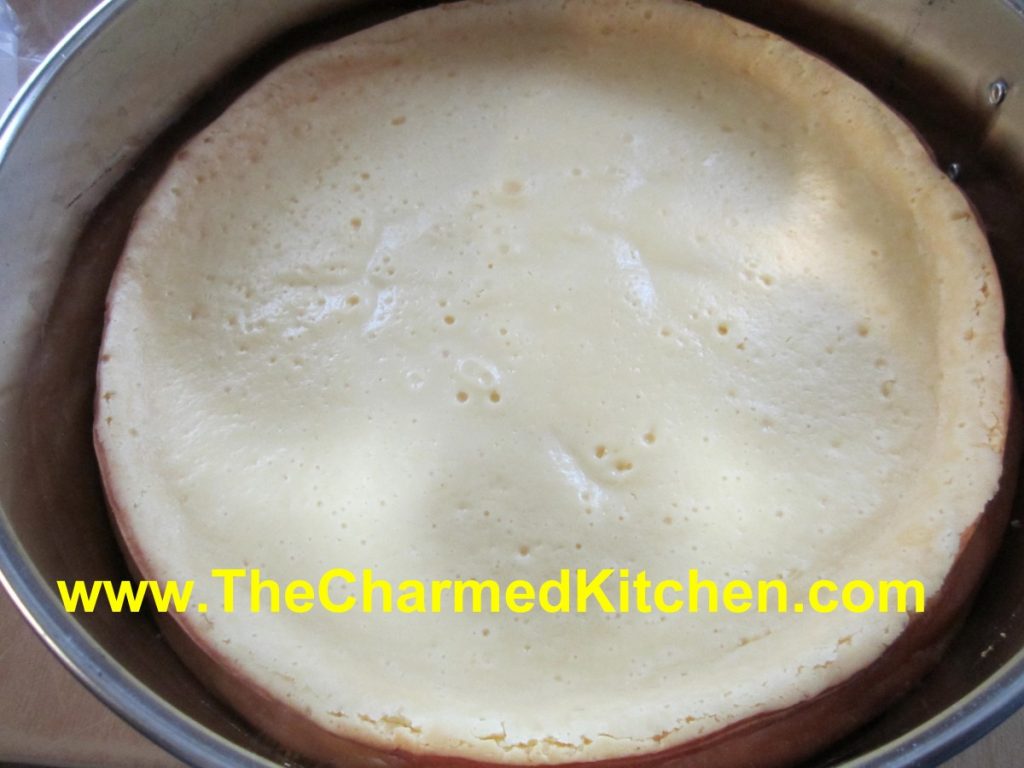
Cheesecake is one of the most popular desserts around, and for good reason. It is rich and satisfying in a way no other dessert can be. I make a lot of different cheesecake recipes, and this is one of my favorites. Simple to make, with all the creamy denseness you expect in a classic cheesecake. You can leave it plain to serve, or top with sour cream, as suggested in the directions, or top with fruit, preserves, shaved chocolate. Well, you get the idea. Have fun, get creative.
If you get cracks in your cheesecakes, try buttering the pan before baking. It will help to prevent the cheesecake from sticking to the pan, reducing cracks. Also, don’t over mix the eggs. Just stir them in.
Classic Cheesecake
1/3 c. butter
1 ¼ c. graham cracker crumbs
¼ c. sugar
2 (8oz.) packages cream cheese, softened
1 (14oz.) can sweetened condensed milk
3 eggs
¼ c. lemon juice
8 oz. sour cream
Preheat oven to 300-degrees. Combine butter, crumbs and sugar and press firmly into the bottom of a lightly buttered 9-inch springform pan. In a large mixing bowl beat cheese until fluffy. Gradually beat in milk. Stir in eggs and juice and mix well. Pour into prepared crust and bake 50-55 minutes or until set. Cool completely then spread sour cream over the top. You can omit the sour cream, or add different toppings.
Tips for a Better Cheesecake
I thought I’d share some tips with you for better cheesecake. Have you ever had a cheesecake crack? You did everything according to the directions and it comes out of the oven just fine and then- a crack. It happens a lot but it doesn’t have to. There is a simple solution.
I followed the rules, too. I did not over beat the eggs, sometimes I added a pan of water to the oven. There are recipes that call for leaving the cheesecake in the oven, with it turned off, to cool down slowly. All work sometimes- but then- a crack. You cover it up with pie filling or sour cream but it still bothers you- what did you do wrong?
I came upon the solution that has worked for me. It’s simple really. Cheesecakes puff up while baking and then as they cool down they deflate. They crack because they stick to the sides of the pan. As it shrinks it pulls on the cheesecake and a crack results.While cheesecake recipes almost never tell you to do this- I just spray the pan with a non-stick coating or brush with a little oil or melted butter. So simple. Every time I have done this the cheesecake puffs then shrinks while cooling and the result- no cracks.
Here are some more cheesecake baking tips.
- Let the cream cheese and eggs stand at room temperature for 30 minutes before using.
- Mix the ingredients until just mixed, don’t over mix as that also causes cheesecakes to puff up and then fall and crack.
- Use a springform pan so you can remove sides after baking.
- Either butter the sides of the springform pan or loosen the sides as soon as it comes out of the oven to prevent cracks as the cake cools.
- Place springform pan on baking sheet or pizza pan to catch any drips.
- Keep oven humid during cooking to reduce cracking. Just place a pan of water on a lower oven rack for recipes that are not already using a water bath.
- Let baked cheesecakes cool down slowly. Cool on a wire rack and remove sides when the recipes specifies.
- Test for doneness near the end of the baking period by gently shaking the cheesecake. When fully cooked a 1-inch section in the middle will jiggle slightly. This area will be 2 inches wide in a sour cream recipe. This soft spot will firm up after cooling down. Knife tests do not work on cheesecakes because the knife will cause the cake to crack and cakes including sour cream will always test undone even when fully cooked.
- Stored cooled cheesecake in the refrigerator covered with plastic wrap or an inverted bowl to prevent drying out and also to keep it from picking up odors. Cheesecake will keep for up to 3 days.
- To freeze, place the cooled whole cheesecake or cheesecake slices in the freezer unwrapped. Leave in until partly frozen and then wrap tightly in freezer wrap. Use within a month for best flavor. Thaw in the refrigerator. Loosen wrap, but keep cake covered during thaw.
Bonus Tip: Don’t be afraid to play around with recipes. You can interchange crust recipes or add fine chopped nuts to a crust. Experiment with flavorings. Try using mint, lemon, almond, chocolate and nut flavorings to add a little zing to a favorite recipe. You can also decorate your cheesecake with powdered sugar, cocoa, fruit, nuts, candies, shaved chocolate…
Halloween Candy Mini Cheesecakes
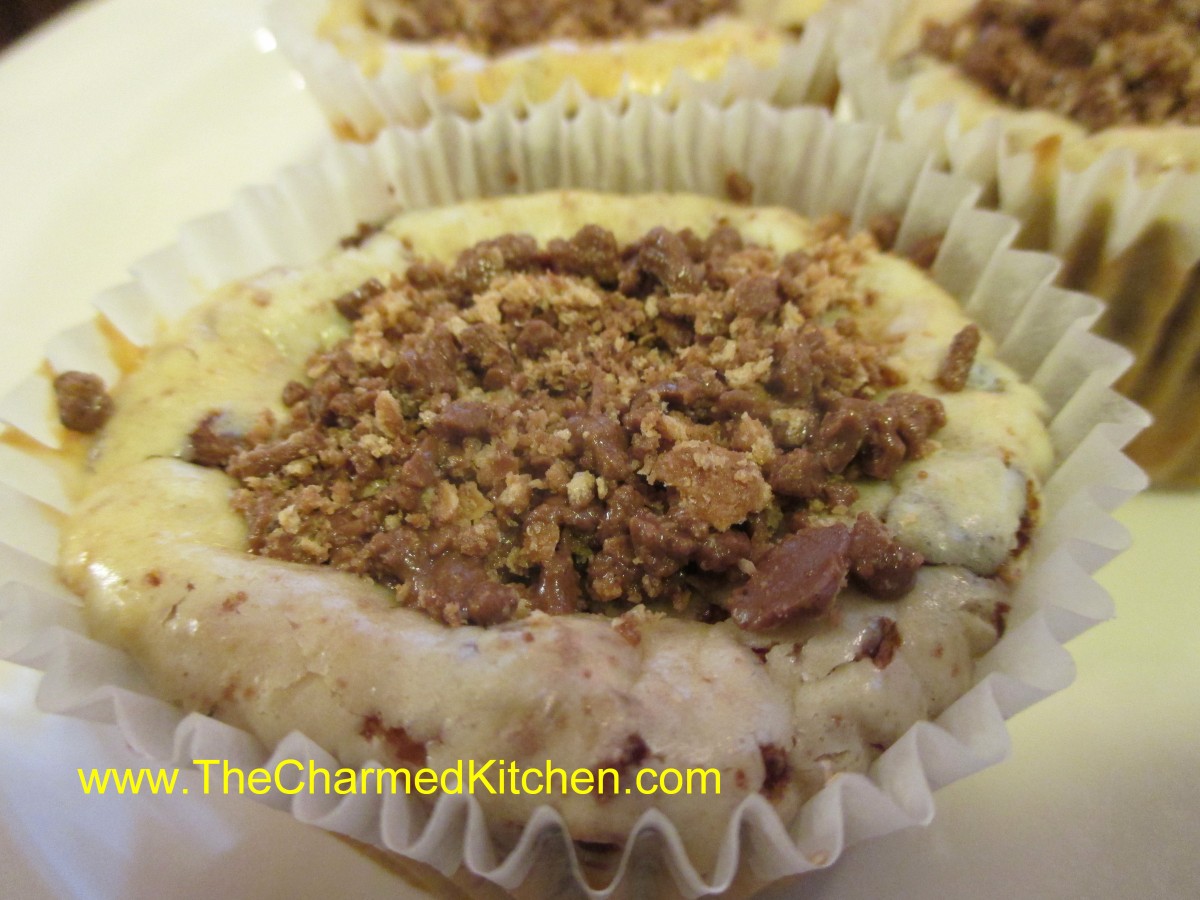
Kit Kat Mini Cheesecake
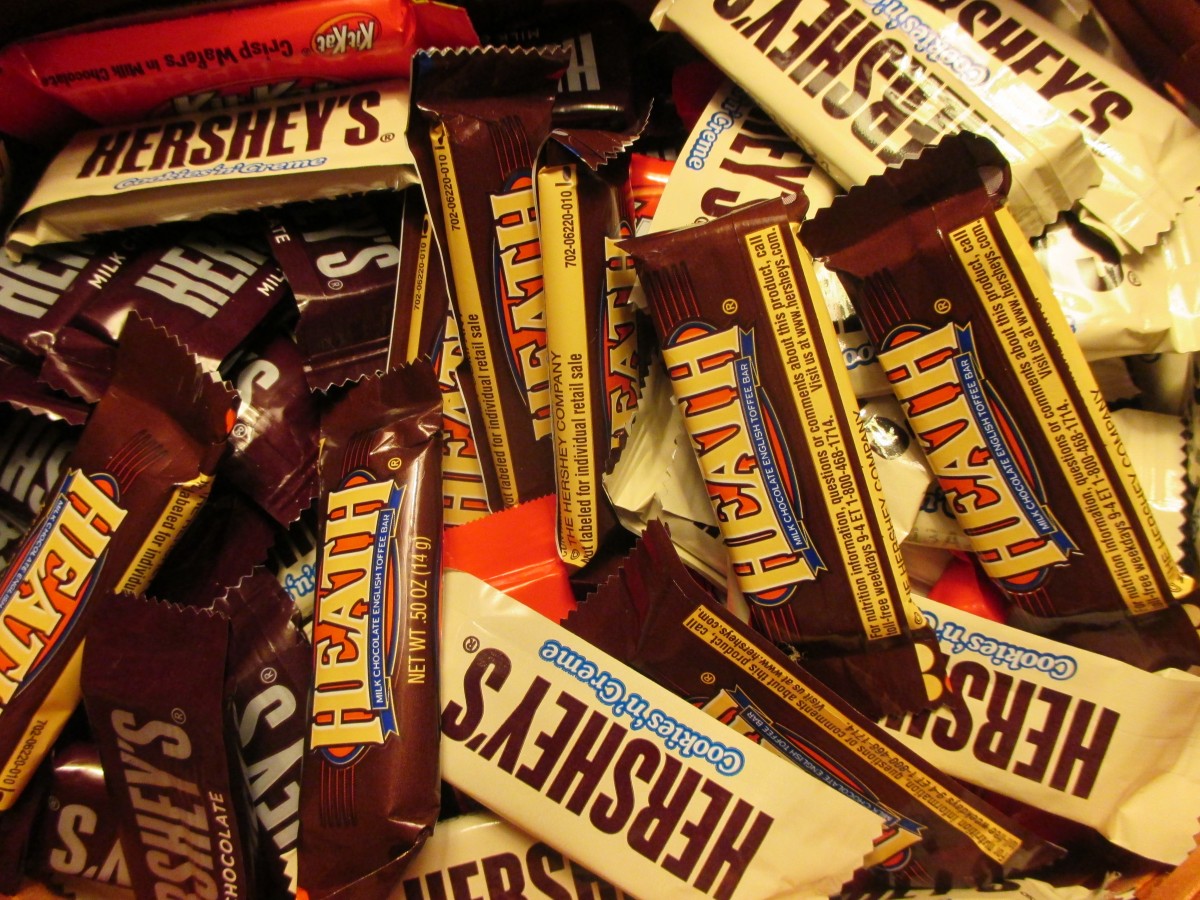
Due to really cold, wet weather I found myself with a lot of leftover Halloween candy. I needed to make a dessert for a dinner later tonight so I decided to use the candy in the dessert. I came up with a couple of ideas and wanted to share them with you. The first idea I came up with was mini cheesecakes. I’ve made them before so I used my recipe and just folded in crushed candy bars. Once the cheesecakes cool they deflate a little so I also added some crushed candy bars to the top to make them look nice. Only change from the original recipe was a slight decrease in sugar to compensate for the extra sweetness of the candy. I used what I had leftover, but I am sure a lot of different candy bars would work. I used a small food processor to really crush up the candy bars. I made 2 batches, one with cookies and cream candy bars and the other with Kit Kat bars.
Halloween Candy Mini Cheesecakes
12 vanilla wafers
2 (8 oz.) cream cheese, softened
1/3 c. sugar
2 t. vanilla
2 eggs
2/3 c. crushed candy bars plus 1/4 c. crushed candy bar, for topping
Line 12 muffin tins with paper liners. Place 1 wafer in each. Beat together remaining ingredients (except candy) for 1 minute with electric mixer. Fold in candy. Divide this mixture in the muffin tins, filling each 3/4 full. Bake 25 minutes at 325 degrees. Cool and decorate with extra crushed candy. Makes 12. These can be frozen.
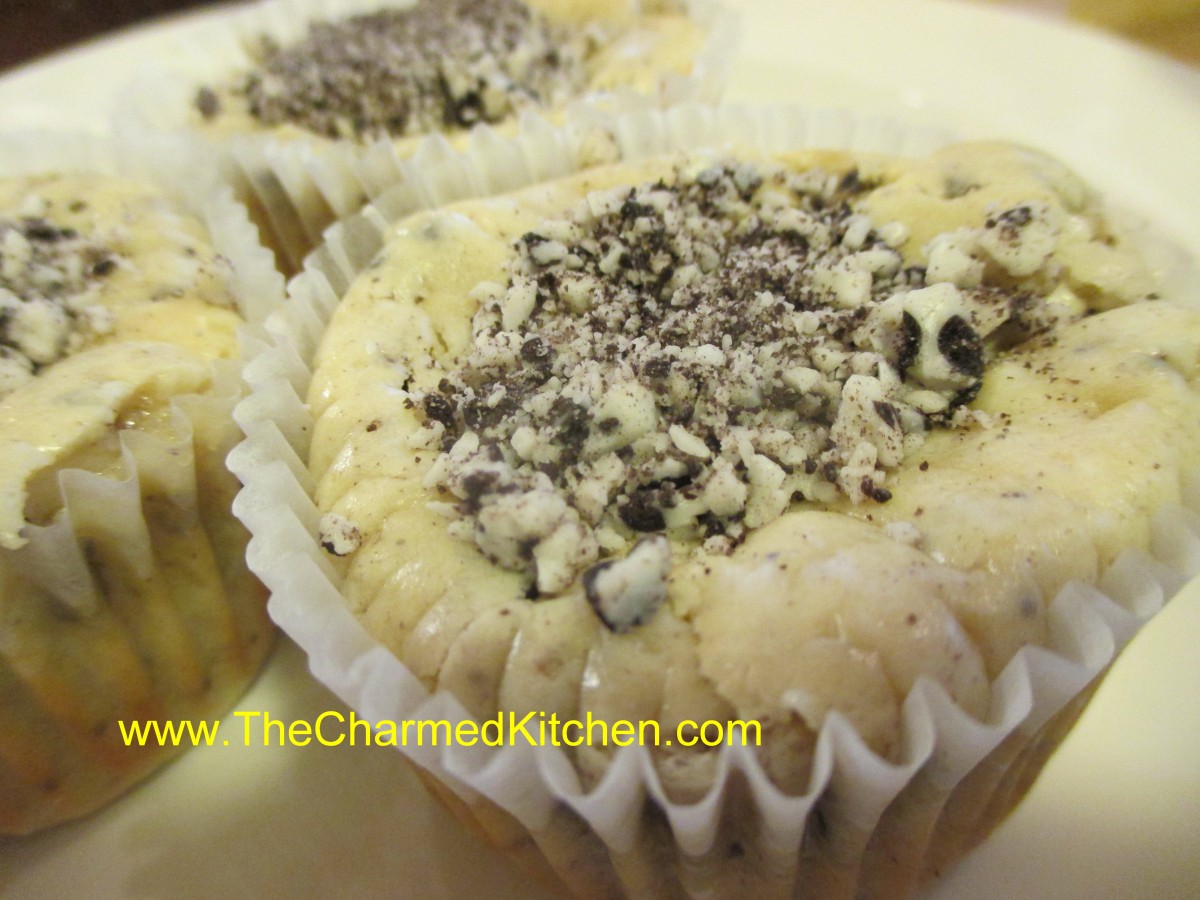
Cookies and Creme Mini Cheesecakes
Leftovers
Lemonade Cheesecake Squares
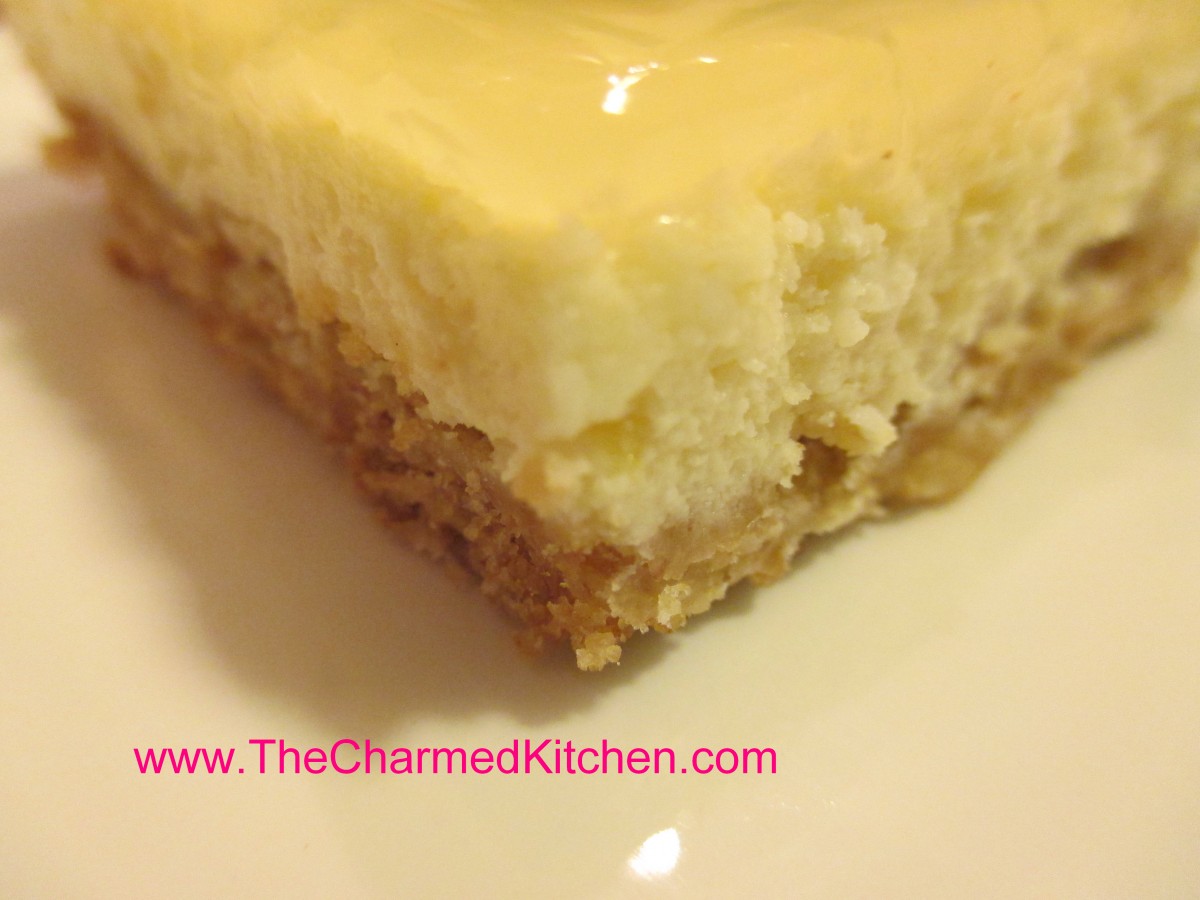
Lemonade Cheesecake Squares
I always enjoy the combination of lemon and cheesecake. I wanted a new recipe and decided to jazz up the flavor with lemonade both in the filling and as a glaze on top. The end result is just what I had hoped for. Creamy, not too sweet and a pop of lemon flavor from the glaze. I also wanted to add more texture to the crust so I added some oats in addition to the graham crackers and baked this cheesecake in a 9×13-inch pan. You could serve it with a few berries on top, if you like. Here is the recipe.
Lemonade Cheesecake Squares
Crust:
¾ c. butter (1½ sticks)
1 ¼ c. graham cracker crumbs
1 c. oatmeal, old-fashioned or quick cooking
¼ t. salt
Filling:
2 (8oz.) packages cream cheese, softened
¾ c. frozen lemonade concentrate, thawed*
3 T. flour
2 eggs
2 t. grated lemon peel
Glaze:
¾ c. frozen lemonade concentrate, thawed*
2½ T. cornstarch
Heat oven to 350-degrees. Grease a 9×13-inch baking pan. Beat together butter with the rest of crust ingredients. Press into bottom of prepared pan and bake 20 minutes. Beat cream cheese, lemonade and flour until fluffy. Stir in eggs and peel. Pour over crust and bake for 25 minutes, or until set. Cool then add the glaze. To make the glaze: in small saucepan combine the lemonade with the cornstarch. Heat together over medium heat until mixture becomes thickened and bubbly, stirring constantly. Pour over cheesecake. Store covered in fridge. Makes 24 squares.
*You can use store bought frozen lemonade concentrate or here is the recipe I use to make my own.
Homemade Lemonade Concentrate
1 1/3 c. lemon juice- fresh or bottled
1 c. sugar
lemon zest, optional
Combine ingredients and stir until sugar is dissolved. Freeze until ready to use. Makes a little over 1 1/2 cups. To use: combine three parts water to one part concentrate.
http://thecharmedkitchen.com/2014/07/12/homemade-lemonade-mix/
Balaton Cherry Cheesecakes- Gluten Free
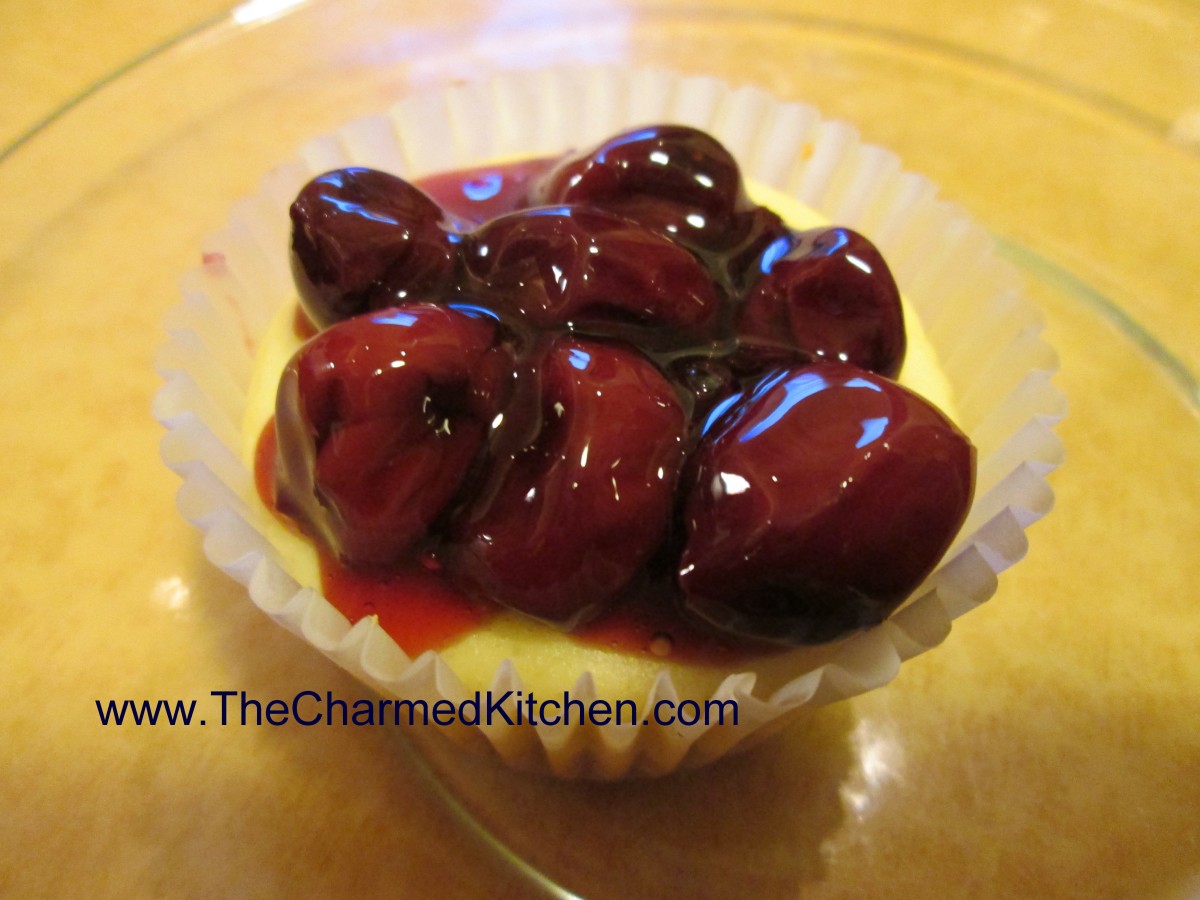
Balaton Cherry Cheesecakes- Gluten Free
I was having some friends over recently and wanted a gluten free dessert. I was also lucky enough to have recently received some frozen cherries from King Orchards in Michigan.* Inspiration struck and I ended up making these mini cherry cheesecakes. The crust is a shortbread type cookie made with gluten free flour. The filling pretty straight forward with a nice splash of lemon juice and vanilla. The cherries are a variety called Balaton with Hungarian origins. While they are considered a tart cherry they are darker than most tart cherries and have a sweetness to them that I just love. I used 2 cups of frozen cherries-I like a lot of cherries on my cheesecake- but I only used 2 tablespoons of sugar to sweeten them. The recipe made a dozen. Here is what I did.
Balaton Cherry Mini Cheesecakes – Gluten Free
Crust:
1/4 c. softened butter
1/4 c. sugar
1/2 c. gluten free flour – found in some grocery stores- I got mine at Costco
pinch of salt.
Filling: 2 (8 oz.) packages cream cheese, softened
1/2 c. sugar
2 T. lemon juice
2 t. vanilla
2 eggs
Balaton Cherry Topping:
2 c. Balaton cherries- or other frozen tart cherries- thawed
2 T. sugar, or to your taste
1 t. tapioca starch- you could also use cornstarch
Preheat oven to 325 degrees. Line 12 muffin pans with paper or foil liners. In mixing bowl combine ingredients for crust by first mixing the butter and sugar together and then stirring in the flour and salt. Divide the dough into 12 portions and roll into balls. Place one ball in each paper lined pan and press to flatten. Bake for 10 minutes. While crust is baking make the filling. Combine cream cheese, sugar, lemon juice and vanilla and blend until smooth. Stir in the eggs. Spoon the batter into the muffin pans- they will be pretty full. Bake for 20-25 minutes, or until puffy and set. Cheesecakes will flatten a little when cooled. While the cheesecakes are baking you can make the cherry topping. Pour off any liquid from the defrosted cherries into a small saucepan. You should have about half a cup. Add sugar and tapioca starch or cornstarch and heat over medium heat. Stir constantly until mixture thickens- it just takes a few minutes. Stir in the cherries and allow mixture to cool down. Once cheesecakes and topping are both cooled down spoon cherries over the cheesecakes and chill until ready to eat. These could be frozen- but you aren’t going to have any left over.
*http://kingorchards.com/
Creamy Baked Cheesecake
Creamy Baked Cheesecake
It’s one of our favorite desserts and for good reason. Cheesecake is rich and satisfying in a way no other dessert can be. I make a lot of different cheesecakes and this is one of my favorites. Simple to make and you can top it with any number of goodies to make it your own. If you get cracks in your cheesecake try buttering the pan first. It will help to prevent cracking. Also, don’t over mix the eggs. Just stir them in.
Creamy Baked Cheesecake
1/3 c. butter
1 ¼ c. graham cracker crumbs
¼ c. sugar
2 (8oz.) packages cream cheese, softened
1 (14oz.) can sweetened condensed milk
3 eggs
¼ c. lemon juice
8 oz. sour cream
Preheat oven to 300-degrees. Combine margarine, crumbs and sugar and press firmly into the bottom of a lightly buttered 9-inch springform pan. In a large mixing bowl beat cheese until fluffy. Gradually beat in milk. Stir in eggs and juice and mix well. Pour into prepared crust and bake 50-55 minutes or until set. Cool completely then spread sour cream over the top.


