Monthly Archives: August 2013

Dilly Green Beans

Dilly Green Beans

Dilly Green Beans

In cooking class last night we made dilly green beans. These are one of my favorite pickles.  I like pretty much any type of pickle and I love green beans so no surprises there. If you have an abundance of green beans you might consider making a batch of these to enjoy year round.  While the recipe calls for 1/4 teaspoon of red pepper flakes per jar- feel free to add more for a spicier version.


Dilly Green Beans


4 lbs. table‑perfect whole green beans

1 3/4 t. crushed dried hot red pepper

3 1/2 t. dried dill seed or seven fresh dill heads

7 cloves of fresh garlic, peeled

5 c. vinegar

5 c. water

1/2 c. less 1 T. pickling salt


Wash beans thoroughly.  Remove stems and tips, and cut them as much as possible in uniform lengths to allow them to stand upright in canning jar, coming to the shoulder of the jar.  have jars clean and very hot, and lids and sealers ready in scalding water.  In each jar place one dill head or 1/2 t. dill seed, add one garlic clove, and 1/4 t. crushed hot red pepper.  Pack beans upright in jars, leaving 1 inch of head room.  Heat together the water, vinegar and salt.  When the mixture boils, pour it over the beans, filling each jar to 1/2 inch from the top.  Run a plastic knife down and around to remove trapped air.  Adjust lids, and process in a boiling water bath for 10 minutes, start timing after the water in the canner returns to a boil.  Remove jars.  …Wait at least 2 weeks for these beans to develop their flavor.  Yield: 7 pints


Source:  Putting Food By
Posted in Cooking |

Crock Pot Quiche

Crock Pot Quiche

Crock Pot Quiche

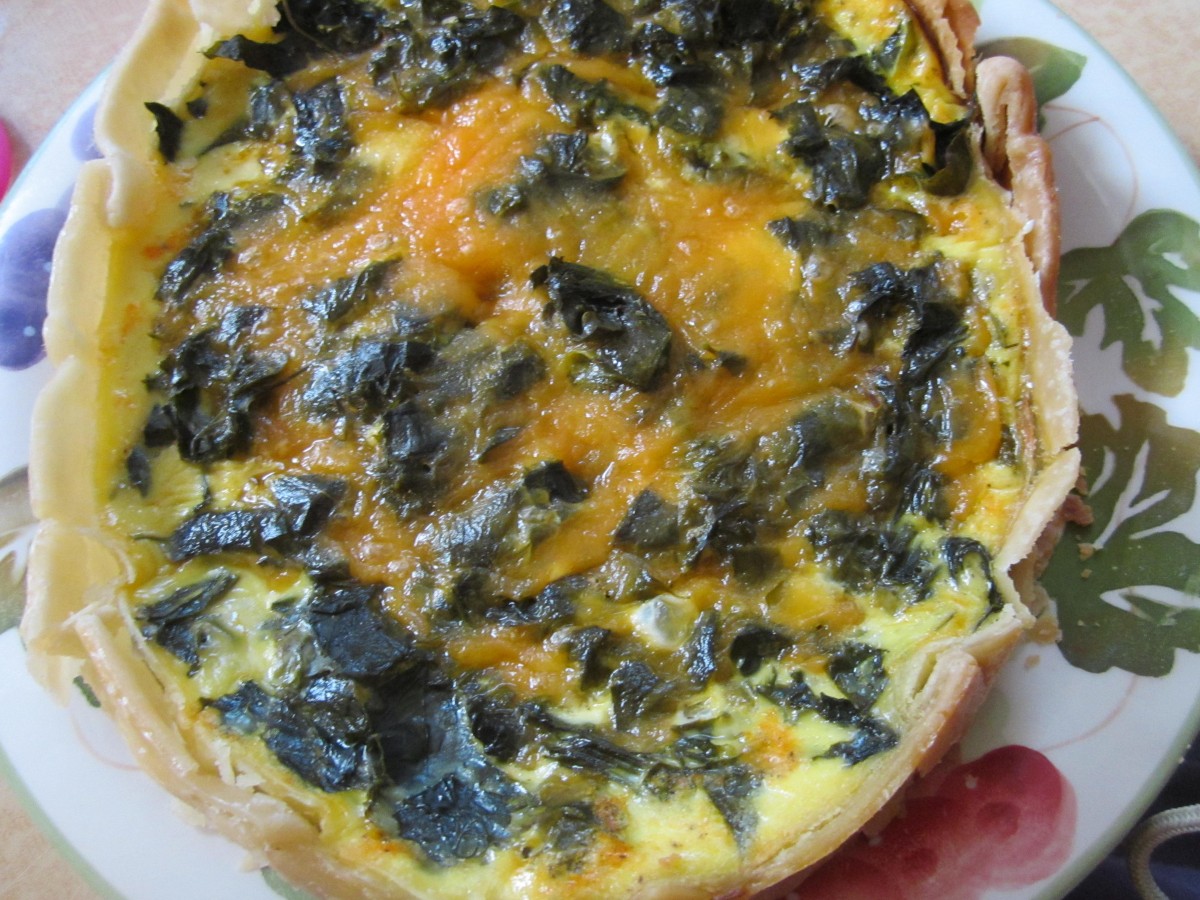
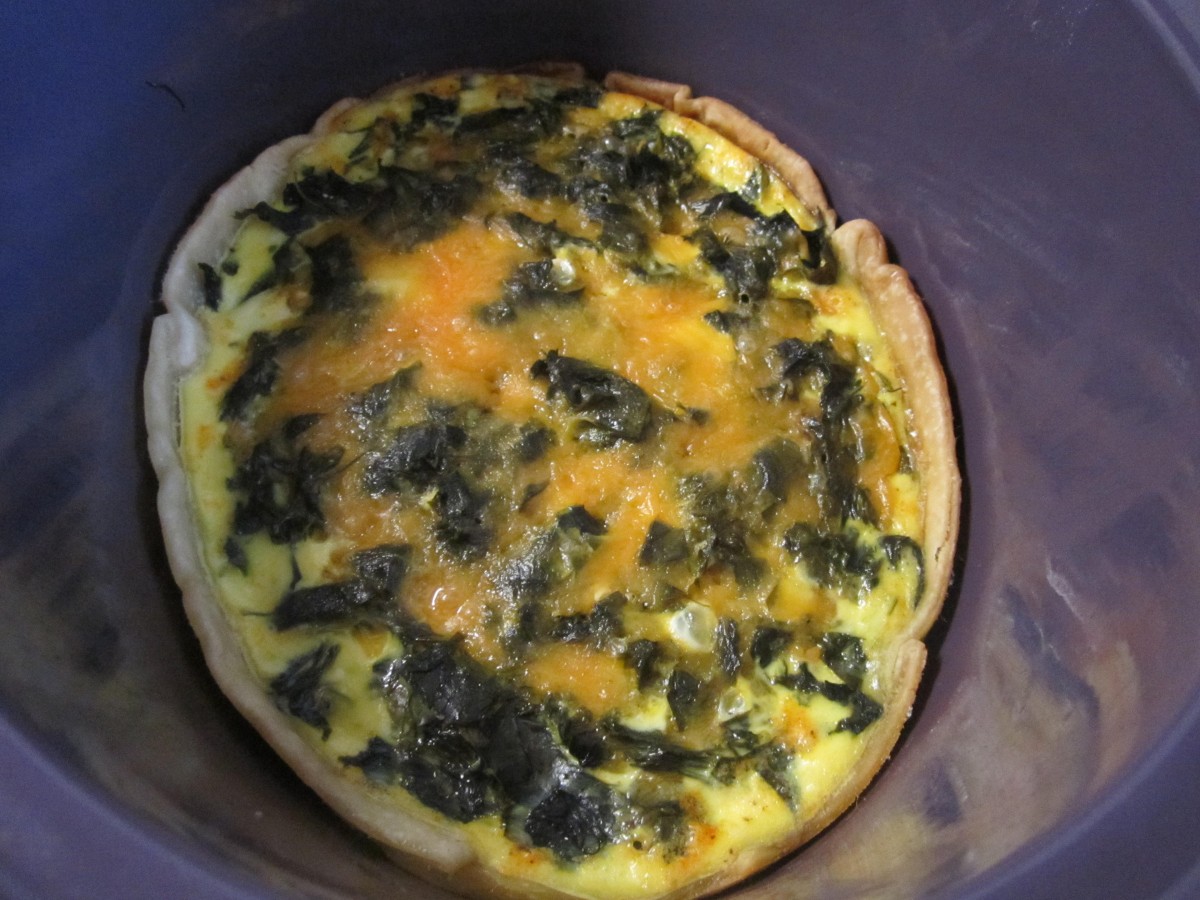
I have to give credit for the inspiration on this one to Harlan Cheek. Last week he posted a recipe for baking a pecan pie in a crock pot. I was intrigued. It certainly would be cooler than turning on the oven. If it worked for pie would it work for a quiche? I had to find out. I followed his directions as best I remembered them. I started by spraying the inside of the crock pot with non- stick baking spray. I am sure I could have oiled it instead or maybe rubbed it with butter. Then I placed the pie crust in- trying to fit it as best I could. It was pretty easy. I added the fillings like I normally would, put on the lid and set it on high. I let the quiche bake for 90 minutes- then gave it a look. Harlan’s recipe said  to bake for 2-3 hours. It was set but the crust needed a little more time so I let it go another 30 minutes.

It worked!! A perfectly “baked” quiche in the crock pot.

OK- I can hear the question you want to ask-how do you get it out? We had errands to run so I turned it off and left it in the crock pot, uncovered, for an hour or so. It was still warm. I loosened the edges and removed the crock from the base. I placed my hand on the top of the quiche and turned the crock over. It came out right into my hand and I placed it on a serving plate. A little of the crust crumbled- but it mostly held together. Next time I might try 2 spatulas. Hindsight….

If you haven’t tried this before I urge you to try. I’ll post the recipe for the quiche soon. It was made with a weed from my yard- and lots of cheese. I would love to hear what you baked in your crock pot and how it turned out.

Quiche on the serving plate

Quiche on the serving plate


Posted in Cooking |

Drying Plums

Drying Plums

Drying Plums

Plums are abundant right now and I recently got some Italian or prune plums. They’re small and very sweet. They also dry easily and turn into prunes. I’ve noticed lately that commercially they are often marketed as dried plums.  Maybe they think it sounds nicer than prunes. Well, no matter. To dry the plums I first placed them in boiling water for a minute.This helps to crack the skin and makes them dry easier. Especially important if you want to dry them with the pits intact. Since I was pitting them it probably wasn’t critical but old habits die hard.  I made a small cut in each and removed the pits. I then made a solution of 2 cups water and 1 t. crystalline ascorbic acid ( Vitamin C). I soaked them in the solution for a couple of minutes then drained them. I then put them in my dehydrator and 14 hours later I had prunes, or maybe I should say dried plums. Either way they are moist and sweet and I can enjoy them long after their season in over. I’ll pop them in the freezer- just to be extra safe and extend their shelf life. I also have some larger plums. I’ll dry those next. I’ll pit and slice them and give them the same ascorbic acid dip- although I could also have used lemon juice and water or citric acid. They’ll also be dried for use later in baking, granola and just for snacks.

Posted in Cooking |

Kale with Apples

Kale with Apples

Kale with Apples

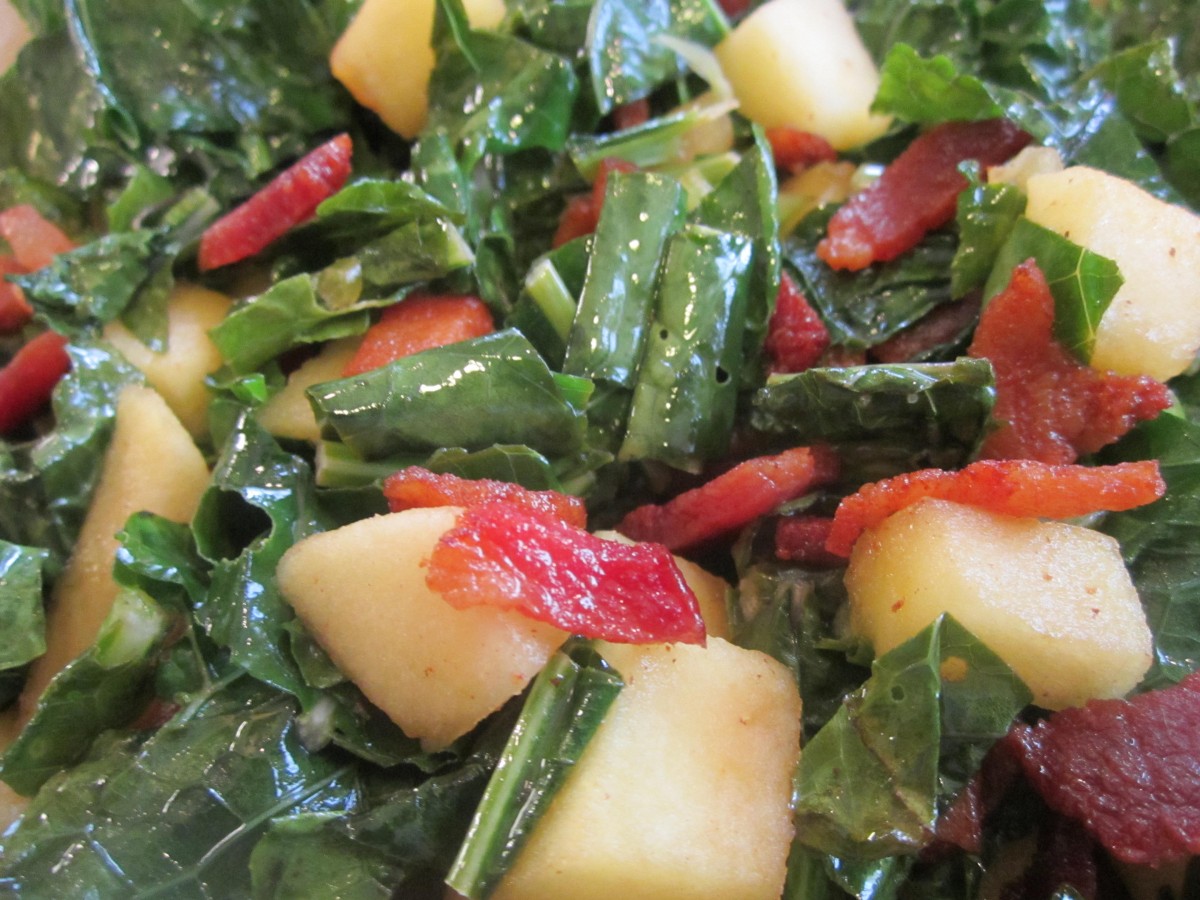
I made this dish in honor of my friend, Mari, who harvested 100 pounds of apples from her tree the other day. She also has a lot of kale in her garden so here is way to enjoy them together.

Kale with Apples

3 thick slices bacon, chopped

5-6 cups sliced kale- tough stems removed

3 T. water or apple juice

3 apples, peeled if desired, cored and chopped

salt and pepper to taste

hot pepper sauce to taste

Cook bacon in skillet until crisp. Remove bacon and all but 1 tablespoon of the fat. Add kale and saute until wilted. Add water or juice and cover. Cook over medium heat until kale is tender. This could take 5 to 15 minutes, depending on the type of kale and how old it is. Once the kale is tender add the apples and cook, uncovered, until apples are tender. Stir once in awhile to keep mixture from sticking. Most of the liquid in the skillet should cook off. Adjust seasonings and serve. Serves 2 as a side dish.

Posted in Cooking |

Sweet Focaccia

Sweet Focaccia

Sweet Focaccia

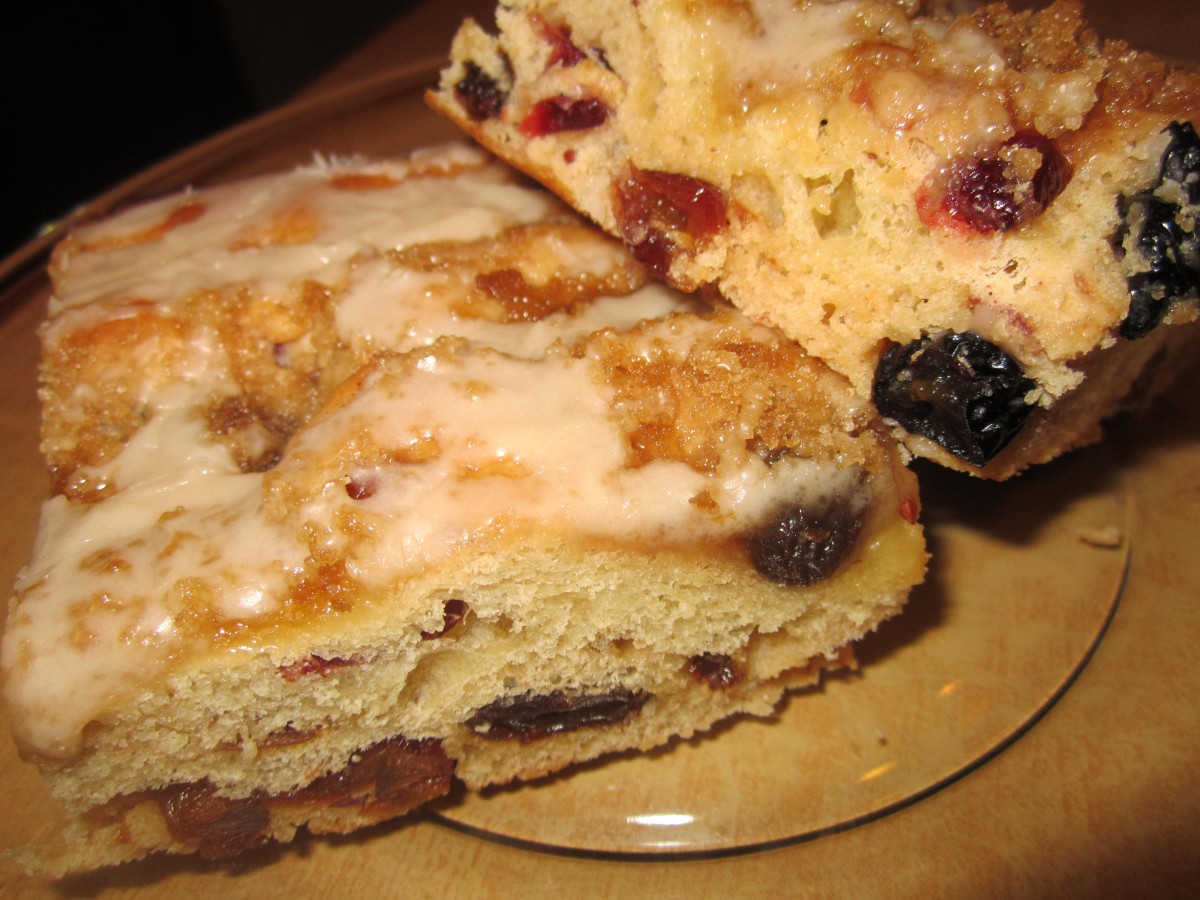
Focaccia is a wonderful Italian flat bread. Baked in a jellyroll pan, it is about an inch thick and is often used in savory dishes with cheese and other toppings-  like pizza. It is also sometimes split to make sandwiches. When I make focaccia I often add sauteed shallots, garlic and fresh rosemary. This time I made a lightly sweetened version. It only has 1/2 cup of brown sugar in it total- but gets a lot of sweetness from the dried fruit and orange juice. Loaded with dry fruits it could be a dessert or even a tasty breakfast. It was a big hit when a friend dropped in last night. It is moist and has a wonderful flavor and texture. You can leave it plain once baked or add a powdered sugar glaze. I added the glaze. 

Sweet Focaccia

3 cups assorted dried fruits (cherries, raisins, currants, cranberries or blueberries)

2 c. orange juice

1 packet yeast

1 t. sugar

3 ½ c. flour

2 t. salt

1/2 c. firmly packed brown sugar

½ t. cinnamon

¼ t. nutmeg

6 T. cold butter, cut into bits

In a bowl combine the fruit and orange juice and let stand 20 minutes. Drain fruit, reserving 1 cup of the liquid. Heat liquid until it is lukewarm. In the bowl of an electric mixture combine yeast with warm juice and sugar and let stand 5 minutes. Add flour, half the brown sugar, seasonings and butter and mix until dough is well-mixed. Knead dough with dough hook for 5 minutes, dough will be sticky. Add fruit and mix until evenly blended. Transfer dough to floured work surface and just roll around to coat with the flour. Place in oiled bowl, turning to oil top. Cover with plastic wrap and place in a warm place to double, about 11/2 hours.

 Note: At this point, if you would rather, you can punch the dough down and wrap it, then chill it overnight. Bring to room temperature before continuing.

Press the dough into an oiled 15×10 inch jellyroll pan and let it rise, loosely covered, for about 1 hour. Dimple the dough using your fingertips and sprinkle with the remaining brown sugar. Bake in a preheated 400-degree oven for about 30-35 minutes or until golden brown. Can be served warm or at room temperature.

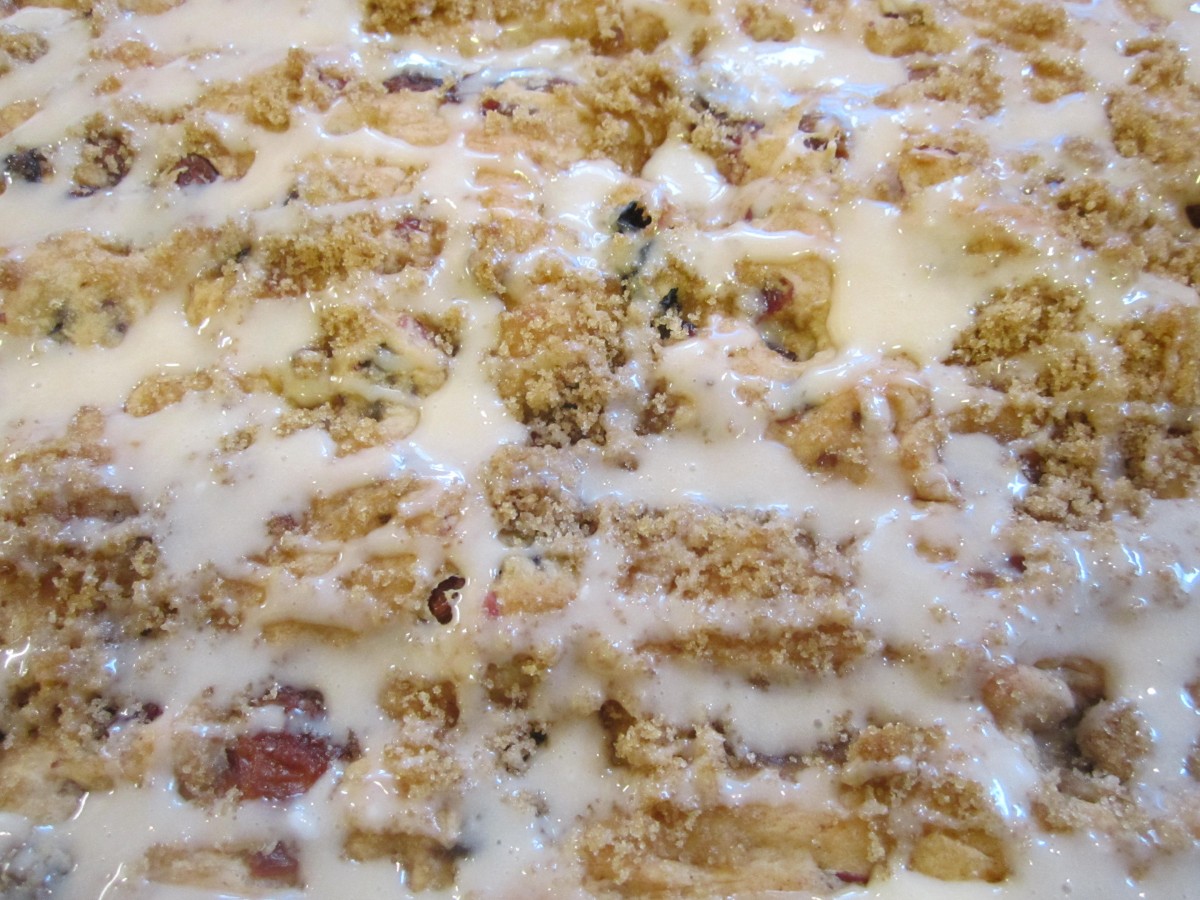
Note: The focaccia is just fine the way it is, but you can drizzle it with a powdered sugar glaze, or dust with powdered sugar. It makes a great breakfast dish, or the base for fruit shortcake,. If you wish to use large pieces of fruit like apricots, pineapple or mangoes, dip scissors in oil and use them to snip the fruit into smaller pieces. I sometimes also add 1/2 c. chopped nuts to the dough when I add the fruit. 

Note: Any focaccia made with fruit, vegetables, meats or cheese should be refrigerated. Also, baked focaccia can be wrapped well and frozen for a couple of months. Just defrost in the wrapping and then warm a little, if desired.

Freshly Glazed Sweet Focaccia

Freshly Glazed Sweet Focaccia

Posted in Cooking |

Fruit and Nut Granola

Homemade Granola

Homemade Granola

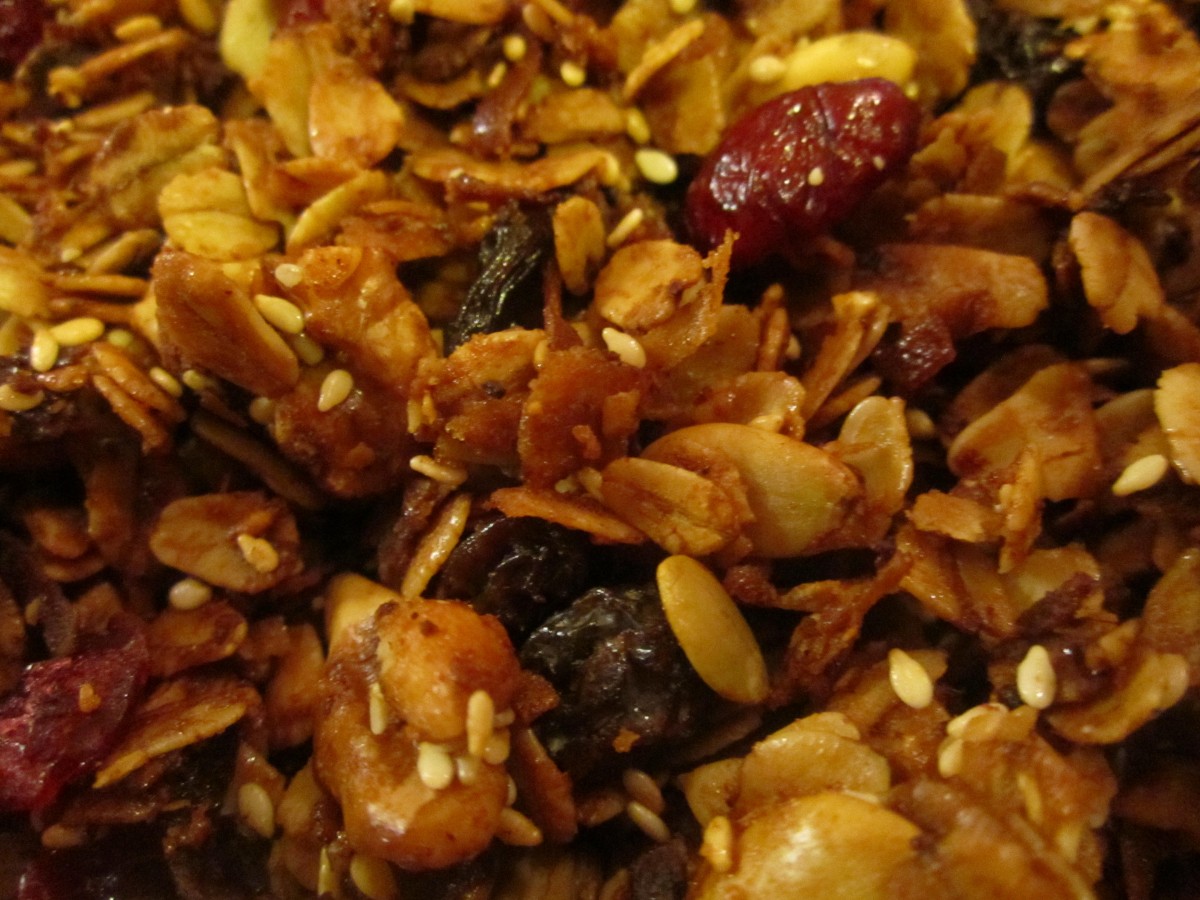
I really love good granola.  Not too sweet and loaded with nuts, fruits, seeds and more. Sadly, much of what is available in the stores is too sweet and lacking the extras I enjoy. I end up making my own and getting exactly what I want. Granola is easy to make, too. Sweetened with just a little honey and loaded with nuts, seeds and fruit it becomes more than just a handy breakfast food. It is also great as a snack. This batch I used walnuts, coconut, almonds, sesame seeds and pumpkin seeds plus dried cherries, raisins and dried blueberries. Also nice if you have kids- it’s a pretty healthy snack choice- and the kids can pick what they like to add to it.

Granola

3 c. rolled oats

1/4 -1/2 c. each of any of the following to equal 1-2 c. total

Sesame seeds, sunflower seeds, chia seeds, wheat germ, peanuts, pecans, almonds, hazel nuts, pumpkin seeds, walnuts, coconut… you get the idea. Don’t forget to chop up any big pieces.

1 t. cinnamon

1 t. orange peel

1/2 t. nutmeg

pinch of salt, optional

1/4 c. oil

1/4 c. honey- or add a little more if you like a sweeter granola

2 t. vanilla

Dried fruit to equal 1 -1 1/2 cups. Some choices could include: raisins, dried cranberries, cherries, pineapple, dates, figs, apricots, bananas, blueberries etc.


In large bowl combine oats with seeds and nuts and toss well with seasonings. Heat together oil, honey and vanilla and pour over oat mixture, tossing to coat evenly. Spread on a cookie sheet and bake in a 300 degree oven for 30 minutes. Halfway through the baking time stir mixture so the edges won’t burn. Remove from oven and return to large bowl. Toss with the dried fruit and allow to cool before storing in an airtight container in a cool, dry place. Use in 1 month or store in freezer or fridge to keep longer. Makes 5-7 cups.


Posted in Cooking |

Easy Mini Doughnuts

Easy Doughnuts

Easy Mini Doughnuts

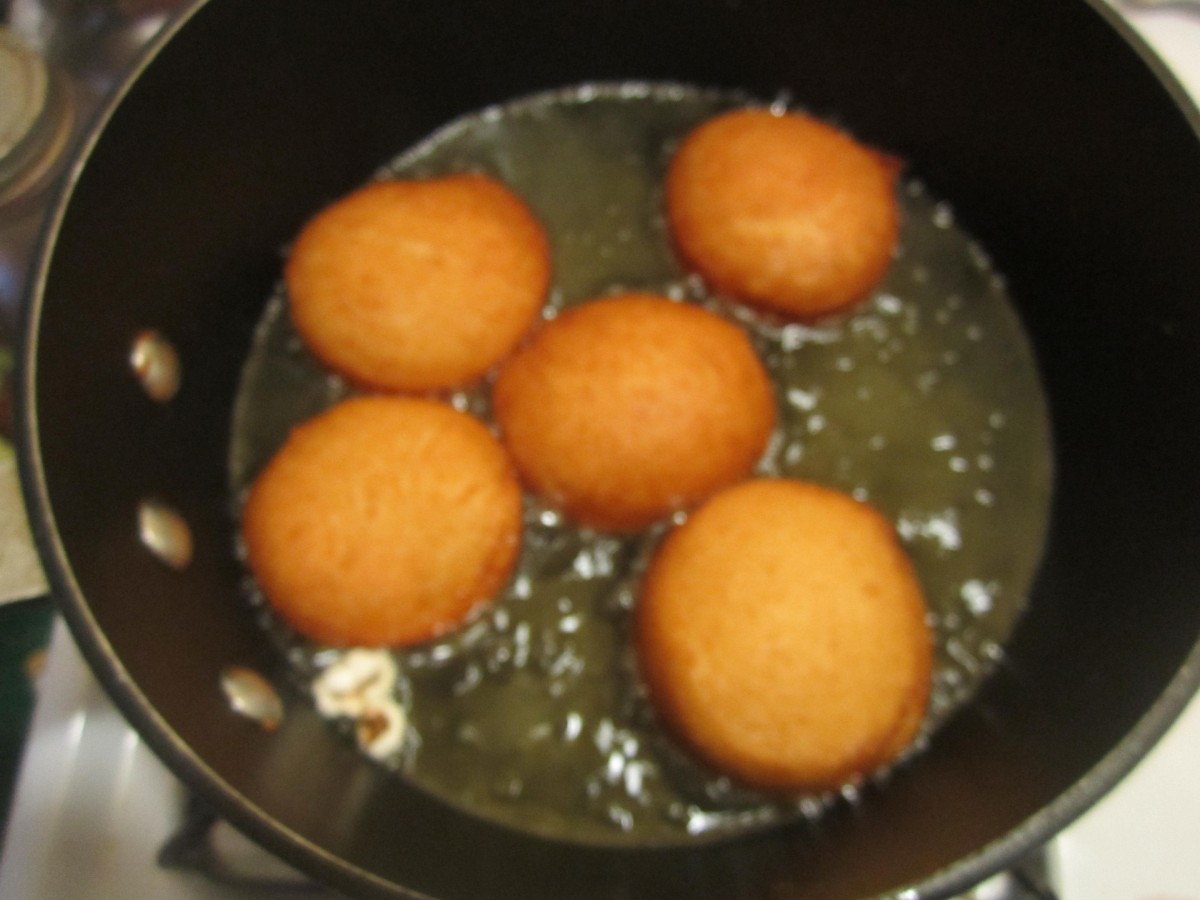
I had a couple of friends drop by the other day and while we had plenty of savory things to munch on I didn’t have any dessert. I did have a couple of packages of refrigerated biscuits, though. I heated up oil in a medium saucepan- only needed 3 cups or so. I also tossed in a kernel of popcorn as the oil was heating up. Popcorn pops at 350 degrees so when it popped I knew the oil was hot enough. I fried the biscuits, 5 at a time, for a minute or so per side, or until they were golden brown. Then I drained them on paper towels. I mixed a couple of cups of powdered sugar with some milk and vanilla to make the glaze. While the doughnuts were warm I dipped them in the glaze then set them on a plate to cool a little before serving. They were a big hit. It probably took longer to heat the oil than to actually cook the dough. If you don’t have biscuits laying around- I normally don’t have them- you can make biscuits from scratch and do the same thing. Great when you have unexpected guests- or just a taste for a warm doughnut.

Note: I could also have rolled them in cinnamon sugar or a mixture of cinnamon and powdered sugar. Or I could have melted chocolate chips with a little milk and made a chocolate glaze. I have made these before where I use a small cake decorating tip to insert jelly.

Frying the doughnuts

Frying the doughnuts

Posted in Cooking |

Smoky Shrimp and Corn Soup

Smoky Shrimp and Corn Soup

Smoky Shrimp and Corn Soup

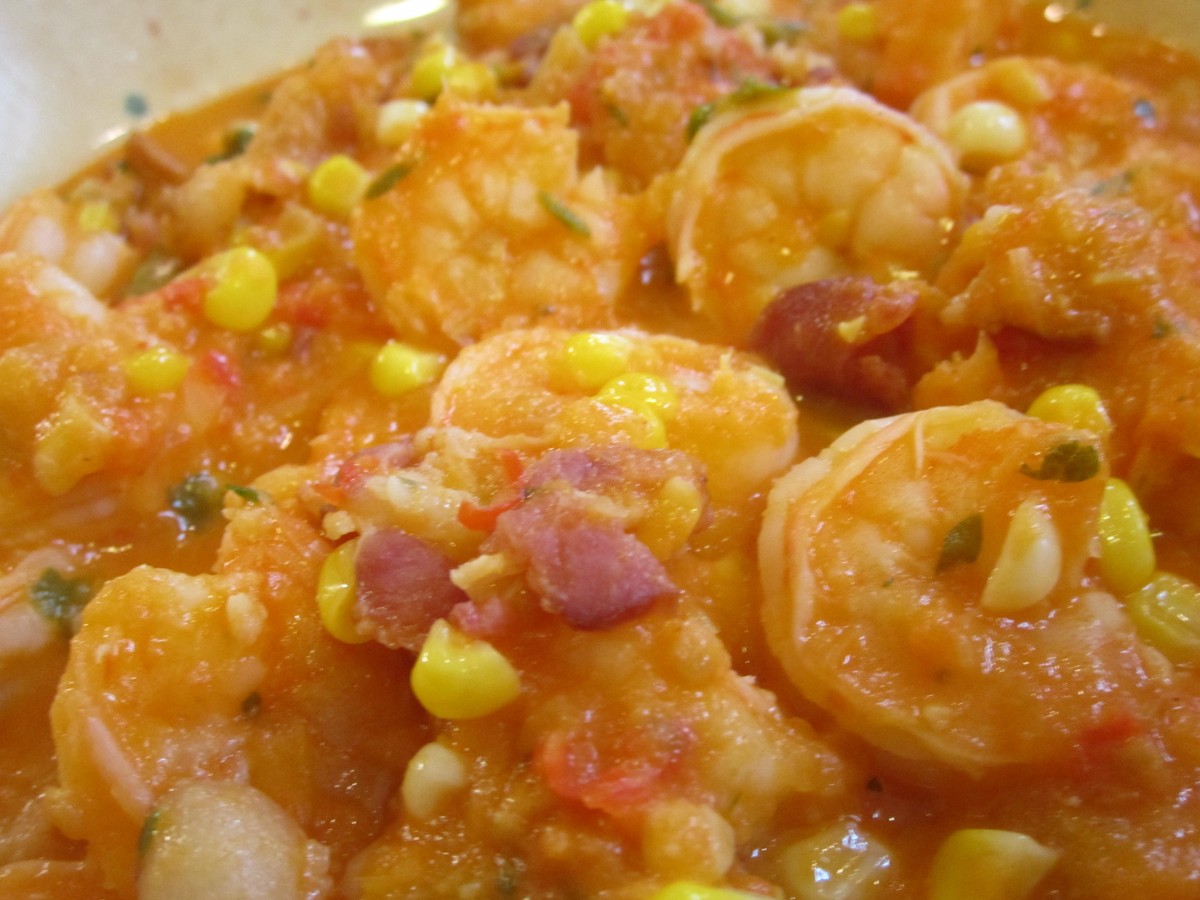
One of those days that I was inspired by produce I wanted to use and what I had on hand. In the end I ended up with a really good soup that I will be making again soon. I had some fresh tomatoes and corn and some shrimp and bacon. Added a few more ingredients and the soup was finished. This soup was hearty enough that it could easily have been served over pasta or rice, too.


Smoky Shrimp and Corn Soup

4 c. peeled and chopped fresh tomatoes

2 ribs celery, chopped fine

1 sweet red pepper, seeded and chopped

1 small leek, white part only, washed and chopped fine- you could use a small onion instead

1 c. stock- chicken, vegetable or seafood*

1/4 c. sherry, not cooking sherry

4 slices of thick-sliced bacon, chopped

corn kernels from 1 large ear of corn

1 1/2 lbs. raw medium shrimp, cleaned, shelled  and de-veined

hot pepper sauce

salt and pepper to taste

Fresh chopped parsley

Make the soup base by combining the tomatoes, celery, peppers, leek, stock and sherry in a pot and simmer until vegetables are tender, about 15 minutes. Meanwhile cook the bacon in a skillet until crisp. Drain off most of the fat in the pan and add the corn to the skillet with the bacon. Saute the corn for 3 or 4 minutes- to cook it and give it a little color. Puree the soup base.  I used an immersion blender so I didn’t have to take the soup out of the pan.  Add the bacon mixture and the raw shrimp to the soup base. Simmer until the shrimp are cooked, about 5 minutes. Add hot sauce, adjust seasoning and add the parsley.  Serves 3-4.

* I had shrimp with shells on so I peeled the shells and placed the shells and tails in a little more than a cup of water and simmered them for 20 minutes to make a shrimp stock for my soup. Then I just strained out the shells and used it in the soup.

Posted in Cooking |

Hot Pepper Vinegar

Hot Pepper Vinegar

Hot Pepper Vinegar

If you find yourself with more hot peppers than you can use you might want to use some to make hot pepper vinegar. In just a few weeks you’ll have vinegar that is spicy and great to add to salsa, chili, marinades and more.

To make the pepper vinegar you’ll need a clean jar with a tight-fitting lid, 5% acidity vinegar (it tells you that on the label) and hot peppers. I like using cider vinegar. You can also add garlic cloves, if you like. Always remember to wear rubber gloves when handling hot peppers. Wash peppers and cut a couple of slits in each one. That will allow the vinegar to fill up the peppers. Place peppers in the jar and add peeled garlic cloves, if desired. Pour in vinegar to completely cover the peppers. Put the lid on the jar and tip the jar back and forth a few times. As you do this vinegar will fill up the peppers. You’ll likely have to add more vinegar. Fill jar so peppers are covered. Put lid back on the jar. Check the next day as the vinegar will continue to fill the peppers. Add more vinegar, if needed. Leave the jar in a cool, dark place for a couple of weeks. Strain out the peppers. I usually discard them- but they are still edible. Save them if you like. For extra clear vinegar pour strained vinegar through a coffee filter or several layers of cheesecloth to filter. Pour into a bottle and enjoy!! You can also leave a pepper or two in the bottle for a more decorative appearance. Makes nice gifts, too.

Posted in Cooking |

Drying Tomatoes

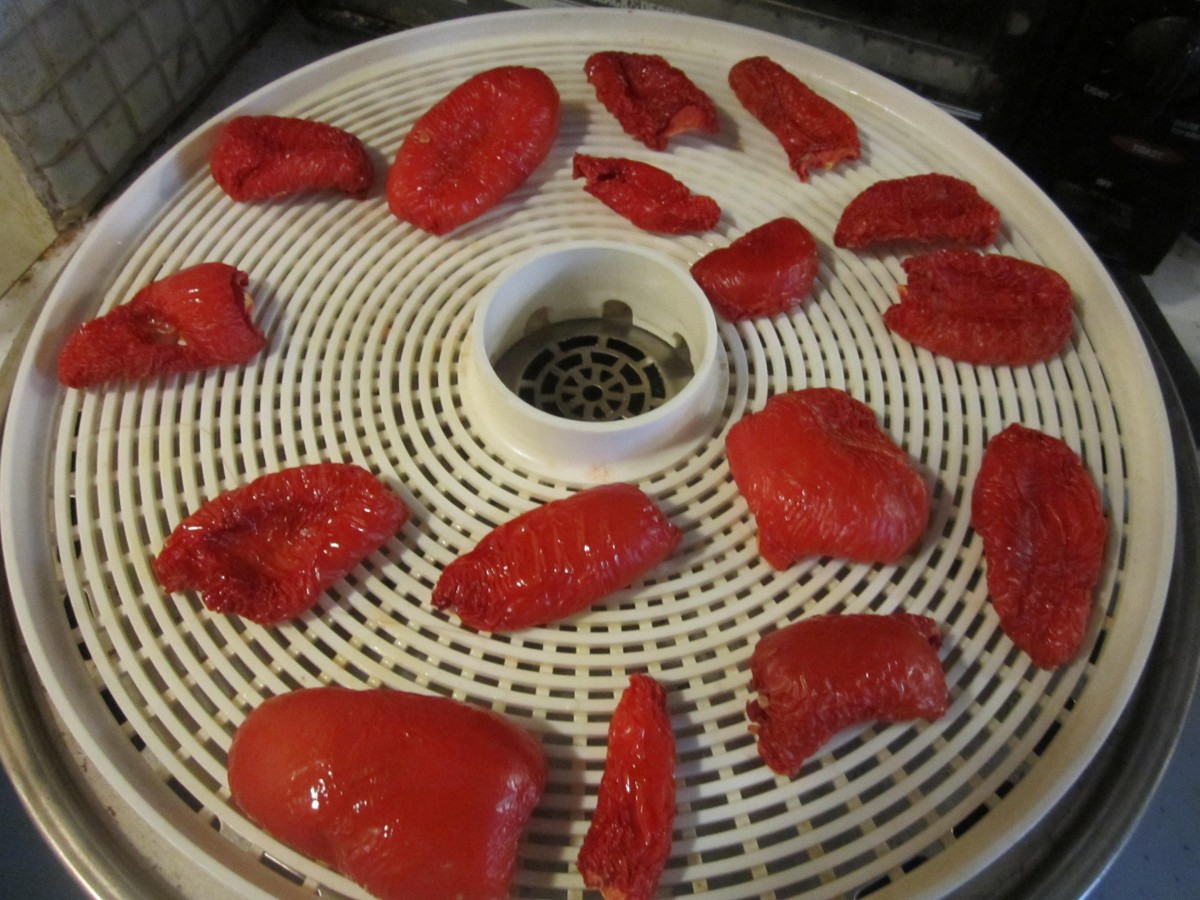
Tomatoes after 12 hours in the dehydrator

Tomatoes after 12 hours in the dehydrator

Tomato season always seems too short. This season more than most. A lot of us want to save as many of them as possible. Canning is great and freezing, too. Still I enjoy “sun-dried” tomatoes so much I always make sure to dry plenty of them.  In warmer, drier climates tomatoes really can be sun-dried. Not possible where I live so I use a dehydrator to dry mine. It’s easy and only requires a little patience.

To prep tomatoes for drying just cut them in half- for small tomatoes and plum tomatoes, or slice larger ones. Remove the seeds- I use a spoon for small tomatoes and just squeeze larger tomatoes after slicing in half. Then I slice the larger ones. They will stick to your dehydrator tray unless you oil it first. I use a non-stick spray or dip a paper towel in oil and rub it over the trays. Start tomatoes cut side up for the first 12 hours or so. This will help with the sticking problem. Then you turn them over and continue drying until crisp. Time will vary with the size of the tomatoes and with individual dehydrators. My small dehydrator has a pre-set temperature so I just leave them in. My larger one has temperature controls so I start my tomatoes for the first couple of hours at 150 degrees then reduce heat to 130 until dried. Drying normally takes a day or two. Once dried I store my dried tomatoes in the freezer. Left at room temperature tomatoes tend to reabsorb moisture and will darken. Edible but not pretty.

You can also powder some of the dried tomatoes. I use the tomato powder when a recipe calls for a small amount of tomato paste. I just mix a small amount of water in with the powdered tomatoes until I get the consistency desired.

Oven drying is possible. Oven should be set at 130-with the door cracked to allow moisture to escape. I don’t recommend it because of the time required and the heat it generates- with the oven door cracked open. I do have friends that dry in their ovens all the time and say its fine. Would love to hear if you have oven dried tomatoes.

The tomatoes when I put them in. Note how much they will shrink.

The tomatoes when I put them in. Note how much they will shrink.


Posted in Cooking |