Coconut Cracker Snacks

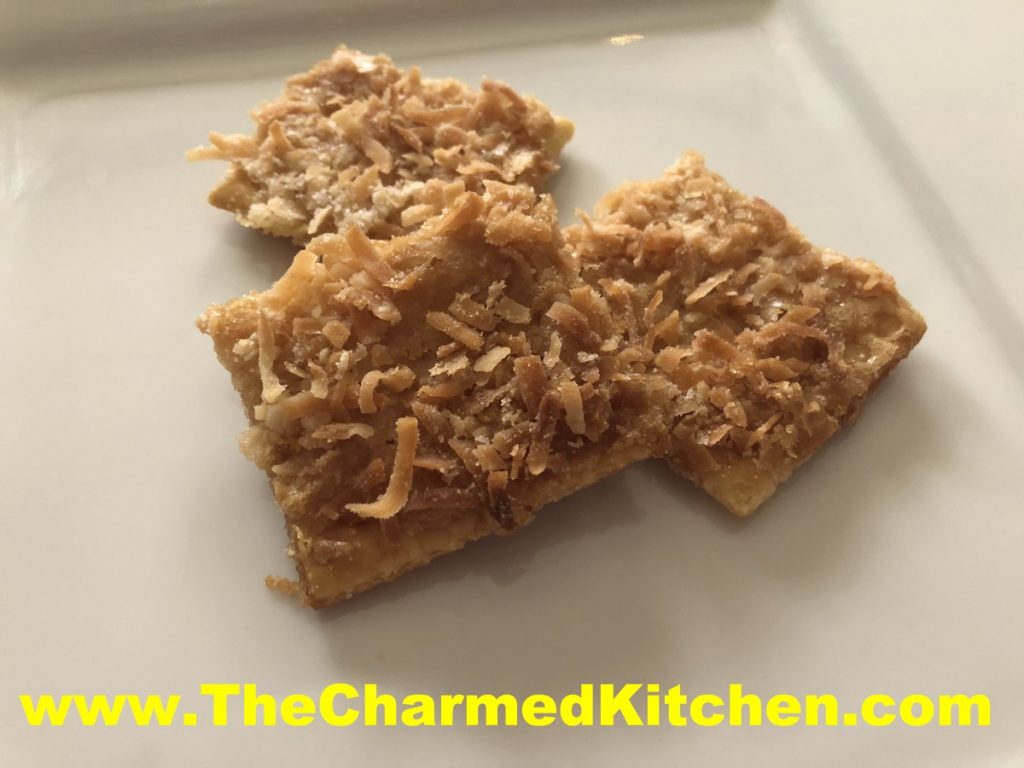
These unassuming little treats are amazingly satisfying. They have the right combination of sweet, salty and crunchy. We made them in cooking camp yesterday and the kids loved them. Now, in the interest of full disclosure, we did not add the coconut to the tops before baking. I knew enough kids would not like coconut. We baked them without a topping. When they came out of the oven, we sprinkled a cup of chocolate chips on the top, let them soften a bit, then spread the chocolate out to cover them. We then set them in the fridge for a few minutes so the chocolate would harden.
The original version is saltine crackers topped with butter, brown sugar, coconut and cinnamon. They are ready in just a few minutes. Perfect when you are craving something sweet, but don’t have a lot of time. Not too sweet and just a little salty, too. You could use chopped nuts in place of the coconut if you prefer. They are super crunchy, too. Like a brittle, but with a cracker base. Great served alone, or with ice cream. Nice treat to take to picnics or road trips,
Store in a cool, dry place to keep them crunchy.
Coconut Cracker Snacks
36 saltine crackers
1/3 c. butter
1/3 c. brown sugar
1 c. coconut
1 t. cinnamon
Cover a baking sheet with foil. Place the crackers, touching, side by side in a single layer. Melt butter in microwave, then add sugar and heat together 1 minute on high. Stir butter and sugar mixture together until smooth and drizzle this over the crackers. Combine coconut and cinnamon and then sprinkle the coconut over the crackers. Bake in a 350 degree oven for 8-10 minutes, or until coconut is toasted. Cool on baking sheet on a cooling rack. Crackers will easily break apart from each other. Makes 36.
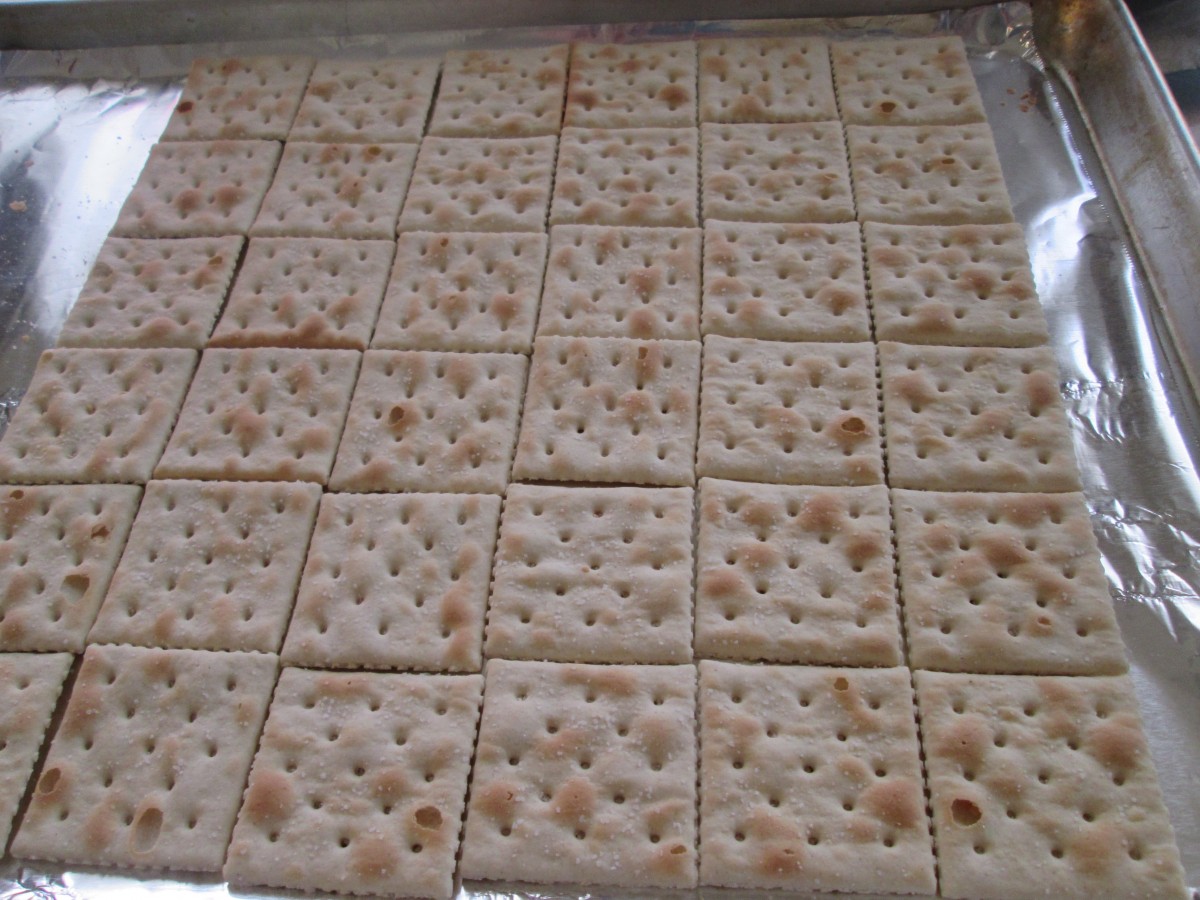
Arrange crackers on a baking sheet
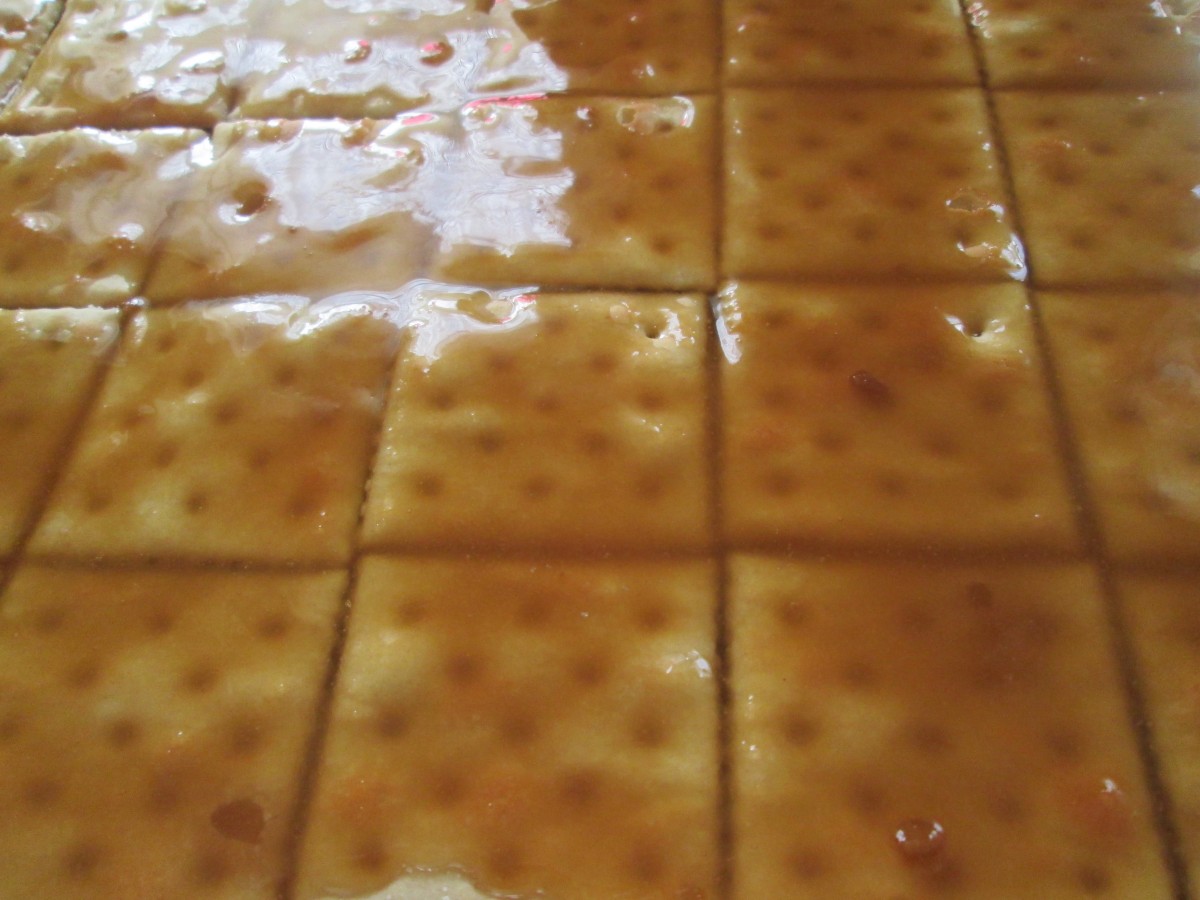
Drizzle crackers with the butter/brown sugar mixture
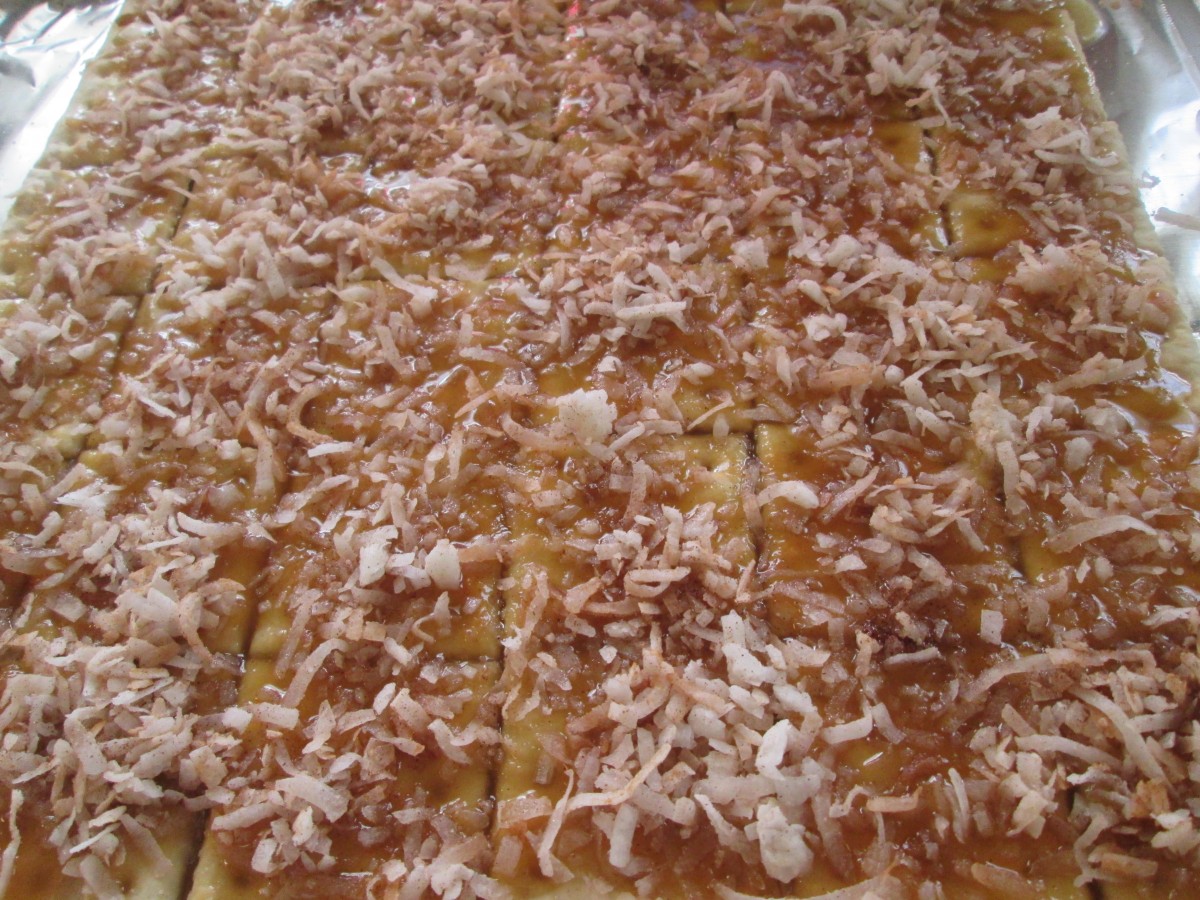
Sprinkle on the coconut and bake until coconut is toasted
The Science of Creamy Mac and Cheese

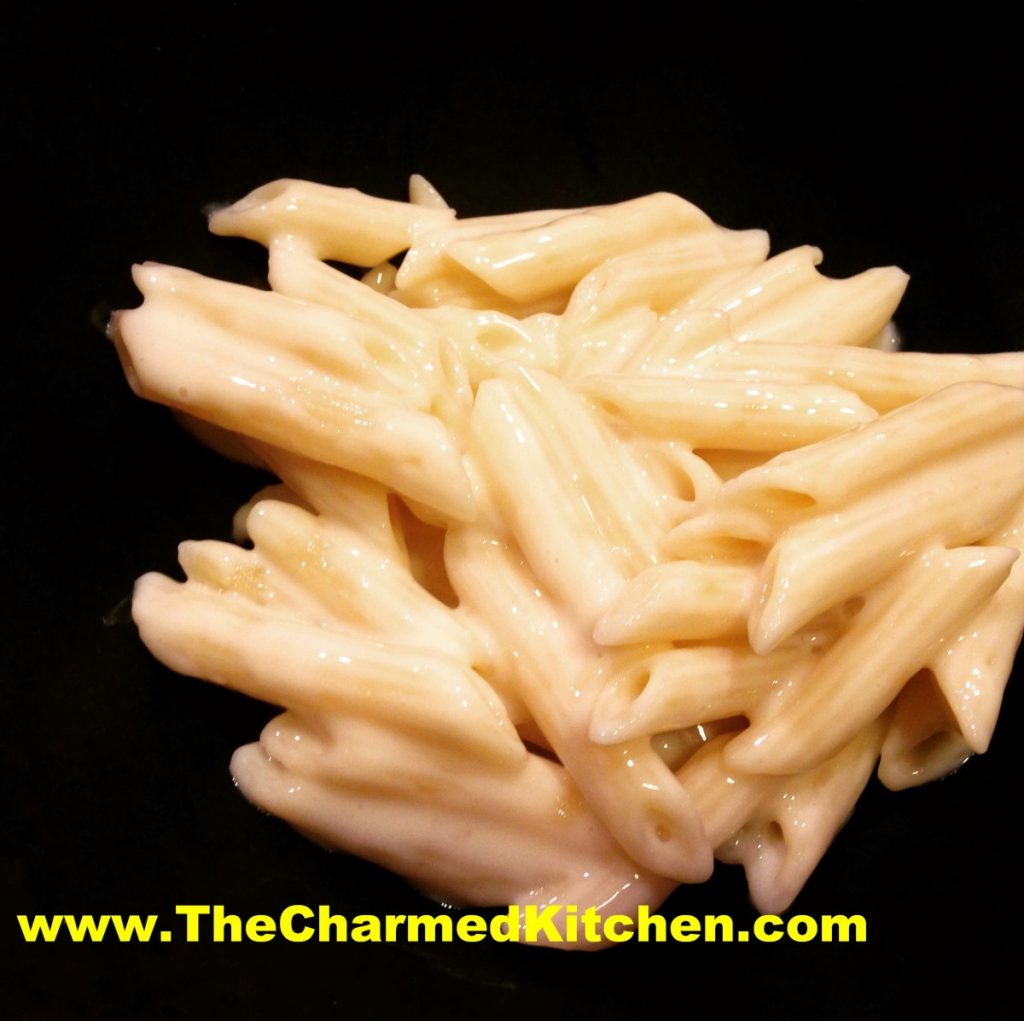
I knew about sodium citrate and its effects on cheese sauces. It took me a while to try it myself. The end result was the creamiest cheese sauce ever. Now I use it all the time when I want a really creamy cheese sauce.
We made two versions of mac and cheese in cooking camp yesterday, using medium cheddar cheese. They made the traditional roux-based recipe and the less traditional sodium citrate version. Both versions tasted fine, but the textures were different. The sodium citrate version was preferred by almost every camper.
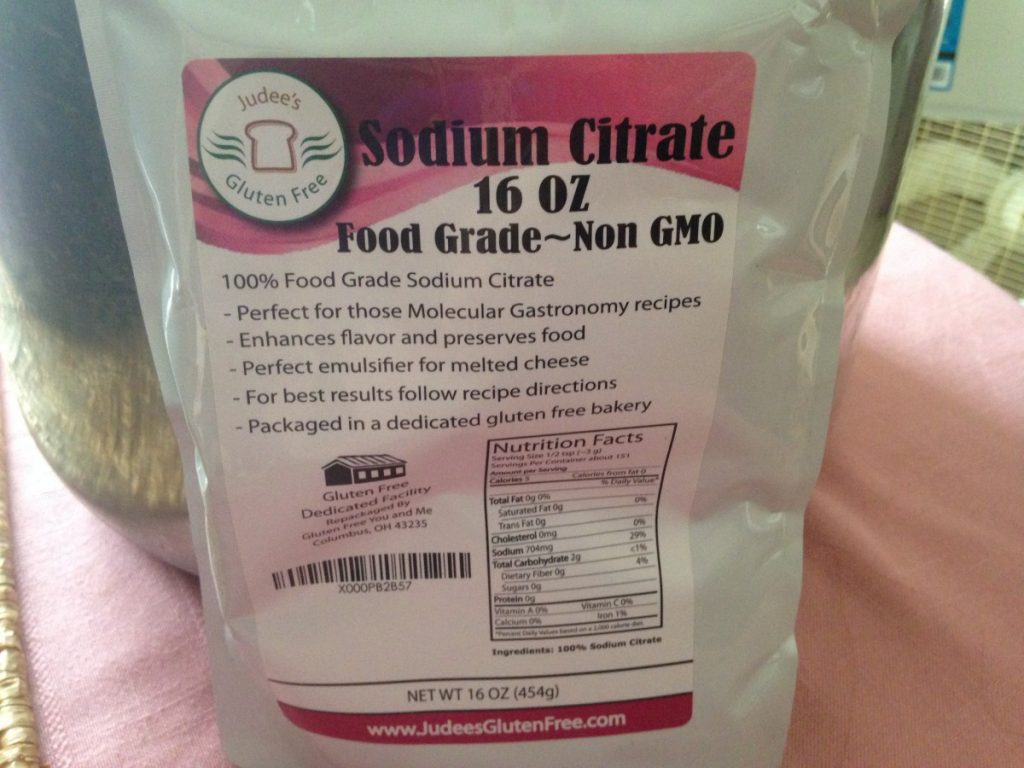
Sodium citrate is the natural salt of citric acid. It has a sour taste, and is used as a preservative and food additive. It is also used in sour candies.
For a lot of us, making a cheese sauce involves making a classic white sauce, or béchamel. Flour and butter are combined in a saucepan, then heated together until the butter melts and the mixture is smooth. Then you add milk, cream or half and half. Once the mixture thickens, you add the cheese and end up with a cheese sauce. Wonderful and classic, but some cheeses don’t melt that well. You end up with a tasty, but somewhat un-creamy end product.
There is a way to make the creamiest cheese sauce ever and it involves a little science. When you make a cheese sauce, the cheese will melt, but sometimes has a grainy texture. That is because of the way the proteins bond with calcium in the cheese. When you combine warmed liquid with a little sodium citrate, then add the cheese, the sodium substitutes for some of the calcium and the cheese breaks down better. The end result is a really creamy sauce.
The liquid you use can be water or milk. I like half and half. I found several recipes on line. I played around, and ended up with the recipe below. Some directions said you have to use an immersion blender to get a creamy result. I did that the first time and the sauce was very creamy. I used a whisk the next time. I found whisking worked just fine. The kids just stirred the sauce with a spoon.
You want to be sure to use food grade sodium citrate.
Super Creamy Mac and Cheese
1 lb. dry pasta
2 T. butter
2 c. half and half – you can also use water, milk, broth
2½ t. sodium citrate
1 lb. shredded cheese- we used cheddar, Muenster or any cheese that melts well, will work
Salt and pepper to taste
Cook pasta according to package directions. Drain, place in bowl and toss with the butter. Set aside. Heat half and half in a saucepan, over medium heat. Stir in the sodium citrate and bring to a simmer. Add the cheese slowly, about ¼ cup at a time, whisking well until melted before adding more. Sauce will become thick and creamy. Once all the cheese has been added, stir in the prepared pasta, adjust seasonings and serve. If you like, you can place mac and cheese in a casserole, top with buttered bread crumbs and bake until bread crumbs are toasted, about 20 minutes at 350 degrees. Serves 4.
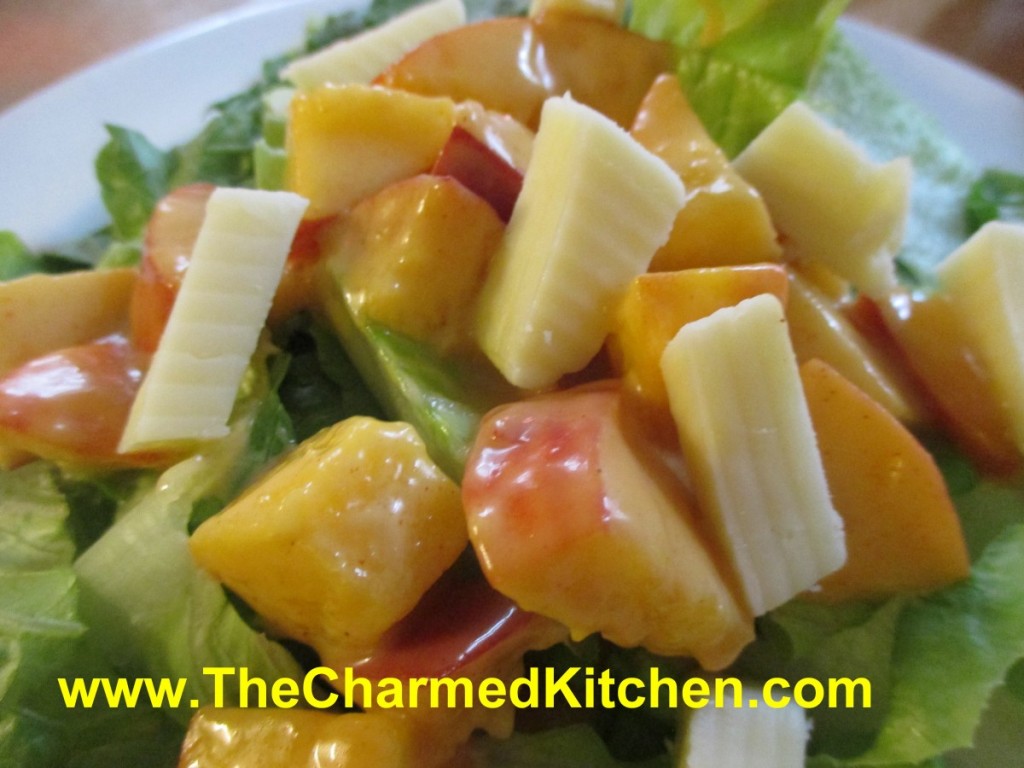
Peach Chef Salad

When you think about cooking with peaches, don’t limit yourself to desserts and jam. Peaches can pair well with savory dishes, too. I often use peaches for glazes and sauces for meats.
In this dish, I paired peaches with traditional chef salad ingredients. I tossed the peaches in a homemade honey French dressing, then spooned them over the salad. The result was wonderful- and a great lunch or dinner option for hot weather.
You can top the salad with cheese, meats or both. I like to add some nuts, too. I topped the salad with sharp cheddar cheese and bacon. I really liked the combination of the sweet fruit with the smoky bacon. Use what you like- and what you have on hand.
A chef salad is a great way to use up leftover grilled chicken or that open package of cheese. Add extra veggies, too, if you like. It also makes a wonderful meal when you don’t want to cook. Lovely, cool meal for a hot day.
Peach Chef Salad
Honey French Dressing:
1/3 c. honey
1/4 c. white wine vinegar or cider vinegar
1 t. paprika
1 t. dry mustard
1/4 t. salt
1/2 c. olive oil
3 cups chopped peaches
Salad:
6 c. torn salad greens
12 oz. cooked chicken, turkey, ham etc, cut into strips
1 c. cubed cheese
1/2 c. cashews, optional
To make the dressing, in blender, combine first five ingredients and start running machine on high. Add oil in a slow stream until mixture becomes thickened. Pour into bowl and stir in peaches and chill, several hours if you can. When ready to serve arrange greens on one large platter or on smaller salad plates. Arrange meat and cheese on platter or plates. Spoon over the peach/dressing mixture, add cashews, then serve. Serves 4-6.
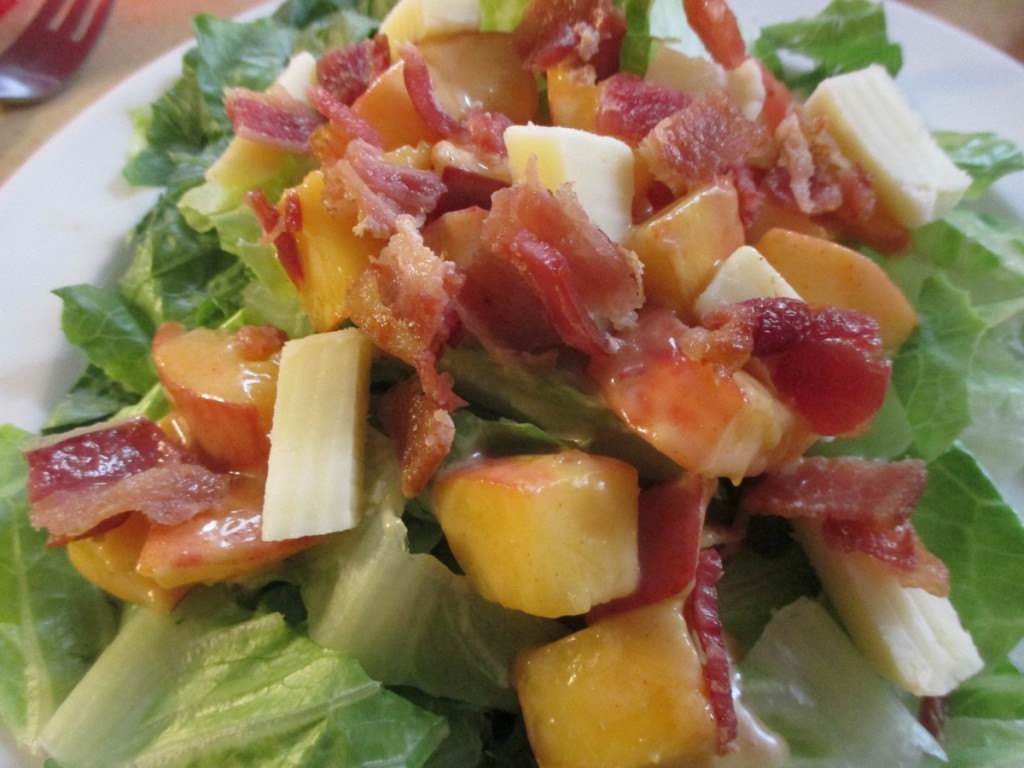
Salad topped with bacon and cheese
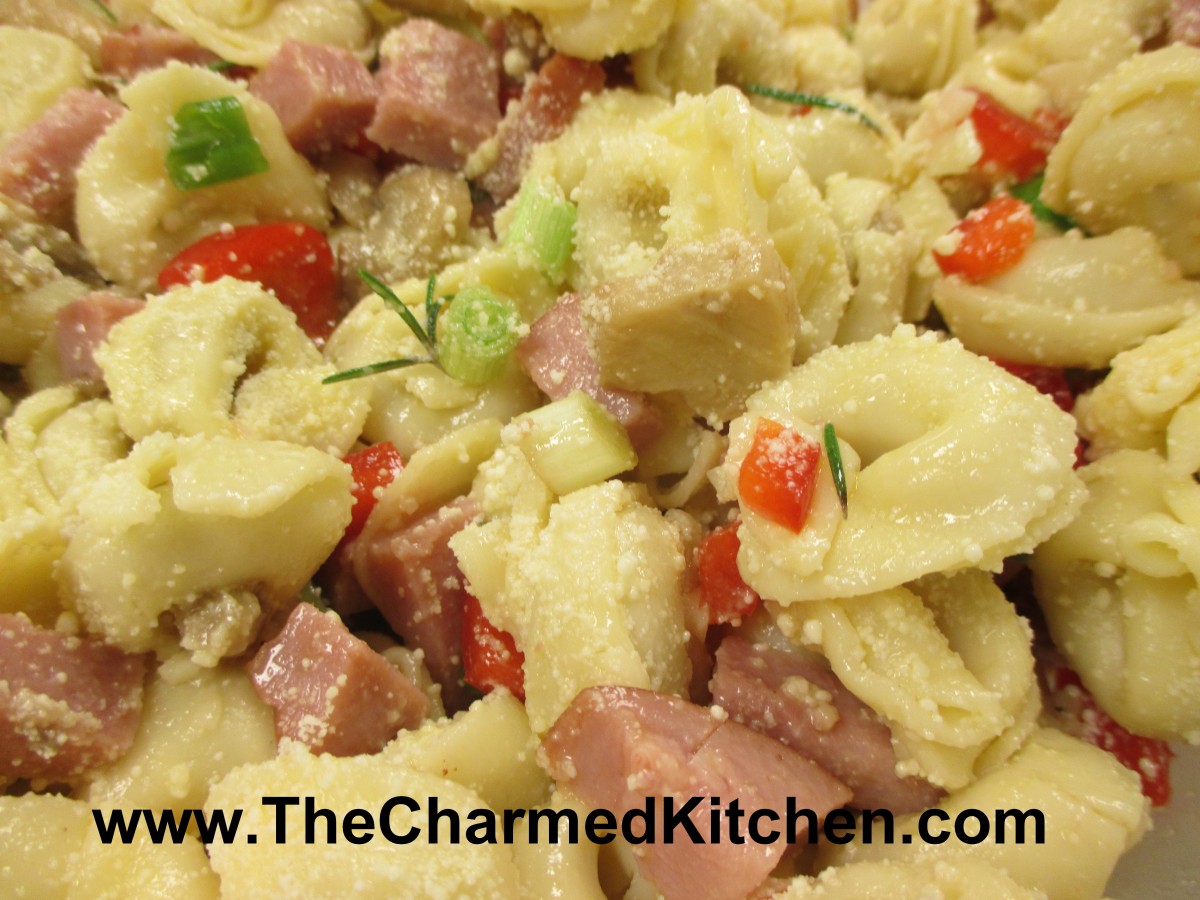
Tortellini and Ham Salad


Main dish salads are always a favorite of mine when the weather gets warmer. Sometimes I just don’t feel like eating hot food. I made this salad with mushroom tortellini and some leftover ham. It might sound odd to eat tortellini cold, but we eat cold pasta salad all the time. Why not? I really liked it. The mushrooms flavor worked great with the smoky ham. I served mine on a bed of fresh spinach- which made the dish even better.
Tortellini and Ham Salad
¼ c. olive oil
¼ c. red wine vinegar
1 t. fresh rosemary
1 clove garlic, minced
1 t. sugar, optional
1/2 t. red pepper flakes
12 oz. mushroom or cheese tortellini, cooked
1½ c. diced ham
1 red pepper, seeded and diced
1 c. sautéed, sliced mushrooms, cooled, optional
4 green onions, chopped
Parmesan cheese, optional
Combine first 6 ingredients in large bowl and whisk to blend well. Add next 5 ingredients and toss to coat. Add salt and pepper to taste. Chill at least 30 minutes before serving. Serve with Parmesan cheese on the side. Serves 4.
Homemade Blueberry Liqueur

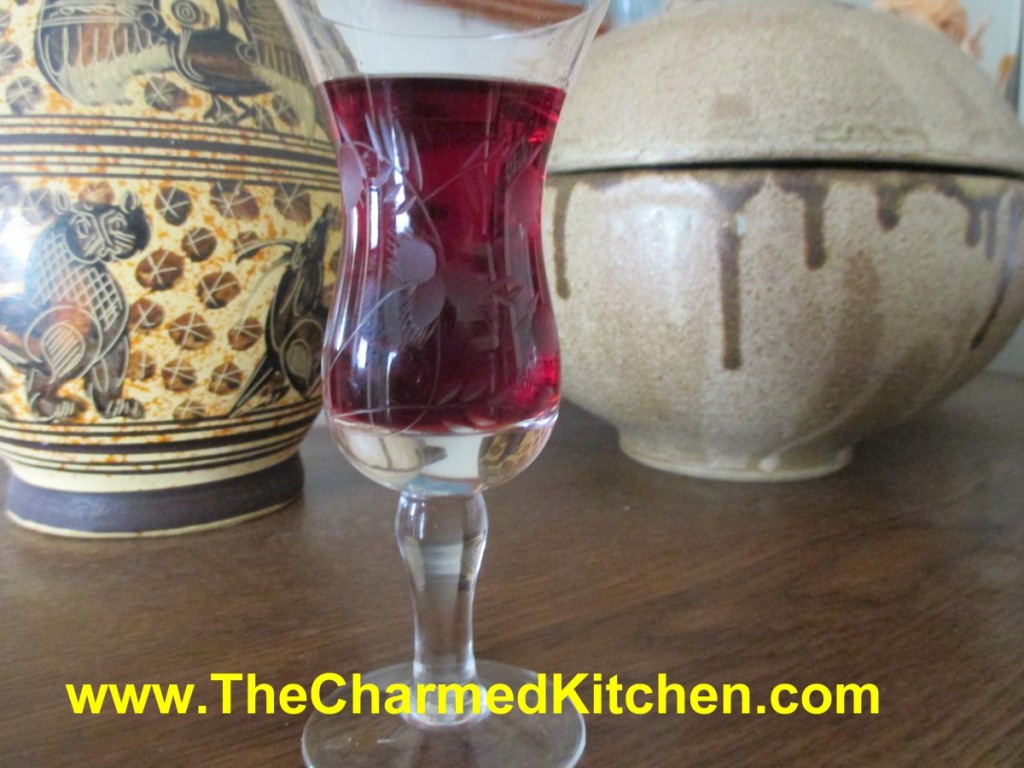
I always stock up on blueberries when they are in season. I end up with a lot of frozen berries to enjoy throughout the year. I was cleaning out the freezer awhile ago, and decided to use some of my frozen berries to make blueberry liqueur.
After steeping for several months, I strained out the blueberries last night. I ended up making two different liqueurs. One is unsweetened- just blueberries, vodka, lemon zest and a clove. It is sometimes called an eau de vie- French for water of life- or blueberry vodka. It is one of my favorites for making all sorts of cocktails.
The other was sweetened a little with a sugar syrup- but you could use honey. That is blueberry liqueur or blueberry cordial. It will be allowed to mature for a couple of weeks.
Both are wonderful.
The color is so pretty and they can be sipped, as is, or used in cocktails. You can use other berries, if you prefer.
I look forward to enjoying these with friends and family. Soon!!
Blueberry Liqueur
4-c. fresh or frozen blueberries
Sliced and scraped peel of one lemon, optional
1 clove, optional
3-c. vodka or 2 c. vodka and 1 c. brandy
1 c. sugar syrup, optional, recipe follows
Lightly crush berries with a fork. Combine with peels and clove and vodka and steep 3 months. Strain and filter and add sugar syrup. Mature 4-6 weeks.
Sugar Syrup
Simple syrup is made from 1 cup of sugar and ½ cup of water. Bring to a boil, then cool. You will have 1 cup of syrup. Some recipes call for plain sugar and others for honey. Watch when you substitute honey for sugar, as it is sweeter and stronger flavored. Better to use orange or clover honey.
Sweet Cherry Vanilla Jam

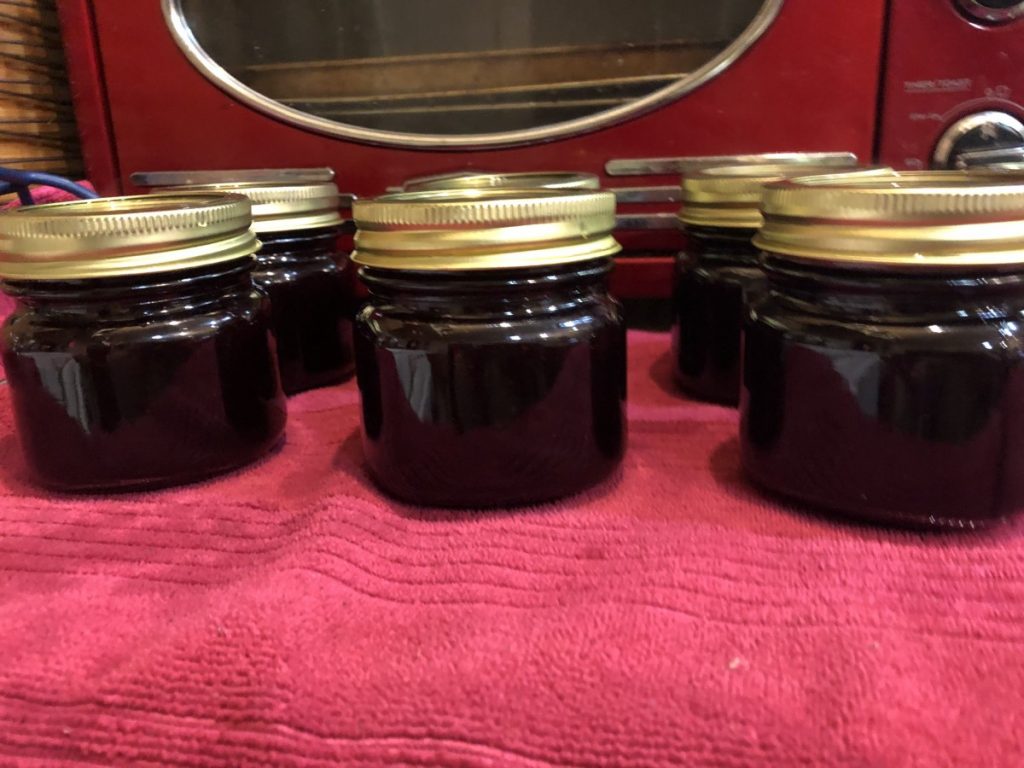
I look forward to cherry season every year. I love eating fresh cherries, but I also like to preserve them, to enjoy year round. One of my favorite things to make is cherry jam.
This must be a great year for cherries. They seem bigger than usual, and very sweet.
While I normally make jam from sour cherries, I knew the sweet ones would work. Besides the cherries, sugar and pectin, this jam also contains lemon juice, vanilla and cinnamon. Those extra ingredients give the jam a more complex flavor and a little bit of a tang.
This may be one of my favorite jams ever!!! I was worried it would be too sweet, but it isn’t. The flavor of the cherries comes through as well at the flavor of the vanilla and cinnamon. Thinking I made need to buy more cherries and make another batch….
Here is the recipe. Enjoy.
Sweet Cherry Vanilla Jam
4 c. chopped pitted sweet cherries, about 2 lbs.
6 T. powdered pectin
6 T. lemon juice
2 T. pure vanilla extract
1 t. cinnamon
4½ c. sugar
Wash jelly jars and lids and keep warm until ready to use. Place a large pot of water, with a rack, on to boil for the water bath. In large saucepan combine cherries with pectin, lemon juice, vanilla and cinnamon. Bring to a rolling boil, stirring often. Add the sugar and bring mixture back to a rolling boil, stirring often. Once the mixture gets to a full, rolling boil, cook for one minute longer, stirring constantly. Remove jam from heat and skim off any foam. Ladle hot jam into hot jars, filling to about 1/4 inch from the top. Wipe off rim and screw on the lids. Repeat with remaining jam. Process in a hot water bath for 10 minutes. Turn off heat and let jar sit in canner 5 minutes before removing. Remove from water bath and allow jars to cool. Yield: about 6 half pint jars of jam.
Adapted from The Ball Blue Book
Mint Chocolate Chip Ice Cream

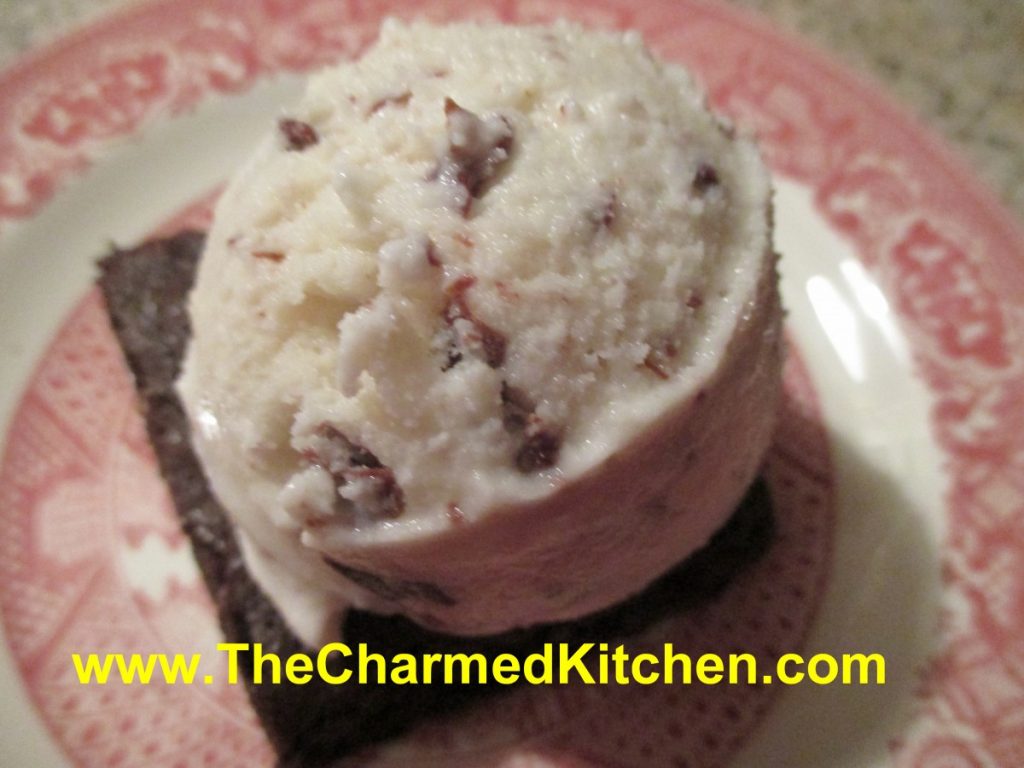
Mint chocolate chip ice cream is a favorite of mine. I have tried a lot of mint chocolate chip ice creams, but was not always happy. I wanted to make my own and see how that turned out.
The tricky part is getting chips that aren’t hard chunks, but rather, little flecks of chocolate, that melt on your tongue when you eat the ice cream. In the past, for chocolate chip ice cream, I have brushed melted chocolate in thin sheets, chilled it, and then broken it into tiny pieces. It worked, but kind of a pain to do.
I tried something different this time, and with a few adjustments, it worked out great. In the past, I posted a recipe for homemade chocolate magic shell. You remember magic shell, the chocolate syrup that hardens when you drizzle it on ice cream. The recipe is quite simple. Chocolate, coconut oil and powdered sugar, melted together. It remains a liquid at room temperature. So, to create the “chips”, I just added some of the magic shell to the ice cream as it froze in the ice cream maker.
After a little playing around, I got the knack of drizzling it slowly. The end result, little flecks of chocolate through the ice cream that were tender and melted as you ate the ice cream. We had the ice cream served on a homemade brownie, then topped with more magic shell and some whipped cream. You will note that my “mint” ice cream is not green. I opted to omit food coloring, but feel free to add some, if you prefer. And, if you just want chocolate chip ice cream, don’t add the mint extract.
Mint Chocolate Chip Ice Cream
2 c. half and half
1 c. whipping cream
½ c. sugar, or to taste*
2 t. mint extract
1 t. vanilla extract
About ½ c. magic shell- recipe follows
Combine half and half, cream, sugar and flavorings. Stir until sugar dissolves. Add more sugar, if needed, to suit your taste. Place mixture in an ice cream maker and start freezing it. Once it starts to thicken, drizzle the magic shell in slowly as the machine is running, to create little flecks of chocolate throughout the ice cream. I have to guess that I used about ½ a cup. Add until you have the amount of chips you like. Once ice cream forms, place in freezer until ready to serve. Makes about a quart.
*The mixture might taste a little sweet to you, but when you freeze it, it will taste less sweet. When making ice cream, the base should be a little”too” sweet to allow for the taste change after freezing.
Homemade Magic Shell
1 c. chocolate chips- I used dark chocolate chips
3/4 c. coconut oil- I used the unrefined
1/2 c. powdered sugar
Heat all together until melted. I melted mine in a microwave for 1 minute, but you could also melt over a double boiler. Stir until smooth. Store at room temp. To use, drizzle over ice cream, wait about 10-20 seconds- and it will harden.
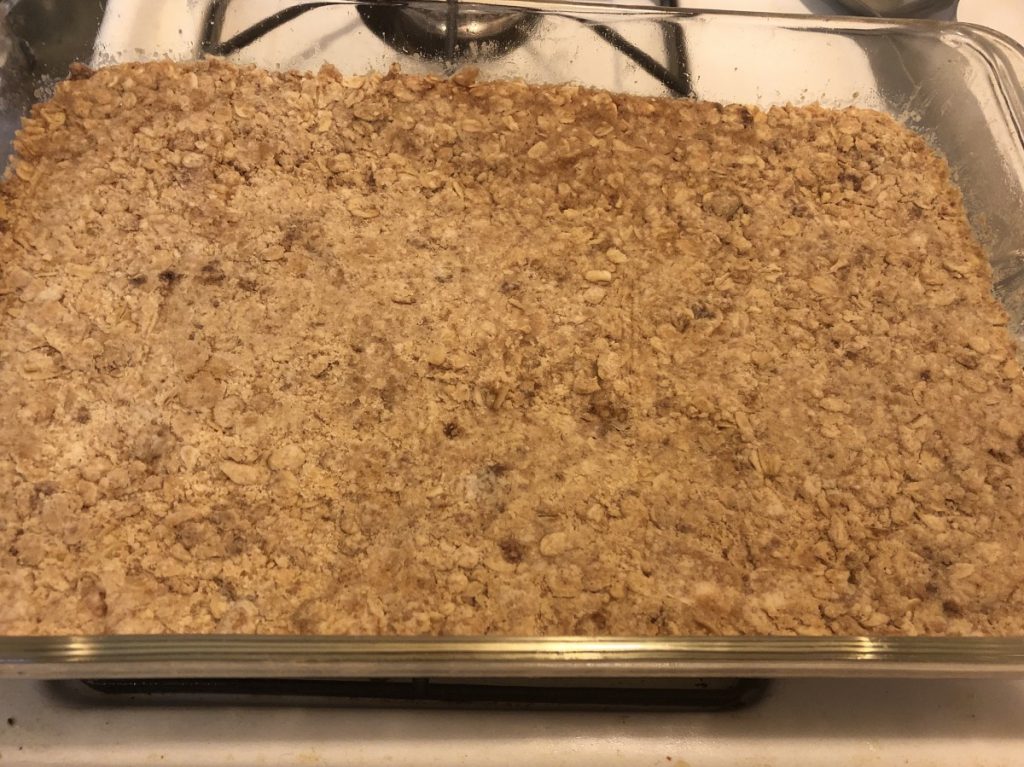
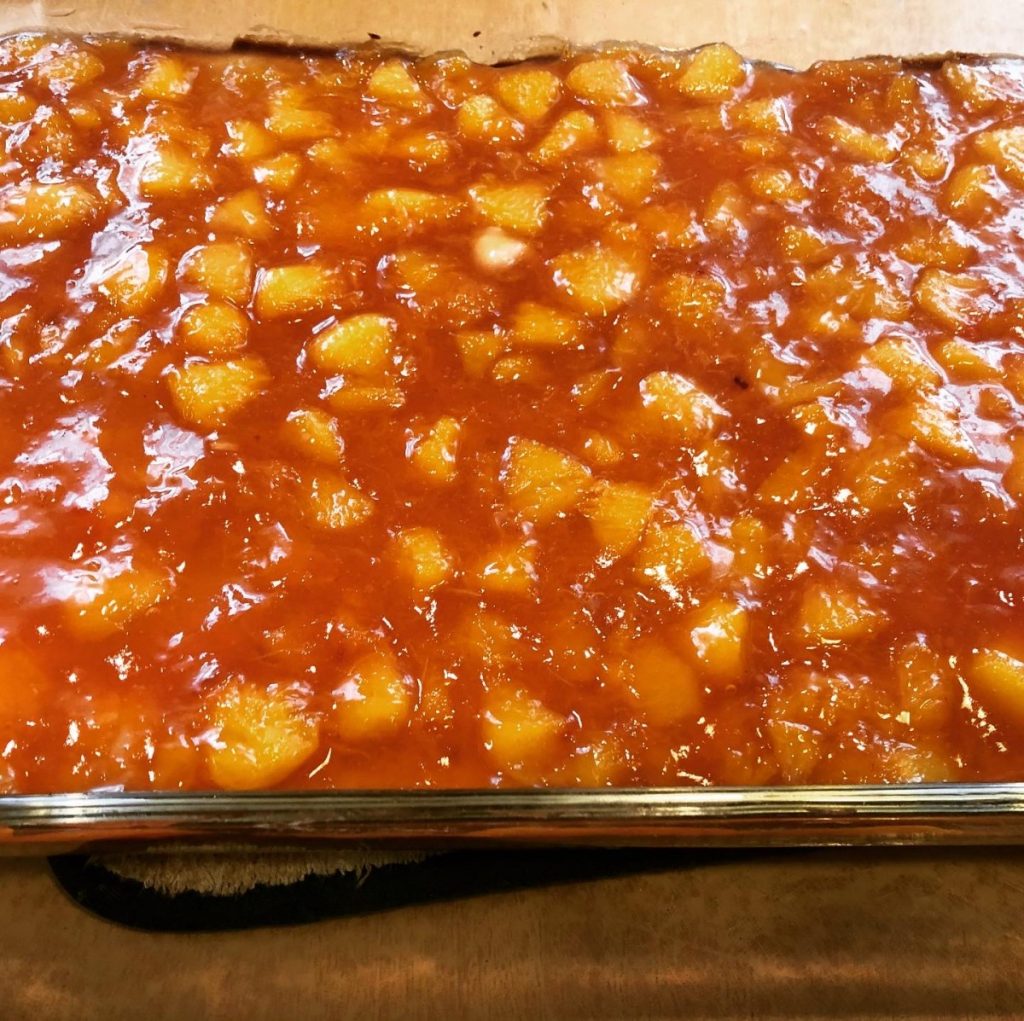
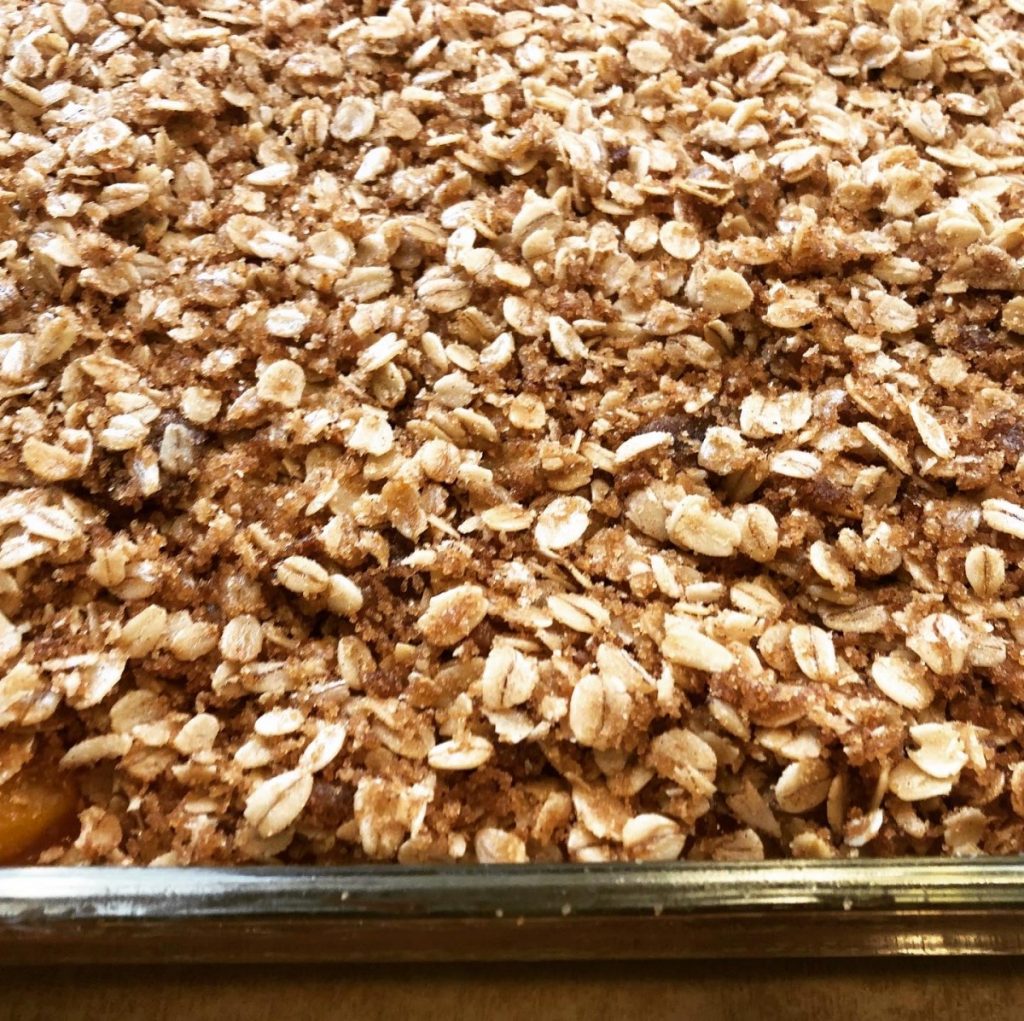
Peach Cheesecake Squares

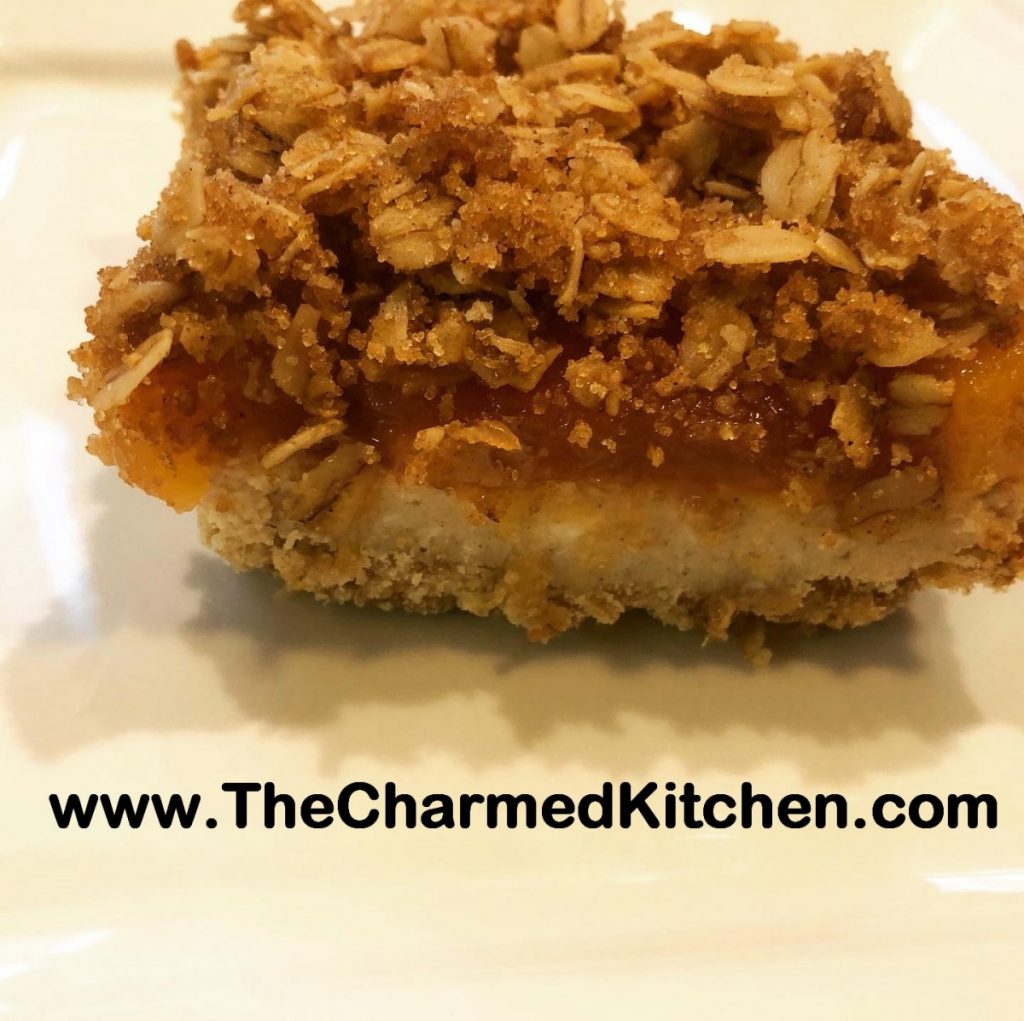
I love peaches and I love cheesecake. Never thought to combine them before. Wow, what a great dessert!! With peaches in season, it seemed like the perfect time to make it.
This recipe was inspired by a post I saw about a place that makes peach cheesecakes. I decided to make a less traditional cheesecake. I used a 9×13 baking dish instead of a springform pan. I also ended up making the cheesecake in layers. Let me explain.
I baked the crust a little, then added the cheesecake layer to bake. I was trying to figure out the best way to add the peaches. I decided to put them on after the cheesecake was baked, so I cooked them while the crust and cheesecake layers were baking. The crumb topping was an afterthought. I wanted some texture and just put that together at the end.
The result was a really good dessert. Enough peaches. Light and rich at the same time. I will most definitely make it again.
So here is the recipe. Enjoy!!!
Peach Cheesecake Squares
Crust
¾ c. butter
1/3 c. brown sugar
1¼ c. flour
1 c. oatmeal, old-fashioned or quick cooking
2 t. cinnamon
¼ t. salt
Cheesecake Layer
2 (8oz.) packages cream cheese, softened
¾ c. sugar
2 T. flour
2 eggs
2 T. vanilla
2 t. cinnamon
Peach Layer
5-6 peaches, peeled, pitted and chopped, about 5 cups prepared fruit
2/3 c. sugar, or a little less
2 T. lemon juice
1 t. cinnamon
4 T. cold water
2 T. cornstarch
Crumble Topping
1½ c. rolled oats
½ c. butter
¼ c. brown sugar
3 T. flour
2 t. cinnamon
Heat oven to 350-degrees. Grease a 9×13-inch baking pan. Beat together butter and brown sugar, then stir in the rest of crust ingredients. Mixture will be crumbly. Press into bottom of prepared pan and bake 20 minutes. While crust is baking, prepare cheesecake layer. Beat cream cheese sugar and flour until fluffy. Beat in eggs one at a time. Stir in vanilla and cinnamon. Pour over crust and bake for 25 minutes, or until set. While filling is baking, prep peaches. Combine peaches with sugar, lemon juice and cinnamon in medium saucepan. Cook over medium heat until peaches are softened. Stir off and on to keep mixture from sticking. Combine cold water and cornstarch. Stir until smooth and pour into peach mixture. Mixture will thicken up. Stir until mixture returns to a simmer. Remove from heat and set aside. Prepare crumble topping. Mix all ingredients with your fingers until well blended. Place on a baking sheet and place in 350 degree oven for 15 minutes. You can do this while the cheesecake is baking, to save time. Let the cheesecake cool a few minutes. Then spoon over the peaches. Spread evenly and let it cool for 30 minutes. Spread the crumble mixture over the peaches. Cool then chill. Store covered in fridge. Serves 12. Can be frozen.
Homemade Cherry Liqueur


I make a lot of homemade liqueurs, but cherry is one of my favorites. I enjoy just sipping it, or adding it to other cocktails or mixing it with soda water.
It is easy, and the reward is having this lovely liqueur to enjoy even when cherries aren’t in season. I added a couple of vanilla beans to mine, but you can leave them out, if you prefer. You could also add 1-2 tablespoons of vanilla extract.
If you like a less sweet liqueur, you can add less sugar. You could use sour cherries instead.
Cherry Liqueur
2 c. granulated sugar
4 c. vodka or brandy
1 lb. large, washed, stemmed and pitted sweet cherries
2 (6-7 inch) vanilla beans, broken into several pieces, optional
Place sugar and vodka or brandy in a large jar- I used a half gallon canning jar. Stir until sugar is mostly dissolved. Add cherries and vanilla and cover jar. Do not stir. Place in a cool, dark place for 3 months, without stirring or shaking. Strain and filter. Divine! Makes 4-6 cups.
Cheesy Cherry-Blueberry Coffee Cake

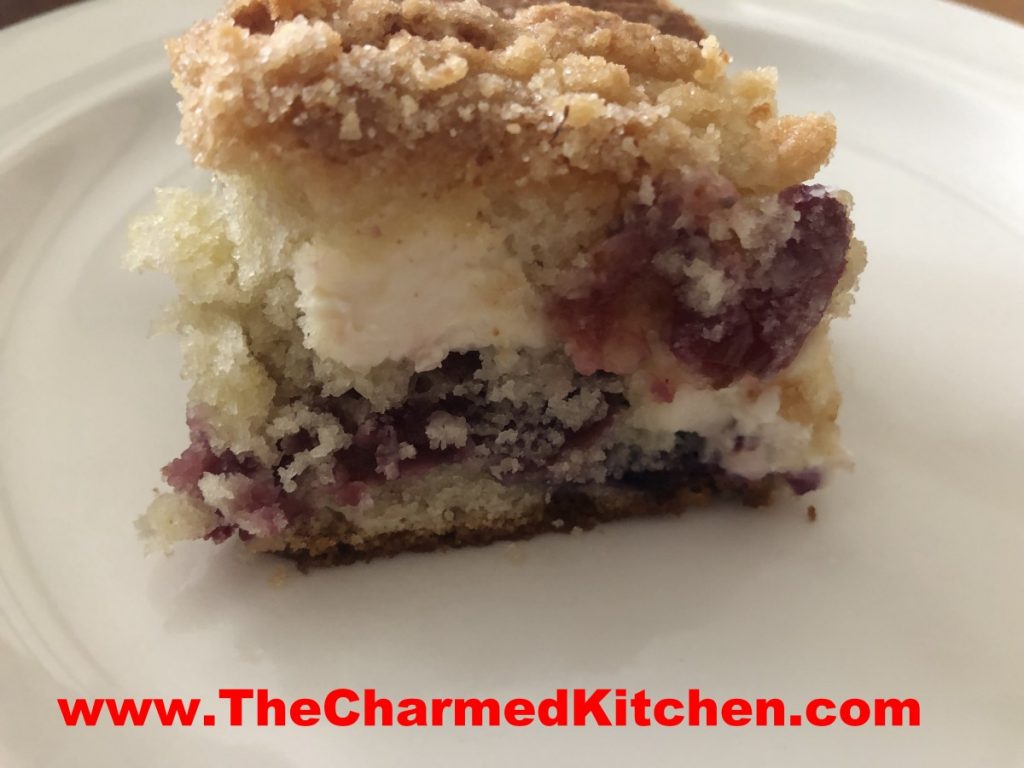
If you need a really special dessert for your next party or cookout, consider making this cheesy cherry-blueberry coffee cake. It is one of my favorite coffee cake recipes ever. The cake is not too sweet, and the combination of cream cheese, with the fruit reminds me of a cherry-blueberry blintz.
The streusal topping adds a nice little crunch.
It is fine served all on its own. You can also serve it with ice cream or whipped cream. You can also top with more blueberries and cherries.
While I think of this cake as a wonderful dessert, it can be served as a breakfast or brunch dish.
As if this weren’t enough- this cake freezes great. Who are we kidding? There won’t be any leftovers – but you could freeze them, if you had some.
So here is the recipe. Enjoy!!
Cheesy Cherry-Blueberry Coffee Cake
1 1/4 c. sugar
1/2 c. butter
2 eggs
2 1/4 c. flour
1 T. baking powder
1 t. salt
1 c. milk
1 c. fresh or frozen blueberries
1 c. pitted and coarsely chopped cherries
8 oz. cream cheese, cubed
1 t. grated lemon peel
Topping:
1/4 c. sugar
1/4 c. flour
1 t. grated lemon peel
2 T. butter
Preheat oven to 375. Grease and flour a 13×9 inch baking dish. Cream together sugar and butter until fluffy. Beat in eggs. Combine 2 cups of the flour with baking powder and salt and beat into batter alternately with the milk. Toss fruit with the remaining flour and fold into the batter along with the cheese and lemon rind. Pour batter into prepared pan. Combine sugar, flour and lemon peel for topping and cut in butter to resemble coarse crumbs. Sprinkle over batter and bake for about 45 minutes. Use toothpick to test for doneness. Serves 12.


