Monthly Archives: September 2015

Mom’s Breaded Chicken

Mom's Breaded Chicken

Mom’s Breaded Chicken

With the holiday weekend approaching I thought I would share this recipe again. Always brings back great memories of childhood picnics/cookouts with my family. I love this recipe and I hope you do, too.


I miss the big family picnics we had when I was a kid. My Dad and I would go early in the morning to pick out our favorite location and get tables arranged. Then he would start a fire in the grill and make us bacon and eggs in the cast iron skillet. Everyone started arriving soon after that. Well, not everyone. My Mom and one of my aunts would always come a little later. That is because they were finishing up the breaded chicken that was always a part of these picnics. She wanted it to be served nice and warm. It would have been breaded the day before. My mom felt that when you breaded the chicken ahead of time it seemed to help the breading to stick better. I do it the same way today. This isn’t fried chicken. The breaded chicken is lightly browned in a skillet then finished off in the oven. It is crispy on the outside and nice and juicy inside. It is also a lovely memory for me of time spent with family. Here are the directions for how she made it.

Mom’s Breaded Chicken


Chicken pieces, I often use a whole bird, cut into pieces, or just thighs and drumsticks.

salt and pepper to taste

flour

Parsley

Paprika

Garlic powder

eggs

Milk

Bread crumbs

oil


Pat chicken pieces dry. Season with salt and pepper. In a bag, combine flour- about ½ c. per 8 pieces of chicken should be about right. Season flour with a little salt and pepper.  In bowl combine milk and eggs with the rest of the seasonings, including more salt and pepper. I use 1 egg with enough milk to make a thin batter for every 4-5 pieces of chicken. Keep in mind that the size of the pieces matters. Wings will need less batter than legs. Place bread crumbs in a shallow dish or in a plastic bag. Place a few pieces of chicken in bah with the flour and shake to coat, dipping off the excess. Then dip chicken pieces (1-2 at a time) in egg mixture, turning to moisten completely. Then place in crumbs and turn or shake to coat evenly. Repeat with remaining chicken until all of it is breaded.

At this time you can cover and refrigerate the chicken for several hours or overnight if desired. You can also go ahead and cook it right away. Mom suggests you bread the chicken the night before so it will stick better, but hey, you’re an adult, do what you want.

To cook the chicken, heat ½- inch of oil in a heavy skillet and preheat the oven to 400 degrees. Foil a roasting pan and then place a rack inside. Once the oil is hot, brown the chicken pieces several at a time, turning to brown evenly. Place the browned chicken on the rack in the baking dish and continue to brown remaining chicken. Place chicken in oven and bake until chicken is cooked and juices run clear when chicken is poked. Cooking time will vary depending on the size of the pieces, how much you browned them and how many you are cramming in one pan. Baking time will be about 45 minutes. Check a large piece of chicken, near the middle of the pan to be sure.

This is a real summer favorite and the baking on the rack helps fat to drip off, giving you fried chicken flavor with fewer calories. This chicken can be served hot, warm or cold.


Posted in Cooking |

Winter Squash Saute

Winter Squash Saute

Winter Squash Saute

Winter squash season is here, and I could not be happier. I love the variety of squash (and pumpkin) out there. They are both beautiful and tasty. This dish is a saute of squash with onions, garlic, carrots and finished off with black sesame seeds. I used butternut squash, but you could use any number of hard squashes, or even pumpkin.  It is simple to make, but packed with flavor. If you are looking for a different way to cook some of those squash- try this dish. I think you might be surprised at just how good it is.


Winter Squash Sauté

3 tablespoons olive oil

1/2 cup chopped onion

1 teaspoon minced garlic

4 cups cubed fresh butternut, acorn or Hubbard squash or pumpkin

1/2 cup grated carrot

2 tablespoons soy sauce

1 teaspoon salt

1 teaspoon ground black pepper

2 teaspoons black sesame seeds

Heat the oil in a large skillet. Add the onion and garlic; cook and stir until the onions begin to brown. Stir in the squash, carrot, soy sauce, salt, and pepper; cook, covered, another 5 to 7 minutes, until squash is tender. Sprinkle with sesame seeds before serving.

Posted in Cooking |

Sweet and Sour Cabbage with Apples

sweet and sour cabbageI think cabbage is under rated. It is such a versatile vegetable. It’s good in both hot and cold dishes, it isn’t expensive, and cabbage is good for you. I was looking for a side dish for a duck dinner the other night and I decided on sweet and sour cabbage. Since I had a pretty good sized head of green cabbage and just a small piece of red cabbage I mixed the two together. I added cider vinegar, sugar and apples to round out the dish. It came out this pretty light pink color and had a flavor that went well with the duck. I’d also serve this as a side dish with ham, pork or even a lamb roast. It would go well with any of them. You could use any color cabbage for this dish- or combine colors, as I did.

Sweet and Sour Cabbage with Apples

2-3 T. oil

2-3 onions, sliced thin

8 c. chopped cabbage, any color

1 c. stock- chicken or vegetable stock

1/2 c. apple cider vinegar

1/4 c. sugar

1 t. celery seeds

3 apples, peeled , cored and diced

salt and hot pepper sauce to taste

Heat oil in skillet and cook onion until tender and a little wilted. Add cabbage, stock, vinegar, sugar and celery seeds and cook until cabbage is tender. Most of the liquid will evaporate. Add the apples and cook until apples are just heated through. Season with salt and hot sauce and serve. Serves 5-6.

Posted in Cooking |

Chicken Florentine

Chicken Florentine

Chicken Florentine

After picking up some spinach the other day I was trying to decide what to do with it. I remembered a dish my Mother used to make, Pork Chops  Florentine. Basically, pork chops baked with spinach. Mom added potatoes to the dish, too. I remember how much I loved it, and how I thought there was never enough spinach. Spinach cooks down a lot, so prepare to use more than you might think. I used a one pound package of spinach, and could have used more. It was quite easy to make and since I bought 2 pounds of spinach I’ll likely do something similar with the rest of it. I didn’t have pork chops so I used 4 bone-in chicken thighs, but any cut of chicken would have worked. Boneless will take a lot less time to cook. Pork chops would also be wonderful in this dish.


Season the chicken pieces with salt and pepper. Brown the  chicken pieces in a skillet. Once it’s nice and brown on both sides turn down the heat and cover the skillet. Cook until juices run clear when chicken is poked with a fork. This took about 30 minutes with the thighs. Remove the chicken from the pan and spoon out most of the fat. Add 1 large onion, sliced, and cook until golden. Add the spinach- I used a pound and it was freshly washed so it had some water on the leaves. Stir the spinach over medium high heat until it wilts down. You can even turn the heat down and cover the pan to speed up the process. While the spinach is wilting, place 1 cup of milk or half and half in a jar with a tight-fitting lid. Add 2 T. flour- put on the lid and shake until the mixture is smooth. Pour milk mixture over the wilted spinach and stir until mixture becomes thickened and bubbly. Add salt and pepper to taste and a some grated nutmeg. I also added a dash of hot sauce. Return chicken to the pan, turn down the heat and simmer for 5 minutes or until everything is nice and hot.

Posted in Cooking |

BLT Snacks

BLT Snacks

BLT Snacks

Sometimes, when I am canning tomatoes, I get tunnel vision. I get so obsessed with getting every last tomato in a jar, I forget to save some to eat fresh. That is exactly what happened last week. So many pretty jars- but no fresh tomatoes left. Plus, I had a taste for a BLT. My solution? Well, I did have a nice supply of cherry tomatoes. Rather than trying to make a sandwich with my teeny tomatoes, I turned them into a snack, instead. I used all the ingredients I would have used for my sandwich, but just scaled them back to fit on crackers. Simple and really good. Just smeared a little mayo on each cracker. Then, I topped it with shredded lettuce, a 1-inch piece of bacon and a slice of cherry tomato. I even added a little shredded sharp cheddar cheese to some. Now my only problem, is waiting for more cherry tomatoes to ripen, so I can make these again.

Posted in Cooking |

Cinnamon Apple Bread

Cinnamon Apple Bread

Cinnamon Apple Bread

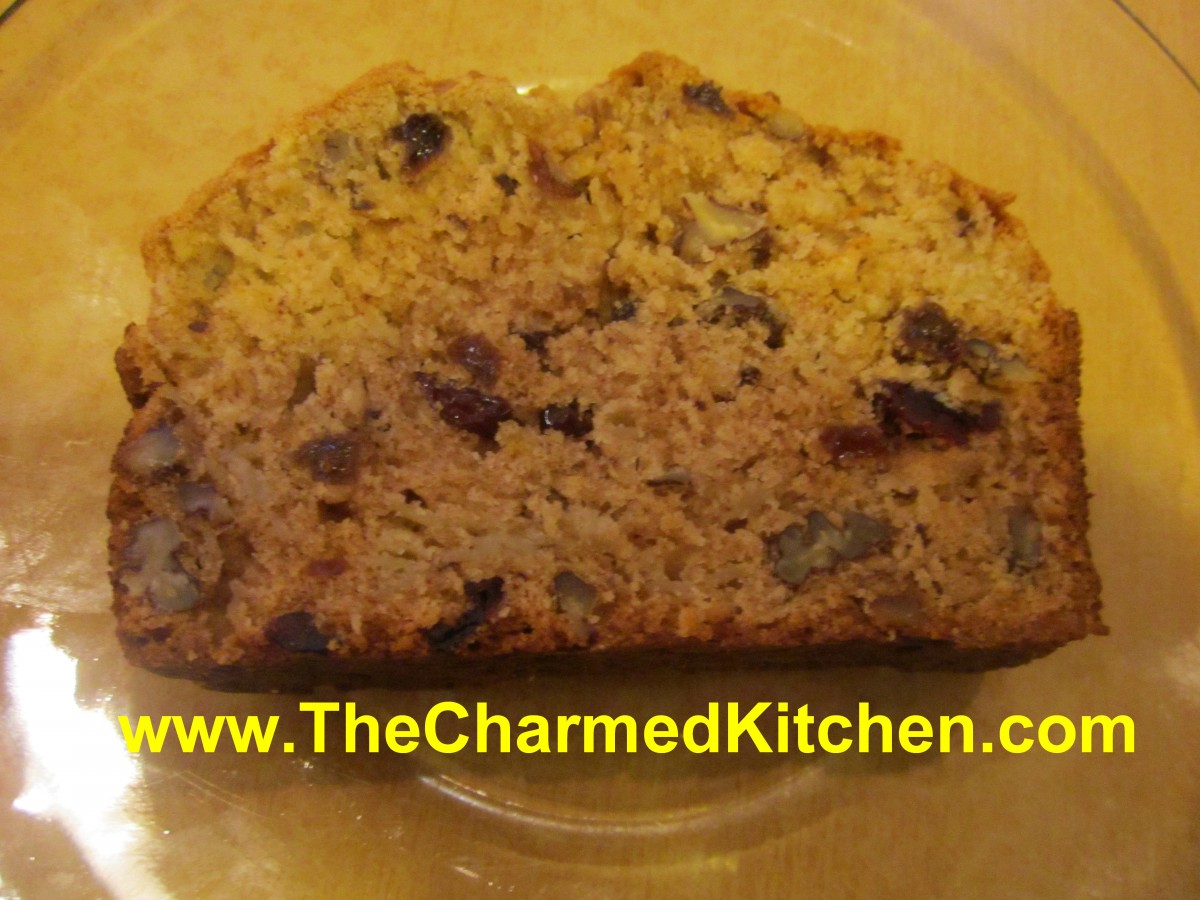
I love apple season. Every week there are new varieties to try. Fresh apples are so crisp and juicy. I make frequent  trips to local orchards all season long. Besides just eating apples, I like to bake with them. This bread is one of my favorites. Not too sweet, it is moist from the shredded apples, flavored with cinnamon and studded with raisins and nuts. This apple bread makes a great breakfast or snack. I have been known to top a slice with cinnamon ice cream and a little caramel sauce for a simple dessert. This recipe makes one loaf, but I often double it- so I can freeze the second loaf for later. Enjoy!!

Cinnamon Apple Bread

1/3 c. butter, softened

2/3 c. sugar

2 t. grated lemon or orange peel

1 t. cinnamon

2 eggs

3 T. milk

1 t. lemon juice

1 t. each baking powder and salt

1/2 t. baking soda

2 c. flour

1 1/2 c. peeled shredded apples, about 2 large apples

1 c. raisins*

1/2 c. chopped nuts

Topping:

3 T. sugar

1 t. cinnamon


Cream together butter, sugar, peel and cinnamon. Beat in eggs until light and fluffy. Stir in milk and lemon juice. Stir in dry ingredients then fold in apples, raisins and nuts. Pour batter into greased 9×5 – inch loaf pan. Combine topping and sprinkle over the top of the batter.  Bake in a preheated 350 -degree oven for 1 hour. Use a toothpick to test for doneness. Cool 15-20 minutes before removing from pan. Yield: 1 loaf.

*You can use other dried fruits. I sometimes use dried cranberries or cherries.

Posted in Cooking |

Martha’s Beets

Martha's Beets

Martha’s Beets

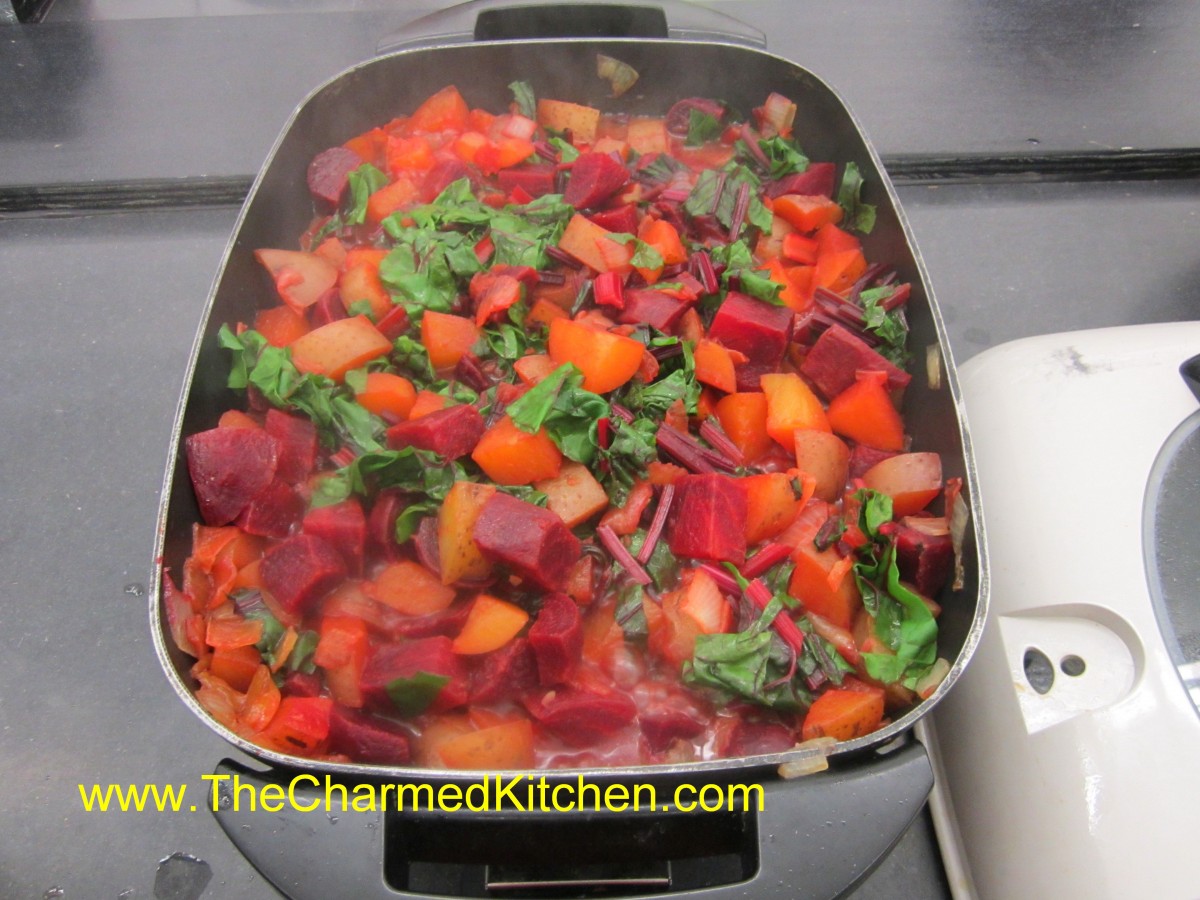
I had picked up some beets from a local farmer the other day. I have made this dish many times and it seemed like a good time to make it again.  This is a recipe that my friend, Martha, made for us one chilly autumn afternoon. The amounts are random for a reason. Just use what you have- more or less – and let the flavors blend together gently. It is perfect for warming you up on a chilly day. Full of earthiness and great fresh flavors it is always a favorite of mine. I always think of her, with great affection, when I make it. Love you, Martha.


Martha’s Beets

Oil

2 Onions, chopped

Potatoes, cut in big chunks, peeled, if desired

1 bunch beets, with greens*

Chicken or vegetable  stock

Parsley

Salt and pepper

Cook beets in boiling water for 20 minutes. Cool and slip off skins. Cut up larger beets, if desired. In large pot cook onions in oil until tender. Add potatoes and prepared beets with just enough stock to keep them from sticking. Cover and cook over medium-low heat until vegetables are tender. Meanwhile chop up the beet greens. Add them to the pot and stir in. Cover and continue cooking until greens are tender. Toss in fresh parsley and cook 5 minutes longer.

* If you can’t find beets with greens, or if you like more greens, you can also add red Swiss chard in place of the beet greens.

Posted in Cooking |

Braided Herb Bread

Braided Herb Bread

Braided Herb Bread

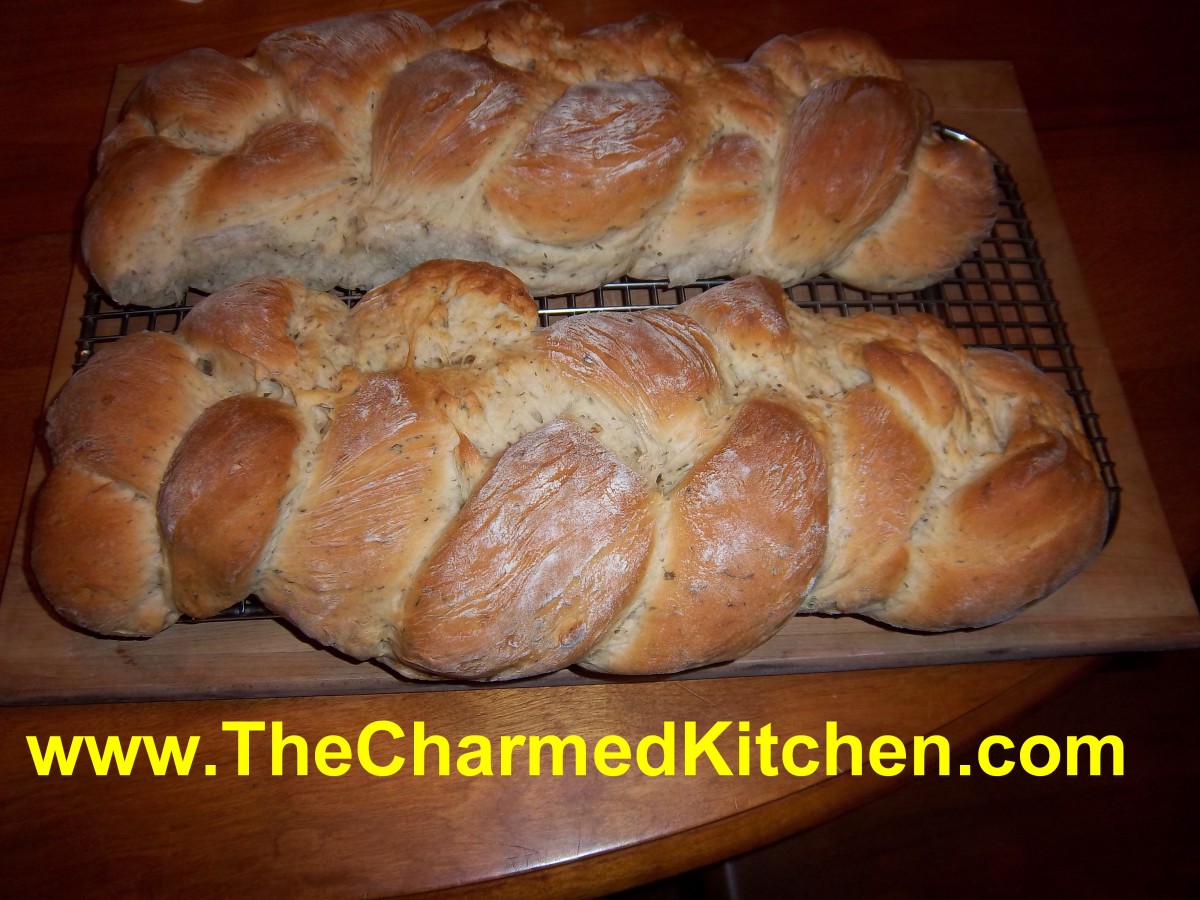
 As fall begins, and the weather gets cooler, I find myself baking more bread. This is one of my favorite recipes. The mix of herbs, garlic and shallots gives this bread great flavor. I like to toast it and spread with a little butter. It also makes a wonderful sandwich bread.  Works well for croutons and as bruschetta, too. You can bake the dough in 9×5 -inch loaf pans, if you want a more traditional shaped bread.

Braided Herb Breads

5 ½ -6 ½ c. flour
2 packages quick rising yeast
½ c. sauteed, minced shallots or onions*
2 T. each dried marjoram and parsley
1 T. each dried oregano and minced garlic
1 T. honey
2 t. dried thyme
2 t. salt
¼ c. olive oil
2 ¼ c. hot water

In a mixing bowl combine 2 c. of flour with the rest of the ingredients and mix until smooth. Beat with electric mixer 4 minutes then add 1-cup additional flour and beat 1 minute longer. Stir in flour ½ cup at a time until soft dough forms. Turn onto surface and knead, adding flour gradually until dough is smooth and elastic. Place dough in lightly greased bowl and turn to cover. Cover with a towel and let rise until doubled, about 30 minutes. Turn dough onto surface and cut in half. Cut each half into thirds. Roll each piece of dough into an 18-inch rope. Loosely braid three ropes together and repeat with the remaining dough. Place on greased baking sheet and cover until doubled in size, about 20 minutes.
Bake in a preheated 375-degree oven for 25-30 minutes, or until bread sounds hollow when tapped lightly. Makes 2.

* I cook the shallots or onions in a little oil or butter, then cool before adding to the dough.

Variation: Whole wheat: Add 2 cups of whole-wheat flour to replace 2 cups of white flour. Also try adding ¼ c. of wheat germ, oat bran or 2 tablespoons of seeds (sesame, pumpkin, sunflower, poppy, etc.)
Regular yeast can be used, but rising times will be longer and water should be warm, not hot.

Posted in Cooking |

Pumpkin Seed Flatbread

Pumpkin Seed Flatbread

Pumpkin Seed Flatbread

This flatbread is really like a type of cracker. Studded with hulled pumpkin seeds and lightly spiced – they are fun and easy to make. Since pumpkin seeds are in the markets right now, it is also a great time of year to make them. Heck, you can use your own hulled pumpkin or squash seeds, too.   It’s perfect for entertaining or just snacking. Rolled really thin you can cut them out into any shape or size you like. Be sure to store leftovers  in an airtight container. Who are we kidding? There aren’t going to be leftovers. Serve plain or with butter or cheese. Great with chili, too.


Spiced Pumpkin Seed Flatbread

1 c. warm water

1 T. sugar

1 packet active dry yeast

6 T. cold butter

2 1/2 c. flour

1/3 c. cornmeal

1 T. chili powder

1 t. salt

1 c. hulled pumpkin seeds, chopped very fine

1 egg

2 T. cold water

coarse sea salt for sprinkling

In a large bowl combine the lukewarm water, sugar and yeast and allow to stand for 5 minutes. Cut butter into bits and add to yeast mixture along with the flour, salt, cornmeal and chili powder. Stir until mixture forms into a ball. On floured surface knead dough until smooth and butter is incorporated. Place in a lightly oiled bowl, turning to coat top of dough with oil. Cover with plastic wrap and chill 1 hour. Combine water and egg and set aside. Roll out half the dough (keep rest chilled until ready to use) on lightly floured surface until quite thin (1/8-inch) and sprinkle with half of the pumpkin seeds. Use rolling pin to press seeds into flatbread. Brush with some of the egg wash and cut into strips. You should get about 24 from each half of the dough. Use a spatula to transfer strips to lightly floured baking sheets. Sprinkle with the salt to taste and repeat with the remaining dough. Bake in a 400-degree oven for 10-15 minutes, or until crisp. I usually put both baking sheets in at once, one in the top and one nearer the bottom of the oven, then I switch them halfway through the baking. Makes about 48.

Posted in Cooking |

Spiced Pumpkin Scones

Spiced Pumpkin Scones

Spiced Pumpkin Scones

I posted this recipe last year, but it is worth a re-post. These scones are easy to make and not only great for breakfast and snacks- they make a fun base for shortcakes. I used some for pear shortcakes and they were a big hit. Once baked, they are drizzled with a vanilla glaze and then a cinnamon glaze.  The scones are slightly crisp on the outside, but tender and delicate on the inside.

Spiced Pumpkin Scones

4 c. all purpose flour

1/2 c. sugar

1 T. baking powder

1 t. each salt, cinnamon, allspice, nutmeg and ginger

1/2 t. cloves

1 1/2 sticks cold butter

1 c. cooked pumpkin or winter squash

3 oz. milk

2 eggs

Vanilla glaze

2 c. powdered sugar

1 t. vanilla

4-6 T. milk

Cinnamon Glaze

2 c. powdered sugar

2 t. cinnamon

4 T. milk

Preheat oven to 400. Lightly grease 2 baking sheets or line them with parchment paper. Set aside. Combine flour with sugar, baking powder and spices and stir to blend. Cut in butter until the mixture looks like coarse crumbs. Combine pumpkin or squash with the milk and eggs and stir into the flour mixture. Stir until well mixed. Dough should be just a little sticky. Use an ice cream scoop to scoop dough onto the prepared baking sheets- leaving a couple of inches between them. Hint: If you spray a little non-stick spray on the cookie scoop first the dough will pop out easier.  Bake for 15 minutes or until scones are browned on the bottom and just getting golden on the top. If you want to put both baking sheets in the oven at the same time- switch them half way through the baking time and allow a few extra minutes. Remove scones to cooling rack. Meanwhile make both glazes by combining ingredients and stirring until smooth. Drizzle with the vanilla glaze while still warm and allow scones to cool and glaze to harden before drizzling with the cinnamon glaze. Makes about 20-30 depending on the size of the scoop you use.

Posted in Cooking |