Giant Peanut Butter Cup
If you are looking to make something special for Valentine’s Day this year, you might want to try your hand at making a giant peanut butter cup. It takes a bit of effort, but is not really hard to make.
I’ve made small ones in the past, so I knew the basic structure. Using a 10-inch tart pan offered different challenges, but I went ahead and gave it a try. I wasn’t worried about the components. I had good quality dark chocolate and peanut butter. I knew it would taste good. I wasn’t sure it would stay in one piece.
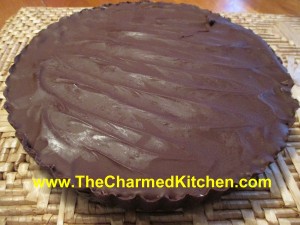
It worked, and here is the result. I used a pretty good amount of chocolate. You could probably use less, but I wanted the chocolate thick enough on the bottom the make it sturdy. I also used a slightly altered version of the filling I use when I make buckeyes. I am pleased with how it came out.
Here is how I did it.
Giant Peanut Butter Cup
1- 1½ lbs. chocolate – I used a nice quality dark chocolate
1½ c. peanut butter
1 stick (½ cup ) butter, softened
2 ½ c. powdered sugar
2 t. vanilla
You will need a tart pan with a removable bottom. I used a 10-inch pan, but a 9- inch pan would work, too. Cover the removable bottom of the tart pan with wax paper. It will make it easier to get the thing out in one piece later. I cut out a square and just folded the extra wax paper under the pan and taped it down. Melt the chocolate and pour enough of it into the bottom of the tart pan that you can cover the bottom generously. Use a small spoon to push chocolate up the sides of the pan.
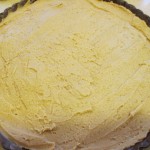
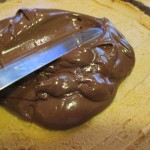
Now at this point you could just keep tipping the pan to get the chocolate evenly coated inside. I know my limitations. I just pictured myself dropping the pan of melted chocolate, so I used the spoon method instead. The important thing is that the entire inside gets a coating of chocolate. Place pan in fridge to cool and chocolate to set up. Meanwhile, in medium bowl mix peanut butter and butter together until well mixed. Stir in sugar and vanilla and mix until smooth. Spread this mixture over the chocolate shell. Don’t press too hard. You don’t want to break the shell. I will confess that before I added the peanut butter, I played around with loosening the chocolate shell. I was worried it would not come out later. After I added the peanut butter mixture, I put it back in the fridge to firm up. Once the peanut butter mixture was chilled, I melted the rest of the chocolate and poured it over the top.
I used a lot of chocolate in the base and needed to melt more chocolate than I originally planned on. I do think the thicker shell helped when it came time to get it out of the tart pan.
To remove the peanut butter cup- make sure it is completely hardened. I gently pulled at the sides all around the edges of the tart pan, to loosen it. Then I pushed up on the removable bottom of the pan. After a few gentle pushes, it came out. I had to trim a little chocolate off the bottom when removing the wax paper, but it helped in getting the peanut butter cup out in one piece.


