Spicy Pickled Beets
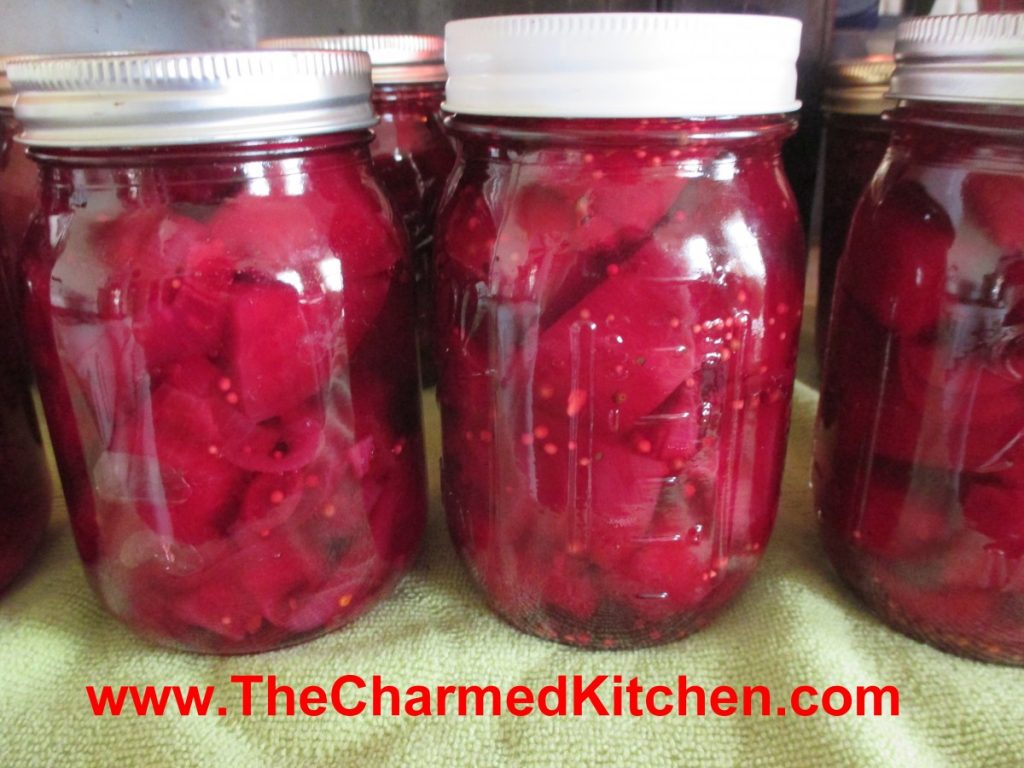
Beets are just one of those foods. People seem to love them, or hate them. I am a beet lover. I enjoy them in all sorts of dishes. The nice thing about making a batch of pickled beets is being able to open up a jar whenever you want.
This recipe is a pretty classic way to preserve beets. The brine is a sweet and sour mixture with pickling spice, salt and red pepper flakes for added flavor and heat. You could play around with the seasonings a little. Maybe adding more heat or less, depending on your preference. Keep in mind that spices tend to intensify in flavor when canned.
Pickled beets are great served as a side dish with all sorts of foods. I like them served with cheeses, crackers and other pickled foods as an appetizer. I also like to add them to salads. If you don’t want to can them- you can store them in the fridge for up to a couple of months.
Spicy Pickled Beets
4 lbs. beets, smaller sizes preferred
3 c. thin sliced onions
2 c. sugar
2 T. Pickling spice
1 T. canning salt
2 t. red pepper flakes
2½ c. cider vinegar- 5% acidity
1½ c. water
Wash and trim beets, leaving a couple inches of stem attached. Cook in boiling water until tender. Cool beets down so you can handle them. Peel beets and cut into 1½- 2-inch diameter pieces, if beets are large. Leave whole if beets are small. Set aside. Combine the rest of the ingredients in a pot and bring to a boil. Reduce to simmer and simmer 5 more minutes. Add beets and cook a few minutes, until beets are warmed through. Ladle hot beets into clean pint jars, leaving ½ inch headspace. Ladle in hot liquid, leaving ½-inch headspace. Remove air bubbles, wipe off rim, screw on lid to finger-tip tightness. Repeat with remaining beets and liquid. You should fill about 5 pint jars. Process in a boiling water bath for 30 minutes. Turn off the heat and leave jars in water bath 5 minutes before removing to counter to cool. Yield: 5 pints.
Zucchini Brownies- Gluten Free
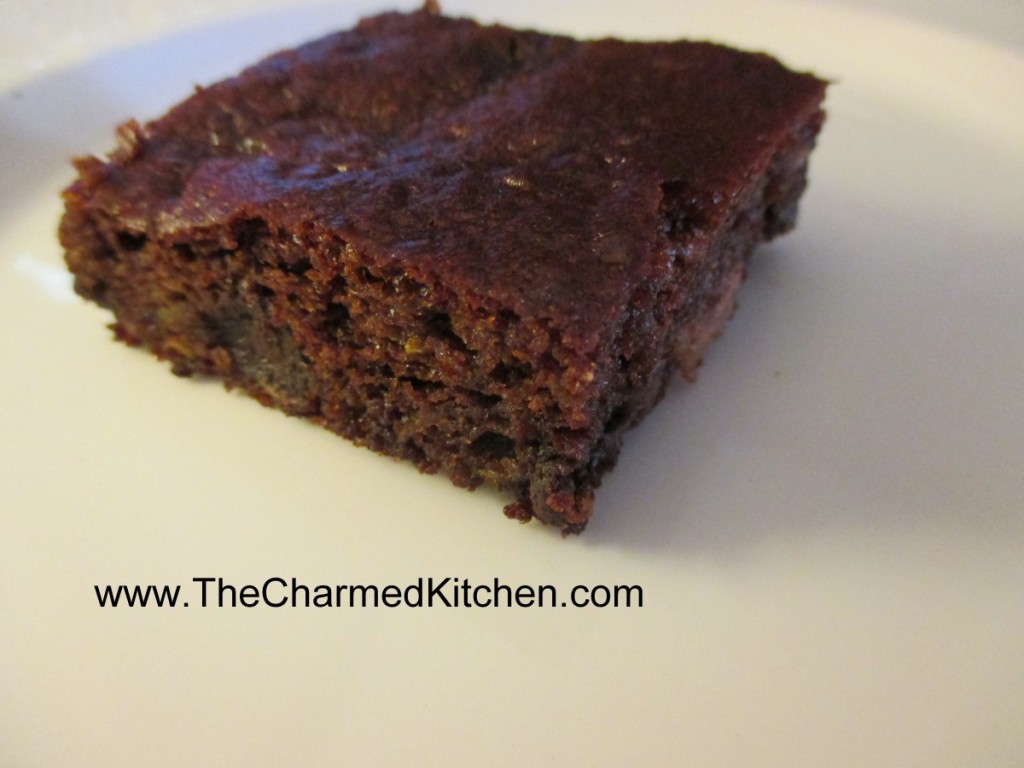
These brownies are everything you want in a brownie. Sweet, moist and very tender. The fact they are also flour and gluten-free is a nice bonus for those who can’t have gluten.
You might think, when you read the ingredients, that I left something out. I didn’t. They baked up beautifully and had a wonderful texture. I think the next time I make them, I might also add some chopped nuts.
Gluten-Free Zucchini Brownies
1½ c. shredded zucchini
1 c. almond butter- but you could use peanut butter instead
1 c. chocolate chips
1/3 c. honey – but you can use 1/2 cup if you want a sweeter brownie
¼ c. unsweetened cocoa powder
1 egg
1 t. vanilla
1 t. baking soda
1 t. cinnamon
½ t. allspice
Preheat oven to 350 degrees. Grease a 9×9 inch pan, set aside. Combine all ingredients in a medium bowl and stir until well blended. Pour batter into pan and spread evenly. Bake 25-30 minutes, or until toothpick inserted comes out clean. Cool before cutting. Makes 16.
Peach and Blueberry Cake

This cake is the perfect summer dessert. It is moist and filled with the fruits of summer. It also travels well, so you can box it up and take it along to the park for a picnic or to a cookout.
The cake is pretty simple to make. The batter can be mixed by hand- no need for long beating times or for getting out the mixer. In the time it takes to preheat the oven, you can have the cake ready to bake.
The batter and fruit are layered in the pan, along with the cinnamon sugar.
I added a citrus/powdered sugar glaze, once the cake was cooled, but it is optional.
So here is the recipe.
Peach and Blueberry Cake
1 c. oil, I used avocado oil
4 eggs
1 t. vanilla
1/3 c. lime juice- you can use lemon, instead
3 c. flour
2 c. sugar
3 t. baking powder
¼ t. salt
2 medium peaches, peeled, pitted and sliced
1½ c. blueberries- fresh or frozen
½ c. sugar
2 t. cinnamon
Glaze:
1 c. powdered sugar
1 t. lemon zest
2 T. lime juice- or enough to make glaze of pouring consistency.
Grease a 9×13 inch pan. Preheat oven to 350-degrees. Combine oil, eggs, vanilla and juice. Stir until smooth. Set aside. In medium bowl combine flour, 2 cups of sugar, baking powder and salt. Stir to combine dry ingredients, then add the oil/egg mixture. Stir until batter is smooth. It will be thick. Place ½ of batter in prepared pan. Arrange peach slices on batter and top with the blueberries. Combine the ½ cup of sugar with the cinnamon. Sprinkle on ½ of the cinnamon mixture. Pour on remaining batter and sprinkle with remaining sugar mixture. Bake 45 minutes, or until cake tests done. Cool. Serve the cake as is, or make the citrus glaze and drizzle it over cooled cake. Serves 12.
Creamy Zucchini Soup – Hot or Cold

You can never have enough recipes for zucchini. If you have ever planted zucchini, you know what I mean. I decided to post a number of my favorite zucchini recipes all week.
This is a recipe I’ve had for ages, but had not made in a while. I forgot how much I liked it. As an added bonus, it can be served hot or cold.
I leave the skins on my zucchini, I like the way the little green flecks look in the soup, but you can peel, if you prefer. You can also use a combo of green and yellow summer squash.
Here is the recipe.
Creamy Zucchini Soup
1 medium onion, chopped
2 T. butter
4-6 medium zucchini, sliced
1 large potato, peeled and diced
1 T. chopped parsley
½ t. each basil, marjoram and thyme
1 t. hot sauce, or to taste
salt and pepper to taste
6 c. chicken or veggie broth
1 c. milk or half and half- I prefer the half and half
In Dutch oven cook onions in butter until tender. Add vegetables and seasonings and cook until hot. Add broth, heat to a simmer and cook 15 minutes. Puree mixture in blender in batches and return to pot. Add milk and heat through. Adjust seasonings. Serve hot or cold. I topped mine with some fresh chopped parsley and a little hot sauce. Serves 6-8.
Sweet Corn Ice Cream

This is one of those times when you just need to trust me. Ice cream flavored with sweet corn might sound odd to you, but it is really quite tasty. The corn flavor actually works very well when added to traditional ice cream ingredients like cream, sugar and eggs.
What a fun dessert to make for your next summer barbecue. You can even let people taste it to see if they can guess the secret ingredient!
I had heard of ice cream being made with corn before, but only tasted it recently. A cousin of mine made some and I was lucky enough to try it. It was really good. Corn ice cream is popular in Mexico, at least that is what I read.
I decided to make some of my own. It was perfect timing. I had some cream and half and half that needed to be used soon. I also had 2 ears of corn in the fridge. You can just cut the corn from the cob and add it to the recipe. That will leave you with kernels of corn in the finished ice cream. Nothing wrong with that. I pureed the corn mixture, because I wanted a smoother finished ice cream. Either is fine, based on your preference. I used 2 ears of corn- that was all I had. I could see adding another ear of corn for a more corny flavor. Frozen corn could also have been used.
Sweet Corn Ice Cream
2 ears sweet corn
1½ c. half and half
1 c. heavy whipping cream
¾ c. sugar- or a little more or less, to taste
4 egg yolks
1 t. vanilla
Scrape the corn kernels off the cobs and place in a medium saucepan. Add the half and half and the cream and bring to a simmer. You can leave the kernels as is, or puree the mixture at this point. I wanted a smoother ice cream, so I used my immersion blender to puree the corn in the pot. In a medium bowl, beat together the egg yolks, sugar and vanilla. Add ½ cup of the hot cream mixture to the eggs, whisking in well. Add another ½ cup of the cream mixture, whisking again. Add one last ½ cup of the hot cream and again, whisk until smooth. Pour the egg mixture into the saucepan with the cream and while whisking, simmer until mixture starts to thicken and will coat the back of a spoon. This will take about 5 minutes. Don’t use too high a heat, or you will scramble your eggs. Mixture should reach 160 degrees to be sure eggs are cooked. Remove from heat and pour mixture into a bowl. Allow ice cream base to cool down, then chill in fridge. Chilled mixture can be frozen in an ice cream maker once cold- in a few hours- or even the next day. Once mixture has been frozen in ice cream maker, place in a container and freeze until ready to serve. Makes about 5-6 cups of ice cream.
Zucchini and Cheese Tartlets

Since zucchini are so prolific, there never seem to be enough recipes for them. I like this one as an appetizer. You can make up a big batch, bake and then freeze some for whenever you need them. Served with a salad they make a nice lunch or light dinner.
Zucchini and Cheese Tartlets
1 recipe of pie crust dough, enough for 2 pies, home made or store bought, recipe follows
1 medium zucchini shredded, about 1 1/2 cups
1 T. flour
1 c. shredded cheese- any kind you like. I like cheddar.
2 eggs, beaten
1/2 c. minced onion
1 t. Italian seasoning
salt and pepper to taste
hot pepper sauce to taste
Preheat oven to 375 degrees. Roll out dough to 1/8-inch thick. Use a 2 1/2-inch biscuit cutter to cut out circles of dough. Place dough circles in mini muffin pans. Press them in gently being careful not to tear them. Repeat with remaining dough and re-roll scraps. You’ll end up with about 3 dozen in all. If you don’t have enough pans, keep the extra dough circles under a towel or plastic wrap so they don’t dry out until you are ready to use them. In mixing bowl combine zucchini and toss in the flour. Add remaining ingredients and mix well. Adjust seasonings to your taste. Place a rounded teaspoonful of zucchini mixture into each of the tartlet shells in the prepared pans. Don’t over fill. Bake for 12-15 minutes or until golden brown on top. They will puff up while baking but flatten when cooling. Can be served hot, warm or at room temperature. Makes about 3 dozen.
Can be frozen. To reheat take straight from the freezer and place on a baking sheet. Bake in a preheated 325 degree oven and bake for about 20 minutes, but check after 15 minutes.
Layered Crust
Somewhere between a crust and a puff pastry this crust is very flaky but also fragile. Great for small pies, turnovers, tarts and tartlets.
6 T. unsalted butter, room temperature
¾ c. vegetable shortening or lard, room temp. – you can even use chilled coconut oil
2½ c. pastry or all-purpose flour
1 t. salt
½ t. baking powder
1 t. lemon juice or vinegar
6 T. ice water, about
Start by mixing the 2 fats together and spreading them out into a ½ -inch thick rectangle. Chill at least 30 minutes before proceeding. Measure dry ingredients into a bowl and toss to mix. Score the chilled rectangle and cut the fat into ½ – ¾ -inch cubes. Drop into the flour mixture and toss to make sure all of the cubes are coated in flour. Combine liquids and toss in 2 tablespoon increments until dough will just hold together. You will see the lumps of fat. Wrap and chill dough for at least 2 hours. Now the fun begins: On a lightly floured surface roll the dough into a rectangle about ½ inch thick and 10 inches long. Fold the sides in, making 3 layers, like folding a piece of paper to put in an envelope. Turn the pastry ends to be at 6 and 12 o’clock and roll again into a rectangle. Fold again, turn again and repeat one more time for 3 turns in all. Cover and chill at least 4 hours. Makes 2.
Dilly Green Beans
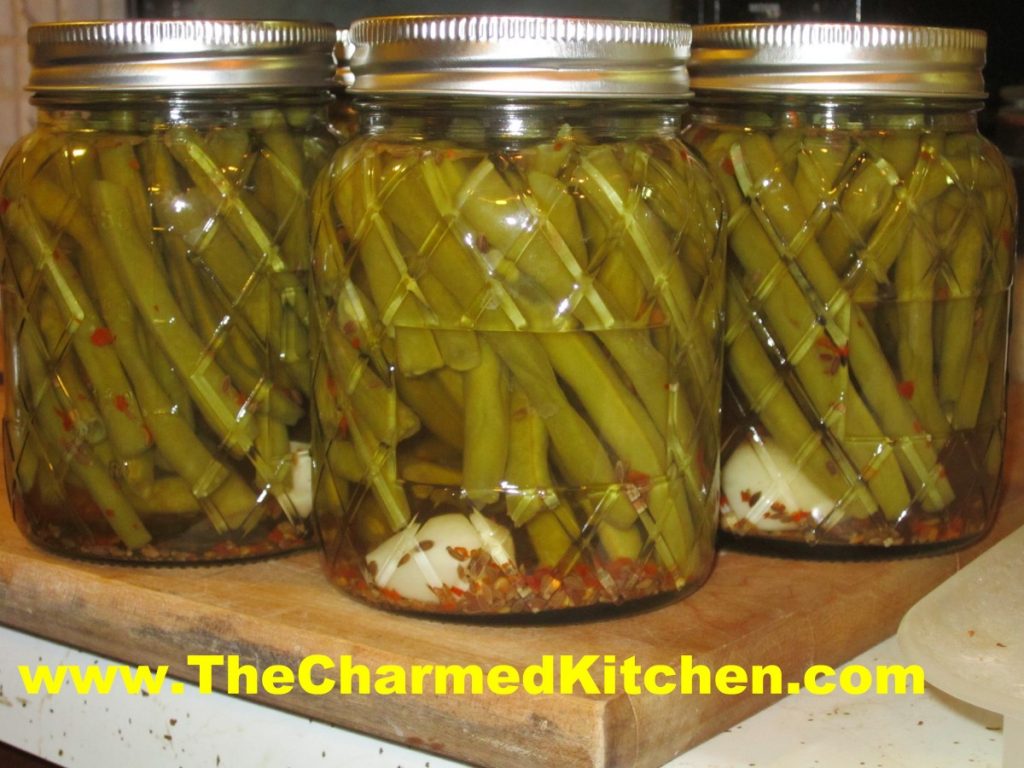
These are one of my favorite pickled veggies. I like pretty much any type of pickle, and I love green beans, so no surprises there. They have a great, tart flavor.
If you have an abundance of green beans, you might consider making a batch of these to enjoy year round. Green beans are also at local farm markets now, and are at their peak.
These are good just eaten like other pickles, as a side. But they are also a fun addition to a Bloody Mary- or so I am told. I also like to serve them as an appetizer with cheeses, crackers and olives. Who am I kidding? I eat them right out of the jar.
While the recipe calls for 1/4 teaspoon of red pepper flakes per jar- feel free to add more, for a spicier version.
Dilly Green Beans
4 lbs. table‑perfect whole green beans
1 3/4 t. crushed dried hot red pepper
3 1/2 t. dried dill seed or seven fresh dill heads
7 cloves of fresh garlic, peeled
5 c. vinegar
5 c. water
1/2 c. less 1 T. pickling salt
Wash beans thoroughly. Remove stems and tips, and cut them as much as possible in uniform lengths to allow them to stand upright in canning jar, coming to the shoulder of the jar. have jars clean and very hot, and lids and sealers ready in scalding water. In each jar place one dill head or 1/2 t. dill seed, add one garlic clove, and 1/4 t. crushed hot red pepper. Pack beans upright in jars, leaving 1 inch of head room. Heat together the water, vinegar and salt. When the mixture boils, pour it over the beans, filling each jar to 1/2 inch from the top. Run a plastic knife down and around to remove trapped air. Adjust lids, and process in a boiling water bath for 10 minutes, start timing after the water in the canner returns to a boil. Remove jars. …Wait at least 2 weeks for these beans to develop their flavor. Yield: 7 pints
Source: Putting Food By
Canning Tomatoes
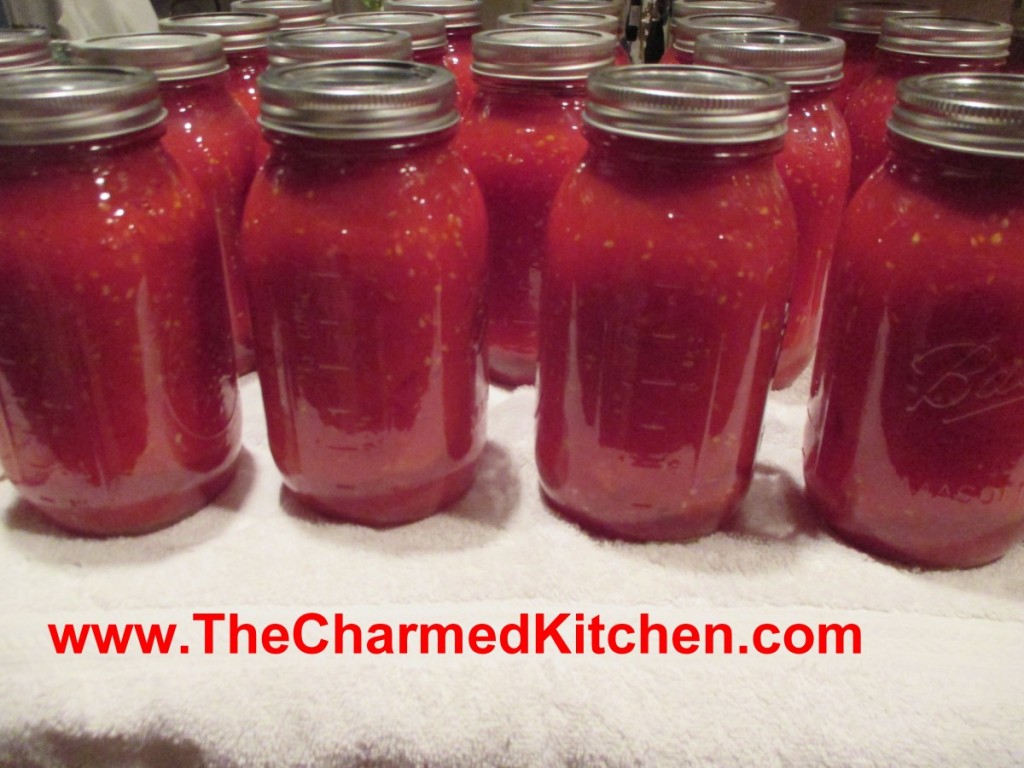
I love my home-canned tomatoes. They taste so much better than anything than comes in a can. Worth the effort. We canned tomatoes in class last night.
You have options when canning tomatoes- crushed, juice, sauce- and more. The one option you won’t see for home- canned tomatoes is diced. There is a reason for that. When tomatoes are canned commercially, calcium is added to keep them firm. That is why commercially canned diced tomatoes hold their shape. Home canned diced tomatoes will just cook down, get very soft and not hold their shape. Canning tomatoes whole will give you a firmer end product, if that is what you want.
I have been asked several times in canning classes, if it is safe to can yellow or orange tomatoes. We have all heard that yellow and orange tomatoes are lower in acid, so are they still safe to can? The answer is yes, they are safe to can.
Why?
In spite of you might have been told, orange and yellow tomatoes are not acid free or low acid.
Truth is, that yellow and orange tomatoes have just as much acid as red tomatoes.
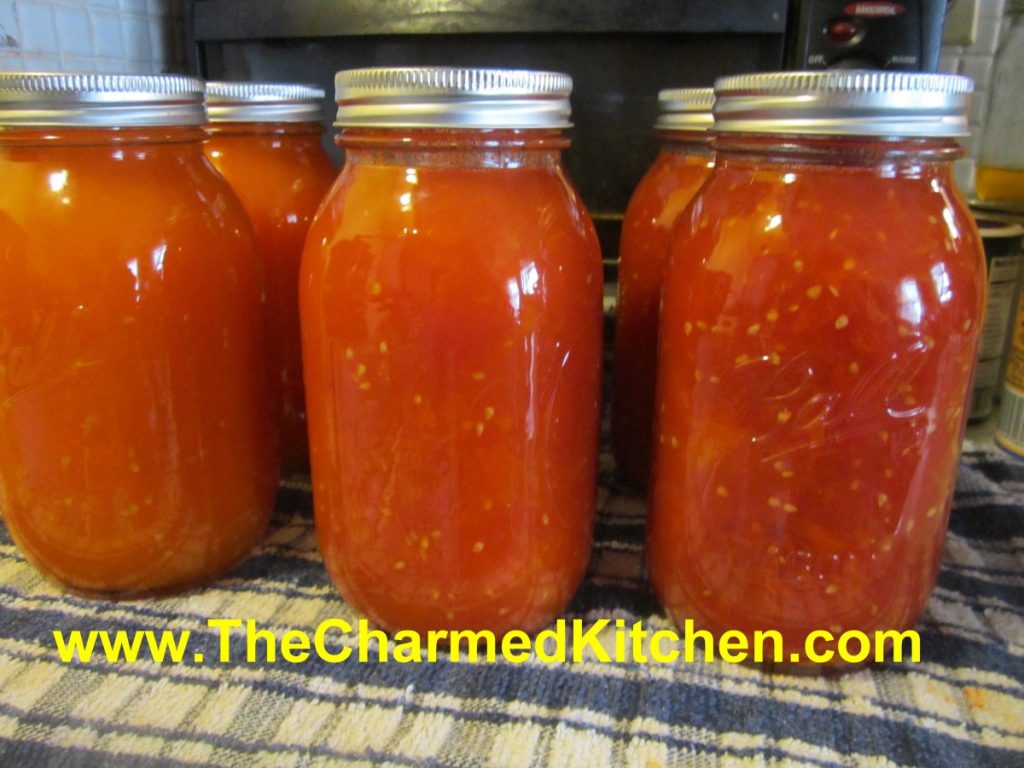
Well, for the most part at least. In terms of acidity or Ph, yellow and orange tomatoes are about average. Some cultivars have more, some less. Bottom line is that all tomatoes are safe to can- as long as you acidify them.
Adding salt is optional, and is for flavor only. Use canning/pickling salt or non-iodized salt when canning.
Here are some popular canning recipes to get you started.
All follow the NCHFP (National Center for Home Food Preservation) recommended procedures.
Crushed Tomatoes
Peel and core tomatoes , trim off any bad spots and quarter. Place about 1/4 of your prepared tomatoes in the kettle and cook, stirring constantly over high heat. Use a potato masher to crush tomatoes and extract juices. Once they are boiling add remaining tomatoes, stirring constantly. You don’t need to crush these tomatoes. Bring to a boil and boil for 5 minutes. In clean, hot jars add needed acidity listed below. You can also add 1 teaspoon of canning salt per quart if desired. Ladle in hot tomatoes, leaving 1/2-inch headspace. Wipe jar rims clean and adjust lids. Process in boiling water bath. Pints 35 minutes, quarts, 45 minutes. 1,000-3000 ft over sea level add 5 minutes. Twenty-two pounds of tomatoes will yield about 7 quarts of tomatoes.
Whole Tomatoes in Juice
Use any extra tomatoes to make juice. I use tomatoes that are too big to can whole, or those that have blemishes that need to be trimmed. Cut up clean, unpeeled tomatoes in a kettle and cook, stirring often until tomatoes are mushy. Strain mixture, pressing on solids or run through a food mill or tomato juice extractor. Set aside,. Place peeled, whole tomatoes in kettle and add enough tomato juice to cover them. Heat to a simmer and simmer gently 5 minutes. Add lemon juice or citric acid to jars, using amounts listed below. Add salt, if desired. Add tomatoes and cover with hot juice, leaving 1/2 -inch headspace. Wipe rims and adjust lids. Process both pints and quarts 85 minutes in a boiling water bath.
Tomato Juice
Wash, stem and trim bruises off tomatoes. Cut into chunks. Add about 1 pound of tomatoes to kettle and bring to a boil while crushing. Continue to add additional cut up tomatoes slowly, keeping mixture boiling. This will keep the juice from separating later. Simmer an additional 5 minutes once the tomatoes have all been added. Press mixture through a strainer , sieve or food mill to remove seeds and skins. Add lemon juice or citric acid to jars according to directions listed below. Add salt if desired. Return juice to boil and add to prepared jars leaving 1/2-inch headspace. Wipe rims and adjust lids. Process n a boiling water bath pints 35 minutes and quarts 40 minutes. Add 5 minutes processing time at elevations between 1,001 and 3,000 ft.
Tomato Sauce
Prepare as for juice. After juice is made return to pot and start cooking down to desired thickness. You’ll lose about 1/3 of the volume for thin sauce and 1/2 of the volume for thick. Add lemon juice or citric acid to prepared jars as described below. Add salt if desired. Add boiling sauce leaving 1/4 -inch headspace. Wipe rims and adjust lids. Process in a boiling water bath 35 minutes for pints and 40 minutes for quarts. Add five minutes at 1,001-3,000 ft. elevation.
Acidity and Tomatoes
Tomatoes must be acidified before canning. When canning either whole, crushed or juiced tomatoes you must add either 2 T. bottled lemon juice per quart or 1/2 t. citric acid . For pint use 1 T. lemon juice or 1/4 t. citric acid. You can also use 4 T. (5%) vinegar per quart, but it will alter the flavor and is not recommended. You can add a little sugar to offset the flavor, if you like.
Zucchini Bread Pudding

I had some extra zucchini bread and wanted to do something different with it. I ended up making this zucchini bread pudding. It came out even better than I thought it would. Rich, not too sweet. A simple, classic dessert.
I felt it needed some sort of topping or sauce. I made a vanilla caramel sauce to dress it up a little. It worked great. My neighbor really liked it. Ice cream or whipped cream would have worked, too.
I guess I should really call it a zucchini bread bread pudding. After all, it is bread pudding made from zucchini bread. My spell check hates it when I type the same word twice, so zucchini bread pudding it is.
I know this would also work with other quick breads, like pumpkin or banana bread.
So here is the recipe- for the bread pudding, the zucchini bread and the caramel sauce.
Zucchini Bread Pudding
6-8 cups cubed zucchini bread- recipe follows
8 oz. cream cheese- cubed
2 c. half and half
3 eggs
1 T. vanilla
1 t. cinnamon
Vanilla Caramel sauce- recipe follows
Butter a 2-quart casserole. Preheat oven to 350 degrees. Place half the cubed zucchini bread in the prepared pan. Add half the cubed cream cheese, scattering over the bread. Repeat with remaining bread and cheese. In bowl, combine the remaining ingredients, beating until well mixed. Pour over the zucchini bread mixture. Place casserole in oven and bake for 30 minutes, or until bread pudding is set. Allow bread pudding to cool a little before serving. Serve with the vanilla caramel sauce or top with ice cream or whipped cream. Serves 8.
While often served warm, this bread pudding is tasty served chilled, too. Heck, I just had some for breakfast.
Zucchini Bread
3 c. flour
3 eggs
2 c. sugar
2 c. shredded zucchini
1 c. oil
1 c. chopped nuts or raisins
½ c. sour cream or strained yogurt
1 t. each vanilla, cinnamon, baking powder, salt and baking soda
Preheat oven to 350 degrees and grease 2 (9×5 inch) loaf pans. Set aside. Place flour in large bowl. Beat eggs and add with remaining ingredients to flour, mixing well and scraping bowl. Pour batter into prepared pans and bake 1 hour and 20 minutes, or until browned and toothpick in center emerges clean. Cool in pans on wire rack. Freezes well. Makes 2.
Vanilla Caramel Sauce
1 c. sugar
¼ c. water
4 T. butter
2 t. vanilla
¼ c. half and half
Pinch of salt
Combine sugar and water in a small saucepan. Bring to a boil and cook for about 3 minutes. Remove from the heat and add the remaining ingredients. Stir until smooth.


