Sunny Spring Salad

Today’s recipe is a tasty vegetarian salad that is as satisfying as it is pretty. The color is bright, just perfect after several days of chilly weather. If it doesn’t feel like Spring outside, it can feel like Spring inside.
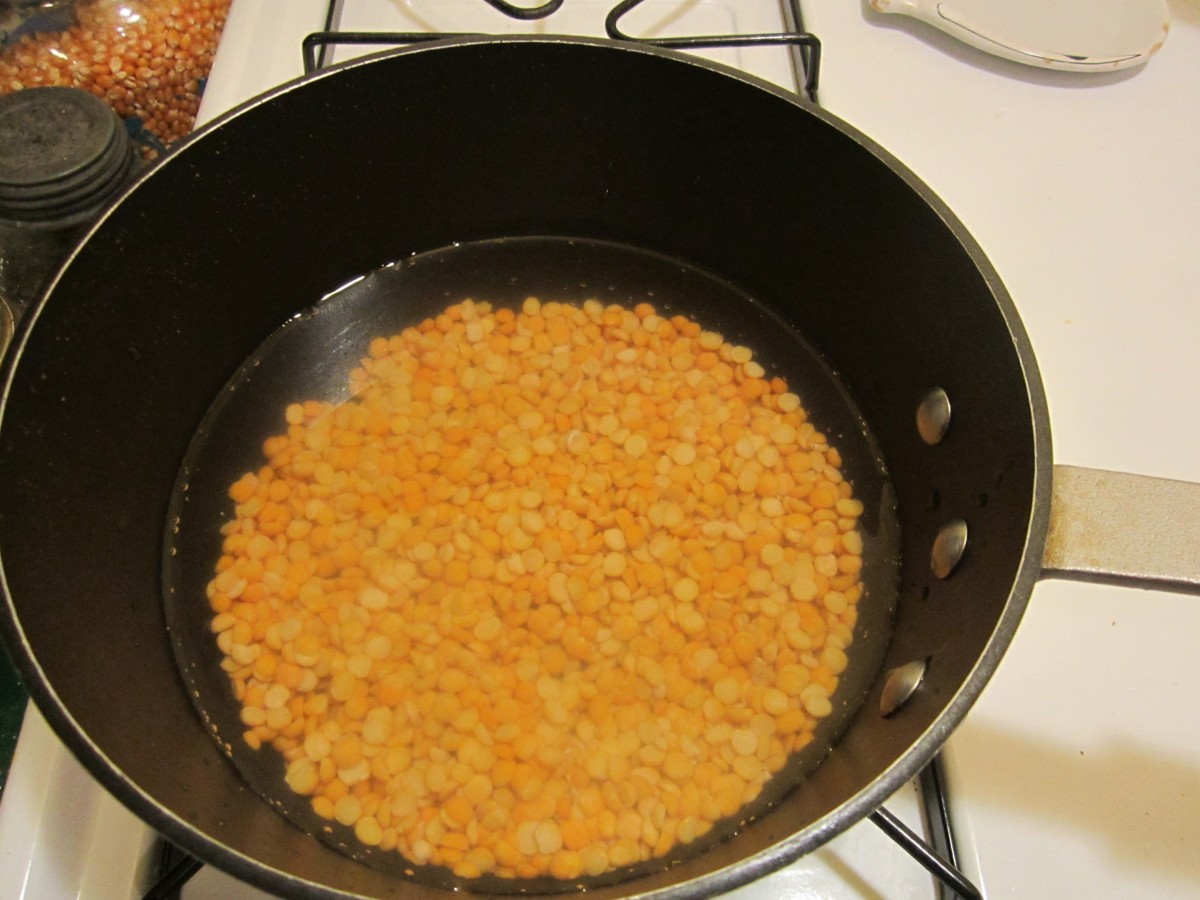
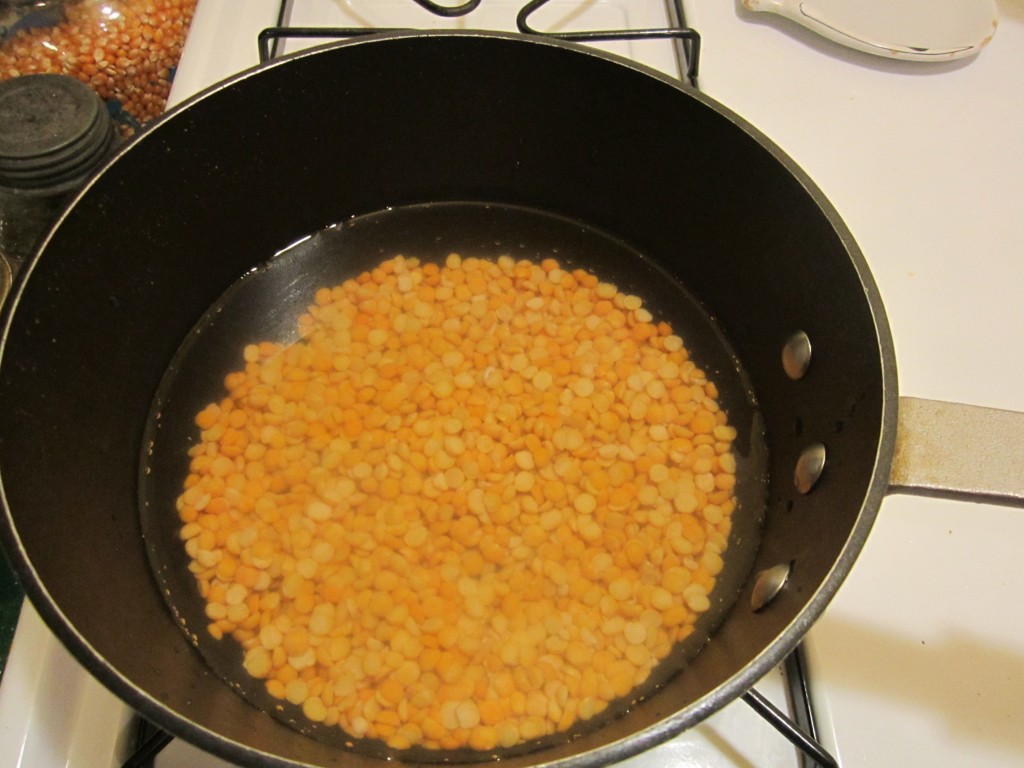
When I say split peas, what comes to mind? Split pea soup? GREEN split pea soup? Years ago my dear friend, Dale Gallis, turned me on to yellow split peas. I started making soup from them, but also use them in salads.
The yellow split peas are combined with carrots, sweet onion, sweet peppers and fresh herbs, then tossed with a simple combination of apple cider vinegar and olive oil. You can serve it right away, or let the flavors blend in the fridge for a bit. I served my salad over a mix of Spring greens.
Yellow (or green) split peas cook to al dente in about 20 minutes, so they are a quick option, too. Much shorter cooking times than other legumes.
Sunny Spring Salad
1- 1 1/2 c. raw yellow split peas
salt
1 carrot, peeled and shredded
1/2 c. chopped sweet onion
1/2 c. chopped sweet pepper
1/2 c. chopped parsley
1/2 c. snipped chives
1/4 c. olive oil
1/4 c. cider vinegar
salt and pepper to taste
6 c. mixed Spring greens
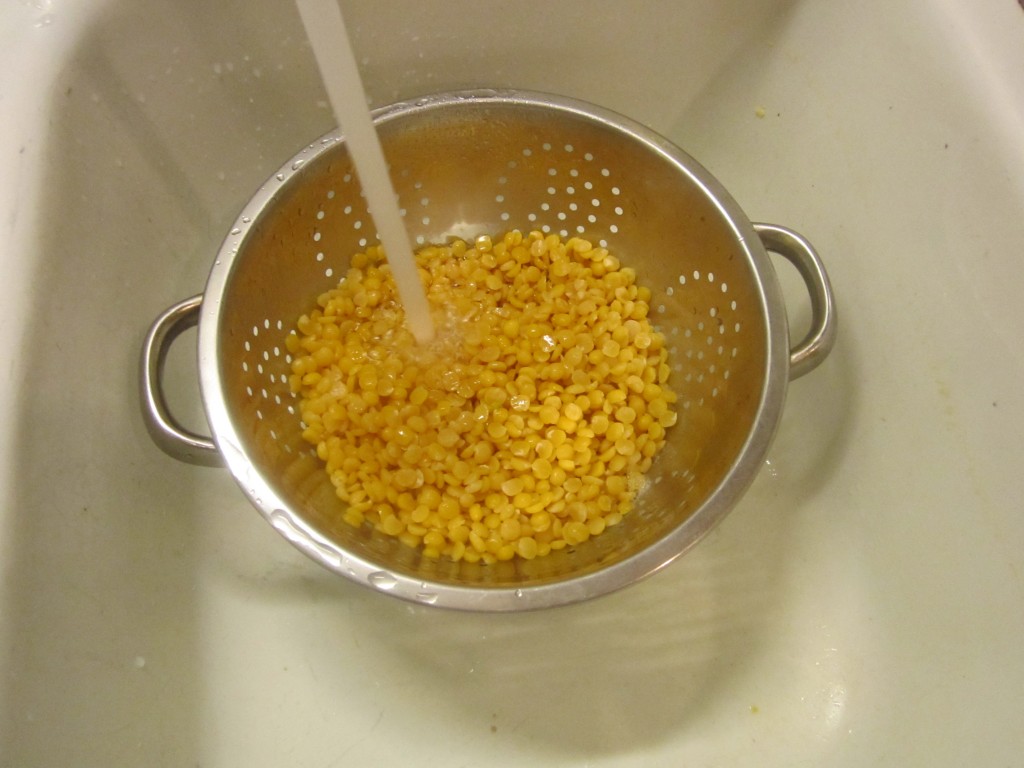
Rinse peas and place in a saucepan. Cover with water and add a little salt. Bring to a boil and simmer until peas are tender, about 20 minutes. Drain and rinse under cold water. Combine peas with carrots, peppers and onion and toss well. Add parsley, chives, oil, vinegar and salt and pepper to taste. Chill until ready to use. Serve on greens. Serves 3-4.
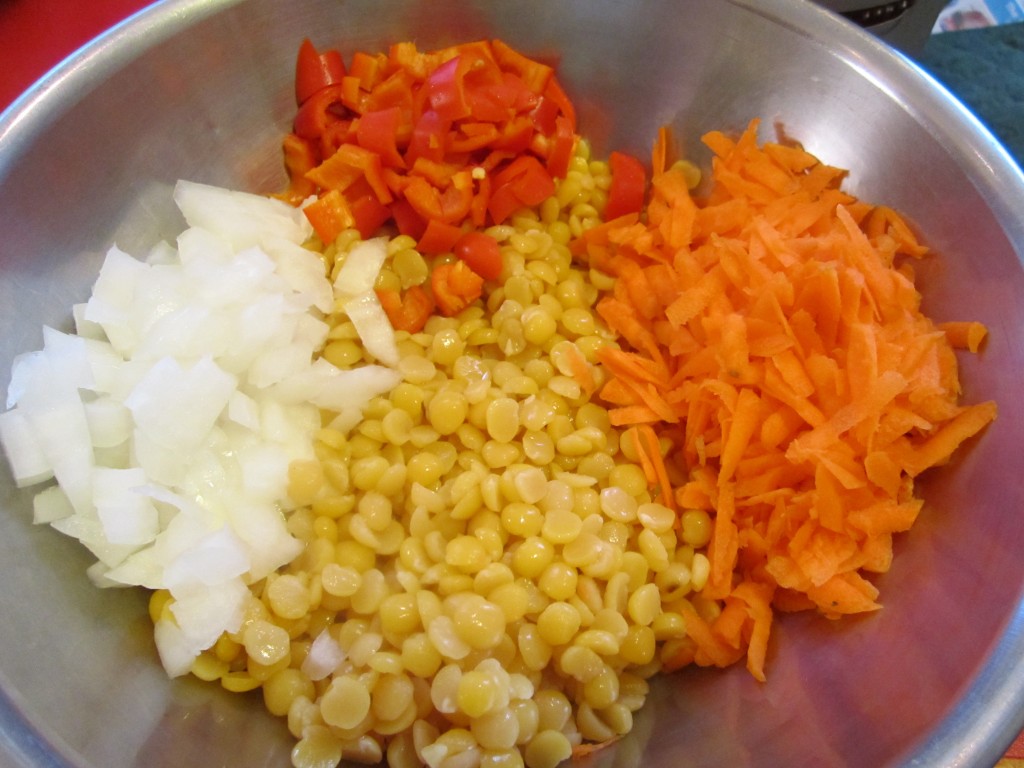
Combine peas with other veggies
Chicken Florentine Soup

This soup is warm and comforting. It was a nice choice for an unseasonably chilly evening. It was one of those spur of the moment recipes that really exceeded expectations. I just had a few ingredients to start with- one of those times when you look through the fridge for inspiration and get lucky.
I knew I was making soup, and that I had chicken and chicken stock. Adding onions and carrots to soup- pretty standard for me. I’ve been on a spinach kick lately so that seemed like a natural addition as well. Found a few mushrooms I’d forgotten about, and put them in, too.
For some reason it was such a perfect combination. I love when it works that way. I am also happy when I remember to write down what I did so I can make it again someday- and share the recipe with all of you. Since the soup has spinach as a central ingredient, I decided to call it Chicken Florentine Soup. So here is the recipe.
Chicken Florentine Soup
2 T. oil
1 medium onion, sliced
1 large carrot, peeled and sliced thin
6-8 cups chicken stock
1½ lbs. boneless, skinless chicken, cubed – I used thighs
1-2 c. sliced mushrooms – I used the baby Bellas
8 oz. fresh spinach, washed well
¼ c. chopped fresh parsley
Salt and pepper to taste
Dash of hot sauce
Heat oil in soup pot and cook onion until tender. Add carrot and cook a few minutes more. Add stock and bring to a boil. Reduce to simmer and cook 10 minutes. Add chicken and mushrooms and cook 10 minutes longer. Add spinach and cook 5 minutes more. Adjust seasonings and serve. Makes 6 servings
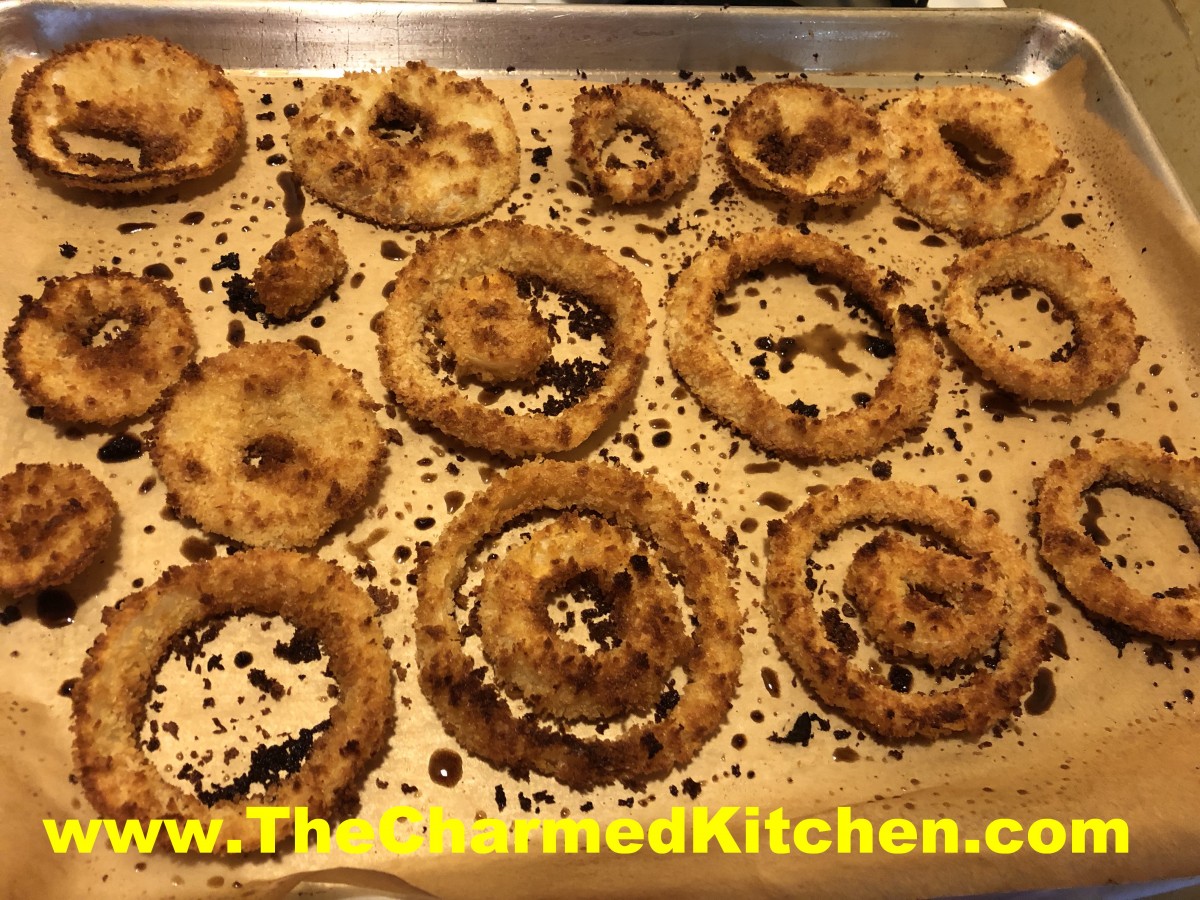
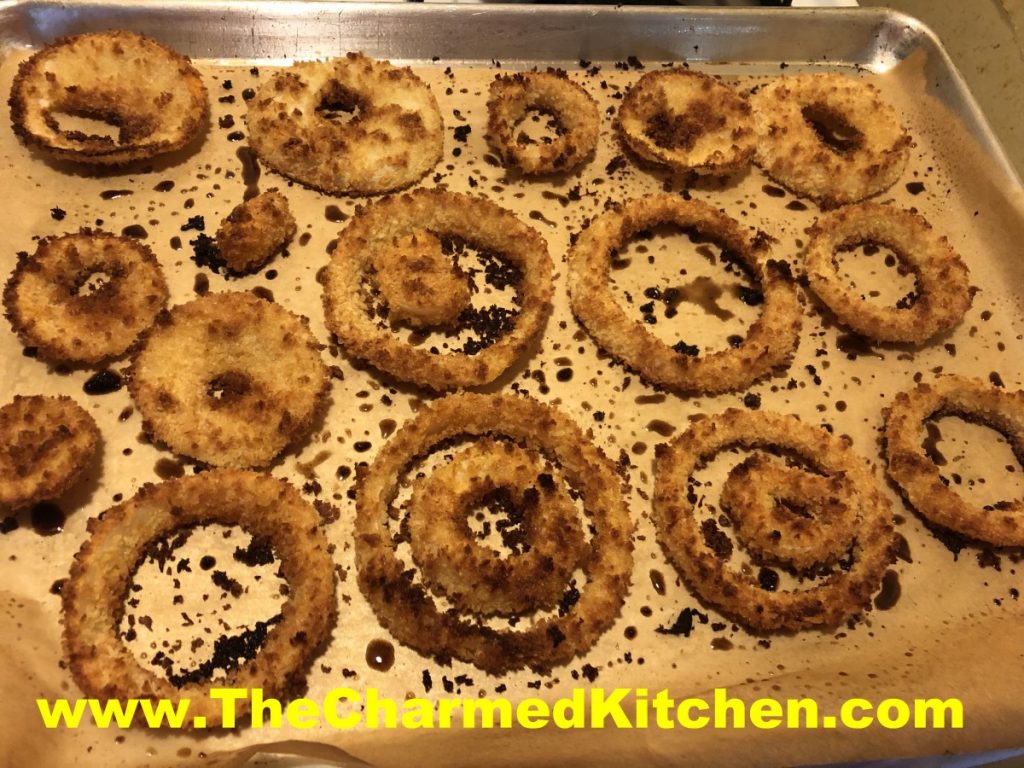
Extra Crispy Baked Onion Rings

These onion rings are fabulous. They have all the crunch of traditionally fried onion rings, without frying!!! The secret is panko bread crumbs and a very hot oven.
I’ve tried baking onion rings before. They were good, but not great. The panko adds more texture than other bread crumbs add. This gives you pretty crunchy onion rings.
The 450 degree oven is a must, too. You need really high temps for this to work.
I used a Vidalia onion and it worked great, but you can use any large onion. Sweet onions are my first choice, but even a big yellow onion will mellow out when cooked.
The drizzle of oil is a must, too. You can just give them a spritz of your favorite non-stick baking spray. Or use a spoon to drizzle them lightly with oil before baking. Because of the high heat- I used avocado oil.
I used the same recipe to make baked zucchini slices, too. They came out great as well.
Here is the recipe. I hope you try it.
Extra Crispy Baked Onion Rings
1 large onion- sweet preferred
½ c. flour
1 t. salt
½ t. pepper
¼ t. smoked paprika
2 eggs
2 T. water
About 2 cups panko bread crumbs
Oil or non-stick cooking spray
Extra salt
Preheat oven to 450 degrees. Line a large baking sheet with parchment paper and set aside. You might need a second one. Peel onion and slice into ½-inch thick pieces. Separate into rings. In a bag, combine the flour with the salt, pepper and paprika. In a bowl, beat together the eggs and water. In a second bowl, place the panko crumbs. Place a few of the onion rings in the bag of flour and shake to coat evenly. Remove from the bag, tapping off excess flour. Place rings in the egg mixture next, turning to coat them completely. Last step is placing the egg-dipped onion rings in the bread crumbs and turning to make sure they get coated evenly. Place onion rings on the prepared baking sheet and continue the procedure until all the onion rings are breaded. To save space, you can place smaller onion rings inside of the larger ones. Drizzle with a little oil, or spray with non- stick coating. I have this pump-bottle thing that lets me spritz oil on stuff. If you are drizzling oil, put a tablespoon or two in a bowl, and use a spoon to drizzle the oil all over the onion rings. Bake for 15-20 minutes, or until golden brown. You can turn them over after 10 minutes, for a more even bake. Remove from oven and sprinkle with a little more salt before serving. Serves 3-4 depending on the size of the onion.
Homemade Crumpets

I love crumpets when I make them myself. They are a cross between a pancake and an English muffin. Crumpets should be moist, soft and light. The ones I’ve tried from the grocery store are heavy and dry. I didn’t like them. If the only crumpets you have ever tried were from the store, you probably don’t like them either. I think if you make your own, you will be surprised at just how tasty crumpets can be.
I’d suggest serving them with jam and clotted cream.
You will need crumpet rings to cook them in. Crumpet rings and English muffin rings (they are pretty much the same thing), can be purchased online and in some specialty cooking supply stores.
The rings are greased and set in a skillet to warm. Then, the crumpet batter is spooned into the rings. They cook in the rings, right in the skillet. This helps them to keep their shape and to rise nice and high.
Many years ago my father made rings for me from cans. We saved cans from things like canned tomatoes or corn. He cut off the lids on both sides and then cut the cans to about 1 1/2 inches in height. There is a rough edge, so I am always very careful when handling them. Buying them is probably a better idea.
Crumpets
2 c. skim milk, scalded*
3 c. flour
1 t. salt
1 package active dry yeast
¼ c. warm water
¼ c. butter, melted
Cool milk to lukewarm, then stir in flour and salt, beating until smooth. In small bowl place water and sprinkle over with the yeast. Let stand 5 minutes until bubbly. Stir in butter then add this to the flour mixture, beating well. Cover and let rise in a warm place until doubled in bulk, about 1 hour. Grease 2 ½ inch muffin rings, or use 3 ½ oz. tuna fish cans and place in a hot, lightly greased skillet. Spoon 2 tablespoonfuls of batter into each ring, reduce heat to low and cook crumpets 12 minutes per side. Remove from rings and set aside to cool. Repeat procedure with remaining batter. Makes about 20 crumpets. Serve split and topped with jam or preserves and Devonshire clotted cream. You can make a mock version of clotted cream- recipe follows.
* I don’t normally use skim milk in cooking, but this recipe calls for it. I reconstitute non fat dry milk for this recipe.
Mock Clotted Cream
1 c. whipping cream
¼ c. sour cream
Just beat together whipping cream and sour cream until soft peaks form.
Homemade Chicken Nuggets

I started making these chicken nuggets for my godson when he a little kid. He is all grown up now, but requests them any time he is visiting. They are actually pretty easy to make and so much better than what is served at fast food places. I often make a big batch and freeze some for later.
They are made with boneless chicken- white or dark meat both work. The real secret is not to overcook them. Try to cut the chicken in even sized pieces so they cook at the same rate. Check them for doneness after 10 minutes.
Don’t be afraid to play around with seasonings. Sometimes I add hot sauce to the egg mixture. I also recently have grown fond of adding smoked paprika to the mix.
Chicken Nuggets
1/2 c. flour
1/2 t. each salt and pepper
1 egg
3 T. milk
1 t. dried parsley
1/2 t. paprika
1/2 t. salt
1/4 t. pepper
1/4 t. garlic powder
1 lb. boneless chicken, cubed into 1-inch pieces
bread crumbs- about a cup
oil
In plastic bag, combine flour with salt and pepper and set side. Combine egg with milk and seasonings in a bowl and mix with a fork until smooth. Place bread crumbs in a medium bowl. Place a few pieces of chicken at a time in the bag with the flour. Hold bag closed and shake to coat chicken pieces. Add the floured chicken pieces to the egg mixture and stir to coat well. Using a fork, remove the chicken pieces and drop in the breadcrumbs, rolling to coat evenly. Place breaded chicken pieces on a baking sheet. Repeat until all the chicken has been breaded. Drizzle with a little oil and place in a preheated 450 degree oven. Bake for 10-12 minutes, or until juices run clear and chicken is cooked. You can also bake in a convection oven or air fryer at 425 for 10-12 minutes. Serve with barbecue sauce, sweet and sour sauce, honey mustard or whatever dipping sauces you like. Serves 3-4.
To freeze for later use you can freeze raw or cooked- I prefer to freeze the nuggets raw and cook when needed. Place nuggets on a baking sheet and place in freezer until hard. Place in freezer container. When using frozen uncooked nuggets- bake in a 425 degree oven for 20-25 minutes.
Mom’s Chicken Noodle Soup
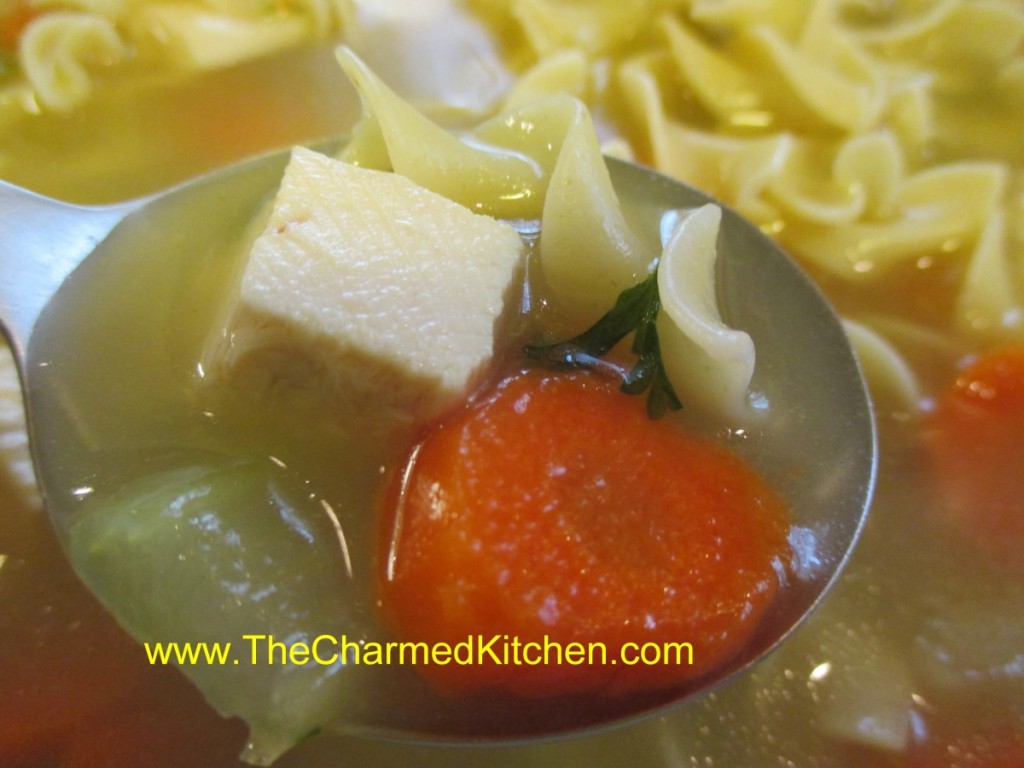
My Mom made wonderful chicken noodle soup, so I think of her every time I make it. I pretty much make mine the same way she did. She taught me well. Since it a chilly, rainy day today, I decided to make some.
I don’t really have an exact recipe for this soup. So rather than writing out the recipe, I will tell you what I do- and what not to do. There is one pretty important thing about chicken noodle soup you should know- don’t cook the noodles in the soup. I know that sounds wrong. Trust me, if you cook your noodles in your soup you’ll end up with a goopy mess. Cook your noodles separately and add them when serving the soup. This does two good things. It keeps the noodles from getting overcooked and it lets each person add just the amount of noodles they like. Let’s face it some people just like a few noodles and others prefer a lot. This way each person gets their soup the way they like it.
So for directions here is what I do. I start with homemade chicken stock. Since I made the stock, I’ll have the chicken I used to make it. I cube up some of the meat and add it to the stock. I also add some diced onions, sliced carrots and sliced celery and let them simmer in the soup until tender. I sometimes add other veggies. Green beans or maybe a zucchini. I don’t get too crazy with the veggies here or it will become vegetable soup. I almost always remember to add some parsley. I love fresh ground pepper, too. Don’t put too much stuff in – you will be adding noodles after all. I cook my noodles and when the soup is ready to serve I warm them up a little- often just in a bowl in the microwave. That way the noodles won’t cool down your soup. I ladle the soup into bowls and put the noodles on the table so everybody can add their own. Seems to work out pretty well.
My Mother was so funny when eating this soup. She had to have it come out “even”. She’d be nearly finished and realized she was out of noodles- so she would add a few. But then she needed more broth so she would add more of that. This went on several times. At the end she always insisted she only had one bowl.
I loving memory of Irene Kubacki Strauss
Blueberry Waffles
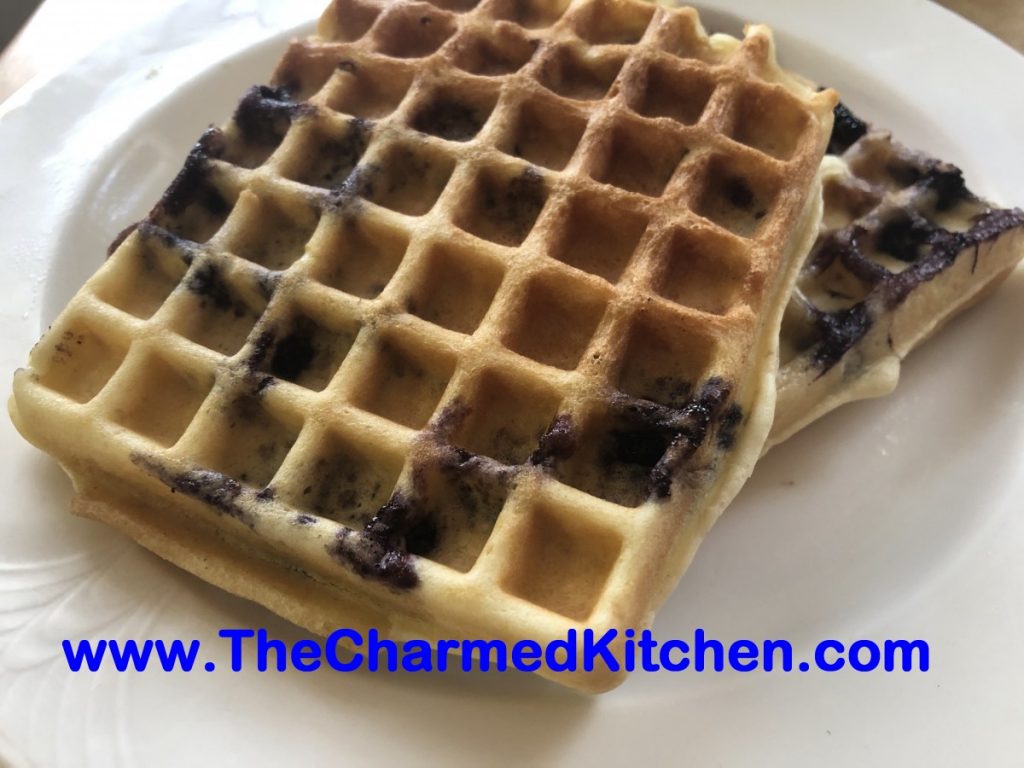
i recently posted a recipe for blueberry pancakes and it got me to thinking- why didn’t I ever make blueberry waffles? I gave it a try and loved the way they came out. I just added some berries to one of my favorite waffle recipes. They are light and crispy, but still tender in the middle. I served them with butter and maple syrup. They would also be great with powdered sugar.
The blueberries made them special. They would make a great breakfast for Mother’s Day. They could also be used as the base for a shortcake. Topped with ice cream or whipped cream, they would make a wonderful dessert.
Blueberry Waffles
1 1/3 cups flour
4 t. baking powder
1 t. salt
2 t. sugar
2 eggs, separated
½ c. butter, melted
1¾ c. milk
2 t. vanilla
1 c. blueberries, fresh or frozen
In a large mixing bowl, whisk together all dry ingredients. Separate the eggs, adding the yolks to the dry ingredient mixture, and placing the whites in a small mixing bowl. Beat whites until moderately stiff; set aside. Add milk, melted butter and vanilla to dry ingredient mixture and blend. Fold stiff egg whites into mixture. Fold in blueberries. Ladle mixture into hot waffle iron and bake. Makes about 6 waffles.
Black and White Cookies
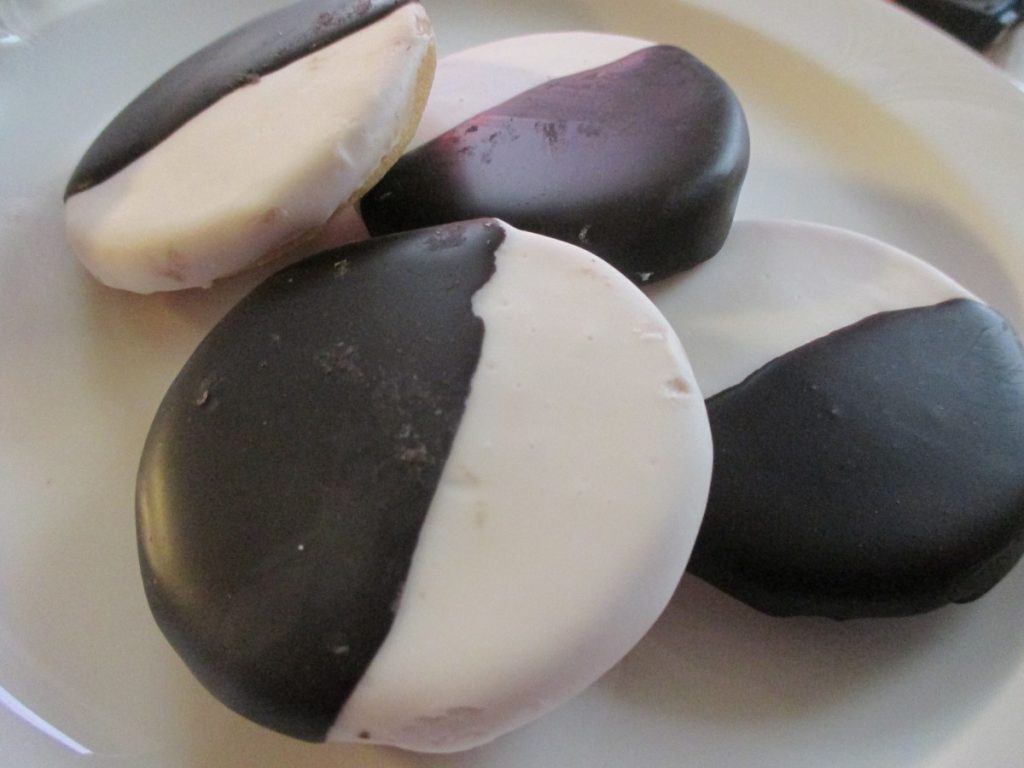
These lovely cookies are always a lot of fun to make and to serve. The name comes from the mix of both white and dark frostings used to decorate them. Black and White Cookies are a classic. They are tender, cake-like cookies and one of my favorites.
After the cookies are baked, you brush them with both white and dark chocolate frostings. The effect is dramatic and tasty. If you have never tried one, you really should.
Black and White Cookies
1 3/4 cups sugar
1 cup unsalted butter – room temp.
4 large eggs
1 cup milk
1/2 tsp. vanilla extract
1/4 tsp. lemon extract or
2 1/2 cups cake flour
2 1/2 cups all purpose flour
1 tsp. baking powder
1/2 tsp. salt
Frosting:
4 cup confectioner’s sugar
1/3 to 1/2 cup boiling water
1 ounce bitter or semi sweet chocolate
Preheat the oven to 350. Line two baking sheets with parchment paper. In a large mixing bowl, combine sugar and butter until fluffy. Stir in eggs, milk, vanilla, extracts, until smooth. Fold in flours, baking powder, salt and stir until mixed. Using a soup spoon (or a small ice cream scoop) drop spoonfuls of dough onto baking sheet, leaving 2 inches of room between them. Bake until edges are browned – 20-30 minutes.
Frosting: Place confectioner’s sugar in a bowl. Gradually stir in boiling water until you have a thick spreadable mixture. Remove half of frosting to a bowl and stir in melted chocolate. With a brush, decorate each cookie half with white frosting, half with chocolate. Let set until thoroughly dry.
About 4 dozen cookies.
Blueberry Pancakes and Blueberry Syrup
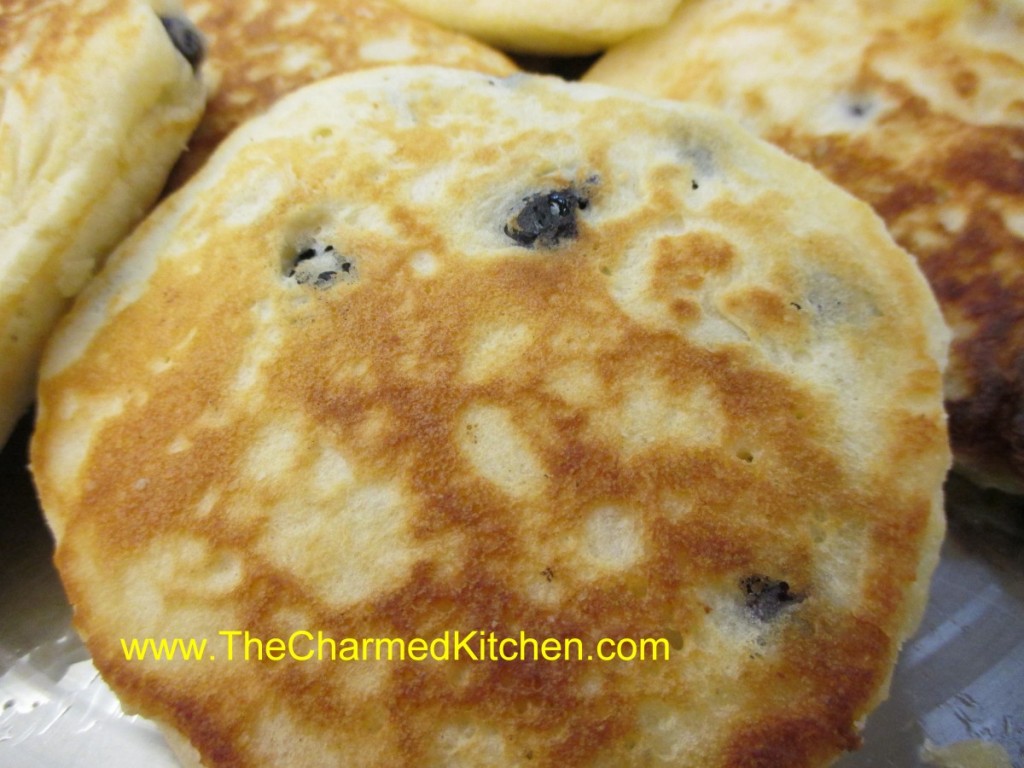
For breakfast I can’t think of a better dish than blueberry pancakes with fresh made blueberry syrup. These would make a great breakfast for Mom on Mother’s Day.
I was talking to a friend yesterday about some of our favorite breakfast foods. Blueberry pancakes were at the top of both our lists.
This is why I freeze blueberries. So I can have these wonderful pancakes whenever the mood strikes.
The secret is to fluffy pancakes is not to over mix the batter. The ingredients are stirred until just combined. I used a homemade biscuit mix as the base. The recipe follows.
The baking mix is normally made with shortening, but I use coconut oil. You can use the mix in any recipe that calls for baking mixes, like Bisquick or Jiffy mix. When using coconut oil, you might want to store the mix in the fridge in hot weather. Normally I store it at room temperature, but pop it in the fridge during the summer. You could also make the baking mix with butter- store in the fridge.
The syrup is pretty simple. Just three ingredients; blueberries, sugar and a little water. Sometimes I add some vanilla or a little lemon zest. I served it warm over the pancakes.
Blueberry Pancakes
2 c. biscuit mix*
1 c. milk – I used half and half
2 eggs
1 c. fresh or frozen blueberries
Combine mix, milk and eggs until just blended. Fold in berries. Pour batter by scant 1/4 cups in lightly greased griddle or skillet over moderate heat. Turn when pancakes are dry around the edges. Cook until golden brown. Makes about 13.
* Like Bisquick or Jiffy Mix or home made- recipe follows
Biscuit Mix
8 c. flour
1 c. powdered milk
1 c. powdered buttermilk (or 1 more cup powdered milk)
1/4 c. baking powder
1 T. salt
1 1/2 c. shortening* I use coconut oil
Combine dry ingredients and cut in shortening until well mixed. Store in tightly covered container. Makes 10 cups.
* You can substitute coconut oil or butter for the shortening- but mix will have to be kept cool. Refrigerate if using butter and use withing 3 months.
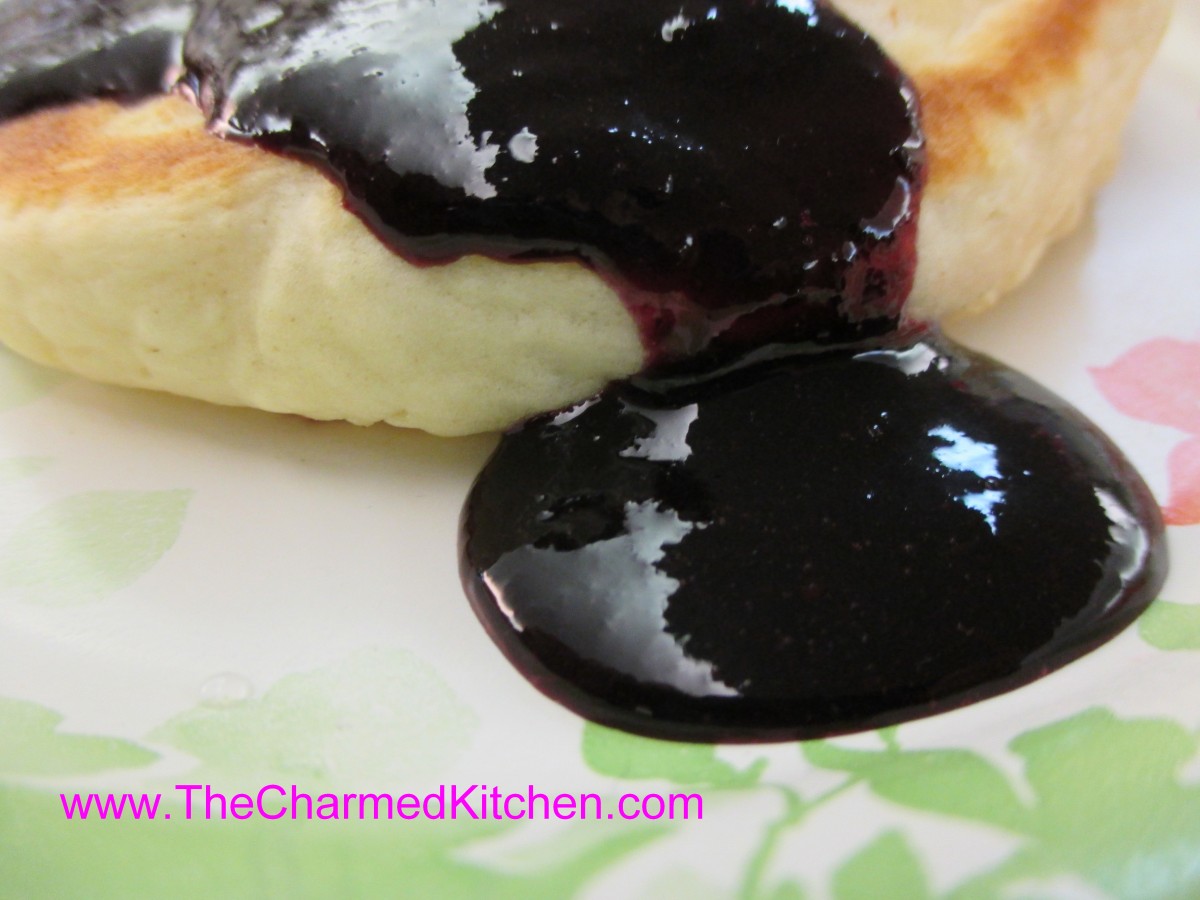
Blueberry Pancakes with Blueberry Syrup
Blueberry Syrup
4 c. blueberries
1 c. water
1½ c. sugar
In saucepan heat berries and water to a boil and boil 2 minutes. Crush berries with a potato masher as they cook. Add sugar and cook for 10- 15 minutes on medium heat until mixture thickens. Process syrup with an immersion blender or in a blender until smooth. Cool, then refrigerate. Keeps a couple of weeks. Makes about 3½ cups.
Two Avocado Soups

I am not sure avocado jumps into most people’s minds when thinking of soup. Maybe it should. The rich, buttery texture of avocados makes for a lovely soup base.
I have two different recipes for avocado soup that I love. One is served warm, the other is served chilled. Either can be a great first course for your Cinco De Mayo dinner.
The warm soup in nice to serve on chilly evenings. It can be a great first course for dinner, and pairs well with grilled cheese for lunch. I topped it with fresh parsley, but a few drops of hot sauce also make for a nice presentation.
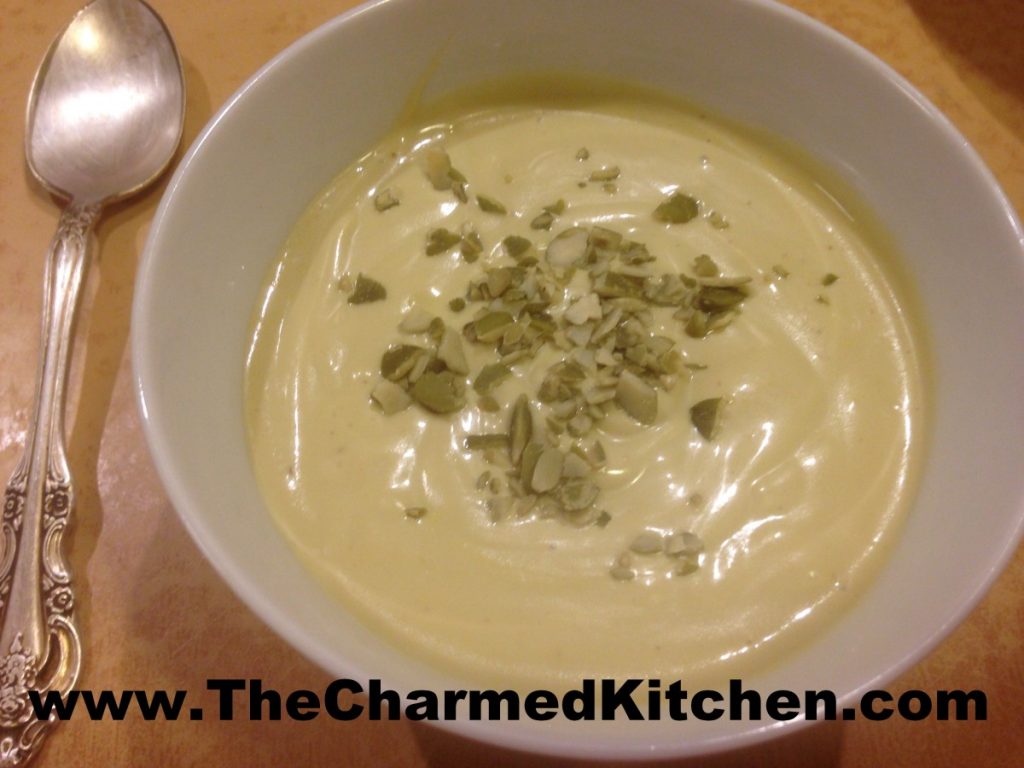
The chilled soup is just perfect as a first course on hot days. It is creamy, but not heavy, and quite refreshing. I topped mine with finely chopped pumpkin seeds, for a little added texture, but it could also be topped with fresh snipped chives or croutons.
So here are the recipes for both soups.
Warm Avocado Soup
4 c. chicken stock
2 c. milk
2 t. chili powder
1 t. cumin
1 t. garlic powder
hot pepper sauce to taste
salt to taste
3 ripe avocados
1 c. sour cream or yogurt
fresh parsley leaves for garnish
Heat stock and milk together until just beginning to bubble around edges. Stir in seasonings and keep warm. Peel and seed avocados, and place them in a food processor or blender. Place only what will comfortably fit, and blend in two batches if need be. Combine avocados with the sour cream in a mixing bowl. Stir to blend. Add a ladle of warm stock mixture to avocado mixture. Whisk to prevent lumps. Return warmed avocado/sour cream to the pan and heat through but do not boil. Adjust seasonings. Ladle into bowls and garnish with parsley. Serves 4 – 6.
Chilled Avocado Soup
2 ripe avocados, pitted and peeled
1 t. lemon juice
1 c. cold chicken or vegetable stock
1 c. light cream or evaporated milk
½ c. yogurt
½ c. dry white wine
salt and pepper to taste
½ c. chopped, toasted pumpkin seeds
Combine all ingredients in blender, except pumpkin seeds, until smooth and chill until ready to use. Garnish with pumpkin seeds. Makes 4 cups.