Strawberry Liqueur

Strawberry Liqueur
This strawberry liqueur is like summer in a bottle. I make a lot of different liqueurs and strawberry is one of my absolute favorites. It is wonderful for sipping or over ice. It is also a fun addition to any number of cocktails. A friend adds it to ice cream with extra berries and blends it up for an adult strawberry milkshake.
With strawberries in season, this is the time of year to enjoy them. I have been eating strawberries in breakfasts, desserts, chocolate fondue and salads.
I want to preserve some for later, too. I made strawberry jam and dehydrated some. I will also freeze some.
Another way to preserve strawberries, is by making a liqueur with them. It is pretty simple. Just combine berries with vodka and a small amount of powdered sugar. I use half gallon canning jars for this, but you could use any food safe container with a tight fitting lid.
Let the mixture steep long enough for the berries to infuse the alcohol with their flavor. You can sweeten it later on, or even leave it unsweetened, if you prefer. I like to sip the liqueur as is, or serve on the rocks with a splash of club soda.
Strawberry Liqueur
3 cups fresh strawberries, sliced
3 T. powdered sugar
3 c. vodka
1 c. simple syrup*
Sprinkle powdered sugar over berries and let dissolve. Pour over vodka and let steep 2 weeks. Crush berries and strain then filter. Add sugar syrup and mature 1 week. Makes 5 cups.
*Simple syrup is made from 1 cup of sugar and ½ cup of water. Bring to a boil, then cool. You will have 1 cup of syrup. You can sweeten your liqueur with honey, if you prefer. Watch when you substitute honey for sugar, as it is sweeter and stronger flavored. Better to use orange or clover honey. Add to suit your taste.
Strawberry Sorbet

Strawberry Sorbet
If you are looking for a versatile dessert, sorbets are a great option. Almost any fruit can be used, and you can sweeten, or not, to suit your own taste. If you start with frozen fruit, you can blend up your sorbet and serve it right away. Even better, if you can process and freeze it a couple of times.
Sorbets can be served on their own, with cake, or drizzled with chocolate sauce. I sometimes add a scoop of sorbet to a glass of lemonade or ice tea on a hot day. So refreshing. Sorbet can be a fun topper in cocktails, too. I sometimes combine a couple of fruits in one sorbet.
I made this strawberry sorbet the other day. I had some strawberries in the freezer and I needed a quick dessert. It came out just wonderful.
You can make the sorbet in an ice cream machine, if you have one, but you don’t need to. I don’t. It really is simple. As an added bonus, once your sorbet is made, you have it on hand whenever you need a dessert. The secret is to blend the sorbet a couple of times after it is frozen, if you can. Each time, the sorbet gets smoother and creamier. I use my food processor.
So here is the recipe for my strawberry sorbet. You can substitute any number of different fruits.
Strawberry Sorbet
1 1/2 lbs strawberries, fresh or frozen
1/2 c. sugar, or to taste – you could also sweeten with honey, if you prefer, or use no sweetener
1 T. lime or lemon juice
Wash and stem berries. Place in food processor with juice and blend until smooth. Sweeten to taste, stirring until sugar is dissolved. Place in a container with a lid and freeze. Once frozen, remove strawberry mix from freezer and sit it on the counter to soften a little bit. This is really the important part. You don’t want it to thaw, but you do want it soft just enough to break into chunks. Place chunks in food processor and blend it again. It will actually start to look a little creamy and lighter in color. You can serve it right away- or put it back in the freezer to serve later. At this point the sorbet is ready- but you can repeat the soften/process step once more, if you like, for even creamier sorbet. Makes 3-4 cups.
Black-eyed Pea Salad
Black-eyed Pea Salad
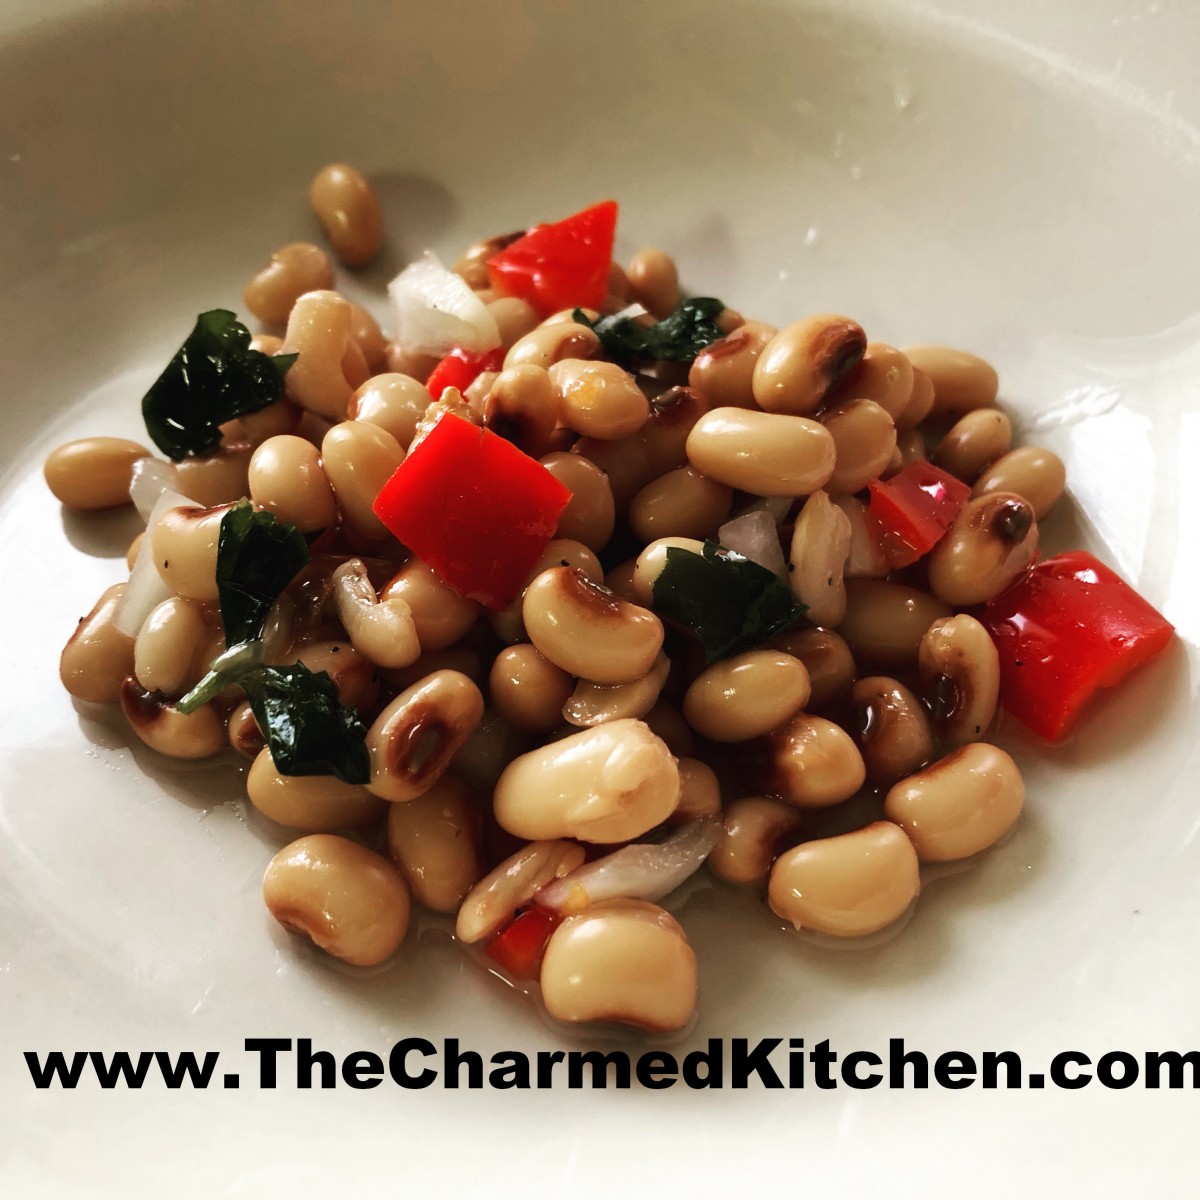
I taught a vegetarian cooking class last week and this recipe was a big hit. Several of the people in class said they never thought of eating black-eyed peas in a salad. They had only had them in hot dishes before.
Black-eyed peas, like other legumes, are a wonderful addition to both hot and cold dishes. This recipe was presented as a great vegetarian option for dinner. Truth is, this makes a nice salad for almost any summer party, picnic or cookout. Even the carnivores should be pleased.
It is a simple recipe you can make ahead of time. Not too many ingredients, but packed with flavor.
I used dried peas and cooked them in my pressure cooker. If you are really pressed for time, you could use canned black-eyed peas instead. You’d need 4 or 5 cans. A can of black-eyed peas ( 14 oz.) will give you about a cup and a half of peas. A pound of dried gives you about 7 cups of cooked peas.
Here is the recipe. Great summertime salad. Serve it plain- or over a bed of salad greens.
Black-eyed Pea Salad
1 lb. dried black-eyed peas
1 large sweet onion, chopped fine
1 sweet pepper, seeded and chopped
1/4 c. olive oil
1/4 c. red wine vinegar
1/4 c. chopped fresh parsley
1/2 t. dried thyme
salt and pepper to taste
Cover beans with cold water in saucepan and bring to a boil. Boil 5 minutes. Turn off heat and allow to stand 1 hour. Drain and rinse beans. Return to saucepan and cover with cold water. Simmer beans until tender, about 1 1/2 hours. Drain. Place cooked beans in a bowl and cover with remaining ingredients. Toss to coat, cover and chill. Serve as a main dish or on the side. Also tasty served over salad greens or stuffed in a hollowed out tomato. Serves 6-8.
Strawberries and Cream Bread
Strawberries and Cream Bread
I have posted this recipe before, but have been getting requests for it, so I thought it was worth sharing again. Since strawberries are in season, it seemed like the right time to post this recipe.
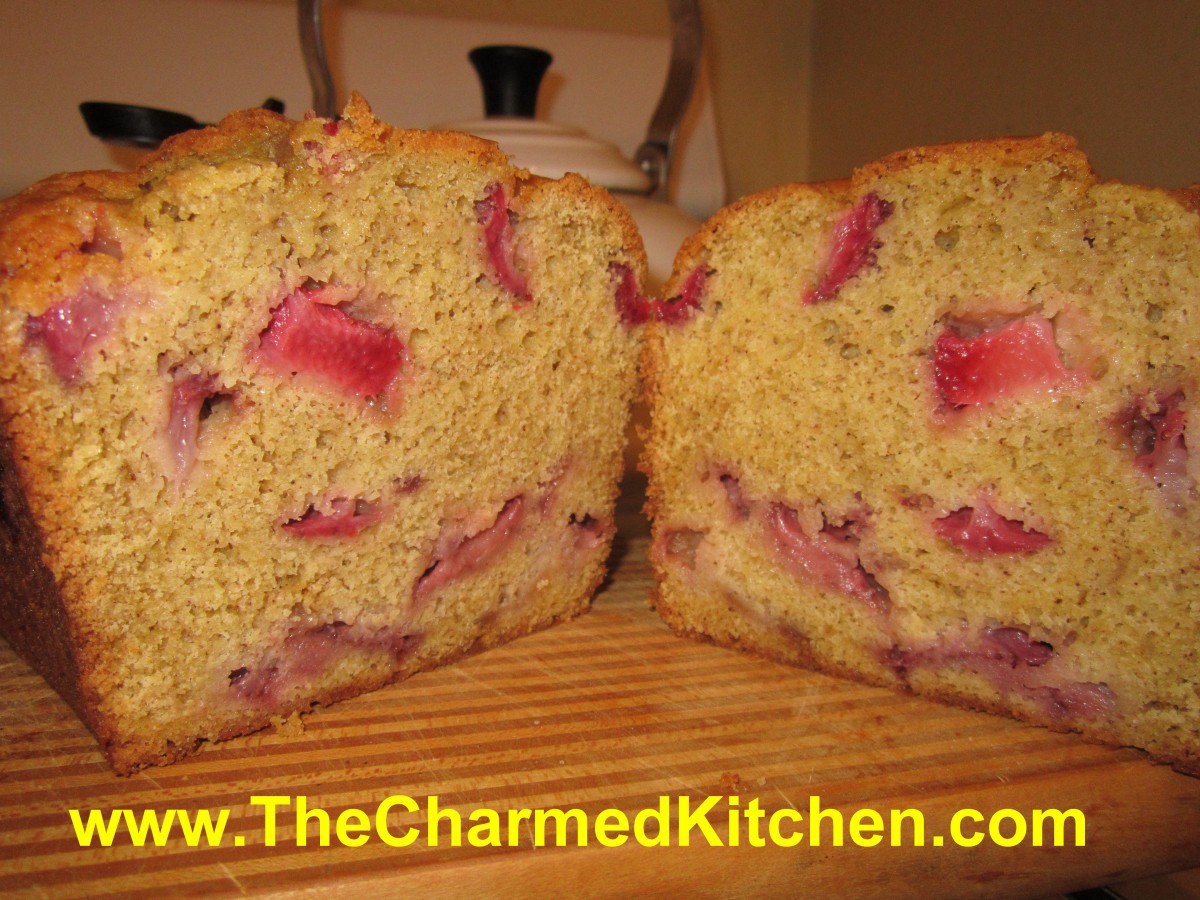
This is one of my favorite quick breads. The bread is tender and full of the sweet taste of fresh strawberries.
The batter will be very thick- don’t worry- it is supposed to be that way. When it cooks, the juices from the fresh berries keeps it moist.
I always end up making a double batch, one loaf to eat fresh and one to give as a gift, or freeze.
This bread is fine just the way it is for dessert, or you can top with sliced strawberries, ice cream, whipped cream or some melted chocolate. Or top it with all of them!!
Here is the recipe. Enjoy!!
Strawberries and Cream Bread
1 ¾ c. flour
½ t. baking powder
½ t. baking soda
½ t. salt
½ t. each cinnamon and nutmeg
½ c. butter, at room temperature
¾ c. sugar
2 eggs, room temperature
½ c. sour cream, room temperature
1 t. vanilla
1 c. fresh strawberries, coarsely chopped*
¾ c. chopped nuts, optional
Grease an 8×4 inch loaf pan and preheat oven to 350 degrees. In a large bowl combine dry ingredients. Set aside. In small bowl beat butter until creamy. Add sugar and beat 1 minute. Beat in eggs one at a time. Beat in sour cream and vanilla. Stir in flour mixture until just moistened. Fold in strawberries and nuts and place batter in prepared pan. Bake 60-65 minutes, or until toothpick inserted in center comes out clean. Let stand in pan 10 minutes. Remove from pan and cool on wire rack. Makes 1 loaf. Freezes well.
* frozen berries are not recommended in this bread.
Strawberry Vanilla Jam
Strawberry Vanilla Jam
Once you taste homemade jam, you will understand why it is worth the effort to make your own. Homemade jams, preserves and jellies are a great way to save seasonal fruits to enjoy all year. They also make nice gifts.
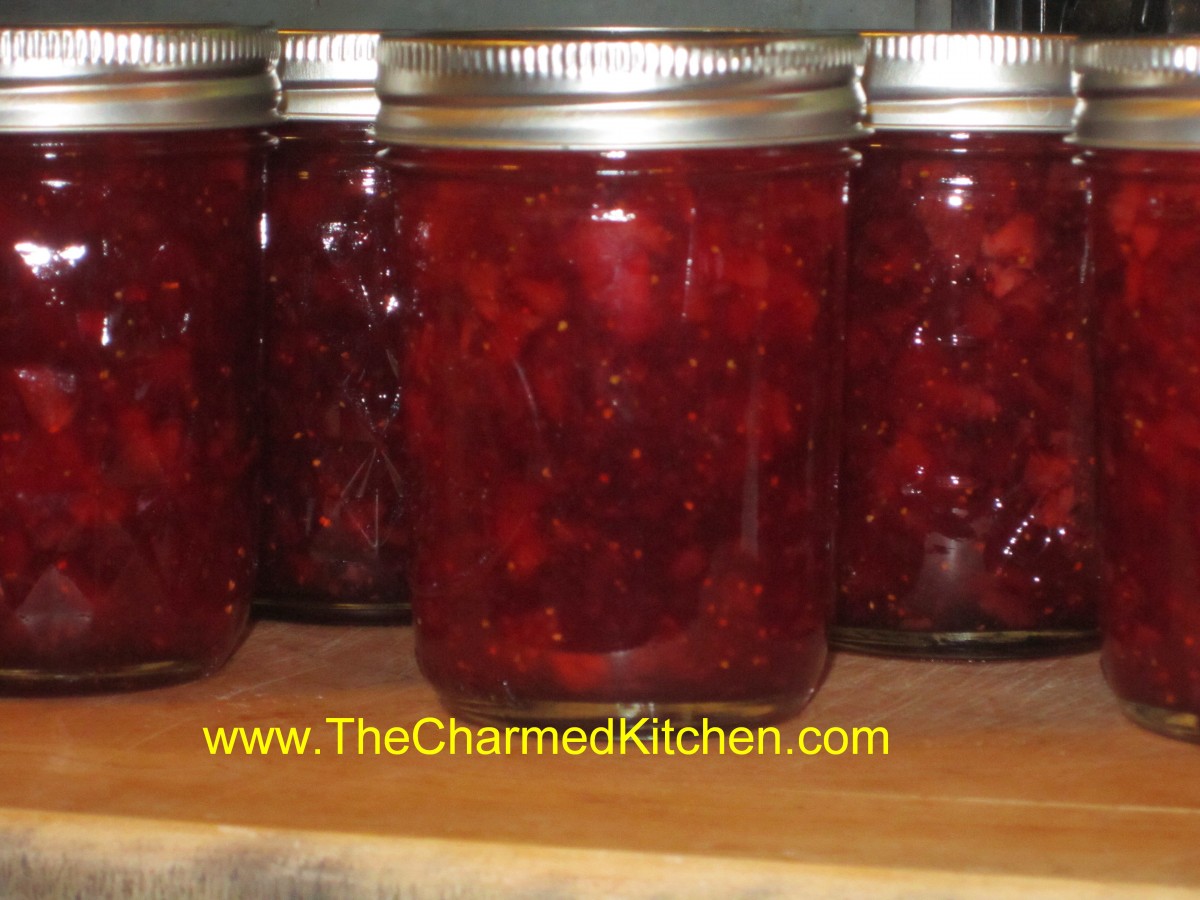
One of my favorite homemade jams is strawberry. I like the addition of some vanilla to my strawberry jam. I think it adds an additional layer of flavor, without covering up the natural beauty of the berries. Of course, you can omit the vanilla, if you prefer.
I try to make enough to last all year, but I end up running out quickly. This jam is great on toast, but also a nice addition to several desserts I make.
With local berries in season now, it is a perfect time to make a batch, or two.
In grocery stores, berries are often sold in one pound packages, not in quarts. A quart of strawberries should weigh 1 1/4 pounds. That should help you figure out how many berries you will need.
Here is the recipe.
Strawberry-Vanilla Jam
2 qts. strawberries, stemmed, washed and crushed
2 T. pure vanilla
1 package dry pectin
1/4 c. lemon juice
7 cups sugar
Combine berries, vanilla, pectin and lemon juice in large saucepan and bring to a boil over medium heat, stirring often. Add sugar and turn heat up to high. Stir often until mixture comes to a boil. Boil hard one minute stirring constantly. Ladle hot jam in to jars leaving 1/4 inch headspace. Wipe rims and screw on lids comfortably tight. Place in boiling water bath and process 10 minutes. Remove to cooling rack, towel or wooden surface to cool. Makes 8-9 half pints.
Broccoli With Hummus
Broccoli with Hummus
In a recent cooking class with kids, they learned to make hummus. I think they were surprised at how simple it is to make. A lot of adults are surprised, too. Hummus is so easy to make.
Hummus is made from chickpeas, olive oil, tahini, lemon juice, garlic and a few seasonings. Of course, you can make all sorts of variations, if you prefer. You just combine the ingredients in a food processor or blender until smooth. Doesn’t get much simpler. I prefer to make my own, so I can flavor it the way I want.
The kids had sugar snap peas and carrots with their hummus. We used it like a dip. It was a big hit with them.
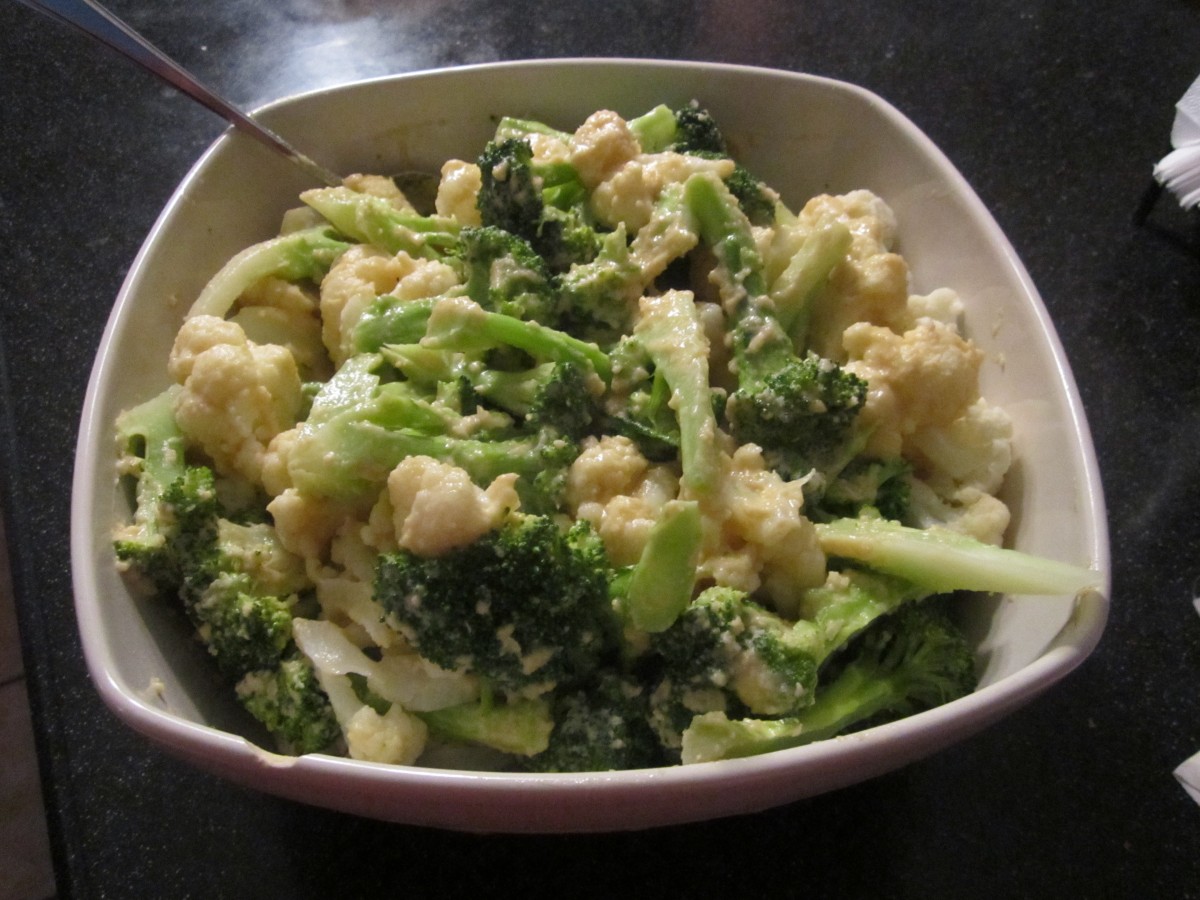
But hummus can be used as more than a dip. I love to toss hummus with hot vegetables. It would replace butter or maybe a cheese sauce.
One of my favorite combinations is hummus with broccoli. The flavors work great together. You just toss hummus with freshly cooked broccoli. So yummy.
Since I had some cauliflower, I added some of it to the dish as well.
So try making your own hummus. And if you have store bought hummus, try tossing it with hot, cooked veggies for a fun side dish.
Steamed Broccoli with Hummus
1 lb. fresh broccoli
1/2 c. hummus, homemade or store bought
Cut broccoli into long spears, peeling and trimming tough stems. Steam until just tender. Warm hummus over low heat or in a microwave and spoon over the cooked broccoli. Serves 4 as a side dish, 2 as a main course.
Hummus
1 can garbanzo beans, drained
1/4 c. olive oil
2 T. lemon juice
2 T. tahini (sesame seed paste)
2 cloves garlic
salt and hot pepper sauce to taste
Combine all ingredients in a blender or food processor until smooth. Adjust seasonings. Chill. Serve with pita bread, crackers or fresh vegetables. Also nice spread in a pita bread with sliced tomatoes, cucumbers and lettuce. Freezes well.
Mom’s Chicken and Herb Dumplings

Mom’s Chicken with Herb Dumplings
There are foods I will always associate with my childhood. Chicken and dumplings is one of those dishes. I can remember watching my Mom spooning the dumpling batter over the simmering pot of chicken and vegetables. She’d cover the pot and wait.
When she uncovered it, the dumplings had puffed up, and pretty much covered the whole dish. It was magical to me. The dumplings were so tender and light.
I can’t make this dish, all these years, later without thinking of her. A friend stopped in for dinner last night, and since it was unseasonably chilly and I had some chicken…. I decided to make us chicken and dumplings for dinner. It really was the perfect dinner for a chilly evening.
My mom made her dumpling batter with a buttermilk baking mix- like Bisquick. Eventually, she started making her own baking mix, like I do today.
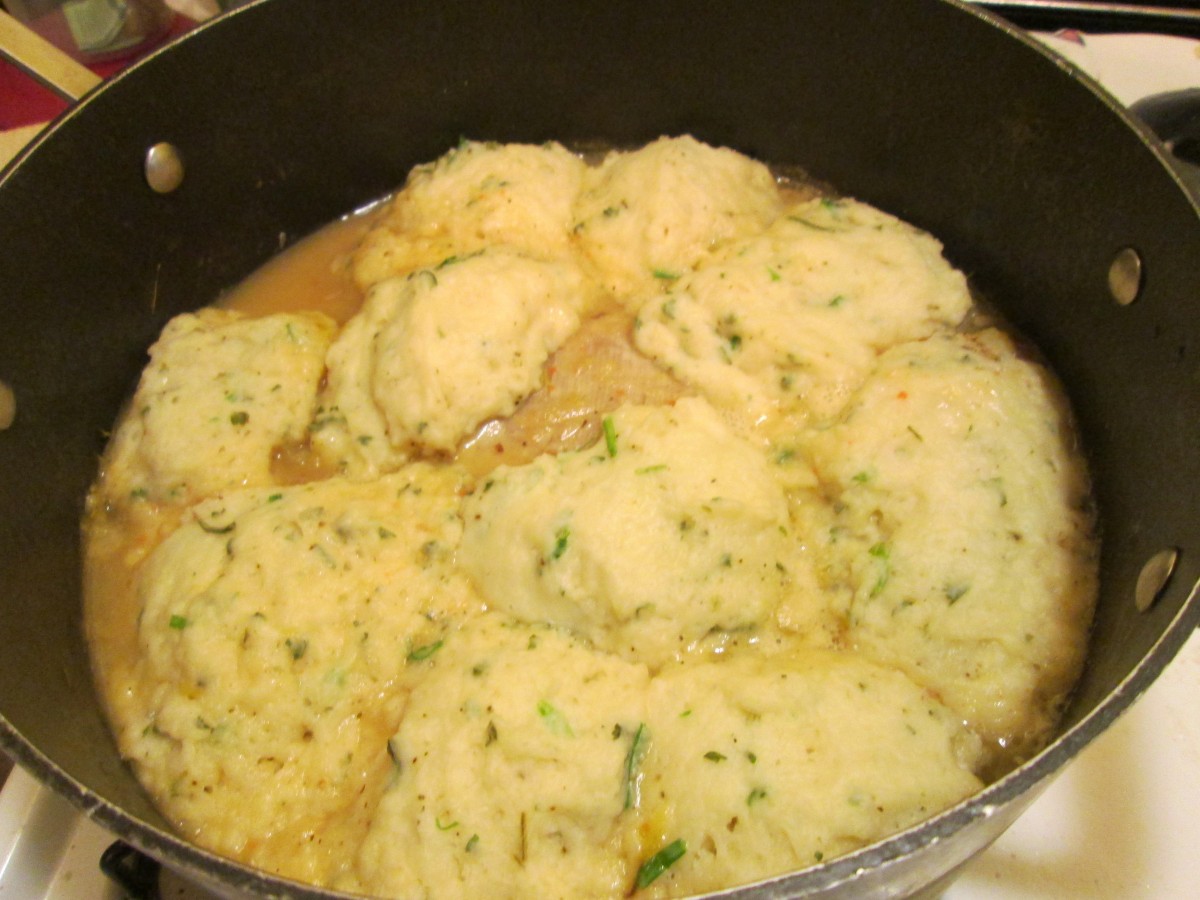
Dumplings will puff up when cooked
Mom’s Chicken and Herb Dumplings
1 T. oil
1 (3 lb.) broiler, cut into pieces
salt and pepper
flour for dredging
1 medium onion, chopped
2 carrots, peeled and sliced
3-4 potatoes, cut into chunks
2-3 c. chicken stock
1 t. each marjoram and thyme
1 c. buttermilk baking mix* I make my own, recipe follows
1/3 c. milk
2 t. fresh parsley
2 t. snipped chives or green onions
1/2 t. red pepper flakes
Season chicken pieces with salt and pepper and dredge pieces in flour. Heat oil in large skillet and brown chicken pieces on all sides. Remove chicken pieces and sauté onion until tender. Add carrots, potatoes, broth and chicken to skillet and cook, covered, 20 minutes. Sprinkle herbs over the chicken. Combine baking mix with milk, parsley, chives and red pepper flakes and spoon batter in skillet in 8 mounds. Cover and cook over low heat 20 more minutes. Serves 4.
*Here are two versions of the biscuit mix.
Chef Pastry Mix/ Biscuit Mix
8 cups sifted, all-purpose flour
1 c. powdered milk
1 c. powdered buttermilk
¼ c. baking powder
1 T. salt
2 c. shortening, coconut oil or butter- if using butter store in the fridge- coconut oil version should be stored in fridge in warm weather
Sift dry ingredients together 3 times. Cut in fat to resemble cornmeal. Keep in an airtight container. Store in a cool dry place and use within six months.
Whole Wheat Baking Mix
5 c. flour
3 c. whole wheat pastry flour
1 c. whole wheat flour
1/3 c. baking powder
1 c. powdered milk, not non-fat
2 t. salt
3 1/2 sticks butter
Mix dry ingredients together well, then cut in butter. Store in fridge for up to 3 months and can be frozen for up to a year. Makes about 12 cups.
Strawberry Waffles

Strawberry Waffles
These waffles would make a great breakfast. We actually had them for dessert last night. That’s the thing about waffles. They can be eaten any time of the day.
The season for local berries is pretty short, so I try to enjoy them as much as possible, while I can.
This waffle recipe came about because I needed a dessert for dinner with a friend. It was a last minute dinner, so I didn’t have a lot of time. Waffles seemed like a great idea. They don’t take a lot of time to make, and they highlighted the berries. My friend really liked them. I did, too.
I made the waffles with fresh strawberries in the batter. Then, the waffles are served topped with more fresh berries and a dusting of powdered sugar.
They were a perfect dessert. I could see topping them with ice cream or whipped cream, too. Any leftover waffles can be frozen.
For the fresh strawberry topping, you just combine fresh, sliced berries with some sugar. If you can make it ahead of time, the sugar draws juice out of the strawberries, kind of making its own sauce. I made the topping first, then popped in the fridge.
So here is my recipe. Enjoy!!
Strawberry Waffles
1 1/3 c. flour
2 T. sugar
4 teaspoons baking powder
2 t. cinnamon
½ t. salt
2 eggs, separated
½ c. butter, melted
1¾ c. milk
2 t. vanilla
1 c. chopped fresh strawberries
Powdered sugar for topping waffles
Strawberry topping- recipe follows
In a large mixing bowl, whisk together all dry ingredients. Set aside. Separate the eggs. Set aside the yolks. Place the whites in a small mixing bowl. Beat whites until moderately stiff; set aside. Combine milk, melted butter, egg yolks and vanilla in small bowl. Add to dry ingredient mixture and blend. Stir in berries. Fold stiff egg whites into mixture. Ladle mixture into hot waffle iron and bake. To serve, top with powdered sugar and strawberry topping. Makes 10-12 (4-inch) waffles.
Topping
1 qt. strawberries
½ c. sugar- or to taste
Wash and stem berries. Slice berries. Place in bowl and sprinkle on the sugar. Stir to combine and place in fridge until ready to use. Try to do this at least 30 minutes before using. That will give the mixture time for juice to be released from the berries.
Purple Sweet Potato Gelato
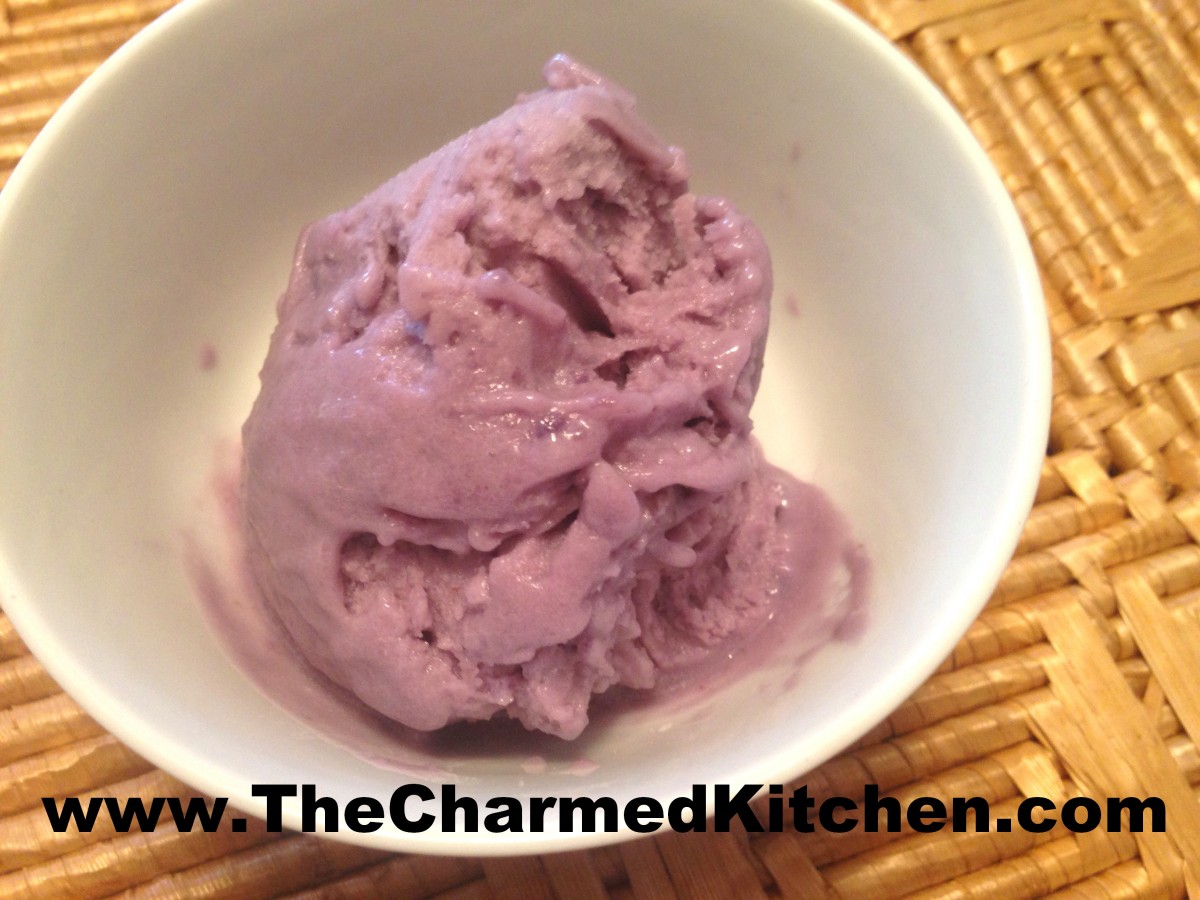
Purple Sweet Potato Gelato
This might be one of the oddest frozen desserts I have ever made. It is also one of the tastiest.
I started with a purple sweet potato, which I peeled and steamed until it was tender. Once the potato cooled down, I pureed it with a can of coconut milk. I then sweetened the mixture and added some vanilla. I chilled the mixture, then froze it in my ice cream maker.
The texture was so smooth and the flavor was wonderful. The pretty purple color was an added bonus.
The sweet potato itself doesn’t look like anything special, until you cut it open. While the outside is a pale, whitish color, the inside is bright purple. When cooked, it tasted like any other sweet potato.
I used one pretty good sized sweet potato. Thinking just under a pound. Here is the recipe.
Purple Sweet Potato Gelato
1 large purple sweet potato, peeled, cooked and cooled down
1 can ( about 13 oz.) coconut milk
3/4 c. sugar- or to taste
2 t. vanilla
In blender or food processor, combine sweet potato and coconut milk. Process until mixture is very smooth. Sweeten to taste with sugar and add the vanilla. Chill mixture, then process in an ice cream machine. If you don’t have an ice cream machine- freeze mixture. Then remove from freezer and let it soften a few minutes. Process in a food processor until smooth and creamy. Makes about 1 quart.
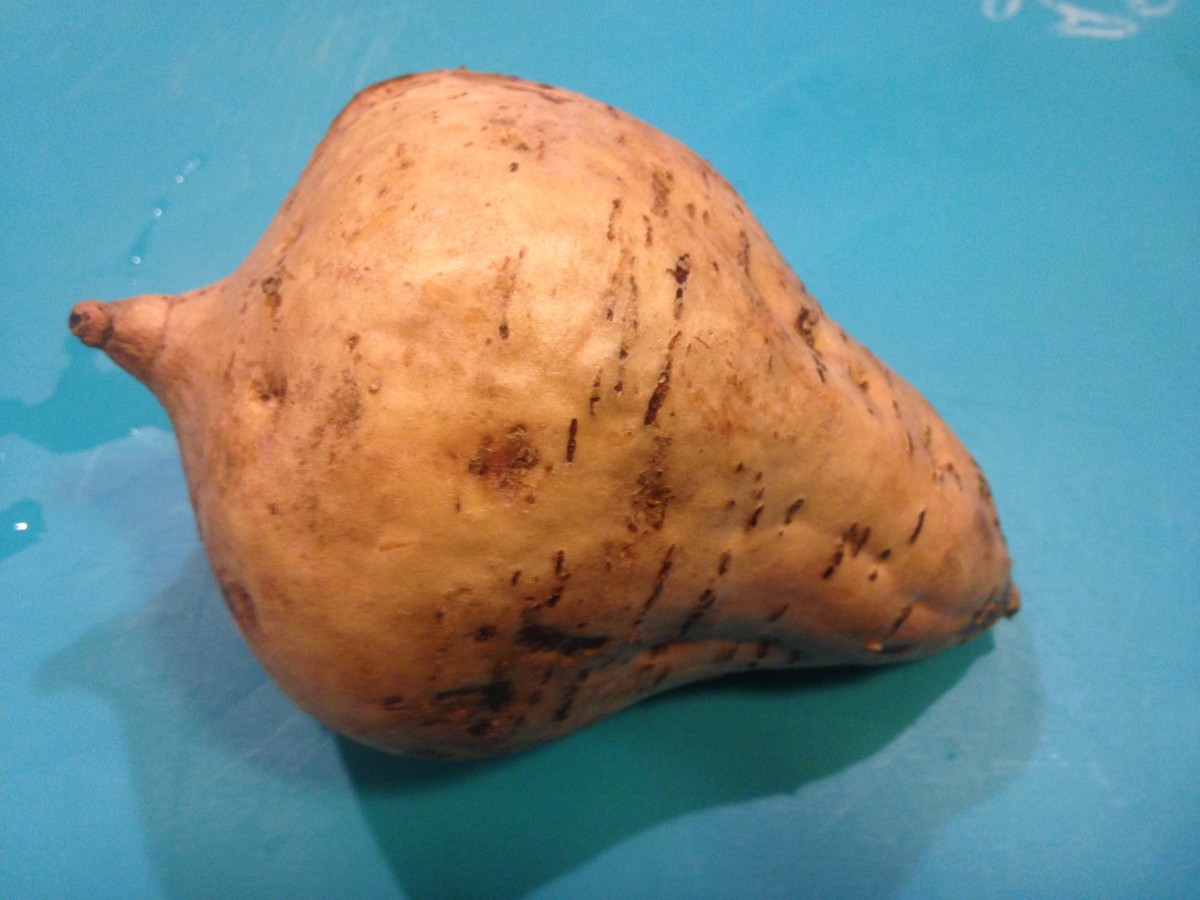
Purple Sweet Potato, uncut
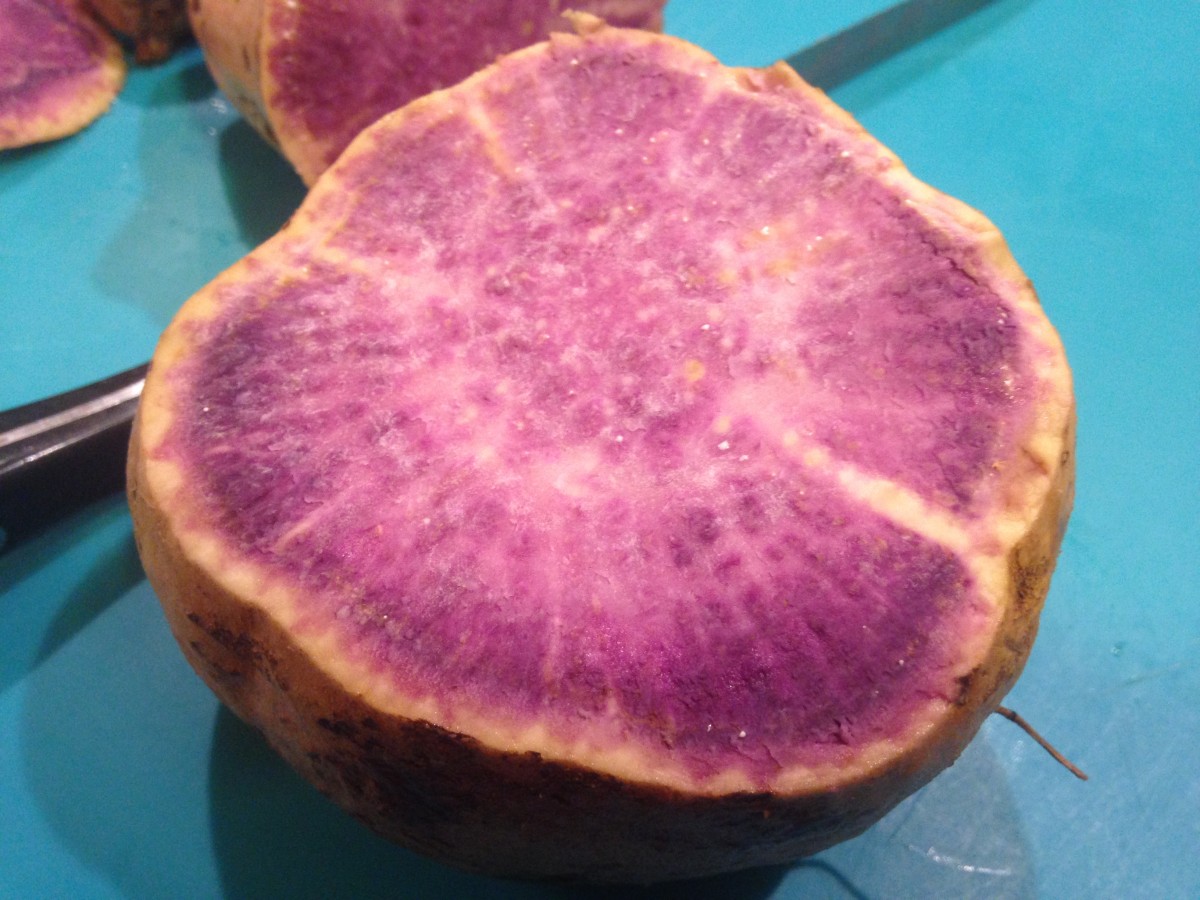
Purple Sweet Potato – inside
Extra Crispy Baked Onion Rings

Extra Crispy Baked Onion rings
These onion rings are fabulous. They have all the crunch of traditionally fried onion rings, without frying!!! The secret is panko bread crumbs and a very hot oven.
I’ve tried baking onion rings before. They were good, but not great. The panko adds more texture than other bread crumbs add. This gives you pretty crunchy onion rings.
The 450 degree oven is a must, too. You need really high temps for this to work.
I used a Vidalia onion and it worked great, but you can use any large onion. Sweet onions are my first choice, but even a big yellow onion will mellow out when cooked.
The drizzle of oil is a must, too. You can just give them a spritz of your favorite non-stick baking spray. Or use a spoon to drizzle them lightly with oil before baking. Because of the high heat- I used avocado oil.
I used the same recipe to make baked zucchini slices, too. They came out great as well.
Here is the recipe. I hope you try it.
Extra Crispy Baked Onion Rings
1 large onion- sweet preferred
½ c. flour
1 t. salt
½ t. pepper
¼ t. smoked paprika
2 eggs
2 T. water
About 2 cups panko bread crumbs
Oil or non-stick cooking spray
Extra salt
Preheat oven to 450 degrees. Line a large baking sheet with parchment paper and set aside. You might need a second one. Peel onion and slice into ½-inch thick pieces. Separate into rings. In a bag, combine the flour with the salt, pepper and paprika. In a bowl, beat together the eggs and water. In a second bowl, place the panko crumbs. Place a few of the onion rings in the bag of flour and shake to coat evenly. Remove from the bag, tapping off excess flour. Place rings in the egg mixture next, turning to coat them completely. Last step is placing the egg-dipped onion rings in the bread crumbs and turning to make sure they get coated evenly. Place onion rings on the prepared baking sheet and continue the procedure until all the onion rings are breaded. To save space, you can place smaller onion rings inside of the larger ones. Drizzle with a little oil, or spray with non- stick coating. I have this pump-bottle thing that lets me spritz oil on stuff. If you are drizzling oil, put a tablespoon or two in a bowl, and use a spoon to drizzle the oil all over the onion rings. Bake for 15-20 minutes, or until golden brown. You can turn them over after 10 minutes, for a more even bake. Remove from oven and sprinkle with a little more salt before serving. Serves 3-4 depending on the size of the onion.
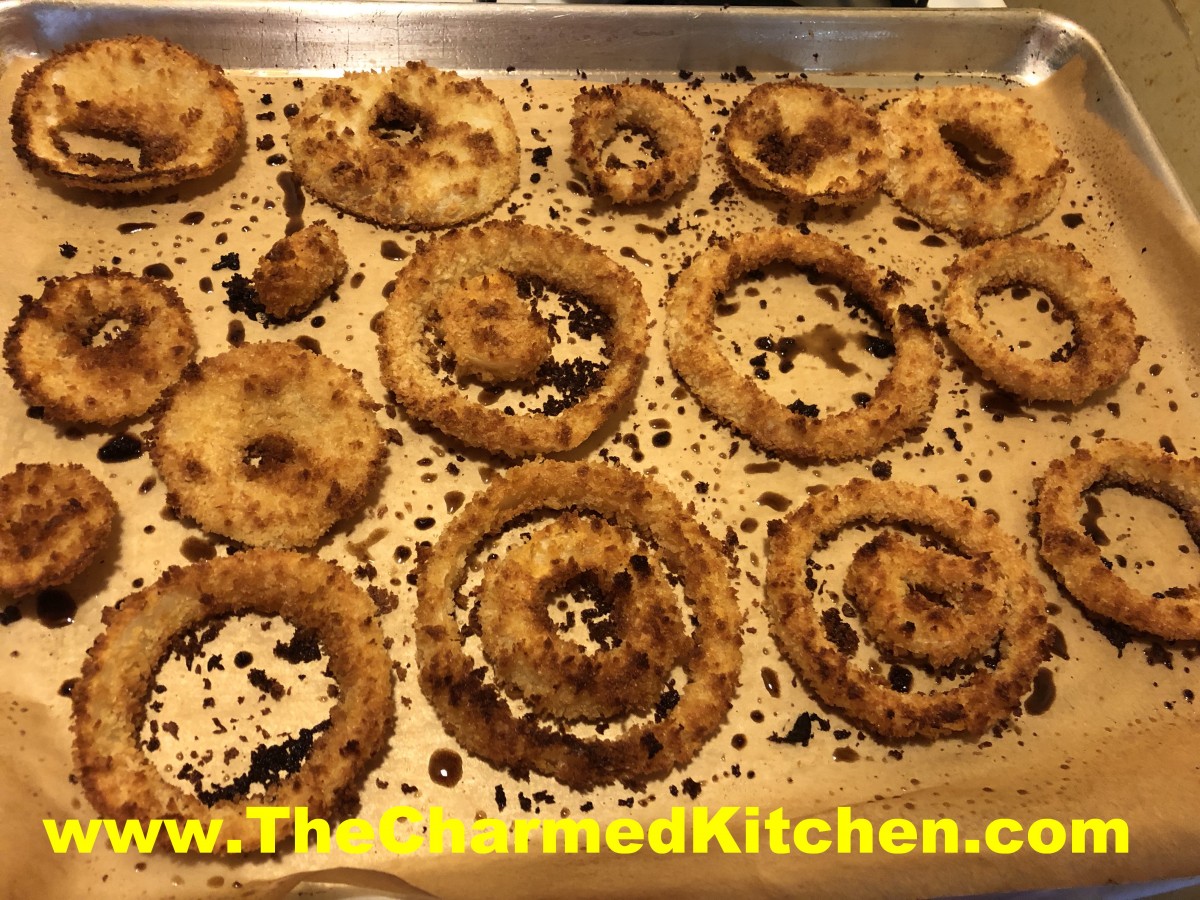
Right out of the oven


