Strawberry Chocolate Crepes

Chocolate Crepes with Strawberries
Since local strawberries are coming into season, I am sharing one of my favorite strawberry recipes. The chocolate crepes pair so nicely with the fresh berries. This makes a wonderful summer dessert.
If you haven’t made crepes, this might be just the reason to start. I often make a double batch of the crepes, then freeze some, between layers of wax paper. That way I can have crepes whenever I want.
Truth is, you can fill these crepes with all sorts of stuff. I had fresh berries, so that is what I used. I added some Kahlua to the batter for a little extra flavor and it worked out just great.
You can have all the components ready, then just assemble when ready to serve. While I think of these as a great dessert, they also go over big at brunch.
Here is the recipe.
Chocolate Crepes
1 c. flour
4 eggs
1 1/2 c. milk
¼ c. cocoa
3 T. sugar
¼ c. Kahlua or other coffee flavored liqueur or ¼ c. strong coffee
1/4 c. butter, melted and cooled
Mix all ingredients in blender (except butter) until smooth, scraping sides often. Add butter and blend well. Let stand for 30 minutes before using, or batter can be refrigerated, covered, overnight. Beat again, just before using.
Heat 6 or 7 inch skillet. Brush with butter or oil and pour in about 1 tablespoon of batter, tipping pan to cover bottom of pan completely with batter. Cook until edges start to brown, turn over and cook until lightly browned (about 2 minutes per side.)
Crepes can be made day ahead or even frozen between sheets of waxed paper and frozen. Makes 18.
Strawberry filling
2 pounds strawberries
1/2 c. sugar
1 T. vanilla
healthy dash of cinnamon
Slice berries and mix with the remaining ingredients. Set aside until ready to fill the crepes.
Whipped Cream
1 c. whipping cream
1 t. vanilla
3-4 T. sugar
Whip cream with remaining ingredients just before ready to fill crepes.
Assembling the crepes
When filling the crepes I spooned some berries down the center of the crepe and added some whipped cream. Folded over, topped with a few berries and another bit of whipped cream.
Lemonade-Glazed Chicken

Lemonade Glazed Chicken
If any drink says summer, it’s lemonade. A tall, icy glass of lemonade is the perfect refresher on a hot summer day. Lemonade is also fun to cook with, especially during the summer.
I’ve been making my own lemonade concentrate for some time now. It’s just lemon juice and sugar. Sometimes I use honey, instead. I keep some in the freezer so I can make fresh lemonade whenever I want it.
I find myself looking for other ways to use the concentrate. I ended up making this glaze when I wanted a sauce to use on chicken. I really liked it.
I’ve tried this glaze on chicken a couple of times. I could see it going well with pork or even seafood. The sweet/sour nature of lemonade works well as a base for sauces.
I used homemade lemonade concentrate, but store bought is fine, too. Here is the recipe.
Lemonade Glaze for Chicken, Pork, Seafood
2 T. oil
1 medium onion, chopped fine
2 t. minced garlic
12 oz. lemonade concentrate recipe follows
¼ c. red wine vinegar
2 T. hot sauce, or to taste
1 T. prepared mustard
3 T. honey
1 t. cumin
1 t. ginger
2 t. salt, or to taste
Heat oil in pan and cook onion until lightly browned. Add garlic and cook 1 more minute. Add remaining ingredients and cook until mixture has cooked down and thickened- about 10-15 minutes on medium high heat. Stir occasionally. You should end up with about 1½ cups of glaze.
To use: Brush on meat during last 15 minutes of cooking if baking or grilling. Add in last 5 minutes if cooking in a pan.
Here is the recipe for the lemonade concentrate.
Homemade Lemonade Concentrate
1 1/3 c. lemon juice- fresh or bottled
1 c. sugar*
lemon zest, optional
Combine ingredients and stir until sugar is dissolved. Freeze until ready to use. Makes a little over 1 1/2 cups. To use: combine three parts water to one part concentrate.
* You can use honey instead of sugar- but only use 1/2 c. honey as it is much sweeter than sugar.
Growing and Cooking with Chives

Chive Crepes with Crab Meat Filling
What’s not to love about chives? This allium family herb is an easy to grow perennial. With little effort, you will be rewarded with onion flavored leaves and blossoms year after year.
When the chives are first up in my garden I want to use them in everything. They will be around all season, but that first Spring harvest is always my favorite.
Their delicate onion flavor goes well with so many dishes. I enjoy cooking with the blossoms, too. Anyplace you might use green onions, you can use chives. I add them to dips, salad dressings, soups, veggie dishes. You get the idea. Same thing with the flowers. Toss them in any dish where you want a mellow, onion flavor. I have a friend who likes to dip the blossoms in batter and deep fry them.
Chive Crepes with Crab Filling
Chives add a pretty color and wonderful flavor when used in crepes. I made a crab filling, but you could fill them with any number of savory ingredients. This is a great dish for brunch, lunch or breakfast.
3/4 c. flour
1/8 t. salt
3 eggs, beaten
2 T. melted butter
3/4 c. milk, approximately
1/3 c. fresh chives*
Butter or oil for pan
In blender mix together flour, salt and eggs until smooth. Add butter, milk and chives and blend until batter consistency is that of cream. Let stand for 30 minutes before using, or can be refrigerated, covered, overnight. Mix well, just before using.
Heat 6 or 7 inch skillet. Brush with butter or oil and pour in about 2 teaspoons of batter, tipping pan to cover bottom of pan completely with batter. Cook until edges start to brown, turn over and cook until lightly browned (about 1-2 minutes per side.)
Crepes can be made day ahead or even frozen between sheets of waxed paper and frozen. Makes 12.
When ready to serve: Crepes can be filled ahead or guests can fill their own
* You can use other combinations of fresh herbs like parsley, thyme, cilantro.
Crab Filling – enough for 6-8 crepes
2 T. butter
1/2 c. minced onion
3 T. flour
1 c. milk
Salt and pepper to taste
1 6-oz. can crab meat, drained, or 1 c. cooked cocktail shrimp
1 c. shredded mild cheese, I used Fontina
Chopped chives or green onions
Heat butter in skillet and cook onions until tender. Add flour and mix well. Stir in milk and seasonings and cook until sauce is thickened and bubbly. Stir in seafood and heat through. Spoon some of this mixture onto a crepe. Add some cheese and roll up. Garnish with chopped chives or green onions. Makes 6-8.
Chive Butter
I also like to make Chive butter. The recipe is pretty simple.
3 T. snipped chives
½ t. lemon zest
1/2 c. (1 stick) softened butter
Mix all ingredients until well combined. Chive butter can be stored in a jar, or wrapped in plastic wrap and chilled or frozen until ready to use. Good with fish, poultry, carrots, and potatoes.

Chive Blossom Vinegar
Chive Blossom Vinegar
One of the ways I preserve my herbs every year, is by using them to flavor vinegar. It is easy to do and you’ll have great flavored vinegar to use all year round. You can use the vinegar in salad dressings or in marinades and sauces. Chive blossom vinegar is one of my favorites. I often use white wine vinegar but you can use red wine vinegar, apple cider vinegar or even white vinegar. The blossoms give the vinegar a beautiful color, too.
All you need is a clean jar, chive blossoms and vinegar (5% acidity). The acidity is listed on the label. For every cup of blossoms add 2 cups of vinegar to the jar. Close the jar and put it in a cupboard for a couple of weeks, or longer. When ready to use, strain out the blossoms. Pour the strained vinegar through coffee filters or layers of cheesecloth to get out any sediment. The end result is clear and quite pretty. Store in a cool, dark place for best color and flavor.
Freezing Chives
An easy way to preserve your chives is just to freeze them. Take freshly washed and dried chives and chop them up. You can use a knife, scissors or food processor. Place the chopped chives on a tray or baking sheet and place in the freezer to harden a bit, before transferring to a freezer container or freezer bag. By pre-freezing them before packaging, you keep them from clumping up and freezing into a green lump.

Chives in hanging basket
Growing Chives
When growing chives, a sunny, well drained spot is preferred, but chives will tolerate some shade. They prefer to be in the ground, but I have chives that are in pots and thriving. I even have chives that popped up in one of my hanging baskets. They return every year.
Chives require little maintenance, but there is one annual clean-up job: stem removal. At first glance, chives looks like just leaves, but there are stems in there. Each purple chive blossom that appears in Spring is on a stem. While the stems are edible, they are also tough and woody, compared to the leaves. I like to remove the stems once the chives are finished blooming. Even in a large clump of chives, this job only takes about 5 minutes.
First, identify the stems. They either have a chive blossom on them- or they will have a brown tip from where the blossom was removed. When you touch a stem, you’ll be able to tell right away that it is tougher than the leaves. Pinch the stem between your fingers and run your fingers down to the base of the stem. Give a little tug and the stem pops right out. Repeat this with the rest of the stems. Kind of boring, but only take a few minutes. Once done, your plant will be all tender leaves.
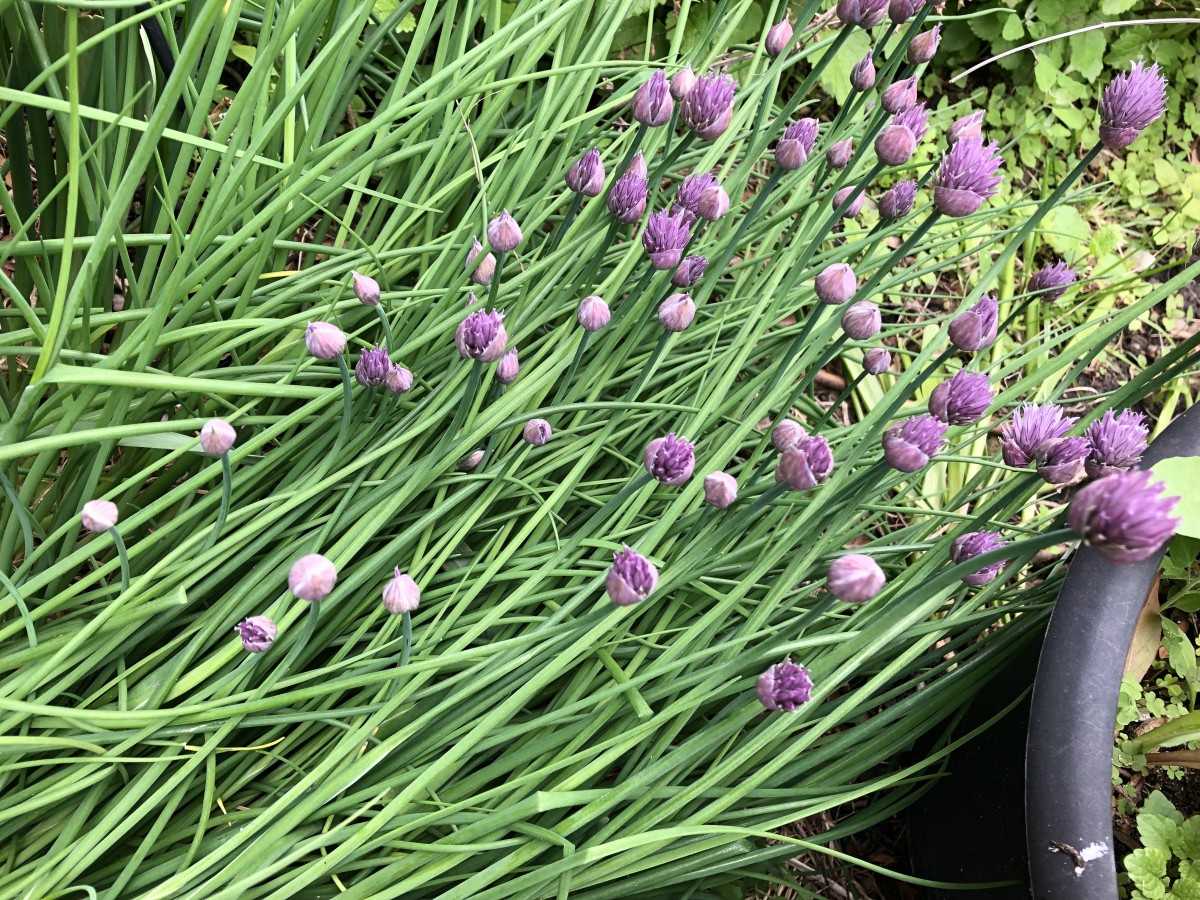
Blossoms just starting to open
Picnic Food Safety
 With picnic and cook-out season here-I thought it would be a good time to post some tips to keep your picnic safe.
Common Picnic Problems
Besides ants, the biggest concern at a picnic should be food safety. While most of us know to keep cold foods cold, and hot food hot, there are some basic things we should all do to insure a safe, happy day.
Away from home and refrigeration, it is can be tricky to keep foods cold until ready to serve. Bring plenty of ice and coolers for all perishable food. Keep food cold until you are ready to cook or eat it. Get food back into coolers as soon as everyone has finished eating.
Package raw meats extra carefully. Raw meat juices, spilling on salads, will make them inedible. Pack raw meats separately if you can, or on the bottom of the cooler in a leak-proof container. You might also consider bringing meats like burgers frozen to thaw on the grill or in the cooler. Smoked meats are safer than their non-smoked counterparts but both types can spoil. The ideal situation is to have one cooler only for raw meats.
Don’t make burgers on site. Outdoor prep is always tricky. Better to form burgers at home, where you can wash all surfaces, as well as your hands, thoroughly. If you make them there- bring disposable gloves and a lightweight cutting board to work on.
Never use ice for drinks that has been in contact with raw meat, or even if any raw meats have been stored in the ice. Keep beverage ice in its own cooler, or keep it bagged to insure it is clean and safe.
Solid blocks of ice melt more slowly than cubes, and make good cooler inserts for long, hot summer days. Also, keep coolers in the shade to offset the power of the sun.
Meat should be cooked thoroughly and ground meat is always more at risk for contamination. Make sure your fire is hot enough. Allow for chilly, windy days and pack extra coals or other fuel, to keep the fire hot throughout the cooking process.
Make sure you don’t put cooked meats on the tray that the raw meat was on. Also have different prepping and serving utensils for both the raw and cooked meats.
You can also precook meats (like chicken pieces or ribs), cool and chill until ready for dinner. Then just heat them up over the coals. This way you don’t have the worry of bringing along raw meats and you’ll spend less time cooking and more time having fun.
Mayo is not the evil purveyor of bacteria some people think. Mayo from a fresh jar, can actually retard the growth of bacteria. This does not mean you can leave the potato salad in the trunk for 3 hours because it has mayo in it. It just means that mayonnaise is not the culprit for food spoilage- bad handling was likely the cause.
While 2 hours is the maximum for food to be left out before being refrigerated again, use common sense. Obviously, on a 95 degree day that time is much shorter. Rather than one big bowl of pasta salad, bring several smaller ones that you can switch out. That way you always have cold salad that is safe. And bring plenty of serving spoons. It does no good to swap out the bowls of pasta salad for a fresh bowl, if you keep using the same serving spoon. Try to stay in the shade, too. Bringing some sort of canopy can keep food cooler than sitting in direct sunlight.
I am a big believer in a good hand washing being the best way to clean your hands- but you might not have running water where you are. Hand sanitizers are great when you don’t have hand washing as an option. I also bring a package of sanitizing wipes, in case a surface needs cleaning up, too.
If it is a hot day- you might want to have a large container, filled with ice, that you can put the bowls of salad into, to keep them colder. That way the salads are surrounded by the ice and stay cold a lot longer. You can use a small baby pool. I like to use a container designed for under the bed storage. Nice size.
In the end, it is about using common sense, and copious amounts of ice. Remember, that if you lose track of time, forget to put something back in the cooler or leave something in the trunk, it is always better to play it safe. When in doubt-throw it out.
Cheesy Blueberry Coffee Cake

Cheesy Blueberry Coffee Cake
If you need a really special dessert for your next party or cookout, consider making this cheesy blueberry coffee cake. It is one of my favorite blueberry recipes ever.
The blueberry cake is not too sweet, and the combination of cream cheese, with the blueberries reminds me of a blueberry blintz.
It is fine served all on its own. You can also serve it with ice cream or whipped cream. Served with sliced, slightly sweetened strawberries or raspberries, it becomes a great dessert for Memorial Day or the 4th of July.
While I think of this cake as a wonderful dessert, it can be served as a breakfast or brunch dish.
As if this weren’t enough- this cake freezes great. Who are we kidding? There won’t be any leftovers – but you could freeze them, if you had some.
So here is the recipe. Enjoy!!
Cheesy Blueberry Coffee Cake
1 1/4 c. sugar
1/2 c. butter
2 eggs
2 1/4 c. flour
1 T. baking powder
1 t. salt
1 c. milk
2 c. fresh or frozen blueberries
8 oz. cream cheese, cubed
1 t. grated lemon peel
Topping:
1/4 c. sugar
1/4 c. flour
1 t. grated lemon peel
2 T. butter
Preheat oven to 375. Grease and flour a 13×9 inch baking dish. Cream together sugar and butter until fluffy. Beat in eggs. Combine 2 cups of the flour with baking powder and salt and beat into batter alternately with the milk. Toss berries with the remaining flour and fold into the batter along with the cheese and lemon rind. Pour batter into prepared pan. Combine sugar, flour and lemon peel for topping and cut in butter to resemble coarse crumbs. Sprinkle over batter and bake for about 1 hour. Use toothpick to test for doneness. Serves 12.
Herb Gardening Class

Fresh Sage
The last of my herb gardening classes will be this Tuesday, May 28th at the Olmsted Falls Library. The program runs from 7-8 pm and is free!!!
This is a great way to learn about herbs and how to grow them. We will also cover preservation methods.
The address is 8100 Mapleway Drive, Olmsted Falls, OH 44138
Ice Cream Cone Cupcakes

“Ice Cream” Cupcake
This might look like an ice cream cone, but it isn’t. It is a cupcake!! The batter is baked inside ice cream cones, then decorated to look like ice cream cones. I used from scratch recipes for both the cupcake batter and the frosting, but feel free to use what ever recipe you like. This is such a fun twist on a cupcake. Great for summer parties.
Because you use more frosting than you might normally use for more traditional cupcakes, make sure to have extra. I chose the recipe I did because it makes plenty of frosting. I did not tint my frosting, but you can, if you like.
These are fun for kids to make. You can let them decorate their own “cone”. For a kid’s party you can even have a couple of different cupcake flavors and frostings to pick from- and some assorted toppings, like cherries, tiny candies and assorted sprinkles.
Once you frost the cupcakes, they become a little top heavy. I find setting them together, letting them touch each other a little, helps to keep them from tipping over.
Sometimes, some of the batter drips over the edge of the cone when baking. Just pretend some of the “ice cream” has melted and cover drips with frosting.
Here are the recipes I used, with the directions for baking the cupcakes.
Chocolate “Ice Cream Cone” Cupcakes
4 oz. semisweet chocolate
1 cup butter
1 cup all-purpose flour
1 3/4 cups sugar
4 eggs
1 teaspoon vanilla extract
24 flat bottomed ice cream cones
Preheat oven to 325 degrees. In the top of a double boiler, combine chocolate and butter. Heat, stirring occasionally, until mixture is melted and smooth. Remove from heat and allow to cool to lukewarm.
Sift flour and sugar together into a large bowl. With mixer on low speed, beat in eggs one at a time. Stir in chocolate mixture and vanilla. Place 24 cones in muffin tins to hold them up and fill 2/3 full with batter. Bake for about 20 minutes, or until cupcakes puff to top of cones. Test with a toothpick. Cool and frost to look like ice cream. Decorate with sprinkles. Makes about 24.
Super Fluffy Frosting
1½ cup butter
1 1/2 tablespoons vanilla extract
1½ lbs. confectioners’ sugar –
1/8 teaspoon salt
3 T. milk
In a mixer, combine the butter, vanilla and 1 tablespoon milk. Add the sugar and salt, beat until well mixed. Add a tablespoon or two more of milk, if needed. Turn mixer to the highest speed and beat for 15 minutes.
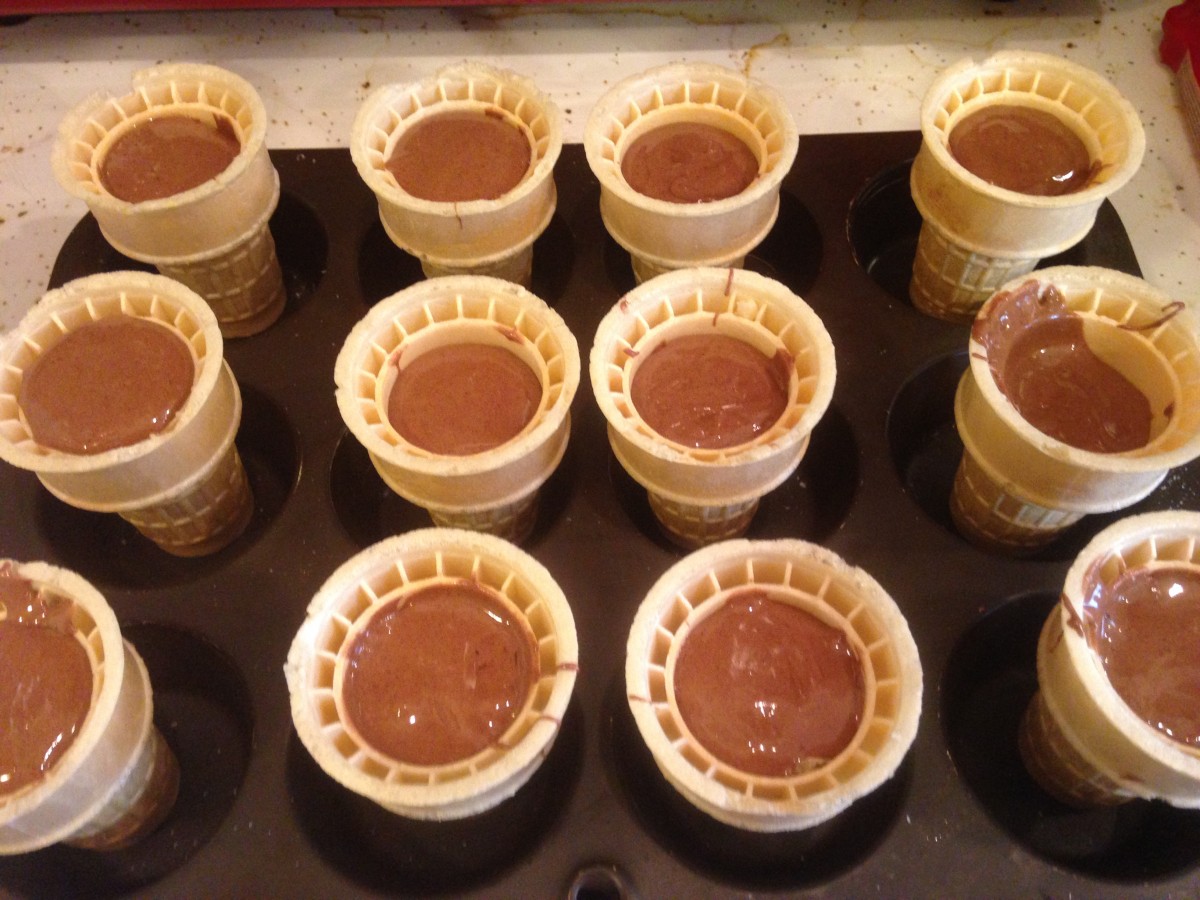
Cones filled, and ready to bake
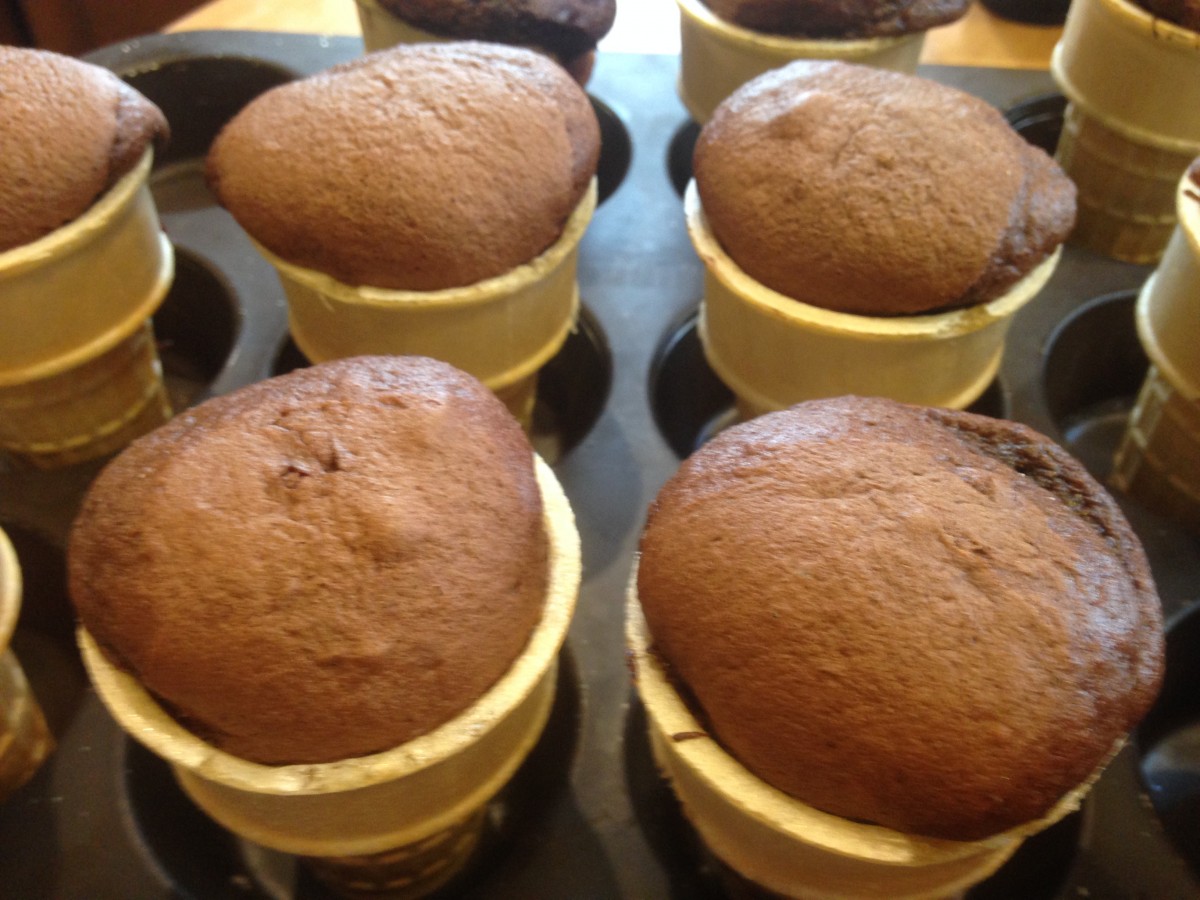
Fresh out of the oven

Ready for the party
Amy’s Baked Beans
Amy’s Baked Beans
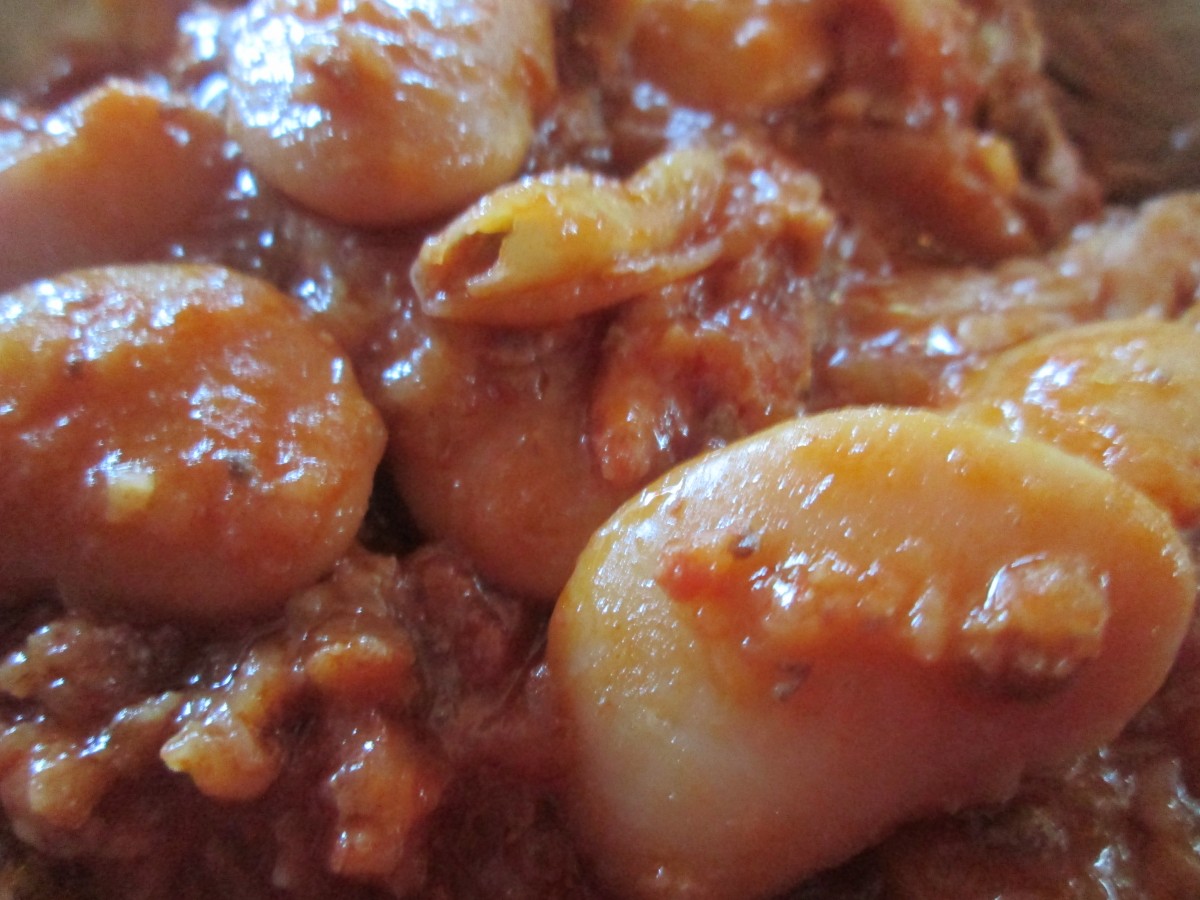
This is a wonderful recipe for baked beans. I got the recipe from my friend Amy. She used to make them for almost every summer barbecue. Unlike traditional “baked” beans, this recipe starts with canned beans.
I love traditional baked beans. The ones baked all day, until the beans get tender and the flavors are perfectly blended. But I don’t always have time to make them. By starting with canned beans, it saves a whole lot of time, without compromising flavor. When I serve these beans, everyone comes back for seconds.
It’s a simple recipe, with relatively few ingredients. It can be baked in the oven, or done in a crock pot.
Super easy and very tasty.
Amy’s Baked Beans*
6 c. chopped onion
1 lb. ground meat
1 lb. bacon, cut into 1-inch pieces
1/2 c. brown sugar
2 cans tomato soup
3 can butter beans, rinsed and drained
Mix onion, meat and bacon in skillet and cook until onions are translucent. Drain off excess fat. Place in Dutch oven with remaining ingredients and cook, covered, in a 350 degree oven for 90 minutes.
Note: You can also cook in a crock pot on high for 4 hours or longer. Uncover, for awhile, if you like, for thicker sauce.
*This recipe has been in the McWilliam family for several generations. They are also called Grandma McWilliam’s Beans and before that Aunt Elizabeth’s Beans.
Mom’s Macaroni Salad
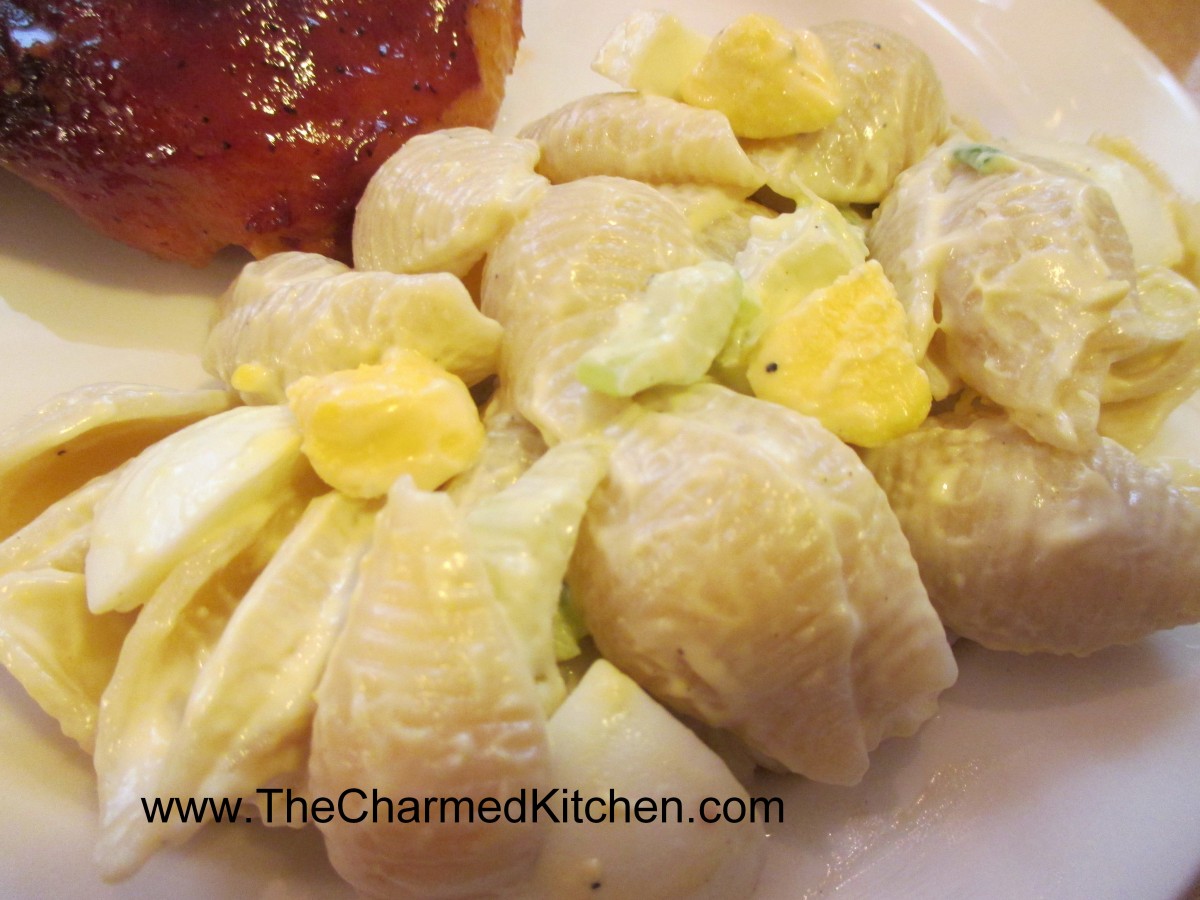
Mom’s Macaroni Salad
I’ve been in a nostalgic mood this week. Some of my mood is because of a conversation with friends. We were talking about childhood memories and summer holidays. It made me think about some of the foods I looked forward to in the summer.
For summer cookouts, we always had this salad. Back then, Mom called it macaroni salad, even though she never made it with macaroni. She used shell pasta. We never referred to it as pasta salad, either. Whatever you call it, it is a wonderful salad. I loved it then, and I love it now.
I won’t say I don’t make other pasta salads. I do. I make all sorts of combinations, but this is the salad that brings me home.
Mom used mostly mayo, with a little salad dressing, like Miracle Whip. She felt it gave the salad just a little more zing. I use straight mayo, but that part of the recipe is flexible.
She added quite a few hard cooked eggs and I think they add a richness to the dish. My dad would cut up the celery and green onions for her. Mom liked the veggies cut into a fairly small dice in this dish, and Dad had great knife skills. I love the image of them cooking together.
So here it is- a family recipe wrapped up nicely with some memories, too.
Mom’s Macaroni Salad
1 lb. uncooked pasta, shells are preferred
Salt and pepper
Mayonnaise, about 1 cup
Salad dressing, like Miracle Whip, about ½ cup or more mayo
3-4 ribs celery, sliced thin
4-5 green onions, trimmed and sliced thin
8-12 hard-cooked eggs, cooled and peeled
Cook pasta according to package directions, but do not overcook. Rinse with cold water and drain well. Place drained pasta in a large bowl and sprinkle with salt and pepper to taste. Add dressings and vegetables and stir until well mixed. You may want to add more dressing to suit your taste. Chop eggs and stir into salad. Adjust seasonings if needed and chill before serving. Serves 8-10.
Broccoli and Cauliflower Salad

Broccoli and Cauliflower Salad
I make broccoli salad pretty often. It is one of my favorites. Sometimes, I like to switch it up a little by adding cauliflower. The result is a salad that has a great mix of flavors, colors and textures.
The addition of bacon also adds a wonderful smoky flavor. Certainly, feel free to omit the bacon for a vegetarian salad.
With or without the bacon, this is a great salad.
I make this salad year round, but more often during the spring and summer. I also like to bring it to picnics and cook outs. Everyone seems to like it.
So if you are looking for a salad t0 bring to your next cook-out, consider this one.
Broccoli and Cauliflower Salad
1 small head cauliflower, trimmed and broken into bite- sized pieces
2 broccoli crowns, cut into bite- sized pieces
1 sweet pepper, seeded and chopped
1 c. shredded cheese- I used a sharp cheddar
8- 10 slices of bacon, cooked and chopped
1/2 cup of mayo – or more according to your taste
salt and pepper to taste
Steam the cauliflower and broccoli until just tender/crisp. About 5 minutes in a microwave steamer, 6 minutes in a conventional steamer. Place in a bowl to cool down then combine with remaining ingredients and stir to combine well. Adjust seasonings, if needed. Serves 6-8.
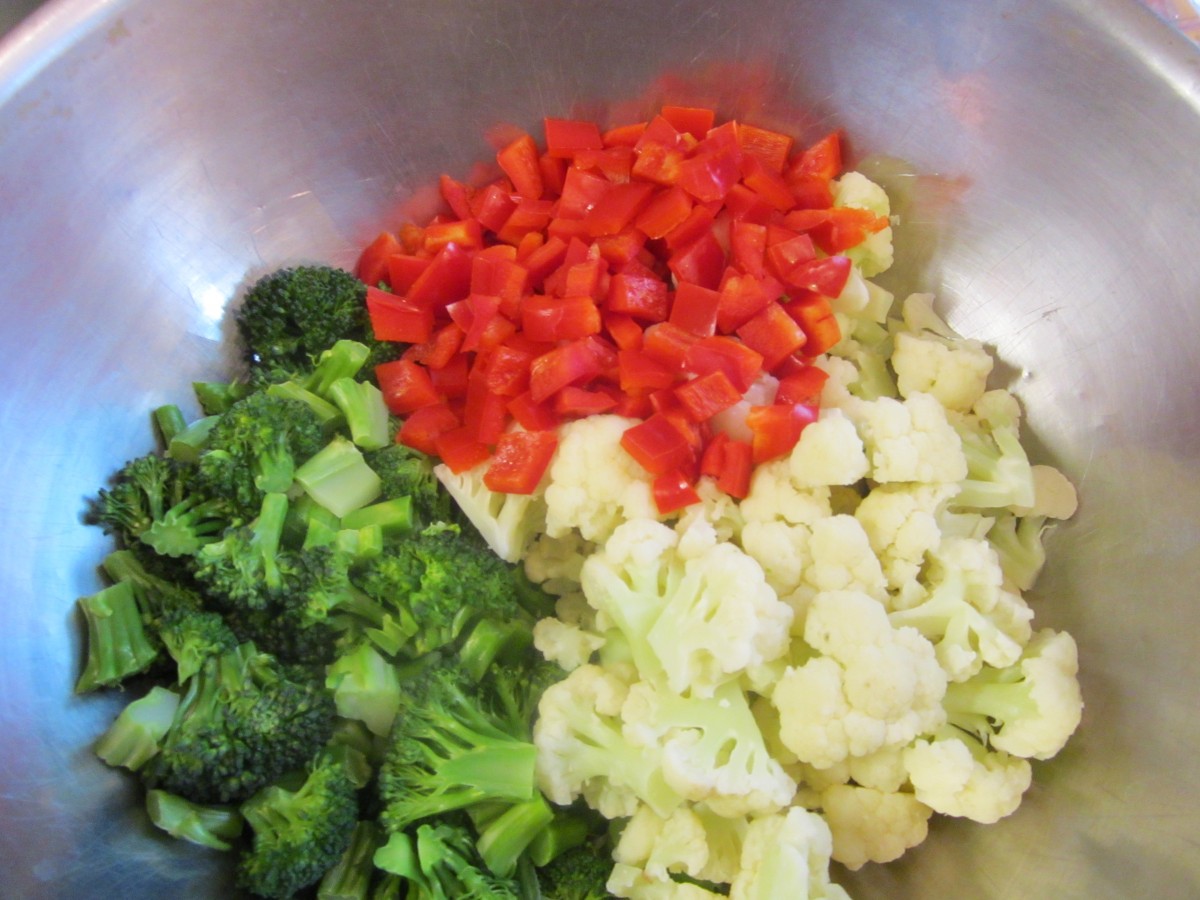
Combine veggies in a large bowl.
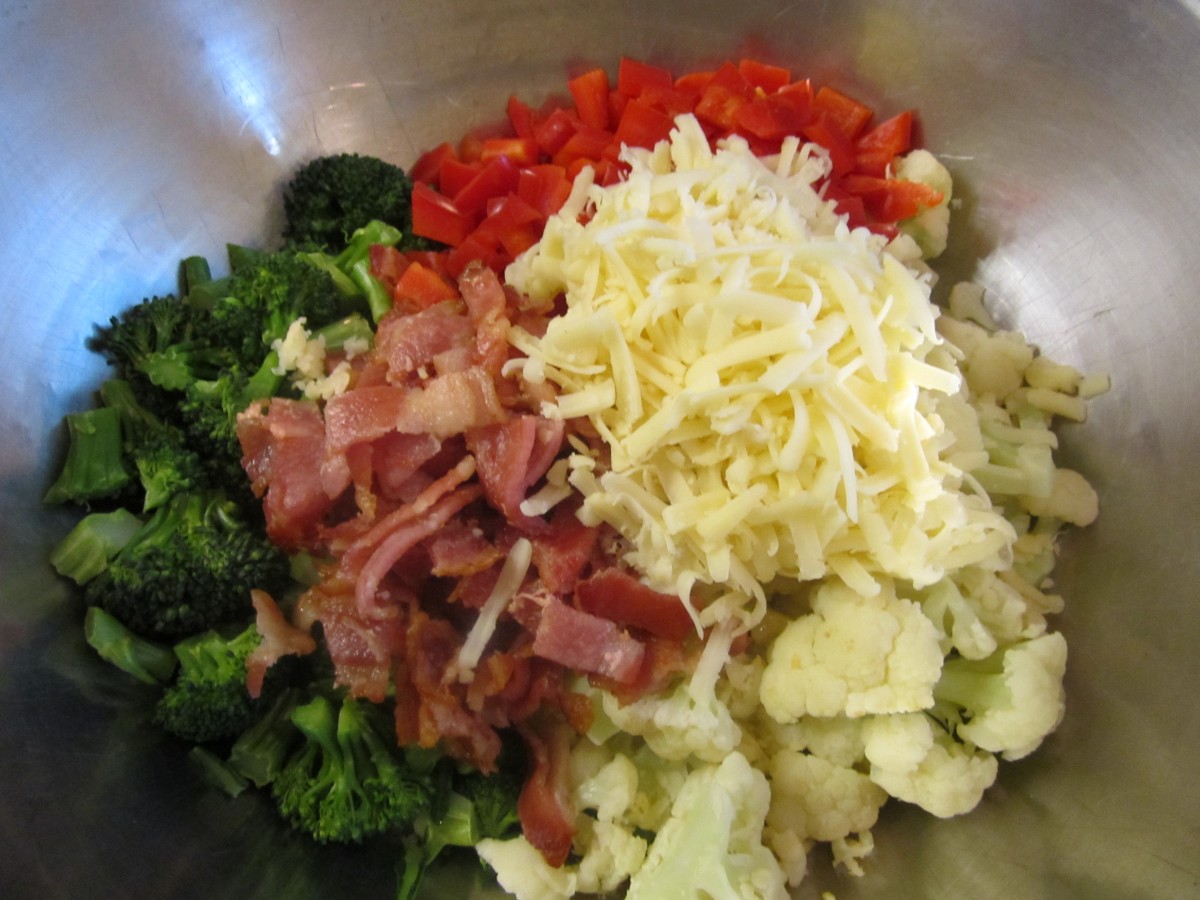
Add cheese and bacon
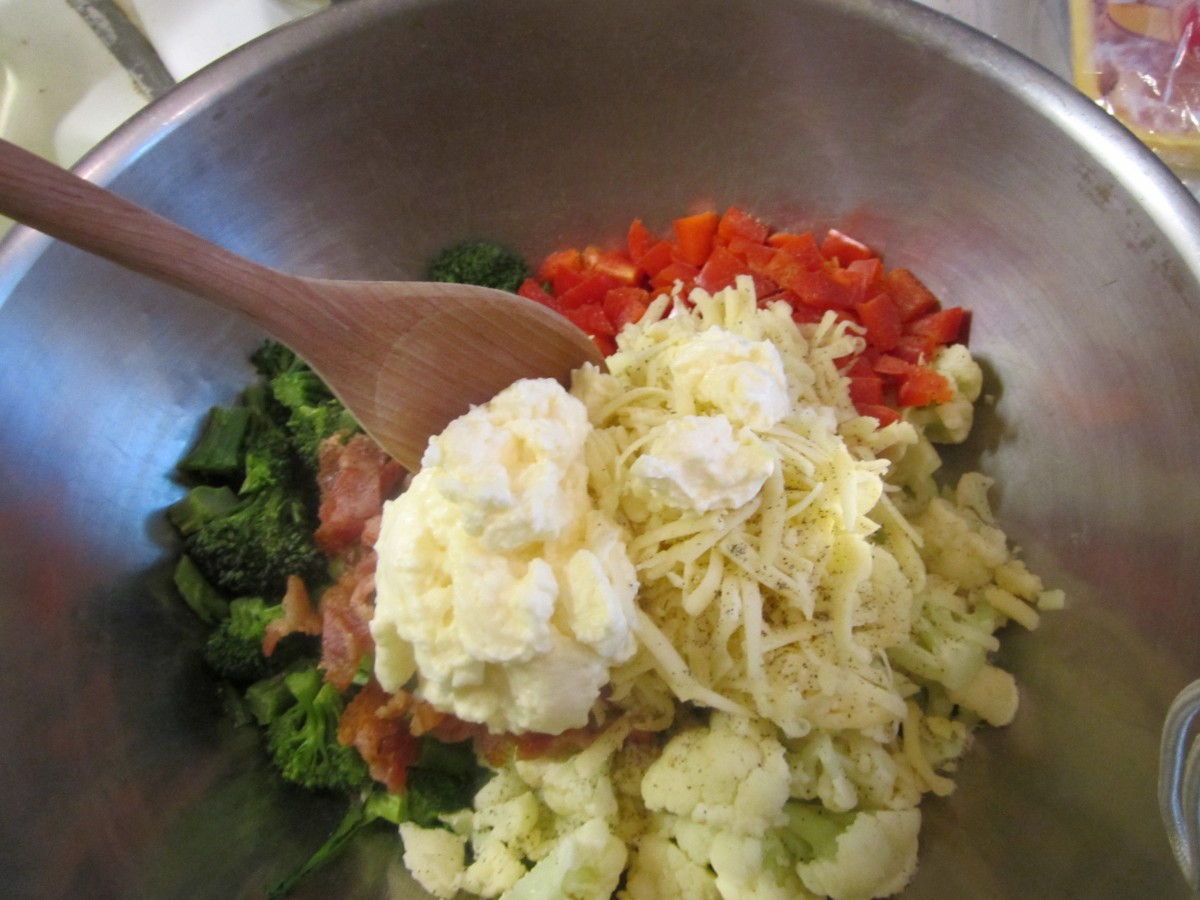
Add mayo, salt and pepper and stir to combine


