In Love with Lovage

Lovage
Lovage is one of my favorite herbs. I feel like it doesn’t get enough attention. So many people have never even heard of lovage. It’s leaves taste just like celery leaves, so it is very useful in the kitchen. As an added bonus, it is very easy to grow- and it is a perennial.
I love celery in so many foods. I don’t think you can make a decent stock without it. I especially like using celery leaves. Problem is, often the celery I see in the store has few, if any, really nice leaves. The solution? Lovage.
Lovage leaves can be used in any dish you would use celery leaves: soups, stews, stocks and salads. The seeds can also be used as a substitute for celery seeds in recipes.
Lovage grows to a height of a couple of feet, except when it is in bloom. When blooming, lovage sends up stems that can reach 6 feet!
The stems of lovage are tough, almost woody. While they can’t be used chopped like celery, the stems are hollow and can be cut to size and used as straws in drinks like Bloody Marys or vegetable juices.
I’ve never seen lovage sold as a fresh herb. As far as I know, the only way you can enjoy this lovely plant is to grow it yourself. It thrives in sun, but will tolerate some shade. For a little effort you can have fresh “celery” leaves whenever you want. I also freeze plenty for use throughout the year.
Here is a favorite recipe of mine using lovage. Perfect for Spring.
Fresh Pea Soup with Lovage
2 T. butter or oil
1 medium onion, chopped
2 c. fresh English peas, pea pods (sliced), or sugar snaps (sliced)
¼ –½ c. fresh lovage leaves, chopped fine
3 c. chicken stock or veggie stock
salt and pepper to taste
1 c. sour cream
Heat butter or oil in medium saucepan. Sauté onion until tender. Add peas, lovage, stock, and salt and pepper. Cook until peas are the desired tenderness, about 3 – 7 minutes. Puree soup in batches until smooth. Place sour cream in a small bowl. Ladle 1 cup of hot soup into the sour cream, and stir to smooth. Pour this mixture into the soup and cook, barely simmering, until soup is heated through, about 2 minutes. To serve, ladle into bowls and garnish with lovage sprigs. Serves 3 – 4.
Note: You can also serve this soup cold.

Fresh Pea Soup with Lovage
Cinnamon and Vanilla Belgian Waffles
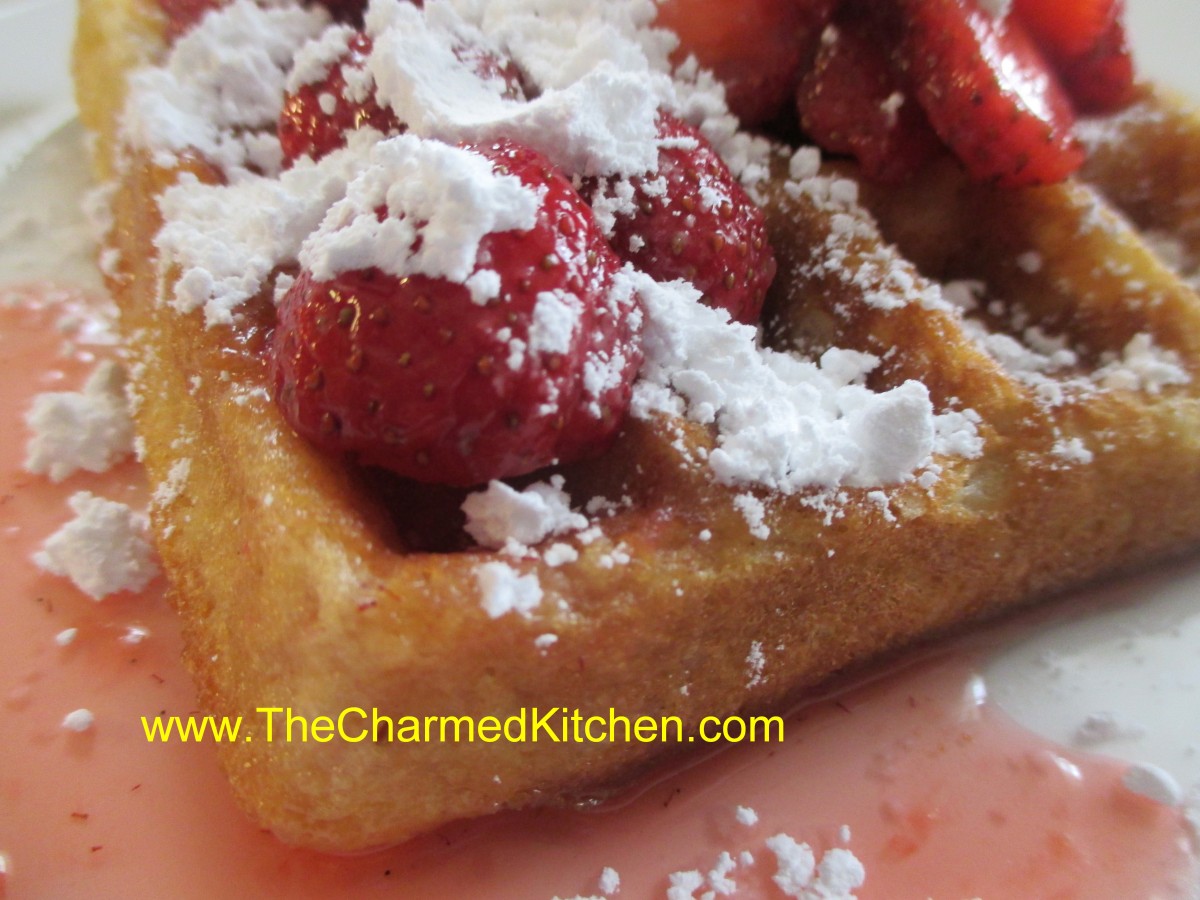
Cinnamon-Vanilla Belgian Waffles
Today we are making waffles in cooking camp. I just know the kids are going to love them. Who doesn’t love waffles?
When I want a special breakfast, I make waffles. No one ever complains when you make waffles for breakfast. Or if you make waffles for lunch or dinner, for that matter.
The response is even better when you make Belgian waffles. At least that has been my experience. My theory is, that because Belgian waffles are bigger, people love them even more.
These waffles are light and rich at the same time.
Belgian waffles can be used as a dessert, too. For dessert, just top them with ice cream, chocolate sauce or whipped cream – or all three.
You can even freeze any extras. Oh, who are we kidding? There aren’t going to be leftovers. But if there were, you could freeze them.
Cinnamon-Vanilla Belgian Waffles
2 c. all-purpose flour
3/4 cup sugar
3-1/2 teaspoons baking powder
2 t. cinnamon
2 eggs, separated
1-1/2 cups half and half- or milk
1 cup butter, melted
2 t. vanilla extract
Sliced fresh strawberries, powdered sugar or syrup
In a bowl, combine dry ingredients. In another bowl, lightly beat egg yolks. Add milk, butter and vanilla; mix well. Stir into dry ingredients just until combined. Beat egg whites until stiff peaks form; fold into batter. Bake in a preheated waffle iron according to manufacturer’s directions until golden brown. Serve with strawberries, powdered sugar or syrup. Yield: 10 waffles (about 4-1/2 inches).
Easter Bunny Breads

Easter Bunny Breads
These slightly sweet bunny breads are a great addition to your Easter table. They can be used for breakfast or brunch. They could also be served with dinner, minus the candies!! The dough itself has plenty of cinnamon flavor and a slightly dense texture.
They are moist enough to eat just the way they are, or spread with butter. My favorite parts are the feet- which are a little crunchy. The recipe makes 6 bunnies. I chose to decorate mine with melted white chocolate and candies, but they are also pretty when left un-decorated. This would be a fun decorating activity for kids, too.
Cinnamon “Bunny” Breads
6-6½ c. flour
¾ c. sugar
2 pkts. Active dry yeast
1 T. cinnamon
1 t. salt
1 c. milk
½ c. water
¼ c. butter – half a stick
5 eggs – save one for brushing the breads
White chocolate and tiny candies for decorating
In mixing bowl place 2 cups of the flour with the other dry ingredients. Heat milk, water and butter together until very warm. Butter does have to melt completely. Place milk mixture in bowl with flour mixture and beat for 3 minutes. Add another cup of flour and beat another 2 minutes. Beat in 4 eggs and gradually add enough flour to make a soft dough. Place dough on a floured surface. Knead until smooth. Return dough to bowl and cover, allowing to rise until doubled, about an hour. Grease two large baking sheets, or cover in parchment or use a silicone liner. You will put 3 bunnies on each sheet. Place dough on floured surface. Divide into 6 pieces. Each piece will be a bunny. To form a bunny, take about a third of one of the pieces of dough. Shape into a round and place on a greased baking sheet. This is the body. Use about ¼ cup of the dough to form the head. Flatten the head a little on one edge and tuck the flattened part under the body. Pinch off a tiny piece for the nose and place on the head. Divide the rest of the piece of dough into 6 pieces. Use 4 pieces to form the feet. Shape into balls and tuck one edge under the body, like you did with the head. Use the last two pieces for the ears. Roll each into a tube, shape a little to look like ears, and stick one edge under the head. Repeat with the rest of the dough pieces. You’ll end up with 6 bunnies. Cover with plastic wrap, then a towel, and allow to rise in a warm place until doubled, 30-60 minutes. Preheat oven to 350 degrees. Combine remaining egg with a tablespoon of water and beat to combine. Remove the plastic wrap from the bunnies. Brush the bunnies with the egg mixture, covering completely. Bake for 20-25 minutes, or until golden brown and bread sounds hollow when tapped lightly. I switched the baking sheets in the oven after 10 minutes, so the bunnies bake evenly. Cool on rack. Once cool, decorate with melted chocolate, piped on to make whiskers. You can also use the melted chocolate to affix candies. Makes 6 bunnies.
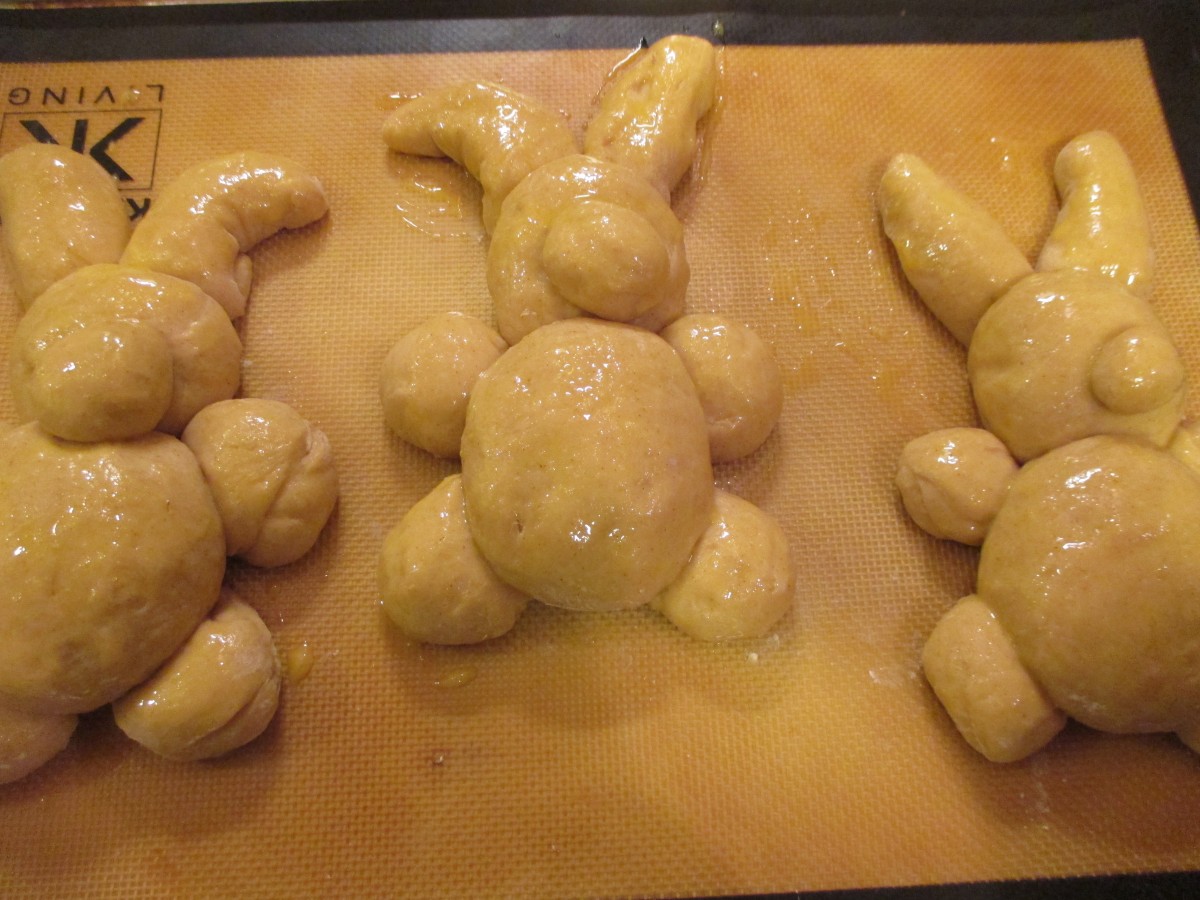
ready to bake

Freshly baked
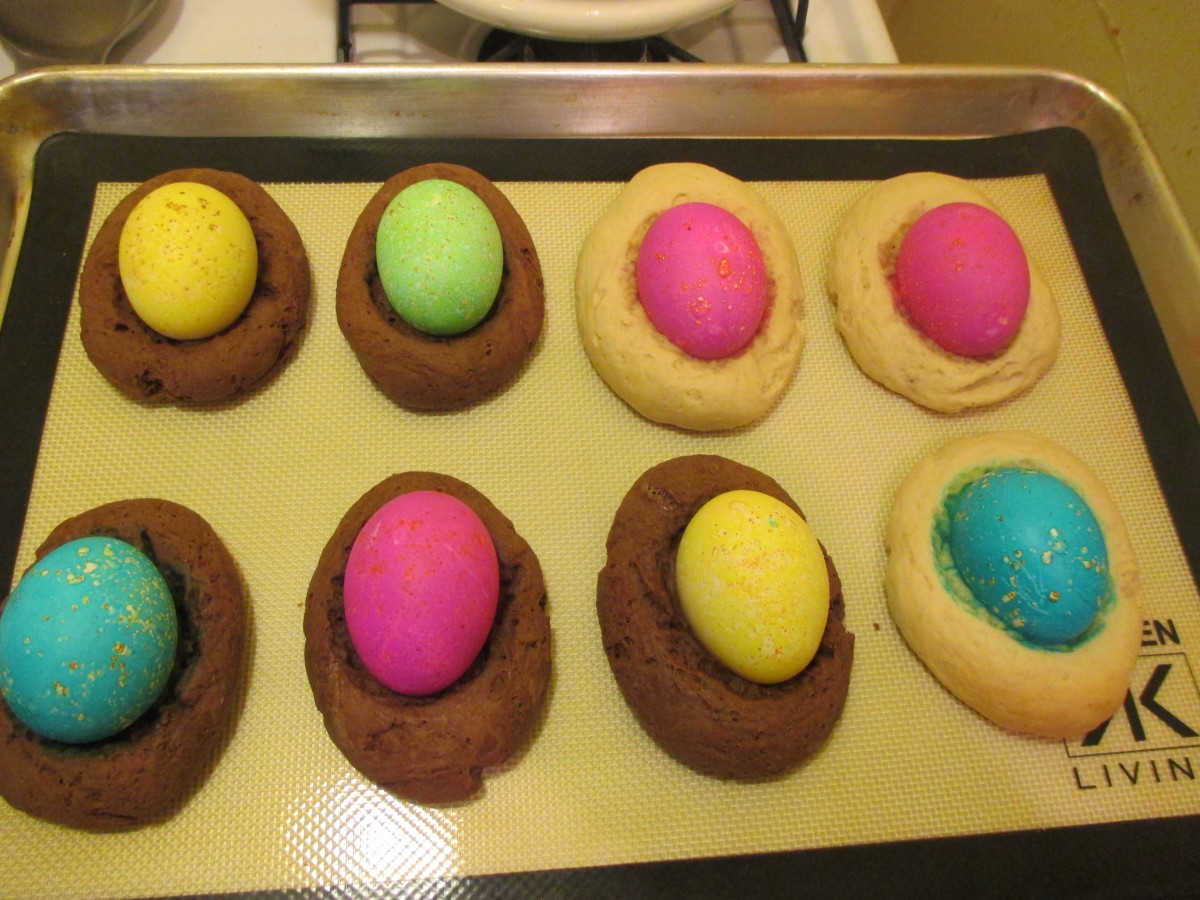
Chocolate Easter Egg Biscotti
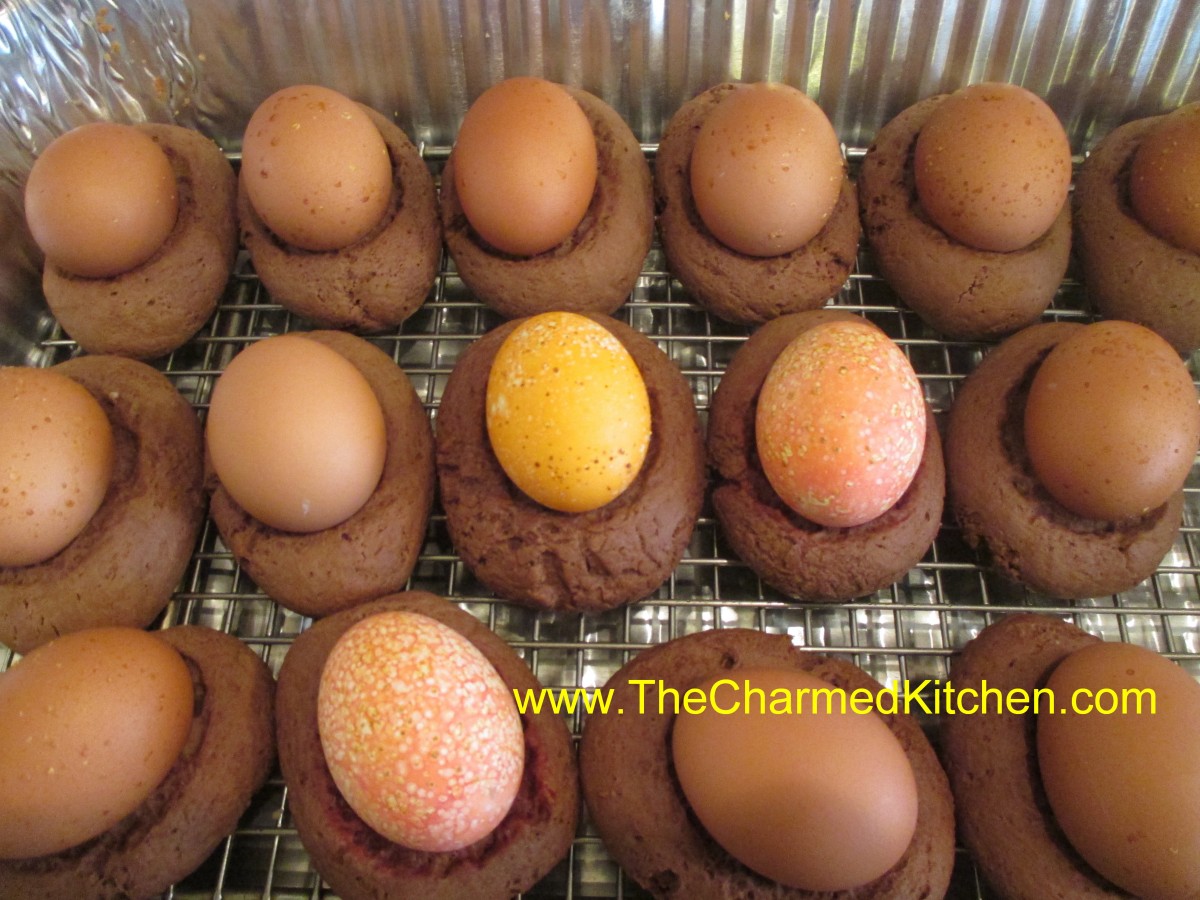
Chocolate Easter Egg Biscotti
After a friend mentioned that she would love my Easter Egg Biscotti even better if they were chocolate, I decided to try to make her some.
The biscotti are really just a big cookie, baked around an egg. Once cooled, I drizzle with a powdered sugar glaze. They are such a fun treat for Easter.
You don’t have to precook the eggs used in the middle. They will cook when the biscotti bake around them. If your eggs are already hard- cooked, that is fine, too.
This is the end result of my experiment. I used the original recipe, and added cocoa powder. Worked out really nice, so I thought I’d share them with you.
The original recipe came from the mother of a childhood friend. Rose made them with shortening. Over time I started making mine with butter, instead. The only change is, I chill the dough 30 minutes, or so, before using.
Chocolate Easter Egg Biscotti
1 c. shortening or butter – I use butter
1 ½ c. sugar
4 eggs
5 t. baking powder
1 t. salt
2 t. vanilla
1 c. milk
6 c. flour
¾ c. cocoa powder
24-30 eggs, plain or dyed
Powdered sugar glaze- recipe follows
Preheat oven to 350 degrees. Cream together shortening and sugar. Beat in eggs. Add next 4 ingredients and blend until smooth. Mix flour with cocoa. Stir in flour mixture 2 cups at a time. Dough should be pliable. If dough is too sticky add a little more flour. If using butter in the recipe, chill dough at this point. Take a piece of dough about the size of a large egg and roll until smooth. Place on a greased baking sheet. Indent middle slightly and then place an egg in the center, pressing down slightly. It should look like a nest. Continue with remaining dough allowing about 2-3 inches in between, as they will spread some. You can fit 6-8 on a large baking sheet. Bake 20 –25 minutes or until browned on the bottom. Cool on wire rack before drizzling with frosting. Makes 24-30. Store in the fridge.
Sugar glaze
2 c. powdered sugar
2-3 T. milk or orange juice
1 t. vanilla
Food coloring, if desired
Mix together until smooth and of drizzling consistency.
Chocolate and original biscotti waiting to be baked
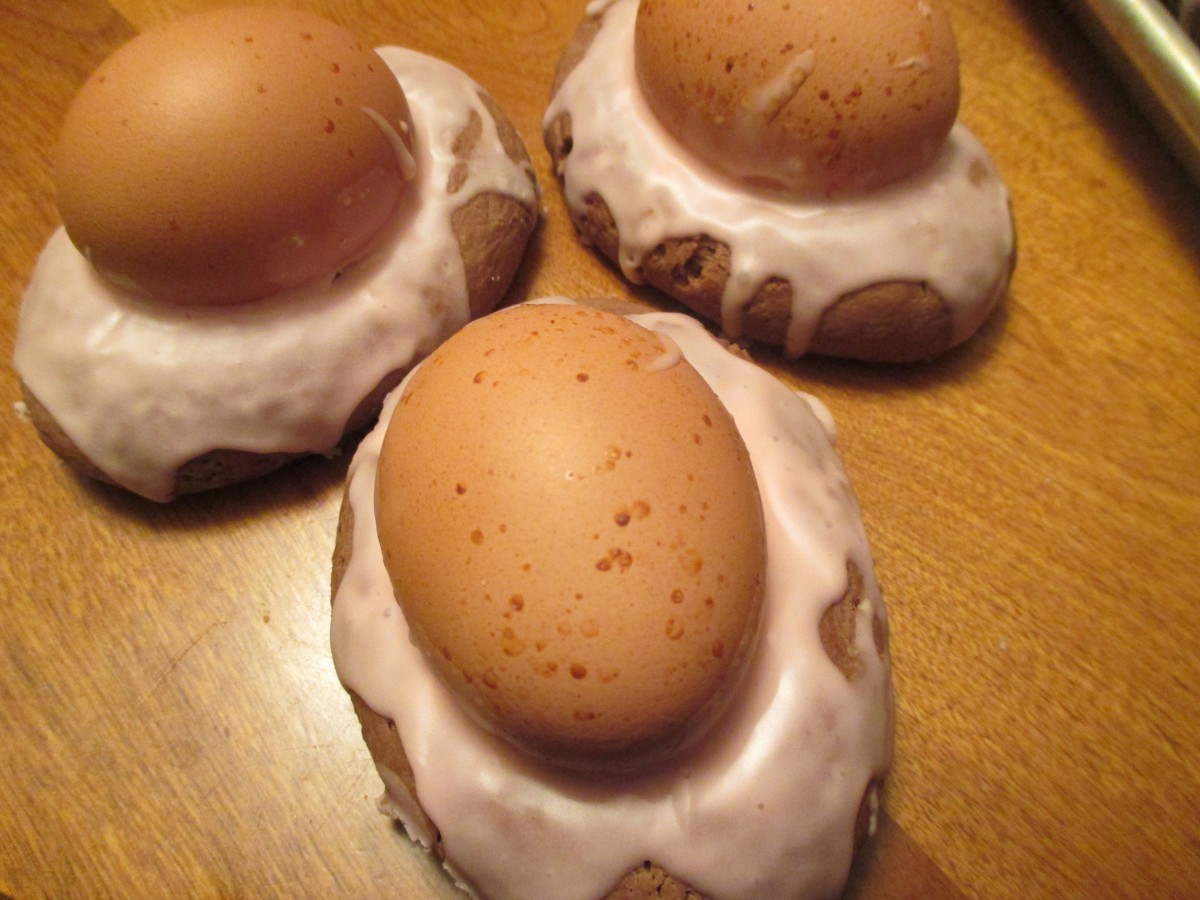
Glazed and ready to enjoy
Easter Egg Biscotti

Easter Egg Biscotti
I get so many requests for this recipe, I decided to post it again. This is a treat from my childhood. Rose Dieglio was the mother of my best friend, Debbi. Rose made these every year, and I loved them. Years later, she was kind enough to share her recipe with me. I always make a bunch to hand out to friends and family. It is a tradition I enjoy very much.
The dough is a type of cookie. You roll the dough out in pieces about the size of eggs. Make an indent in the dough and press in a tinted egg. The egg does not have to be cooked- it will cook when the biscotti bakes.
The dough is a little sticky. Just add a little flour to your fingers when shaping the dough, if needed.
The original recipe calls for shortening. I make them with butter, instead. If you use butter in the dough- chill it before baking.
Once baked, the biscotti can be topped with a powdered sugar glaze and sprinkles, if you like.
Easter Egg Biscotti
1 c. shortening or butter- I use butter*
1 ½ c. sugar
4 eggs
5 t. baking powder
1 t. salt
2 t. vanilla
1 c. milk
6 c. flour
24-30 eggs, plain or dyed
Powdered sugar glaze
Preheat oven to 350 degrees. Cream together butter or shortening and sugar. Beat in eggs. Add next 4 ingredients and blend until smooth. Stir in flour 2 cups at a time. Dough should be pliable. If dough is too sticky add a little more flour. Take a piece of dough about the size of a large egg and place on a greased baking sheet. Indent middle slightly and then place an egg in the center, pressing down slightly. It should look like a nest. Continue with remaining dough allowing about 2-3 inches in between as they spread when baking. You can fit 6-8 on a large baking sheet. Bake 20 –25 minutes or until browned on the bottom. Cool on wire rack before drizzling with frosting. Makes 24-30. Store in fridge.
* If using butter- chill dough a couple of hours before baking.
Sugar glaze
2 c. powdered sugar
2-3 T. milk or orange juice
1 t. vanilla
Food coloring, if desired
Mix together until smooth and of drizzling consistency.

Cooling down
Lemon Squares

Lemon Squares
For me, Lemon Squares are a blast from the past. They were a treat I remember making with my mother when I was a kid. A crisp, tender crust, topped with a lemon custard. Just the right balance of sweet and tart.
I decided to make them for a dinner with my cousin and her husband. They loved them.
I forgot just how much I loved them, too. I also forgot how easy they are to make. These are a great dessert any time of the year, but I think especially nice for Spring. They also would make a wonderful dessert for Easter.
Lemon squares are baked in two steps. The crust is pressed into the pan and baked. Then the crust is topped with the egg/lemon mixture and returned to the oven for the second bake. So simple- and so good.
I did make a couple of changes from the original recipe. I was very happy with how they came out.
Here is the recipe. Enjoy!!
Lemon Squares
1 c. flour
½ c. butter
¼ c. powdered sugar
3 eggs
1 c. sugar
2 T. lemon juice
2 t. lemon zest
½ t. baking powder
¼ t. salt
Mix together flour, butter and powdered sugar and press into the bottom of an 8×8-inch pan. Bake in a 350-degree oven for 20 minutes. Beat together remaining ingredients and pour over baked crust. Return to oven for 20-25 minutes or until golden and puffed. Cool. Cut. Makes 16 squares.
Cranberry Orange Scones
Cranberry Orange Scones
I make scones pretty often. There is nothing quite like the taste of fresh baked scones. Plus, baking them makes the house smell wonderful.
I taught a British cooking class recently , and we made scones in class. Someone asked me what scones are. I told her I think of scones as biscuits for company. Maybe biscuits with extra stuff in them is also a good definition.
The procedure for making both scones and biscuits is the same. You just put more fun ingredients in scones. Although scones can be plain, they often contain fruits, nuts and spices.
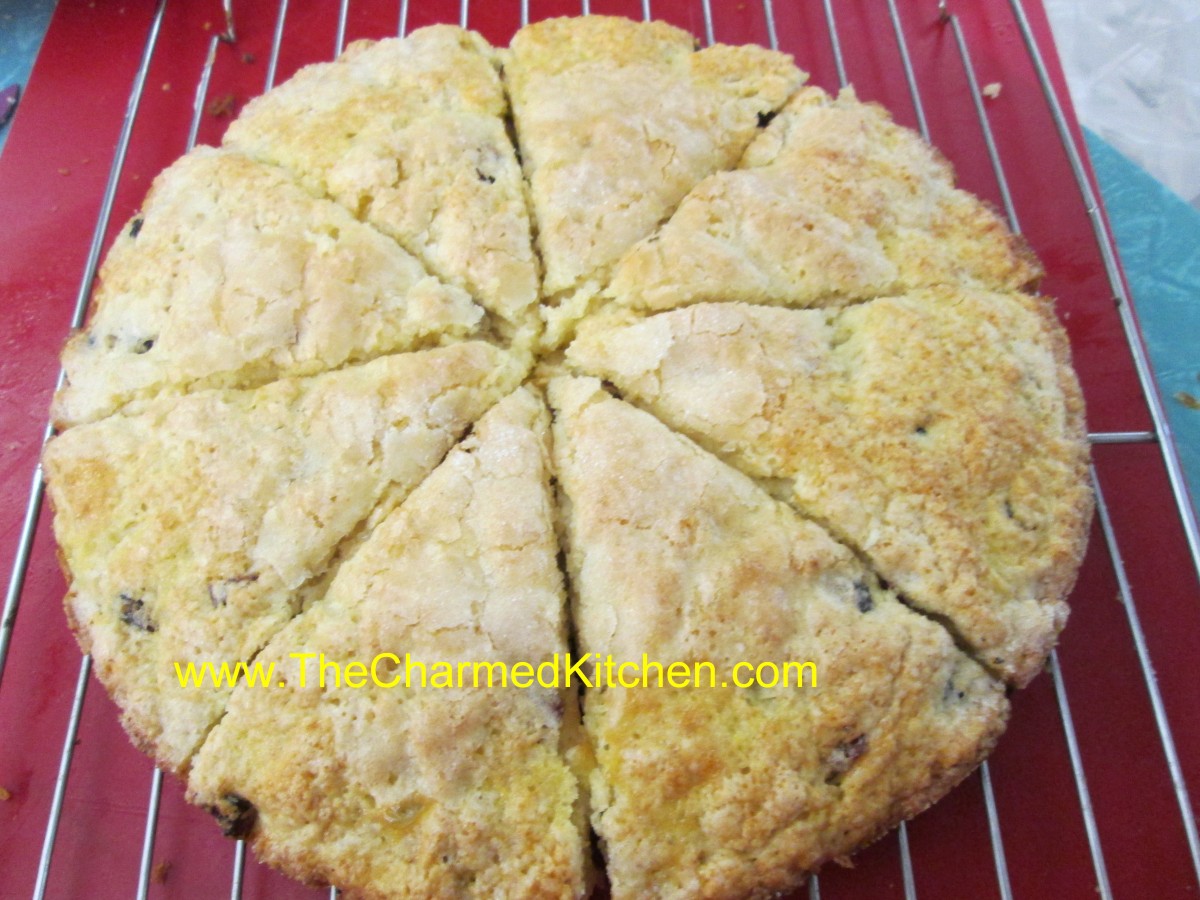
These scones are shaped by pressing the dough in a round cake pan, then cut into wedges before baking.
They come out looking great and tasting great, too. If you don’t have buttermilk just add a little lemon juice to regular milk. I actually used half and half instead of milk, and added 1 tablespoon of lemon juice to the half and half. It worked great.
Perfect breakfast for this weekend. Serve warm with butter and jam.
Cranberry-Orange Scones
2 c. flour
4 T. sugar
2 t. baking powder
1 t. baking soda
1 t. grated orange peel
½ t. salt
¼ c. butter
1 c. dried cranberries
2/3 c. buttermilk
1 egg
Extra milk and sugar, for topping
Preheat oven to 425 degrees and lightly grease a baking sheet. Combine dry ingredients in medium bowl and cut in butter to resemble coarse crumbs. Stir in cranberries. Beat together milk and egg and add to flour mixture, stirring with fork until just coming together. Turn onto floured surface and knead 5-6 strokes or until ball of dough holds together. Transfer dough to prepared sheet and with floured hands, press dough into an eight-inch circle. I place dough in floured 8-inch cake pan, then invert onto the baking sheet- for a nice, even circle. With a sharp, floured knife cut dough into 8 wedges. Brush top of dough with a little extra milk, then sprinkle tops with a bit of sugar. Bake 14-16 minutes. Makes 8.
Dough can also be patted out on work surface and cut into circles or pressed into a square and cut into smaller squares.
Asian Turnip Cakes
Turnip Cake
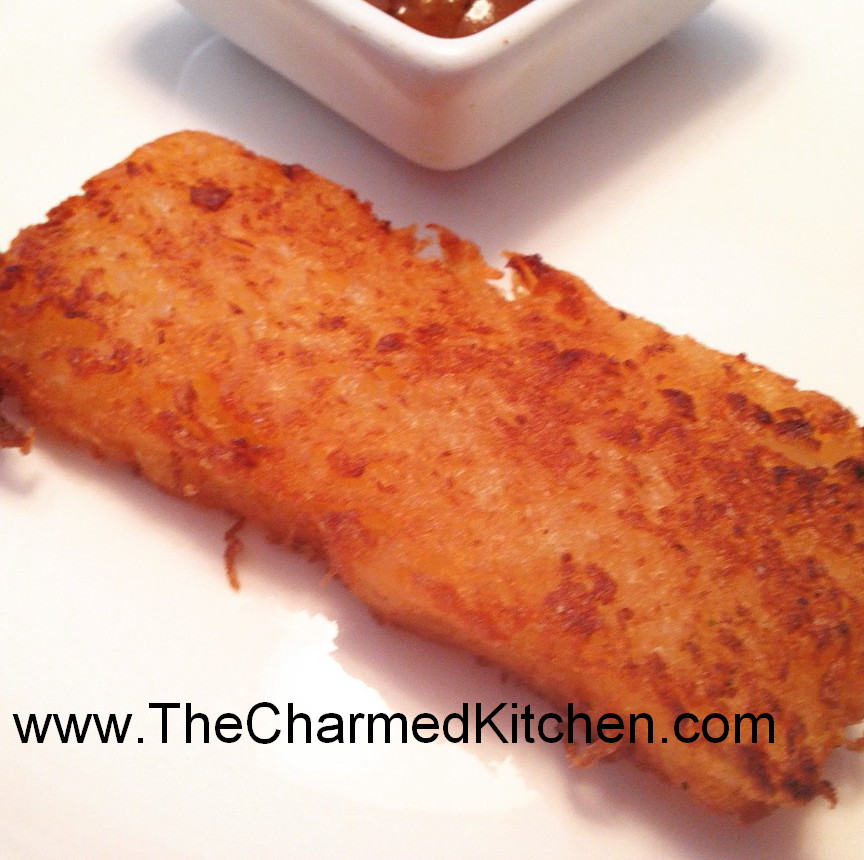
I first had turnip cakes at a local Asian restaurant. I loved them, and was intrigued at how to make them. They were little squares, lightly crisped on the outside, smooth and creamy in the middle.
When I first heard turnip cake- I was thinking of the purple and white turnips I knew. That is not what these turnip cakes are made from.
It helped a lot when I realized the “turnip” cake was actually made from Daikon radish. Daikon radishes are also called Chinese turnips. They are really big, white radishes. They are available at Asian grocery stores and other grocery stores. Now that I knew the ingredient I needed, I had to find a recipe.
I searched the internet and found a lot of different variations for how to make them.
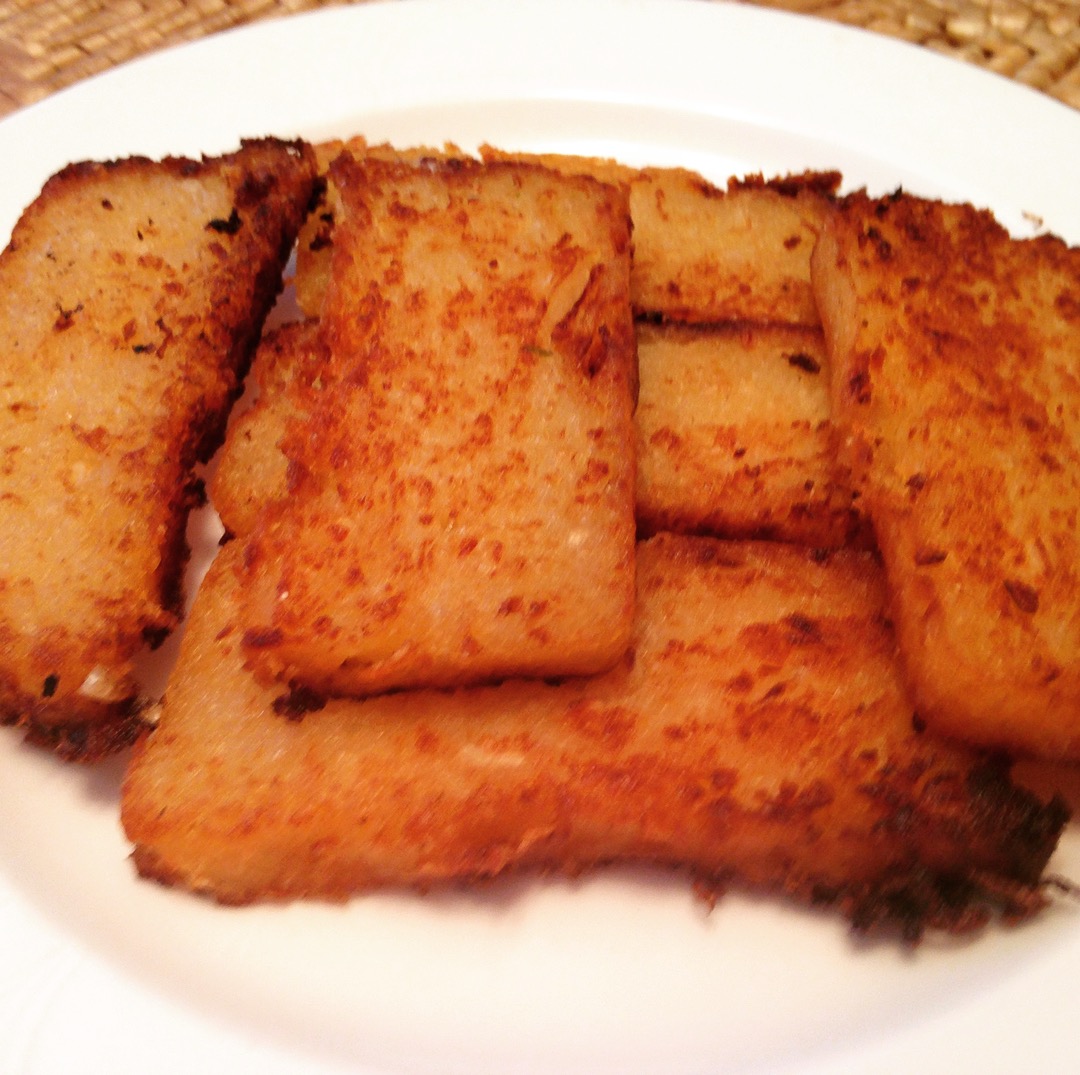
The first recipe I tried was more like a potato pancake. Shredded radish paired with eggs and bread crumbs. They were good, but not what I had at the restaurant. The turnip cake I had enjoyed was smooth and sort of starchy. Plus, it was a neat square shape.
I found several recipes that included the steaming step. This enabled the cakes to be set up with a starch, cooled and sliced before the final frying step. This was what I wanted!!
The most promising recipe included rice flour- but I was out of rice flour, so I improvised with cornstarch and a little wheat flour. It worked really well.
Most recipes included shrimp or Chinese sausage and sometimes green onions. I decided, this time, to make them vegetarian. That worked well, but you certainly could add meat or shrimp to yours.
I shredded the daikon pretty fine, but you could still discern the radish in the final dish. I liked that a lot. I did not grate them as some recipes suggested.
So here is my version of turnip cakes. They sound like a bit of work, but it really is worth the time. I also like that all the prep can be done a day or two ahead of time, then just slice and fry when you want them.
Turnip Cakes
1 large Daikon radish- about 1¼ lbs., give or take
1 c. water
½ c. minced onion
1 t. salt
½ t. white pepper
½ c. cornstarch
2 T. flour
Oil for frying
Oyster sauce for dipping, optional
Peel and shred radish. I used a fine shredding blade. Squeeze out some of the liquid from the radish. Place shredded radish in bowl with the water and onion and steam in microwave for 4-5 minutes- you can also place radish and onion in saucepan with water and simmer 4-5 minutes. Set aside to cool. Combine the radish mixture with the cornstarch, flour salt and pepper. Oil an 8×4-inch loaf pan. Place the radish mixture in the prepared pan and steam for 50 minutes.* I placed plastic wrap over the pan to prevent water from dripping into the pan. Remove pan from steamer and cool down for at least 30 minutes. . At this point you can finish preparing the turnip cakes- or place in fridge until ready to make them. When ready to fry the turnip cakes, remove from the pan and cut into slices- about ¾ -inch thick. Heat oil in a skillet over medium high heat. Cook cakes in oil on both sides until golden brown and crisp. Drain on paper towels. Serve with oyster sauce- or whatever dipping sauce you prefer. Makes about 10.
* To steam the mixture- I just used a large stock pot with a cooling rack in it. I brought about 2 inches of water to a boil, placed the pan on the rack and covered the pan. You could also steam in the oven with a roasting pan, with an inch of boiling water in it and covered with foil.

Slicing the turnip cakes before frying
Ready to serve
Ham and Asparagus Quiche

Ham and Asparagus Quiche
I had some fresh asparagus and wanted to make something special with it. I decided to make a quiche. I also had some ham, so combining the two ingredients in a quiche seemed like a good idea.
It was a very good decision.
Quiches are so versatile. You can fill them with almost any ingredients. They can be served for breakfast, brunch, lunch or dinner. You can also bake it right away, or freeze it for later. I often make two quiches, just so I can freeze one for later use.
The mix of ham, asparagus and Havarti cheese worked well together. You could use any number of cheeses that you like. Swiss would be nice, Gruyere or even a sharp cheddar would also work.
I use a homemade crust, but you can use a store bought crust, if you prefer.
Ham and Asparagus Quiche
1 (9-inch) unbaked pie crust
1½ c. shredded cheese – I used Havarti
4 t. flour
1½ c. diced cooked ham
12 oz. asparagus, trimmed, cut in ½- inch pieces and steamed 3 minutes
4 eggs
1 c. milk or half and half
2 T. fresh chopped parsley or 2 teaspoons dried
¼ t. salt
1T. Dijon mustard
1 t. hot sauce
Toss cheese with flour in a bowl and place in pie crust. Sprinkle the ham and asparagus over the cheese and set aside. Combine remaining ingredients in a small bowl beating well to combine. Pour over the ham and asparagus mixture and bake in a preheated 400-degree oven for 15 minutes. Turn down heat to 350-degrees and bake until knife inserted off-center comes out clean, about 30 minutes more. Makes 1.
Note: This quiche freezes well. After adding the fillings just wrap in heavy foil and freeze solid until ready to bake. When ready to bake unwrap and allow to sit at room temperature for 30-60 minutes. Bake as with the fresh version, but add another 10-15 minutes to the baking time. If you don’t want to freeze the pie pan, you can line the pie pan with foil before you add the crust. Once it is frozen you can remove the frozen quiche from the pie pan and wrap, returning to freezer. When ready to use unwrap and put the quiche back in the pie pan before baking. Or, if you are planning on freezing it, you can use a foil pie pan.
10 Plants You Might Not Know You Can Eat
 A lot of people don’t realize how many common plants they can eat. I thought it might be fun to share a few of them with you. Some of these are plants we grow as landscape/ornamental plants. Others are more often thought of as “weeds”. All have one thing in common. They are edible.
Some you may already know. I hope I might show you a few edibles you didn’t know about before.
I tried to stick to plants that were easy to identify. If you are not sure what it is – don’t eat it. Don’t eat plants where pesticides have been sprayed, either.
With any luck, you have at least a few of these in your yard.
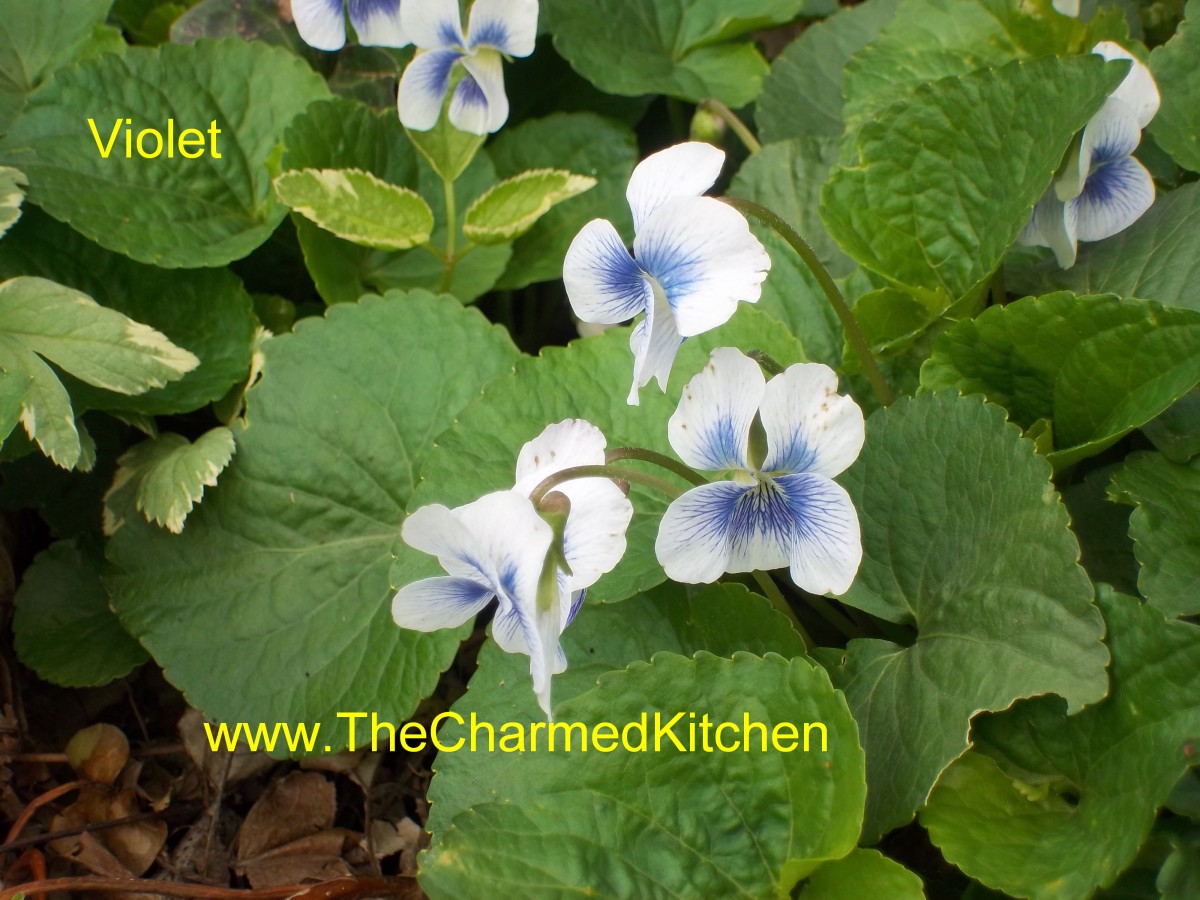 Violets: Violet flowers are edible and used to decorate pastries and to make jelly. Did you know you can also eat the leaves? They are mild flavored- especially when young- and are a great addition to salads. Violet leaves are also high in vitamin C.
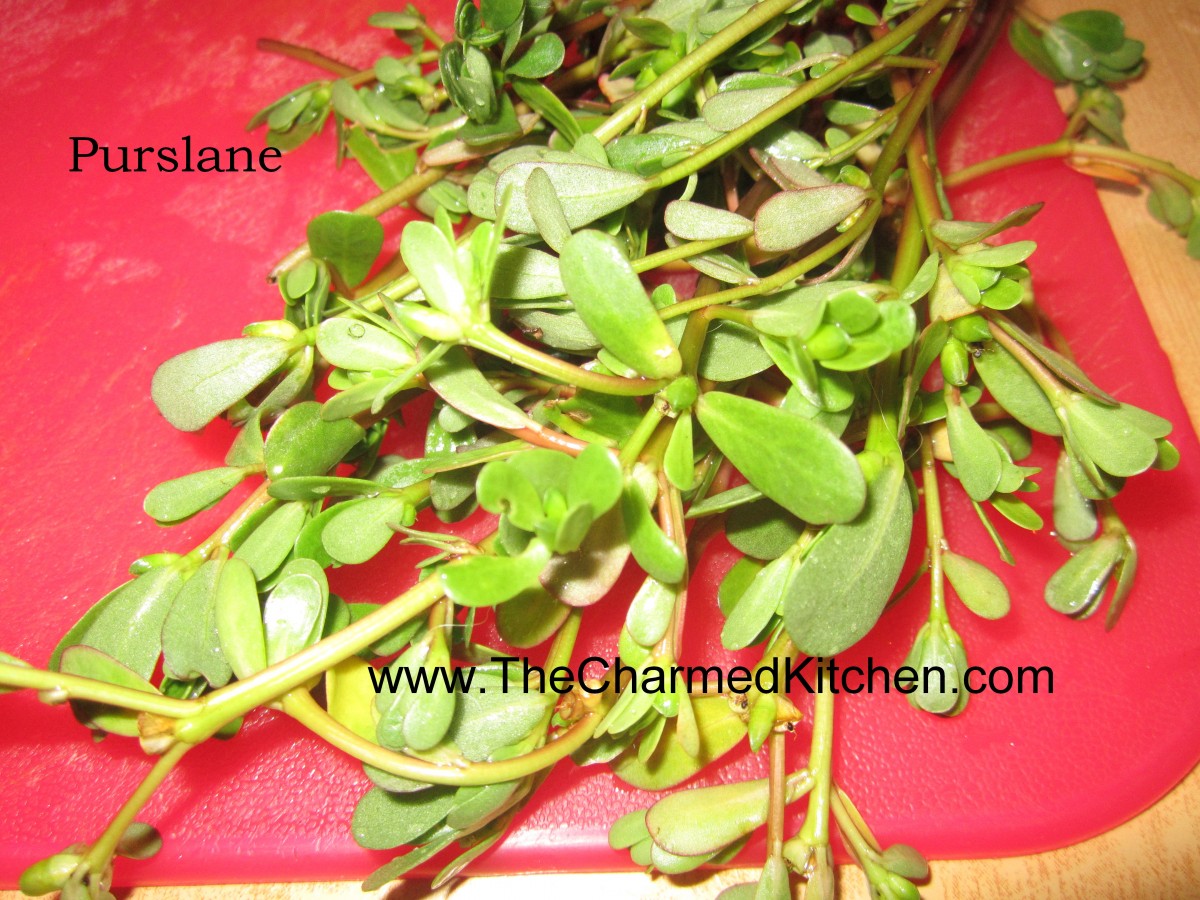 Purslane: The thick, fleshy leaves of purslane are easy to identify. Many vegetable gardeners make every effort to keep them out of their yards. Truth is, purslane is grown as a vegetable in many parts of the world. The leaves can be eaten raw in salads, can be cooked in a stir fry or just steamed as a fresh veggie. They can also be pickled. I make a salsa out of purslane leaves. They are crunchy with a slightly citrus flavor.
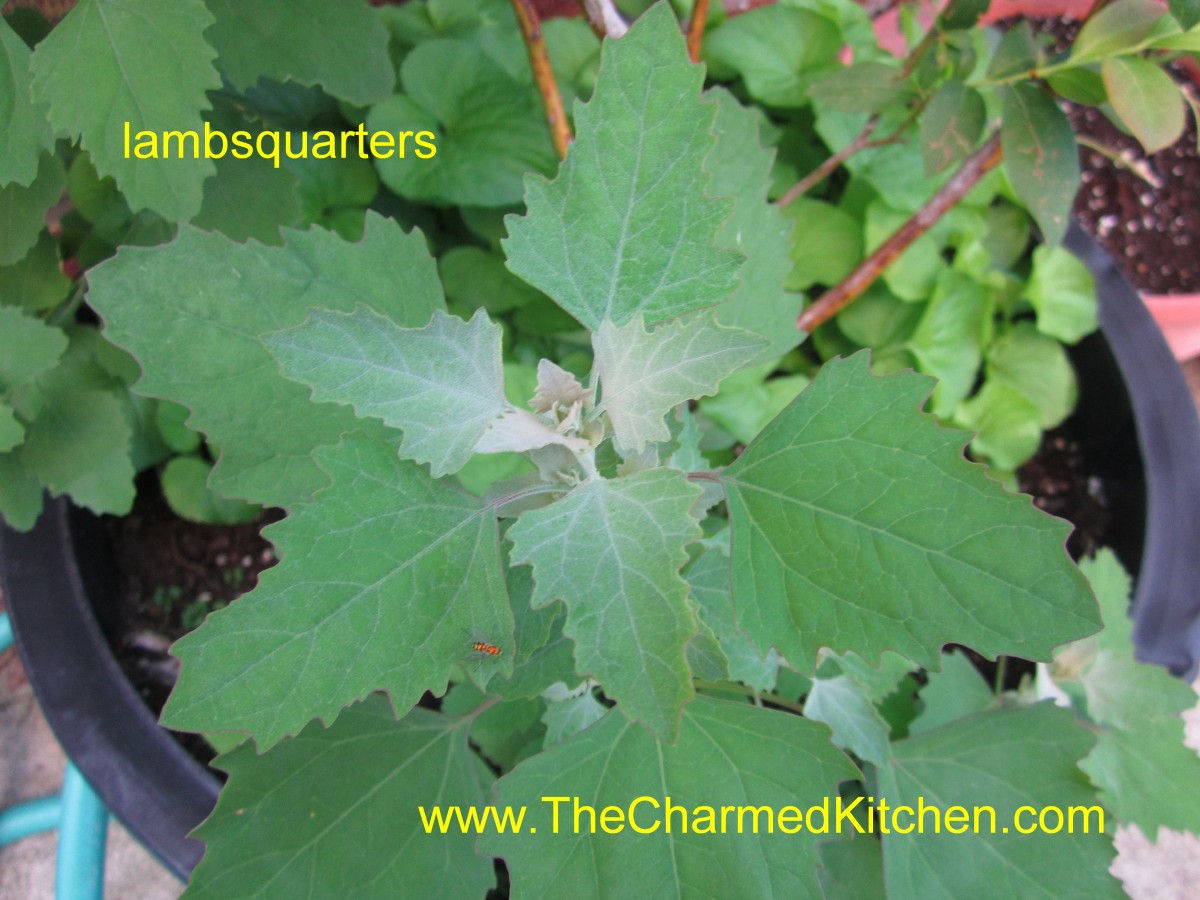 Lambsquarters: Lambsquarters are one of my favorites. They sprout all over my yard and in pots as soon as the weather warms up in the Spring. The leaves can be eaten raw when young or cooked as they mature. They taste just like spinach and are even better for you. Plants can get quite large and provide an easy harvest of nutritious greens.
 Dandelions: We spend so much money trying to kill them. Sad because they are really a tasty green. Dandelions were brought to America by European immigrants as a vegetable. Their bitter greens can be an acquired taste. By combining the greens with certain foods you make them taste less bitter. Starchy foods like breads or potatoes, dairy products, tomatoes and vinegars all seem to tame the bitterness. Dandelion greens can be eaten cooked or raw. Flowers are used to make jelly and wine and can be added to baked goods.
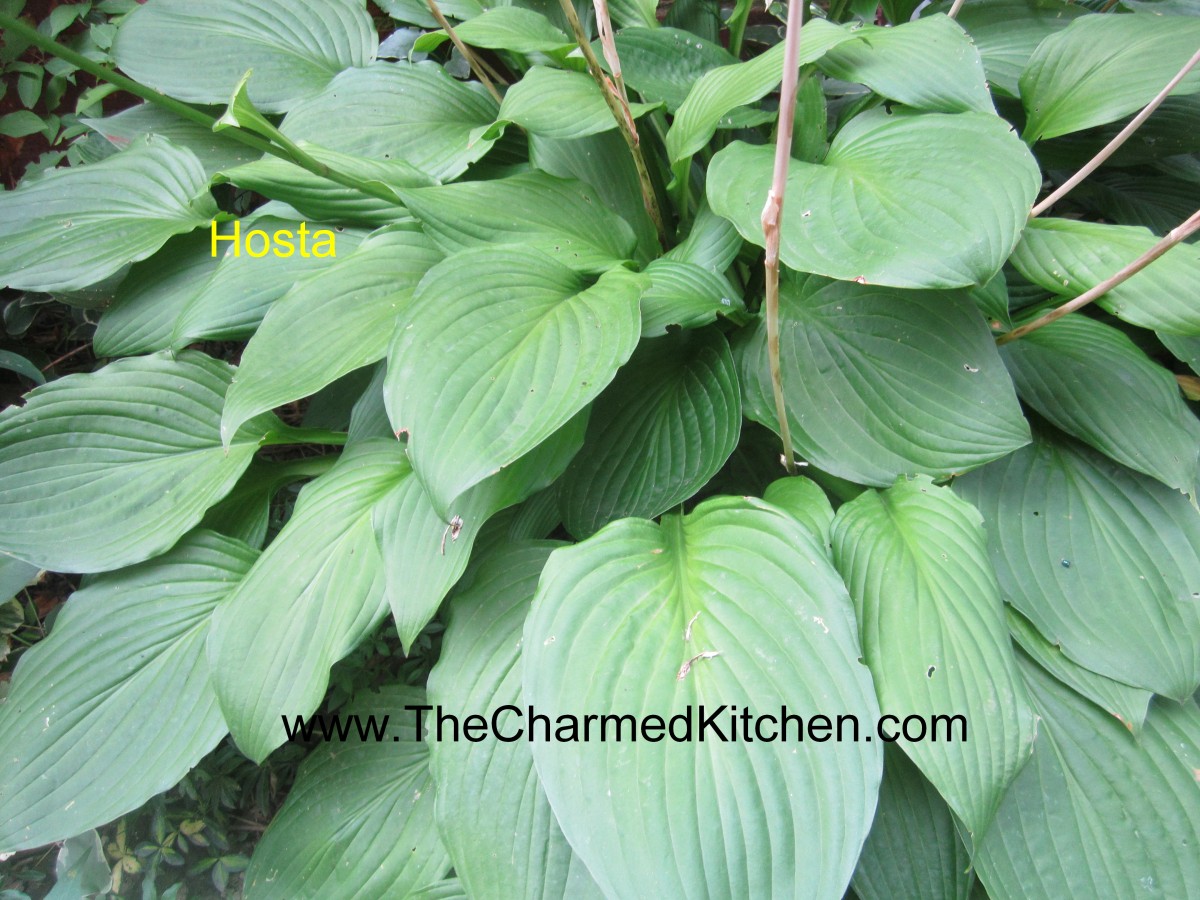 Hosta: If you can get to them before the deer do, you will be pleasantly surprised. Hosta leaves are quite mild flavored, similar to Bibb lettuce. I add them to salads and even serve them with dips. The older leaves get tough so pick young leaves.
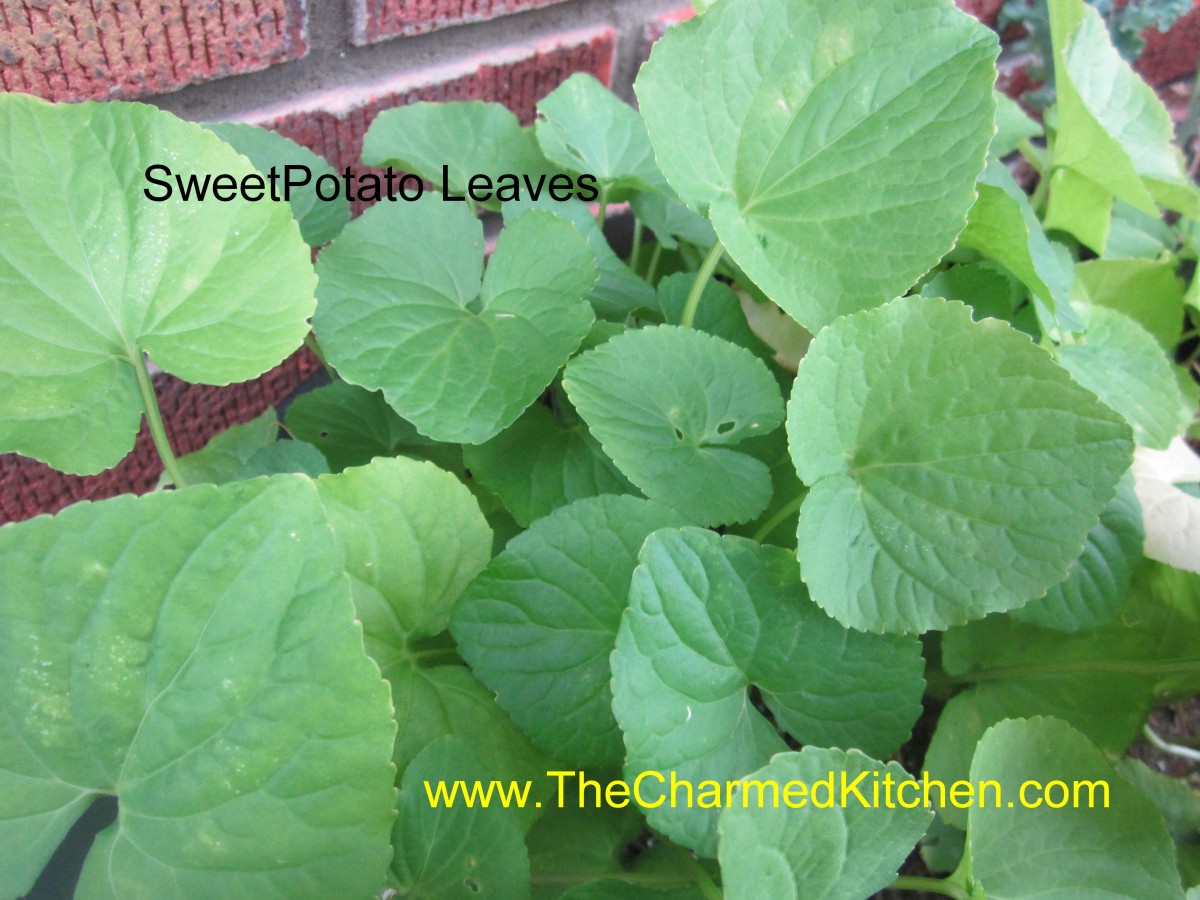 Sweet Potato Leaves: A friend from Hawaii first told me about eating sweet potato leaves. The leaves are pretty mild flavored. I normally eat them cooked although I have friends that eat them raw as well. You can eat the leaves of all sweet potatoes, including ornamental types.
 Lilac: Lilac flowers are fragrant and edible. I use them every year to make lilac infused vinegar. They have a nice spicy taste that works well in the vinegar. Blossoms can be added to salads, too. This year I also made lilac jelly.
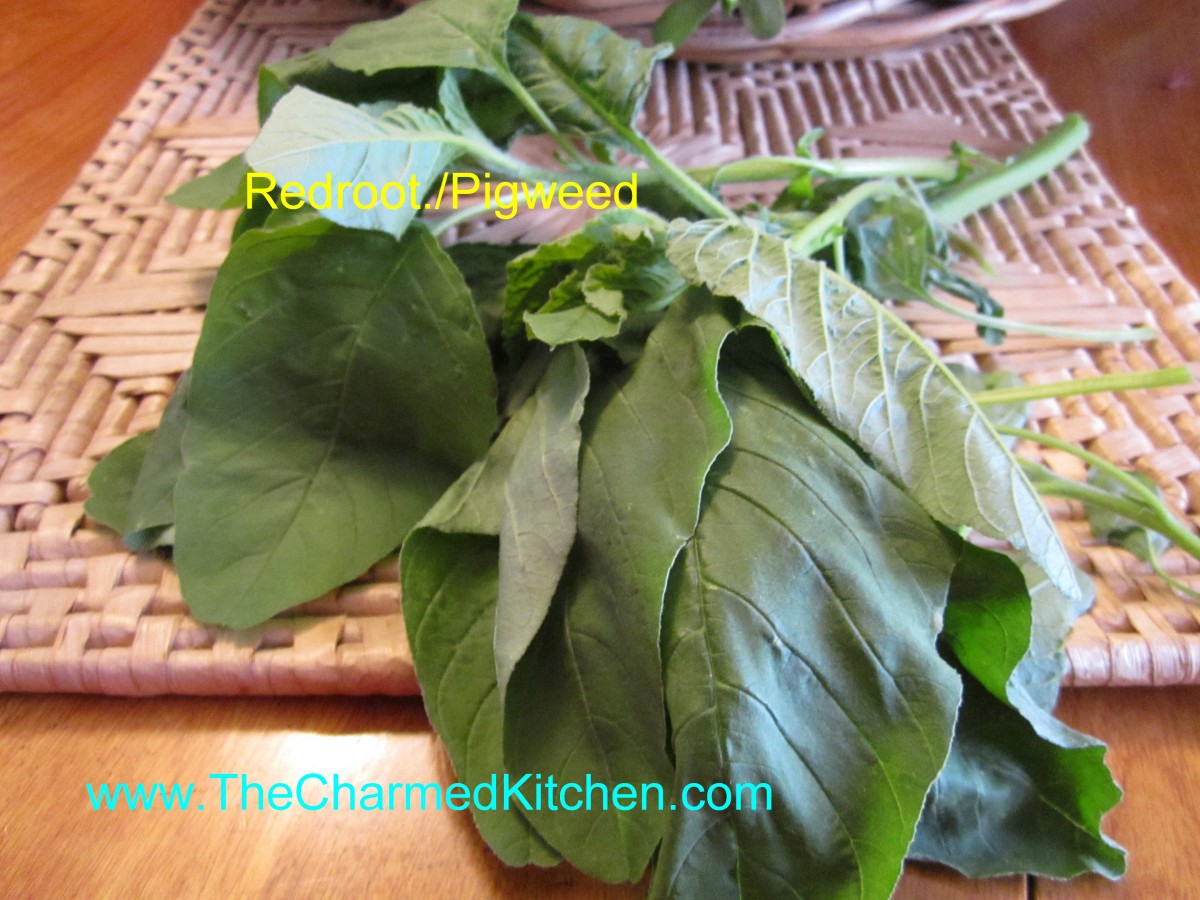 Redroot/Pigweed: This member of the amaranth family is distinguished by a reddish color to its roots. It has a spinach like flavor and can be cooked and used like spinach is any recipe. The plants can get several feet tall and often show up in places where the soil has been tilled.
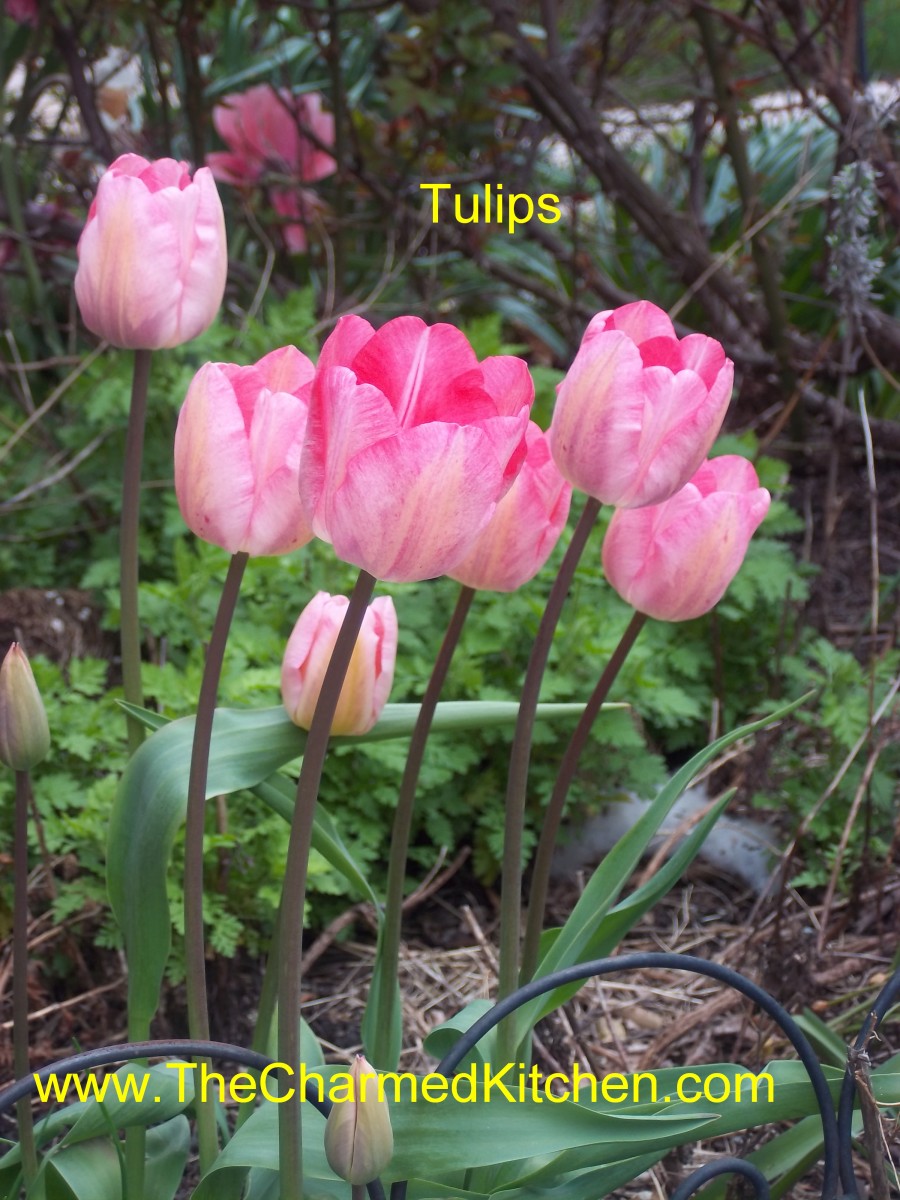 Tulips: Tulips are more than pretty, they are also quite tasty. The petals taste like a mild flavored lettuce and can add a beautiful touch to salads. The bulbs are also edible but we rarely eat them because to do so would destroy the plant. The petals, however, can be harvested and eaten year after year without harming the plant.
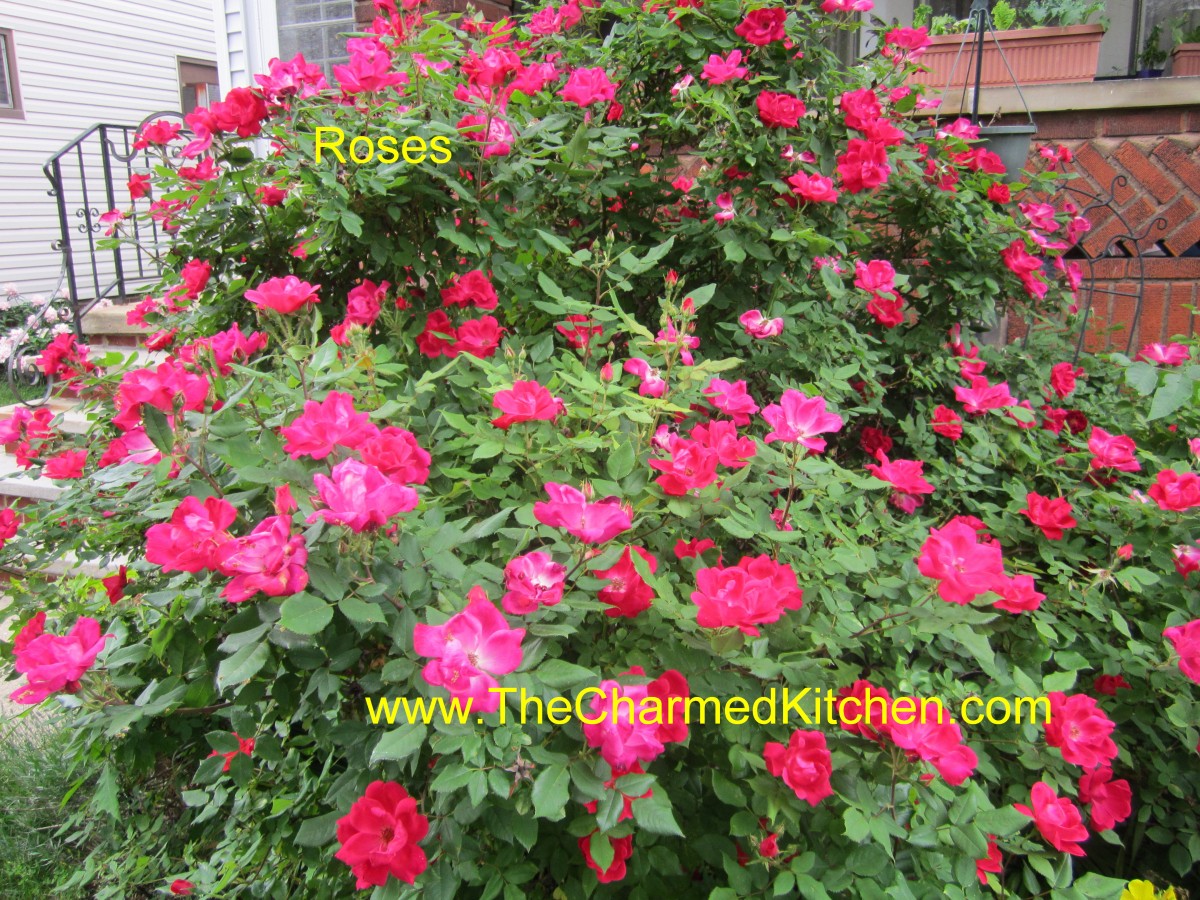 Roses: Rose petals have been used to make fragrances for a very long time. The petals are also edible and can be added to salads and used to make jelly, syrup and of course, rose water. The hips are also quite edible. Rose hips are the round balls that are left after the bloom is spent. They are full of vitamin C and can be cooked and used to make tea and jelly.
This is far from a complete list. Just a few things from my yard that I thought you might have, too.


