Herb Gardening Program
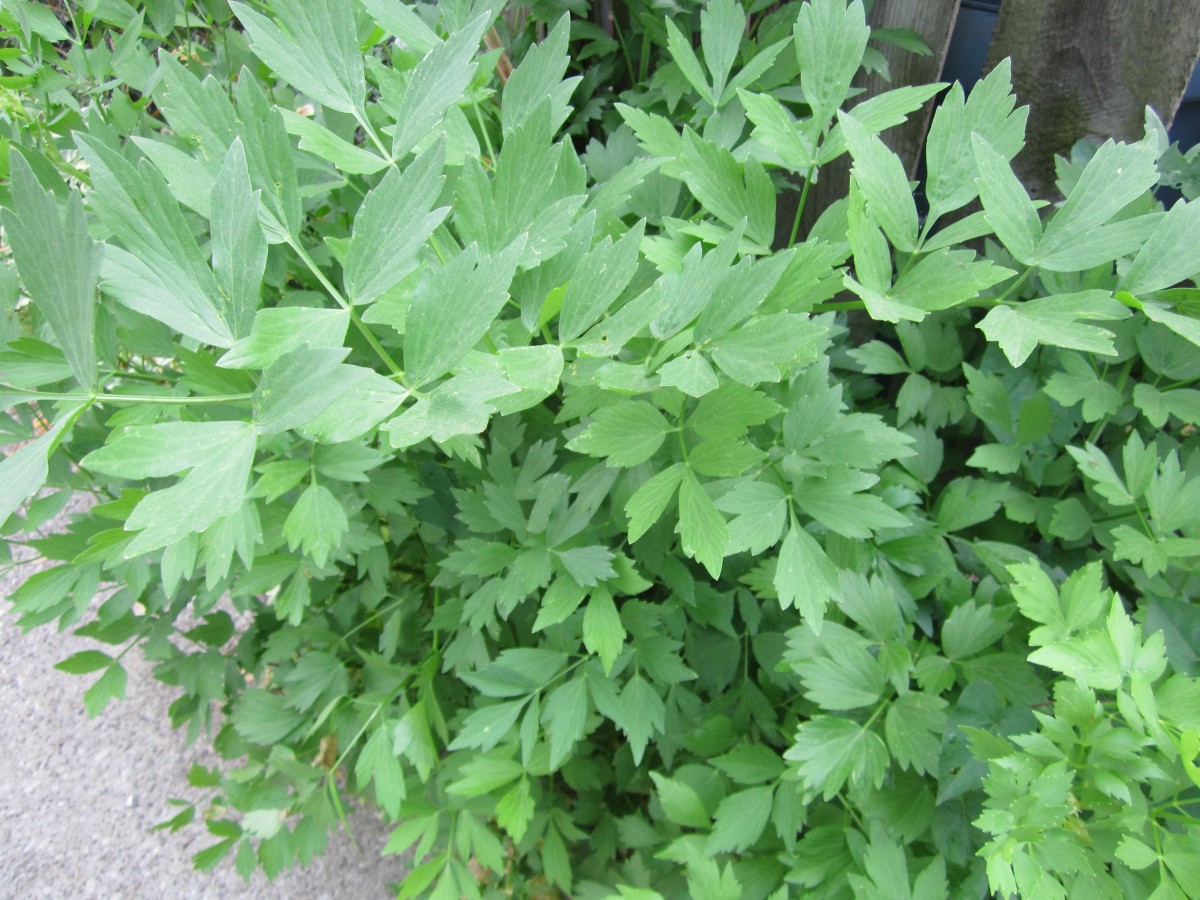
Lovage
I will be giving a talk tomorrow evening, on Herb Gardening at the Solon Library. After the recent snow- it might be nice to think about warmer days ahead.
This is a free program, open to the public. If you want to learn more about growing your own herb garden- please plan on coming.
Here are the details.
Herb: Spice Up Your Garden program on Monday, April 1 at 7pm at the Solon Library. The branch address is 34125 Portz Parkway, Solon, OH 44139
I have a few more programs coming up at other branches, in case you can’t make it tomorrow.
Easter Cupcakes

Trio of Easter Cupcakes
These cupcakes would make a great dessert for Easter- or any spring time party. They are also a fun dessert for kids to make.
I started out by making a double batch of my classic white cupcakes- recipe follows.
I also made a double batch of white chocolate frosting. You could certainly make a vanilla buttercream, if you prefer.
To add a little color to the cupcakes, I divided the batter into three bowls and tinted each of them a different pastel color.
As I filled the pans, I just added a spoonful of each of the tinted batters in them. They came out really nice. I made three different cupcakes: bunnies, chicks and nests.
Details on how to make each of them are listed below.
Classic White (Vanilla) Cupcakes
1 cup sugar
1/2 cup butter
2 eggs
2 teaspoons vanilla extract
1 1/2 cups all-purpose flour
1 3/4 teaspoons baking powder
1/2 cup milk
Preheat oven to 350 degrees. Line a muffin pan with 12 paper liners. In a medium bowl, cream together the sugar and butter. Beat in the eggs, one at a time, then stir in the vanilla. Combine flour and baking powder, add to the creamed mixture and mix well. Finally stir in the milk until batter is smooth. Pour or spoon batter into the prepared pan. Bake 20 to 25 minutes. Cupcakes are done when they springs back to the touch. Makes 12.
White Chocolate Frosting
6 oz. white chocolate – if using bars, chop before melting
1 stick (4 oz.) cold butter, cut into cubes
1-2 c. powdered sugar
1 t. vanilla
Melt chocolate. I just melt mine in a microwave safe dish, but you can use a double boiler. Let chocolate cool down a little. Beat butter into the melted chocolate. Beat until smooth and then beat in the powdered sugar and vanilla. Whip until frosting is smooth and fluffy. I normally beat for 5 minutes or longer. If too thick, add a few drops of water or milk. For this recipe, I made a double batch of frosting.
Bunnies
extra white chocolate
food coloring- pink or red
chocolate chips
pastel ( pink) M&M’s
Make bunny ears by melting some white chocolate and putting it in a piping bag or bottle. On wax paper, make outline of the ears in white chocolate and allow to cool/harden. Place a drop or two of pink or red food coloring in a microwave safe bowl and add some white chocolate. Melt in microwave, being careful not to burn the chocolate and stir until it turns pink. Pipe the pink chocolate into the middle of the ears. Allow to harden before peeling off of the was paper. Using a star tip, pipe frosting on cupcake. I made three layers – to add height to the cupcake. place ears on cupcake and add chips/candy for eyes and mouth.
Chicks
Frosting tinted yellow and green
mini chocolate chips
fruit roll up
Using star tip, pipe the chick’s body onto the cupcake in yellow frosting. Pipe on head and wings. Pipe green frosting around chick to form a nest. Use mini chips for eyes and cut fruit roll up for beak.
Nests
Frosting tinted green
egg shapes malted milk balls- or you could use jelly beans
Pipe green frosting on cupcakes to make nests. Add three, or more, candies in the middle for eggs.

Piping pink filling in ears
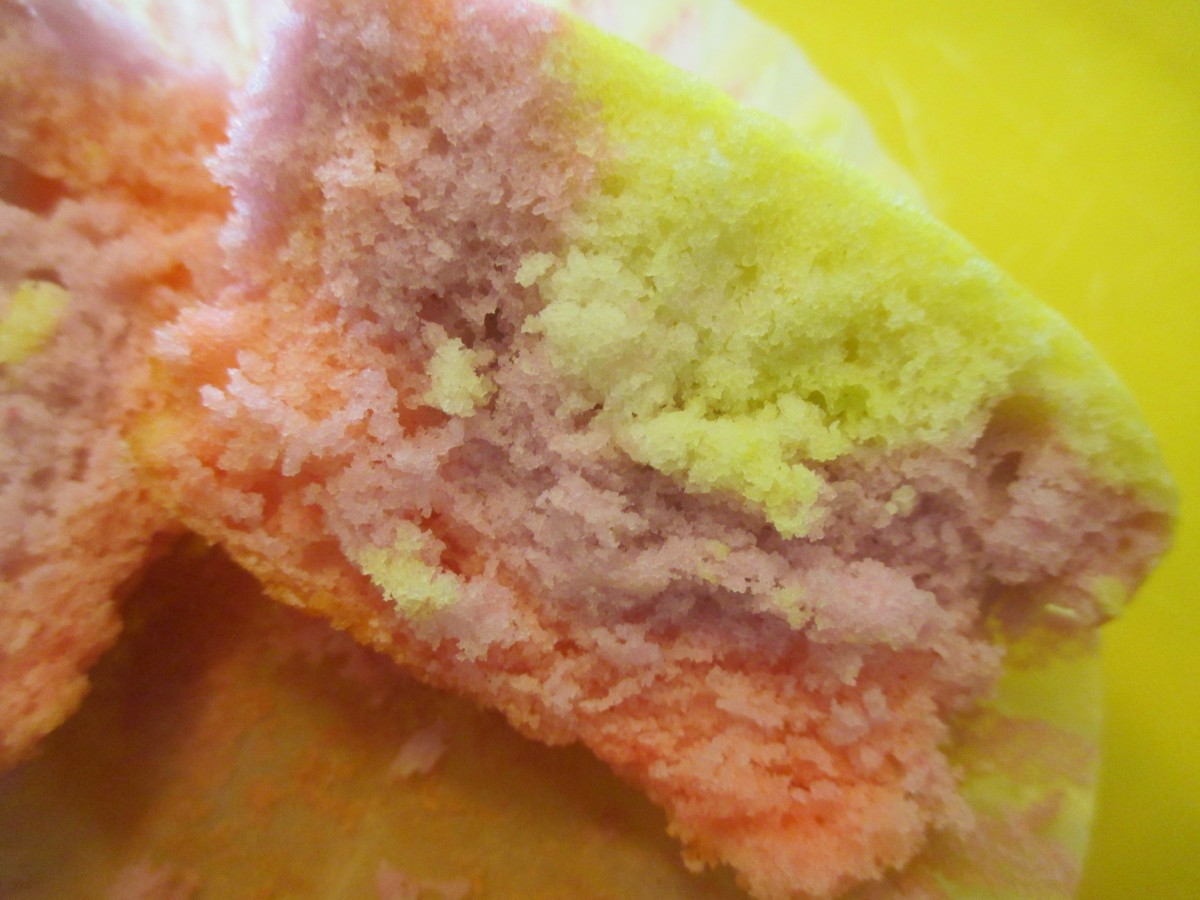
rainbow cupcake

bunnies
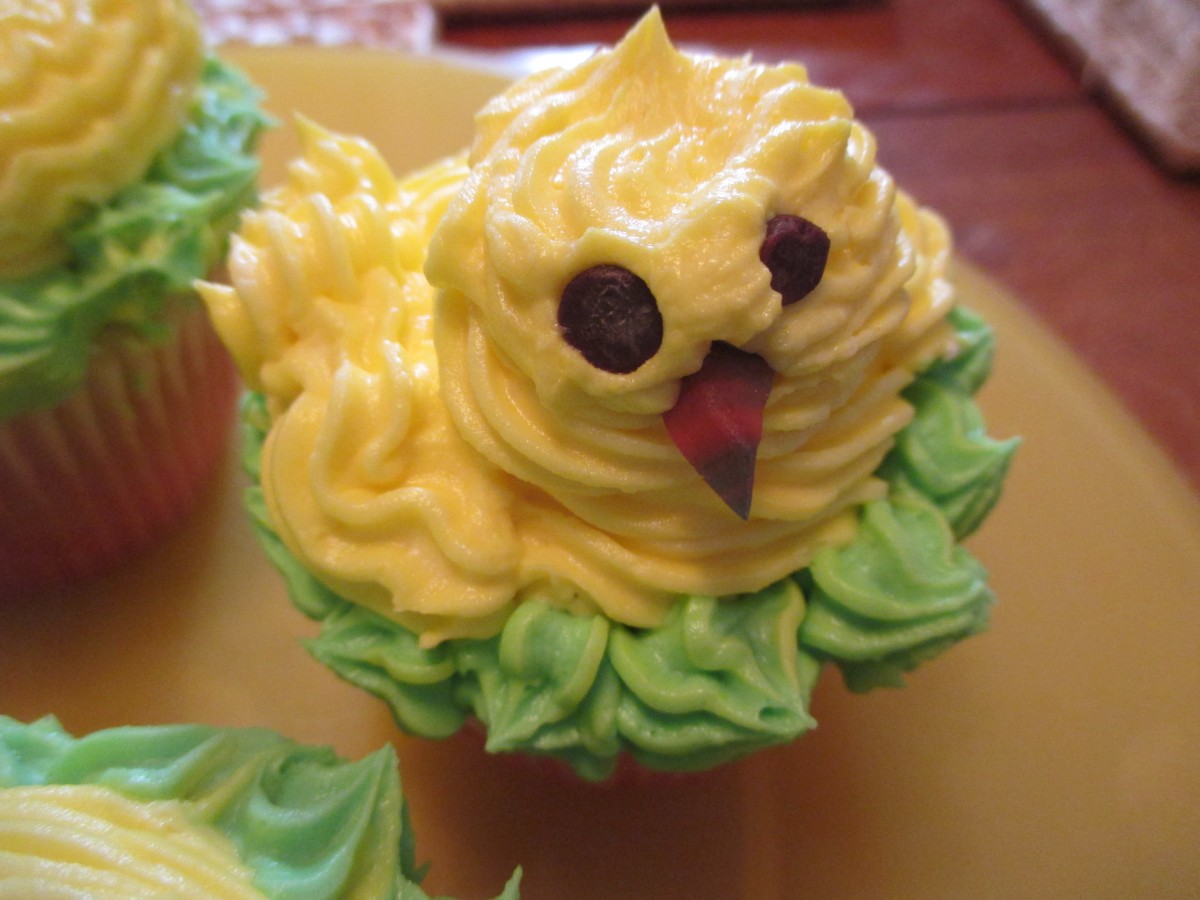
Chick cupcake
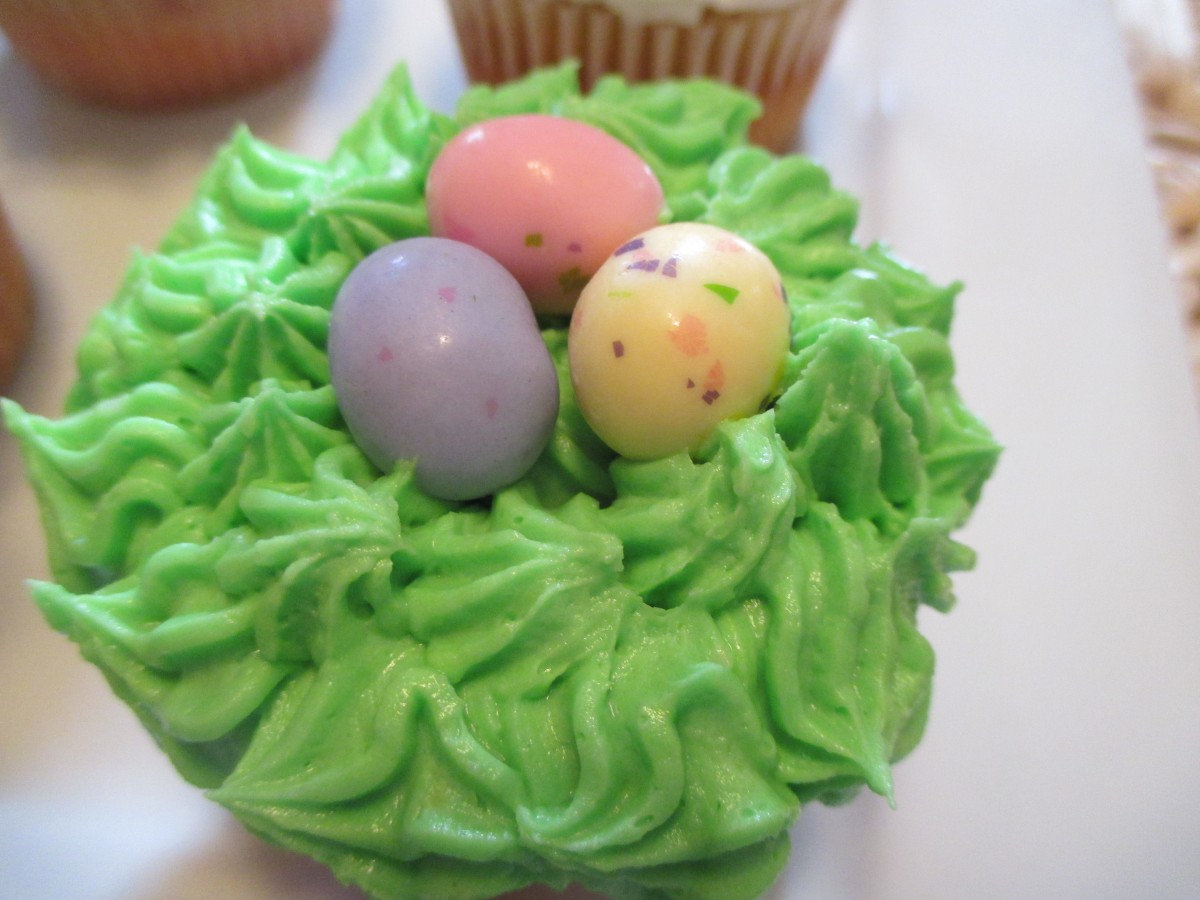
The nest cupcake
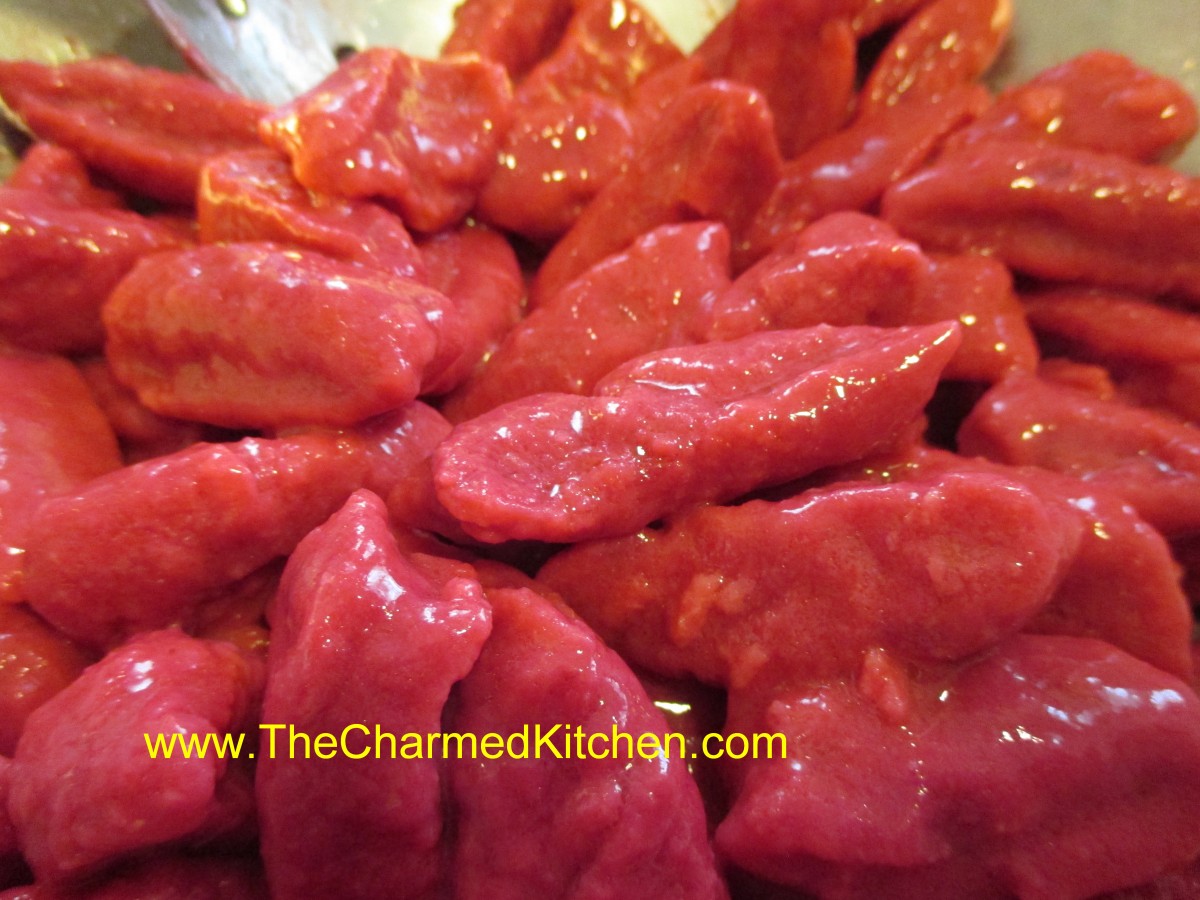
Really Good Crab Cakes
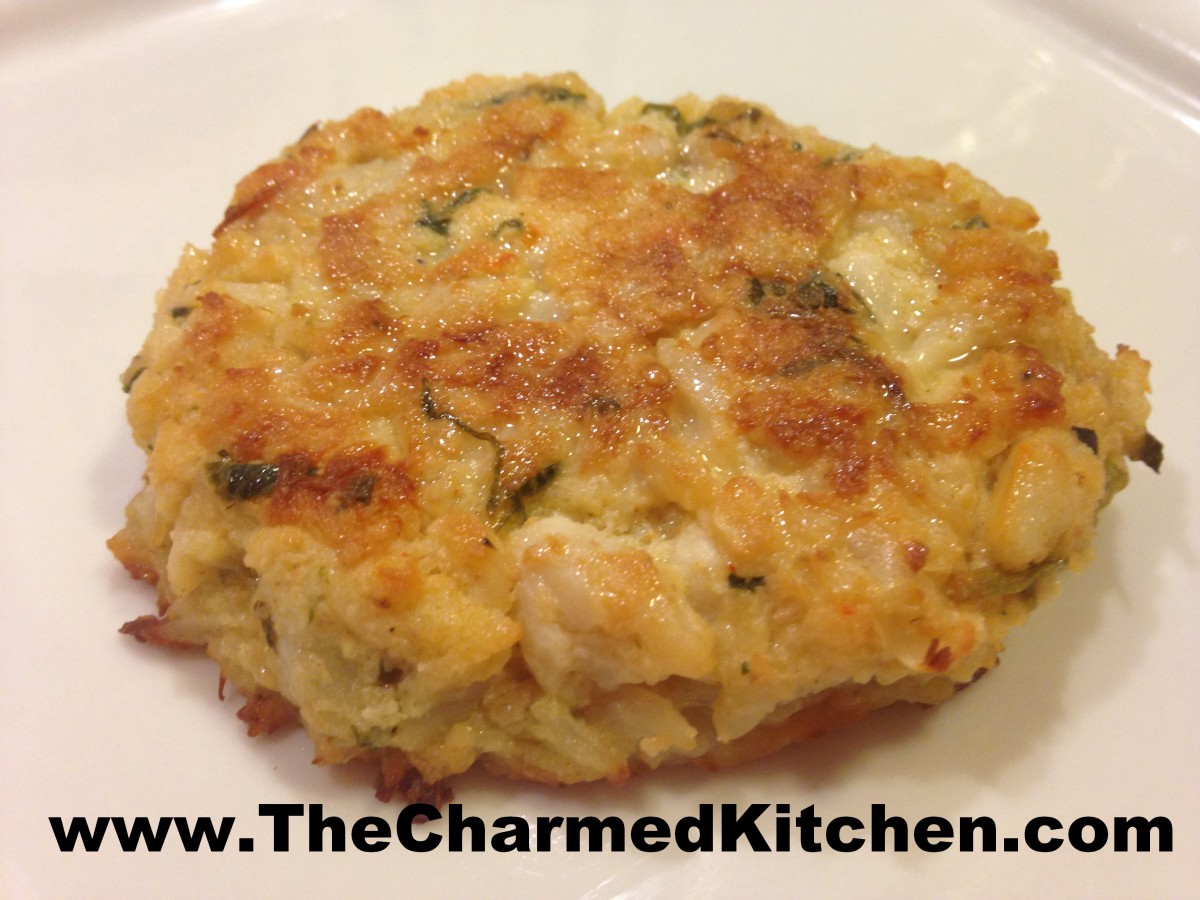
Crab Cakes
Crab cakes are one of those foods I save for special occasions. I had good friends over for dinner last night. I wanted to make something special- so I made them crab cakes. They loved them.
Both friends said they had not been big crab cake fans before. Past experiences had been less than amazing. They loved mine- said they were “really good.”
The secret to crab cakes it adding just enough ingredients to hold the crab meat together, without losing the beautiful texture of the crab in the process. These crab cakes did all that.
I used a little sour cream to help hold them together and to add moisture. I know many who prefer mayo as a binder. Either works, I just like sour cream.
I have pan-fried them in the past, but decided to bake these in the oven. Either method works. It just comes down to what you prefer. By baking them, I had more time to get the rest of the dinner together. We ate our shrimp and corn chowder while the crab cakes baked.
We had them with fresh asparagus with hollandaise , coleslaw and croissants. It was a truly special meal.
Really Good Crab Cakes
2 eggs
2 T. sour cream or Greek yogurt
1 t. thyme
1 t. lemon juice
½ t. cayenne pepper
½ t. dry mustard
Salt to taste
¼ c. fresh chopped parsley
¼ c. fresh chopped green onions or chives
About ½ c. breadcrumbs
1 lb. lump crab meat
Olive oil
Mix all the ingredients together, except oil. Start with about ¼ cup of the breadcrumbs and add just enough to hold the mixture together. Mixture will be crumbly. Form into patties- you can make 4 large or 8 small.
You can cook them one of two ways.
To bake: Place the crab cakes on a lightly oiled baking sheet and brush the cakes with a little more oil. Bake in a preheated 450- degree oven for 15 – 18 minutes, for small cakes. Bake 20-24 minutes for large cakes. Turn them once during baking to brown both sides.
To pan fry: Heat skillet to medium hot. Add oil and gently add the cakes. Cook for 4-5 minutes per side, or until golden brown and crispy. Turn once, carefully, to brown on both sides.
Rainbow Pierogi
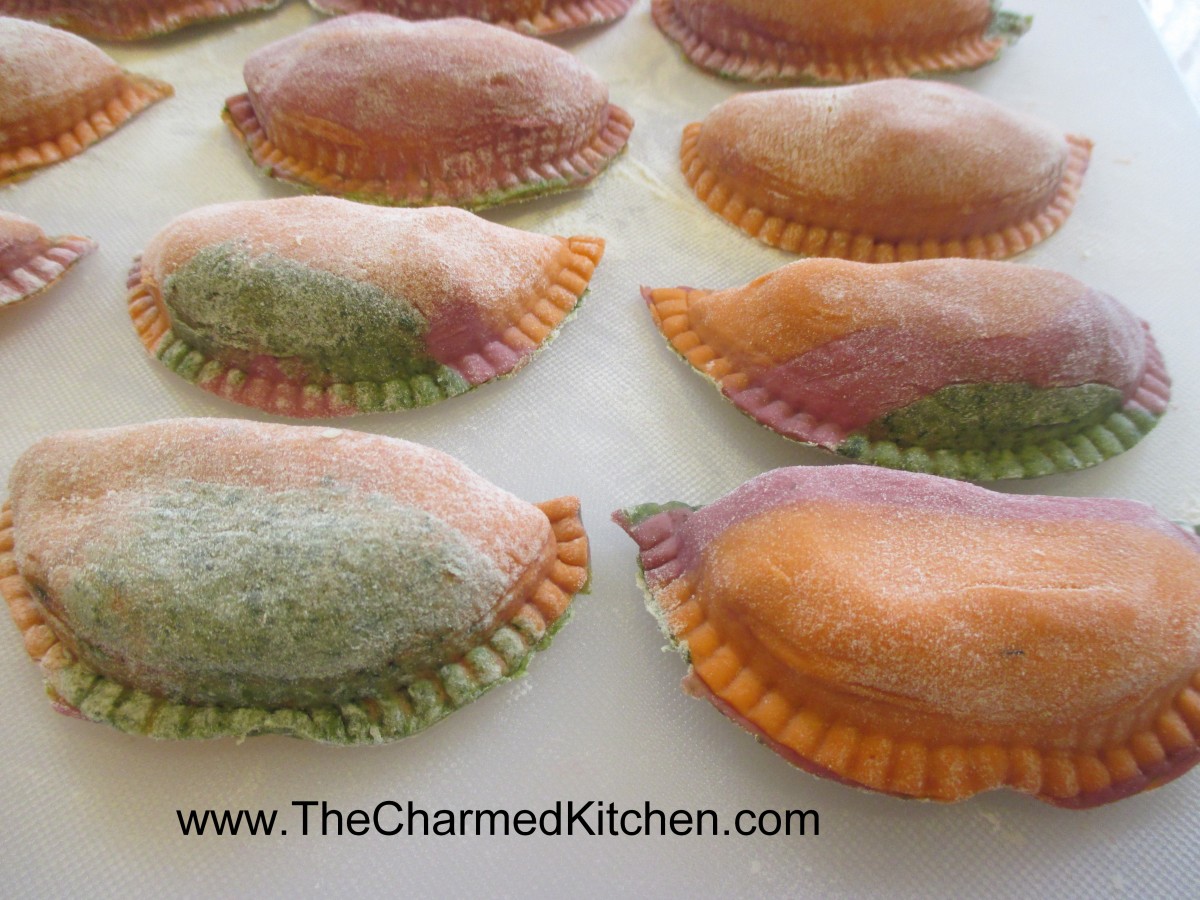
Rainbow Pierogi
Pierogi, if you don’t know, are filled dumplings. They are part of my Polish heritage. Pierogi are often filled with potatoes, but they can be filled with any number of ingredients. They are a nice choice for a meat-free dinner.
I used a potato and cheese filling, so that part is pretty traditional. The dough I made- not so traditional
I already enjoy making pasta with veggie- based dough. The colors are so pretty, and I love the way they taste. So, I went a step further and used my veggie-based dough to make these colorful pierogi.
These are so pretty for any Spring dinner. They would also be nice for Easter- they sort of look like Easter eggs!!!
You can freeze them, too. So if you make a big batch- you can enjoy them for several meals.
I served them with sauteed onions and sour cream. Here is the recipe for all.
Rainbow Pierogi
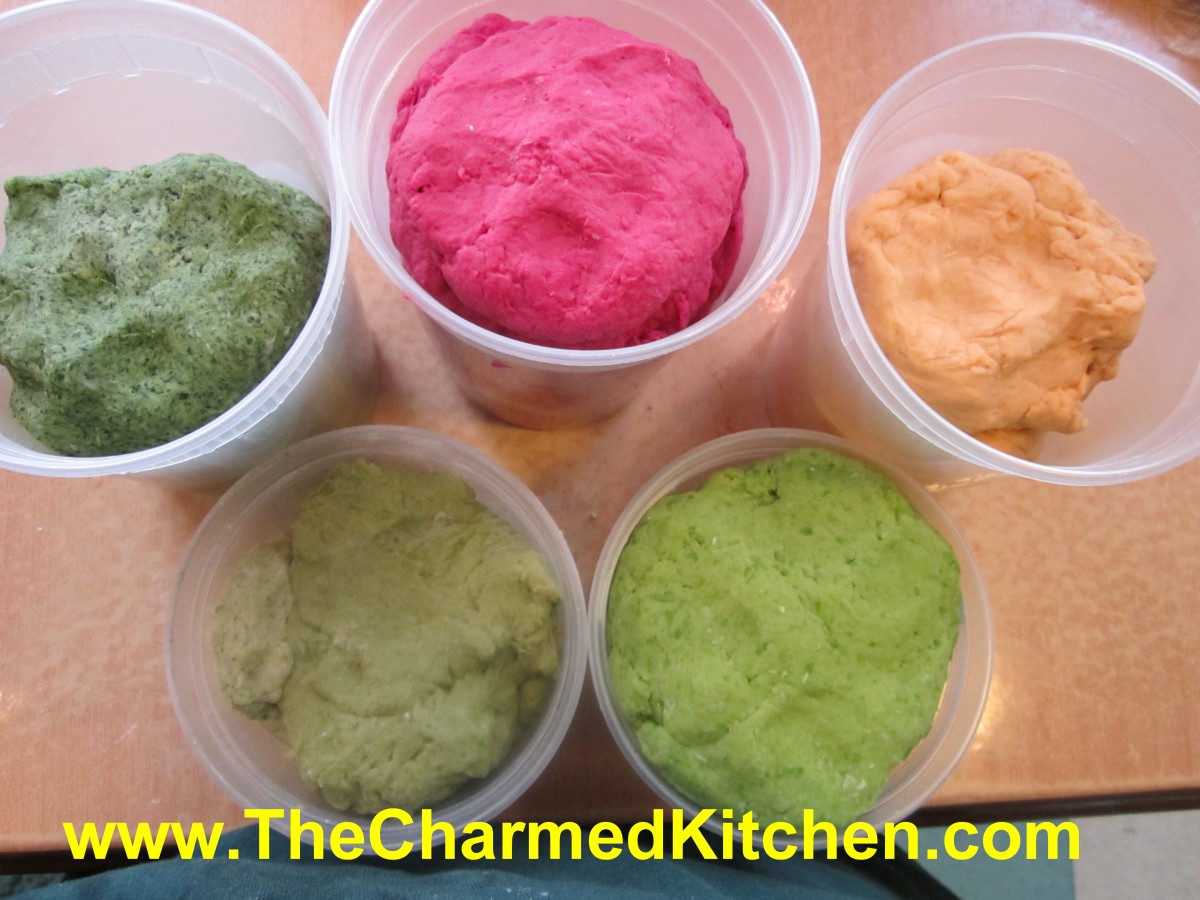
All of the vegetable doughs were mixed using a food processor. If you want to mix them by hand- puree the veggies first. Once the doughs are made allow them to rest at least 30 minutes. Since veggie pasta dough tends to be a little softer than traditional pasta- I actually prefer to make them a day ahead and chill. Chilling the dough, even for an hour, will help. The traditional pierogi dough was mixed in a stand mixer.
To make the pierogi a little sturdier, you can also make regular pierogi dough and mix a little of that dough in with the veggie-based doughs.
When ready to roll out your dough, grab a hunk of each dough and press them together. If the the dough is a little sticky that will help. Then on a floured surface roll out to the desired thickness. Folding and rolling a couple of times helps to mix up the color pasta better. I use a template to make my pierogi- but you can cut them out with any round cutter or even a glass or jar. Spoon filling of your choice on center of dough circle. Fold dough in half over filling and press edge with fork to seal. Wetting the edge of the dough will help the dough to stick. Don’t overfill or pierogi will split. Test a couple first to get the hang of it. Place a few at a time into salted boiling water and cook until they float. You can eat them as is, or brown cooked pierogi in butter in a skillet. Serve with grilled onions and/or sour cream. We would often make a larger batch and then freeze them, uncooked, on wax paper-lined baking sheets. When frozen they would be transferred to a freezer bag or container. Place right from the freezer into boiling water when ready to use.
Carrot Pasta
1 c. flour
1/2 t. dried dill
1/3 c. carrot puree
1-2 T. water, if needed
Beet Pasta
1 c. flour
1/2 t. dill
1/3 c. beet puree
1-2 T. water, if needed
Spinach Pasta
2 c. flour
1 10 oz. package frozen spinach, cooked, drained, reserving some of the liquid
Mix this dough as for other pastas, but don’t be too quick to add reserved liquid. While kneading you’ll get water out of the spinach. May require more kneading and rolling than other pasta doughs. Be patient, it’s worth the work.
Classic Pierogi Dough
2 c. flour
1 t. salt
½ c. water (you can also use half milk and half water)
1 egg
Mix all ingredients together and knead on floured surface until smooth. Cover and let rest at least 15 minutes. Roll out thin and cut into circles. Re-roll scraps. You should get between 20-30.
Pierogi Filling
1 lb. Potatoes, peeled and boiled
4 oz. cream cheese – normally I would use farmer’s cheese or cottage cheese, but cream cheese was what I had
1/2 c. shredded cheddar cheese, optional
salt and pepper to taste
Mash potatoes with other ingredients and season to taste.
I usually add some chopped sweet onion to my filling, but one of my guests isn’t crazy about onions, so I am leaving them out. Feel free to add some, if you like.
Veggie Pasta Dough
Easter Bread Wreath
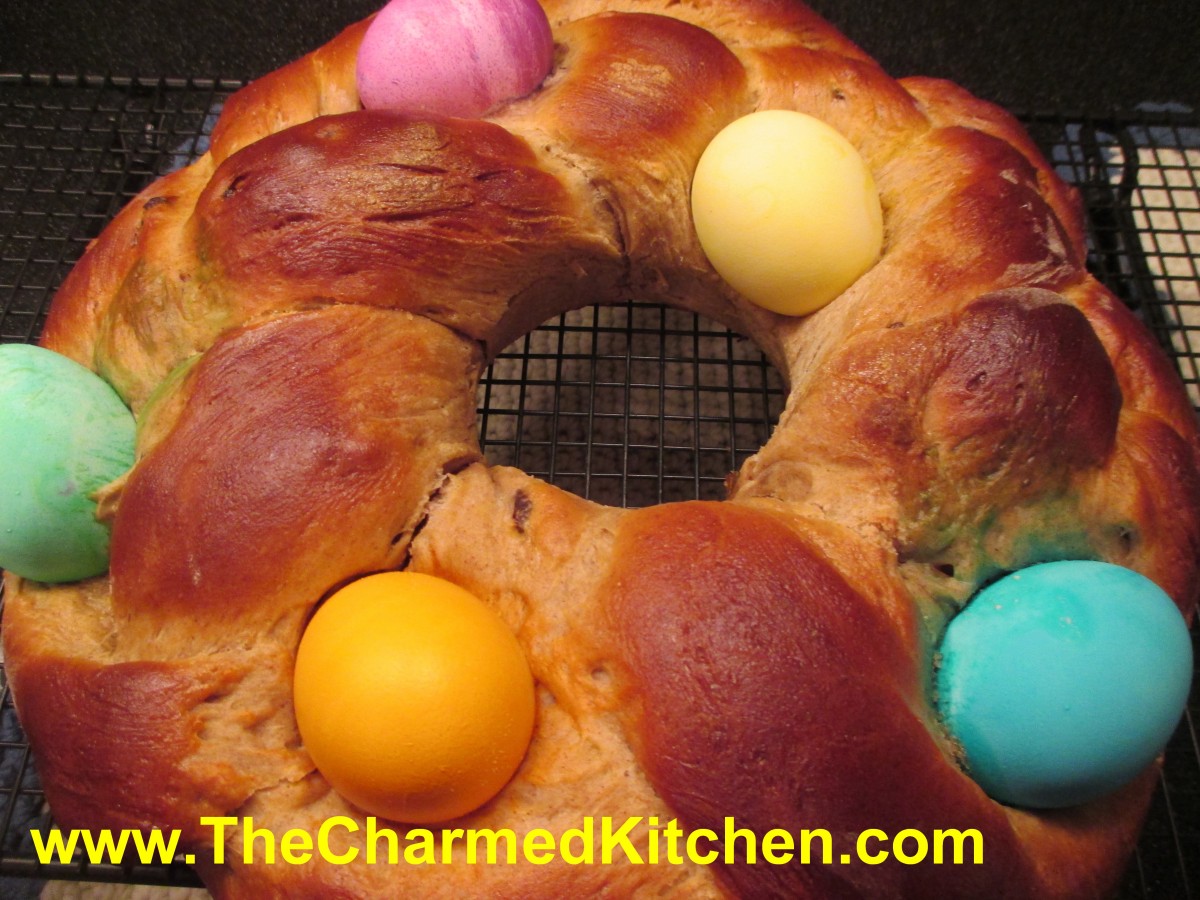
Easter Bread Wreath
This Easter bread wreath, with eggs baked on top, is a fun bread to make for the holiday. It is a tradition in many families.
I hadn’t made one in a long time, and when I went to find my recipe, I couldn’t locate it. I decided to make a new recipe.
I wanted it to have a lot of flavor- something that would be fun served at a breakfast, brunch or with dinner, but not too sweet. I added spices and raisins, but I could see using other dried fruits.
I left it plain on top – but you could easily add a powdered sugar glaze. No, I did not hard cook the eggs first. They cook while the bread is baking. Saves a step, for sure.
I tested the bread out with friends. Almost half was eaten before dinner, so I am confident to say, that this recipe is a winner. The texture of the bread is really nice and the dough is richly spiced.
I added mace, but if you don’t have any mace, add a little more nutmeg or allspice. Mace is a spice I would encourage you to try sometime. So here is the recipe. Hope you like it as much as we did.
Cinnamon Raisin Easter Wreath Bread
4½ -5 c. flour
1 pkt. yeast
½ c. brown sugar
2 t. cinnamon
1 t. salt
½ t. allspice
½ t. nutmeg
½ t. mace
1 c. warm water
½ c. butter, melted
2 eggs
½ c. raisins
5-6 uncooked eggs, dyed if you like
Combine 2 cups flour, yeast, sugar, seasonings and salt in large bowl. Heat together water and butter until warm and add to flour mixture. Beat 2-3 minutes. Beat eggs and reserve 1 tablespoon of the eggs for brushing the top of the bread later. Add remaining eggs and another cup of flour to the bowl. Beat 4 minutes. Add the raisins and enough of the remaining flour to make a soft dough. Knead on a floured surface until smooth and elastic, but still soft. Place in oiled bowl turning to oil top. Note: I actually used my stand mixer, and just left the dough in the bowl to knead, and then covered it to rise. I was able to leave the dough a little sticky this way, using less flour. Cover and let rise until doubled, about 45 minutes. While dough is rising, prepare a pan. Grease a large baking sheet- or use a silicone baking mat. Grease a one cup oven-proof custard cup and place it upside down on the middle of the baking sheet. This will keep a “hole” in the middle of your wreath. If you don’t have a custard cup, you can use a metal one-cup measure instead. Punch dough down and divide in three pieces. Roll each piece into a 20-inch long rope. Braid the ropes together. Wrap the braid around the custard cup on the baking sheet and pinch ends together to keep the braid from coming apart. Cover and allow to rise until doubled (50-60 minutes). Just before baking, combine reserved egg with a little water and brush the wreath with the egg wash. Place 5 or 6 eggs on the top of the braid- being careful not to press down too hard. Bake in preheated 350-degree oven for 25 minutes. Cover bread with foil and bake 10-15 minutes longer, or until bread sounds hollow when tapped lightly. Here is the only tricky part. You have to remove the wreath, but not drop the glass custard cup in the middle. You can let the bread cool a few minutes before moving. I use a silicone baking sheet so I slide the whole thing off the baking sheet and onto a cooling rack. I use two large spatulas to lift the wreath up and leave the custard cup behind. If it doesn’t come right out, use a knife to loosen. Just lift the wreath up enough to slide the custard cup out. Let cool before serving- store leftovers in fridge – because of the eggs on top. Makes 1.
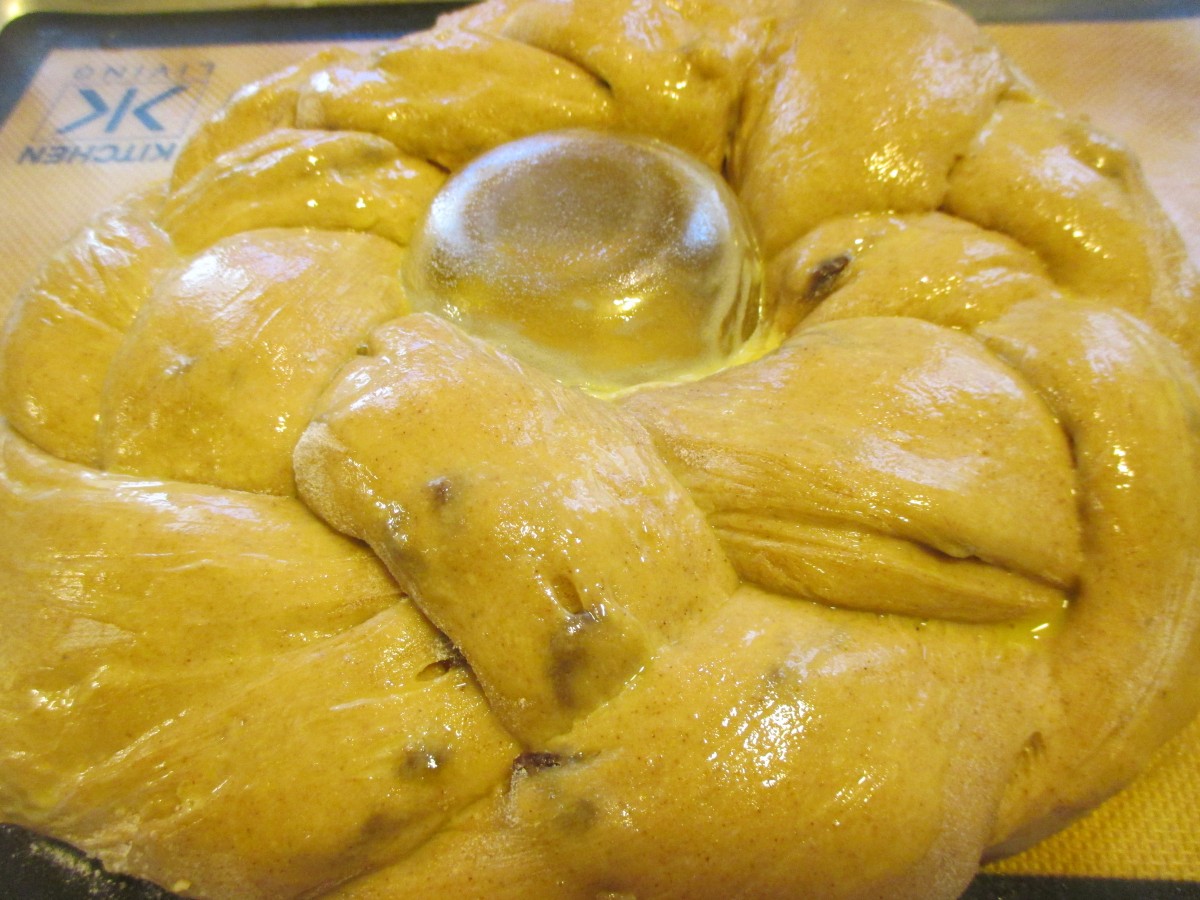
Ready for the oven
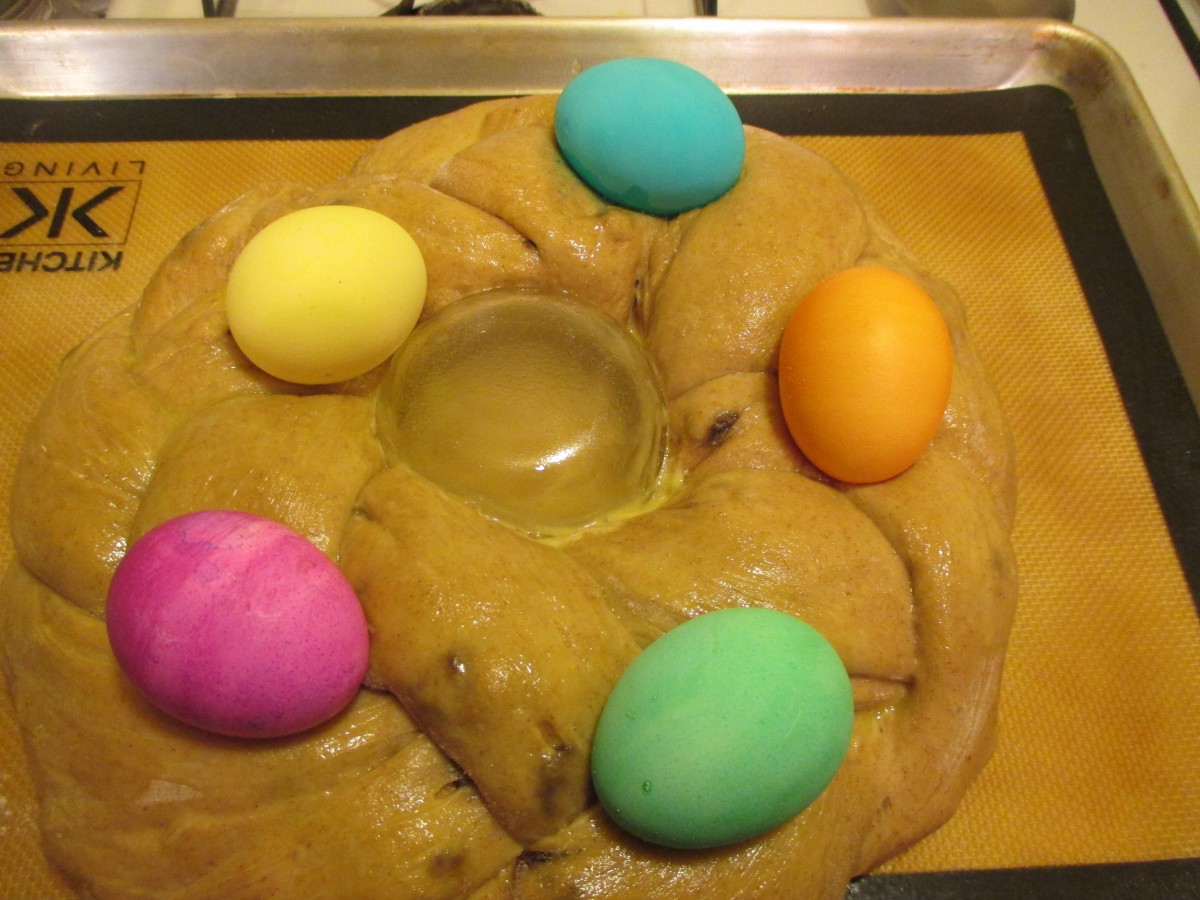
Place eggs on top before baking
Scotch Eggs
Scotch Eggs
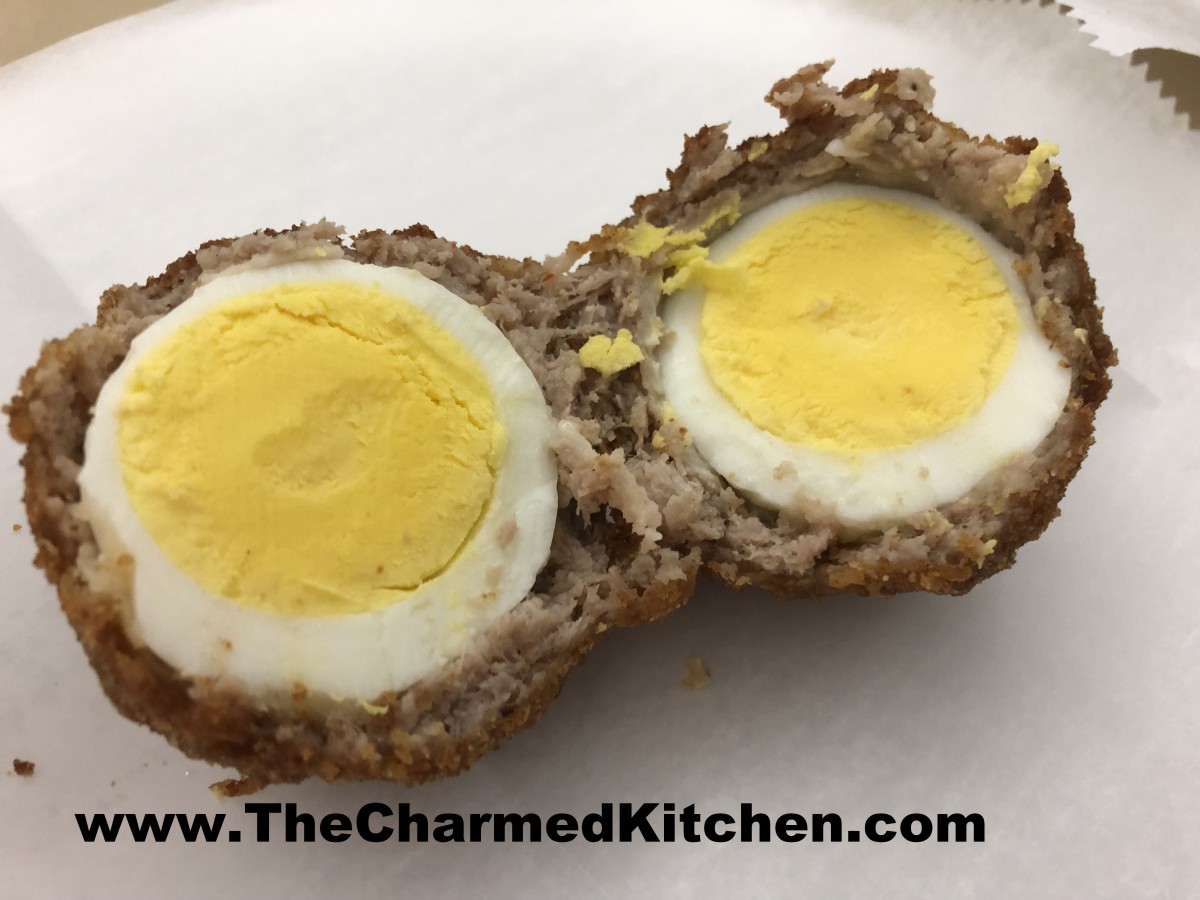
Scotch eggs are a fun dish to make for breakfast, brunch or dinner. If you never had one before, a Scotch egg is a hard cooked egg, encased in sausage, then breaded and fried. They are really good.
We made them in a British cooking class last night and everyone loved them.
The first time I had Scotch eggs was when my friend, Dale, made them and brought them to a party. I have loved them ever since.
This is also a fun dish to make after Easter, when you might have hard-cooked eggs you are wanting to use.
Scotch eggs can be served plain, or with a dipping sauce. I used a pork breakfast sausage, but you could use a different sausage, if you like. Hot sausage would be good. You can make them the day before, then just warm up before serving.
Scotch Eggs
6 hard-cooked eggs, well chilled
1 pound breakfast sausage
1/2 cup flour
2 eggs, beaten
3/4 cup fine bread crumbs
Vegetable oil for frying
Peel eggs and set aside. Divide sausage into 6 portions. Roll each egg in flour and with hands press a portion of the sausage around each egg. If the sausage sticks to your hands, dip your hands in a little water to make pressing the sausage easier. Dip sausage-wrapped eggs into beaten eggs and roll in bread crumbs. Heat vegetable oil to 350 degrees. Cook each egg in oil about 4-5 minutes or until sausage is cooked and browned. Drain on paper toweling. Serve warm. Makes 6.
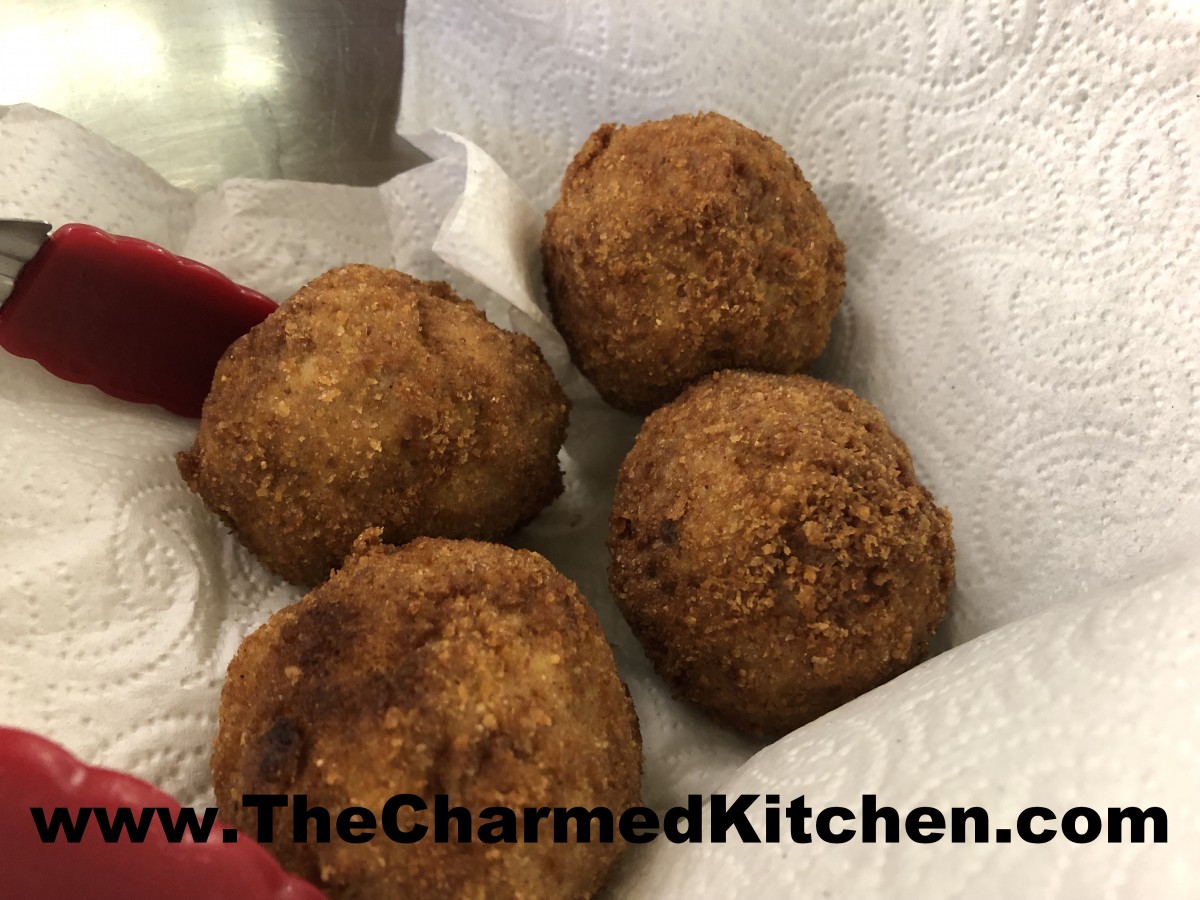
Scotch eggs, ready to serve
Amy’s Skillet Chicken Pot Pie
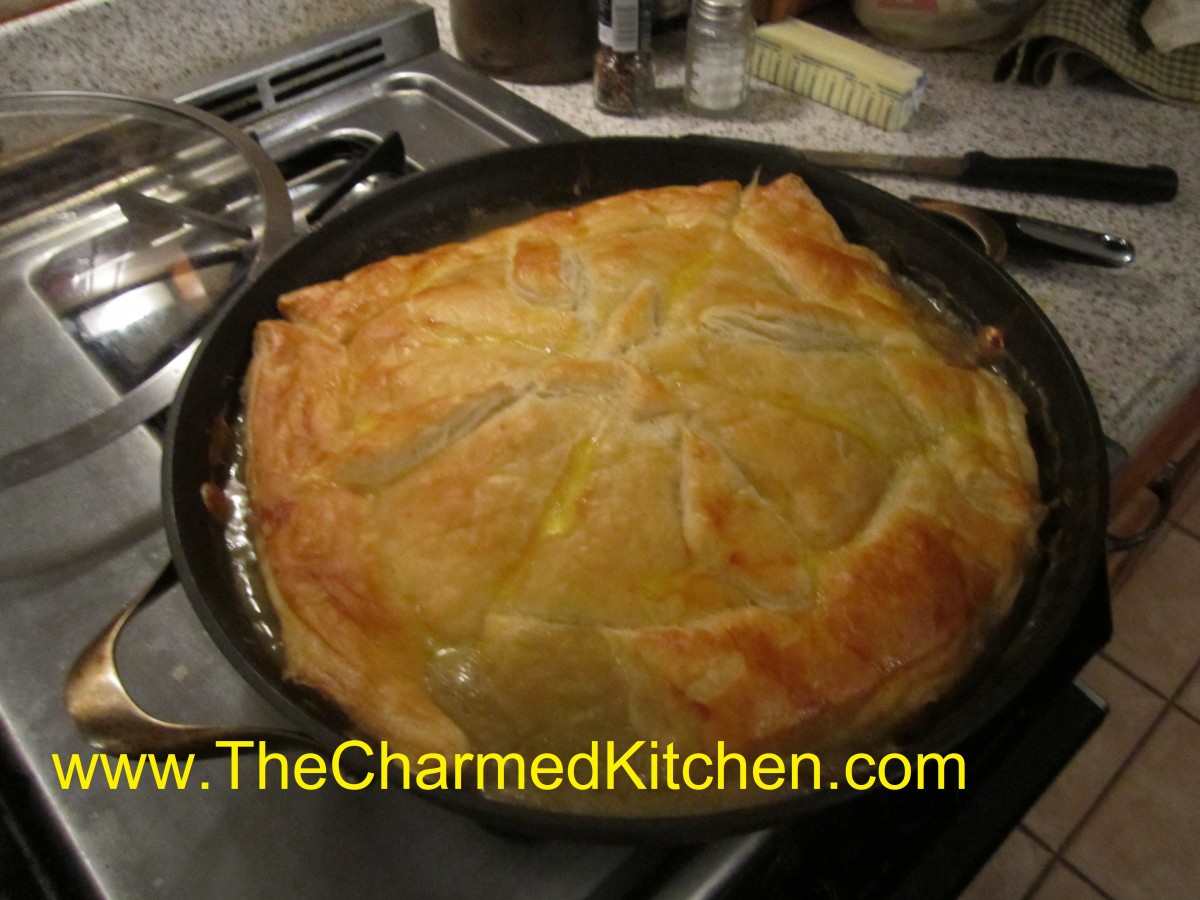
Amy’s Skillet Chicken Pot Pie
I am not sure there is better comfort food than chicken pot pie, at least not for me. Brings back very nice memories.
This chicken pot pie is made in a cast iron pan. It is started on top of the stove, then finished in the oven. Kind of the ultimate one-pot dinner.
My friend Amy was so proud of how this recipe turned out. She found the original recipe somewhere, but changed it, to make it her own.
It was a while back when she made this for a dinner with me and other friends, but it seemed like a good time to share the recipe. It was, and is, the best chicken pot pie I ever tasted. For our dinner that night, Amy doubled the original recipe, and used a larger skillet. You could easily cut it in half and use an 8 or 10-inch skillet
Here is Amy’s recipe. Enjoy!!
Amy’s Skillet Chicken Pot Pie
¼ c. olive oil
2 T. butter
1 sweet onion, chopped
4 parsnips, peeled and sliced
4 cloves garlic, minced
1 tablespoon chopped fresh sage, optional
1 small bunch kale, center ribs and stems removed, leaves chopped
Kosher salt
freshly ground pepper
¼ cup all-purpose flour
3 cups low-sodium chicken broth
2 T. sherry
½ small butternut squash, peeled, cut into 1/2-inch pieces (about 1½ cups)
½ of a roasted chicken- meat removed from bones, torn onto bite sized pieces – about 1½ cups of meat
1 sheet frozen puff pastry, thawed
1 large egg
Place a rack in upper third of oven; preheat to 425°. Heat oil in a deep 12-inch cast-iron or other heavy ovenproof skillet over medium-high heat. Add onions; cook, stirring occasionally, until beginning to brown, about 4 minutes. Reduce heat to medium-low. Add parsnips, garlic and sage to skillet and cook, stirring occasionally, until garlic begins to brown, about 2 minutes. Add kale and season with salt and pepper. Cook, tossing often, until wilted, about 4 minutes. Sprinkle flour over. Cook, stirring constantly, for 4 minutes. Stir in broth, 1/2-cupful at a time, then add squash. Bring to a boil, reduce heat, and simmer until squash is just softened and broth is thickened, 8-10 minutes. Add chicken to skillet, stir, and season with salt and pepper. Unfold pastry and smooth any creases; place over skillet, allowing corners to hang over sides. Whisk egg and 1 teaspoon water in a small bowl. Brush pastry with egg wash; cut four 1-inch slits in top to vent. Bake pot pie until pastry is beginning to brown, 15-20 minutes. Reduce oven temperature to 375° and bake until pastry is deep golden brown and crisp, 15-20 minutes longer. Let cool for 10 minutes before serving.
A Trio of Gnocchi
A Trio of Gnocchi
When I was a kid, my mother made dumplings or spaetzle. That was part of my Eastern European heritage. I was much older before I tasted gnocchi for the first time. Similar to dumplings, gnocchi are Italian in origin.
Made with cooked potatoes, flour and eggs, when done right, gnocchi are quite light and tender. I wish I could remember where I got this recipe. I have a hand written copy of it- but it isn’t my handwriting. This is the version I have been making forever. The original recipe calls for steaming the potatoes, but I will admit to baking them or using leftover boiled potatoes. I sometimes use red skinned or Yukon Gold, too, with nice results. All methods produced a product I was happy with.
A few times, I decided to go off course a bit, and make gnocchi using additional ingredients Ingredients that changed the color and the flavor, but still left me with the gnocchi I loved.
Two of my favorite “non-traditional” gnocchi recipes include using sweet potatoes or beets. These ingredients make for very colorful, tasty gnocchi. So here are the recipes for all three recipes. They make a great addition to any Spring menu.
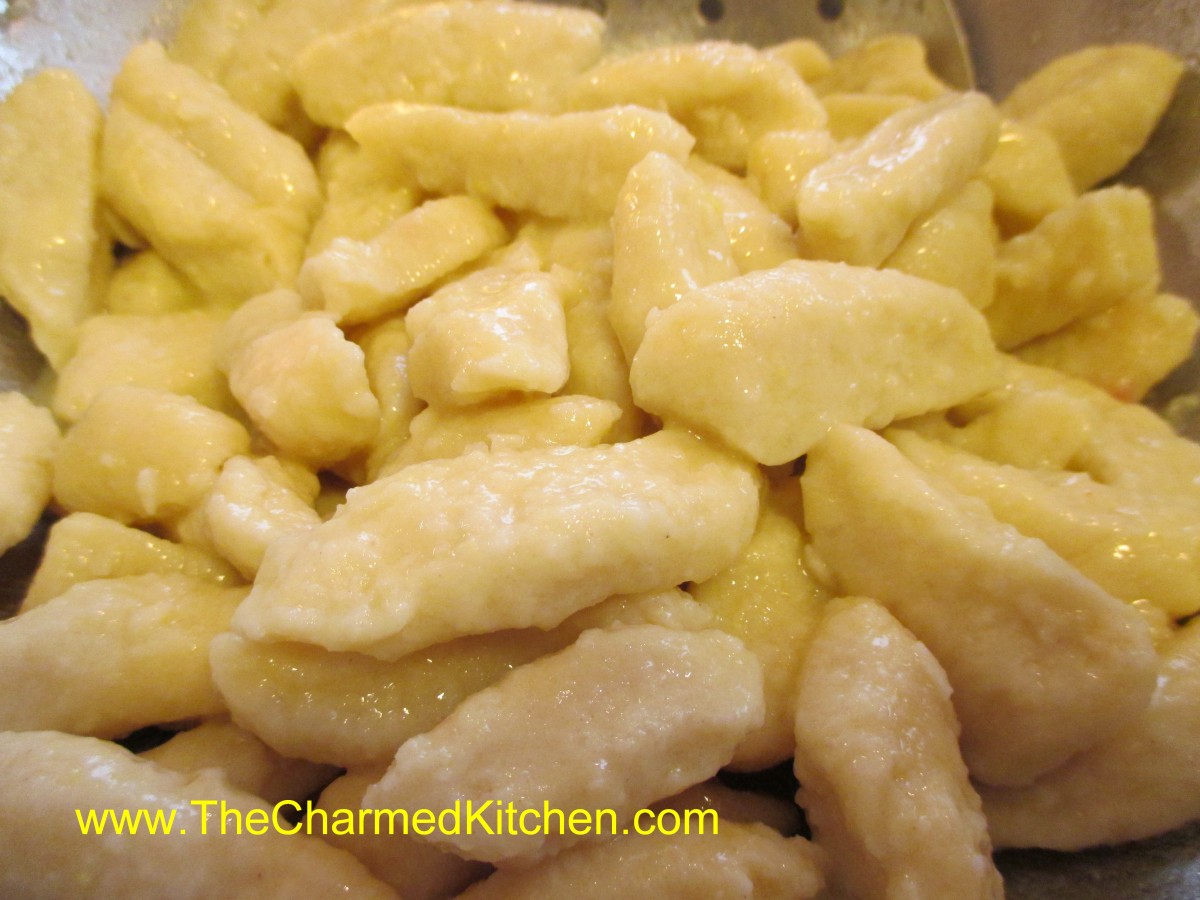
Classic Gnocchi
4 small russet potatoes, 22-24 oz. total, peeled, diced into 1/2-inch cubes
1 egg
2 T. whipping cream
1 1/4 t. salt
1/8 t. nutmeg
1 1/2 c. (about) flour
Steam potatoes over boiling water until tender, about 12 minutes. Place in bowl and mash or put potatoes through a ricer. Place in bowl and cool about 10 minutes. Add egg, cream, salt and nutmeg and mix well. Stir in flour and combine until slightly sticky dough forms. Add more flour a tablespoon at a time if the mixture is too moist. Turn dough onto lightly floured work surface and divide into 6 equal portions. Roll out 1 piece into a rope about 20-inches long by 3/4 inch. Cut dough into 3/4 -inch pieces and roll each piece over the tines of a fork or over a wire whisk to make grooves in them. Arrange finished gnocchi in a single layer on a floured baking sheet and repeat the process with the remaining dough. Boil the gnocchi in well-salted boiling water, about 1/3 at a time. Boil for 4-5 minutes. They will come to the surface and be tender. Check after 4 minutes. Serve with butter and Parmesan cheese or with a favorite pasta sauce.
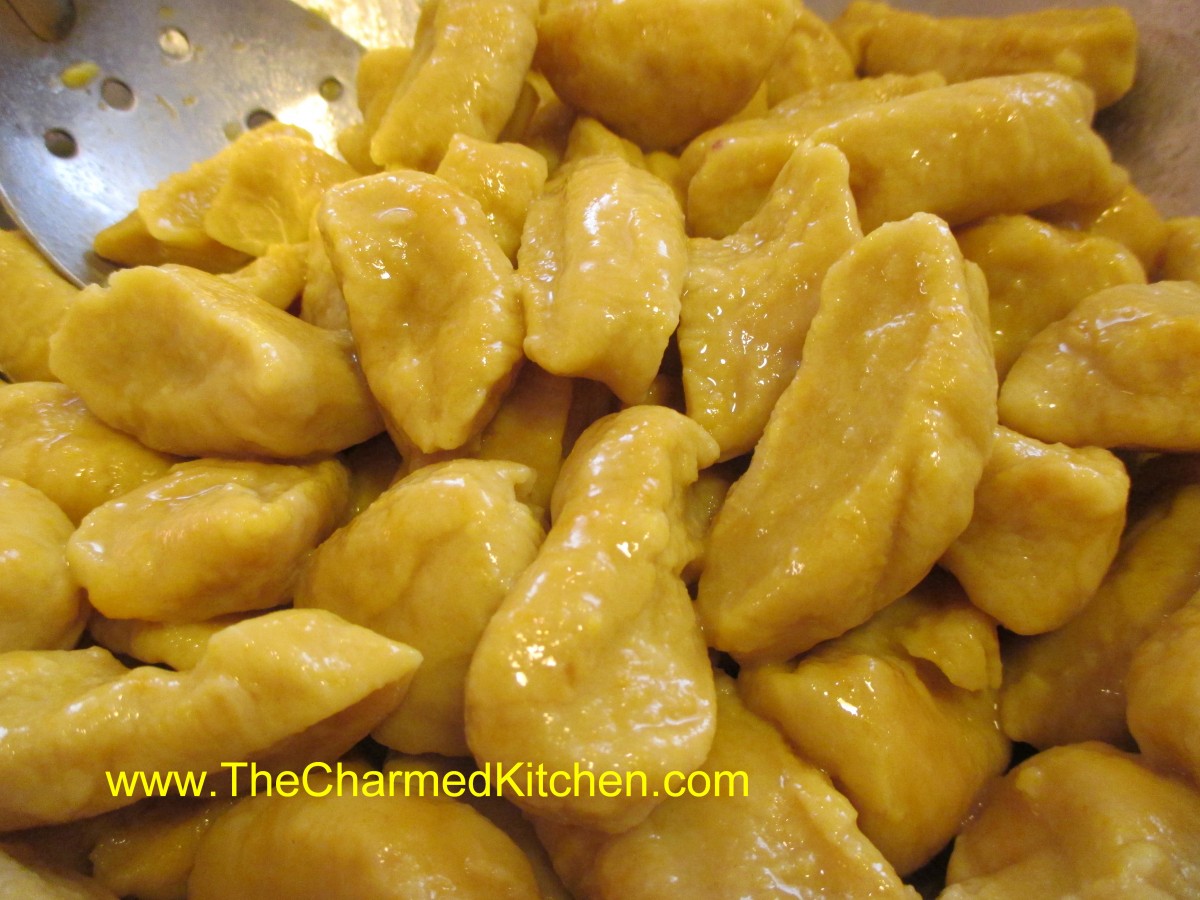
Sweet Potato Gnocchi
1 c. mashed, cooked sweet potatoes
1/2 c. mashed, cooked russet potatoes
2 eggs
1 t. salt
1 t. turmeric, optional
2 c. flour or more
Get a pot of water boiling. In mixing bowl combine the sweet potatoes with the eggs and seasonings. Add about 1 1/2 cups of the flour and stir until a soft dough forms. Continue adding flour, a little at a time, until the dough can be handled without sticking to your hands but is still soft. Take about 1/4 of the dough at a time and roll into a rope, about 15 inches long, on a floured work surface. Cut dough into 1/2 thick pieces. Place pieces in a pot of boiling water and after a few minutes the gnocchi will float to the top. Cook them for several minutes after they have risen to the top of the pot. Remove with a slotted spoon and drain. If you aren’t going to use them right away drizzle with a little oil to prevent sticking or toss with butter. You can also run a little cold water over them instead. Repeat with the remaining dough.
Beet Gnocchi
2 small russet potatoes, 11-12 oz. total, peeled, diced into 1/2-inch cubes
2 medium/small beets, roasted, skin on, cooled
1 egg
1/4 c. whipping cream
1 1/4 t. salt
¼ t. dill weed
1 1/2 c. (about) flour
Steam potatoes over boiling water until tender, about 12 minutes. Place in bowl and mash or put potatoes through a ricer. Place in bowl and cool about 10 minutes. Remove skins from cooled beets and dice. Place beets in a food processor or blender. Add the cream and process until smooth. Combine with potatoes, egg, salt and dill and mix well. Stir in flour and combine until slightly sticky dough forms. Add more flour a tablespoon at a time if the mixture is too moist. Turn dough onto lightly floured work surface and divide into 6 equal portions. Roll out 1 piece into a rope about 20-inches long by 3/4 inch. Cut dough into 3/4 -inch pieces and arrange finished gnocchi in a single layer on a floured baking sheet and repeat the process with the remaining dough. Boil the gnocchi in well-salted boiling water, about 1/3 at a time. Boil for 4-5 minutes. They will come to the surface and be tender. Check after 4 minutes. Serve with butter and Parmesan cheese or with your favorite sauce. Serves 6.
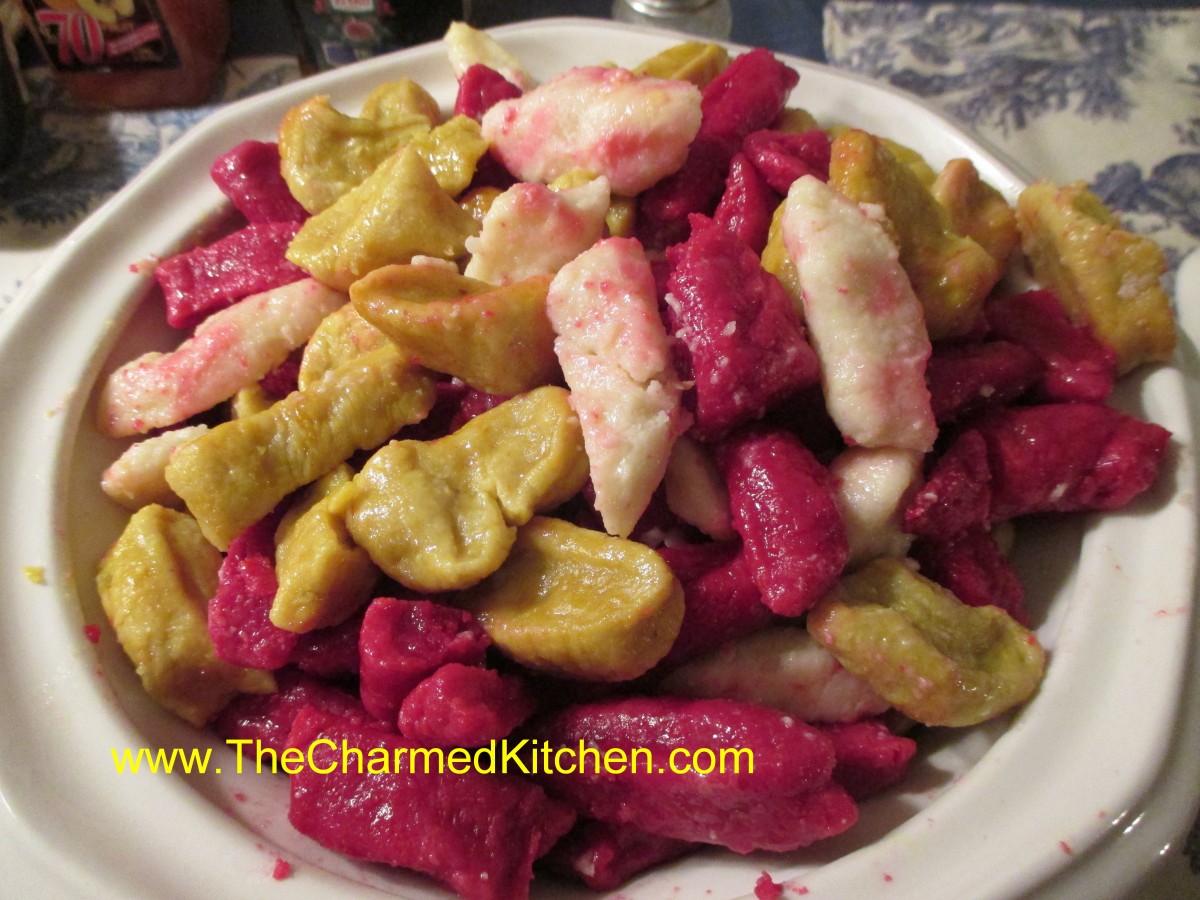
Classic Gnocchi
Sweet Potato “Gnocchi”
Beet Gnocchi
Macaron Madness

Macarons
I have been baking forever. There aren’t that many baking “firsts” for me anymore. One bucket list item was to make macarons. Macarons are French cookies, made from almond flour, egg whites and sugar. Simple ingredients, with an elegant end result. They are similar to meringues, which I have made often in the past.
They can be tricky, so I decided to do some research before trying to bake them myself. I watched videos, searched recipes and then decided it was time to go for it. My first batch did not go according to plan. They got over- baked and the dough was too stiff. I went back and tried again.
Sometimes failure can teach us more than success.
I had clearly not mixed the dough long enough. Not the stage where you beat the egg whites. They were mixed to perfection in very stiff peaks. Where I messed up the first time, was not mixing the egg whites with the almond flour mixture long enough. I was so focused on the folding in directions, I was afraid to over mix it. Big mistake.
When you get to the “folding in” part, don’t be afraid to mix the batter. The more you mix, the softer the batter gets. The second time around, I folded and stirred long enough for the batter to get a little runny. Think of a bowl of oatmeal.
After that, the rest was pretty easy. I piped to dough into circles on the baking sheet. They weren’t perfect, but so much better than the first batch. I expect them to look even better with more practice.
When they baked, they got their “feet”. When done the right way, macarons rise a bit, forming a ring below the original circle of batter.
Once baked, I let them cool before filling with a strawberry buttercream frosting. For the buttercream, I just mixed a few tablespoons of softened butter with half a cup of powdered sugar and a tablespoon of strawberry jam. I had added a little pink food coloring to the batter, so I thought the pink frosting would look pretty.
So here is the recipe I used.
Macarons
¾ c. almond flour
1 c. powdered sugar
2 egg whites
3 T. granulated sugar
Food coloring, optional
½ -¾ c. jam or frosting for filling the cookies
Sift almond flour and powdered sugar together. Mix well and set aside. In mixing bowl, beat egg whites for 3 minutes on medium. Egg whites should be foamy. With mixer running, sprinkle in the sugar. Beat another 3 or 4 minutes, or until soft peaks form. Add food coloring at this point, if using, and increase speed on mixer to high. Continue to beat egg whites until stiff peaks form, another 3 minutes, or so. Take about a third of the egg whites and mix into the almond flour mixture. Mixture will be sort of dry- don’t worry. Fold in the rest of the egg whites and stir/fold until mixture has the consistency of a thick batter. Think of cooked oatmeal. You don’t want to over or under mix at this point. Just stir until it gets to the “oatmeal” stage. Probably 50 strokes or so. Line a baking sheet with parchment- or use a silicone liner. Place batter in a piping bag with a round tip. Squeeze the batter into circles on the baking sheet, trying to keep them even in size. I did circles just under 2 inches across. They don’t spread during baking. Batter should settle, but if there are any little peaks, use a wet finger to press them down. Tap baking sheet on the counter 4 or 5 times to remove any air bubbles. Set aside for about 15 minutes. You need to let the dough form a kind of dry skin on the top. The way to test is to lightly touch the dough. If it sticks your finger, wait a few more minutes. Once the dough had dried enough- bake them in a preheated 350 degree oven for 12-15 minutes, depending on the size of your macarons. Remove from oven and allow to cool on baking sheet before removing. Use frosting or jam to sandwich cookies together.
Tiramisu
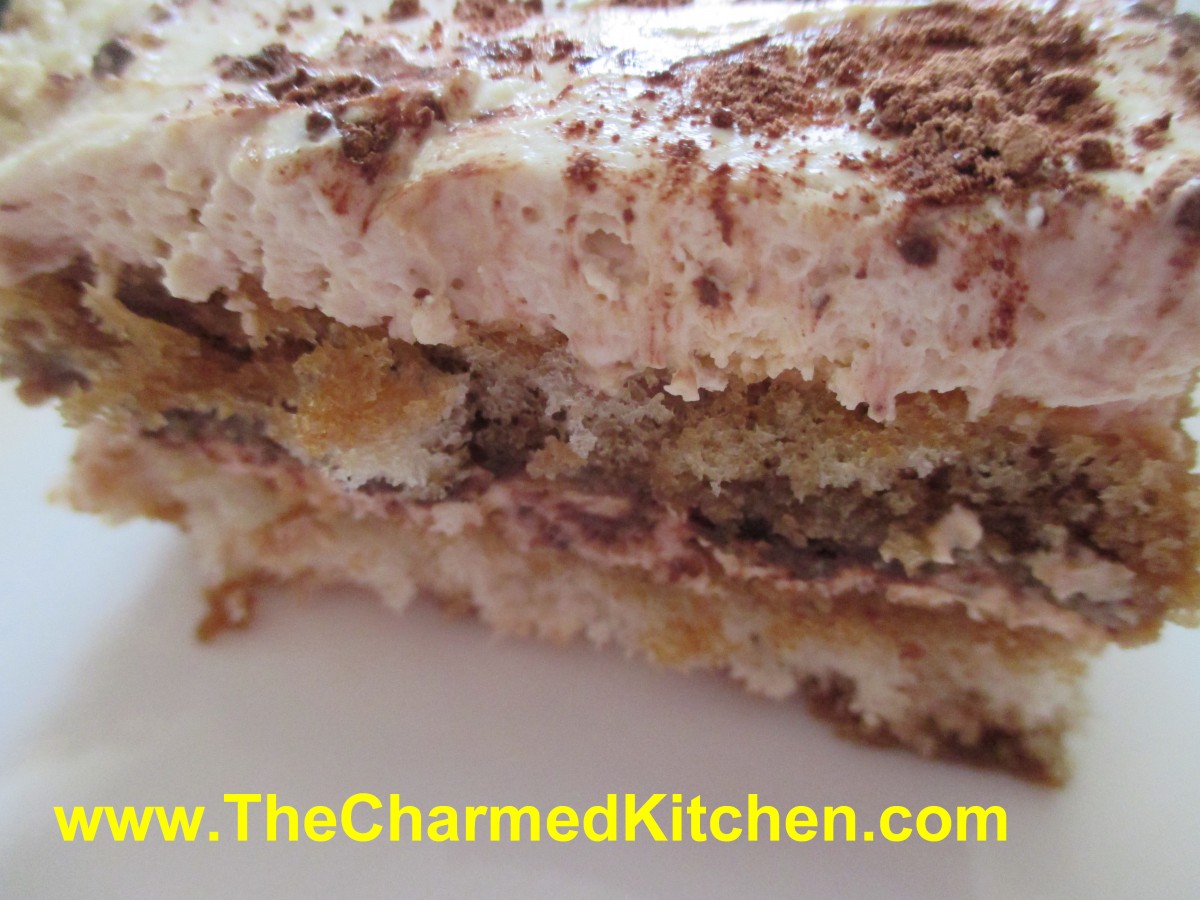
Tiramisu
Tiramisu is one of those desserts that everybody seems to like. Tiramisu is a layered dessert, made from ladyfingers, drizzled with coffee, egg custard (zabaglione) and cocoa. There are a lot of variations out there. This happens to be one I like.
We made tiramisu in an Italian cooking class the other night. Not surprising, everyone loved it. I think the magic of tiramisu is how it can be rich and light at the same time. For me, that starts with the creamy layer. The egg custard is made first, then chilled. Later it is combined with mascarpone and whipped cream. The end result is bliss.
Tiramisu is not hard to make. The custard requires a little work, but the rest is just about assembly. It might be a lot more work if you bake your own ladyfinger cookies. I just buy them.
I prefer to use the larger, crisp ladyfinger cookies. I find them at Italian grocery stores. Other grocery stores sell ladyfingers that are soft, like sponge cake. I have used them in a pinch, but they are not my favorite. I think they get too soft after the coffee is added.
In the end, no matter which cookies you use- the flavor of your tiramisu is sure to be a crowd pleaser.
Classic Tiramisu
5 egg yolks
1/4 c. sugar
1/2 c. Marsala wine (not cooking wine)
1 c. whipping cream
2 T. sugar
1 lb. mascarpone cheese
2 c. strong coffee, room temp.
2 T. sugar
1/2 c. brandy
1 T. vanilla
48 ladyfingers
3 T. cocoa
Make zabaglione (egg custard). In double boiler, over simmering water, beat together egg yolks and sugar until lemon colored. Stir in Marsala and continue cooking, stirring constantly until mixture thickens and will mound on a spoon. This will take about 10 minutes. Remove from heat and cool down. You can place in bowl in fridge 30 minutes or so. Beat together whipping cream and sugar until stiff peaks form. Beat in mascarpone and chilled zabaglione. Chill 1 hour. Stir together coffee with remaining sugar, brandy and vanilla and set aside. Assemble tiramisu by placing 16 of the ladyfingers in the bottom of a 9×13-inch pan. Drizzle about 1/3 of the coffee mixture over the ladyfingers, about 1 tablespoon each. Top with 1/3 of the cream mixture and sprinkle with 1 tablespoon of the cocoa. Repeat this process 2 more times until all ingredients are used. Chill until ready to serve. Serves 12.


