Chocolate Shortbread
Chocolate Shortbread Cookies
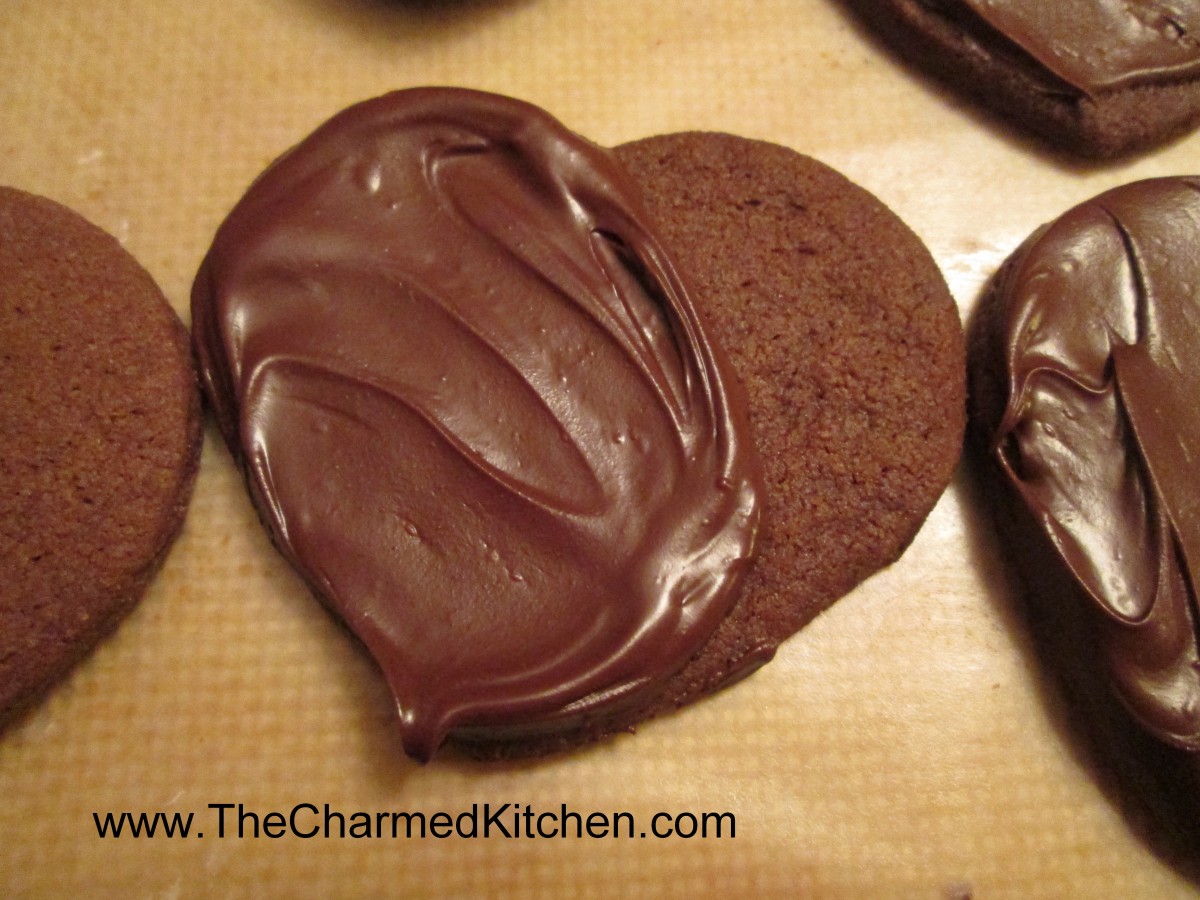
I never met a shortbread cookie I didn’t like. These are no exception. With the addition of cocoa, you end up with a cookie that has the traditional delicate texture of shortbread, with the added bonus of a rich, chocolate flavor.
They are great just plain, dusted with powdered sugar or, my favorite way, brushed with a little melted bittersweet chocolate.
Simple, tasty and a nice treat for the chocolate lovers you love.
Chocolate Shortbread
1 c. butter, room temperature
3/4 c. sugar
2 c. flour
1/3 c. cocoa
1/4 t. salt
8 oz. semi-sweet chocolate
Beat together butter and sugar until well blended. Mix together dry ingredients and slowly beat into butter mixture, stirring it in at the end. Roll out dough about 1/4 inch thick and cut out with cookie cutters. Re-roll scraps and cut out the remaining dough. Place on an un-greased baking sheet and bake at 325 degrees until cookies are firm around the edges, about 20 minutes. Cool on baking sheet 5 minutes before transferring to a rack to cool. Melt chocolate and dip cookies in it or use chocolate to hold 2 cookies together. You can also use a buttercream frosting to make them sandwich cookies. Makes 2-3 dozen, depending on the size.
Chocolate Crepes

Chocolate Crepes with Strawberries
Since everyone seemed to enjoy my Mom’s crepe recipe the other day, I thought I would share my recipe for chocolate crepes. These would make a great dessert, or breakfast, for Valentine’s Day. The chocolate crepes pair so nicely with fresh berries, but you could add any number of fillings. Ice cream works, or a fresh pudding or custard.
I topped mine with berries and whipped cream. You could also add some shaved chocolate as a topping.
If you haven’t made crepes, this might be just the recipe to convince you.
I often make a double batch of the crepes, then freeze some, between layers of wax paper. That way I can have crepes whenever I want.
Truth is, you can fill these crepes with all sorts of stuff. I had fresh berries, so that is what I used. I added some Kahlua to the batter for a little extra flavor and it worked out just great.
You can have all the components ready, then just assemble when ready to serve. Such a lovely dessert.
Here is the recipe.
Chocolate Crepes
1 c. flour
4 eggs
1 1/2 c. milk
¼ c. cocoa
3 T. sugar
¼ c. Kahlua or other coffee flavored liqueur or ¼ c. strong coffee
1/4 c. butter, melted and cooled
Mix all ingredients in blender (except butter) until smooth, scraping sides often. Add butter and blend well. Let stand for 30 minutes before using, or batter can be refrigerated, covered, overnight. Beat again, just before using.
Heat 6 or 7 inch skillet. Brush with butter or oil and pour in about 1 tablespoon of batter, tipping pan to cover bottom of pan completely with batter. Cook until edges start to brown, turn over and cook until lightly browned (about 2 minutes per side.)
Crepes can be made day ahead or even frozen between sheets of waxed paper and frozen. Makes 18.
Strawberry filling: I just sliced a couple of pounds of berries and added a little sugar- about ½ cup- a tablespoon of vanilla and a healthy dash of cinnamon.
When filling the crepes I spooned some berries down the center of the crepe and added some whipped cream. Folded over, topped with a few berries and another bit of whipped cream.
Cheesy Chocolate Hamantaschen

Cheesy Chocolate Hamantaschen
A friend shared this recipe recently, and I was intrigued. I had to try these cookies. The filling for these traditional Jewish cookies, is inspired by the filling used in cannoli.
I made a few changes from the recipe he shared, and was very happy with how they turned out.
The dough, which contains no sugar, has a wonderful, pastry-like texture. It pairs up well with the filling. The drizzle of chocolate is a perfect finish for them.
They aren’t a gooey, overly sweet cookie, which I really like.
They pair up nicely with tea or coffee. I confess, I had a couple for breakfast with my morning tea. I would definitely make these again.
Thanks, Jared, for sharing this recipe.
Cheesy Chocolate Hamantaschen
Filling:
¼ c. ricotta cheese
5 oz. cream cheese
½ c. powdered sugar
1 t. cinnamon
½ c. mini chocolate chips
Dough:
½ c. (1 stick) butter, softened
3 oz. cream cheese
½ c. half and half or milk
1 t. vanilla
½ t. salt
2½c. flour
Topping:
1 egg white
2 T. water
½ c. chocolate chips
Powdered sugar, optional
Prepare the filling. Beat together the ricotta and cream cheese until smooth. Mix in the milk and cinnamon, then stir in the chips. Chill until ready to use. Make the dough by mixing the cream cheese and butter together. Add the milk, vanilla and salt and mix until smooth. Stir in the flour until a stiff dough forms. Wrap the dough in plastic wrap, or put in a bag and chill at least an hour – or up to a couple of days – before proceeding. On lightly floured surface, roll the dough to a little less than ¼ – inch thickness. Cut dough out into 2-3 inch circles. Place a scant teaspoon of filling in middle of each dough circle. Combine the egg white with water and beat together. Brush a little of the egg white mixture over the edges of the dough circle. Fold the dough up in thirds towards the center, pinching the edges to seal. They should look like little three-corner hats. Repeat with remaining dough, re-rolling the scraps. Brush folded cookies with a little more of the egg white mixture. Place on lightly greased cookie sheets and bake in a 375-degree- oven for 15 minutes, or until golden on the bottom. Remove to cooling rack. Once cooled, melt the chocolate chips and drizzle over the cookies. You can top with some powdered sugar, if you like. Makes 2½-3 dozen.
Homemade Ghee
Homemade Ghee
Ghee, if you haven’t had it before, is a kind of clarified butter, often used in Indian cooking. You can buy it at stores that carry international foods, but it is easy to make.
Ghee has a wonderful, toasted, nutty flavor and it can be used in all sorts of dishes. You can add it to veggies or spread it on toast. I love to add ghee to rice or pasta.
A wonderful bonus when using ghee, because the milk solids have been removed, you can fry foods in it. It doesn’t burn quickly, like regular butter.
Because the solids have been removed, you can store ghee at room temperature. Although, it is recommended to use up home made ghee in a month or so. For longer storage, you can pop it in the fridge, but you don’t have to.
The difference between ghee and clarified butter is that ghee is cooked longer, to develop a darker color and wonderful toasted flavor. The longer cooking also removes any water in the butter, leaving just the fat behind.
There are several methods for making ghee. Some suggest long, slow cooking. Others a little more heat and less cooking time. I prefer the latter. I am not the most patient person.
Here is how I made my ghee.
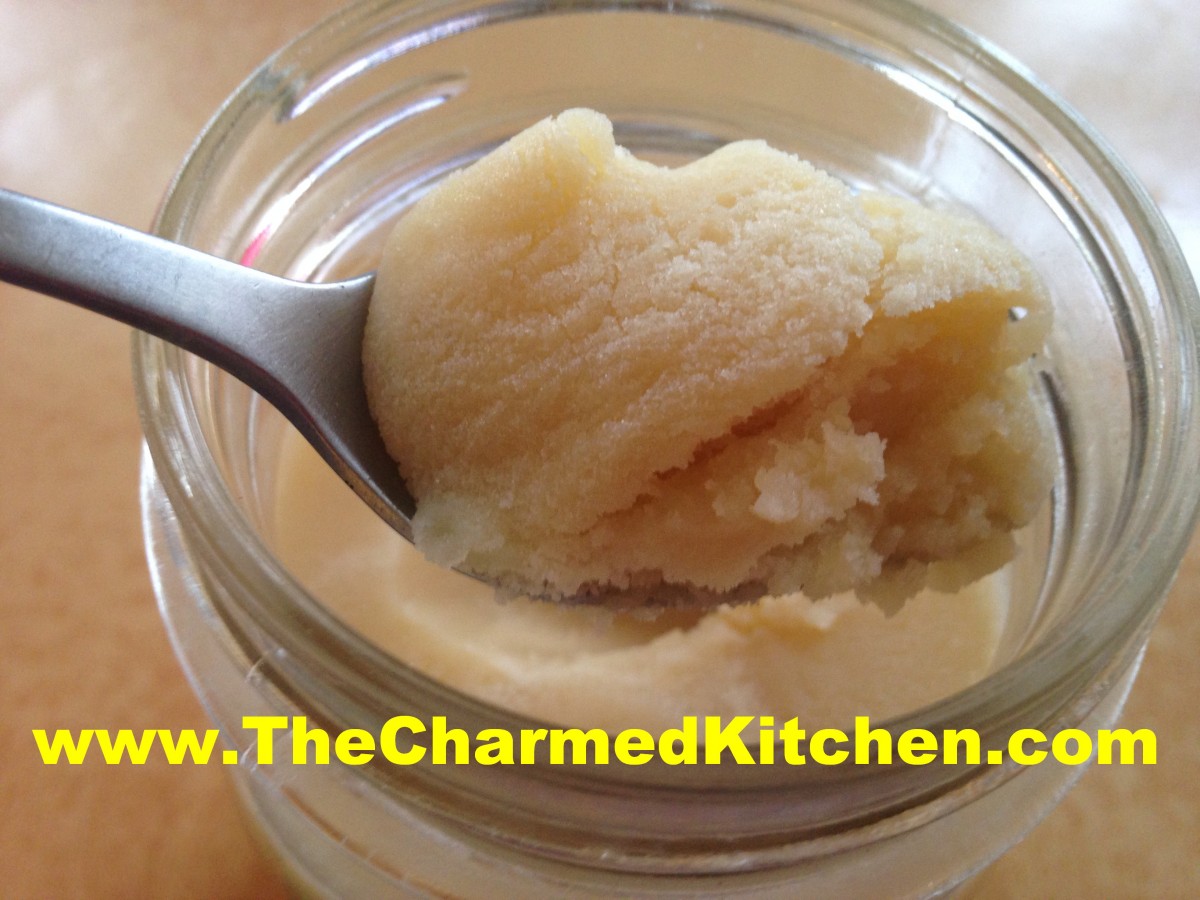
Start with a pound of unsalted butter. Place the butter in a heavy bottomed, medium sized saucepan. Melt the butter over low heat. As soon as the butter is melted, turn the heat up a bit- to medium. It will start to form foam on the top at this point. After a few minutes, the foaming will stop. Turn up the heat a little more- not high heat, but a little higher medium, if that makes sense. Watch for the second foam to form on the top. This takes about 7-8 minutes. It will have turned a pretty, golden color. At this point, your ghee is done. You’ll have to strain it, to keep out the solids, which will have settled to the bottom of the pan. I strained my ghee twice, through several layers of cheesecloth. Be sure the container you are straining the ghee into is heat proof- it is pretty hot at this point. I used a stainless steel bowl, then transferred the ghee to a canning jar. You could also use a fine mesh strainer, if you don’t have cheesecloth. Store in a container with a tight fitting lid- you don’t want moisture to get to your ghee. It will get more solid as it cools down.
One little thing. I used a stainless steel pot and the brown bits took a bit of scrubbing to get out of the pot. Small price to pay for your own ghee.
That’s all there is to it. Use within a month. Trust me, it never lasts that long around here!!
-
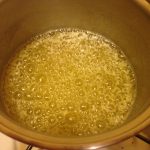
- first foam
-
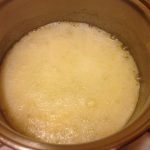
- second foam
-
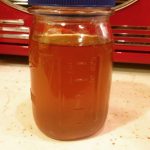
- strained, still warm
-
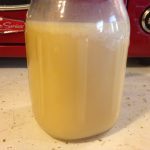
- All cooled down
Mom’s Classic Crepes

Blueberry Filled Crepes
I should make crepes more often. Maybe that can be a resolution for the new year. Crepes are so versatile. They taste great, too.
Crepes are one of those foods that everyone seems to love, but very few love to make them. I hear that all the time. There is some sort of irrational fear of crepe-making that I hope to dispel.
Crepes aren’t hard to make. Once you make a couple, you fall into a sort of rhythm. I do. I use a tiny sauce ladle to portion out the batter. In it goes. I tilt the pan to get an even, thin coating over the bottom of the pan. It just takes a couple of minutes for the crepe to brown lightly. A flip of the spatula, another minute or two- done. Then on to the next.
I always think about my Mother when I make crepes. I loved watching her make them. One after the other- all perfect. She said the first crepe never worked. She said there is a crepe “tradition” that the first crepe of the day always looks like an amoeba. So if this happens to you- just keep going. They get easier to make, I promise. You get into a sweet spot where the pan is the right temp, you are putting the right amount of batter in. Once this happens, you’ll have a stack of perfect crepes in no time at all.
I made a classic recipe- the same recipe my mom used. I have other recipes for crepes, but this one is a sentimental favorite.
Crepes can be filled with either sweet or savory ingredients. I made a blueberry filling for some of the crepes , then used the rest as pancakes for mu shu duck. You can just smear the crepes with you favorite jam or jelly, fold and enjoy.
So here is the recipe for both the crepes and the blueberry filling.

Mom’s Classic Crepes
Mom’s Classic Crepes
3/4 c. flour
1/8 t. salt
3 eggs, beaten
2 T. melted butter
3/4 c. milk, approximately
Butter or oil for pan
Beat together flour, salt and eggs until smooth. Stir in melted butter and then stir in milk until batter consistency is that of cream. Let stand for 30 minutes before using, or can be refrigerated, covered, overnight. Beat again, just before using.
Heat 6 or 7 inch skillet. Brush with butter or oil and pour in about 2 tablespoons of batter, tipping pan to cover bottom of pan completely with batter. Cook until edges start to brown, turn over and cook until lightly browned (about 2 minutes per side.) Remove to a plate and repeat with remaining batter.
Crepes can be made day ahead. They can also be frozen. To freeze, layer crepes between sheets of waxed paper and wrap in plastic wrap of place in a freezer container. Freeze. . Makes 12.
Crepes can be filled ahead or guests can fill their own. Fillings can be served warm or cold. These crepes can be filled with either sweet or savory fillings.
To make the blueberry crepes: Lay a crepe on work surface. Spoon about 2 tablespoons of the blueberry compote onto one half of the crepe. Fold in half, then fold again to create a fan shape. You can also spread the filling all over and roll up the crepe instead. Serve dusted with powdered sugar, if you like. You can also serve with whipped cream or ice cream.
Blueberry Compote
2 pints fresh or frozen blueberries
Zest of 2 oranges
Juice of two oranges
¼ c. honey
Pinch of salt
Place all ingredients in a medium saucepan and cook, over medium heat, until berries soften. Continue cooking, over medium low heat, until most of the liquid has cooked off and mixture thickens. Stir from time to time, to prevent sticking. Watch more closely as mixture cooks down. If you like a sweeter product, you can add a little sugar. Set aside until ready to use. Can be spooned into crepes warm or at room temp. Makes about 2 cups.
Mushroom Stroganoff with Mushroom Pasta
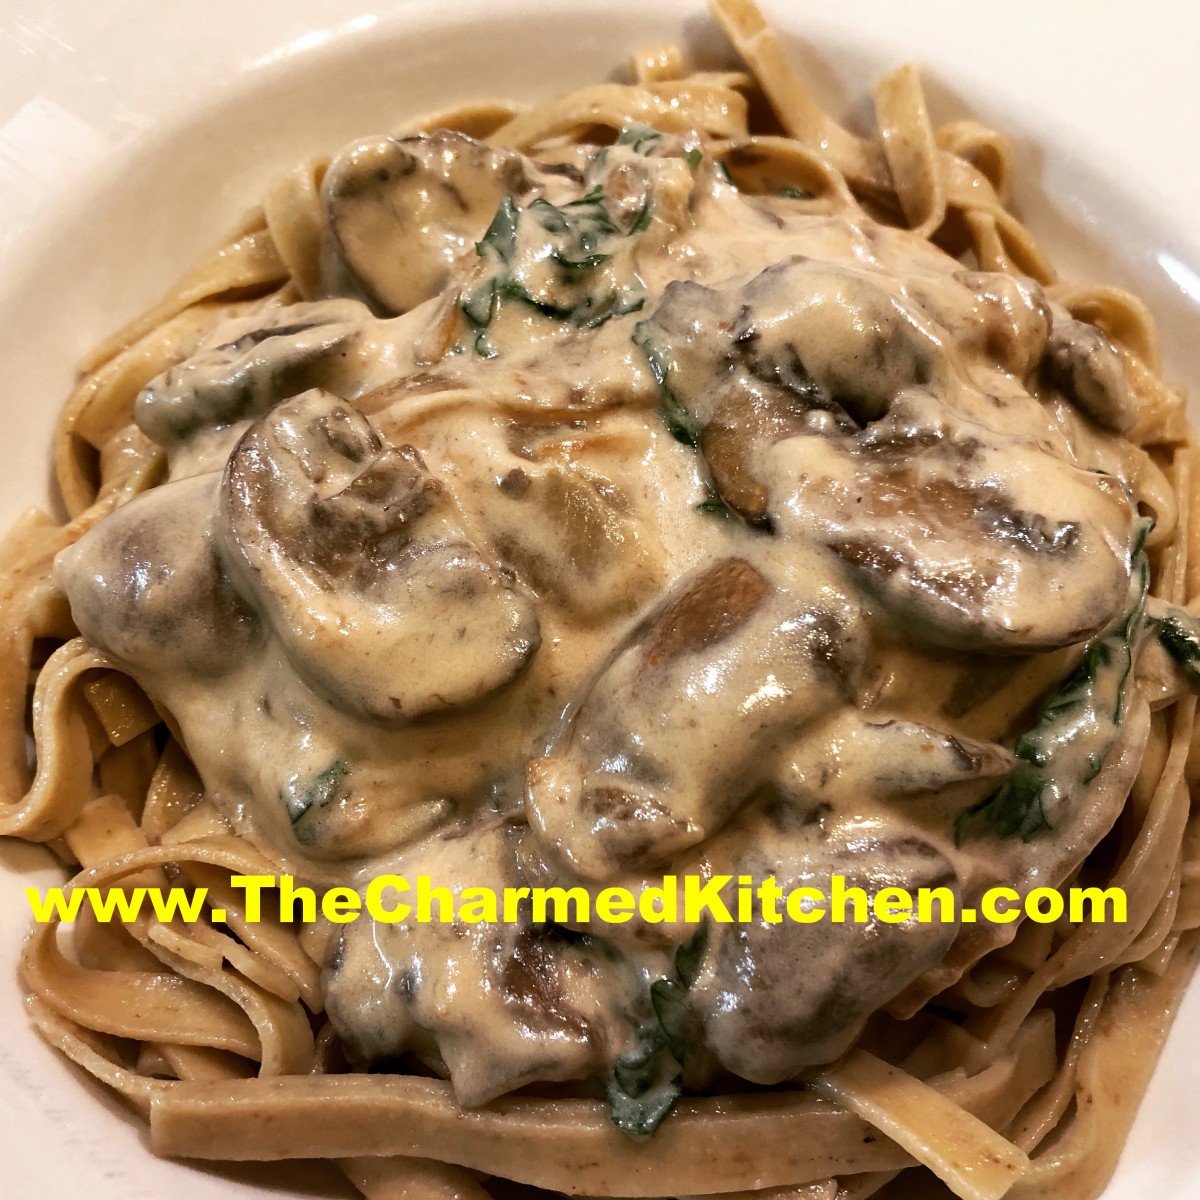
Mushroom Stroganoff with Mushroom Pasta
I had some baby portobello mushrooms and decided to use them to make Stroganoff. I also had some powdered dried mushrooms, so made mushroom pasta, too.
The stroganoff was easy and tasted great. Just a few ingredients, but they packed plenty of flavor.
I used a pound of mushrooms, but I could see making this dish with even more mushrooms. I also think it would be fun to make it with a few different types of mushrooms.
For the pasta, I used mushrooms I had dried myself. Store bought dried mushrooms often have to be soaked first, to remove dirt. I only recommend using mushrooms you washed and dehydrated yourself. You don’t want grit in your pasta.
Mushroom Stroganoff
3 T. oil or butter
1 c. chopped onions
1 lb. mushrooms, washed, trimmed and sliced
1 c. stock- I used chicken stock, veggie or beef would also work
1/2 c. dry sherry
1 c. sour cream
1/2 c. half and half
1/2 c. fresh chopped parsley
salt and pepper to taste
Heat oil in large skillet and cook onions until golden. add mushrooms and cook until they are golden, too. Add stock and sherry and cook until most of the liquid is cooked off. Remove from the heat and stir in the sour cream, half and half and parsley. Warm gently for several minutes until sauce thickens a little. Adjust seasonings and serve over mushroom pasta. Recipe follows. Serves 4-5. I only used some of the pasta for the dish.
Mushroom Pasta
3 c. flour, more if using electric pasta machine. See note.
½ c. mushroom powder- made from dried mushrooms*
1½ t. salt
4 eggs
Water, as needed
Mix flour, mushroom powder and salt. Stir in eggs, kneading until dough is smooth and elastic. Dough will be very stiff. Add a little water, as needed, to hold dough together. You may wish to mix the dough in a mixer or food processor. Cover dough and let rest at least 15-20 minutes before rolling. Under kneading your dough will result in coarse, crumbly pasta. This batch makes about 1 pound. Serves 4-6.
Roll dough out on a well-floured board or with a pasta machine until desired thickness in reached. Add flour as needed to prevent sticking. Cut into strips or whatever shapes are desired. You might want to let the noodles dry 1-hour or more before cooking, but this is not necessary. Pasta can be hung to dry or separated and allowed to dry flat on a table. When pasta is not hanging to dry it must be turned occasionally to dry evenly. Although you may hear otherwise, homemade pasta, even when dried, should be frozen for long term storage. Storing at room temperature can lead to spoilage. Fresh pasta can also be stored in the refrigerator for a day or two.
Cooking fresh pasta happens quickly. For most noodles you are looking at 2-3 minutes at the most. Thicker cuts and ravioli would take a little longer. Watch it carefully. Drain after cooking, and toss with your favorite sauce.
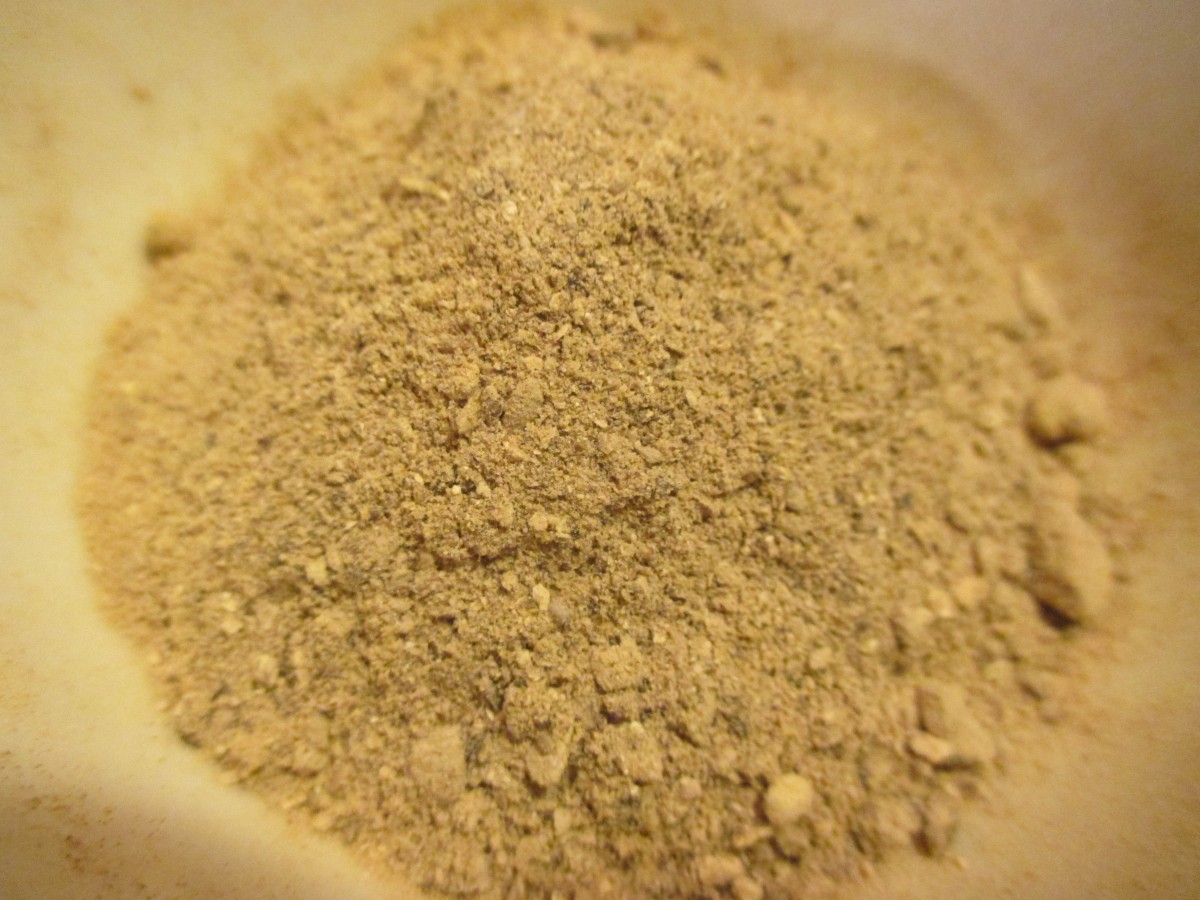
Mushroom powder
*You might be tempted to powder up some store bought dried mushrooms. I would advise against that. Commercially dried mushrooms have not been washed before drying, so you might get dirt in your mushroom powder. I clean my mushrooms thoroughly before dehydrating.
Note: All electric pasta machines vary slightly and you should use their recipes as much as possible. Still, for most models, adding 1/4 c. flour for each cup in a hand rolled recipe works the best. Also recipes that contain seeds and vegetables may clog an electric pasta maker. Follow your manufacturer’s instructions.
Spinach and Mushroom Quesadillas
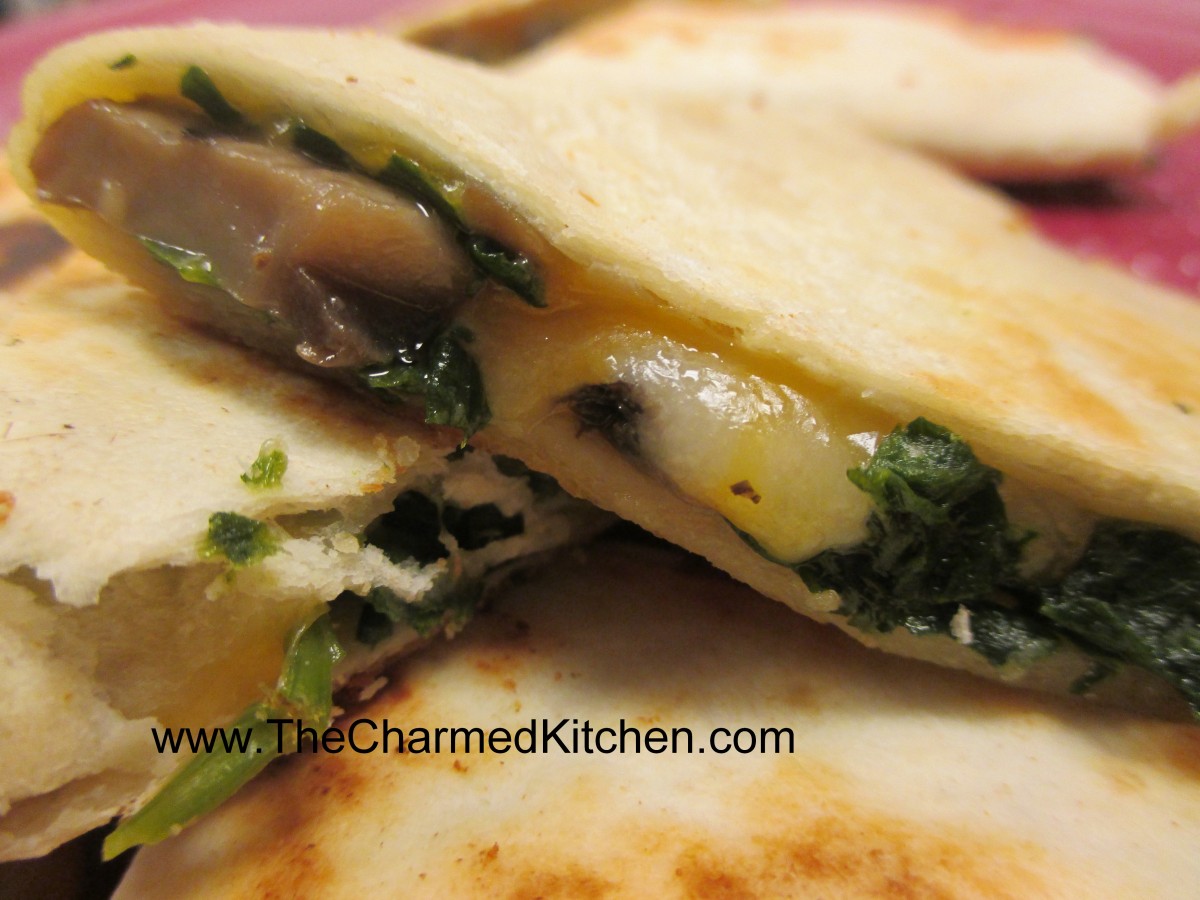
Spinach and Mushroom Quesadillas
Quesadillas are a fun and easy appetizer for any party. You can fill them with all sorts of fillings.
I had some fresh spinach, but you could use frozen spinach, too. Just thaw and drain well before using. I added some Portobello mushrooms and cheese and ended up with a tasty dish.
The spinach and mushrooms worked really nicely together. I had Swiss cheese, so that is what I used, but I could see using a smoked Gouda instead, or maybe a sharp cheddar. I just cooked the quesadillas in a skillet, but you could also bake them in the oven, or brush with oil and cook them on the grill. You can serve them as is- or maybe top with some salsa or sour cream.
Spinach and Mushroom Quesadillas
1 (10 ounce) package fresh spinach
2 cups shredded cheese, I used Swiss
2-3 tablespoons butter
2 cloves garlic, sliced
2 portobello mushroom caps, sliced
Salt and pepper to taste
Hot sauce to taste
A few sprigs of fresh thyme
4 (10 inch) flour tortillas
1 tablespoon oil
Saute spinach in a little butter until wilted. Cool and chop. Set aside. Melt the remaining butter in a skillet over medium heat. Stir in garlic and mushrooms, and cook about 5 minutes. Mix in spinach, and continue cooking 5 minutes. Add seasonings to suit your taste. Place a quarter of the mixture on one side of each tortilla. Top with a quarter of cheese. Fold tortillas in half over the filling. Heat oil in a separate skillet over medium heat. Place quesadillas in the skillet, and cook 3 minutes on each side, until golden brown. Cut each quesadilla into 4 wedges to serve.
Curried Veggies

Curried Vegetables
On a cold winter day, a bowl of curried veggies can really warm you up. There is something about curried dishes that always feel like comfort food to me. The flavor and fragrance of curry always warms me up.
This dish is really a simple one to make. I just sauteed some veggies, then added curry powder and let them all cook together until the veggies got tender. I wouldn’t call it a stew- there is no added liquid, sauce or gravy. Feel free to use the veggies you have around. I used what I have and what I like.
Curry is one of those flavors people seem to love or hate. I am a curry lover. Curry is a blend of spices, so it may vary from one recipe to the next. Depending on the ingredients used, curry can be mild (sweet) or hot. You can buy curry powder at most grocery stores, but the selection will be better at stores that carry international foods. I actually prefer to make my own curry powder. That way I can adjust the seasonings to my taste preference. A recipe for homemade curry powder follows the recipe for the curried veggies.
This dish can be a side dish, a main dish, served on its own or spooned over rice or pasta.
Here is the recipe. Hope you give it a try.
Curried Vegetables
3-4 T. oil – I like avocado oil
1 large onion, cut in chunks
2 cloves garlic, minced
2 medium carrots, peeled and cut into chunks
2 ribs celery, trimmed and cut into chunks
2 c. chopped cabbage
2 medium sweet potatoes, peeled and cut in chunks
1 sweet red pepper, seeded and cut into chunks
1 sweet yellow pepper, seeded and cut into chunks
salt to taste
1-2 T. curry powder –recipe follows
1/4 t. cloves
Heat oil in large skillet. Add onion and saute until tender. Add the garlic, carrots, celery and cabbage and cook until vegetables are tender, stirring often. Add remaining ingredients and cook, covered, over low heat until all vegetables are tender, about 10-15 minutes. Add more curry powder if you like. Serves 6-8.
Curry Powder
2 t. ground cumin
2 t. ground coriander
2 t. ground turmeric
1 t. nutmeg
1 t. salt
½ t. cinnamon
¼ t. cayenne pepper
¼ t. ground black pepper
Combine all ingredients and store in a cool dry place.
Homemade Calzones
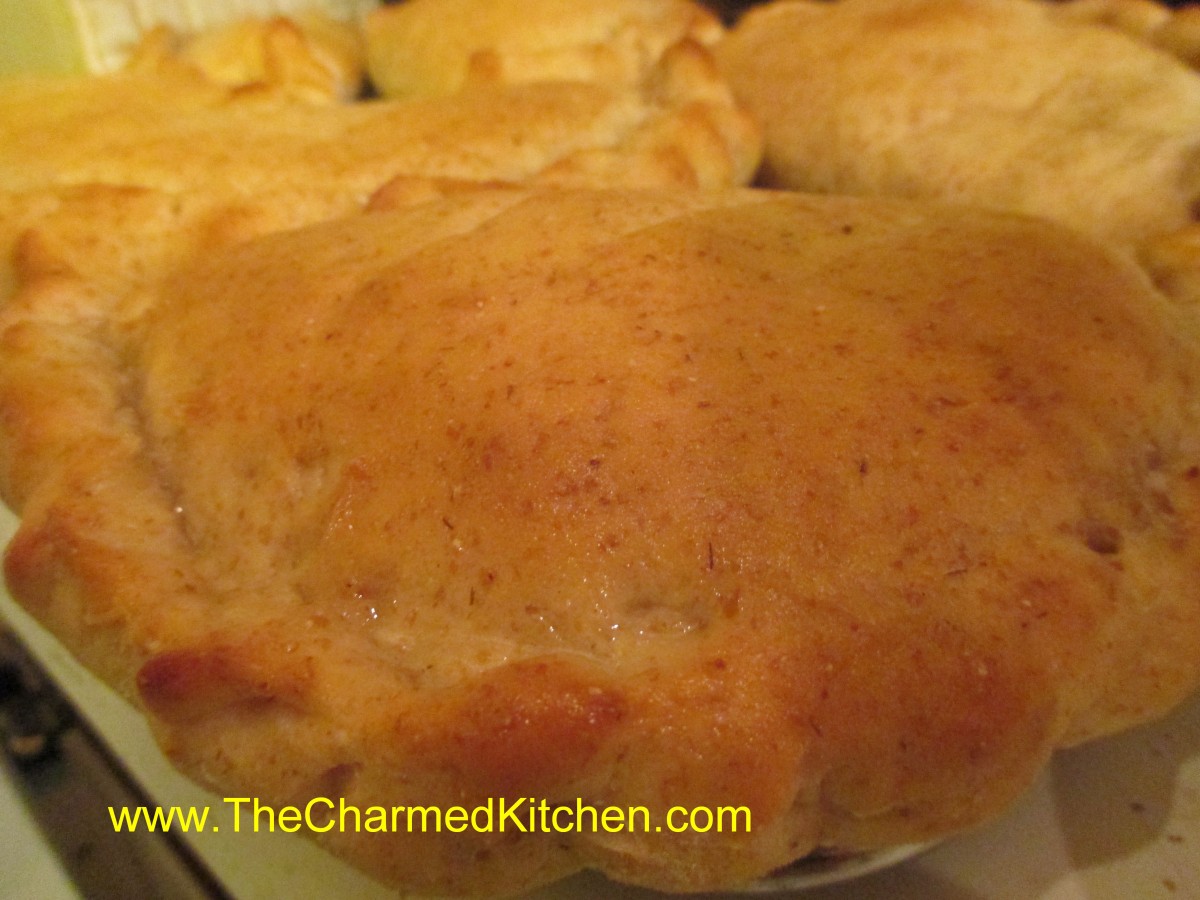
Ham and Swiss Calzone
Calzones are traditionally made with Italian/pizza type fillings, but you can fill them with all sorts of other ingredients. They are kind of a cross between a sandwich and a pizza.
I taught a class in calzone making last night. It was a lot of fun- and a great way to keep warm on a cold night. Thanks to everyone who came out.
Calzones are wonderfully portable, and great to pack for lunch. They are also great food to serve at parties.
I like to make a batch and freeze some of them. I use one of three recipes for dough, listed below, then swap out fillings depending on what I am in the mood for. Get creative and have fun.
Basic Homemade Dough
This recipe is enough for 8 large calzones, more if you make them smaller.
1 packet active dry yeast
1 t. sugar
1 2/3 c. warm water
4-4½ c. flour
2 t. salt
In mixing bowl combine yeast with 3 cups of flour, sugar and the salt. Add the warm water and stir together, mixing well. Gradually add more flour until soft dough forms. Place dough on floured surface and knead until stretchy and smooth, about 10 minutes. Allow dough to rest 3 minutes and knead a few more times. Place in bowl and cover. Let rise until doubled in bulk, about 45 minutes. Punch dough down.
Assembly: Divide into 8 or more pieces. Cover pieces until ready to roll out. Roll out a piece of dough into an 8-inch circle. Add fillings to half of the dough and wet edges with water. Fold over and press edges firmly to seal. Cut a couple of slits in top of calzone to allow steam to vent. Repeat with remaining dough.
Finishing /Baking: Place calzones on greased baking sheets. Cover calzones and allow to rise 30 minutes or so. Bake in a 400-degree oven for 20-25 minutes or until golden brown.
Variations:
Whole Wheat: You can add 1-2 cups whole wheat or spelt flour to replace the same amount of white flour for a whole grain calzone.
Rye: Add 1-2 cups of rye flour to replace the same amount of white flour. This is great for the Reuben calzones.
Fillings: Traditional fillings could include shredded mozzarella cheese, mushrooms, pepperoni, cooked sausage, chopped onions or peppers, pizza sauce (some prefer to serve sauce on the side) olives or anything you might top a pizza with.
Note: For any filling use ingredients that are cold or at room temperature. Vegetables should be cooked as raw veggies will give off water and may make your calzone soggy. If using a sauce make sure it is on the thick side. Sometimes I brush the dough with a little oil first to keep the dough from getting soggy.
Toppings: You can brush the top of the calzones with an egg wash if you like for a shinier top. Apply just before baking. If you want you can also sprinkle the tops with seeds- but use an egg wash to make sure the seeds will stick.
Ham and Swiss Calzones
1 recipe calzone dough, rye variation preferred
1 1/2 -2 lb. thin sliced ham- more or less
3/4 lb. sliced Swiss cheese
Thousand island dressing- recipe follows
1 egg , beaten
In the middle of the dough place 1 1/2 ounces of the Swiss cheese, a spoonful of the dressing and 2-3 ounces of the ham. Brush the edge of the dough with water. Fold over the dough in half and press the edges to seal. Brush the edge again with water and roll the edge over again. It will give you a prettier look and seal the calzone better. Repeat with remaining dough and fillings. Place calzones on greased baking sheets- or on a baking sheet with a silicone liner or parchment paper liner. You will end up with 8 calzones in all. Only put 4 on one baking sheet. Cover and let rest 15 minutes while preheating the oven to 400 degrees. Before placing calzones in the oven brush with beaten egg and make a few slashes with a knife to help steam to escape while baking. I put 2 baking sheets in the oven at the same time and switch them halfway through baking. Bake in a preheated 400-degree for 20-25 minutes or until golden brown. If baking 2 at once switch them after 10 minutes or so. Cool slightly before eating. Serve warm and refrigerate leftovers. Makes 8.
Thousand Island Dressing
Combine equal parts of ketchup, mayo and sweet pickle relish. You likely need at least a cup for this recipe. I made extra so the sandwiches could be dipped in extra dressing, if desired.
Reuben Calzones
1 recipe homemade dough, rye version
1½ -2 lbs. sliced corned beef
½ lb. sliced Swiss cheese
2 c. rinsed and drained sauerkraut
Thousand Island dressing
Caraway seeds, optional
Make dough and assemble 8 calzones dividing the ingredients among them. Dressing can be added in the calzones or served on the side. Use an egg wash and sprinkle on a few caraway seeds , if desired. Makes 8.
Curried Vegetable Calzones
1 recipe calzone dough
2 T. oil
1 onion, sliced
1 c. sliced carrots
1c. chopped cauliflower
1 c. green beans, sliced
1-2 T. curry powder, or to taste
Salt and pepper to taste
Heat oil in skillet and sauté onion until tender. Add the rest of the veggies and cook until tender. Sometimes I cover the pan and turn down the heat to steam them. Once veggies are tender drain and set aside to cool. Season to taste with curry powder and salt and pepper. Divide mixture among 8 calzones. Makes 8.
Spinach and Artichoke Calzones
1 recipe calzone dough, whole wheat works well in this recipe.
1 can (about 15 oz.) artichoke hearts, drained well and chopped
1 package (10 oz.) frozen spinach, thawed, and drained well
2 c. shredded mild cheese or 1c. crumbled feta cheese
1 T. lemon juice
Salt and hot pepper sauce to taste
Combine ingredients and mix well. Divide among 8 calzones. Makes 8.
Freezing Calzones: Note: you can freeze them baked or unbaked. Just place calzones on wax paper on a baking sheet and place in the freezer until frozen. Remove from baking sheet and wrap in plastic wrap, foil or wax paper and place in freezer bags. Label and place back in the freezer.
If you froze them unbaked- thaw in fridge overnight- unwrap but cover loosely with plastic wrap and a towel. Thaw in fridge at least 8- 12 hours. Place on greased baking sheet and place on counter at room temperature for another hour or two, covered with a towel. Bake in oven as normal.
If you froze them baked- you can heat up in a microwave- about 3 minutes per calzone. You can also warm them in a conventional oven. Place on baking sheet and bake in a preheated 350 degree oven for 20-25 minutes. Cover with foil if it starts to get too brown.

Reuben Calzones
Mom’s Creamed Spinach
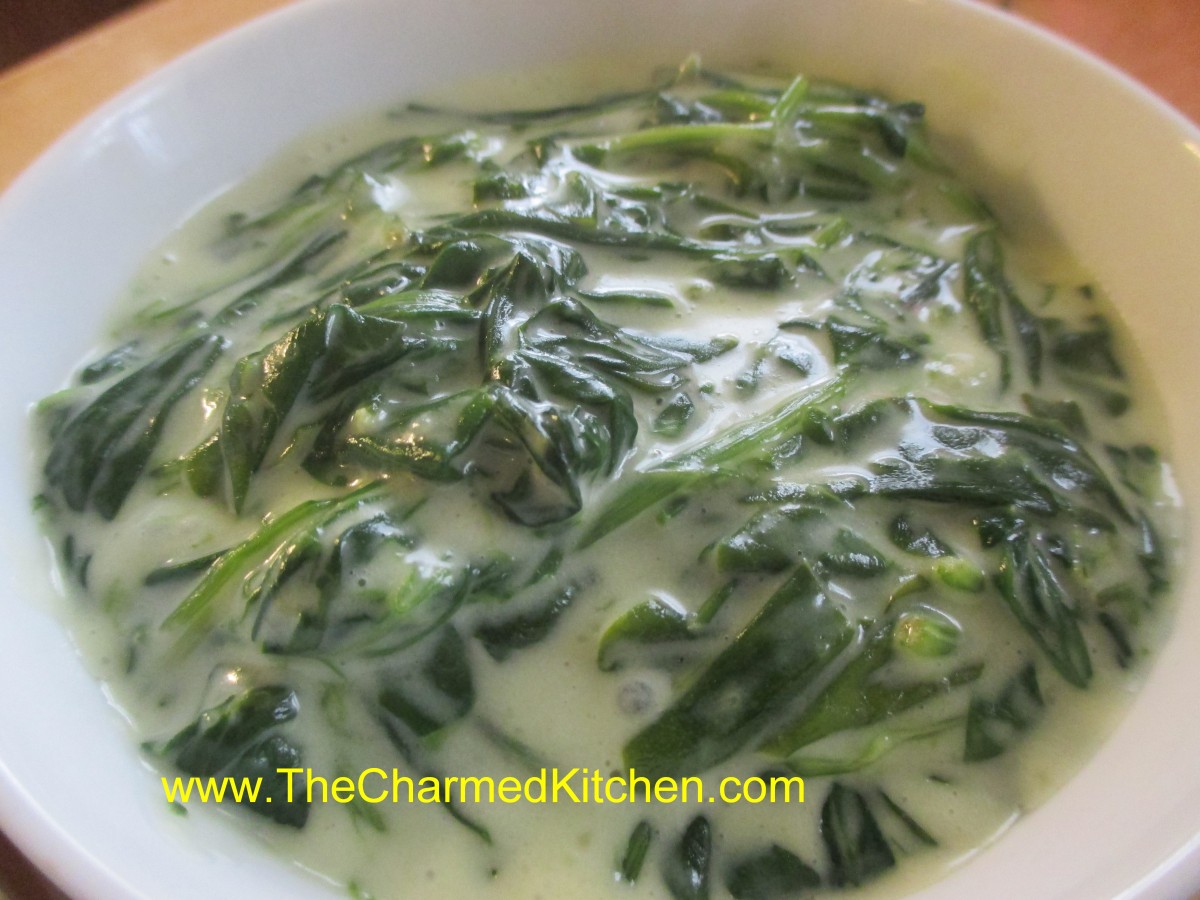
Mom’s Creamed Spinach
Creamed spinach is one of my favorite dishes. A fond memory from childhood, too. Some foods are about more than food.
Creamed spinach always makes me think of my mother. I can remember watching her make creamed spinach, thickening the sauce, and watching her stir the spinach mixture as it became thickened and bubbly. She would let me stir it, to keep it from sticking. It was always one of my favorite dishes- as a kid and today.
Mom really liked spinach. She cooked with spinach a lot. She also made pork chops Florentine, occasionally rolled spinach inside a boneless turkey breast and made a wonderful spinach salad with a sweet and sour dressing, hard cooked eggs and croutons. Here is her recipe.
Creamed spinach is a wonderful side dish, but honestly, I could make a meal out of it. Here is the recipe. Enjoy!!
Mom’s Creamed Spinach
2 (10 oz.) packages frozen spinach or 2 lbs. fresh spinach, washed and stemmed
1 T. butter
1 c. milk – or half and half
2-3 T. flour
salt and pepper to taste
1/2 t. dill weed
Cook spinach in a small amount of water and drain when heated through or wilted. Return spinach to pot and add butter. Place milk and flour in jar with tight fitting lid and shake until well mixed. Add to spinach and cook, stirring constantly until thickened and bubbly. Season to taste and serve.


