Broccoli and Cauliflower Salad

Broccoli and Cauliflower Salad
I make broccoli salad pretty often. It is one of my favorites. Sometimes, I like to switch it up a little by adding cauliflower. The result is a salad that has a great mixed of flavors, colors and textures.
The addition of bacon also adds a wonderful smoky flavor. Certainly, feel free to omit the bacon for a vegetarian salad. With or without the bacon, this is a great salad.
Unseasonably warm weather put me in the mood for a salad, over perhaps soup, for dinner last night.
Broccoli and Cauliflower Salad
1 small head cauliflower, trimmed and broken into bite- sized pieces
2 broccoli crowns, cut into bite- sized pieces
1 sweet pepper, seeded and chopped
1 c. shredded cheese- I used a sharp cheddar
8- 10 slices of bacon, cooked and chopped
1/2 cup of mayo – or more according to your taste
salt and pepper to taste
Steam the cauliflower and broccoli until just tender/crisp. About 5 minutes in a microwave steamer, 6 minutes in a conventional steamer. Place in a bowl to cool down then combine with remaining ingredients and stir to combine well. Adjust seasonings, if needed. Serves 6-8.
Classic Apple Galette
Apple Galette
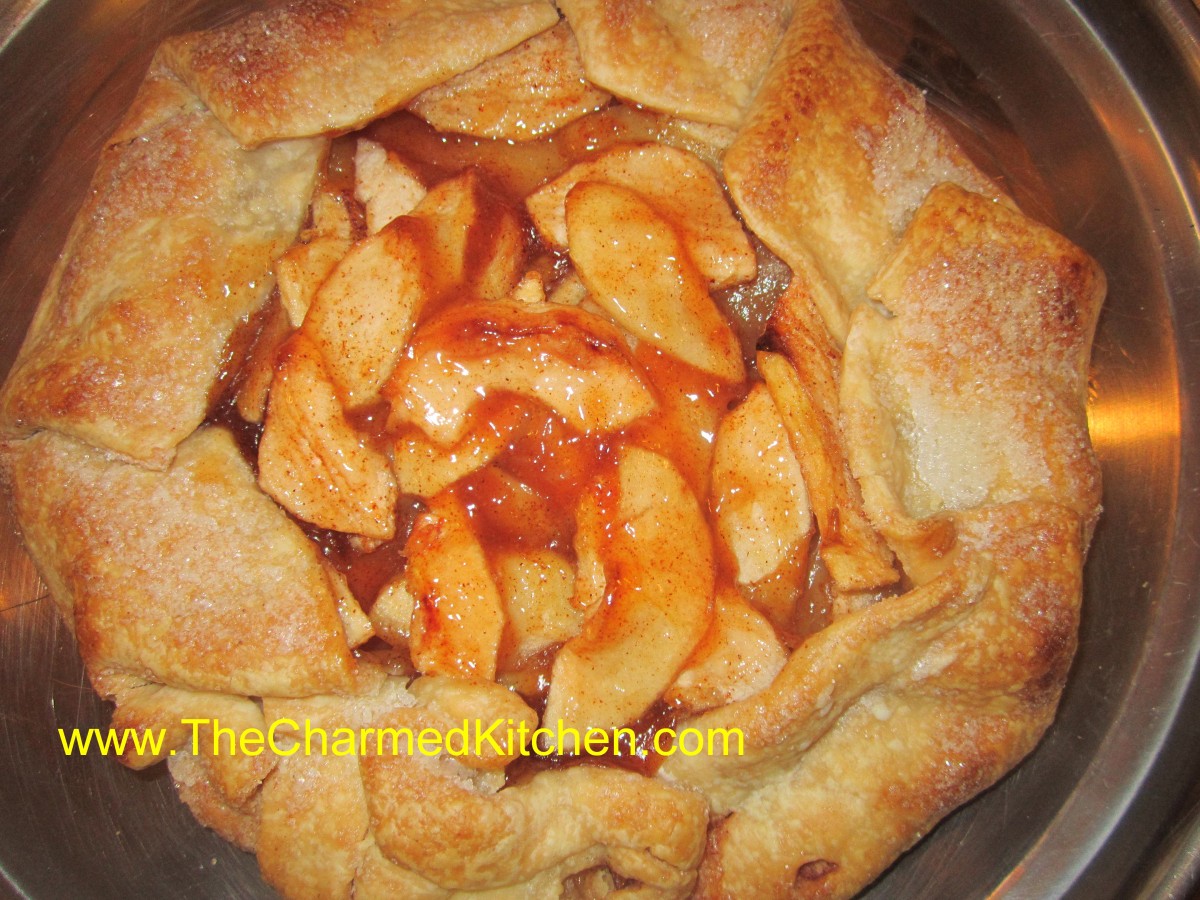
If you like apple pie, you should like apple galette. A galette is made by rolling out your crust, adding filling and folding up the edges. No pie pan involved.
I actually find a galette easier to make than pie. You don’t have to try to roll out your dough to fit into the pie pan. Nor does you dough have to be rolled into a perfect circle.
That takes a lot of pressure off, if rolling a perfect circle of dough is not your best talent. I must confess to liking its rustic charm. I make my own crust, but you can used purchased crusts, if you prefer.
You can serve your galette with ice cream, whipped cream or dusted with powdered sugar. You can make it with other fruits, as well. Any fruit pie can become a galette.
Apple Galette
Flaky Pie Crust
2 c. flour
1 t. salt
3/4 c. butter, chilled
1 T. cider vinegar
4-5 T. cold water
Combine flour and salt and cut in butter. Toss in vinegar and water 1 tablespoon at a time until dough holds together. Use a fork to toss the ingredients together and as soon as the mixture holds together stop adding water. Makes 2. Chill well before using.
Filling:
5-6 medium apples- I used Jonathan, Gala and Macintosh
2/3 c. sugar- plus extra for sprinkling
3 T. cornstarch
1 T. cinnamon
1 T. Lemon juice, plus extra for treating the apples
1 t. nutmeg
1 t. vanilla
1/2 t. salt
Prepare dough. Roll half the dough into a 10-inch circle- repeat with remaining dough. Keep covered with plastic wrap until ready to use. Peel and core apples and slice thin. Place apples in water with lemon juice added to prevent browning. Drain apple slices well and place in a bowl. Toss with the sugar, cornstarch, lemon juice and seasonings. Place one of the crusts on a baking sheet. Pile half of the prepared apples on the center of the crust. You should have about a 2-inch circle of dough around the edges that is uncovered. Fold edges of the crust up over the apples pressing lightly to hold in place. Sprinkle with a little extra sugar. Repeat with the remaining crust and apples. You will have a little liquid in the bowl from the apple mixture- save that for now. Place the galettes in a preheated 425 degree oven and bake for 15 minutes. Turn down heat to 350 and bake for another 40 minutes or until crust is golden brown. While galettes are baking take the liquid left from the apples and cook in a small saucepan until thickened- it will take a minute or two. This will be used to glaze the galettes. When galettes come out of the oven brush the apples with the thickened glaze. Cool on wire rack. Makes 2.
Fruit Tarts in Hudson

Fruit Tarts
I started teaching after school cooking classes in Hudson. I’ll be working with the same 20 kids for the next month, or so. They are great. This is going to be a lot of fun.
Since it was warm yesterday, I thought it would be fun to cook with fruit.
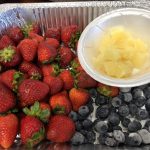
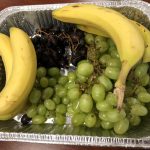
The kids made fruit smoothies, fruit fondue- with yogurt- and fruit kebobs. BTW, kids really like putting fruit on sticks.
The highlight was when I let them know we were making miniature fruit tarts. We don’t have an oven in the room we use for class, so I baked the tarts shells at home. The kids filled them with pudding and then assorted fruits. They really enjoyed making them. Some didn’t want to eat them, so they could show their families what they had made.
Here are some of the pictures. The fruit tart recipe follows.


Eva’s Fruit Tarts
3 c. flour
1 t. baking powder
½ t. salt
1 c. butter
3 eggs
2 pkts. Yeast
½ c. warm milk
Filling:
Pudding or lemon curd plus assorted fruits for topping the tarts.
In mixing bowl, combine flour with baking powder and salt. Cut butter into flour until mixture looks like coarse crumbs. Set aside. Place eggs in a small bowl and beat until smooth. In small bowl, dissolve yeast in warm milk. Add to egg mixture and stir to combine. Add egg mixture to flour mixture and stir until combined. If mixture is sticky, add a small amount of flour. Roll dough out on floured board. Thinner the better, as this dough will puff some when baked. Cut into circles to fit small tart pans. Press into tart pans. Bake tart shells at 350 for 12-15 minutes, or until light golden brown. Thinner crusts and smaller tarts shells will bake quicker. Remove tart shells from the oven and cool before filling. Spoon a little pudding or lemon curd in each tart, then top with assorted fresh fruits. I like berries and grapes. Makes about 4-5 dozen tiny tart shells.
Cabbage with Apples
Cabbage with Apples
I think cabbage is underrated. It is such a versatile vegetable. Cabbage is good in both hot and cold dishes, it isn’t expensive, and cabbage is good for you. Big heads of cabbage are at all the local farm stands this time of year.
So are apples.
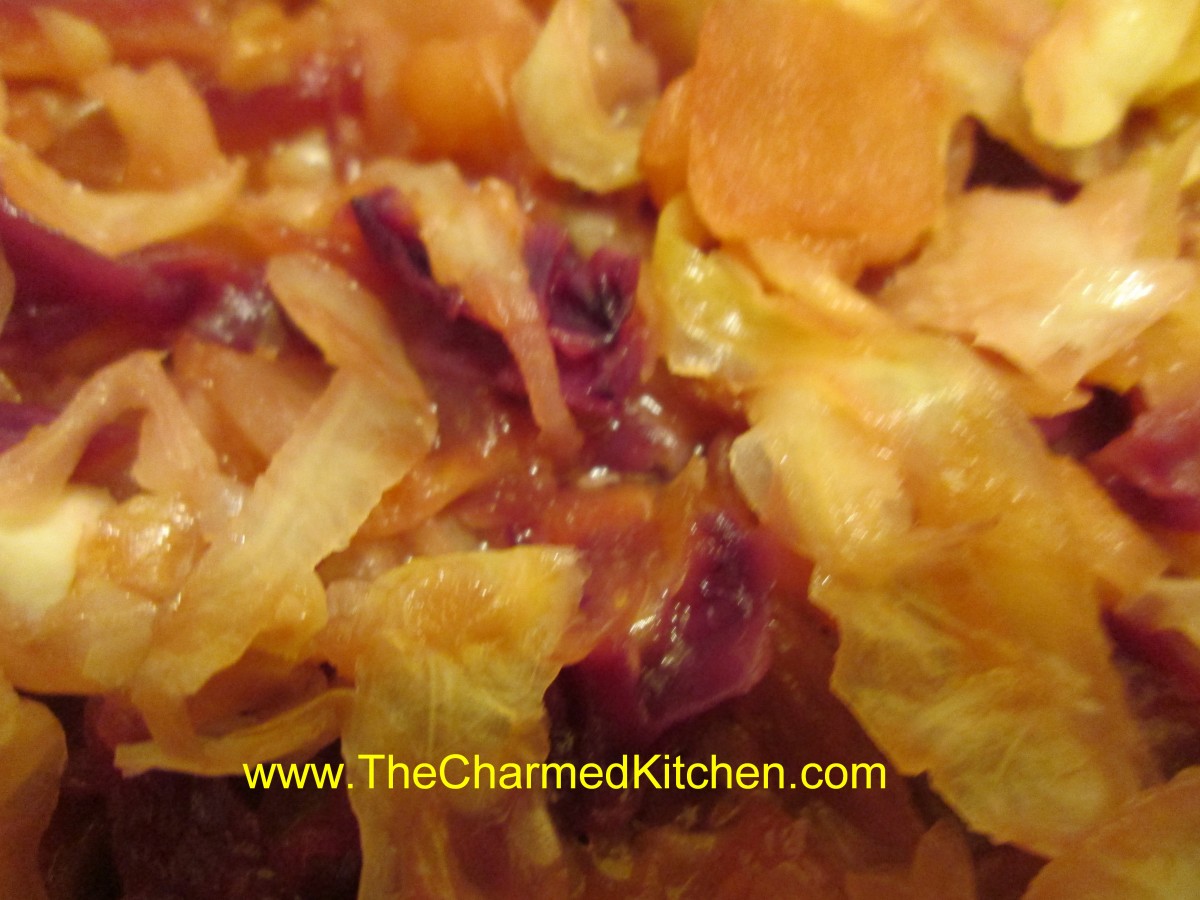
I was looking for a side dish for a chicken dinner the other night and I decided to start with cabbage. Since I had a pretty good sized head of green cabbage, and just a small piece of red cabbage, I mixed the two together. I added cider vinegar, sugar and seasonings. Then I added apples to round out the dish. It had a sweet and sour flavor that went well with the meal. In many ways, cabbage, with its earthy “greenness”, pairs perfectly with sweet/tart apples.
I would also serve this as a side dish with duck, beef, pork or even a lamb roast. It would go well with any of them. You could use any color cabbage for this dish- or combine colors, as I did. Perfect for a Fall dinner.
Cabbage with Apples
2-3 T. oil
2-3 onions, sliced thin
8 c. chopped cabbage, any color
1 c. stock- chicken or vegetable stock
1/2 c. apple cider vinegar
1/4 c. sugar
1 t. celery seeds
3 apples, peeled , cored and diced
salt and hot pepper sauce to taste
Heat oil in skillet and cook onion until tender and a little wilted. Add cabbage, stock, vinegar, sugar and celery seeds and cook until cabbage is tender. Most of the liquid will evaporate. Add the apples and cook until apples are just heated through. Season with salt and hot sauce and serve. Serves 5-6.
Butternut Squash Saute

Butternut Squash Saute
Winter squash season is here, and I could not be happier. I love the variety of squash (and pumpkin) at the markets this time of year. They are both beautiful and tasty.
This dish is a saute of butternut squash with onions, garlic, carrots and finished off with black sesame seeds. It makes a great, seasonal side dish.
I used butternut squash, but you could use any number of hard squashes, or even pumpkin. If you are looking for a different way to cook some of those squash- try this dish. I think you might be surprised at just how good it is.
When cutting up hard squashes, you have to be careful not to cut yourself. A round, hard squash, with a tough outer skin can be a recipe for disaster. I trim a small slice off one end of my squash, creating a flat side. Then I lay it down on that side, to make it more stable for cutting. With the butternut, once it was sliced on one side, I was able to cut in in half pretty easily.
To peel a hard squash, so you can cut it into cubes, and use a vegetable peeler to remove the skin. You will need to run the peeler over the skin a few times to get off all of it. Then cut into cubes.
Butternut Squash Sauté
3 tablespoons olive oil
1/2 cup chopped onion
1 teaspoon minced garlic
4 cups cubed fresh butternut, acorn or Hubbard squash or pumpkin
1/2 cup grated carrot
2 tablespoons soy sauce
1 teaspoon salt
1 teaspoon ground black pepper
2 teaspoons black sesame seeds
Heat the oil in a large skillet. Add the onion and garlic; cook and stir until the onions begin to brown. Stir in the squash, carrot, soy sauce, salt, and pepper; cook, covered, another 5 to 7 minutes, until squash is tender. Sprinkle with sesame seeds before serving.
Apple Cider Sorbet

Apple Cider Sorbet
I’ve had my share of warm apple cider, but I never froze it before. This sorbet is such a nice dessert option. Light and naturally sweet, it is the perfect finish for any meal.
The cider is boiled down, to concentrate the sweetness. Then fresh apples are added and pureed. The mixture gets frozen, then pureed one more time- to really smooth out the texture. Cinnamon sticks impart their flavor when boiled in the cider. You could certainly used ground cinnamon, if you don’t have cinnamon sticks. Feel free to add other spices, too, like allspice, cloves or ginger.
Over the years, I have made all sorts of sorbets. I love the light, creamy texture. I am not sure why I never tried to make an apple sorbet before. I am so glad I finally did. So many holiday meals are heavy. This is a nice, lighter option for dessert. It is also a nice dairy-free option, for those who can’t have ice cream.
Apple Cider Sorbet
6 c. apple cider
2 (4-inch) cinnamon sticks
3 apples, peeled, cored and diced
In saucepan place cider and cinnamon sticks. Cook over medium high heat, uncovered, until cider has cooked down to 2 cups. Remove cinnamon sticks and discard them. Cool cider and combine in food processor with the apples. Puree until smooth. Transfer mixture to a container with a lid. Freeze until solid. Remove from freezer and allow to soften for a few minutes. Break into chunks and puree in processor, until smooth and creamy in texture. You can serve it right away, or return to freezer to enjoy later. Makes 1 quart of sorbet.
Cheesy Butternut Squash Bake

Cheesy Butternut Squash Bake
This butternut squash dish was a big hit at dinner last night. Creamy, cheesy and naturally a little sweet from the squash, it came out even better than I had hoped. When I started making it, I had no idea what I was going to end up with.
I had some leftover cooked squash in the fridge. I needed a side dish for dinner and wanted to use up the squash. I wasn’t sure if I wanted to go savory or sweet. I mashed up the squash, then rummaged in my fridge. I had some sharp white cheddar cheese and shredded it up, adding it to the squash. I also had an open carton of whipping cream- so I added that, too. I was worried it would be too runny, so in went a little cornstarch. Then I added a generous amount of salt and fresh ground pepper.
I put the mixture in a baking dish and popped it in the oven. I took it out when it was all bubbly and hot. In hindsight, I could have given it a few more minutes to brown a little on the top.
Sometimes the hardest part about cooking is coming up with a name for a new dish. I wasn’t quite sure what to call this one. I thought about calling it a mash or maybe a casserole. I ended up with the innocuous name bake. Well, whatever you call it, I think you will love it as much as I did.
Feel free to play around with the cheese you use. Anything that melts will work. You can also use different winter squashes or pumpkin, too.
So here is the recipe.
Cheesy Butternut Squash Bake
4 c. cubed butternut squash
8 oz. shredded cheese- I used a sharp cheddar
½ c. heavy whipping cream- or half and half
2 T. cornstarch
Salt and pepper to taste
Cook the cubed squash until tender. You can steam, boil or roast. If boiling, be sure to drain well. Place cooked squash in a bowl and mash. It is ok if there are still some small lumps. Add remaining ingredients and combine well. Place in a baking dish and bake in a 350 degree oven for 30 minutes, or until mixture is bubbly. Serves 4-6.
Mom’s Green Beans
 It’s funny how certain foods spark memories. Last week, a friend gave me some beautiful beans. Not just green beans, but a mix of colorful beans. Thanks, Terry.
I can’t see fresh green beans without thinking of my mother.
She loved fresh vegetables and I credit her with inspiring a love of veggies in me. But there were certain vegetables that were favorites. Beans were one of those.
In the summertime, our family would often go for a Sunday drive. We’d make our way into the countryside, stopping at little roadside farm stands on the way. My mom would always be on the lookout for beans.
During the summer, after one of our drives, she would serve us an evening snack that seemed normal to me. I am sure it would have seemed odd to my friends.
Mom started by trimming the ends off the beans, but leaving them whole. She would then boil up the green beans. She cooked them until they were just tender. She didn’t like her vegetables “cooked to mush.” Then she would pile them up on a plate, sprinkle them with salt and add a pat of butter.
We ate the beans with our fingers, picking up a bean and running it over the butter. It was a favorite snack of mine.
So I decided to enjoy some of the lovely beans I was gifted, by making them ‘Mom style”. The only difference is that I used a homemade toasted sesame salt.
It was just as wonderful as I remember.

Wilted Kale Salad – With Bacon and Eggs
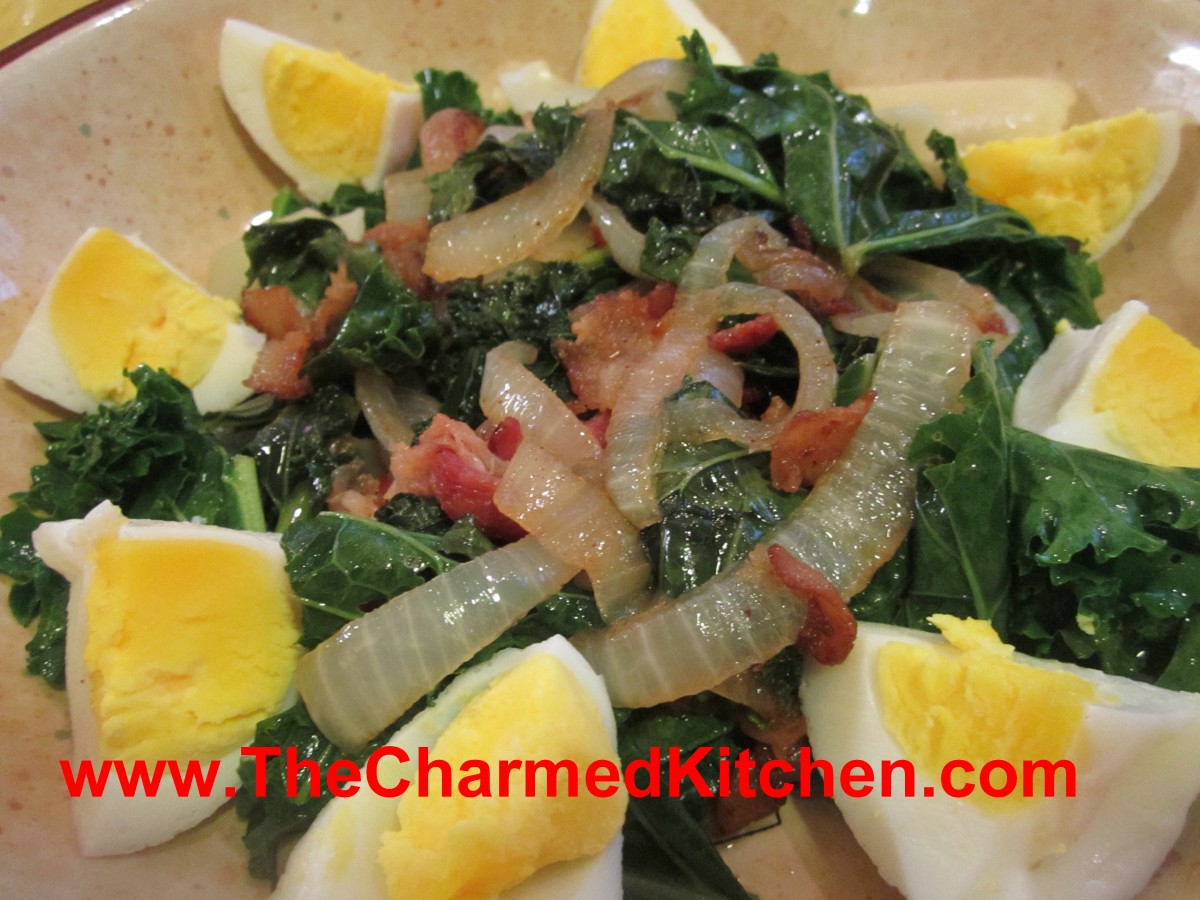
Wilted Kale, Bacon and Eggs Salad
When I was a kid, my Mom used to make a wilted spinach salad. I loved it. I used that as inspiration for this dish. I have a lot of kale growing in my garden. As summer comes to a close, I feel the need to enjoy my garden produce more than ever.
It was muggy yesterday, and I wasn’t in the mood for a lot of cooking. I wanted something fast for dinner and a salad came to mind. I didn’t have any lettuce or spinach in the house- but I did have all that kale.
What I ended up having was even better than expected. A couple of hard cooked eggs, smoky bacon, onion, and a touch of maple syrup made this a dish I plan on having again soon. It is a lovely salad for a muggy end of summer dinner, and a nice Autumn salad, too.
Wilted Kale Salad With Bacon and Eggs
2-3 slices thick sliced bacon, chopped
1 onion, sliced
4-5 cups kale, washed and torn into pieces
2 T. cider vinegar
1 T. maple syrup
dash of hot sauce
2 hard- cooked eggs, peeled and cubed
In skillet cook bacon until crispy. Remove bacon from pan and set aside. Remove some of the fat from the pan- leaving about 2 tablespoonfuls. Add onion and cook until golden. Return bacon to pan and add the kale. Cook over medium-high heat, stirring often, until kale in wilted. I don’t mind my kale on the firm side-cook it longer if you like it more tender. Drizzle in the vinegar, maple syrup and hot sauce and stir to coat evenly. Place on a serving dish and top with the eggs. Enjoy!!
City Chicken

City Chicken
If you never had City Chicken, you don’t know what you are missing. Meat on a stick- always a good thing. But not just meat on a stick- breaded meat on a stick! If you like breaded pork chops, you should love City Chicken.
This is a dish I grew up with. When my Mom made City Chicken, I knew dinner was going to be special.
There is no chicken in the dish at all. Odd, but well, I didn’t name the dish, I just like eating it.
City Chicken is normally made with chunks of pork- or chunks of pork and veal- skewered on wooden sticks. I used pork. After skewering, the meat is dipped in seasoned flour, egg wash and then bread crumbs- or cracker crumbs.
You can just bake them, or brown in a little oil first, before baking- for a crispier coating.
I didn’t have my Mom’s recipe, so I recreated it as I remembered it. I invited a few friends over to try them, and all my guests enjoyed them. So here is my recipe. A tasty dish, and also a trip down memory lane.
City Chicken
2 lbs. boneless pork – I used Western style ribs
½ c. sherry – not cooking sherry
2 T. soy sauce
¾ c. flour
Salt and pepper
3 eggs
½ c. milk or half and half
2 T. chopped parsley
Hot sauce
½ t. garlic powder
1-2 c. bread crumbs
2 t. dried basil
2 t. dried oregano
½ t. dried thyme
Oil
6 –inch Wooden sticks or skewers
Cube pork into 1-inch cubes. Place in a bowl and add the sherry and soy sauce. Stir to combine, cover bowl and place in fridge. You can do this a couple of hours ahead or even a day ahead. You might not really need to do this step, but I like the flavor of the sherry, so I chose to marinade my pork in it before breading. Your choice, completely.
Take pork and skewer it onto wooden sticks. I used skewers that were a little thicker than what I normally use. Since they were long, I cut them in half before using. I ended up with 9.
Place flour in a bag with salt and pepper to taste. Add one pork skewer at a time to the flour, shaking to coat evenly. Place floured pork skewers on a tray. Once finished, combine eggs with the milk, parsley, hot sauce, garlic powder and a little more salt and pepper. Place bread crumbs in a bag with the basil, oregano and thyme. Shake to combine. Dip each floured skewer into the egg mixture, remove from egg mix and allow excess to drip off a little. Then place in the bag of bread crumbs, shaking to coat evenly. Repeat until all the city chicken is breaded.
Now I know I already asked you to wait to marinade the pork in the beginning. I am going to ask you to wait again. If you fry up the city chicken right away, the breading is likely to fall off. If you bread the city chicken early in the day- then leave it in the fridge at least a couple of hours before cooking it, the breading will stay on much better. I actually marinade a day ahead, in the morning. Then I bread them in the evening the night before. But even breading them a couple of hours before makes a big difference. Just keep in the fridge until you are ready to cook.
When ready to cook them- I know you were giving up hope we would ever get to this step- heat oil in a large skillet. You don’t need much oil- a few tablespoons, at most. Brown the city chicken on all sides in the hot oil. Transfer them to a baking dish, as you finish browning them. Place in a preheated 350-degree oven for about 30 minutes. Don’t bake them too long- you don’t want them to dry out. Pork has to reach a minimum internal temp of 145 F. Serves 6.


