Homemade Elderberry Liqueur

Elderberry Liqueur
I love my elderberries and look forward to harvest time every year. I always wish I had just a few more. Elderberries are used for pies and jelly. They are often used to make a medicinal syrup. Lots of people, including me, rave about the healing power of elderberries.
One of my favorite uses for elderberries is to make liqueur. The process is pretty simple. You just combine the berries with some alcohol- vodka, brandy or a combination of the two. The mixture has to steep for a few months to get as much flavor from the berries as possible. After that, it is strained, sweetened and allowed to mellow out a little longer before drinking. The hardest part is just waiting for it to be finished.
It is worth the wait. Elderberries have a slight bitter undertone and unique flavor. I love it.
I gifted a bottle of it last year to a dear friend who loves elderberries even more that I do. She was so pleased and she would call me every time she was drinking it, just to thank me again.
So here is the recipe. If you don’t grow your own elderberries, you can check out local farm markets.
Elderberry Liqueur
4-c. fresh elderberries
Peel from 1 lemon, optional- yellow part only
4-c. vodka or 2 c. vodka and 2 c. brandy
1 c. simple syrup- recipe follows
Stem berries, rinse and place in a large jar. Combine with peel, if using, and alcohol of choice. Close jar and store in a dark place. I just keep mine in a cabinet. I write the date on the jar, so I know when it has steeped long enough. Steep 3 months. Strain and filter and add sugar syrup. Mature 4-6 weeks.
Simple syrup is made from 1 cup of sugar and ½ cup of water. Bring to a boil, then cool. You will have 1 cup of syrup. You can sweeten with honey, if you prefer. Watch when you substitute honey for sugar, as it is sweeter and stronger flavored. Better to use orange or clover honey. Add a small amount, stir well and taste in a few days. You can always add more sweetener later on.
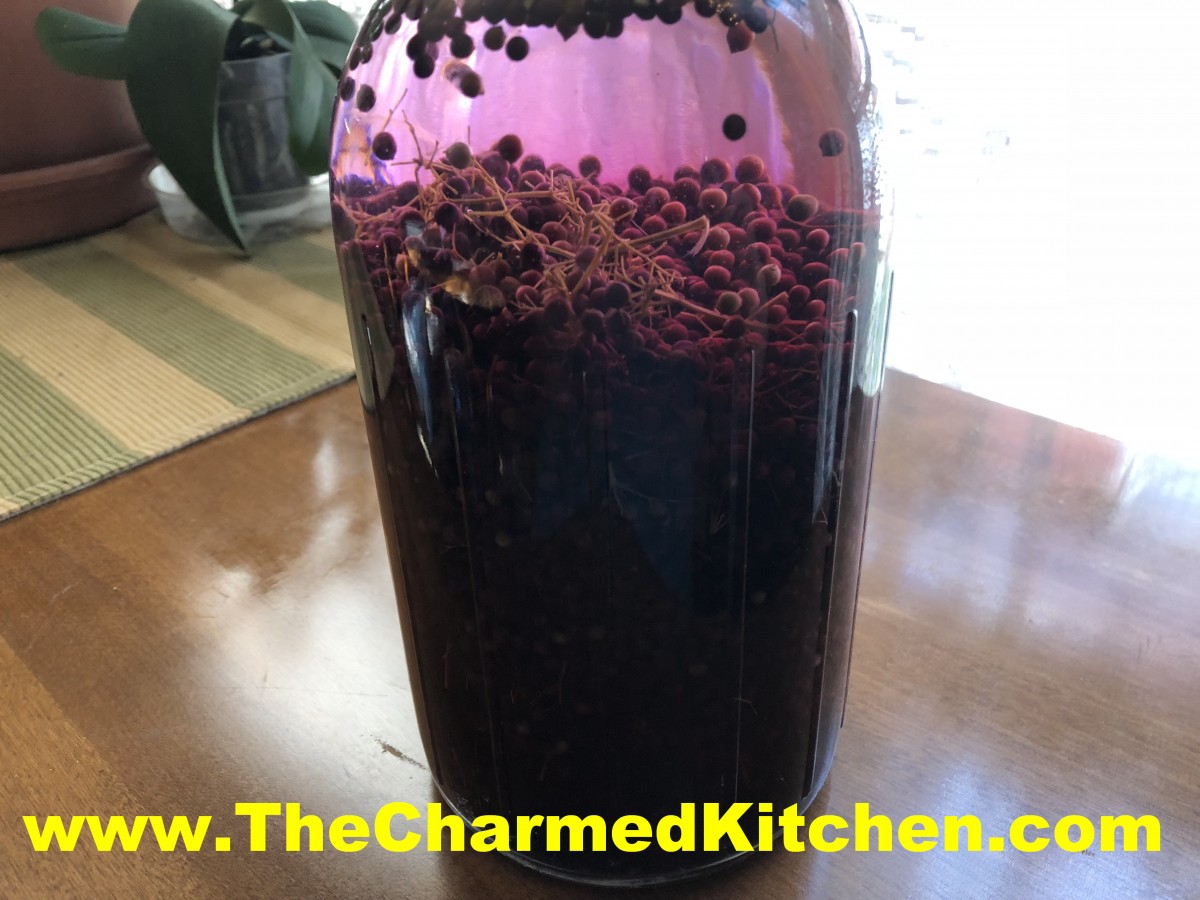
This year’s crop. The liquid will darken with time.
Tomato Lover’s Pasta Salad

Tomato Lover’s Pasta Salad
I have been enjoying plenty of fresh, local tomatoes and I am always looking for new ways to enjoy them. This salad really celebrates the tomato.
I used tomatoes three different ways in this one salad. I started with a homemade tomato pasta, added fresh diced tomatoes and finished it with a tomato salad dressing.
The salad has fresh mozzarella cheese added to it, along with some hard cooked eggs. You could easily add cooked chicken or shrimp, if you prefer.
Here is the recipe for the salad and the dressing. I posted the recipe for the homemade tomato pasta before. The link for the pasta recipe is at the bottom of this post. You can, of course, use store bought pasta, if you prefer.
Tomato Lover’s Pasta Salad
8 oz. tomato pasta or tri-color pasta, I used homemade
12 oz. diced tomatoes
2 sweet peppers, seeded and chopped
½ c. sliced green onions
4 oz. mozzarella cheese, cubed or shredded
3-4 hard cooked eggs
Tomato herb dressing- recipe follows- or use the vinaigrette of your choice.
Cook pasta according to package directions. Drain. Combine with remaining ingredients and toss. Serve immediately or chill. Serves 4.
Tomato and Herb Dressing
1 c. tomatoes, peeled and seeded, fresh or canned
½ c. chopped parsley
2 green onions, chopped
2 T. fresh celery or lovage leaves
2 T. fresh basil leaves or 2 t. dried
½ t. each salt and garlic powder
½ c. olive oil
Dash hot pepper sauce
Combine all ingredients in blender until smooth. Makes 1 ½ c.
Purslane Salsa

Purslane Salsa
This time of year, a lot of gardeners are talking about weeds. Tired of pulling them, tired of fighting them. You might not know it, but you can eat some of them.
Purslane is a very edible “weed” and is growing like crazy right now. It is tolerant of hot, dry weather. The thick, fleshy leaves and stems are pretty hard to miss.
Purslane tastes good raw or cooked. The flavor is a little lemony. Quite pleasant. I like to use the leaves raw, in a type of salsa or relish.
So if you are tired of pulling weeds, look and see if you have purslane. Then you can think of it as harvesting, not weeding.
Purslane Salsa
2-3 cups purslane leaves and small stems, broken or cut into bite-sized pieces
½ c. chopped sweet onion
½ c. chopped sweet pepper
½ c. cider vinegar
½ c. oil
¼ c. chopped cilantro or parsley, optional
Salt and hot pepper sauce to taste
Wash purslane and place in a medium bowl. Add vegetables and stir. Combine vinegar, oil and seasonings in a jar with a tight-fitting lid and shake well. Pour over purslane mixture and mix well. Cover and chill. Serve with tortilla chips or with grilled meats or veggies.
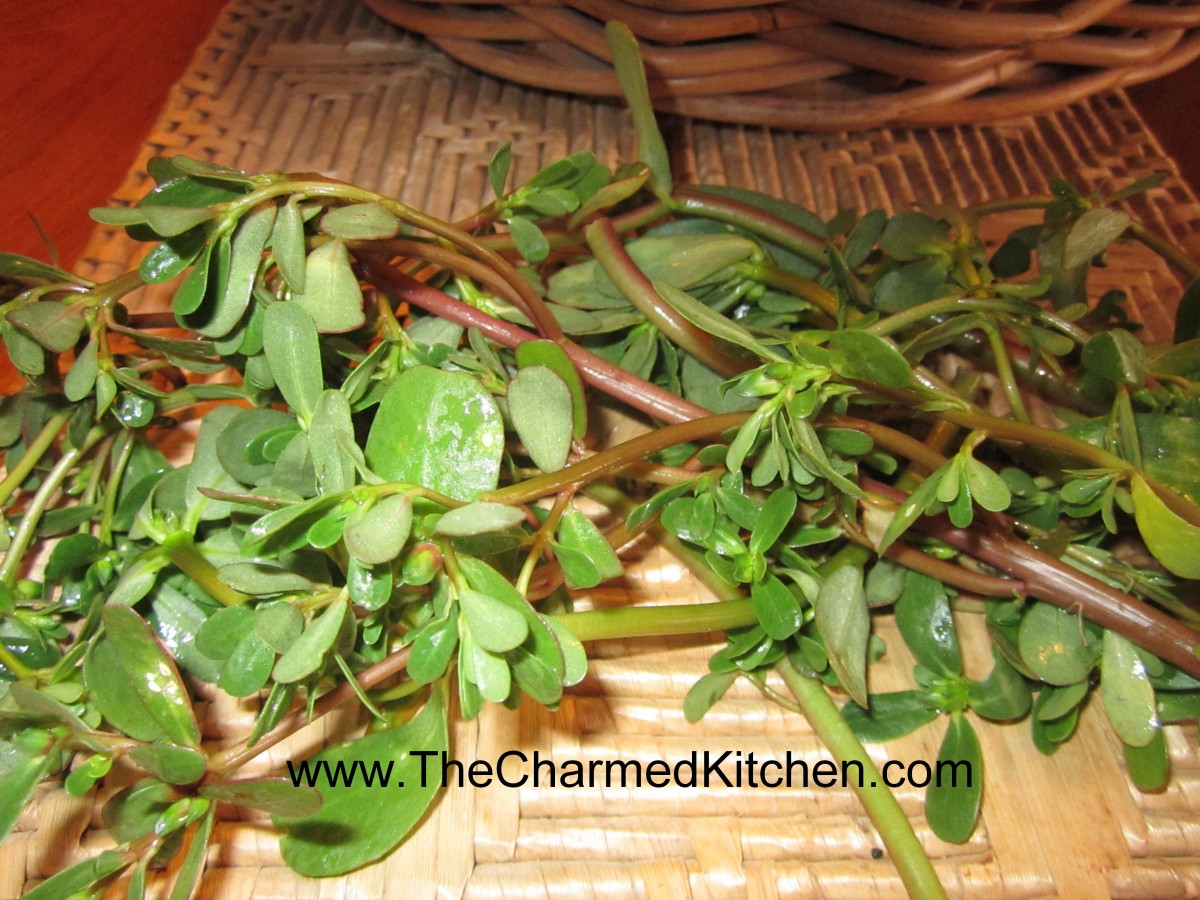
purslane
Homemade Play Dough
Play Dough
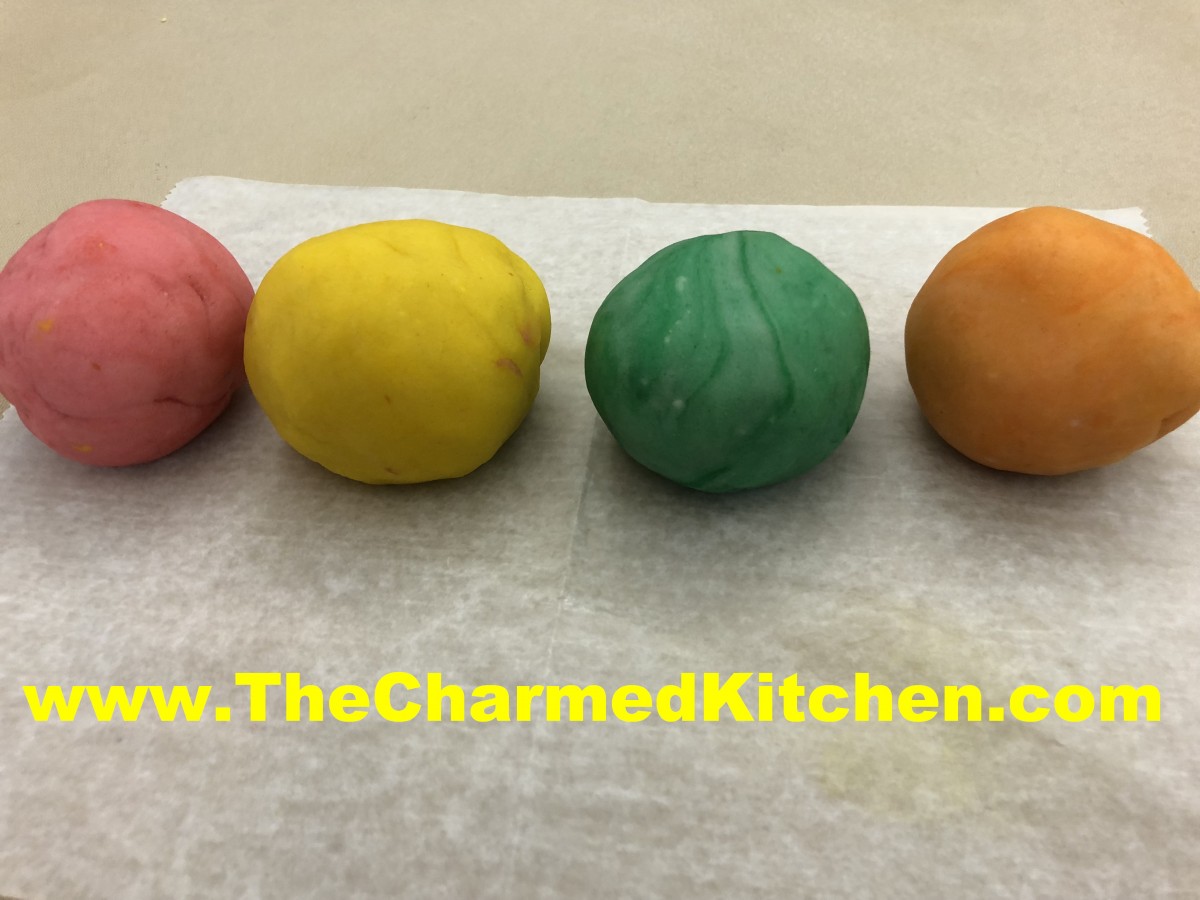
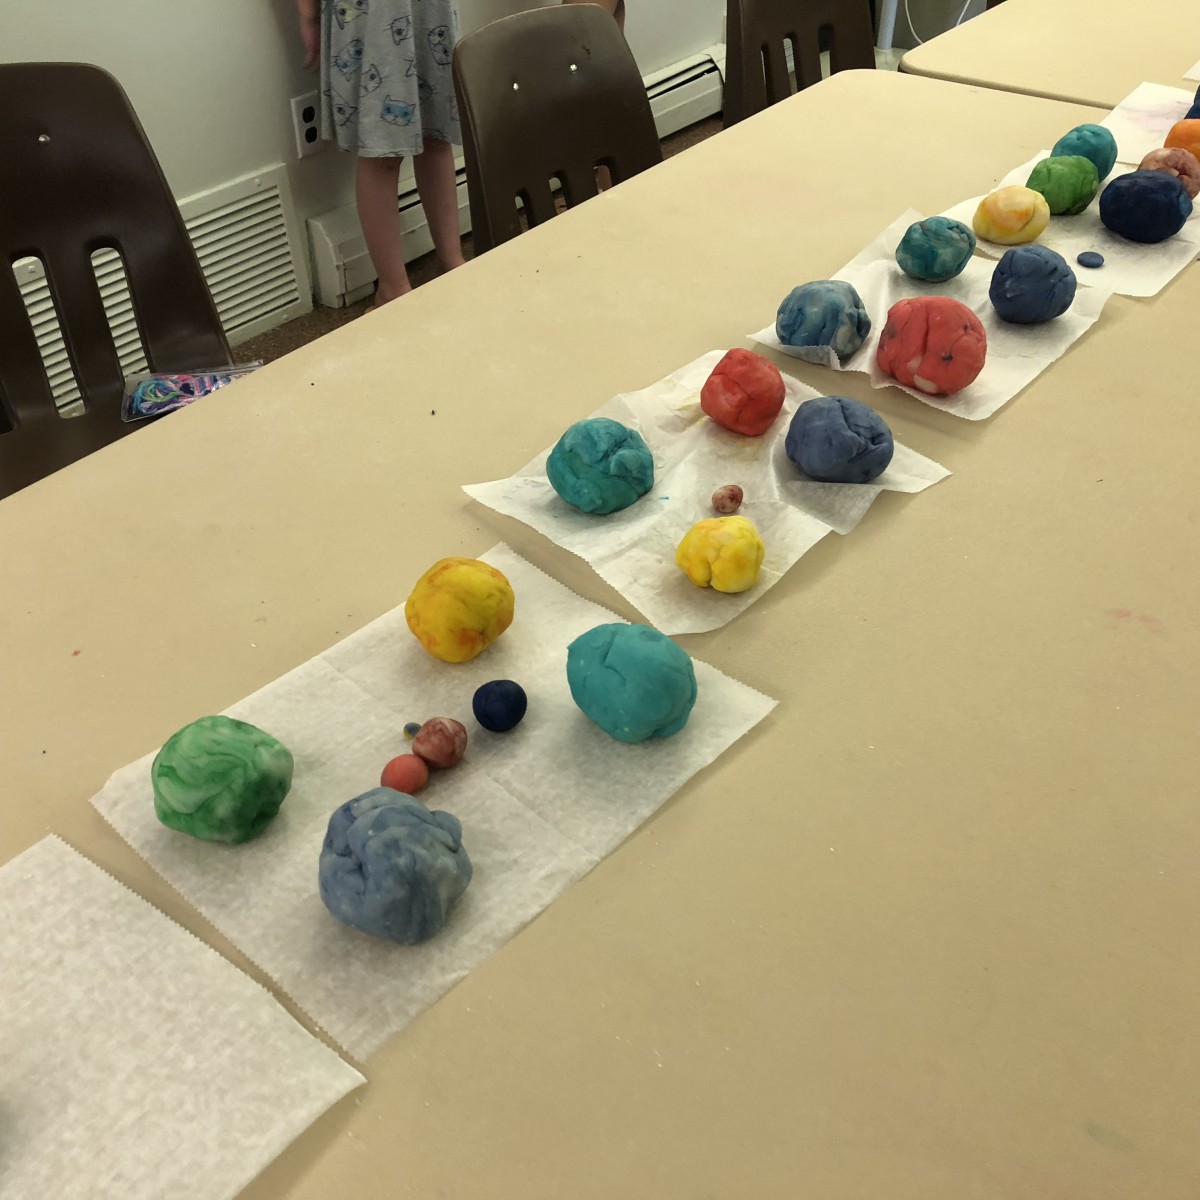
I just finished a week- long craft camp with kids. One of their favorites was making our own play dough. It really is simple to make and provides kids with hours of fun. This can even be an activity at a child’s birthday party, where each child gets to make their own color.
For camp, I had a great assortment of food coloring to choose from. I used paste type food coloring I got at a local craft store. These are food grade dyes. To use them, each child would grab a handful of the plain dough. I provided the kids with disposable gloves to wear for this. Once they picked a color, I would dip a toothpick in the dye and spread it across the surface of thew dough. Then the fun begins. The kids kneaded the dough to mix the color in. If it wasn’t bright enough, I would add more color. Or they mixed colors to get something just their own.
Make sure that kids, and adults, who are kneading dough are wearing gloves. Trust me on this.
Once the dough was all colorful, I provided the kids with plastic containers with lids that they could store their play dough in. They were also encouraged to trade and share.
I explained to the kids that the dough was non toxic. That didn’t mean they should eat it, but there was nothing in the dough that would harm them, if they did. Then I told them again not to eat it. 🙂
So here is the recipe.
Play Dough
1 c. flour
1 c. water
1/2 c. salt
2 t. cream of tartar
1 T. salad oil
food coloring
Combine all ingredients, except the coloring in a saucepan and cook, stirring often until mixture pulls away from the side of the pan. Cool slightly, then knead in food coloring. I actually made several batches the day before and the kids were still able to knead in the food coloring. I just stored the dough in an air tight container overnight. Recipe can be doubled. Store in airtight container.
A Rainbow of Dough

Daisies made with Play Dough
Here is another craft we made with some of our play dough.
Q-tip Daisies
Q-tips
Yellow Play Dough
Green pipe cleaners
Cut q-tips in half. Roll a piece of play dough into a ball shape. Flatten to form the middle of the daisy. Stick q-tips all around to form the petals. Shape a pipe cleaner for look like a leaf. Wrap around another pipe cleaner- to form the stem and stick in the play dough.
How to Preserve Basil
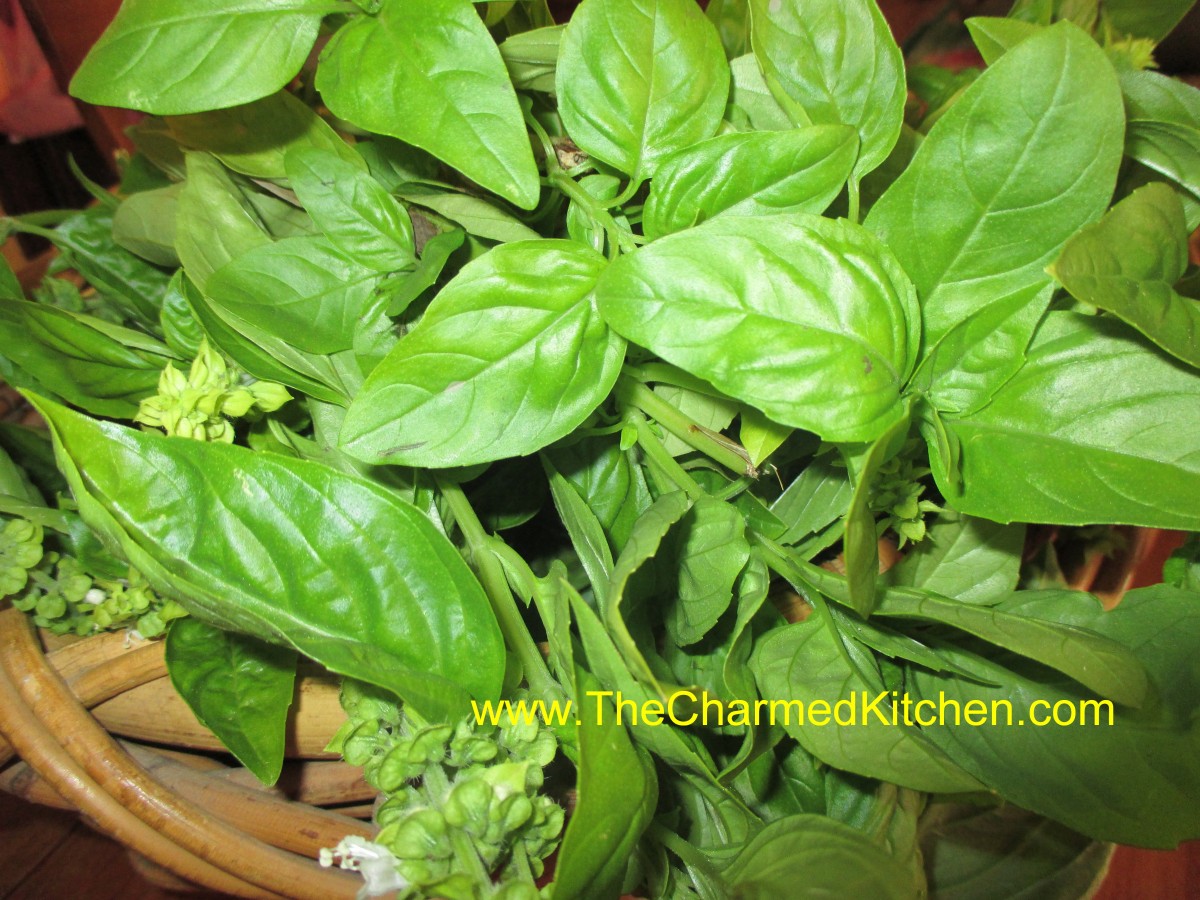
Fresh Basil
This time of year, I am looking to preserve as many herbs as I can, to enjoy year round. Basil is one of my favorites. I grow, and use, a lot of it. I am doing a major harvest of basil today. Some will be frozen in olive oil, some dried, and some added to vinegar.
None of the preservation methods is difficult. Basil can be tricky to dry, though. Unlike a lot of herbs, basil does not air dry well. I have a dehydrator, but if you don’t have one, you can still dry your basil successfully. Believe it or not, you can dry basil, and other herbs, in a microwave. Directions follow.
So I am off to harvest my basil. One thing is sure- my house will smell really good today.
Freezing in Oil
To use basil in pesto sauce, dried just won’t do. You can easily freeze your basil in olive oil and have it ready whenever you want it. Just place clean basil leaves in a blender or food processor and add olive oil. It is important that you use olive oil because it freezes solid. While the machine is running pour in oil until basil is blended. I use very little oil for two reasons. It takes up less room in the freezer and I don’t need so much oil. I can add more oil when I use it, but this way if I am doing a big batch i don’t go through all my oil. Once the mixture is blended pour or spoon it into ice cube trays and freeze. Once frozen solid pop out the basil cubes and put in freezer bags and return to the freezer.You can also freeze chopped basil without the oil. I like it better in the oil, but I freeze other herbs by just chopping them up and freezing them.
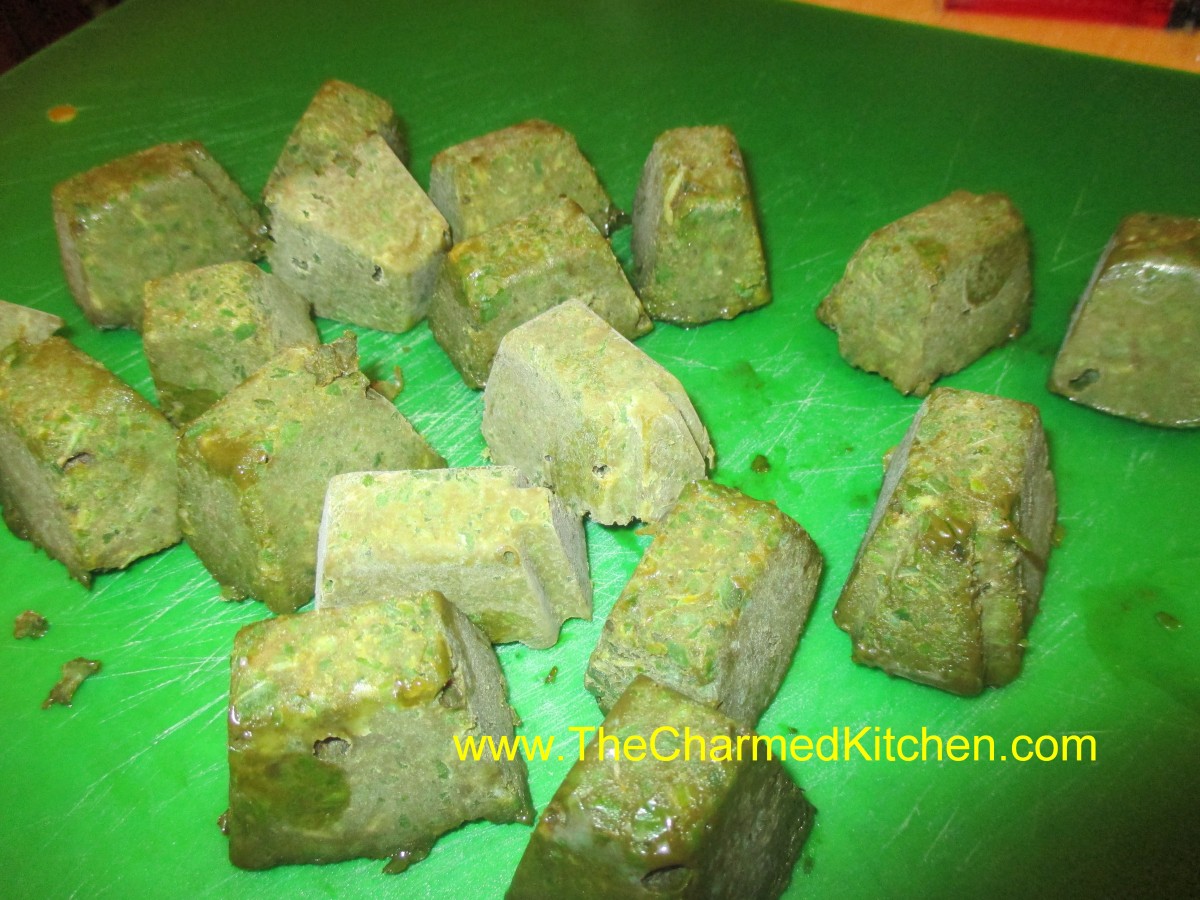
Frozen Basil Cubes
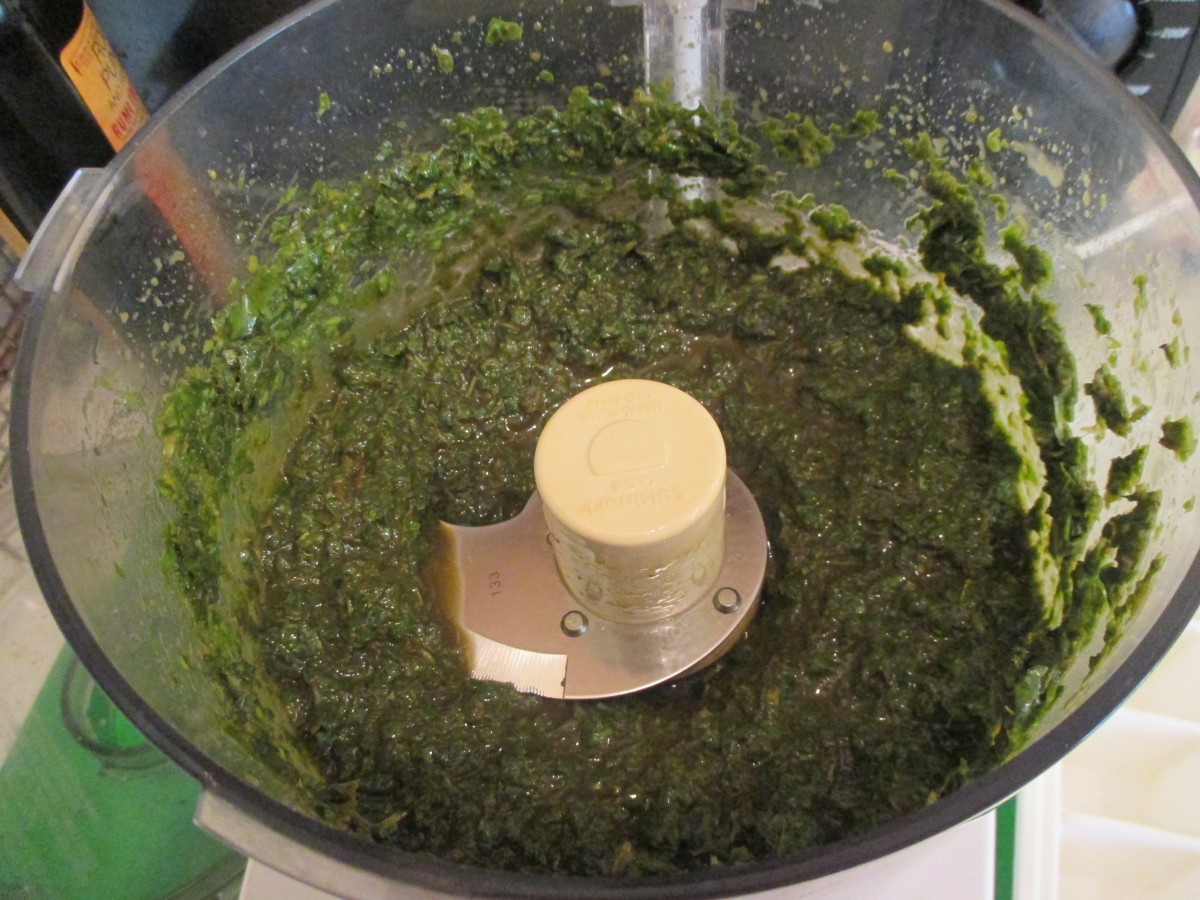
Process basil and olive oil until smooth
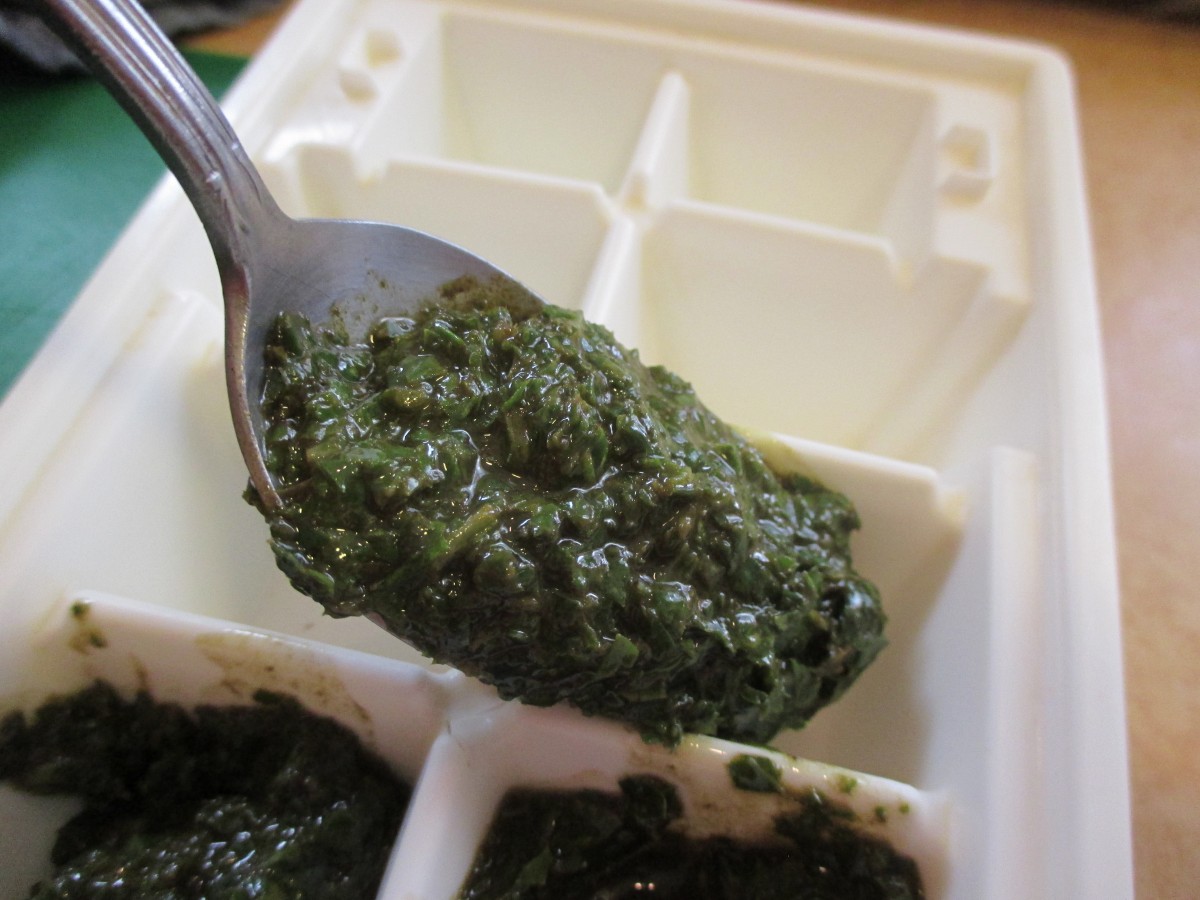
Spoon mixture into ice cube trays and freeze
Microwave Drying
If you don’t have a dehydrator you can dry herbs in your microwave. It only takes a couple of minutes per batch. Just place a handful of fresh, clean basil leaves in a linen-type kitchen towel. Fold the towel over the herbs and place in the microwave. Be sure to put a raw potato in with the herbs in the oven. If you only put the herbs in, it is like running the oven empty and can damage the microwave. Just put the potato off to the side. If you do several batches you will have a baked potato. ? If you have a turntable, just cook on high for 2 minutes. Check and see if they are dry- you might need a little more time. I need about 2 1/2 minutes in my microwave. Better to put them in for 15 more seconds at a time than to over dry them. If you don’t have a turntable microwave on high for a minute. After the first minute turn the herbs 1/4 turn and cook 15 seconds, turn again and cook another 15 seconds. Repeat four times in all. You can dry other herbs in the microwave. Small leaved herbs like thyme are done even faster. Remove the herbs from the oven and allow them to cool. check if they are dry enough and return, wrapped to cook longer if needed. Store in containers in a cool place.
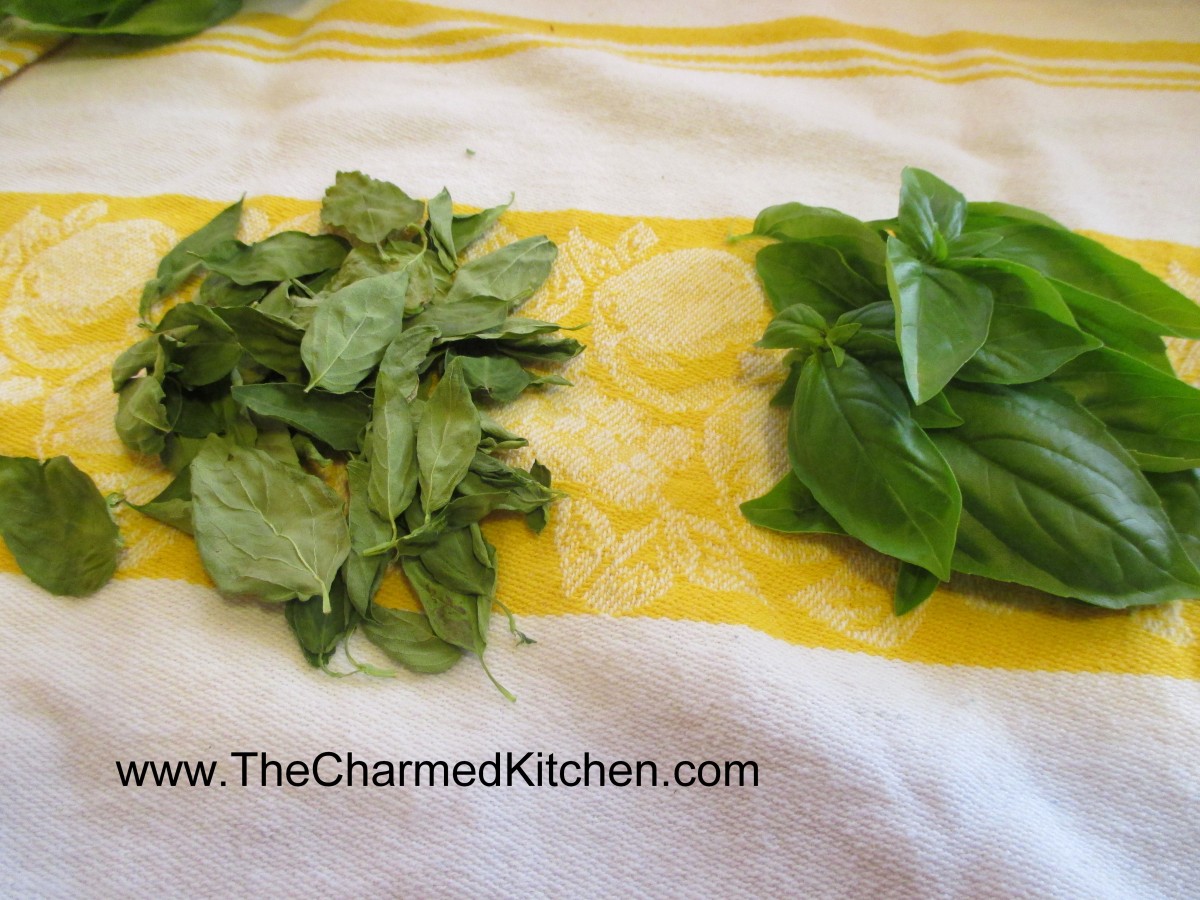
Microwave dried basil on the left and fresh basil on the right
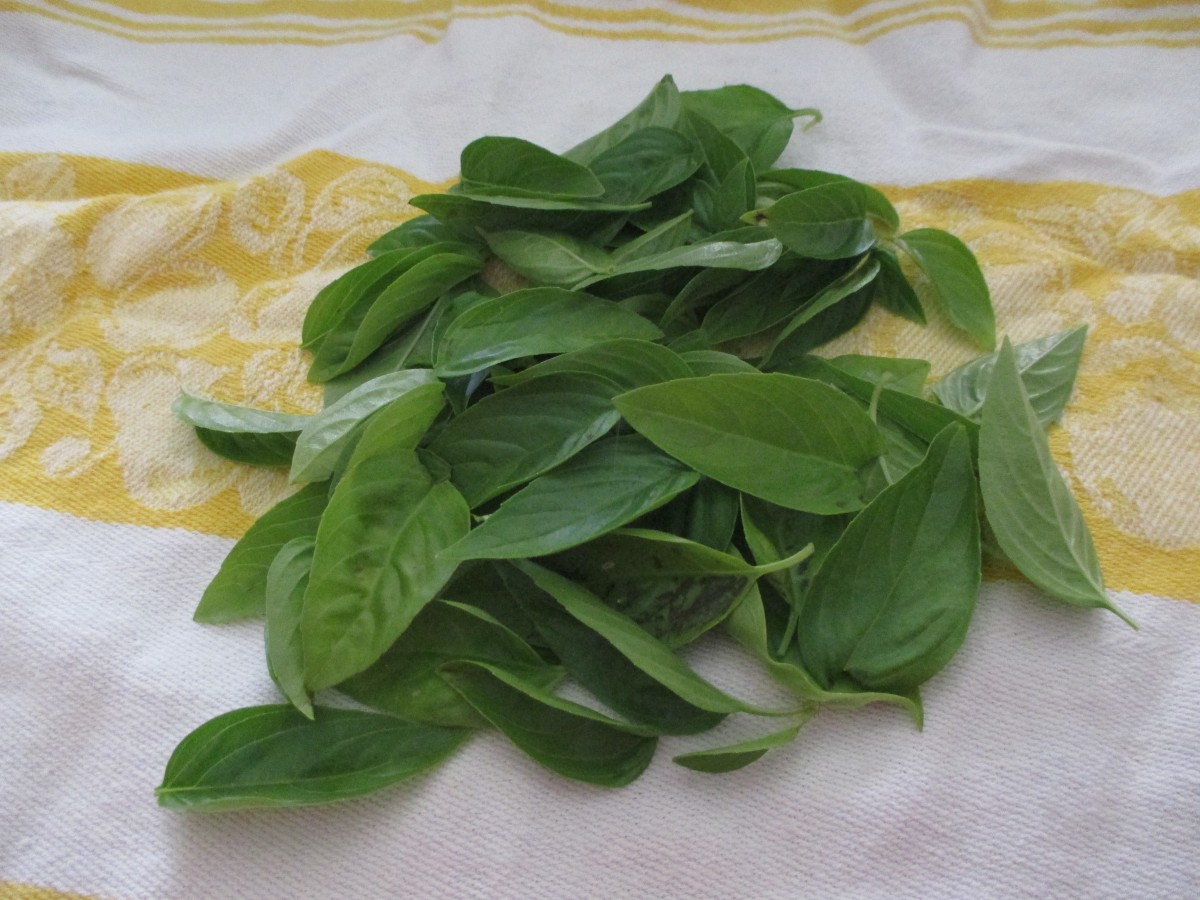
Place fresh basil on a towel and fold towel over the herbs
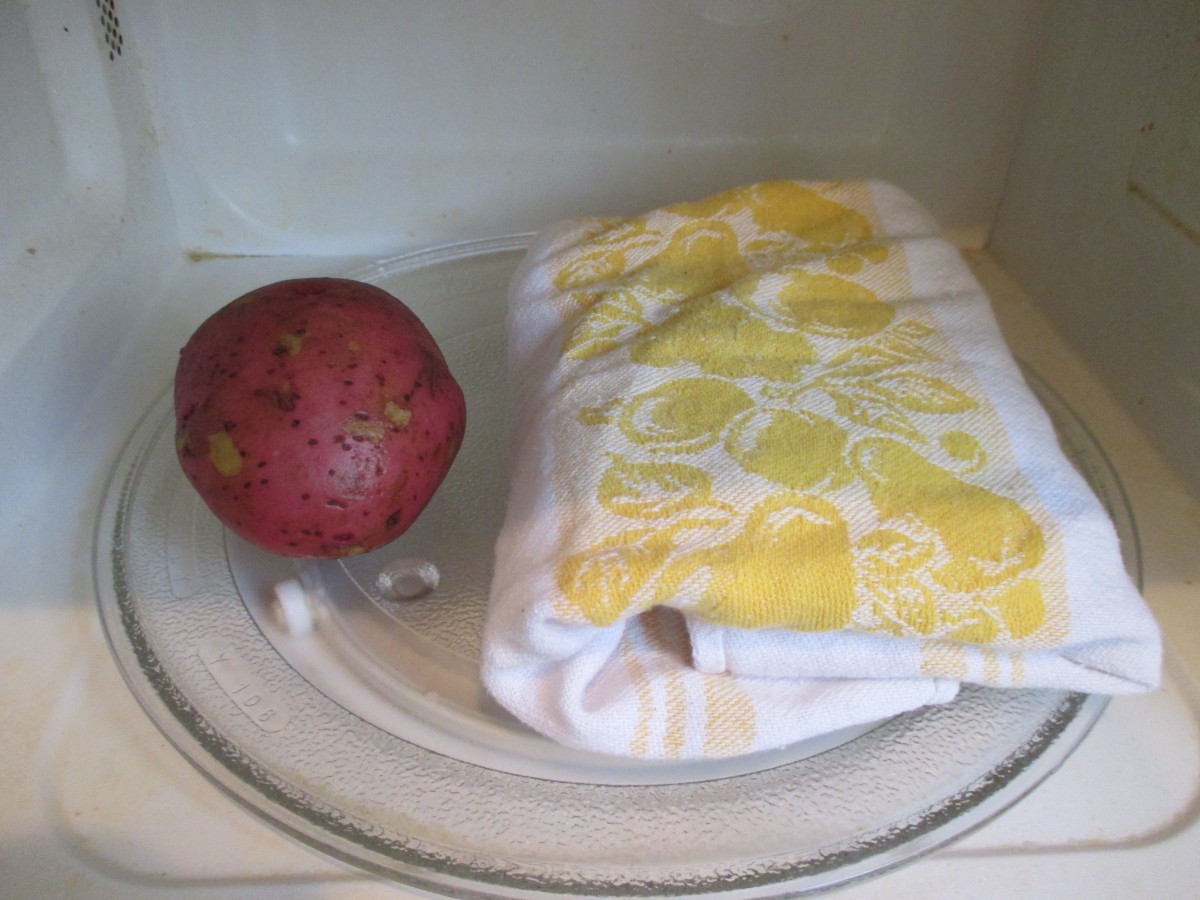
Place in microwave with a potato
All microwaves are different. Some will take longer and some even less time. Watch your herbs carefully. While I have never seen it happen I was told once that theoretically, they could catch on fire if left in too long. Urban legend perhaps, but just be careful.
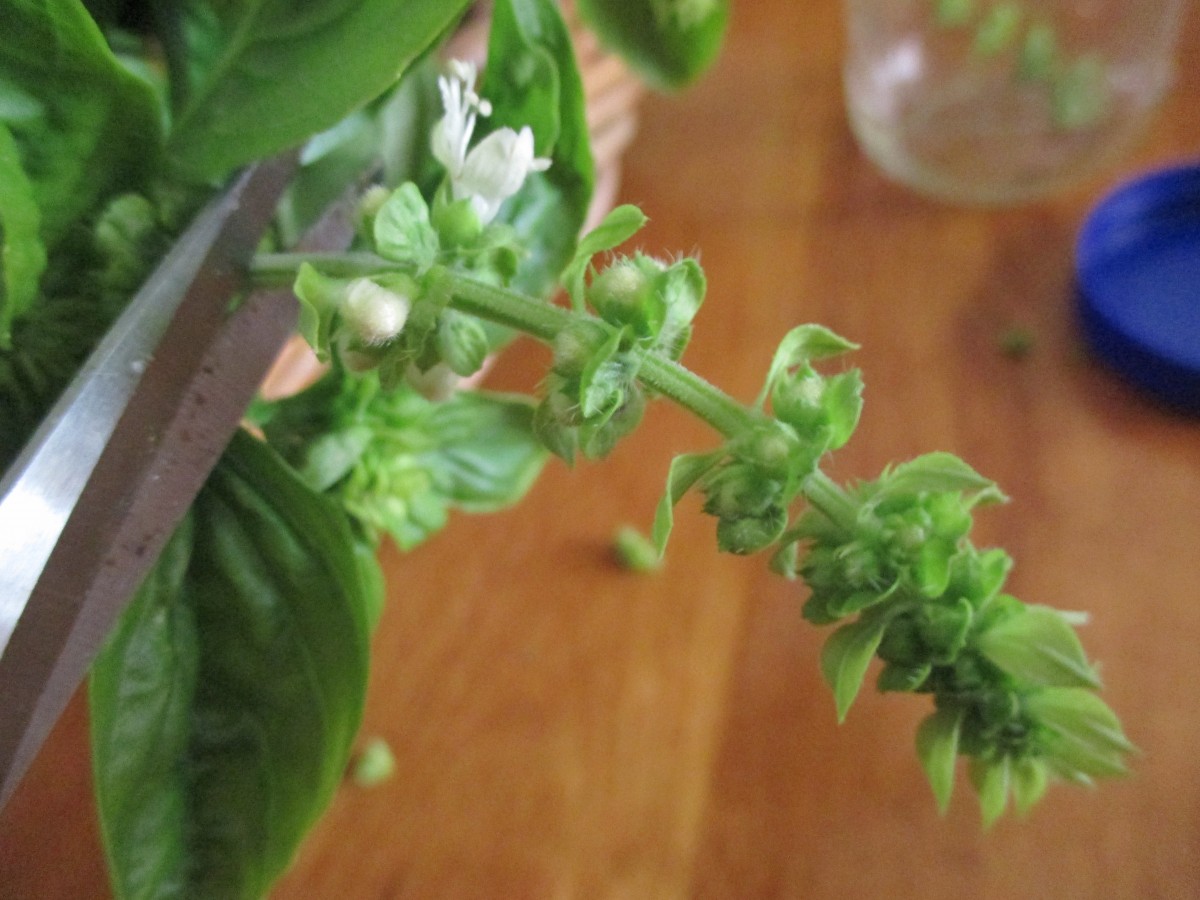
Herb Vinegar
When I grow basil, I try to keep the blossoms pinched off. Better for leaf production. But by this time of year some are blooming. Rather than dumping the blossoms you can use them to flavor vinegar. Just snip off the blossoms and place them in a sterilized bottle or jar. Use several sprigs of basil flowers for every 2 cups of vinegar. Make sure the vinegar is at least 5% acidity. I like to use different vinegars for different herbs. I often use cider vinegar, red wine vinegar (for purple basil) and white wine vinegar. Leaves can be used, too. Vinegar should be heated up to 190 degrees- or just below the boiling point. Close up the jar and store in a cool place (50-70 degrees) for a couple of weeks. Before using strain out the herbs and filter- I use coffee filters or you could use cheese cloth. Store in a pretty bottle, if you have one. They can be kept for up to a year when stored in the fridge.
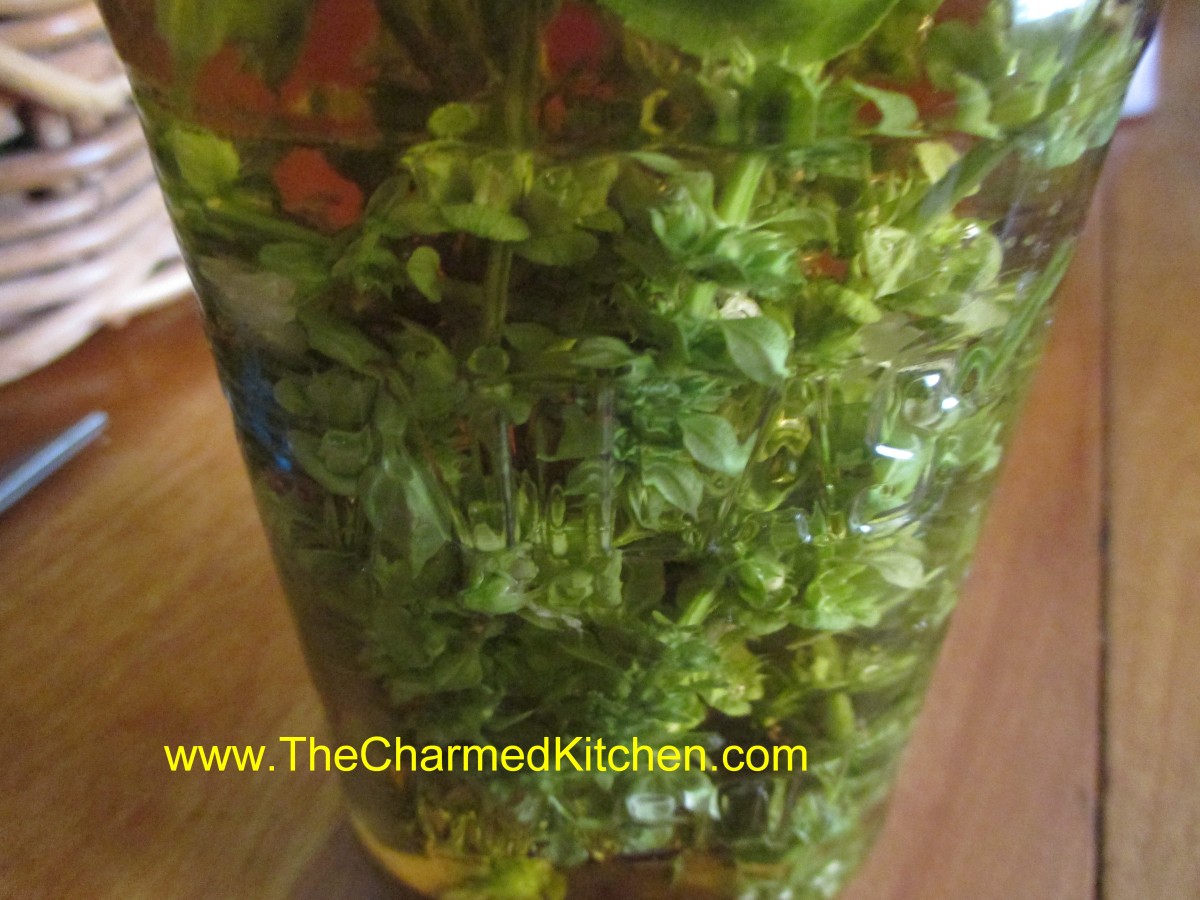
Basil blossoms in vinegar
Snip off basil blossoms
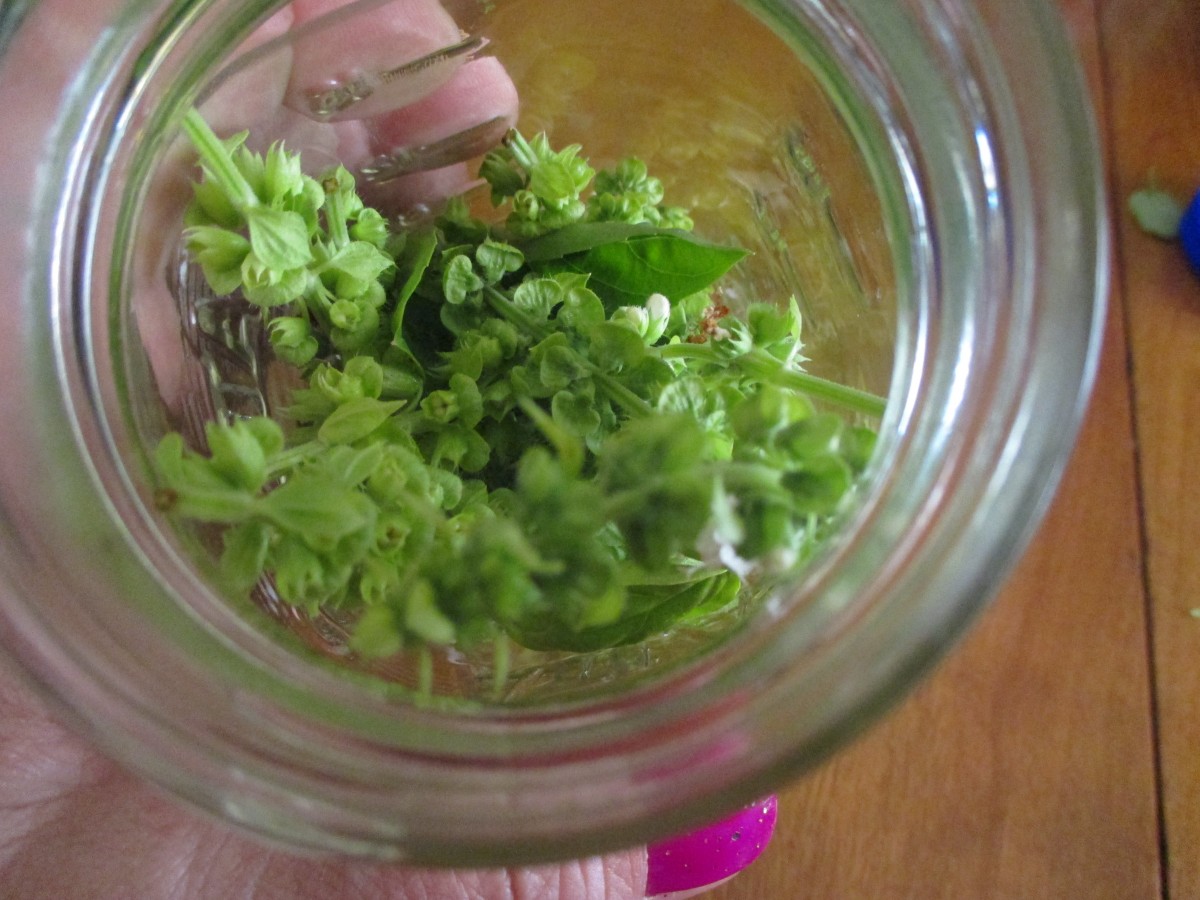
Place blossoms in a jar or bottle
Blueberry Pie Filling
Blueberry Pie Filling
I recently came across a wonderful price on blueberries. A really wonderful price. Being the thrifty person that I am, I stocked up. I put some in the freezer and placed some in vodka for liqueur. I made cupcakes and syrup, muffins and pancakes. I have been eating plenty of them, too. I decided to use some of them to make pie filling.
There is something very satisfying in making your own pie filling. It is so much better than anything you would find in a can. It is a convenient ingredient to have on hand, too. A good quality pie filling can be turned into any number of desserts in no time- even pie!!
You do need to have Clear Gel to can pie filling. It is modified cornstarch. You can’t use regular cornstarch and you can’t use other thickeners. You could just can the berries, then thicken them later, but the Clear Gel makes it so much more convenient to use. I just order mine online, but it is available in some stores- primarily in Amish communities.
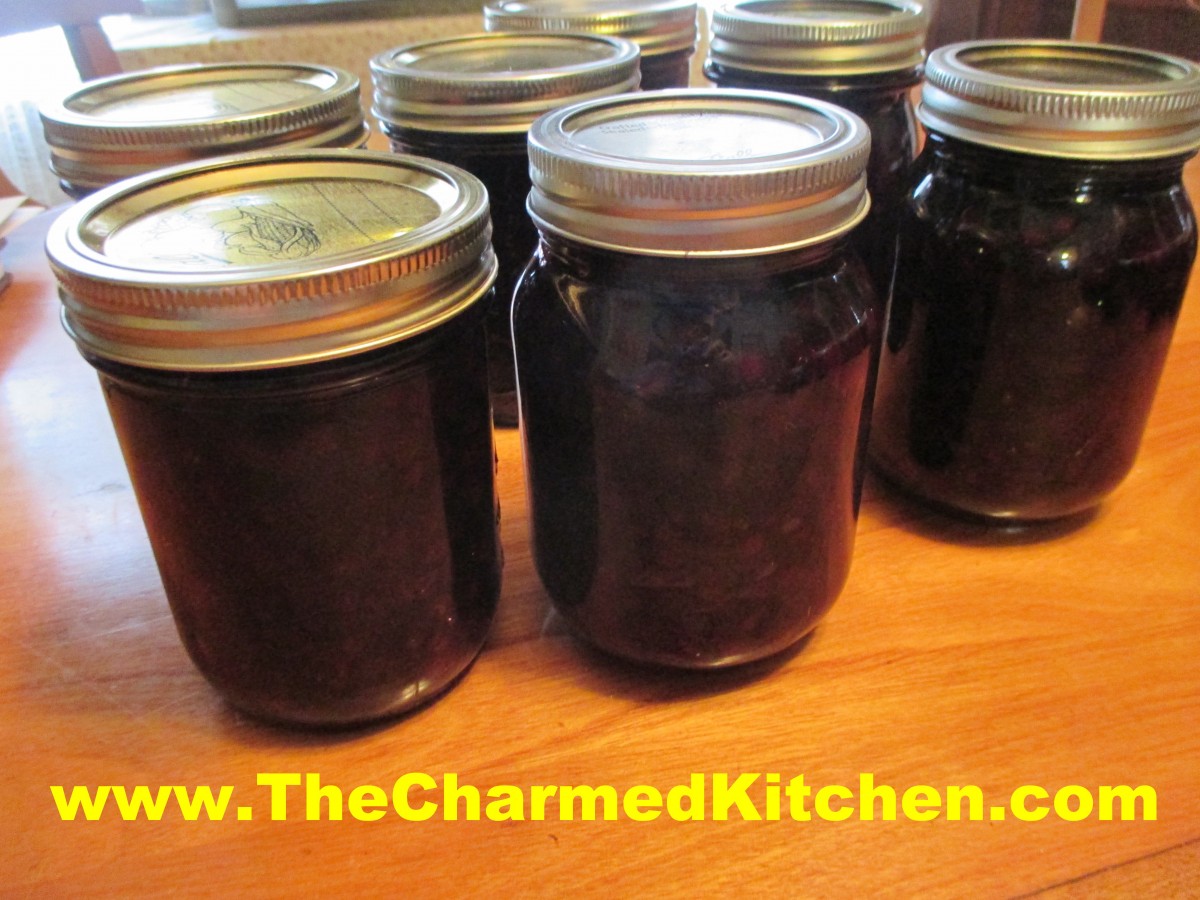
I opted to can my filling in pints. I find that size more convenient for me. Let the jars stay in the canner 5 or 10 minutes after they finish processing. It will reduce siphoning. Some foods, hot in the jars- will leak out of removed from the heat too quickly. Pie fillings are known for issues with siphoning.
Blueberry Pie Filling
6 qts. Blueberries
6 c. sugar
2 1/4 c. Clear Gel (modified cornstarch, not regular cornstarch)
7 c. water
1/2 c. lemon juice
Wash and drain berries. In large sauce pot combine sugar and Clear Gel. Stir in water and cook on high heat until mixtures bubbles and thickens. It is going to be really thick- don’t panic, just keep stirring so it won’t stick. Add lemon juice and boil 1 minute, stirring constantly. Fold in berries and ladle in hot, clean canning jars immediately. Leave 1/2 -inch headspace and remove any air bubbles with a knife. Wipe rims clean and put on lids. Place jars in boiling water bath and process for 30 minutes. Start timing when water returns to the boil. Turn off heat and let jars sit in the water bath 5-10 minutes before removing to counter to cool. Cool jars on counter on rack or towel, free from drafts. Check seals next day. remove rings and wipe down jars with a soft, damp cloth before storing. Makes 14 pints or 7 quarts.
Source NCHFP
Giant Zucchini Bread

Zucchini Bread
Let me be clear. The bread is normal size- the zucchini are giant. Even the most diligent of gardeners will have a few zucchini get away from them.
Zucchini seem to go from too small to gigantic in the blink of an eye. A friend just brought me a bag of really big zucchini.
This time of year I get a lot of questions about overgrown zucchini. People seem to think there is nothing you can do with them. That’s not true. Even older squash can be eaten in all sorts of ways.
You can determine if the skin is too tough to eat by trying to pierce it with a fingernail. If you can easily poke the skin- it is tender enough to eat. If it isn’t, just peel before using.
Cut the zucchini in half lengthwise and look at the seed cavity. If the middle looks spongy, hollow or if the seeds are developing scoop out the middle and discard. The remaining zucchini can be cubed or sliced and added to stews, soups, stir fries and all sorts of dishes.
One of my favorite things to make with the bigger zucchini, is zucchini bread. I shred up a whole zucchini and portion it out in amounts I will need for my bread. I freeze what I won’t be using that day. It is really nice in the dead of winter to be able to make zucchini bread. Here is the recipe I use. It is a favorite and makes 2 loaves, which is a bonus.
Zucchini Bread
3 c. flour
3 eggs
2 c. sugar, I use less
2 c. shredded zucchini
1 c. oil
1 c. chopped nuts or raisins, optional
½ c. sour cream or Greek yogurt
1 t. each vanilla, cinnamon, salt and baking soda
Preheat oven to 350 degrees and grease 2 (9×5 inch) loaf pans. Set aside. Place flour in large bowl. Beat eggs and add with remaining ingredients to flour, mixing well and scraping bowl. Pour batter into prepared pans and bake 1 hour , or until browned and toothpick in center emerges clean. Cool in pans on wire rack. Freezes well. Makes 2 .
Corn and Barley Salad with Basil
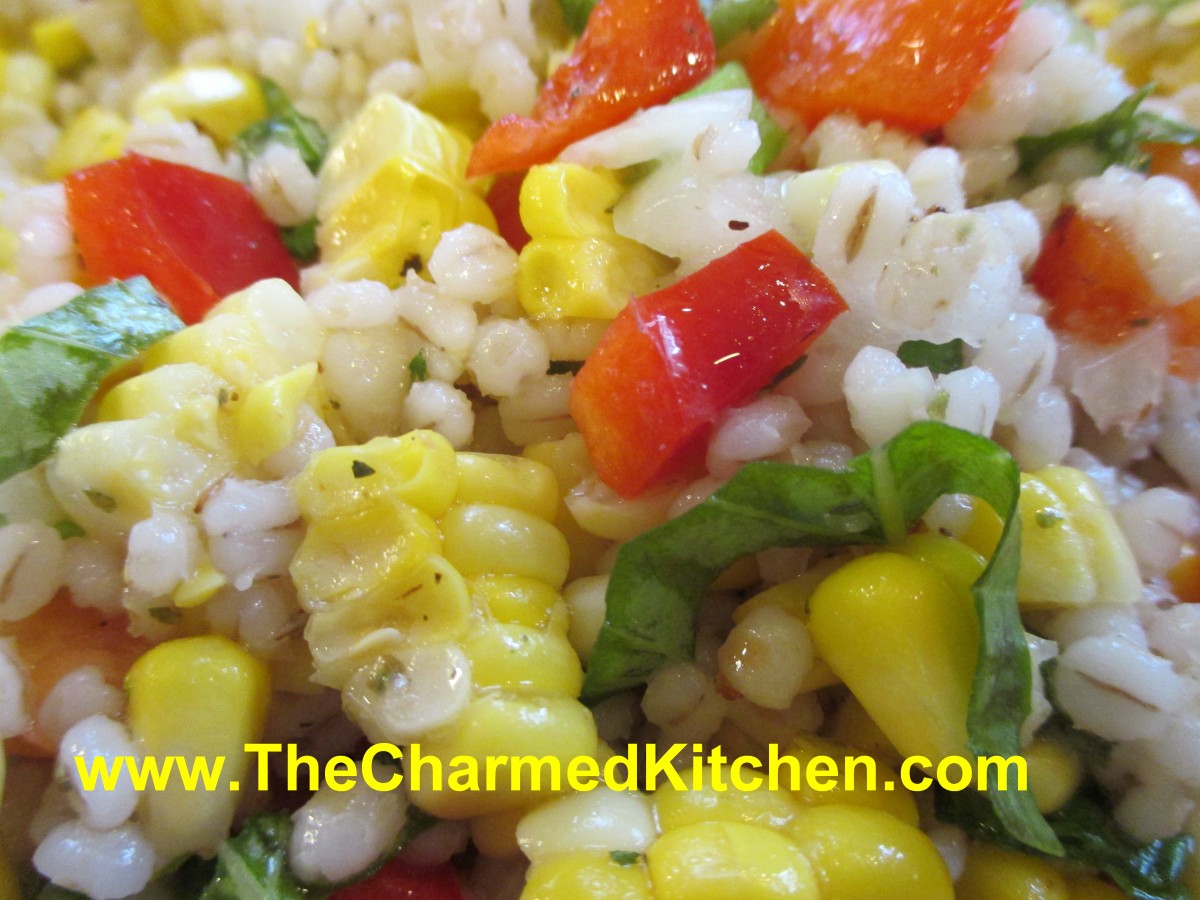
Corn and Barley Salad with Basil
Local sweet corn is at the markets now, and I am loving it. I always stock up, and freeze some to use throughout the year. This salad is a great way to use some of that wonderful corn on a hot day.
I also used barley in this salad. I think most people think of soup, when they think of barley. This versatile grain can also be a nice ingredient in a salad.
This salad can be served as a side dish, but I also enjoy it for lunch or dinner all on it’s own. The combination of corn and barley makes it pretty hearty, but still not heavy. Nice on a hot day, when you want a lighter meal.
I had grilled some corn and had some leftover, so that is what I used. I think the smokiness of the grilled corn added a nice touch. I had some fresh basil so I used that, too.
Corn and Barley Salad with Basil
½ c. pearl barley
salt
3 T. cider or white wine vinegar
1 t. Dijon mustard
fresh ground pepper
3 T. olive oil
3 T. fresh basil, cut into thin strips
3 c. cooked corn, from six ears
1 c. diced sweet onion
1 c. diced sweet pepper, any color
¼ c. sliced green onions
Combine barley, 2 cups water and ½ t. salt in saucepan and simmer, covered until barley is tender, about 50 minutes. Drain and rinse under cold water. Combine remaining ingredients in medium bowl. Add barley and stir to combine well. Chill until ready to serve. Serves 6.
Can You Can Yellow and Orange Tomatoes?

Crushed Orange Tomatoes
I have been asked several times in canning classes, if it is safe to can yellow or orange tomatoes. We have all heard that yellow and orange tomatoes are lower in acid, so are they still safe to can? The answer is yes, they are safe to can.
Why?
In spite of you might have been told, orange and yellow tomatoes are not acid free or low acid.
Truth is, that yellow and orange tomatoes have just as much acid as red tomatoes.
Well, for the most part at least. In terms of acidity or Ph, yellow and orange tomatoes are about average. Some cultivars have more, some less. Bottom line is that all tomatoes are safe to can- as long as you acidify them.
Adding salt is optional, and is for flavor only. Use canning/pickling salt or non-iodized salt when canning.
Here are some popular canning recipes to get you started.
All follow the NCHFP (National Center for Home Food Preservation) recommended procedures.
Crushed Tomatoes
Peel and core tomatoes , trim off any bad spots and quarter. Place about 1/4 of your prepared tomatoes in the kettle and cook, stirring constantly over high heat. Use a potato masher to crush tomatoes and extract juices. Once they are boiling add remaining tomatoes, stirring constantly. You don’t need to crush these tomatoes. Bring to a boil and boil for 5 minutes. In clean, hot jars add needed acidity listed below. You can also add 1 teaspoon of canning salt per quart if desired. Ladle in hot tomatoes, leaving 1/2-inch headspace. Wipe jar rims clean and adjust lids. Process in boiling water bath. Pints 35 minutes, quarts, 45 minutes. 1,000-3000 ft over sea level add 5 minutes. Twenty-two pounds of tomatoes will yield about 7 quarts of tomatoes.
Whole Tomatoes in Juice
Use any extra tomatoes to make juice. I use tomatoes that are too big to can whole, or those that have blemishes that need to be trimmed. Cut up clean, unpeeled tomatoes in a kettle and cook, stirring often until tomatoes are mushy. Strain mixture, pressing on solids or run through a food mill or tomato juice extractor. Set aside,. Place peeled, whole tomatoes in kettle and add enough tomato juice to cover them. Heat to a simmer and simmer gently 5 minutes. Add lemon juice or citric acid to jars, using amounts listed below. Add salt, if desired. Add tomatoes and cover with hot juice, leaving 1/2 -inch headspace. Wipe rims and adjust lids. Process both pints and quarts 85 minutes in a boiling water bath.
Tomato Juice
Wash, stem and trim bruises off tomatoes. Cut into chunks. Add about 1 pound of tomatoes to kettle and bring to a boil while crushing. Continue to add additional cut up tomatoes slowly, keeping mixture boiling. This will keep the juice from separating later. Simmer an additional 5 minutes once the tomatoes have all been added. Press mixture through a strainer , sieve or food mill to remove seeds and skins. Add lemon juice or citric acid to jars according to directions listed below. Add salt if desired. Return juice to boil and add to prepared jars leaving 1/2-inch headspace. Wipe rims and adjust lids. Process n a boiling water bath pints 35 minutes and quarts 40 minutes. Add 5 minutes processing time at elevations between 1,001 and 3,000 ft.
Tomato Sauce
Prepare as for juice. After juice is made return to pot and start cooking down to desired thickness. You’ll lose about 1/3 of the volume for thin sauce and 1/2 of the volume for thick. Add lemon juice or citric acid to prepared jars as described below. Add salt if desired. Add boiling sauce leaving 1/4 -inch headspace. Wipe rims and adjust lids. Process in a boiling water bath 35 minutes for pints and 40 minutes for quarts. Add five minutes at 1,001-3,000 ft. elevation.
Acidity and Tomatoes
Tomatoes must be acidified before canning. When canning either whole, crushed or juiced tomatoes you must add either 2 T. bottled lemon juice per quart or 1/2 t. citric acid . For pint use 1 T. lemon juice or 1/4 t. citric acid. You can also use 4 T. (5%) vinegar per quart, but it will alter the flavor and is not recommended. You can add a little sugar to offset the flavor, if you like.
Spiced Chocolate Zucchini Cupcakes

Spiced Chococlate Zucchini Cupcakes
It’s that time of year. Zucchini time. Maybe I should call it, “What do I do with all my zucchini time?” Zucchini and other summer squash are in abundance right now. This recipe is another, tasty way, to use them.
These are wonderfully spiced, moist cupcakes. Instead of frosting them, I decided to top them with melted butter and cinnamon sugar. It’s something I’ve done with muffins, in the past. I didn’t see why I couldn’t do the same thing with cupcakes.
It was a really good idea. The cupcakes were baked for a picnic, and in the heat, frosting would have melted. Besides, not everyone likes frosting.
As an added bonus- it is a another recipe using zucchini, and that is never a bad thing.
Spiced Chocolate Zucchini Cupcakes
2 cups all-purpose flour
1 t. baking soda
½ t. salt
1 t. cinnamon
½ t. nutmeg
Pinch of cloves
¼ c. unsweetened cocoa
½ cup butter, softened
½ cup olive oil
1½ c. sugar
2 eggs
½ c. buttermilk
1½ t. vanilla
2½ c. grated zucchini
1 cup chocolate chips
Topping:
½ c. butter, melted
½ c. sugar
2 t. cinnamon
Preheat oven to 325 degrees. Grease and flour 24 muffin cups or use paper liners. Mix together the dry ingredients. Set aside. In a large bowl, cream together the butter, olive oil and sugar until light and fluffy. Beat in the eggs one at a time, then stir in the buttermilk and vanilla. Beat in the flour mixture, just until incorporated. Stir in the grated zucchini and chocolate chips. Pour batter into prepared pans. Bake for 25 to 30 minutes, or until the top of the cupcakes spring back when lightly pressed. Cool in pans over a wire rack for at least 10 minutes or until cool enough to handle. Dip top of cupcakes in melted butter, then dip in the cinnamon sugar. Place on rack to finish cooling off. Makes 24.


