Vampire Chasers- Cheesy Garlic Toast

Vampire Chasers
If you are concerned about keeping away vampires this Halloween, you might want to make this recipe for cheesy garlic toast. Garlic is widely accepted as a repellent for vampires- and a lot less messy than a stake through the heart.
This is one of my favorite appetizers. I make them a few times a year, but they are extra fun to serve at a Halloween party.
A mixture of garlic and onions are cooked in butter, then spread over the bread slices. That would be plenty for most garlic bread- but you take it up a notch with a cheesy/ mayo mix on top. Baked for just a few minutes- these are always a hit. They can be served as an appetizer, or as a side with dinner.
Vampire Chasers
1 French baguette, cut into 3/4 inch diagonal slices
1 large minced onion
8 cloves minced garlic
1/4 cup butter
2 cups shredded mozzarella cheese
1/2 cup grated Parmesan cheese
1 cup mayonnaise
Slice the French baguettes diagonally into 3/4 inch slices. In a medium skillet, over medium heat, melt the butter. Combine the onions and garlic in the skillet. Cook and stir until tender. Set aside to cool. In a mixing bowl, combine the mozzarella cheese, Parmesan cheese and mayonnaise. On a cookie sheet, arrange the French bread slices in a single layer. Spread the onion and garlic mixture on the bread slices. Spread the cheese and mayonnaise mixture over the onion and garlic mixture on the bread slices. Bake in a 400 degree oven for 10 minutes or broil about 5 minutes, until the cheese is bubbly and slightly browned. Serve immediately.
Pineapple Scones

Pineapple Scones
This is one of my favorite scone recipes. Pineapple gives them a wonderful flavor, then they are topped with a crunchy cinnamon and nut combination. What’s not to love?
I am always surprised when someone tells me they don’t like scones. Often, the comment is that they are too dry. My reply is that you haven’t had a good scone.
Good scones are slightly crisp on the outside and tender on the inside. These scones never disappoint. These are great served warm from the oven, topped with jam.
I made these in a recent cooking camp with kids. We were having a tea party. For the kids, I left off the nuts, due to allergies. The kids loved them. They had them with strawberry jam and whipped cream.
Pineapple Scones
3 c. flour
1/3 c. sugar
1 T. baking powder
½ t. salt
¾ c. butter
1 (8 oz.) can crushed pineapple in juice, undrained
milk
3 T. chopped nuts
1 T. sugar
½ t. cinnamon
In medium bowl mix together dry ingredients and cut in butter to resemble coarse crumbs. Stir in pineapple and stir until dough starts to hold together. Place dough on lightly floured surface and knead 10-12 strokes until dough holds together, but is tender and soft. When you first start to mix this dough- you might think there is something wrong- that you need to add more liquid. Be patient. There is a lot of moisture in the pineapple and as you mix the dough it WILL come together. Roll or press dough ½ inch thick and cut out with 2-2 ½ inch biscuit cutter. Place on ungreased baking sheet. Re-roll scraps and cut out remaining dough. Brush scone with milk. Combine remaining ingredients and sprinkle over scones. Bake in a preheated 400-degree oven for about 15 minutes. Makes 21.
Spiced Applesauce Cake

Spiced Applesauce Cake
I wish I remembered where this recipe came from. I have a piece of flowered stationery, a little crinkled around the edges, creased from being folded many times, with the recipe written on it. It is not my handwriting. I would love to credit the source of this wonderful recipe.
As a kid, I loved eating applesauce, right out of the jar. I still do. I admit to being spoiled these days, because I make, and can, my own sauce.
You don’t have to limit yourself to just eating applesauce as is. You can bake with it, too. This cake is one way to enjoy applesauce, homemade or store bought. I used butter in the recipe, but if you used coconut oil instead, the recipe would be vegan. The spices work so well together. Simple and full of flavor.
Before someone asks, there is not a mistake, there are no eggs in the recipe.
Spiced Applesauce Cake
2 c. unsweetened applesauce
½ c. butter
2 c. sugar
3 c. flour
1 T. baking soda
½ t. salt
1 t. each cinnamon, allspice and nutmeg
¼ t. cloves
1 c. raisins or chopped nuts
Heat together applesauce and butter until butter melts. Cool down a bit. Preheat oven 375 and grease 9×13-inch pan. Stir all ingredients together bake 30 minutes. Cool in pan.
Home Canned Pineapple
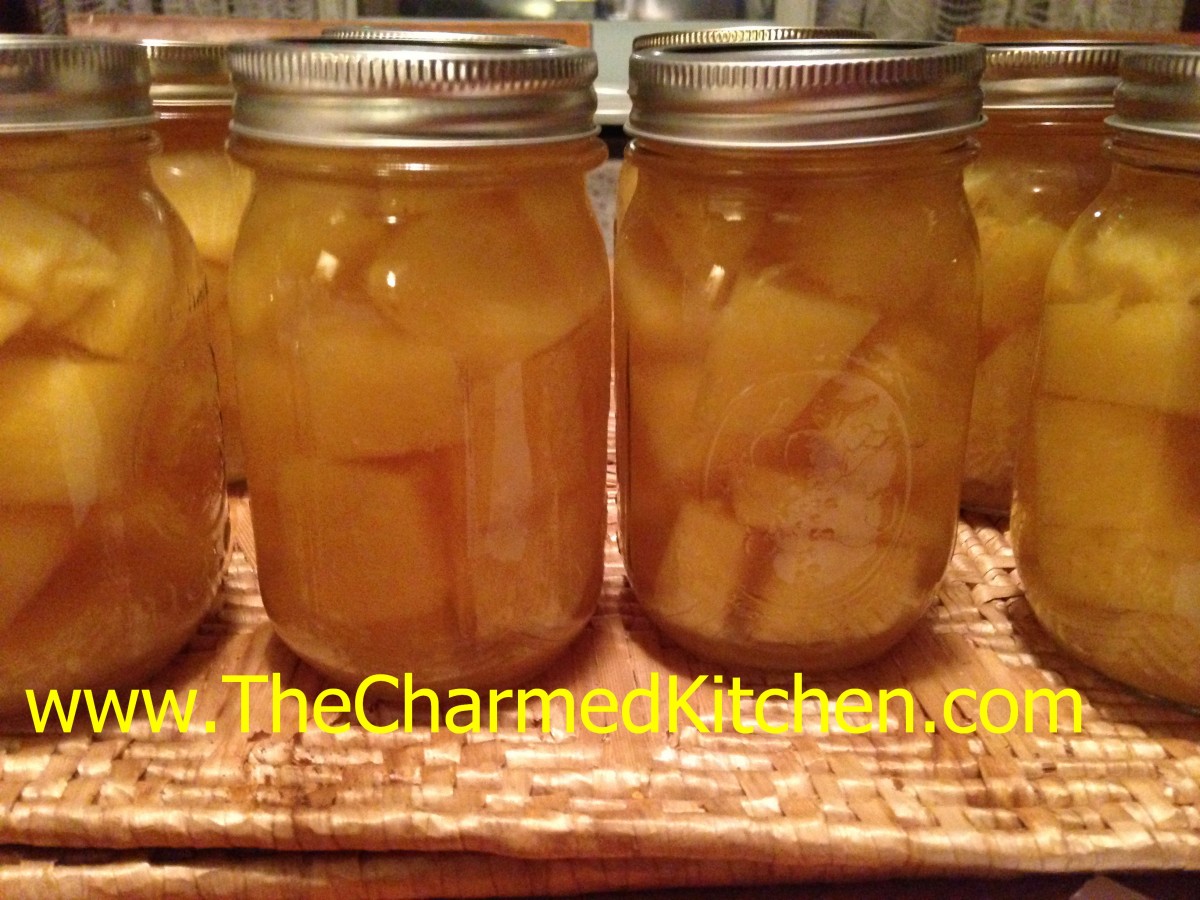
Canned Pineapple
When a local store had pineapples on sale, I decided to take advantage of the great price. I bought 4 of them. I knew I could never eat them all fresh. I bought them with the intention of canning them.
Why bother to can? I just love the way pineapple tastes when canned in jars, as opposed to being canned in cans. I suppose when you factor in my labor, it wasn’t much of a savings, but I still think canning them is worth my time. They ended up costing me about 5o cents per pint. Certainly a savings over the cost of canned.
But sometimes, it isn’t about just the cost savings. It is about the quality of the final product.
I can mostly seasonal, local fruits and veggies, so I can extend the season, so to speak. Pineapples aren’t exactly a local crop here in Ohio. But they were on sale, so I used the moment to stock up a little.
Pineapples are pretty easy to can. I am so glad I did it. Now, when I want pineapple for a recipe, I just have to get them out of the cupboard. So here is the recipe.
Canned Pineapple
4-5 pineapples
5-6 cups unsweetened pineapple juice
Wash, peel and core pineapples. You can cut the pineapples into one-inch cubes or into half-inch thick slices. Use just enough water to keep pineapple from scorching and simmer together until pineapple are heated through. Heat up pineapple juice to a boil. Ladle pineapple cubes into clean, hot jars. Ladle in hot juice. Leave half-inch headspace. Remove any air bubbles with a non-metal utensil. I use a small plastic knife. Wipe rims and screw on lids, fingertip tight. Place jars in canner of simmering water. Make sure water covers jars by at least an inch. Bring water to a boil and process jars 15 minutes for pints, 20 minutes for quarts. When processing time is up, turn off heat and leave jars in canner 5 minutes, before removing to a draft free area to cool. Yield 8 or 9 pints, 4 quarts.
Recipe adapted from the Ball Blue Book
Winter Plant Care
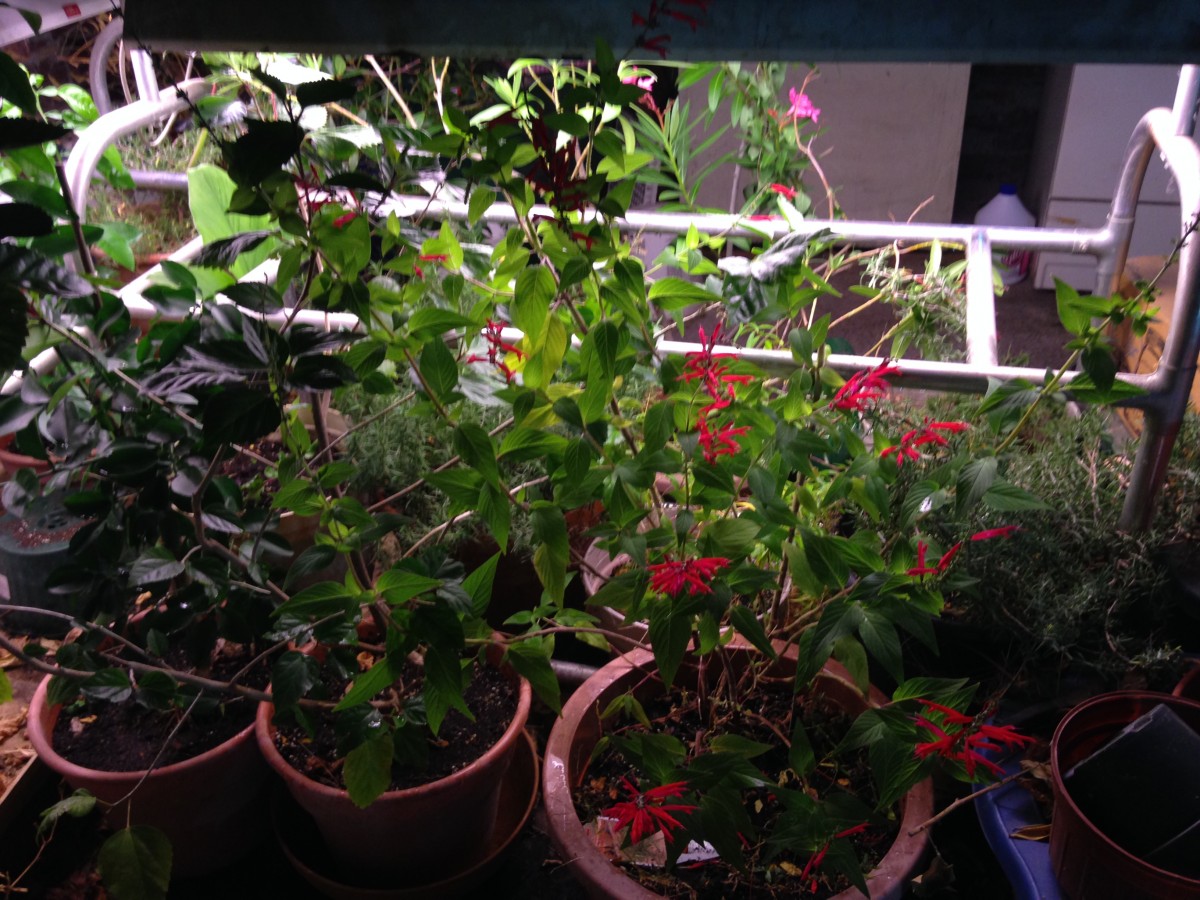
Some of my plants under grow lights in the basement
Since I just brought in a lot of plants for winter, I have been getting questions about how to help them make it through winter. I have an ideal set up at my house. I have a basement and two large grow carts, so my plants are in a good environment for them.The basement will be more humid than the rest of the house. Since Ohio winters have little daylight, the artificial light makes a big difference.
An added advantage is I will be able to harvest fresh herbs all winter.
You can keep plants alive in your house, outside of the basement, but it is trickier.
Creating the right environment it critical to the survival of any plant. In the winter this is a little harder than during the summer. Still, with a little planning you can have plants that will last for years.
Plants all need: Water, air, food and light
Pick out plants that are likely to be happy in your home. Remember, your plant has probably come from a greenhouse under ideal conditions, or it has been outside, getting plenty of natural light. It is normal for new plants to go through a period of adjustment.
Pick plants with low-light requirements if your home does not have a lot of windows.
If you don’t like to water plants often pick plants like cacti and succulents that don’t need to be watered often.
The air in your house will be pretty dry in winter. If you get sparks from static electricity your house is dry. Misting plants will only provide moisture for 30 minutes or so. Place plants on trays, filled with rocks. Then fill the tray with water. This gives your plants moisture. Be sure the plants are above the water level, not sitting in the water. That is the reason for putting rocks in the trays. The plants sit on the rocks above the water.
Assuming you don’t have artificial light…..
1. During winter months when light is less, reduce the amount of water plants receive and use little or no fertilizer.
2. Place plants away from drafts and heat sources.
3. Do not allow plants to touch windows.
4. Do not allow plants to stand in water.
5. Keep the humidity up around the plants.
6. Consider supplementing natural light with artificial light.
7. If you set plants outdoors for the summer, bring them in when indoor and outdoor temperatures are the same.
8. Always check plants that are outdoors for insects before bringing in. You can give them a spray of water before bringing them in, to wash off insects.
9. Keep any new plant away from your other plants until you are sure it is disease free.
10. As the days begin to lengthen you can start to use fertilizer again.
Again, artificial light is a great idea. If you can’t provide it, then let your plants be semi dormant during the shorter days of winter.
Apple and Cabbage Slaw
Apple and Cabbage Slaw
How fun to have a couple of unseasonably warm days in October. I know this won’t last, but it has given me a chance to get some work done outside.
Normally, this time of year, I am thinking about soups and fresh baked bread. But I thought I would use some of my Autumn produce in a salad instead. Apples are in season and cabbage is abundant at my local market. It seemed just natural to pair them up.
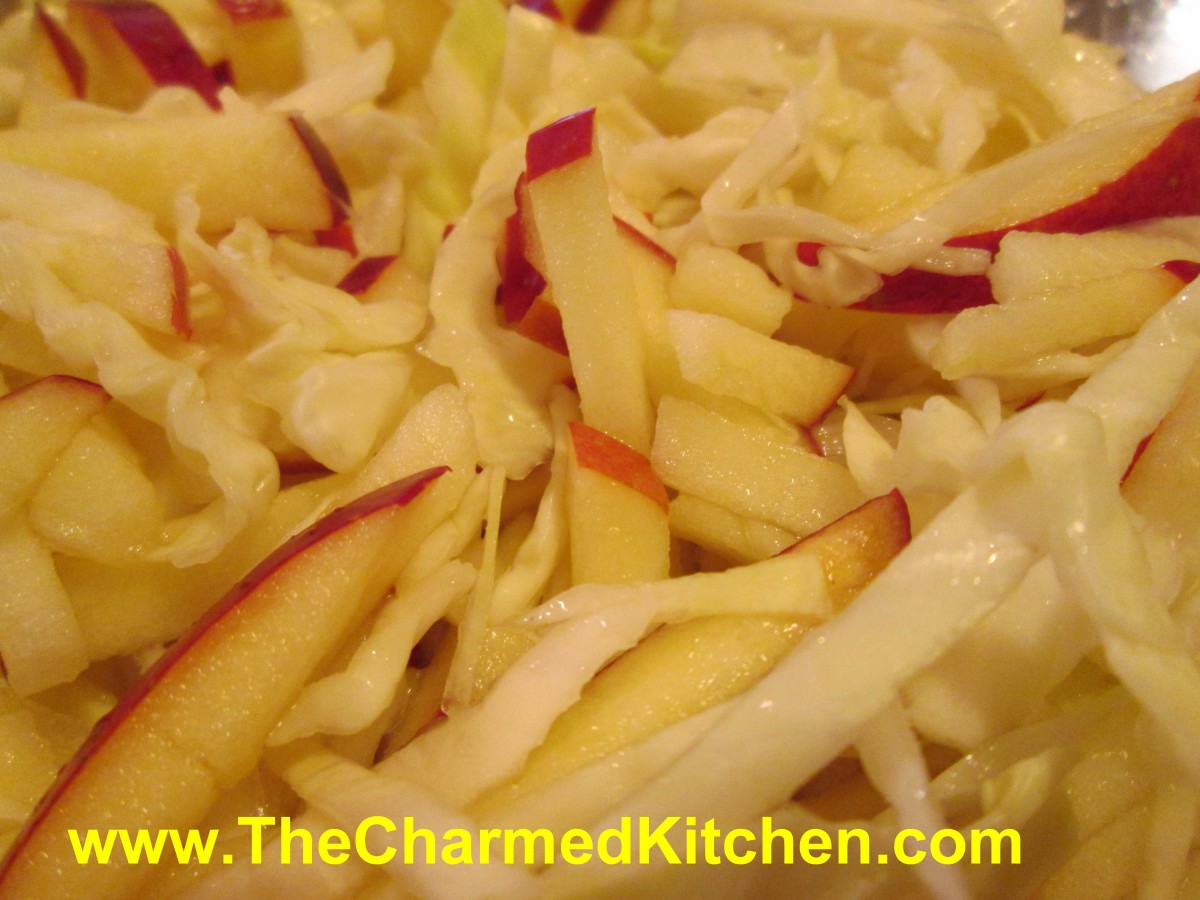
I love cole slaw. I think I could eat it everyday. I often make slaw with a creamy, mayo based dressing sometimes. Other times, I prefer a vinegar type dressing. For this slaw I went really simple. Just vinegar, a little honey and celery seeds, along with salt and pepper. Then I added thin strips of crisp, fresh apples to the shredded cabbage. The apples added a wonderful crunch and sweetness to the dish. So simple and so good. Almost any apple will work in this recipe. I prefer super crisp, slightly tart apples, but use what you like. Here is the recipe.
Apple and Cabbage Slaw
6-8 c. shredded cabbage
2 large apples, cored, unpeeled, cut into thin strips
1/2 c. cider vinegar
2 T. honey
1 t. celery seed
salt and pepper to taste
Combine cabbage and apples in a medium bowl. Combine remaining ingredients in a small bowl and stir until well mixed. Pour over the cabbage mixture and toss to coat evenly. Salad can be eaten right away or chilled for a couple of hours.
Goblin Goo Drink

Goblin Goo Drink
If you want a fun beverage to serve for Halloween, try this Goblin Goo Drink. It’s easy to make and will give guests a start. I will be making this with a group of kids in Hudson later today.
The secret is Jell-o. Make whatever flavor Jell-o you like. Once it is firm, mash it with a fork into pieces.
Place some of the mashed up Jell-o in a glass and add ice and whatever beverage you like. I used cherry Jell-o with sour cherry soda. The Jell-o is invisible that way.
When your guests take a sip they get little gobs of Jell-o in every sip. You can also play with color combinations for fun. Grape Jell-o with orange soda looks like little black globs in the drink. Play with color combinations. You can also do this with Jell-o shots, for the grown-ups.

Mash Jell-o with a fork

Add some Jell-o to the glass before adding ice and soda
Maple Nut Candied Bacon

Candied Bacon
I did a class all about bacon last night and I wanted to share one of the recipes. This candied bacon only has three ingredients- bacon, maple syrup and chopped nuts. The combination in sublime. Salty, sweet, smoky all in one crunchy bite. Everyone loved it!!
The bacon is baked and then coated with maple syrup and chopped nuts. It is returned to the oven, where it bakes until the bacon is crisp and the coating it toasted almost caramelized. It gets crisper once it cools down.
You can make a spicier version by sprinkling with a little cayenne pepper or adding hot sauce to the maple syrup.
Candied Bacon
1 lb bacon
3/4 c – 1 c maple syrup
3/4 c – 1 c crushed pecans (or any nuts you like! I like to leave some
larger pieces and then mix in some more finely ground)
Preheat oven to 350. Put bacon in baking pan and bake about halfway through (about 5-7 minutes or so). Drain most of the grease and allow to cool slightly. Coat each piece in syrup, roll in nuts and put back on pan. You may need more nuts as you go along, though it’s up to you how much to cover them. Bake another 7-9 minutes, until desired crispness. If you do like crisper bacon, just be sure to move the cooked bacon quickly off the baking sheet onto parchment paper, since the syrup will harden. Allow longer cooking times with thicker bacon.
“Bat” Wings
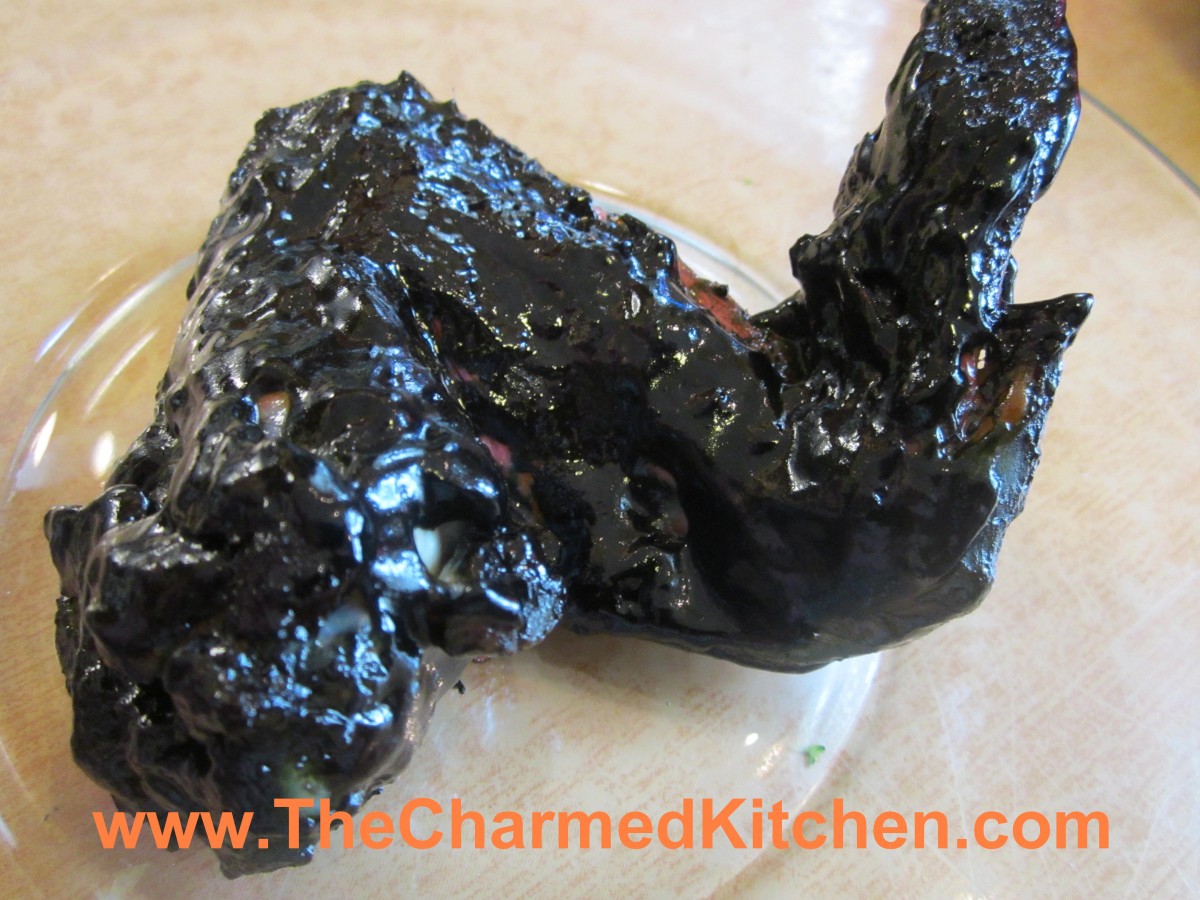
Bat “Wings”
With Halloween fast approaching I thought I’d share this recipe for bat wings. OK, not really bat wings, but you already knew that. I just add black food coloring to barbecue sauce and use it to color chicken wings.
I made a batch for a Halloween party a few years ago and someone actually asked if there were real bat wings. A word of warning- when you use black food coloring it will transfer to you. No matter how careful you are when you eat the wings, you’ll end up with purple fingers. Also, for the best effect keep the wings intact- no trimming off of the tips. They look pretty cool when set out on the table. Creepy- but very tasty.
Bat Wings
2-3 lbs. whole chicken wings
salt and pepper
1 c. barbecue sauce- store bought or home made
black food coloring- handle carefully- it stains
Place chicken wings in a roasting pan, season with salt and pepper and bake in a preheated 400 degree oven for 30 minutes. Meanwhile in medium bowl combine sauce with food coloring. Add just a little black food coloring at a time. Too much will alter the flavor of the food. Remove wings from the oven and dip them in the bowl of sauce. Turn to coat. Place wings on a clean baking sheet and return to the oven. Bake an addition 45 minutes. You can baste them with additional sauce during the baking, if you like. Place on a serving platter and provide plenty of napkins.
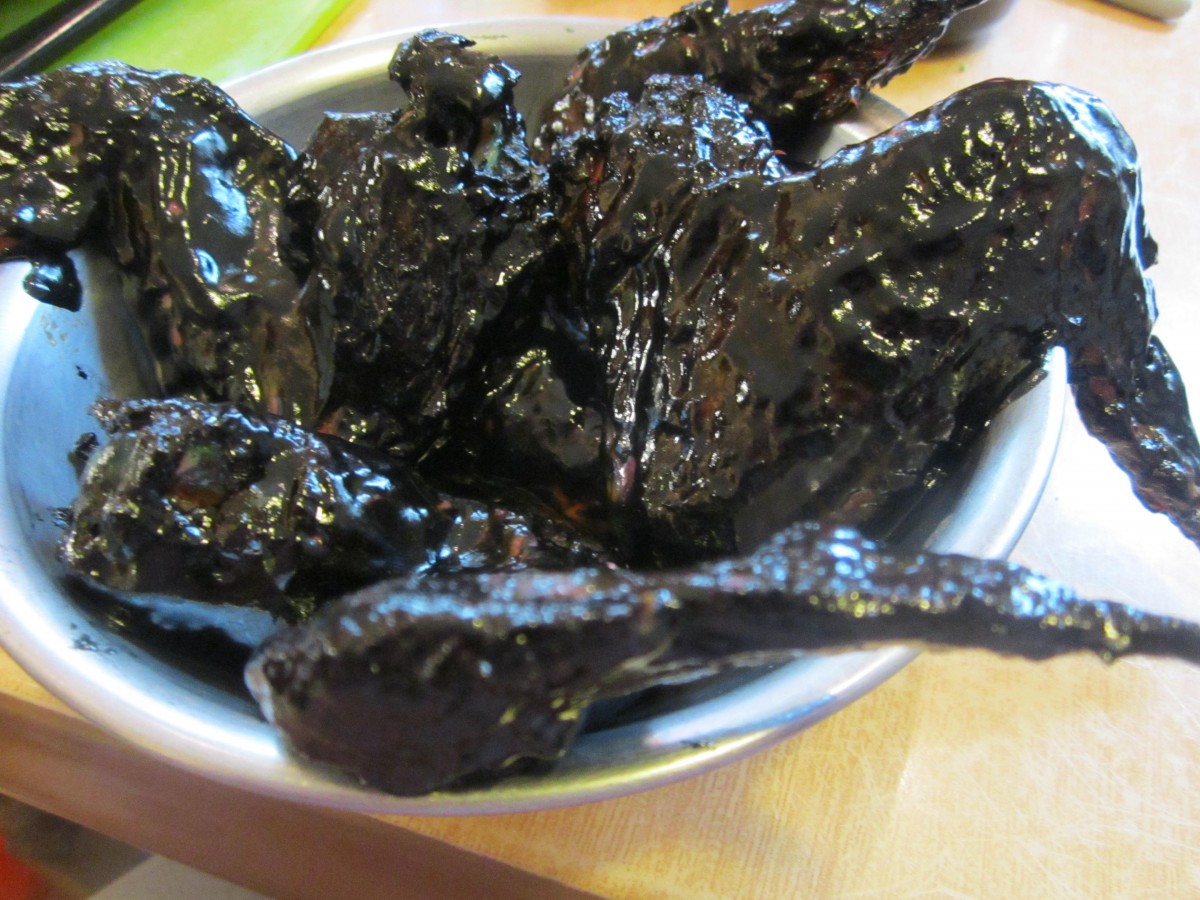
A pile of “bat” wings
Green Tomato Sweet Relish
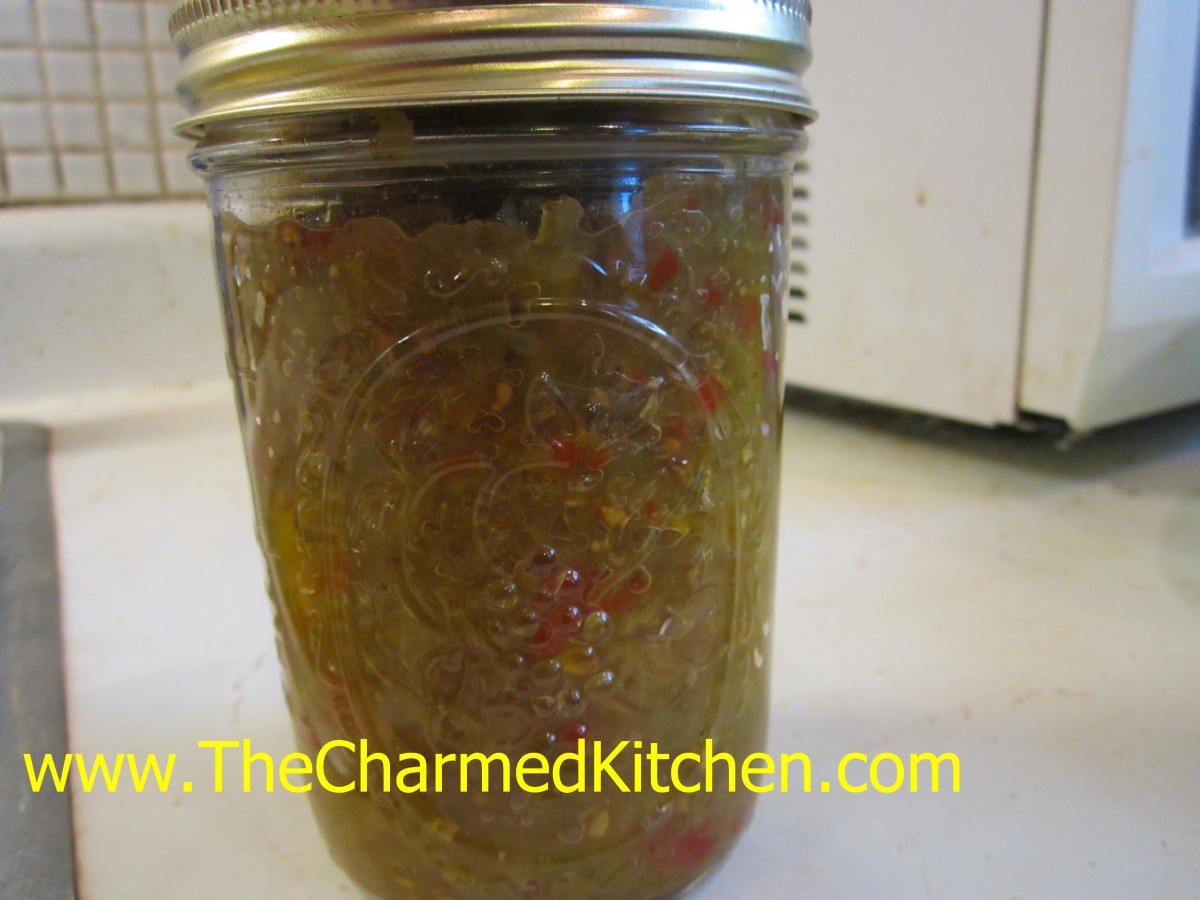
Green Tomato Sweet Relish
This sweet relish is a great way to preserve those last of the season tomatoes. It is every bit as good as relishes made from cucumbers.
I am always a little sad to see fresh tomato season come to an end. I have canned tomatoes and dehydrated some, too.
I know the green tomatoes I have left will not have time to ripen. I don’t want them to go to waste, so I have pickled some. I also like to make this relish with some of them.
Someone asked me for the recipe- so here it is.
Green Tomato Sweet Relish
6 pounds green tomatoes, about 22 medium
2-3 medium onions
2 medium sweet red peppers
1 sweet green pepper
1 large rib celery
1 3/4 c. white or cider vinegar ( 5% acidity)
1 2/3 c. sugar
3 T. canning salt
1 1/2 t. celery seeds
1/2 t. each cinnamon, cloves, allspice and turmeric
1/4 t. cayenne pepper
Wash trim and quarter vegetables. Put vegetables through food grinder using medium blade or pulse in food processor to chop finely. Drain, discarding liquid. Wash jars in hot, soapy water. Rinse and set aside. Combine vinegar with remaining ingredients in large saucepan and bring to a boil. Add vegetables and simmer 10 minutes, stirring occasionally. Continue simmering while packing hot jars, one at a time. Fill to within 1/2 -inch from top of jar. Wipe rims and place on lids. Process 10 minutes in a boiling water bath. Makes 5-6 pint jars.


