Veggie “Roses” Tart
Veggie “Roses” Tart
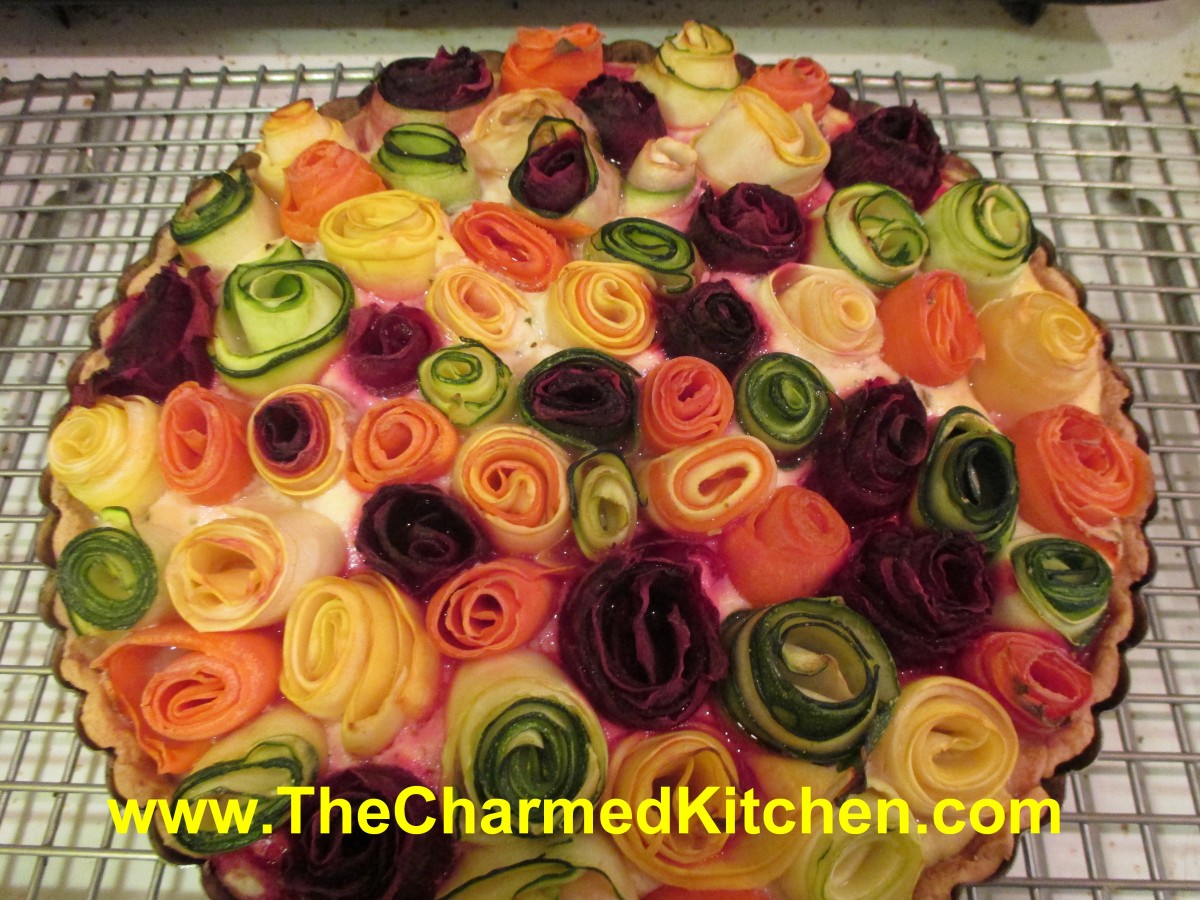
This tart is sure to get some attention at your next party. A flaky crust and cheese filling are topped with veggies. The special part, is that the vegetables are rolled up to resemble roses. Simple and elegant.
It really is easy to make, although a bit time consuming. It can be made a day or two ahead, baked, and then just reheated when you want to serve it. There are three parts to it. The crust- which I made using a favorite pie crust recipe. The filling- a mix of cheeses, eggs and some herbs. Finally the topper. Various veggies, peeled into thin ribbons, wound into little “roses”, and placed on the cheese layer. My friend, Kat, saw a similar creation and posted it. I loved it, and decided to try and create one of these tarts myself. I switched some things from the one she posted. I made my own crust and used some different veggies. So here is how I did it.
The crust:
This is an old family recipe. Simple and flaky. It makes 2 crusts- so I used the other one for another dish. You could make two tarts or freeze the rest for another time.
Flaky Pie Crust
2 c. flour
1 t. salt
3/4 c. shortening, chilled, or use lard or coconut oil, I used coconut oil
1 T. cider vinegar
4-5 T. cold water
Combine flour and salt and cut in shortening. Toss in vinegar and water, 1 tablespoon at a time, until dough holds together. Use a fork to toss the ingredients together and as soon as the mixture holds together stop adding water. Makes 2. Chill well before using.
The crust was rolled out, using half the dough, and fitted into a 9-inch tart pan. I blind baked it- to insure it would be cooked through- because the tart doesn’t cook that long. I poked the crust all over with a fork, then I topped the crust with a sheet of foil and then a pound of dry pinto beans. You can use pie weights, if you have them or uncooked rice. I have a jar of pinto beans that I keep just for blind baking. The crust is placed in a 425 degree oven and baked for 15- 20 minutes. It should be taken out of the oven before the edges get too brown. Set aside until you are ready to fill it.
The Filling:
I used a combination of cheeses and eggs, with some seasonings. I am not sure I needed the eggs- but I wanted the cheese to set up.
1 (15 oz.) container ricotta cheese
1/2 c. Parmesan cheese
2 eggs
1 t. salt- or to taste
1 t. dried oregano
1 t. dried basil- or 1 T. fresh basil
healthy dash of hot sauce
Combine all ingredients and spread over the crust.
The veggies:
Even though these are listed last, you might want to get them ready ahead of time. I used a vegetable peeler to make “ribbons” out of the veggies I used. You could also use a mandolin, if you have one. Some were going to be hard to roll- so I steamed them in the microwave, in batches, for several minutes. That softened them up and partially cooked them. They should be tender- they don’t get much softer in the baking process. Dry them off on paper towels. When I was ready to use them- I grabbed a “ribbon” and rolled it up, adding more ribbons until I had a little “blossom”. As I made them I stuck them in the cheese mixture- already spread over the crust. Sometimes I used 2 veggies in one flower to make it look more interesting. Once the surface was covered, I pressed them down a little so they would all be the same height, roughly. Season with some salt.
I used
2 zucchini
2 yellow summer squash
2 really big carrots – made for wider ribbons
1 really big beet*
I had some pieces left over and just made a stir fry with them.
Baking the tart:
Place the tart on a baking sheet and bake in a 350 degree oven for about an hour. Crust should be nice and golden around the edges and the veggies should be tender.
* The beet was the trickiest- but I wanted that pop of red. I peeled the skin off first, then tried to peel the longest pieces I could. Some were a little short, but once steamed, they still worked pretty well. sometimes I’d finish a beet center off with a longer zucchini ribbon to hold it together.
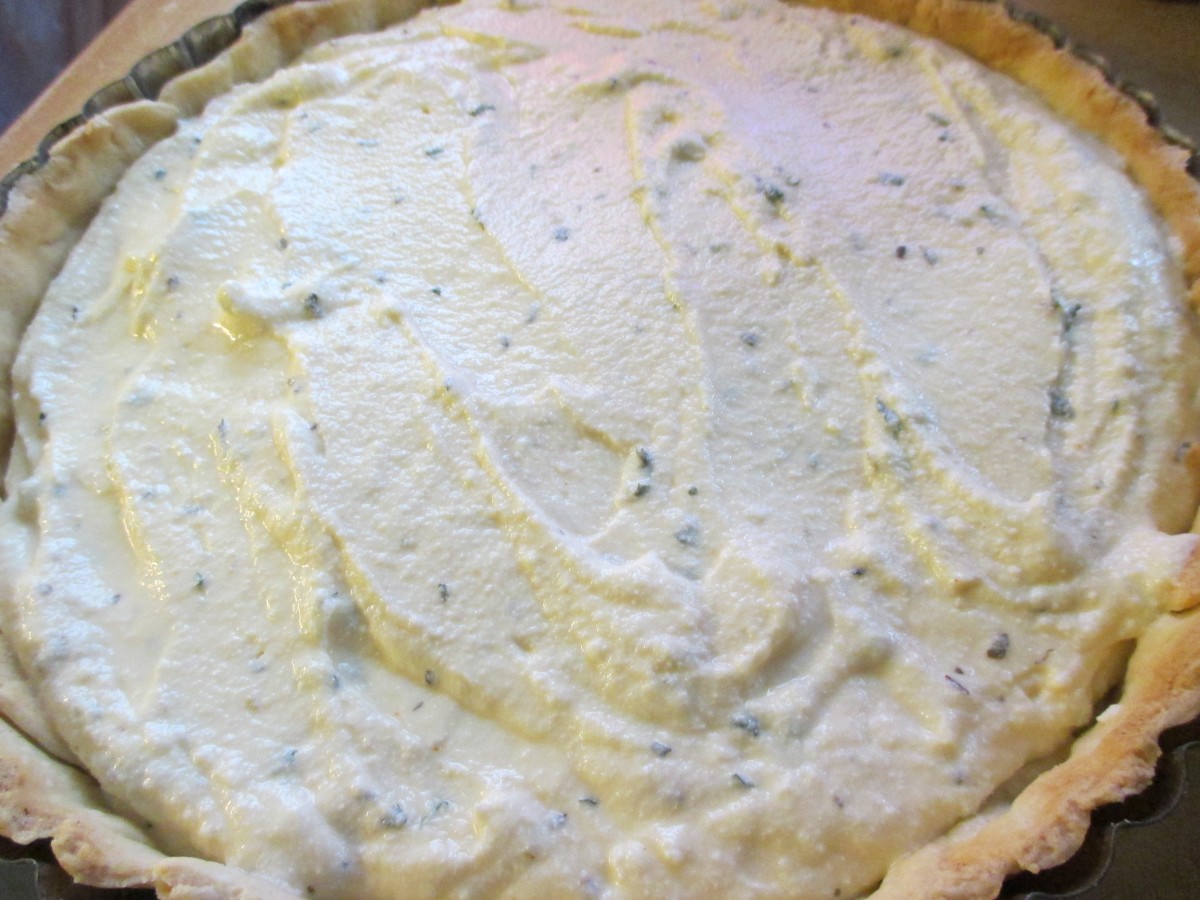
Spread cheese mixture over the crust
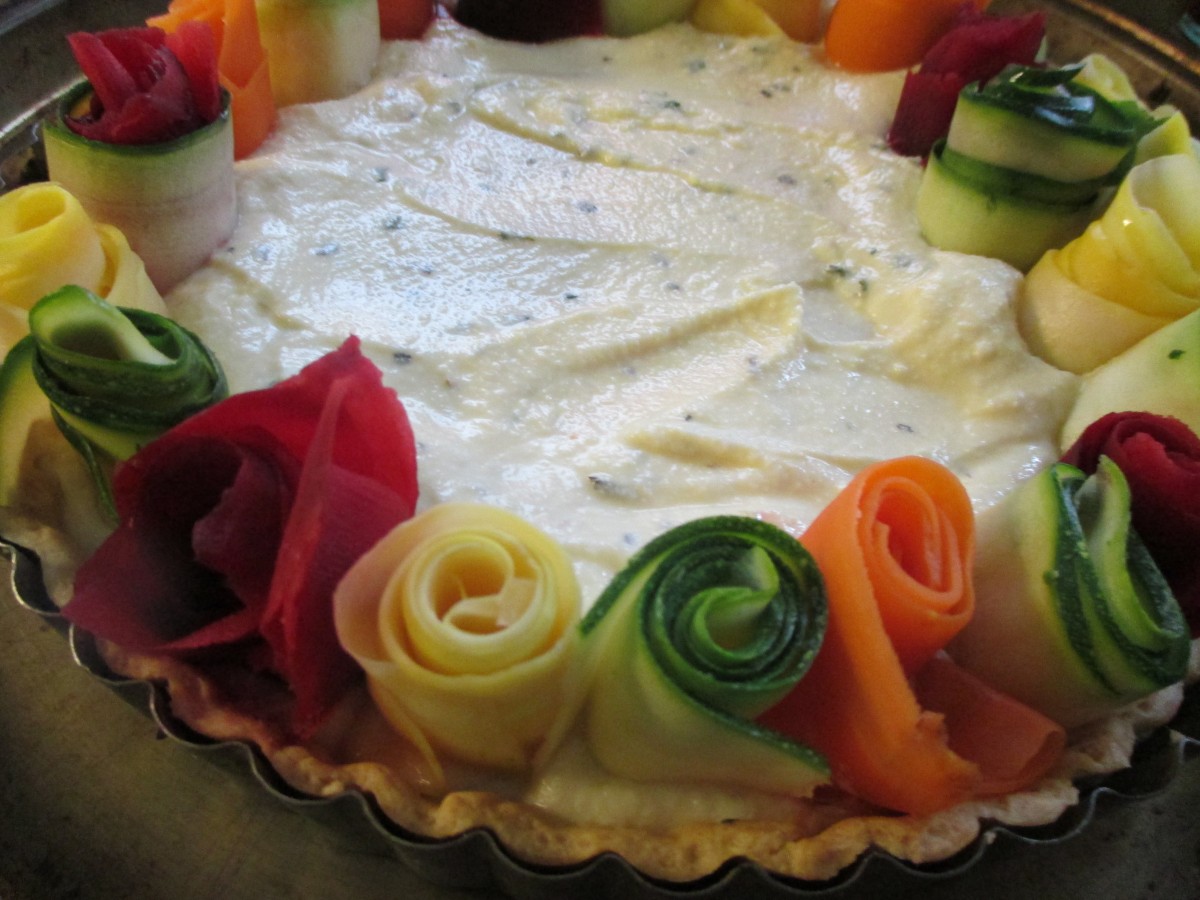
Start placing the “roses” on the cheese mixture
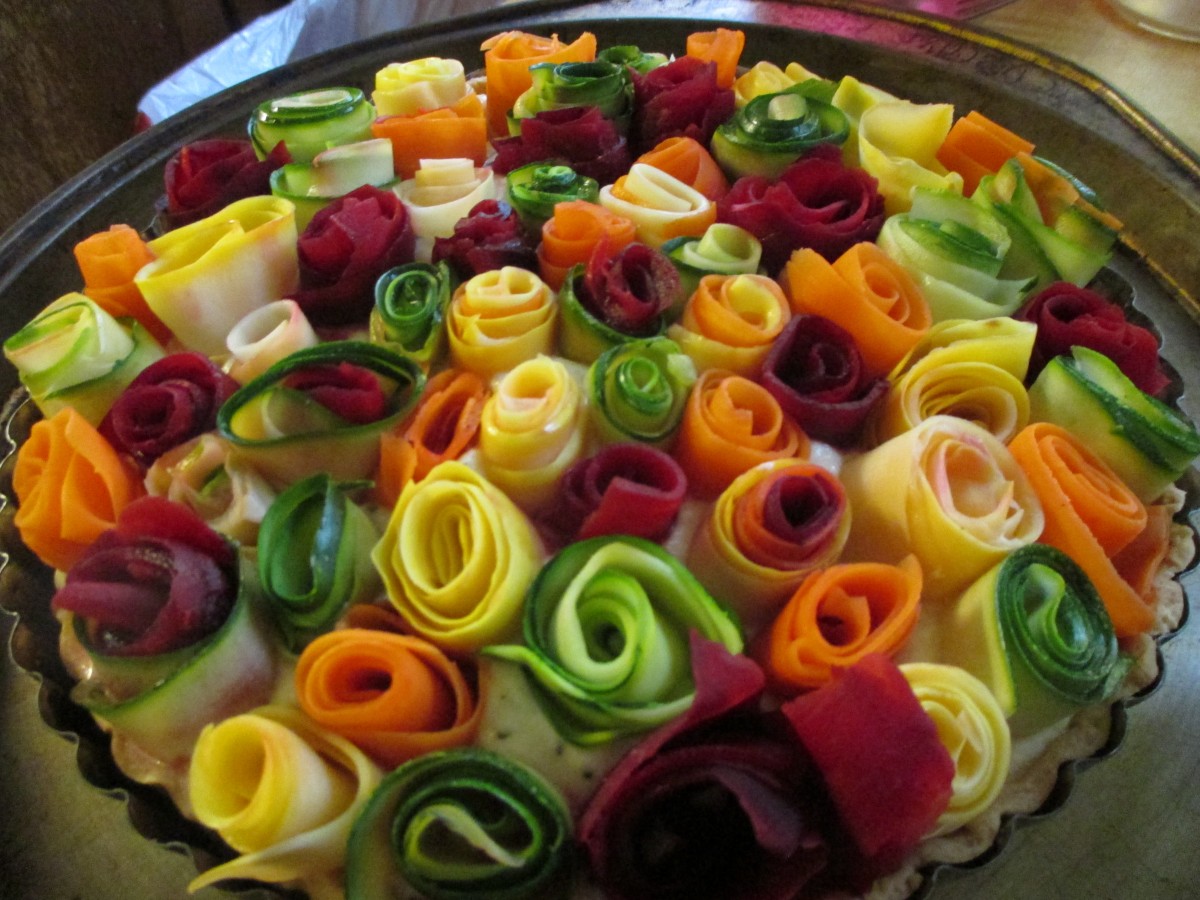
Keep filling in the tart until full.
Traditional Hot Cross Buns

Hot Cross Buns
These rich rolls are a traditional at Easter. At least they are in my house. The dough is rich and slightly sweet. The frosting on top adds to their sweetness.
Hot cross buns can be served at breakfast, brunch or even as a dinner roll. I have served them with coffee, after dinner. So I guess they can be a dessert, too. I used leftover buns to make bread pudding one year.
Because the dough is rich, they are slow to rise. If they aren’t jumping out of the pan after an hour or so, don’t worry. They do rise quite a bit in the oven.
After they cool a bit- pipe on the icing in the crisscross pattern that gives these rolls their name.
Hot Cross Buns
2/3 c. sugar
1 t. salt
2 packages active dry yeast
About 5 cups bread flour
1 ½ c. milk
½ c. butter
2 eggs
1 c. raisins
Icing
¾ c. powdered sugar
1 T. milk
In bowl combine sugar, salt, yeast and about 1 ½ c. flour. Heat together milk and butter until very warm. Beat milk mixture into to flour mixture and beat 2 minutes with electric mixer. Beat in 1 egg and 1 cup flour and beat 2 more minutes until batter thickens. Stir in raisins and enough additional flour to make a soft dough. Turn dough onto a floured surface and knead until smooth, about 10 minutes. Place dough in greased bowl, turning to grease top, cover with a towel and allow to rise in a draft free place until doubled in bulk, about 1 hour.
Place dough on floured surface and divide into 15 equal pieces. Cover with towel and lest rest 15 minutes. Meanwhile grease a 9×13 inch pan. Form dough into smooth balls and place in prepared pan. Cover and let rise until doubled, about an hour. Preheat oven to 350 degrees. Beat remaining egg. Cut a cross in each bun and brush with the egg. Bake for 25 minutes or until buns are golden. Remove buns to wire rack to cool 15 minutes. Make frosting, place in decorating bag and pipe onto buns. Makes 15.
Lamb with Greek Lemon Egg Sauce
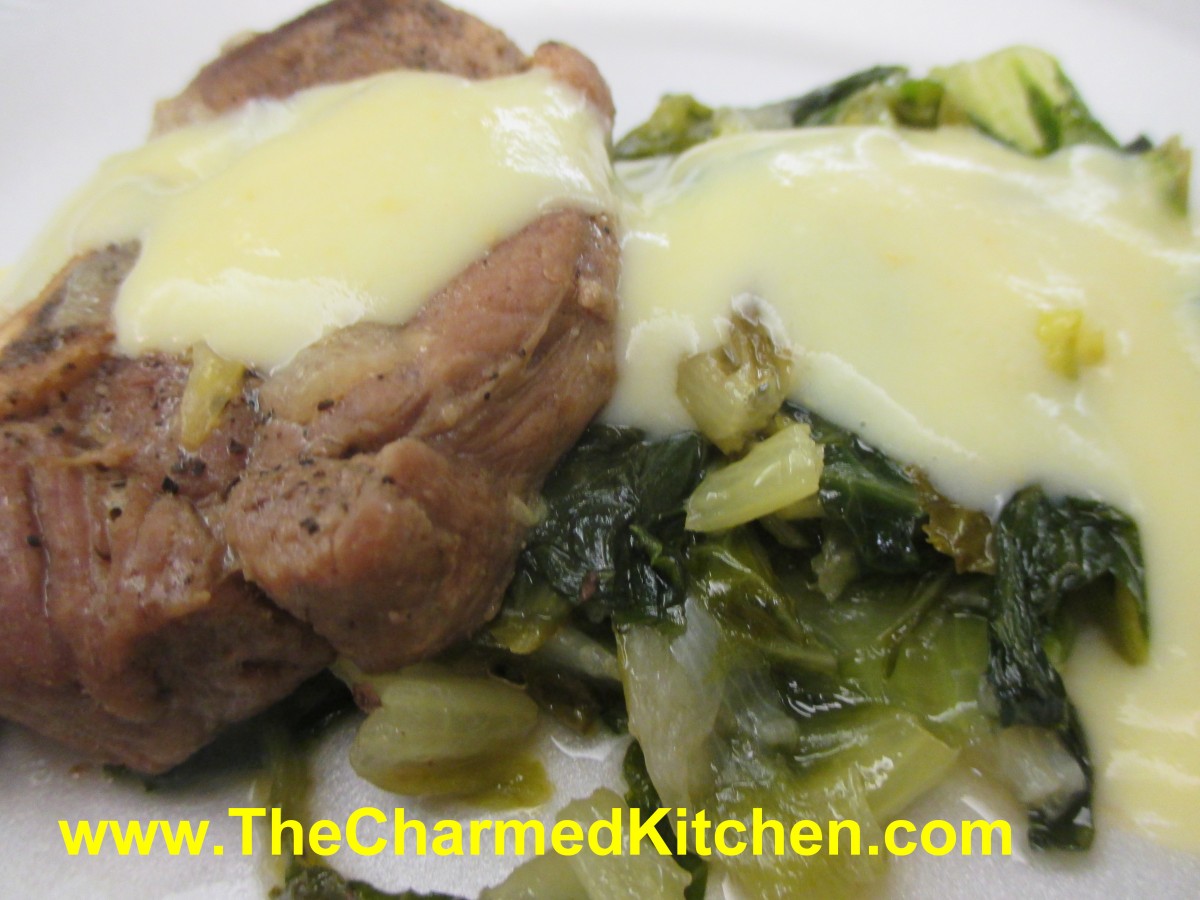
Lamb with Greek Lemon Egg Sauce
I love lamb and enjoy cooking it different ways. This recipe uses lamb shoulder, cooked with onions and Romaine lettuce- yes lettuce. The lamb is browned and then cooks gently until tender. The lettuce also cooks down and adds a nice green flavor to the dish.
The real magic is the lemon egg sauce, used to top the lamb once finished. It is creamy and has just the right amount of tang from the lemon juice. You could also make this dish with pork or even chicken, but my favorite version is with lamb. I also use the lemon sauce with meat and rice stuffed zucchini. My dear friend Amy, had the dish on a trip to Greece and we made it often.
Fricassee of Lamb with Lemon Egg Sauce
2 1/2-3 lbs. lamb shoulder, or use pork
3 medium onions, chopped
2-3 heads romaine lettuce, washed and sliced thin
1/2 c. olive oil
Egg and Lemon Sauce -recipe follows
Cut the meat into serving pieces. Heat the oil in a pot and sauté the meat. Add salt, pepper, the onions, lettuce and a small amount of water. Cover the pot and let the fricassee simmer for about an hour. Prepare the egg and lemon sauce, pour it over the fricassee and serve.
Lemon and Egg Sauce
1-2 c. stock
2 eggs
juice of 1 lemon
flour, about 1-2 tablespoons, depending on how thick you want the sauce
Bring stock to the simmer. Beat eggs well. Mix the flour with the lemon juice.
Add to the eggs and keep beating. Add the hot broth slowly while you keep beating. Pour the egg and lemon sauce in the pot and bring to a simmer, stirring constantly. Makes 1-2 cups. For a thinner sauce eliminate the flour.
Amy’s Skillet Chicken Pot Pie
Amy’s Skillet Chicken Pot Pie
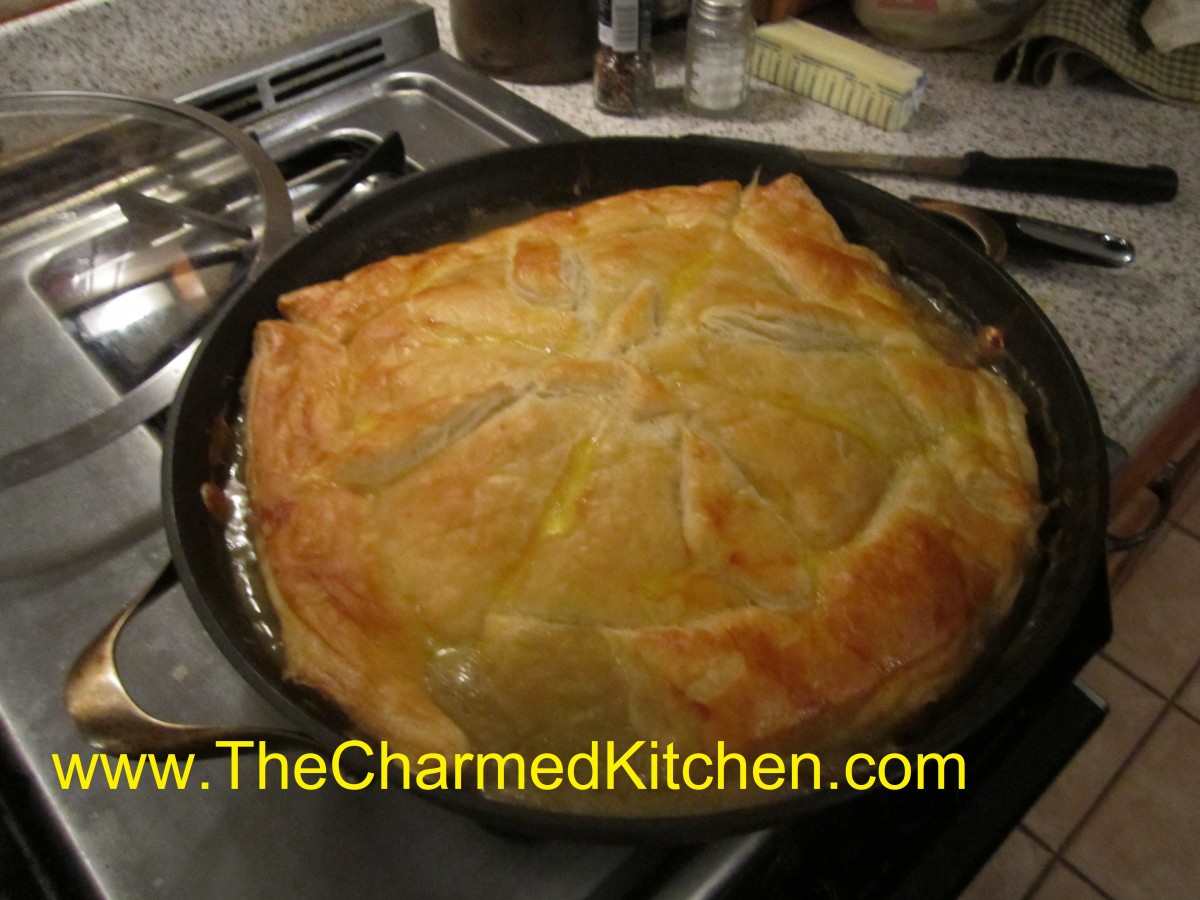
I am not sure there is better comfort food than chicken pot pie, at least not for me. Brings back very nice memories.
This chicken pot pie is made in a cast iron pan. It is started on top of the stove, then finished in the oven. Kind of the ultimate one-pot dinner.
My friend Amy was so proud of how this recipe turned out. She found the original recipe somewhere, but changed it, to make it her own. It was a while back when she made this for a dinner with me and other friends, but it seemed like a good time to share the recipe. It was, and is, the best chicken pot pie I ever tasted. For our dinner that night, Amy doubled the original recipe, and used a larger skillet. You could easily cut it in half and use an 8 or 10-inch skillet
Here is Amy’s recipe. Enjoy!!
Amy’s Skillet Chicken Pot Pie
¼ c. olive oil
2 T. butter
1 sweet onion, chopped
4 parsnips, peeled and sliced
4 cloves garlic, minced
1 tablespoon chopped fresh sage, optional
1 small bunch kale, center ribs and stems removed, leaves chopped
Kosher salt
freshly ground pepper
¼ cup all-purpose flour
3 cups low-sodium chicken broth
2 T. sherry
½ small butternut squash, peeled, cut into 1/2-inch pieces (about 1½ cups)
½ of a roasted chicken- meat removed from bones, torn onto bite sized pieces – about 1½ cups of meat
1 sheet frozen puff pastry, thawed
1 large egg
Place a rack in upper third of oven; preheat to 425°. Heat oil in a deep 12-inch cast-iron or other heavy ovenproof skillet over medium-high heat. Add onions; cook, stirring occasionally, until beginning to brown, about 4 minutes. Reduce heat to medium-low. Add parsnips, garlic and sage to skillet and cook, stirring occasionally, until garlic begins to brown, about 2 minutes. Add kale and season with salt and pepper. Cook, tossing often, until wilted, about 4 minutes. Sprinkle flour over. Cook, stirring constantly, for 4 minutes. Stir in broth, 1/2-cupful at a time, then add squash. Bring to a boil, reduce heat, and simmer until squash is just softened and broth is thickened, 8-10 minutes. Add chicken to skillet, stir, and season with salt and pepper. Unfold pastry and smooth any creases; place over skillet, allowing corners to hang over sides. Whisk egg and 1 teaspoon water in a small bowl. Brush pastry with egg wash; cut four 1-inch slits in top to vent. Bake pot pie until pastry is beginning to brown, 15-20 minutes. Reduce oven temperature to 375° and bake until pastry is deep golden brown and crisp, 15-20 minutes longer. Let cool for 10 minutes before serving.
Amy’s Strawberry Chocolate Tart

Amy’s Strawberry Chocolate Tart
I have posted this recipe before, but wanted to share it again. It was made with love for a very dear and special friend. I will love you always, Amy.
I had an extra pie crust, some strawberries and a dinner with friends. I had said I’d bring the dessert. Since I made strawberry pie the day before for another friend I wanted to do something a little different. I decided to go with a tart. I also know the host of the dinner is mad for chocolate so I wanted to incorporate chocolate into the dessert. Here is the dessert I ended up with.
Amy’s Strawberry Chocolate Tart
1 pie crust- homemade or store bought*
1 cup chocolate chips- or 6 oz. bittersweet chocolate
2 T. butter
1 qt. fresh strawberries, washed and stem ends sliced off
Strawberry glaze:
1 c. strawberries, chopped
1/2 c. sugar, or to taste
1/4 c. water
1 T. cornstarch
Using a tart pan, roll out your crust and fit it into the pan- trim off any excess. Pre-bake your crust. To do this the prepared pie crust should be pricked all over with a fork. Cover the surface with foil and then pie weights. I use dry beans for my pie weights. Pre-heat oven to 400-degrees. Bake crust for 15-20 minutes. Check to be sure it doesn’t get too brown. Remove weights and foil and cool until ready to use. While crust is baking you can prepare the strawberry glaze. Combine 1 cup berries and sugar in small saucepan and bring to a simmer. Cook five minutes, mashing the berries a little. Strain out the solids and return the liquid to the pan. Combine the water with the cornstarch and add to the strawberry liquid, cooking until thickened and bubbly. Remove from heat to cool. Combine chocolate and butter in microwave- safe dish and microwave on high for 45 seconds to a minute . Stir mixture until smooth- you might need to nuke it a few more seconds. Spread melted chocolate over the bottom of the tart crust. Press the berries into the chocolate- pointed side up. Once the tart is full of berries spoon some of the glaze over the berries and chill at least an hour before serving. Serve with whipped cream, if desired. Serves 6.
Half and Half Dough*
This is a great crust for liquid fillings like custard type pies and fresh fruit pies.
¼ c. butter, room temp
½ c. shortening, room temp- you can use lard instead
¼ c. sugar
½ t. salt
2½ c. pastry or all purpose flour
1/8 t. baking powder
¼ c. milk
1 t. lemon juice
Cream together the first 4 ingredients until smooth. Mix together the flour and baking powder. Set aside. Combine milk with the juice and set aside. Stir ½ c. of the flour into butter mixture. Stir until smooth. Add a little of the milk, stirring until smooth. Add remaining ingredients alternately until finished. Dough will firm up once chilled. Chill at least 4 hours before using. Makes 2 crusts.

Cover crust with melted chocolate
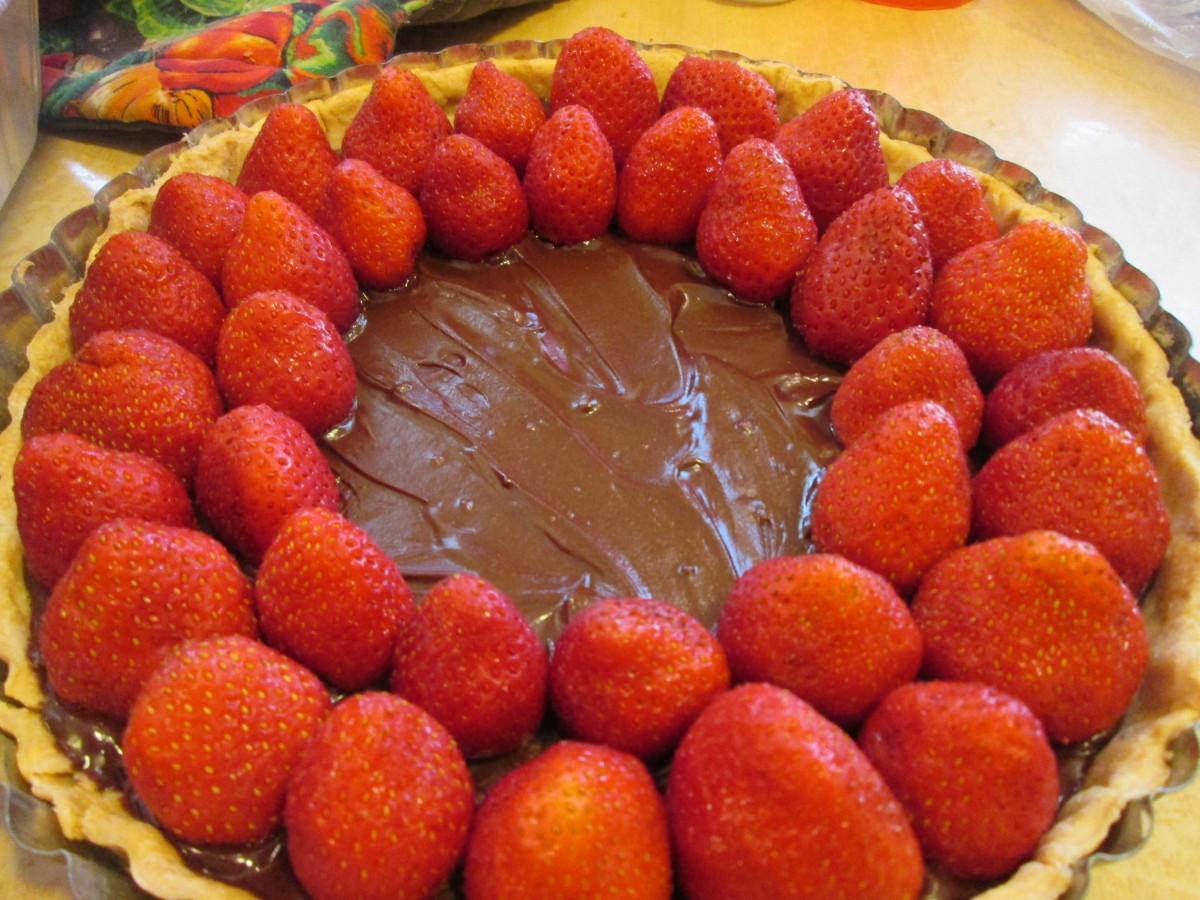
Arrange berries on top of chocolate
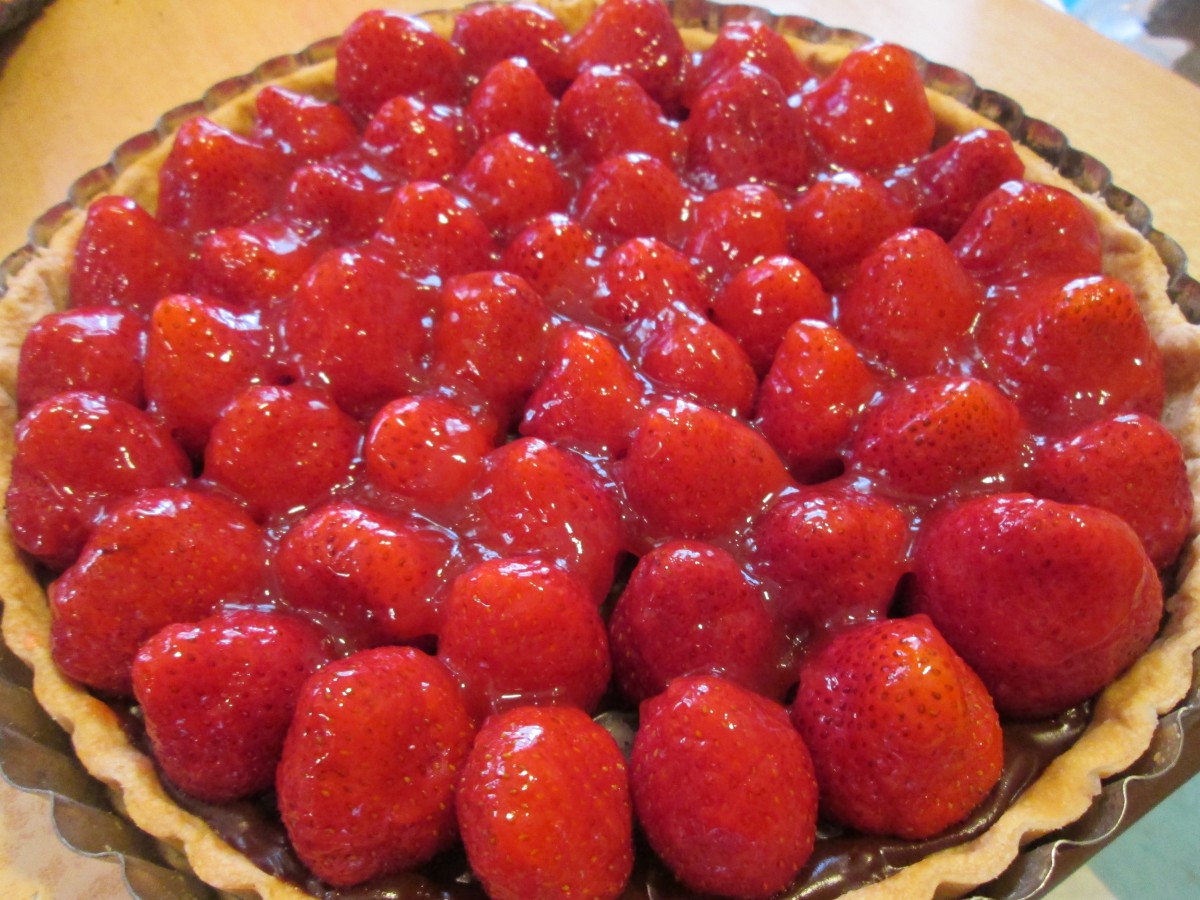
Spoon glaze over berries and chill tart before serving
Rainbow Ravioli on New Day Cleveland
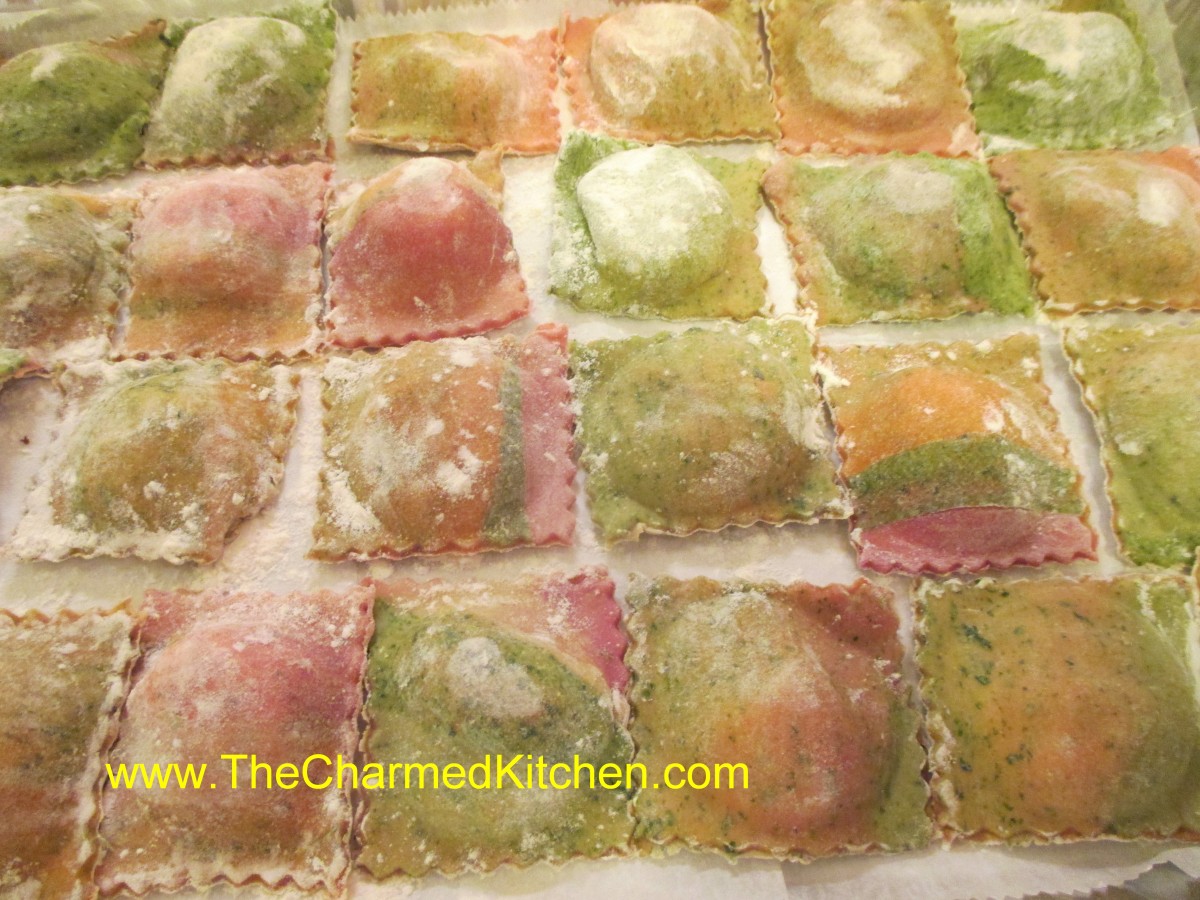
Rainbow Ravioli
Thanks to New Day Cleveland for having me on the show today. It was a lot of fun, as always.
Homemade Mushroom Pasta
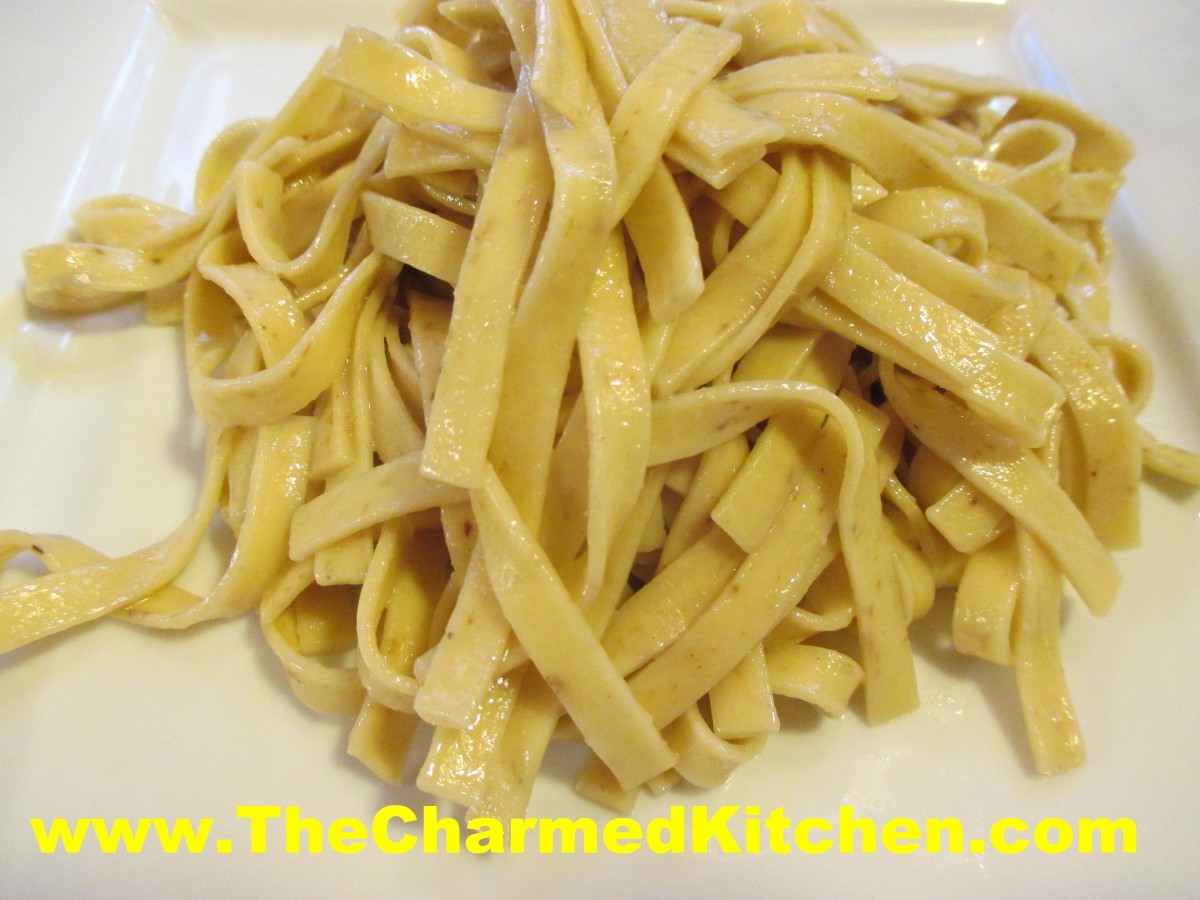
Mushroom Pasta
I love making my own pasta and am always playing around with flavors. I thought it would be fun to make mushroom pasta. I dehydrate mushrooms, and often powder them up- to use in sauces and soups. I figured I could do the same thing with pasta dough. I just added some of the mushroom powder to the dough. The result was really special. The mushroom powder added a great flavor to the pasta dough.
To serve it, after boiling it about 3 minutes, I drained it and tossed with butter and some parsley. I hadn’t planned to do anything special with the pasta- since this was just a trial run. I could see a lot of dishes and sauces I would use this pasta for. My Busha’s Polish mushroom soup comes to mind.
So here is the recipe. Keep in mind that fresh pasta cooks very quickly.
Mushroom Pasta
3 c. flour, more if using electric pasta machine. See note.
½ c. mushroom powder- made from dried mushrooms*
1½ t. salt
4 eggs
Water, as needed
Mix flour, mushroom powder and salt. Stir in eggs, kneading until dough is smooth and elastic. Dough will be very stiff. Add a little water, as needed, to hold dough together. You may wish to mix the dough in a mixer or food processor. Cover dough and let rest at least 15-20 minutes before rolling. Under kneading your dough will result in coarse, crumbly pasta. This batch makes about 1 pound. Serves 4-6.
Roll dough out on a well-floured board or with a pasta machine until desired thickness in reached. Add flour as needed to prevent sticking. Cut into strips or whatever shapes are desired. You might want to let the noodles dry 1-hour or more before cooking, but this is not necessary. Pasta can be hung to dry or separated and allowed to dry flat on a table. When pasta is not hanging to dry it must be turned occasionally to dry evenly. Although you may hear otherwise, homemade pasta, even when dried, should be frozen for long term storage. Storing at room temperature can lead to spoilage. Fresh pasta can also be stored in the refrigerator for a day or two.
Cooking fresh pasta happens quickly. For most noodles you are looking at 2-3 minutes at the most. Thicker cuts and ravioli would take a little longer. Watch it carefully. Drain after cooking, and toss with your favorite sauce.
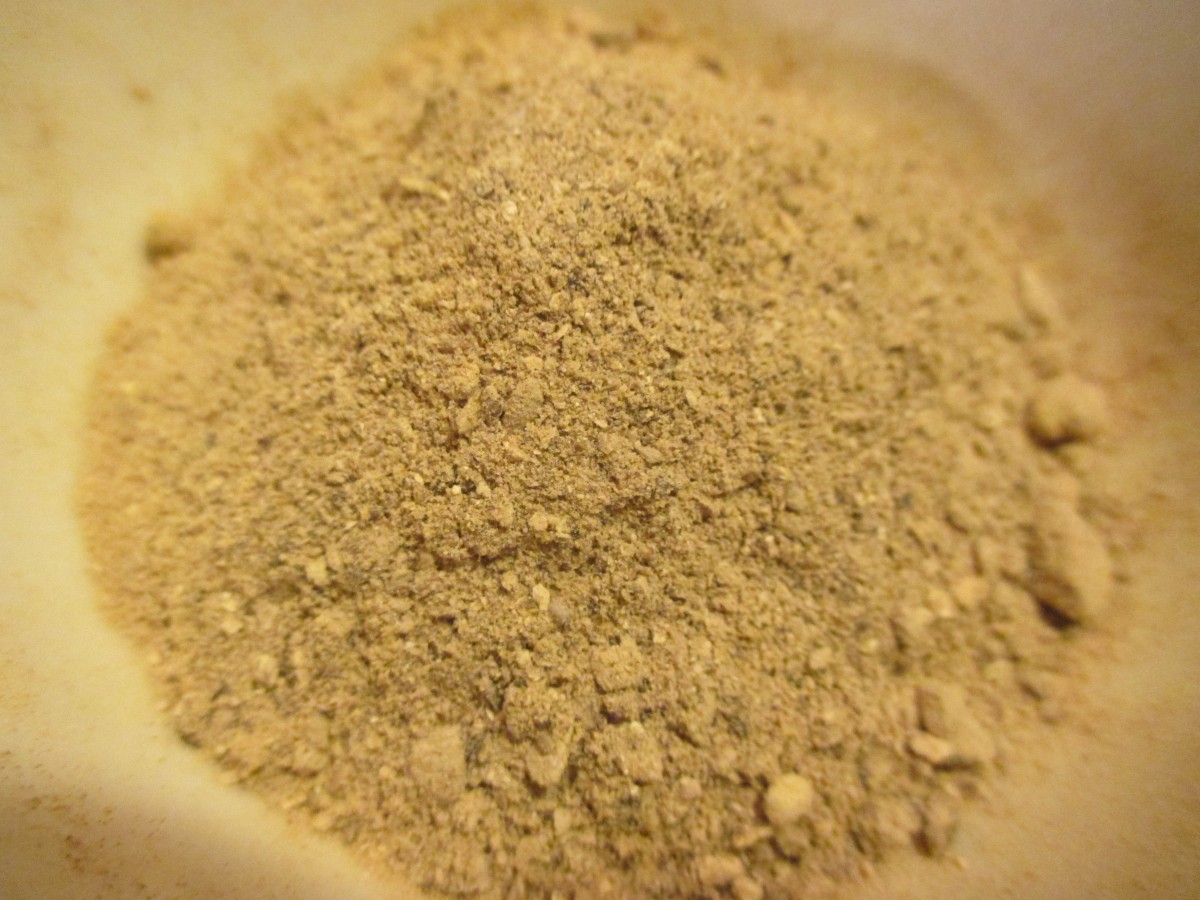
Mushroom powder
*You might be tempted to powder up some store bought dried mushrooms. I would advise against that. Commercially dried mushrooms have not been washed before drying, so you might get dirt in your mushroom powder. I clean my mushrooms thoroughly before dehydrating.
Note: All electric pasta machines vary slightly and you should use their recipes as much as possible. Still, for most models, adding 1/4 c. flour for each cup in a hand rolled recipe works the best. Also recipes that contain seeds and vegetables may clog an electric pasta maker. Follow your manufacturer’s instructions.
Blueberry Lemon Trifle
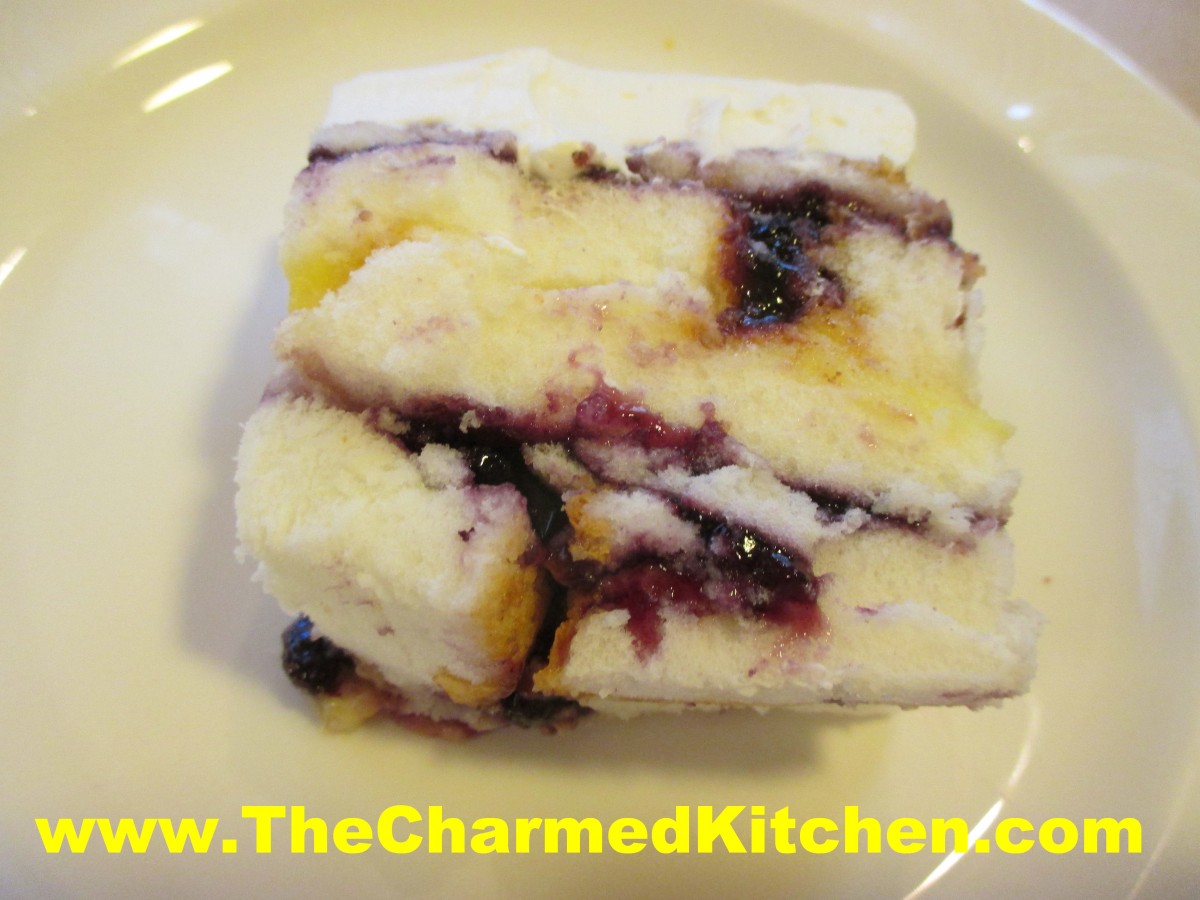
Blueberry Lemon Trifle
This blueberry and lemon trifle was a perfect finish for a Spring dinner with friends. I hadn’t planned on making a trifle. I went shopping and there was a marked down angel food cake in the bakery…. I just had to have it.
Once I got home, I realized I had to do something with the cake. I thought of trifle right away. Trifle is one of those desserts that can be whatever you want it to be. The basics of a traditional trifle are sponge cake, layered with some sort of pudding or custard and fruit. The cake is sometimes soaked in sherry or some other alcohol. Trifles are often topped with whipped cream.
I had just finished canning blueberry pie filling. That would be the fruit element of my trifle. I also had a few lemons that needed to be used soon, so the lemon curd was a good choice. Besides, lemon and blueberries pair so nicely together.
Once you have all the ingredients, the trifle is simple to assemble. Pick a nice, glass bowl, so you can see the layers in the trifle. It is best to put your trifle together a bit in advance, so the cake can soak up some of the moisture from the berries and the lemon curd. It also helps the trifle to stay together. I could actually slice the trifle to serve it.

Blueberry Lemon Trifle, ready to serve
So here is the recipe. I made the pie filling and lemon curd from scratch, but you can use store bought, to save time.
Blueberry Lemon Trifle
1 angel food cake, sliced thin
2 c. blueberry pie filling- homemade or store bought- recipe follows
2 c. lemon curd- recipe follows
1 c. whipping cream
1/4 c. powdered sugar
Place a layer of cake slices in the bottom of the bowl. Spread half of the blueberry mixture on top of the cake. Place another layer of cake slices on top of the blueberry layer and press down a little to even it out. Cut cake pieces to fit as best you can. Add half of the lemon curd and top with more cake. Repeat the process one more time. Don’t worry if something isn’t perfect in the layers- that is kind of the charm of a trifle. Just be sure to get all the ingredients in the bowl. Cover and chill the trifle. When ready to serve beat the whipping cream and powdered sugar together until stiff peaks form and spread over the trifle. You can do this part ahead of time, if you prefer, Just keep trifle, covered, in the fridge, until ready to serve. Serves 6-8.
Blueberry Pie Filling
3 1/2 c. blueberries
3/4 c. sugar, or to taste
1/4 c. Clear Gel*
1 c. water
1 T. lemon juice
In saucepan, bring blueberries and sugar to a boil, stirring often. Combine clear gel with water and lemon juice and add to the blueberry mixture. Return to the boil and cook until thickened and bubbly. Makes 4 cups. You might not need the whole batch for the cookies.
*Clear gel is a modified cornstarch. It is used in commercial pie fillings and in homemade pie fillings, as well. Unlike regular cornstarch, Clear Gel retains it’s thickness, even if you reheat it. You can find it online or in some specialty food stores.
Lemon Curd
1/2 c. lemon juice
zest from one good sized lemon- you should have 2-3 teaspoons
1/2 c. sugar
3 eggs
6 T. unsalted butter- cut into little cubes
In medium saucepan combine all ingredients. Whisk the mixture until the eggs are well blended. Cook over medium low heat, whisking often, until the mixture thickens. This will take 5-7 minutes. Whisk more often as mixtures warms and starts to thicken. Better to heat over lower heat and take longer than over too high a heat. You don’t want the eggs to scramble. Once the mixture is thickened , transfer to a bowl or jar. Cover the surface with a piece of plastic wrap to keep the surface from developing a skin- like any pudding will do. Chill until ready to use. Makes about 2 cups. Will keep in fridge a week or two.
Homemade Lemon Curd
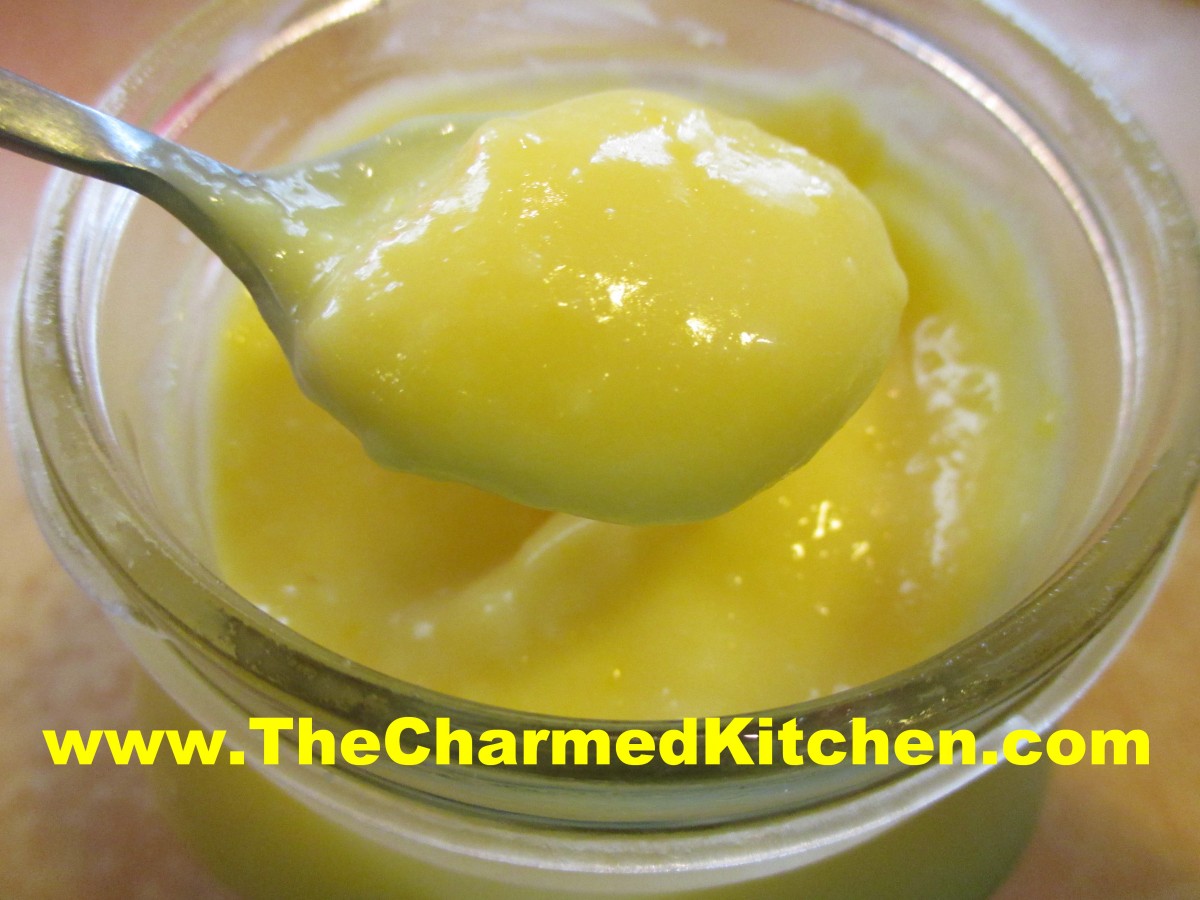
Lemon Curd
Lemon curd is such a versatile dish. It’s a sort of lemon pudding and can be served plain, or with a dollop of whipped cream. It is also great in trifle or served as a topper for any number of cakes and sweet treats. I especially like to make lemon curd to serve with scones. It is also really nice served with berry shortcakes. I am using this batch in a blueberry lemon trifle.
It is easy to make and packed with fresh lemon flavor. Lemon curd is just a few ingredients, cooked over low heat until it thickens up. You can make a batch in under 10 minutes. The longest part of the prep time is just waiting for it to cool down after cooking.
So here is the recipe for the lemon curd. If you never made your own- you might want to give it a try. Certainly worth the effort.
Lemon Curd
1/2 c. lemon juice
zest from one good sized lemon- you should have 2-3 teaspoons
1/2 c. sugar
3 eggs
6 T. unsalted butter- cut into little cubes
In medium saucepan combine all ingredients. Whisk the mixture until the eggs are well blended. Cook over medium low heat, whisking often, until the mixture thickens. This will take 5-7 minutes. Whisk more often as mixtures warms and starts to thicken. Better to heat over lower heat and take longer than over too high a heat. You don’t want the eggs to scramble. Once the mixture is thickened , transfer to a bowl or jar. Cover the surface with a piece of plastic wrap to keep the surface from developing a skin- like any pudding will do. Chill until ready to use. Makes about 2 cups. Will keep in fridge a week or two.
Fresh Mango Chutney
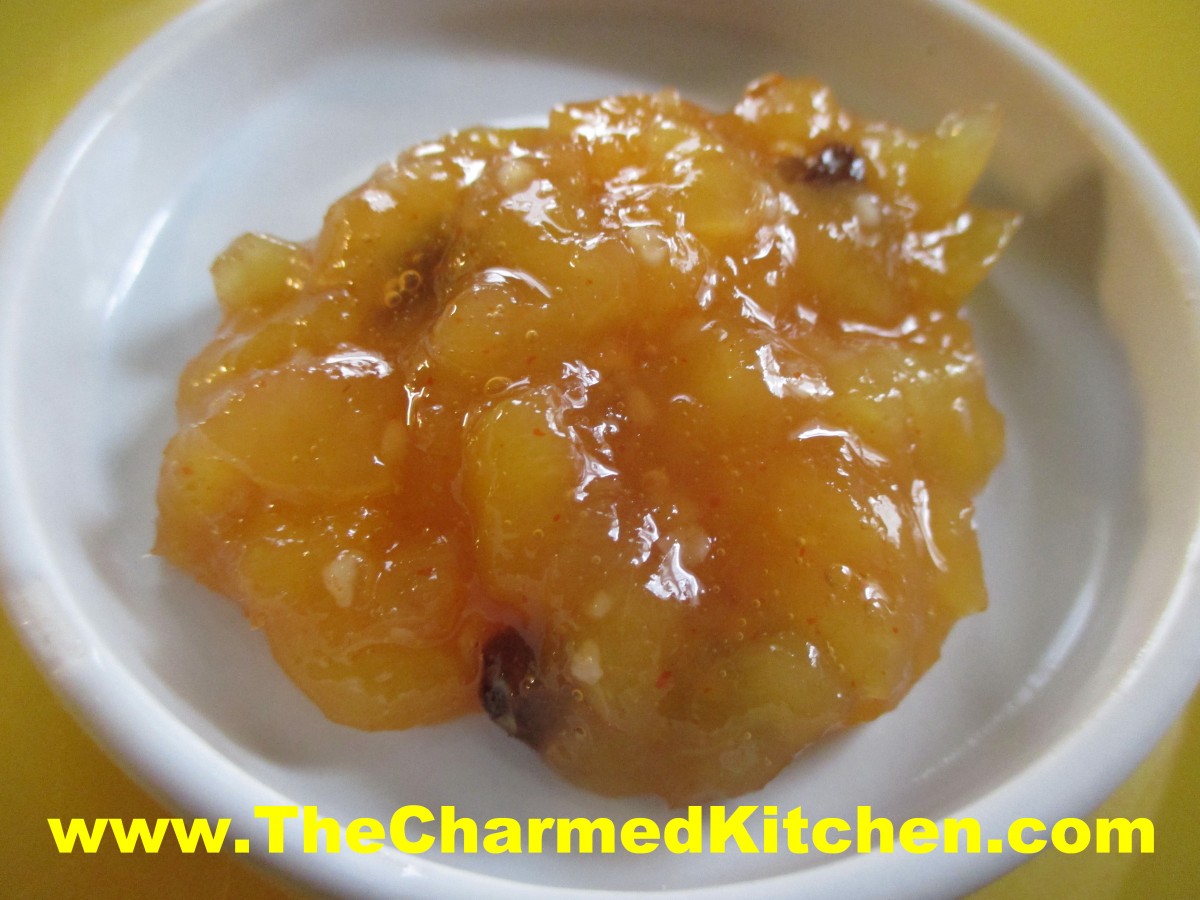
Fresh Mango Chutney
If you never had mango chutney, it might be a little hard to describe. When you look at the list of ingredients, it might also seem like an odd combination. Fruit with garlic? Sounds funny, but it works well together- really!!
Chutney is a condiment that has its roots in India. There are plenty of variations out there-but I am partial to mango chutney. Mango chutney is sort of like a sweet pickle relish, but not exactly like a sweet pickle relish. There is the element of sweet and sour, through the combination of fruit, sugar and vinegar. The addition of ginger, garlic and hot sauce just add to the wonderful flavor of the chutney.
Chutney can be used as a side sauce- so it can be served with whatever food you are eating- sort of like cranberry sauce. You can also add chutney to a food before serving- like folding some into your favorite chicken salad. I find myself just spreading some on bread when making a sandwich. It can also be used to cool down the flavor of spicier foods.
Chutney is actually pretty easy to make. Just keep an eye on it so it doesn’t scorch. Once cooled, keep in a jar in the fridge. You could freeze it, if needed. I never seem to have a problem using it up before I have a chance to freeze it.
So here is my recipe.
Fresh Mango Chutney
2 large unripe mangoes, peeled, seeded and diced- about 2 cups
½ c. water
½ c. cider vinegar
1 ½ c. sugar
2 T. peeled, freshly grated ginger root
½ c. raisins
3-4 cloves of garlic, minced
1-2 t. hot sauce- or to taste
Salt to taste
Place diced mango in saucepan and add the water and vinegar. Simmer for 10 minutes, to soften the mango a little. Add the rest of the ingredients and cook over medium/low heat until mixture thickens. This will take about 20 minutes. Stir more often as mixture thickens. Adjust seasonings. Cool, then store in fridge until ready to use. Makes about 1½ cups. Will keep in fridge a few weeks.


