Barley and Corn Salad with Basil

Barley and Corn Salad with Basil
I think most people think of soup, when they think of barley. This versatile grain can also be a nice ingredient in a salad. This salad can be served as a side dish, but I often enjoy it for lunch or dinner all on it’s own. The combination of corn and barley makes it pretty hearty, but still not heavy. Nice on a hot day, when you want a lighter meal. I had grilled some corn and had some leftover, so that is what I used. I think the smokiness of the grilled corn added a nice touch. I had some fresh basil so I used that, too.
Barley and Corn Salad with Basil
½ c. pearl barley
salt
3 T. cider or white wine vinegar
1 t. Dijon mustard
fresh ground pepper
3 T. olive oil
3 T. fresh basil, cut into thin strips
3 c. cooked corn, from six ears
1 c. diced sweet onion
1 c. diced sweet pepper, any color
¼ c. sliced green onions
Combine barley, 2 cups water and ½ t. salt in saucepan and simmer, covered until barley is tender, about 50 minutes. Drain and rinse under cold water. Combine remaining ingredients and toss with barley in large bowl. Makes 6 servings.
New Day Cleveland- Picnic

Picnic Quiches
I had such a fun time on New Day Cleveland this past Thursday. Natalie is always so much fun to work with. The entire staff are so helpful. Here is my appearance, with plenty of recipes and tips for a safer picnic.
http://fox8.com/2016/06/23/how-to-create-the-perfect-picnic/
Caramel Crepes with Honey Ice Cream
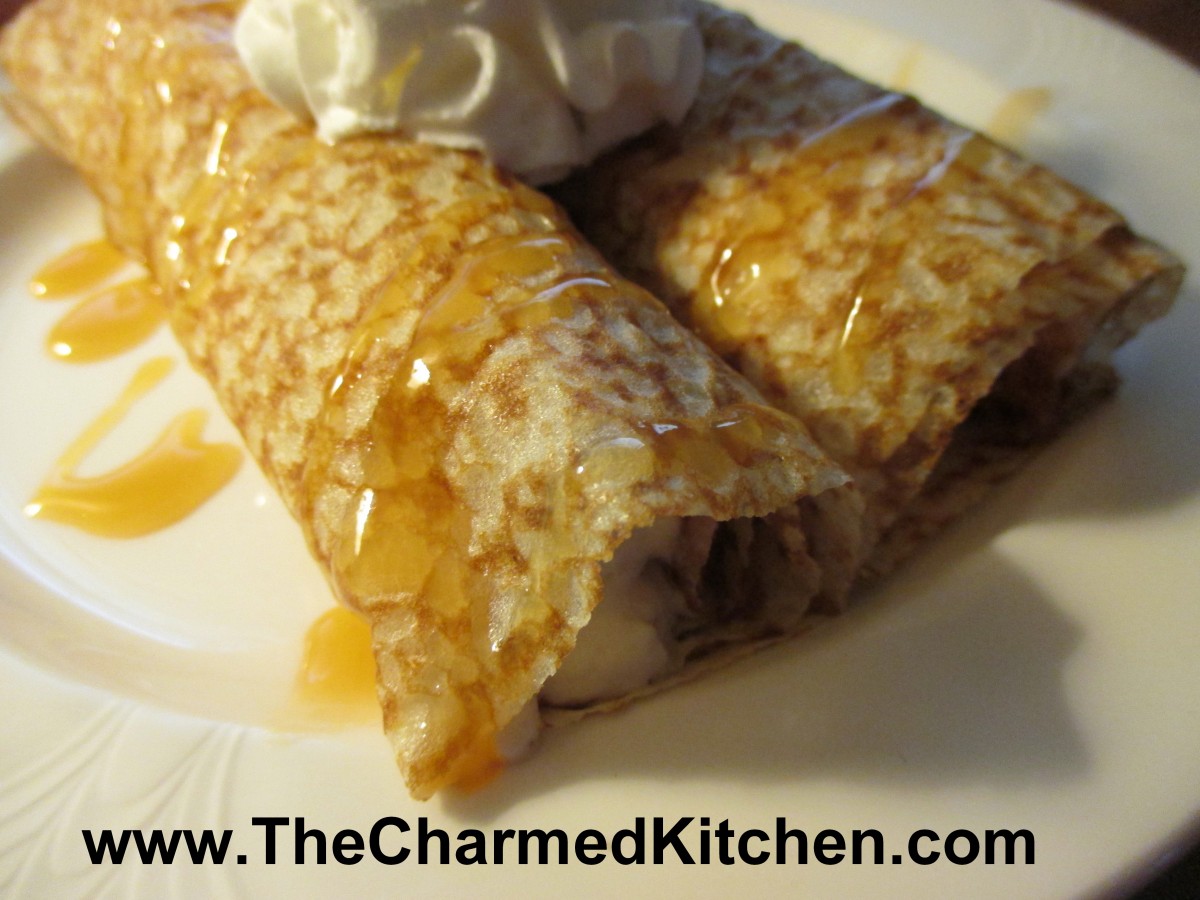
Caramel Crepes with Honey Ice Cream
I had made dessert crepes last week and still had some in the freezer. It has been hot around here so I wanted something cold to serve for dessert. I had recently made honey ice cream, so that part was covered. I made a simple caramel sauce to top the crepes and finished them with a little whipped cream. It really was an easy dessert, but looked special. Tasted pretty good, too. When I make crepes, I often have extra and freeze them for later use. I was happy that I did. Of course, use any ice cream flavor you have. I just spooned some ice cream along one edge of the crepes, and rolled them up. I kept them in the freezer until ready to serve. Then I drizzled with the caramel sauce. Much easier than you might think.
Dessert Crepes
1 c. flour
4 eggs
1 1/2 c. milk
1 T. sugar
2-T. orange-flavored liqueur or orange juice concentrate
1/4 c. butter, melted and cooled
Mix all ingredients in blender (except butter) until smooth, scraping sides often. Add butter and blend well. Let stand for 30 minutes before using, or can be refrigerated, covered, overnight. Beat again, just before using.
Heat 6 or 7 inch skillet. Brush with butter or oil and pour in about 2 teaspoons of batter, tipping pan to cover bottom of pan completely with batter. Cook until edges start to brown, turn over and cook until lightly browned (about 2 minutes per side.)
Crepes can be made day ahead or even frozen between sheets of waxed paper and frozen. Makes 20.
Here is another variation that would be great with chocolate or strawberry ice cream.
Chocolate Crepes
Add 2-3 T. cocoa to flour and mix well before blending. You will probably need to add 1-2 T. extra milk, but mix first.
Honey Ice Cream
1 ½ c. whipping cream
1 ½ c. half and half
2/3 c. honey
6 large egg yolks
Heat together cream and half-and-half to simmer . Whisk honey and yolks in a medium bowl. Gradually whisk in hot cream mixture. Return to pan and heat until mixture thickens (about 170 degrees) but do not boil. Strain into large bowl. Chill until cold. Process in ice cream maker. Makes 4 ½ c.
Easy Caramel Sauce
1 packed cup brown sugar
1/2 cup half-and-half
4 tablespoons butter
Pinch salt
4 t. vanilla extract
Mix the brown sugar, half-and-half, butter and salt in a saucepan over medium-low heat. Cook while whisking gently for 5 to 7 minutes, until it gets thicker. Add the vanilla and cook another minute to thicken further. Turn off the heat, cool slightly and pour the sauce into a jar. Refrigerate until ready to use. You can serve it cold, or warm a little before using.
Raspberry Mini Cheesecakes

Raspberry Mini Cheesecakes
These miniature cheesecakes, topped with fresh raspberries, are the perfect summer dessert. The creamy filling works so well with the tart/sweet berries. I brushed a little raspberry jam over the top, but you could also sprinkle the berries with a little sugar, if you prefer. You can also use a mix of berries and seasonal fruit. Raspberries and blueberries would make a great dessert for the 4th. They bake quickly and can be frozen. I would freeze them plain and then top with berries when ready to serve.
Raspberry Mini Cheesecakes
Crust
1c. graham cracker crumbs
2 T. sugar
2 T. melted butter
Filling
2 (8 oz.) pkgs. Cream cheese, softened
½ c. sugar
2 t. vanilla
2 eggs
Topping
2 c. fresh raspberries, about
½ c. raspberry jam
Preheat oven to 350 degrees. Line 12 muffin tins with paper or foil liners and set aside. In medium bowl, combine crumbs with sugar and butter and mix with a fork. Divide crust among the muffin tins, tamping each one down a little. Bake in preheated oven for 5 minutes. Meanwhile, beat the cream cheese with the sugar until well blended. Beat in vanilla, then eggs. Remove muffin pans from the oven. Spoon the cheese mixture into the muffin tins and return to the oven. Bake for 20 minutes, or until set. They will be pretty full and will puff up while baking. They will also settle when cooling. Once cooled, arrange berries on the top of each little cheesecake. Warm the raspberry jam and brush it gently over the tops. Chill before serving. Makes 12.
Fresh Strawberries and Cream Bread
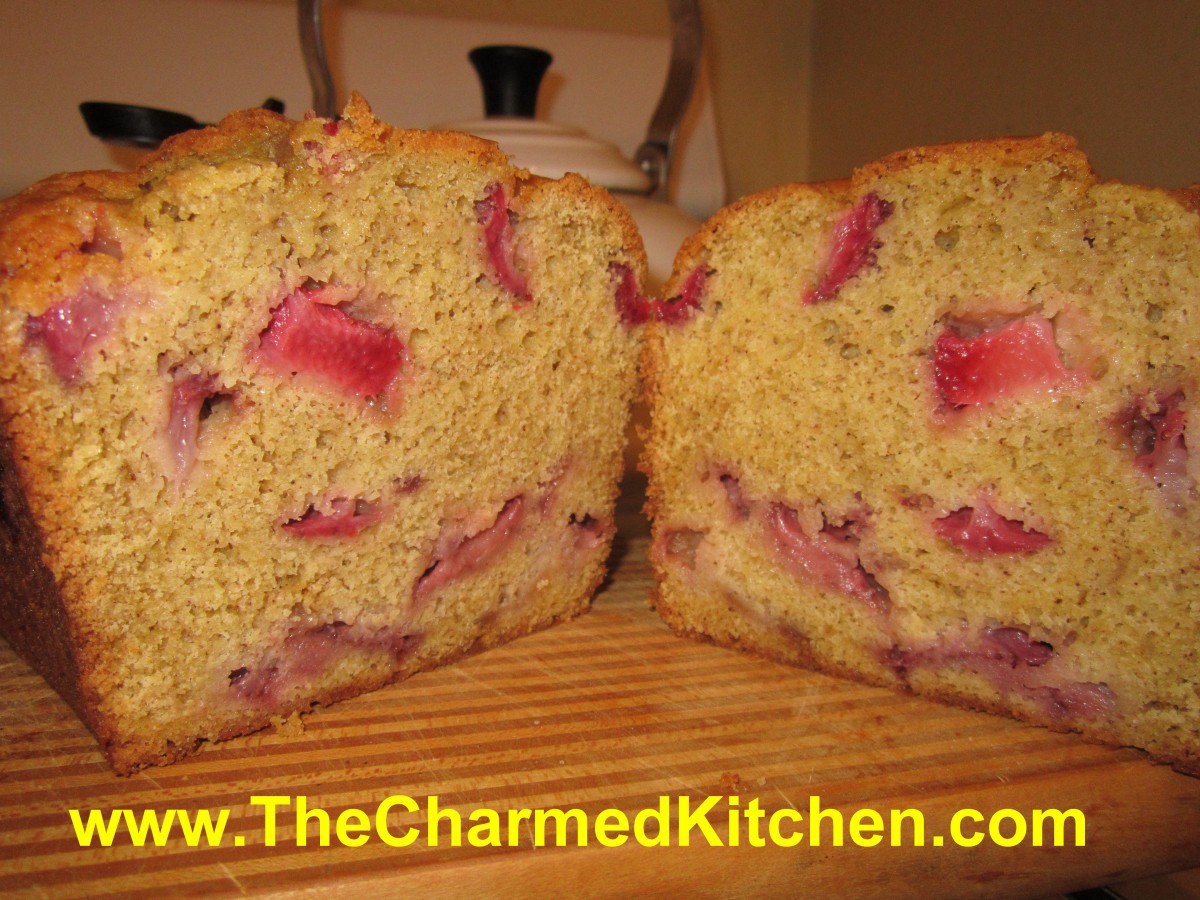
Strawberries and Cream Bread
I have posted this recipe before, but have been getting requests for it, so I thought it was worth posting again.
This is one of my favorite quick breads. Tender and full of the sweet taste of fresh strawberries. The batter will be very thick- don’t worry- it is supposed to be that way. When it cooks, the juices from the fresh berries keeps it moist. I always end up making a double batch, one to eat fresh and one to give as a gift or freeze. It is fine just the way it is for dessert, or top slices with ice cream, whipped cream or some melted chocolate.
Strawberries and Cream Bread
1 ¾ c. flour
½ t. baking powder
½ t. baking soda
½ t. salt
½ t. each cinnamon and nutmeg
½ c. butter, at room temperature
¾ c. sugar
2 eggs, room temperature
½ c. sour cream, room temperature
1 t. vanilla
1 c. fresh strawberries, coarsely chopped*
¾ c. chopped nuts, optional
Grease an 8×4 inch loaf pan and preheat oven to 350 degrees. In a large bowl combine dry ingredients. Set aside. In small bowl beat butter until creamy. Add sugar and beat 1 minute. Beat in eggs one at a time. Beat in sour cream and vanilla. Stir in flour mixture until just moistened. Fold in strawberries and nuts and place batter in prepared pan. Bake 60-65 minutes, or until toothpick inserted in center comes out clean. Let stand in pan 10 minutes. Remove from pan and cool on wire rack. Makes 1 loaf. Freezes well.
* frozen berries are not recommended in this bread.
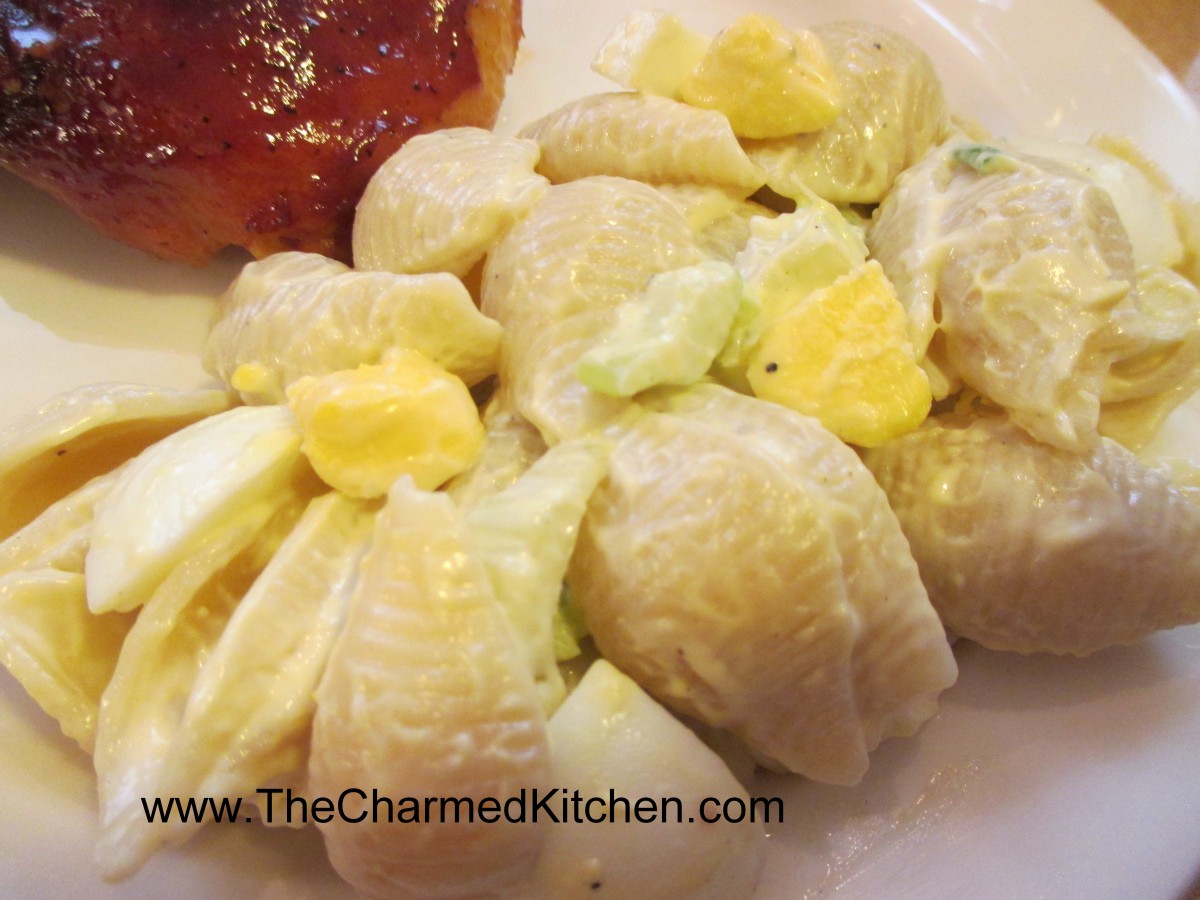
Creamy Corn Salad

Creamy Corn Salad
Corn salads are a great way to enjoy sweet corn with your summer meals. They are nice to take along for picnics, too. This is one of my favorites. There are just a few ingredients, but they work really well together. I am perfectly happy using corn that was boiled or steamed, but this salad tastes even better with corn that was cooked on the grill. Sometimes I’ll add some cooked chicken or shrimp and turn this salad into a main dish. Perfect for a hot day.
Creamy Corn Salad
½ c. mayo
4 T. lemon juice
2 t. prepared mustard
1 t. sugar
2 c. cooked corn, cut from the cob
3 green onions, sliced thin
¼ c. chopped sweet pepper
Salt and pepper to taste
Combine all ingredients in bowl and stir well. Chill several hours or overnight. Serves 4.
Pickled Beets

Pickled Beets
I cook with beets all year long. In cooler weather, I will make a beet soup. This time of year I really enjoy them is salads. I love the bright color and earthy flavor. This simple preparation makes them perfect to add to salads, or to enjoy on their own. They will keep in the fridge for weeks and make a nice side for summer dinners. I sometimes serve these with cheese and crackers as an appetizer. I cooked my beets by just boiling them whole until tender, but you can also roast them. Once cooked, just let them cool a little and slip off the skins. Then just dice them up and add the dressing. They will taste better after a few days in the fridge. It gives the dressing a chance to get into the beets and onion and give them that pickled flavor. Feel free to add other seasonings. I had some fresh dill, so that is what I used.
Pickled Beets
2 lbs. beets, greens trimmed off, leaving 1 inch of the stem
1 red onion, peeled and sliced thin
1 c. cider vinegar
1/2 c. sugar- more or less to suit your taste*
2-3 cloves of garlic, minced
1 T. fresh dill snipped, or 1 t. dried
2 t. salt
1 t. fresh ground pepper
1/2 t. celery seed
dash of hot sauce
Cook beets whole until tender. I boiled my beets for about 35 minutes- they were kind of big. You could roast them, if you prefer. Place in cold water for 5 minutes, then remove from the water and slip off the skins. They usually come off easily, but you might have to peel them. Dice into 1/2 -inch cubes and place in a bowl. Add the onion. Combine remaining ingredients and pour over the beets. Stir to combine, cover and place in fridge. These are ready to eat in a couple of days. Keep for weeks.
*You can also omit the sugar altogether- they will be very tart- but still tasty.
Marinated Mushrooms

Marinated Mushrooms
I love mushrooms. Fresh in salads, sauteed, in soups. Pretty much any way you can imagine. I really like to make a big batch of marinated mushrooms this time of year. They keep for weeks and make a great snack on a hot day. I also like to serve them with assorted cheeses as a quick appetizer. These are also nice to pack for picnics and cookouts. Once you get all the ingredients together and pop them in the fridge. It takes a few days for them to get to the perfect, sort of fresh pickled stage, but I find myself eating a few even the next day. Sometimes I add cherry tomatoes to the mix, too. I add the tomatoes just a couple of hours before serving.
Marinated Mushrooms
Marinade:
½ c. olive oil
1c. vinegar, cider or red wine vinegar preferred
1/3 c. sugar, or to taste
¼ c. water
1 t. salt
1 t. dried minced garlic
2 T. dried mixed herbs, I used my own Italian blend
1-2 lbs. mushrooms
Mix marinade and set aside. Wash and trim mushrooms and cut into halves, if needed. Place in a bowl and pour over the marinade. The marinade does not have to cover them completely. The marinade will draw moisture out of them. Cover and refrigerate for at least a few days for best flavor. Stir them once a day.
To serve: Drain mushrooms and serve as is, or add olives, artichoke hearts, cheese cubes and smoked meats for an antipasto. I’ve also known people to serve them with crusty bread.
Picnic Food Safety
 With picnic and cook out season in full force-I thought it would be a good time to post some tips to keep your picnic safe.
Common Picnic Problems
Besides ants, the biggest concern at a picnic should be food safety. While most of us know to keep cold foods cold, and hot food hot, there are some basic things we should all do to insure a safe, happy day.
Away from home and refrigeration, it is can be tricky to keep foods cold until ready to serve. Bring plenty of ice and coolers for all perishable food. Keep food cold until you are ready to cook or eat it. Get food back into coolers as soon as everyone has finished eating.
Package raw meats extra carefully. Raw meat juices, spilling on salads, will make them inedible. Pack raw meats separately if you can, or on the bottom of the cooler in a leak-proof container. You might also consider bringing meats like burgers frozen to thaw on the grill or in the cooler. Smoked meats are safer than their non-smoked counterparts but both types can spoil. The ideal is to have one cooler only for raw meats.
Don’t make burgers on site. Outdoor prep is always tricky. Better to form burgers at home, where you can wash all surfaces, as well as your hands, thoroughly. If you make them there- bring disposable gloves and a lightweight cutting board to work on.
Never use ice for drinks that have been in contact with raw meat, or even if any raw meats have been stored in the ice. Keep beverage ice in its own cooler, or keep it bagged to insure it is clean and safe.
Solid blocks of ice melt more slowly than cubes and make good cooler inserts for long, hot summer days. Also, keep coolers in the shade to offset the power of the sun.
Meat should be cooked thoroughly and ground meat is always more at risk for contamination. Make sure your fire is hot enough. Allow for chilly, windy days and pack extra coals or other fuel, to keep the fire hot throughout the cooking process.
Make sure you don’t put cooked meats on the tray that the raw meat was on. Also have different prepping and serving utensils for both the raw and cooked meats.
You can also precook meats (like chicken pieces or ribs), cool and chill until ready for dinner. Then just heat them up over the coals. This way you don’t have the worry of bringing along raw meats and you’ll spend less time cooking and more time having fun.
Mayo is not the evil purveyor of bacteria some people think. Mayo from a fresh jar, can actually retard the growth of bacteria. This does not mean you can leave the potato salad in the trunk for 3 hours because it has mayo in it. It just means that mayonnaise is not the culprit for food spoilage- bad handling was likely the cause.
While 2 hours is the maximum for food to be left out before being refrigerated again, use common sense. Obviously, on a 95 degree day that time is much shorter. Rather than one big bowl of pasta salad, bring several smaller ones that you can switch out. That way you always have cold salad that is safe. And bring plenty of serving spoons. It does no good to swap out the bowls of pasta salad for a fresh bowl, if you keep using the same serving spoon. Try to stay in the shade, too. Bringing some sort of canopy can keep food cooler than sitting in direct sunlight.
I am a big believer in a good hand washing being the best way to clean your hands- but you might not have running water where you are. Hand sanitizers are great when you don’t have hand washing as an option. I also bring a package of sanitizing wipes, in case a surface needs cleaning up, too.
If it is a hot day- you might want to have a large container, filled with ice, that you can put the bowls of salad into, to keep them colder. That way the salads are surrounded by the ice and stay cold a lot longer. You can use a small baby pool. I like to use a container designed for under the bed storage. Nice size.
In the end, it is about using common sense, and copious amounts of ice. Remember, that if you lose track of time, forget to put something back in the cooler or leave something in the trunk, it is always better to play it safe. When in doubt-throw it out.
Picnic Quiches
Picnic Quiches
These tiny quiches pack a lot of flavor. They are also a great take along for picnics and cook outs. Since you can eat them hot or cold, they make a nice food for road trips, too. The quiche recipe is made up of three parts- the crust, the filling and the custard. They are baked in muffins tins and each recipe makes a dozen. I have two crust recipes- including a gluten free crust that is made from rice and zucchini. There are three filling choices, but you can get creative and make a number of different variations. The custard is pretty straightforward- half and half, eggs and seasonings. I make a couple of batches at a time and then freeze some for later.
Picnic Quiches
Crust options
Rice Zucchini Crust (Gluten free)
1½ c. shredded zucchini
1¼ c. cooked rice (white or brown)
1 egg
¼ c. Parmesan cheese
Crouton Crust
3½ c. garlic-cheese croutons, about 5 oz., ground
1/3 c. melted butter
Fillings:
Mushroom and Onion
1 medium onion, chopped
Oil
8 oz. mushrooms, cleaned and chopped
3-4 oz. cheddar cheese, shredded or cubed fine
In skillet cook onion in oil until lightly browned. Add mushroom and cook until mushrooms are golden. Cool and combine with cheese before using.
Spinach and Bacon
12 oz. bacon, cooked and crumbled
10 oz. package of frozen spinach, thawed and squeezed dry
4 oz. Swiss cheese, shredded
Combine all ingredients. Set aside until ready to use.
Confetti
1 ear corn, cooked and kernel cut off the cob- about ½ cup
½ c. mined fresh sweet pepper
¼ c. chopped green onion
4 oz. shredded cheese- I like a sharp cheddar in this filling
Custard:
1c. half and half
3 eggs
½ t. each basil and salt
1/8 t. each garlic powder, pepper and paprika
Directions
Grease 12 muffin cups (3 inch). Prepare crust of your choice by mixing crust ingredients together. Pat 2 tablespoons of the crust mixture into each muffin cup. Bake in a 350 degree oven for 10-12 minutes. Cool before filling. While baking and cooling crusts, prepare filling of your choice and make the custard.
Spoon 2 tablespoons of filling over each cooled crust. Spoon about 3-4 tablespoons of the custard over the filling. Bake in a 375 degree oven for 15-20 minutes. Cool on wire racks, chill completely before packing for your picnic.


