Spiced Blackberry Muffins

Spiced Blackberry Muffin
Sometimes little things can just improve your day. It might be starting the day with a mug of raspberry tea and a warm blackberry muffin, like I did today. I used a recipe I had made before, but decided to add some spices to the batter in the form of cinnamon and nutmeg. Dipped the tops of the warm muffins in melted butter and a spiced sugar mixture to finish them off. So good. So very, very good.
Spiced Blackberry Muffins
1 c. milk
1 egg
¼ c. oil
2 c. flour
1/3 c. sugar
1 T. Baking powder
¾ t. salt
½ t. each cinnamon and nutmeg
1 c. blackberries, I used fresh but frozen would work, too.
Topping:
1/2 c. sugar
1 t. each cinnamon and nutmeg
4 T. butter, melted
Beat together milk, egg and oil. Combine dry ingredients and add to milk mixture, stirring to just moisten flour. Fold in blackberries. Fill 12 paper lined muffin cups to 3/4 full. Bake in preheated 400-degree oven for 20 minutes or until golden brown. Combine sugar and spices in a small bowl. Place melted butter in another bowl. When muffins are removed from the oven carefully dip the top of a muffin in the melted butter and then in the spiced sugar. If muffins are too hot to hold wait a few minutes before dipping. Repeat with remaining muffins. Serve warm. Makes 12.
Secret Ingredient Clam Chowder

Clam and Tripe Chowder
There is an ingredient in my clam chowder that I think will surprise you. It is in there because of my Uncle John. He was my Mother’s older brother and a real smart guy. One day he and my Mom were talking about clam chowder. My Mom had made a big pot of it. She was on a tight budget and was saying that she wished she could afford to put in a lot more clams. She didn’t use canned clams- she bought fresh ones and they cost a lot of money. She also made a really good clam chowder. My uncle wondered if she could add tripe to her chowder. He said that the texture was sort of like clams. Tripe didn’t have a strong flavor on its own and surely it would absorb the flavor of the clams. He said he thought they could put them in and no one would ever know. My mother thought about it and agreed, but said the tripe, normally cut in strips, would not look like clams. She then figured out that if she put the tripe through her meat grinder on coarse the tripe would look a lot more like clams and might just work. She was pretty smart, too. So the plan was hatched. The next time my Mom made clam chowder she got tripe, ground it and cooked it until tender. She then added it to her clam chowder and invited family over to try it. Everybody loved the chowder and a couple of people even commented on how many clams were in it. So there it is – the story of why I put tripe in my clam chowder. Unlike my Mother I use canned clams. And unlike her and my uncle, I do tell people what is in it, before they eat it.
Clam and Tripe Chowder
1 lb. tripe
oil
2 large onions, chopped
8 cups water or stock
2-3 cans clams, undrained
2-3 c. peeled and cubed potatoes – about 3-4 potatoes
1 (12 oz.) can evaporated milk- or 1 1/2 cups half and half or heavy cream
2 T. flour, optional
1/2 c. chopped fresh parsley
salt, pepper and hot pepper sauce to taste
When I bought the tripe at the store the package said it had been scalded. Not sure that matters but I figured I’d mention it. I took the tripe and ground it in my meat grinder. If you don’t have a meat grinder, you can cut the tripe up a bit and chop it up in a food processor. Pulse on and off until it is chopped up to the size you want. In soup pot heat the oil and cook the onion until tender. Add the tripe and the water or stock. Simmer, covered, until the tripe is tender, about 90 minutes. Some of the water cooked off, but that was fine with me. Add the clams and their liquid, season to taste and allow to simmer another 30 minutes or so. Add the potatoes and cook, covered, until the potatoes are tender, about 15 minutes. At this point you can add just the milk or you can add the milk and the flour- depending on how thick you like your chowder. If you are thickening it- place some of the milk in a jar with a tight fitting lid along with the flour. Put the lid on and shake well until flour is mixed into the milk and there are no lumps. Add to the chowder with the rest of the milk and the parsley. Bring to a gentle simmer and cook about 5-10 minutes longer. Stir from time to time so the chowder won’t burn. Adjust seasonings and serve. Serves 6-8.
Why I Love Parsley
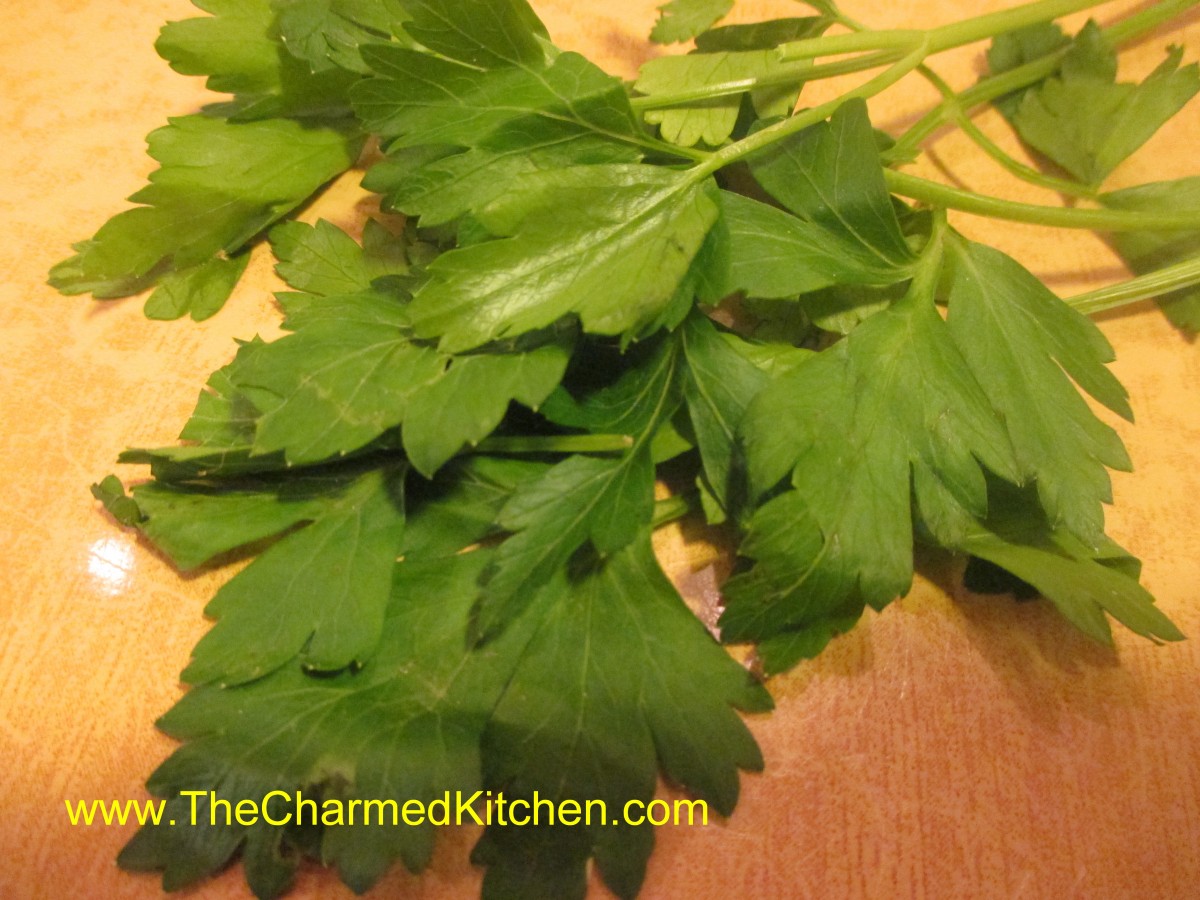
Parsley
Parsley is one of those herbs everyone seems comfortable using- and with good reason. The clean, green flavor goes well with so many foods. Even people who rarely cook with herbs seem OK using parsley. Because it is used so commonly I think it often gets overlooked for just how great an herb it is. Parsley is loaded with Vitamin C and chlorophyll for starters. It is also easy to grow.
While thought of as more of a garnish by some, the flavor can often brighten up a dish. Parsley goes well with meats, veggies, pasta, rice and more. I sometimes use it as a base for pesto. It is also essential to add when making soup stocks.
Since the leaves are so tender- you don’t need to cook it to use it. In fact, you should be careful not to overcook it in dishes. Adding chopped parsley right at the end of cooking, most times, is best. It will add a fresh flavor and a burst of green color to your food.
There are three main types of parsley- the flat leaved or Italian parsley. This is the best one for cooking. It has so much flavor. There is also the curly leaved type. This one is cute and often best suited for garnish. Tasty, but not nearly as much flavor as its flat leafed cousin. The third type is root parsley. This one produces a pretty big tap root that is great for using in soup stocks. The plants are dug up and roots are used fresh- or frozen for later use.
Lets look at growing parsley for a minute. Parsley likes a sunny location, but will tolerate some shade and does very well in pots and hanging baskets. Its fern- like leaves can be planted among flowers and look quite nice.
Parsley is a biennial. That means it produces only leaves the first year. The second year it makes flowers and seeds, then dies. For my part of the world that means I get a harvest of parsley leaves all summer long. Right up until frost I am harvesting. When Spring arrives it sprouts early, with beautiful leaves. Soon after it will produce flowers and seeds. Since I know the plant is going to die anyway I harvest all the leaves that second year – as soon as they start emerging – and freeze and dehydrate them for later use. This gives me a great harvest early in the year.
Parsley holds most of its flavor when dried and freezes great, too. In milder climates, parsley may defy the odds and produce for a third year before making seeds.
Don’t discard those stems, either. While the leaves and small stems are chopped up for fresh eating, the stems can be used to flavor stocks. I often freeze them- then add to the pot when making a stock. Too tough for eating, they are still full of flavor and are getting strained out anyway.
The tradition of using a sprig of parsley to garnish a plate was not just to decorate the plate. It was placed there to be nibbled as a way to freshen your breath after dinner.
So don’t dismiss parsley as just a garnish. It really is a great, simple and clean tasting herb that can brighten up most any dish it is added to.
Stir Fry Soup
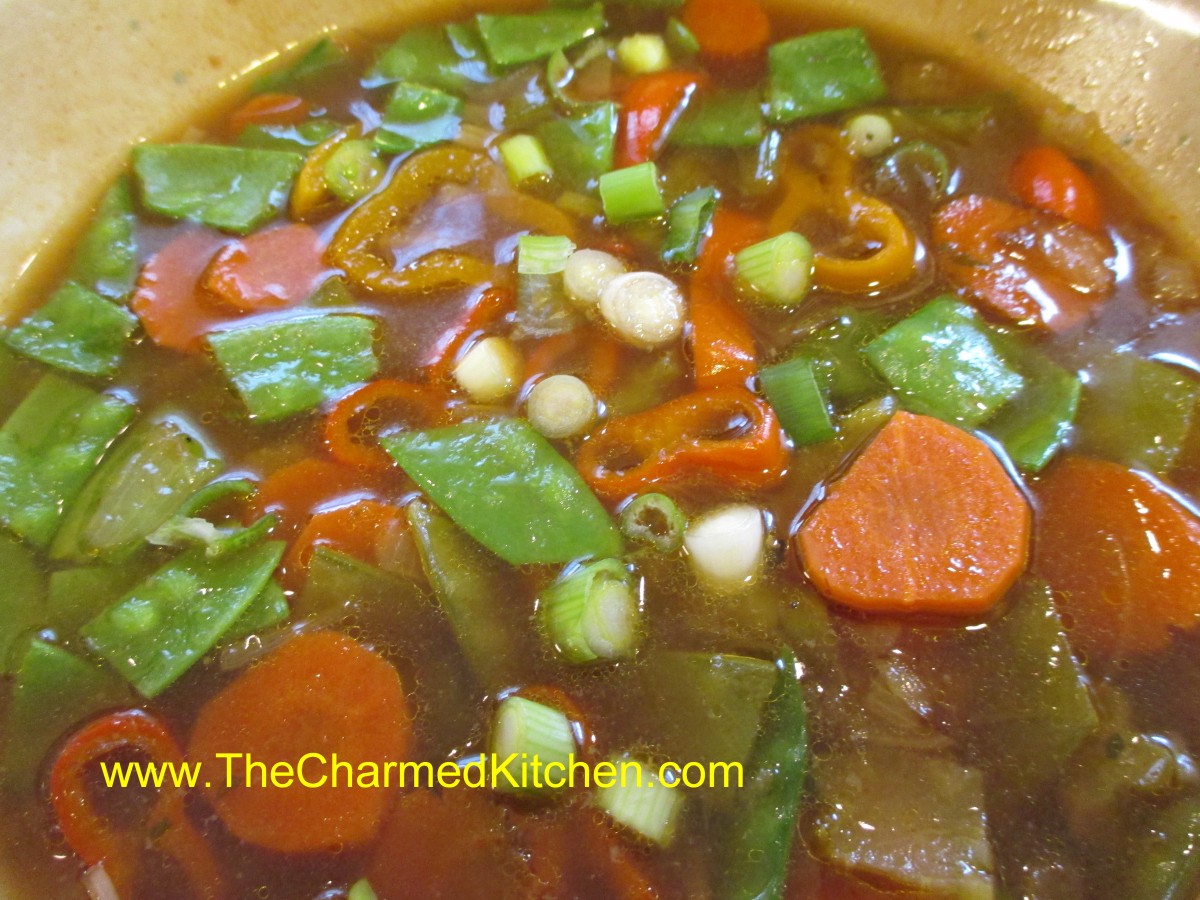
Stir Fry Soup
I wanted vegetable soup the other day and as I looked at the veggies on hand- most of them were veggies I would normally use in a stir fry. I ended up making a stir fry with the veggies then adding stock just before serving to turn it into a soup. I don’t know why I never thought to do this before. It was really tasty. The veggies were still crisp, but by stir frying them first they had the wonderful flavor of being sauteed. I finished the soup off with a drizzle of sesame oil and some chopped green onions.
Stir Fry Soup
2 T. oil
1 large onion, chopped
1 carrot, peeled and sliced
8 oz. pea pods, trimmed and chopped
4 mini sweet peppers, seeded and sliced
4 c. stock- I used chicken- but use what you like
soy sauce to taste
hot pepper sauce to taste
sesame oil
1/4 c. chopped green onions
In soup pot or wok stir fry the onion in oil until browned. Add carrots and stir fry a few minutes longer. Add pea pods and peppers and continue to stir fry until tender-crisp. Add stock and bring to a boil. Adjust seasonings and add sesame oil and green onions right before serving. Serves 4.
Brussels Sprouts Truffles
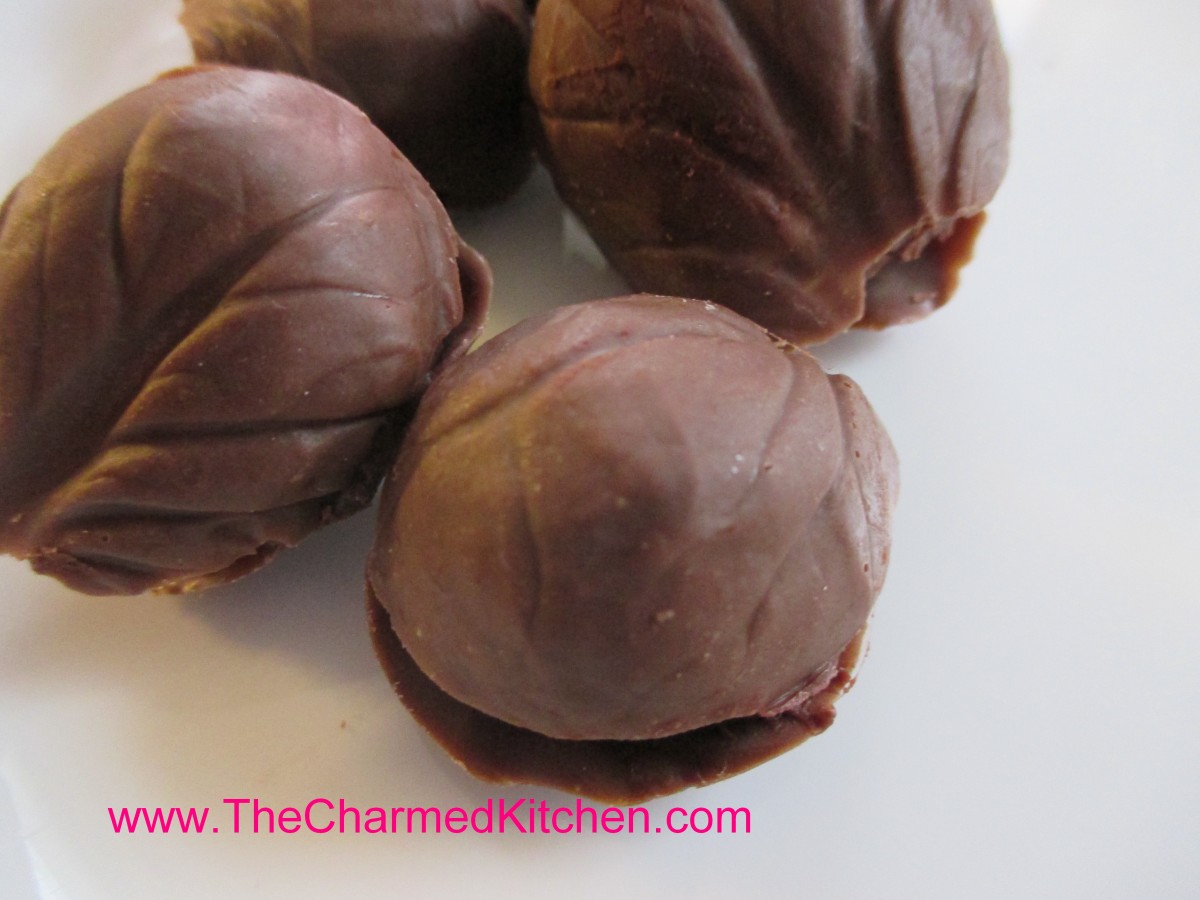
Brussels Sprouts Truffles
I have been thinking of making these for some time now. I think these truffles would be a charming thing to serve for garden parties or as a gift for any of the gardeners in your life. Nice for the chocolate lovers, too. Just the right size for a perfect bite of rich truffle. I made my truffle recipe and put it in the fridge to firm up. The recipe follows. Then I took some of the larger outer leaves off Brussels sprouts. I trimmed the bottoms off to make peeling of the leaves easier. You’ll need two leaves for each truffle so be sure to have plenty. I had about 60. I wiped the leaves clean and then melted several ounces of chocolate. I used a pastry brush to brush the insides of the Brussels sprout leaves with the melted chocolate. Once the chocolate had hardened I gently peeled off the leaves and discarded them. Since the leaves were different sizes I rolled out portions of the truffles that would fit the size of the leaves I was using. I pressed the truffle mixture in one leaf and then placed another leaf, of similar size, over the filling. Normally I would roll the truffles in cocoa powder- but in this case, I didn’t. I wanted the truffles to stick to the leaves and leaving them plain seemed like the best way to do that. The end result was very cute. Store in fridge until ready to serve.
Chocolate Truffles
1/3 c. Whipping cream
6 T. butter, cut into small pieces
2 c. chocolate chips- or 12 oz. bittersweet chocolate, grated or chopped coarsely
Unsweetened cocoa
Heat cream to boiling in small saucepan. Stir in butter and cook until melted. Remove from heat and stir in chocolate until melted. Place in shallow bowl and chill until firm, at least a couple of hours. Roll mixture into 1-inch balls and roll in cocoa. Sometimes the mixture is quite firm and hard to roll into perfectly smooth balls. You can roll them out as smooth as you can, roll in cocoa and then roll again to smooth out. You might want to give them another roll in the cocoa after that. Makes about 30.
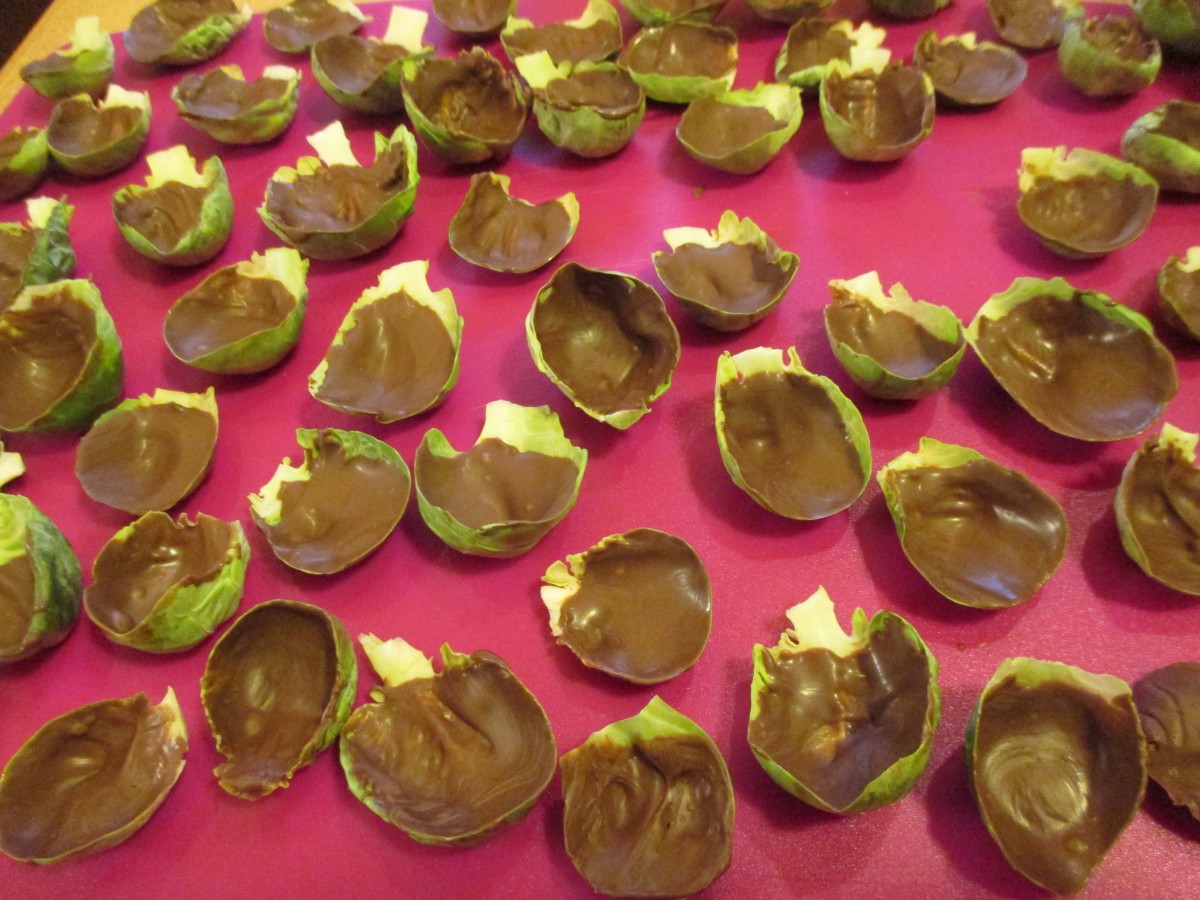
Leaves painted with chocolate
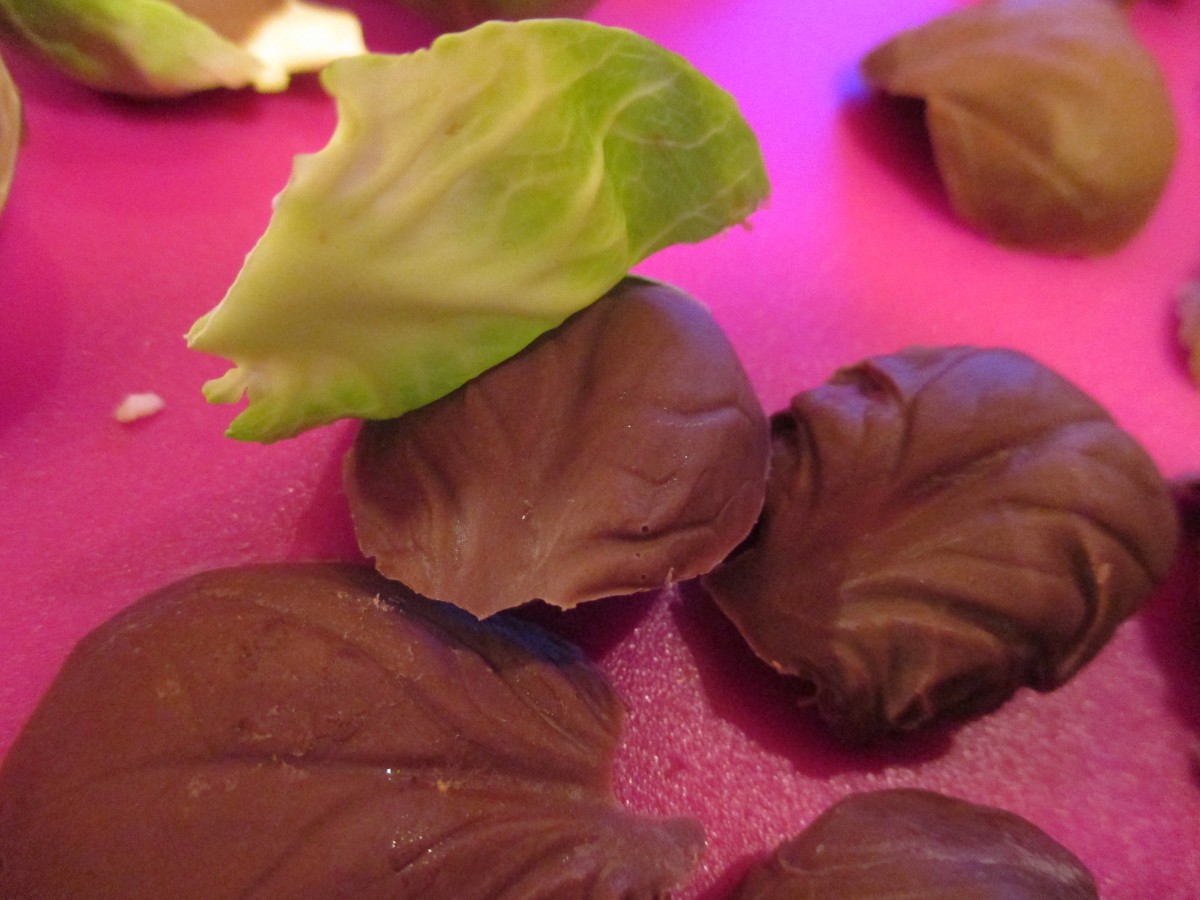
Peel leaves off gently once chocolate has hardened.
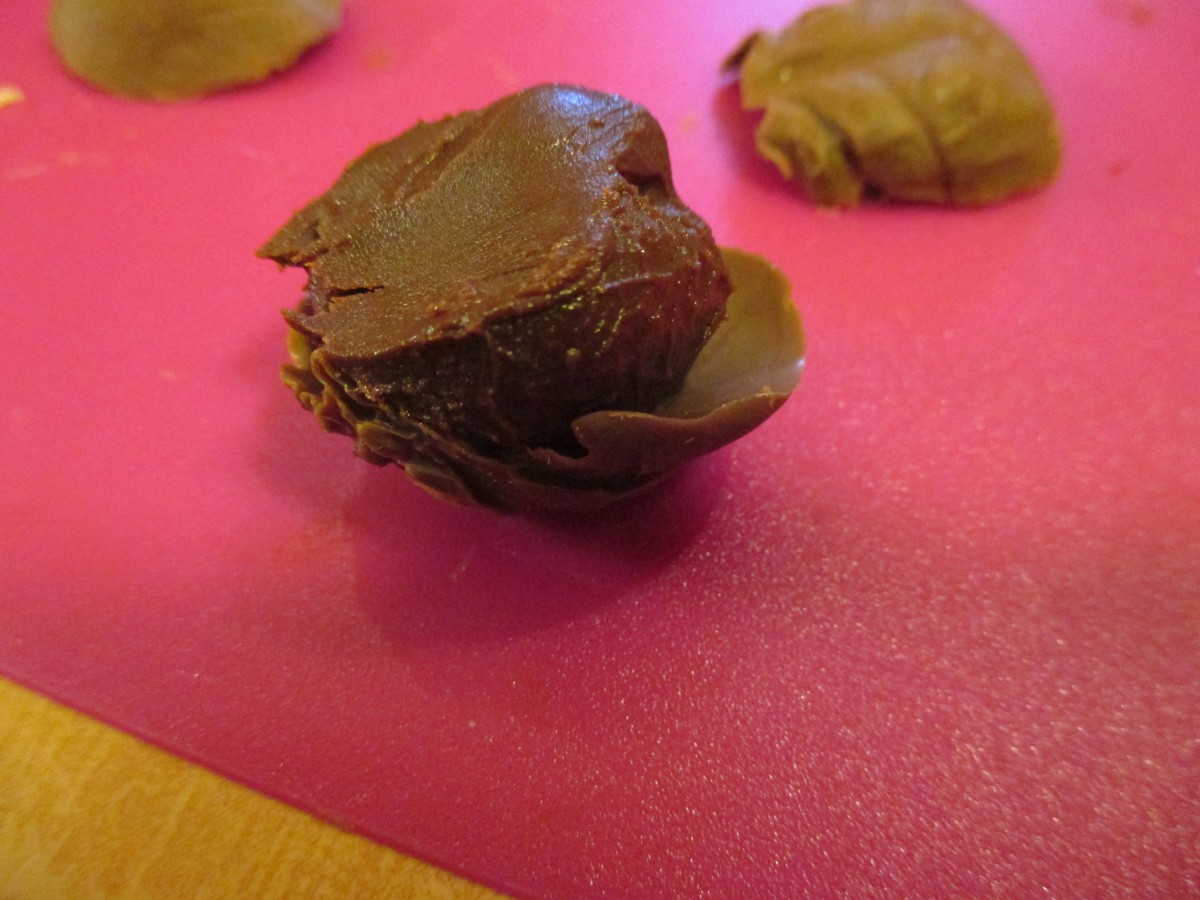
Place truffle filling in a chocolate “leaf” and top with another leaf.
Dill Cucumber Salad
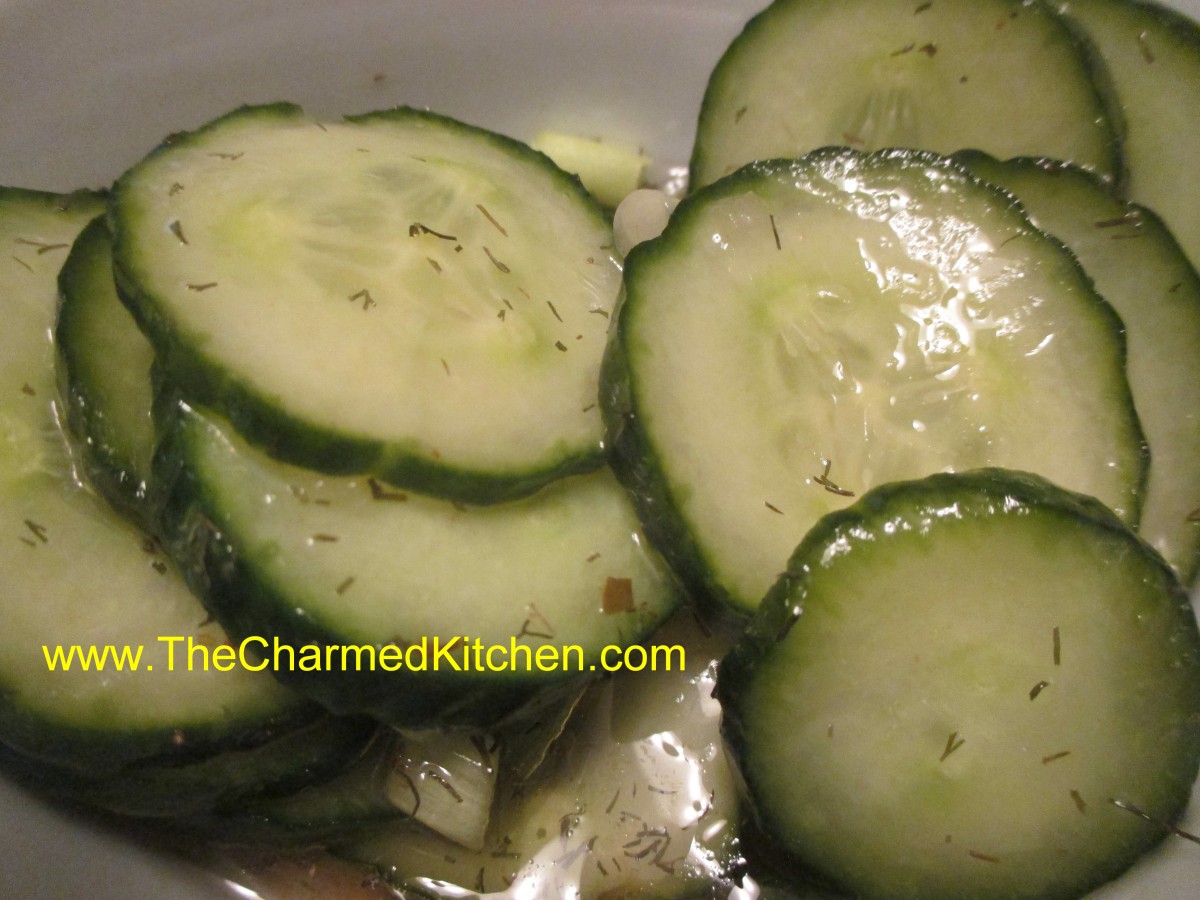
Dill Cucumber Salad
I was having a lamb dinner with a friend last night and wanted a nice, light side dish. A salad, for sure, but I wasn’t in the mood for a tossed salad. I had a couple of cucumbers so I decided to use them. I used a mix of vinegar, oil, salt, sugar and dill. By mixing the salad a few hours before dinner the cucumbers become a sort of fresh pickle. The nice thing about a salad like this is that it keeps fresh and tasty for days. I even like to drain the cucumbers and add them to a sandwich, like a pickle.
Dill Cucumber Salad
2 English cucumbers, sliced thin
2/3 c. cider vinegar
1/3 c. oil
2 T. sugar
2 t. salt
1 t. dill weed- I used dried- use about 1 tablespoon if using fresh
1 t. parsley
Fresh ground pepper and hot sauce to taste
Place cucumbers in a bowl and set aside. Combine remaining ingredients in another bowl and mix well. Pour over the cucumbers and mix together. Chill salad several hours before serving. Serves 6.
Chocolate Mint Scones

Chocolate Mint Scones
I had gotten some strawberries at the market and wanted to use them in a dessert. Shortcakes seemed like a great idea. I was going to just make a simple biscuit, but looked around at what I had and came up with these minty chocolate scones. I used baking mix- like Bisquick- but I use a home made mix. I also had some sour cream so used that in the dough. The chocolate mint part came from a bag of Andes chocolate chips. These are just like the Andes candies, but in chip form. I have used them to make cookies before and had just enough left in the bag for the scones. The scones are very tender and flaky. Let them cool completely before trying to slice for shortcakes.
Chocolate Mint Scones
1 c. baking mix- like Jiffy Mix or Bisquick- I used homemade
1/2 c. sour cream
1 egg
1/2 c. Andes chocolate mint chips
sugar for sprinkling
In small bowl place the baking mix. In another bowl mix together the sour cream and egg. Mix into the baking mix, along with the chips and stir until mixture turns into a soft dough. On lightly floured surface press the dough into an 8-inch square. Cut in half- then cut across in half again- you’ll have 4 squares. Cut diagonally across each square to form 8 triangles. Place triangles of dough onto ungreased baking sheet and sprinkle with a little sugar. Bake in a preheated 400 degree oven for 12-15 minutes, or until golden brown on top. Don’t over bake. Cool on wire rack. Makes 8.
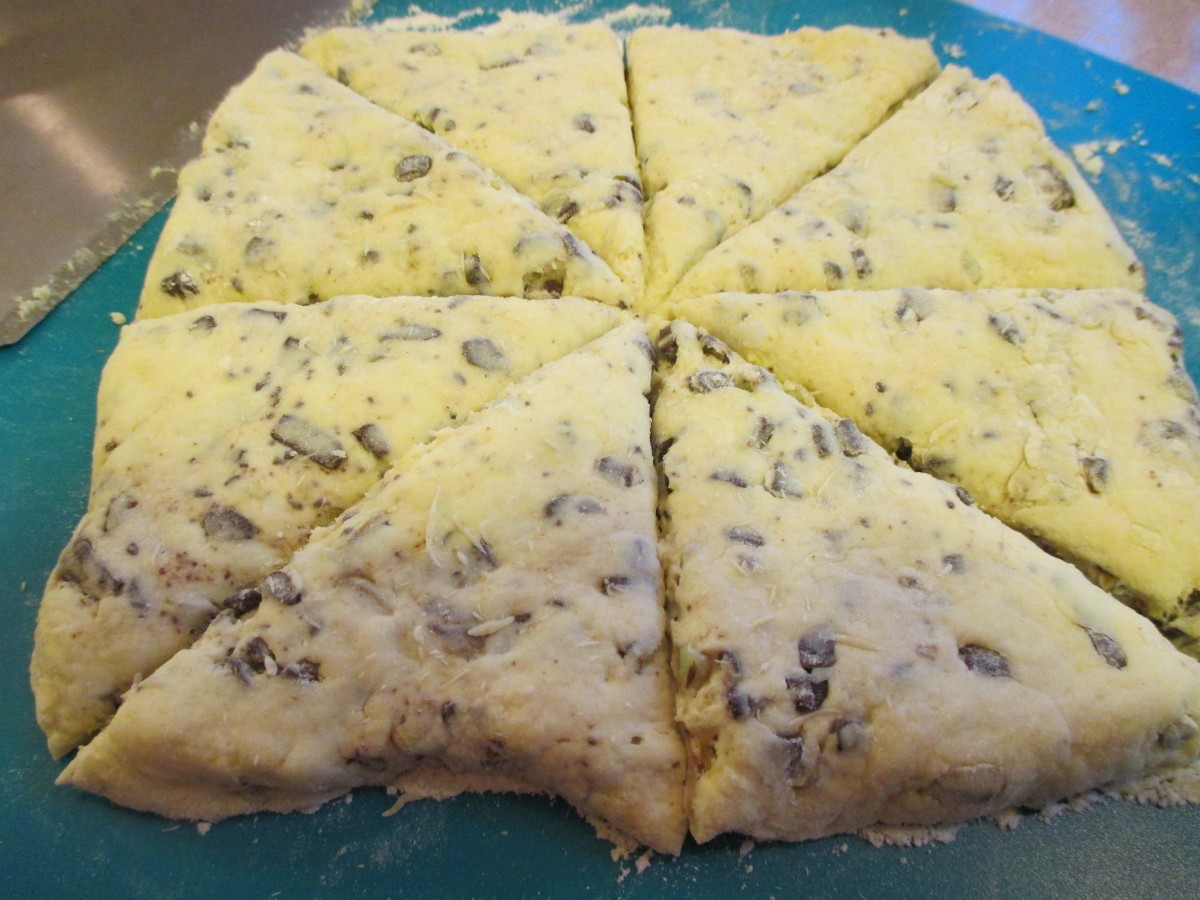
Cut dough into 8 wedges
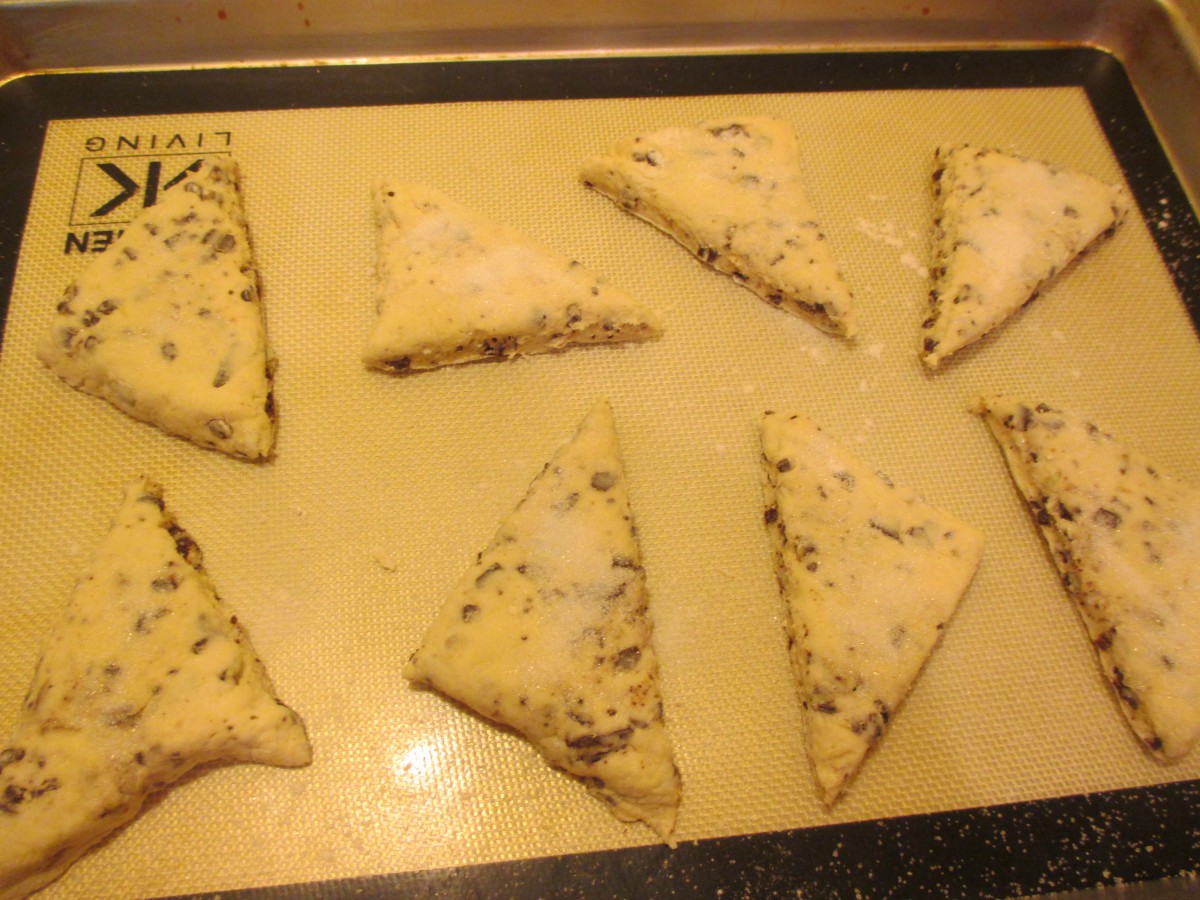
place on baking sheet
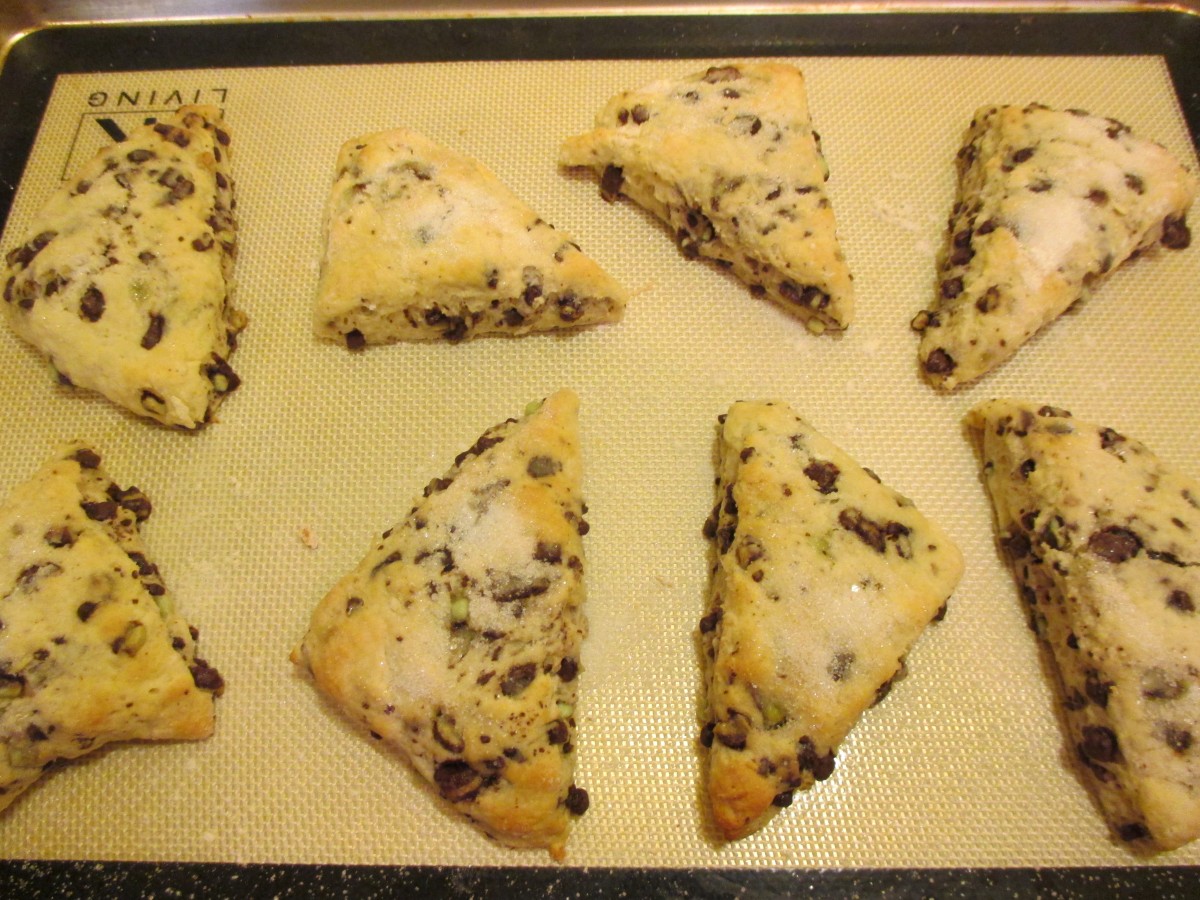
Bake until golden brown
Fig Kolachy

Fig Kolachy
I have fond memories of making these delicate cookies with my Mother. I still make them. I normally fill them with cherry pie filling but have also filled them with blueberry, apple and nut fillings. I wanted to try something different for class last night so I used fig jam for the filling. I made my own, but you could use store bought, if you prefer. You can also finish off the cookies with a light dusting of powdered sugar, if you like.
Fig Kolachy
Dough
3 sticks butter
8 oz. cream cheese, softened
3 cups flour
Fig Jam– recipe follows
Powdered sugar, optional
Mix dough ingredients together and chill well before using.
Roll out chilled dough into squares or circles. Spoon a little fig filling into the center and pinch 2 ends or corners together. Bake in 350-degree oven for about 12 minutes, or until golden on edges. Cool and dust with powdered sugar. Makes 4-5 dozen.
Fig Jam
1 lb. dried figs
2 c. water
1-2 c. sugar- I used 1 cup, but use according to your taste
Zest of 2 lemons
2 t. cinnamon
Chop up figs and place in saucepan with the water and cook until tender, about 30 minutes. Add sugar, zest and cinnamon and cook until thickened, about 20 minutes. Stir often to prevent sticking. Puree mixture and set aside to cool.
Blueberry Chef Salad
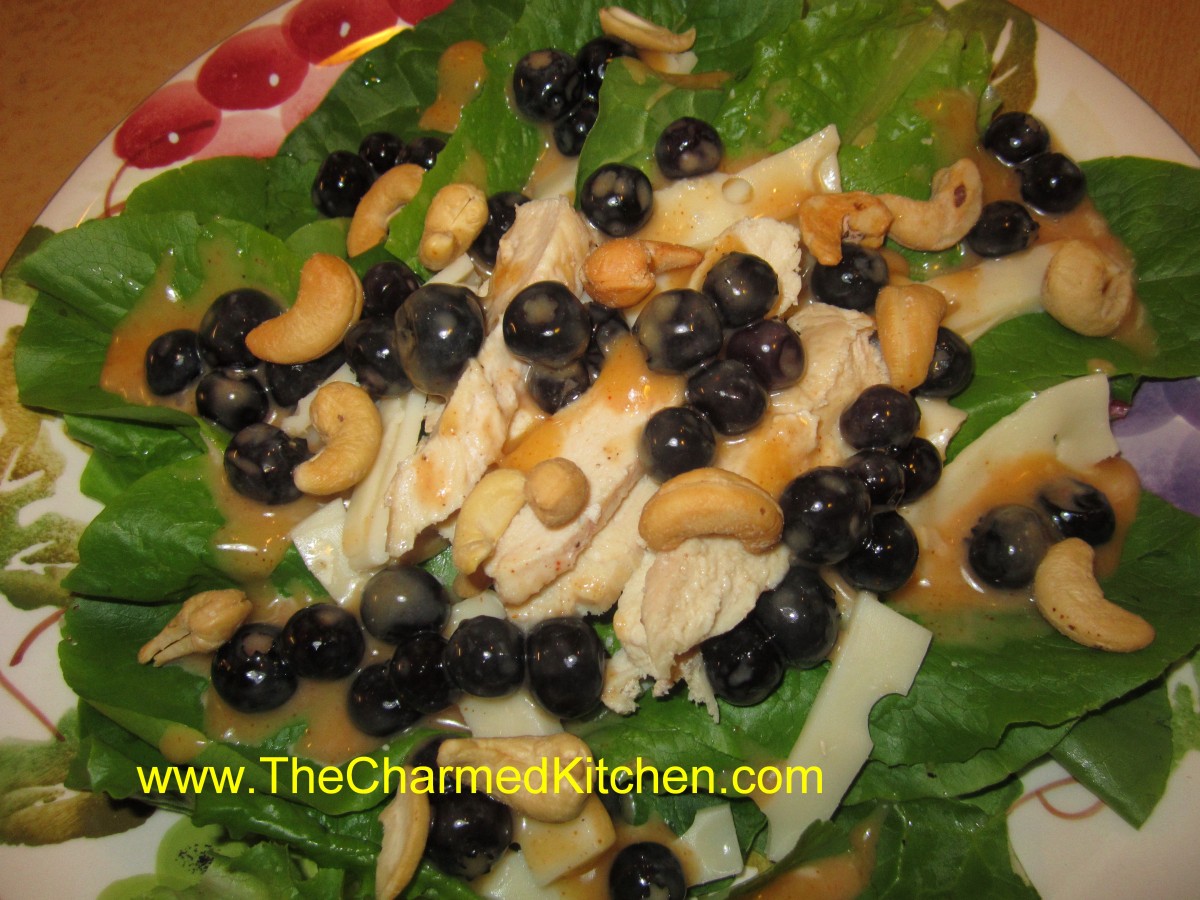
Blueberry Chef Salad
I have really been craving salads lately. Sometimes just having a tossed salad to start dinner is enough. Other times- I want dinner to be the salad. This is one of those salads that is a meal all on its own. Made with fresh or frozen blueberries it is one of my favorites. The dressing is a creamy honey French dressing which pairs beautifully with the berries. I topped mine off with cashews, but you could add croutons if you like.
Blueberry Chef Salad
Dressing:
1/3 c. honey
1/4 c. white wine vinegar or cider vinegar
1 t. paprika
1 t. dry mustard
1/4 t. salt
1/2 c. olive oil
3 cups blueberries
Salad:
6 c. torn salad greens
12 oz. cooked chicken, turkey, ham etc, cut into strips
1 c. cubed cheese
1/2 c. cashews
In blender, combine first five ingredients and start running machine on high. Add oil in a slow stream until mixture becomes thickened. Pour into bowl and stir in berries and chill, several hours if you can. When ready to serve arrange greens on one large platter or on smaller salad plates. Arrange meat and cheese on platter or plates. Spoon over the dressing and cashews then serve. Serves 4-6.
Hummus with Greek Olives
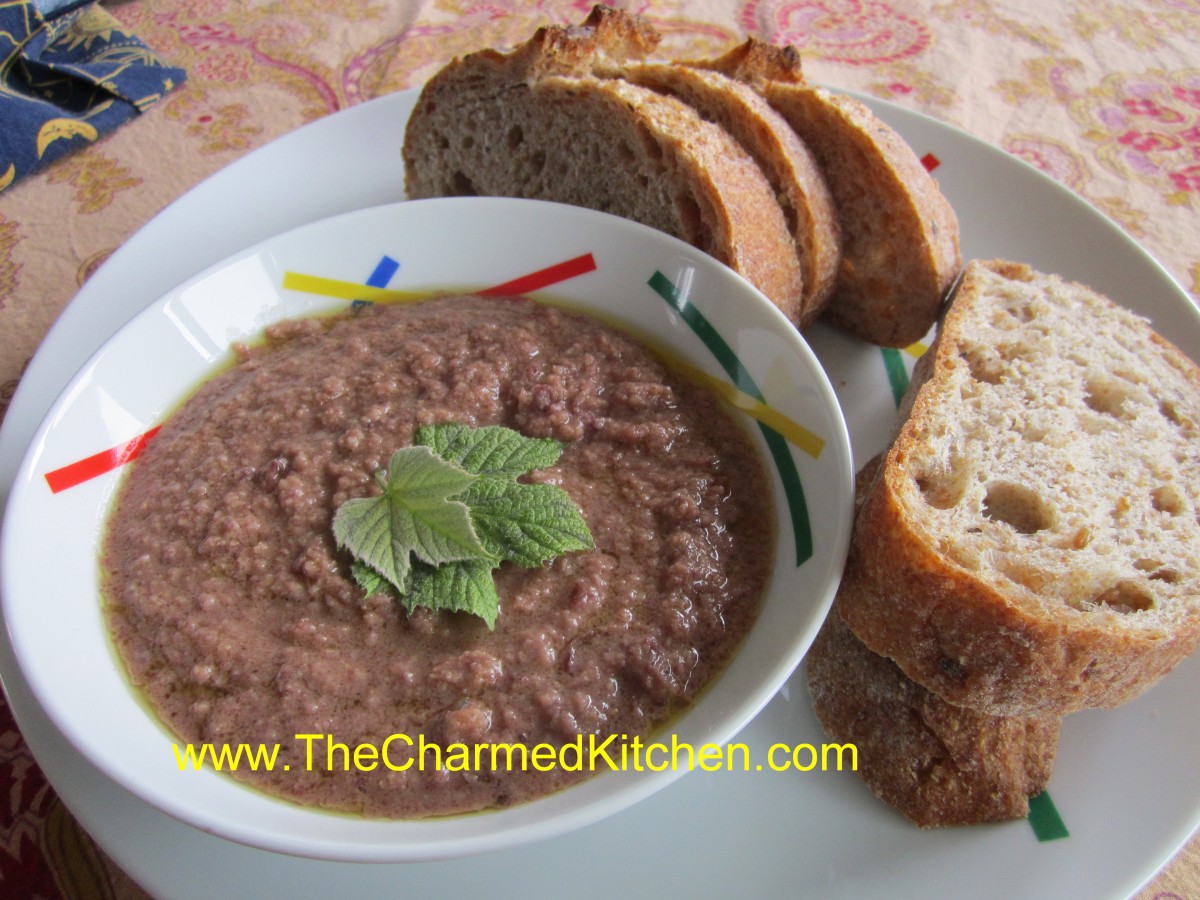
Hummus with Greek Olives
My friend, Jared, was the one who first suggested I add olives to my hummus. Like me, he likes “regular” hummus, too. The addition of olives adds another layer of flavor. Salty, briny and that unique olive taste. Makes sense when you think about it. You are already adding olive oil to hummus, why not add olives, too? I have a big jar of Kalamata olives (thanks, Costco), so I have been looking for ways to use them.
Hummus with Greek Olives
1 can garbanzo beans, drained- or about 2 c. cooked garbanzos
1 c. Greek olives, drained, pitted and chopped
1/4 c. olive oil
2 T. lemon juice
2 T. tahini (sesame seed paste)
2 cloves garlic
salt and hot pepper sauce to taste
Combine all ingredients in a blender or food processor until smooth. Adjust seasonings. Chill. Serve with pita bread, crackers or fresh vegetables. Also nice spread in a pita bread with sliced tomatoes, cucumbers and lettuce. Freezes well.


