Fried Catfish

I love fried fish. I don’t make it at home that often. It is more of a treat around here than an every day meal. This time of year, Friday night fish fries are very popular. I love them. You don’t have to go out to have great fried fish.
I toyed with the idea of baking it, but frying won out. Nothing quite as good as fried catfish in my mind. Had a few friends over and I knew they would like it. too.
This is going to be one of those recipes that is more narrative that exact amounts. I really am good about writing stuff out. I just can’t seem to locate my notes for this one- so I’ll share what I did as best I can remember. It is also so easy to fry fish. Don’t be scared to try.
I started with catfish fillets that were cut down into smaller pieces. The smaller size made them fast and easy to cook. It also made them fun to eat. Like chicken nuggets, only made with catfish. You could certainly use other fish in this recipe.
Since they had been frozen, I thawed them out, and dried them off a bit by patting them with paper towels. I started with a 2 pound bag of catfish. I seasoned a little over 1/2 a cup of flour with salt, pepper and paprika. Then I placed the flour in a bag and tossed in the fish pieces.
I made a mixture of 2 eggs, a little mayo, salt, pepper, garlic powder and a small amount of smoked paprika. I dipped the fish in this mixture and let it soak in there while I put the breadcrumbs in a bowl.
I took the catfish out of the egg wash a few pieces at a time and dropped them in the bread crumbs. I had the crumbs in a good sized bowl- but only filled about a quarter of the way with crumbs. I started with a cup of bread crumbs, but needed more. I added the fish and sort of tossed it in the crumbs by shaking and tossing the bowl. Made sure the fish all got coated. Pressed the crumbs a few times to make sure the breading stuck. Placed fish in a square container and kept adding it as I finished breaded the fish. Covered the dish and placed it in the fridge. I fried the catfish the next day. I could have fried it right away, but I knew I would be getting home just before my guests would be arriving. I wanted to get this part of the job out of the way. Breading sticks better if you do it a little ahead of time.
Once it was time for dinner, I put the oil on to heat up.
I was using an electric pot with a thermometer so I knew when the oil reached 350. I wanted to fry the fish between 350 and 375 degrees. If you don’t have a pot with a thermometer, you can tell if your oil has reached 350 degrees with the use of popcorn. Yes, popcorn. Just put in a kernel or two of unpopped popcorn when you start heating up the oil. Popcorn pops at 350 degrees. When the popcorn pops, you know the oil is ready.
I started to drop the pieces of fish, several at a time, into the hot oil. They were cooked in just a few minutes. I pulled them when they were golden brown. I set them to drain on paper towels, then held in a warm oven, while I cooked the rest of the fish.
I served the fish with lemon wedges and homemade tartar sauce- which is just sweet pickle relish, mayo and capers.
The fish was a big hit.
As to the oil. You’ll have plenty left over. I let it cool and strained it out. Then I poured it in the bottle it came from. You can save it for your next frying project, but don’t use it again and again. Just a couple of times, then toss the rest. There were 4 of us for dinner and there was fish leftover. The 2 pounds of fish was easily enough to serve 6-8.
Classic Gnocchi
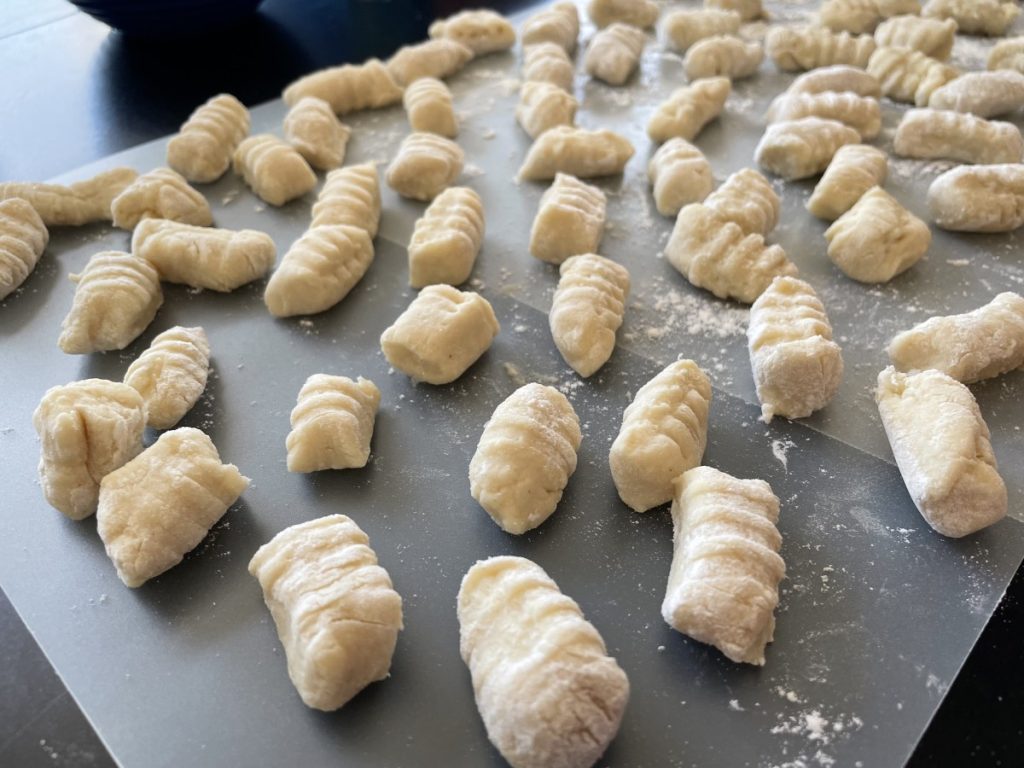
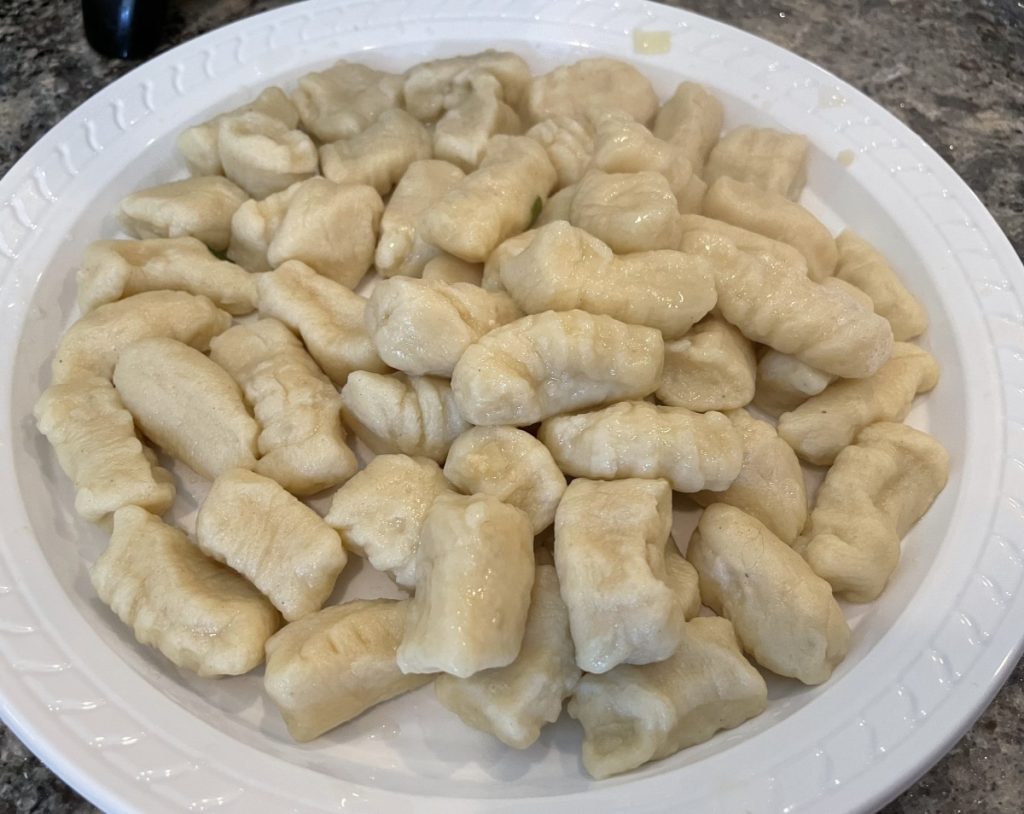
I did a class recently on dumplings. Dumplings can include so many different foods. One of the dishes that was requested we make for the class was gnocchi.
Gnocchi are a type of dumpling made with potatoes. They are tender, tasty and so easy to make. Sort of like a spaetzle, but made with potatoes in the dough. They have a unique texture and flavor. They have a unique appearance as well, as uncooked gnocchi are traditionally rolled across the tines of a fork to leave tiny grooves. The grooves help to hold sauce. It also makes them look pretty. There are special grooved boards made just for making gnocchi, but a fork works well, too.
Once cooked, gnocchi can be served with butter or a little olive oil, with a red sauce or browned in butter or oil. I love them with some fresh grated Parmesan cheese.
So here is the recipe I used. If you never made gnocchi before, I hope you will give them a try. so easy and so good!!!
Classic Gnocchi
4 small russet potatoes, 22-24 oz. total, peeled, diced into 1/2-inch cubes
1 egg
2 T. whipping cream or half and half
1 1/4 t. salt
1/8 t. nutmeg
1 1/2 c. (about) flour
Steam potatoes over boiling water until tender, about 12 minutes. I steam mine in the microwave. Place in bowl and mash or put potatoes through a ricer. Place in bowl and cool about 10 minutes. Add egg, cream, salt and nutmeg and mix well. Stir in flour and combine until slightly sticky dough forms. Add more flour a tablespoon at a time if the mixture is too moist. Turn dough onto lightly floured work surface and divide into 6 equal portions. Roll out 1 piece into a rope about 20-inches long by 3/4 inch. Cut dough into 3/4 -inch pieces and roll each piece over the tines of a fork or over a wire whisk to make grooves in them. Arrange finished gnocchi in a single layer on a floured baking sheet and repeat the process with the remaining dough. Boil the gnocchi in well-salted boiling water, about 1/3 at a time. Boil for 4-5 minutes. They will come to the surface and be tender. Check after 4 minutes. Serve with butter and Parmesan cheese or with a favorite pasta sauce.
Lemon Cheesecake with Lemon Curd

This dessert was inspired by a bag of lemons. I had picked them up with no real plan. I wanted a dessert for a dinner and decided to use them to make a cheesecake. I wanted to really amp up the lemon flavor, so besides the lemon juice and zest in the cheesecake, I added a layer of lemon curd on the top.
It worked out even better than I thought. Lots of lemon flavor in a creamy cheesecake. The lemon curd brought even more lemon to the party. Just wonderful.
So here is the recipe. I used a 9×9 inch glass pan to bake the cheesecake- rather than the normal spring form pan. It worked out really nicely. Kind of made me think about lemon bars, too.
Lemon Cheesecake with Lemon Curd
Crust:
1½ c. graham cracker crumbs
3 T. sugar
4 T. melted butter
Filling:
2 (8oz.) packages cream cheese, softened
¾ c. sugar
2 T. flour
2 eggs
3 T. lemon juice
2 t. grated lemon peel
Lemon Curd: recipe below
Heat oven to 350-degrees. Grease a 9×9-inch baking pan- I used a glass pan. In medium bowl, combine crumbs and sugar, then add melted butter. Toss to distribute butter evenly. Press into bottom of prepared pan and bake 10 minutes. Beat cream cheese, sugar and flour until fluffy. Beat in eggs one at a time. Stir in juice and peel. Pour over crust and bake for 30 minutes, or until set. Cool then top with lemon curd. Chill well before cutting. Store covered in fridge. Serves 8-10.
Lemon Curd
Lemon Curd
1/2 c. lemon juice
zest from one good sized lemon- you should have 2-3 teaspoons
1/2 c. sugar
3 eggs
6 T. unsalted butter- cut into little cubes
In medium saucepan, combine all ingredients. Whisk the mixture until the eggs are well blended. Cook over medium low heat, whisking often, until the mixture thickens. This will take 5-7 minutes. Whisk more often as mixtures warms and starts to thicken. Better to heat over lower heat and take longer than cook over too high a heat. You don’t want the eggs to scramble. Once the mixture is thickened , transfer to a bowl or jar. Cover the surface with a piece of plastic wrap to keep the surface from developing a skin- like any pudding will do. Chill until ready to use. Makes about 2 cups. Will keep in fridge a week or two.
Note: For using with this cheesecake, just make the lemon curd while the cheesecake is baking. Pour over the cheesecake while the curd is still a little warm, to make it easier to spread.
Homemade Breakfast Sausage
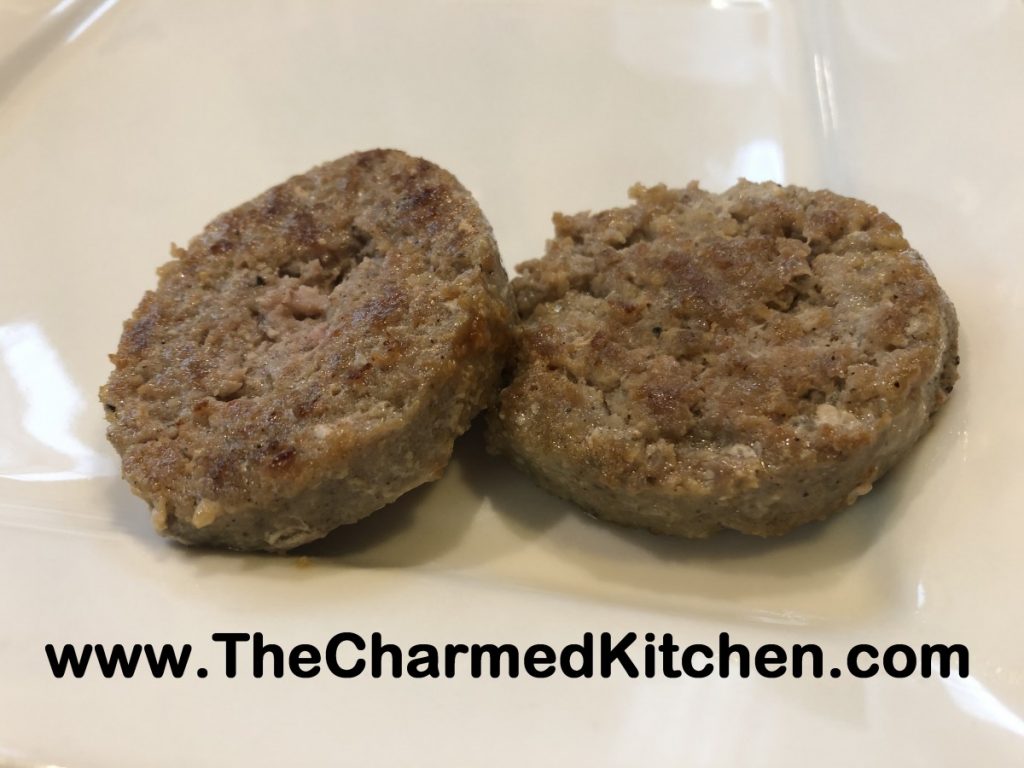
I wanted breakfast sausages, but didn’t have any, so I decided to make my own.
These breakfast sausage are so flavorful. The nice thing about making your own sausage, is knowing all the ingredients that go into them. You can adjust seasonings to suit your taste. Making sausage does not have to be hard. I grew up in a family that had a sausage stuffer. So making sausage seems pretty normal to me. But if you never made sausage, you really should give it a go. I have a home movie, from before I was born, of my parents making Polish sausage. They were grinding the meat, seasoning it, prepping the casings and getting the meat into the casings. They made it look easy.
If you make sausage without the casings, like these little breakfast sausages, the process is pretty simple. You don’t need any special equipment, either. If you don’t have ground meat or a meat grinder, you can grind the meat in a food processor. Just cut the meat into cubes and place in the processor. Pulse on and off until you get the grind size you want. For these sausages, you want a pretty fine grind. Don’t put too much meat in at once. It is better to do a couple of smaller batches.
I made patties, but if you want links, just take the prepared mix, roll it out into tube shapes, wrap in plastic wrap and chill. Then just slice to the length you want. You can use ground pork, turkey, beef, chicken, venison or any combo you like. I even splurged once, and used ground duck.
Homemade Breakfast Sausage
2½ lbs. ground pork, turkey, beef, chicken (leave on some fat)
1 T. dried sage
2 t. salt
2 t. pepper
1 t. dried marjoram
½ t. dried thyme
¼ t. allspice
¼ t. nutmeg
¼ t. dry mustard
⅛ t. cloves
pinch of cayenne pepper
⅓ c. warm water
Mix herbs and spices with water and let stand 10 minutes. Add the water and spice mixture to the meat and blend thoroughly. Form into patties, and chill, or cook immediately.* You can also form into rolls, roll in plastic wrap and chill. Then just slice your patties from the rolls. Patties can be fried or baked. This sausage can also be frozen for later use. Makes almost 3 pounds.
* I have made my own brown and serve by cooking the sausage, over low heat in a large skillet. I add a little water and cover the pan, so they cook, but don’t brown. Cool and then freeze. When I want to have a few, I grab them out of the freezer and just brown in a skillet over medium-low heat.
Roasted Corned Beef
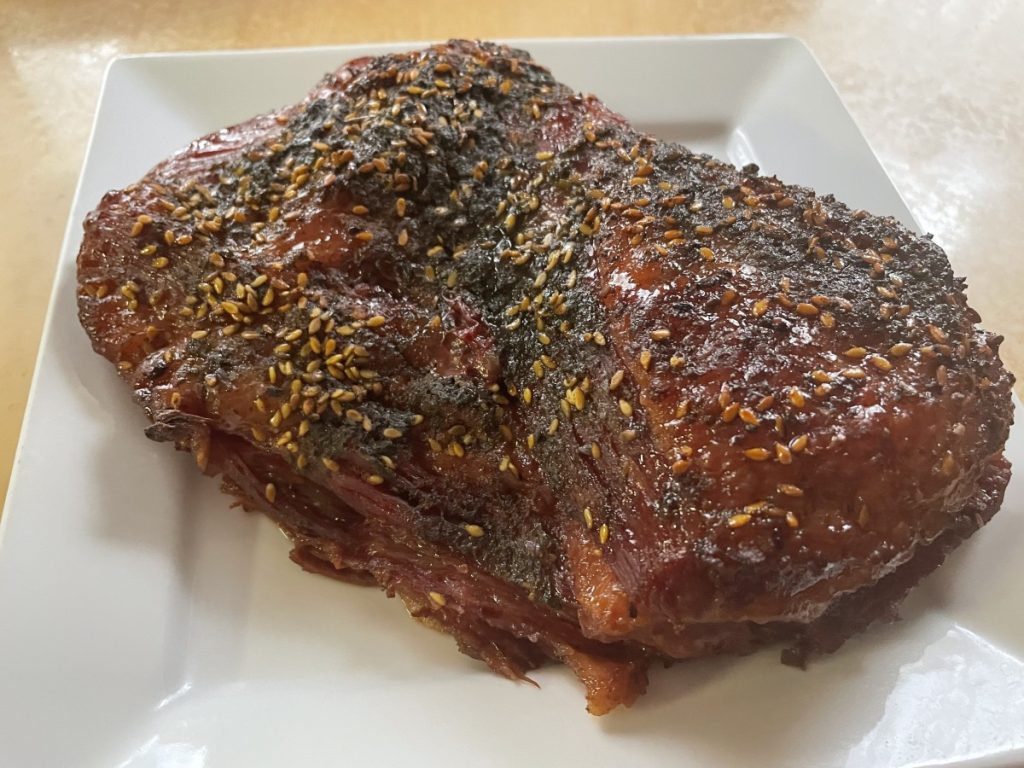
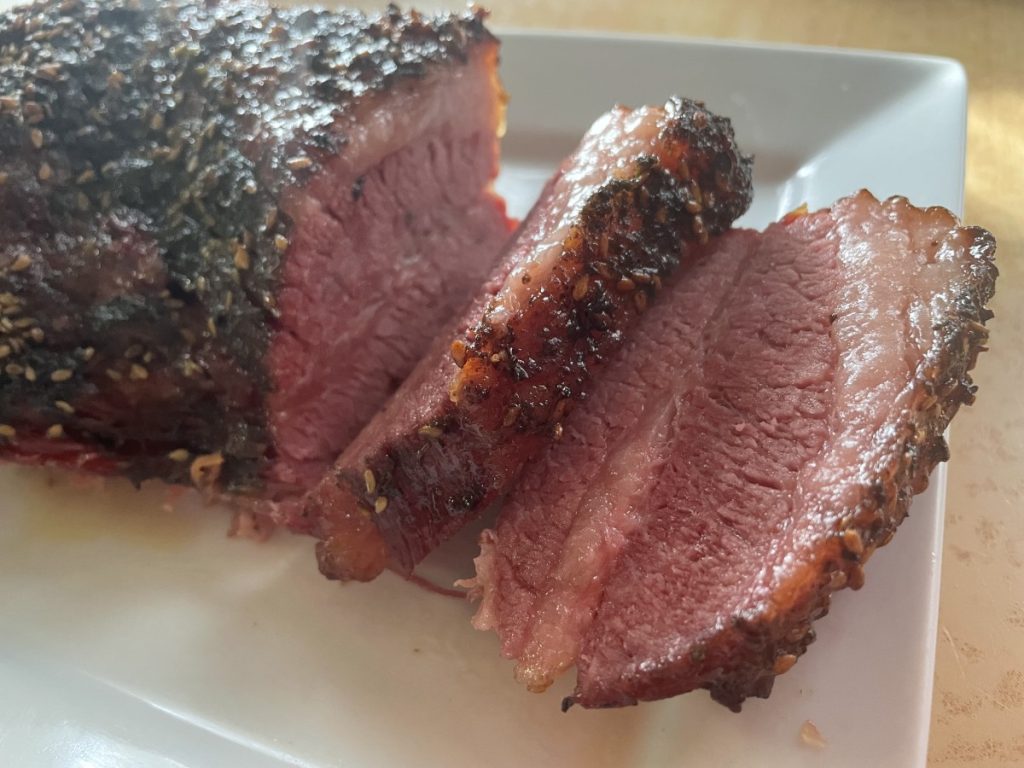
After hearing about roasting corned beef, I finally did it. I can see why those who have raved about the results were so excited. The end result was a roast that was tender, flavorful and kind of pretty, too. I had searched the internet for directions and found a wide assortment of recipes. Most of the roasting temps were in the 300-325 degree range. Cooking times varied from 2-6 hours. All of the recipes I found added water to the roasting pan- but amounts varied widely – from a few tablespoons to several cups of water.
There were also all sorts of options for a spice/sweet rub. I used ingredients I thought would work with the corned beef and I was not disappointed. I used maple syrup, za’atar spice and some brown sugar. Recipe for the za’atar follows after the roasting directions.
I was concerned that the roasted corned beef would be too salty. It was not. A lot of the salt comes out in the water used in the roasting process. I tasted a piece of the roasted onion in the pan and it was super salty. The cooking liquid was, too. The roast was not too salty.
Roasted Corned Beef
4-5 pound corned beef
1/2 c. maple syrup
2-3 tablespoons za’atar
1/2 c. brown sugar
1 onion, peeled and chopped
2-3 cups water*
Remove the meat from packaging. Rinse with cool water and pat dry. Discard the seasoning packet. Place a wire rack in a roasting pan and place the roast on the rack. Brush the roast with about 1/4 cup of the maple syrup. Sprinkle the za’atar over the meat and rub to cover evenly. Sprinkle with 1/4 cup of the brown sugar. Rub the sugar into the roast. Place onions in the roasting pan and add about two cups of water. The meat should be above the water. Seal the roasting pan with foil or cover with a tight fitting lid. Place in a preheated 325 degree oven and roast for 2 1/2- 3 hours. Add more water, if needed. See note below. Pierce roast to make sure it is tender. Brush with the rest of the maple syrup and sprinkle with the rest of the brown sugar. Return to oven, uncovered, and cook until top of roast browns nicely, about an hour. Remove from oven. Let rest 15-20 minutes before slicing.
* The water amount became an issue for me. I thought the pan was sealed tightly, but at 2 hours, I smelled a faint burning smell. The roasting was was just out of water. I added more, replaced the foil and returned the roast to the oven for another hour. I had used a pretty big pan, in relation to the size of the roast- and obviously, the foil was not sealed as tightly as I thought. Check the roast a time or two – to be sure the water does not run out. By the same token, you don’t want the meat sitting in water. If you use a smaller roasting pan, or use a tight fitting lid, you might not need to add more water at all.
There are a number of variations of this recipe. This is the version that I made.
Za-atar Spice Mix
1 T. whole coriander
1 T. whole cumin
2 T. dried marjoram- you could use thyme instead
2 T. sumac- available at some specialty stores
2 T. sesame seeds- I toasted mine.
in small skillet, toast coriander and cumin until you can just start to smell them. Let them cool, then grind them up in a spice mill or coffee grinder. Combine this mixture with the rest of the ingredients and stir to combine well. Store in a cool, dry place.
Irish Soda Bread Scones
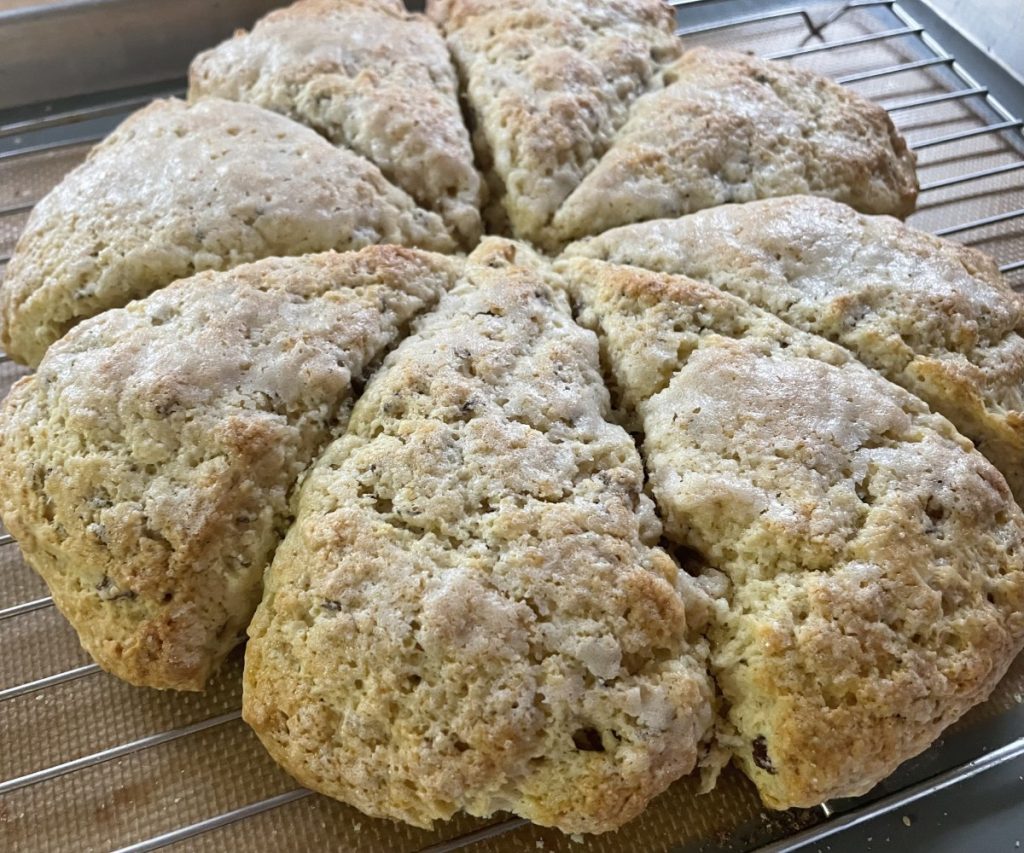
If you are in the mood for Irish Soda Bread- you can get the same wonderful flavor in a scone.
Scones don’t take a lot of time or effort to make. These would be a wonderful addition to your St. Patrick’s Day meal.
While traditionally served for breakfast or tea time, scones are really good any time of the day. They certainly can be served with dinner.
I used golden raisins, but you could use regular raisins, currants or cranberries, for a less traditional scone.
Irish Soda Bread Scones
2 c. flour
3 T. sugar
2 t. baking powder
1 t. baking soda
½ t. salt
1/3 c. butter
½ c. golden raisins
1 t. caraway seeds
2/3 c. buttermilk
1 egg
Milk
Extra sugar for sprinkling
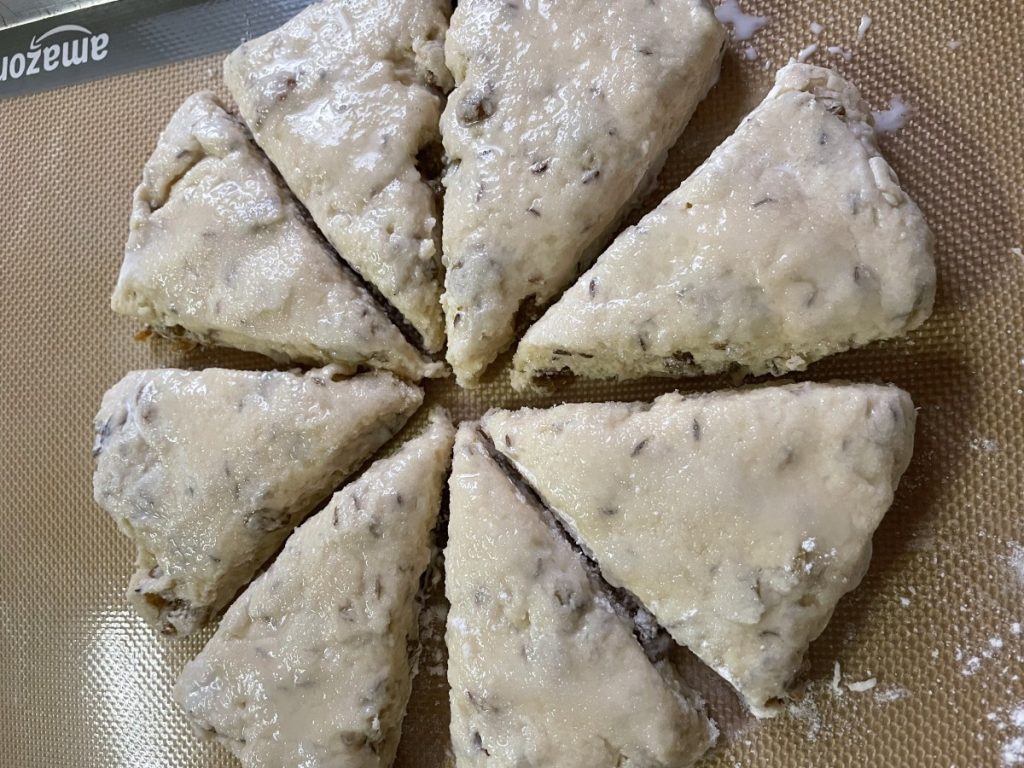
Preheat oven to 425 degrees and lightly grease a baking sheet. Combine dry ingredients in medium bowl and cut in butter to resemble coarse crumbs. Stir in raisins and caraway seeds. Beat together buttermilk and egg and add to flour mixture, stirring with fork until mixture just coming together. Turn onto floured surface and knead 5-6 strokes or until ball of dough holds together. Dust an 8-inch round cake with flour. Press dough into cake pan. Invert pan over onto prepared baking sheet. I find if I do this quickly the dough comes out more easily. Remove cake pan. This will give you a perfect 8-inch circle of dough. With a sharp, floured knife cut dough into 8 wedges. Brush top with milk and sprinkle with extra sugar. Bake 14-16 minutes. Makes 8.
Blackberry Jam
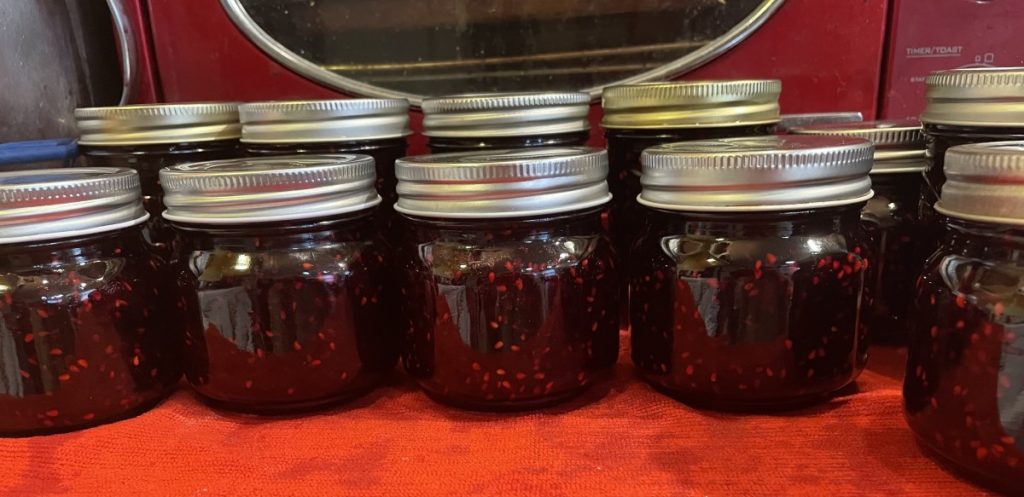
I found blackberries at a great price recently and decided to turn some of them into blackberry jam. I am so happy that I did. The jam gave me a taste of summer in the middle of winter. It also filled the house with wonderful aromas and warmed up the kitchen.
I will definitely be making more again when local berries are in season.
Blackberry Jam
6 cups crushed blackberries- from about 3 quarts of fresh berries
1 box powdered pectin- or 6 tablespoons if you buy in bulk
8½ cups sugar
¼ c. lemon juice
Wash jars and prepare lids according to manufacturer’s instructions. Place canner on stove, add water and bring to a simmer while you make the jam. Wash berries and crush. Place the prepared berries and pectin in a pot and bring to a full boil, stirring often. Once the mixture comes to a full boil, stir and boil it a full minute. Add the sugar and lemon juice and return to the boil. Boil a full minute, stirring continuously. Ladle hot jam into jars, leaving ¼ inch headspace. Wipe rims of the jars and place on the lid. Screw the lid on fingertip tight. Place jars of jam in the canner and bring the water to a boil. Process 10 minutes, then turn off the heat and let jars stand in the canner another 5-10 minutes before removing to a towel or cooling rack. Alllow to completely cool before checking if all the jars have sealed.
Makes 10-11 half pint jars.
Note: You can add flavors to the jam, if you like. I didn’t this time, but vanilla or cinnamon might be nice or perhaps some mint flavoring.
Spelt and Sesame Bagels

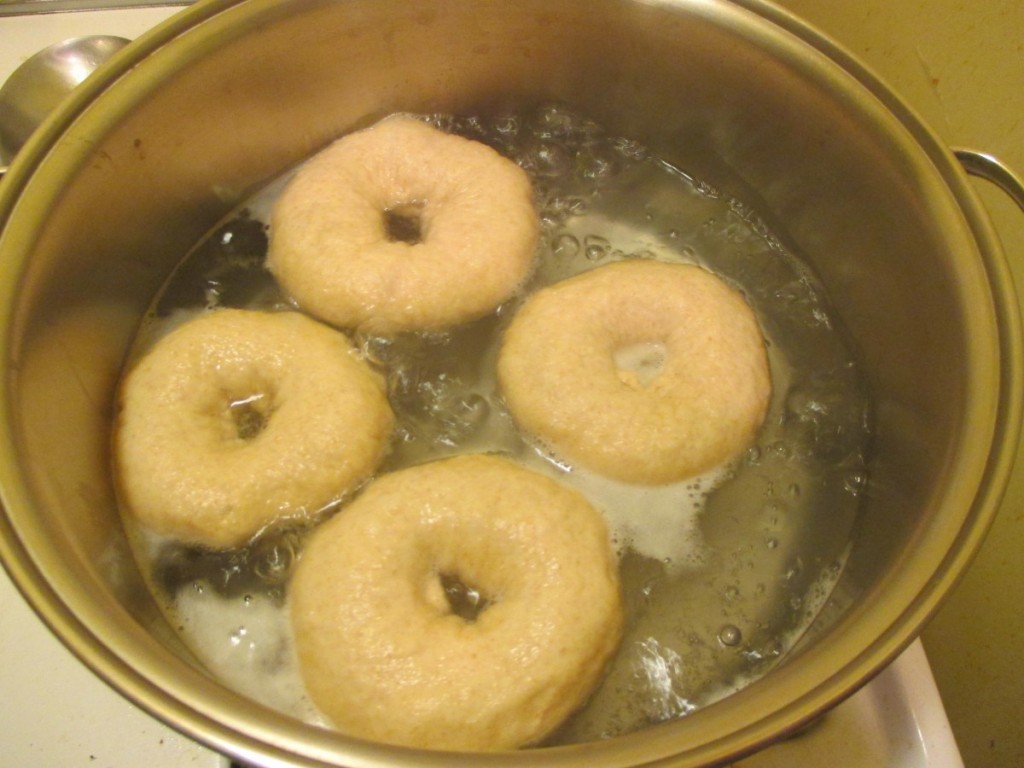
If you never made your own bagels- you really should sometime. They are easy to make, and fun, too. In case you didn’t know, the secret to the chewy texture of bagels in that they are boiled in water before being baked.
There are so many variations. You can swap out the type of flour or add herbs, seeds, onions, garlic or even fruit.
I decided to make my bagels with spelt flour. Spelt is closely related to wheat. It contains gluten, like wheat. Whole grain spelt flour has a lighter texture than whole wheat flour, though. It has all the fiber of a whole grain, but the texture of a white flour. It worked out so well in the bagels. The sesame seeds added even more flavor and texture.
Bagels began in Austria when a baker in Vienna in 1683 wanted to honor the visiting president of Poland. He created a roll that was round, or shaped like the stirrup on the King’s saddle. The new creation was called beugel, which was a variation of the German word for stirrup. Over time the word evolved into bagel. Because they were made with white flour, everyone, other than the rich considered bagels a special treat for special occasions. Today bagels are found in almost every grocery store throughout the country.
Spelt and Sesame Bagels
2 c. bread flour
2 ½- 3 c. spelt flour*
3 T. sugar
1 T. salt
2 pkgs. Yeast
1 ½ c. Water
1 T. oil
1 T. sugar
2 t. salt
1 egg white
Mix 1½ cups flour, 3 tablespoons sugar, 1 tablespoon salt and yeast in a medium bowl. Heat water with oil and add to flour mixture. Beat 2 minutes at medium speed. Add remaining ½ cup of bread flour and beat 1 minute. Stir in enough spelt flour to make a soft dough. Turn onto a floured surface and knead until smooth and elastic, about 8-10 minutes. Set in greased bowl and turn to grease top. Cover and allow to rise in a warm place 1 hour. Punch dough down cover and let rest 15 minutes. Divide dough into 12 pieces and form into smooth balls. Cover with towel and let rest 10 minutes. In large skillet heat 1 inch of water to a simmer. Add remaining sugar and salt to water. With floured finger poke a hole in the center of three of the dough balls. Drop into simmering water cooking 3 minutes. Turn over and cook 2 minutes. Turn to first side and simmer 1 more minute. Remove to greased baking sheet and repeat with remaining dough. Mix egg white with 1 tablespoon of water and brush tops of bagels. Sprinkle with seeds if desired. Bake in a 375 –degree oven for 20 –25 minutes. Makes 12.
* Spelt flour is closely related to wheat. It is used like whole wheat flour in baking, but has a lighter texture while still being a whole grain. If you can’t find spelt flour you can use whole wheat flour in its place in this recipe.
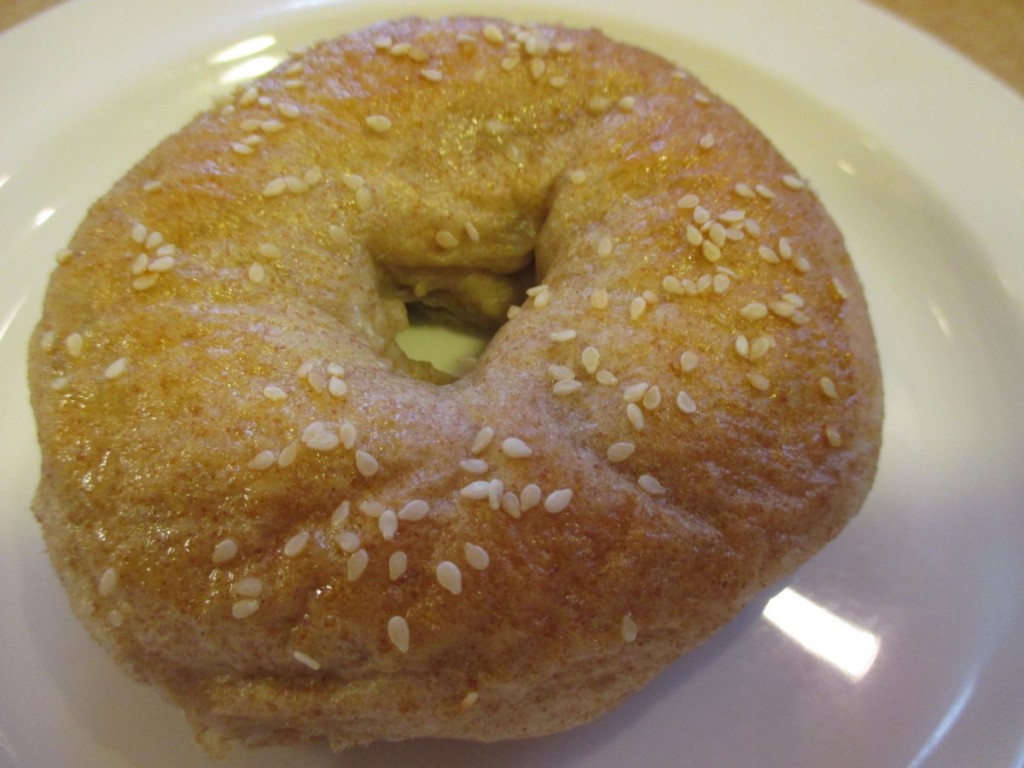
Homemade Bagels
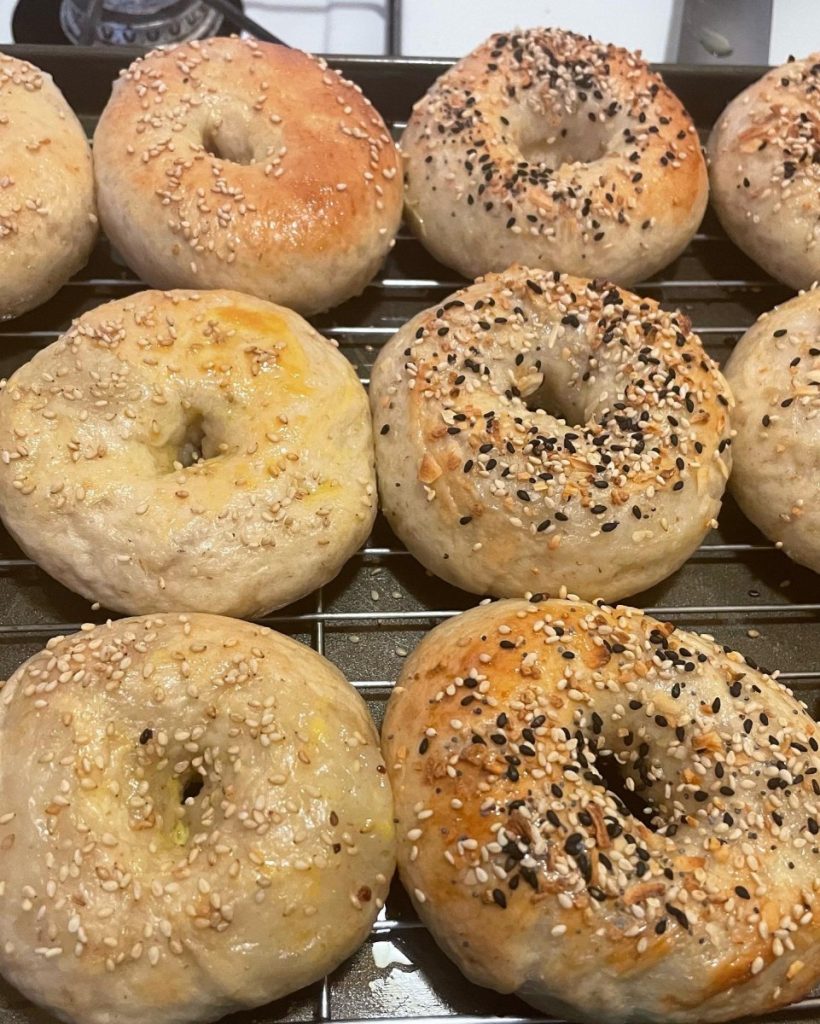
I taught a class last night on making bagels. It was a lot of fun. I think people were surprised on how easy they are to make. The chewy texture in bagels comes from boiling the bagels before baking them. In class we made plain bagels, Parmesan, and spelt. Such a fun evening.
Bagel History
Bagels began in Austria when a baker in Vienna in 1683 wanted to honor the visiting president of Poland. He created a roll that was round, or shaped like the stirrup on the King’s saddle. The new creation was called beugel, which was a variation of the German word for stirrup. Over time the word evolved into bagel. Because they were made with white flour, everyone, other than the rich considered bagels a special treat for special occasions. Today bagels are found in almost every grocery store throughout the country.
Lox and Cream Cheese
Probably the most traditional way to top a bagel. A toasted bagel is spread with cream cheese and then a few thin slices of lox (salt cured salmon). Some people like to also add thin slices of sweet onion. I do. I also like to add a few capers. Years ago this became a tradition in my family. My niece and I always have bagels with lox on Thanksgiving morning.
Bagels
4 ½ -5 c. flour
3 T. sugar
1 T. salt
2 pkgs. Yeast
1 1/2 c. water
2 t. butter
1 T. sugar
2 t. salt
1 egg white
Mix 1 ½ cups flour, 3 tablespoons sugar, 1-tablespoon salt and yeast in a medium bowl. Heat 1½-cup water with butter and add to flour mixture. Beat 2 minutes at medium speed. Add ½ c. flour and beat 1 minute. Stir in enough flour to make a soft dough. Turn onto a floured surface and knead until smooth and elastic, about 8-10 minutes. Set in greased bowl and turn to grease top. Cover and allow to rise in a warm place 1 hour. Punch dough down cover and let rest 15 minutes. Divide dough into 12 pieces and form into smooth balls. Cover with towel and let rest 10 minutes. In large skillet heat 1 inch of water to a simmer. Add remaining sugar and salt to water. With floured finger poke a hole in the center of three of the dough balls. Drop into simmering water cooking 3 minutes. Turn over and cook 2 minutes. Turn to first side and simmer 1 more minute. Remove to greased baking sheet and repeat with remaining dough. Mix egg white with 1 tablespoon of water and brush tops of bagels. Sprinkle with seeds if desired. Bake in a 375 –degree oven for 20 –25 minutes. Makes 12.
Variations:
Light Rye: Prepare as above except substitute 1¼ c. rye flour for 1¼ c. of the regular flour.
Whole Wheat: Substitute 1 ¼ c. whole wheat flour for 1 ¼ c. of the regular flour
Herb: Use ½ tablespoon dried marjoram or parsley or 1 teaspoon dried dill. You can also add ½ teaspoon of garlic powder. Add herbs to flour/ yeast mixture.
Parmesan: Add ¼ c. grated Parmesan cheese to flour/ yeast mixture.
Onion Bagels: Cook ½ cup finely chopped onion in 3 tablespoons butter until tender. Brush onion mixture over the tops of the bagels after they have been baking for 15 minutes.
Sesame or Poppy Seed: Just before baking brush tops of bagels with beaten eggs and sprinkling with sesame seeds or poppy seeds.
Extra crusty: Place under boiler (4-5 inches away) for 3-4 minutes, turning once just before boiling. Bagels should not brown.
More Variations
Blueberry: Prepare dough as usual. When you first start to knead the dough add 1 cup of fresh or frozen (thawed) blueberries and knead as usual. You will need a little more flour.
Cinnamon-Raisin: Add 1-2 T. cinnamon to flour/yeast mixture. Add ½ cup raisins when you start to knead dough.
Multigrain: To flour and yeast mixture add ¼ c. each wheat germ, oat bran and cracked wheat. You’ll need a little less flour.
Super seedy: To flour and yeast mixture add ¼ cup each pumpkin seeds, sunflower seeds and sesame seeds. Also add 2 tablespoons poppy seeds and 1 tablespoon fennel or caraway seeds. You will need a little less flour.
Cocoa: Add ½ cup cocoa powder to flour and yeast mixture. You will need a little less flour. These are great with cream cheese and fruit preserves.
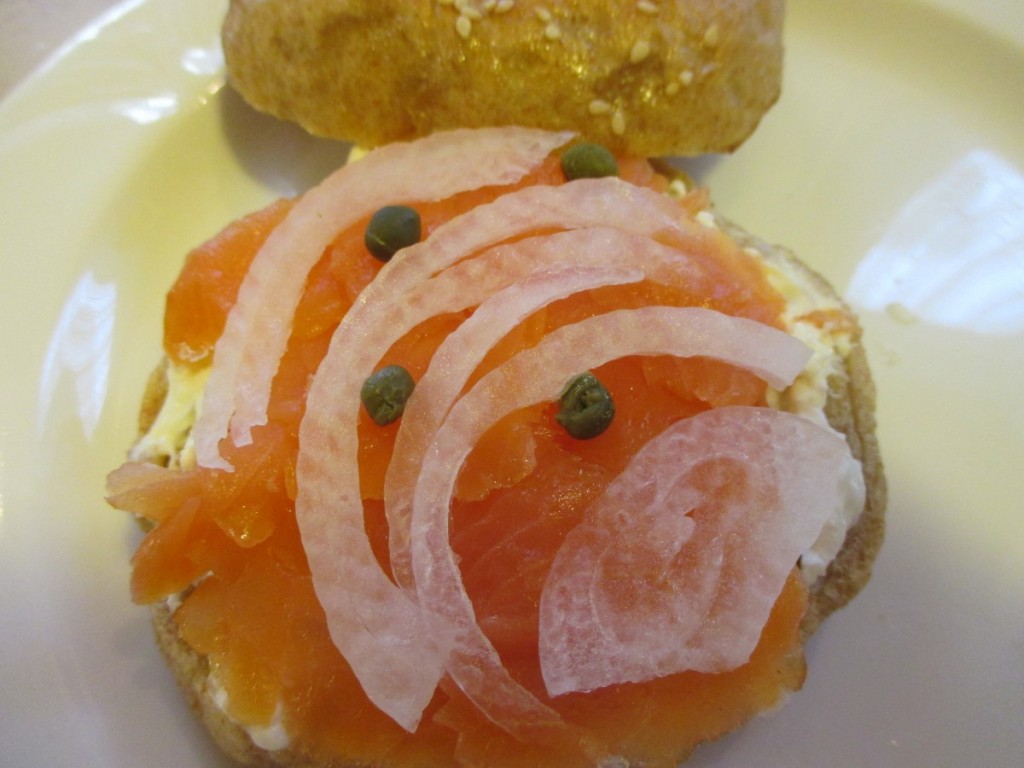
With cream cheese, lox, sweet onion and capers.


