Canning Tomatoes
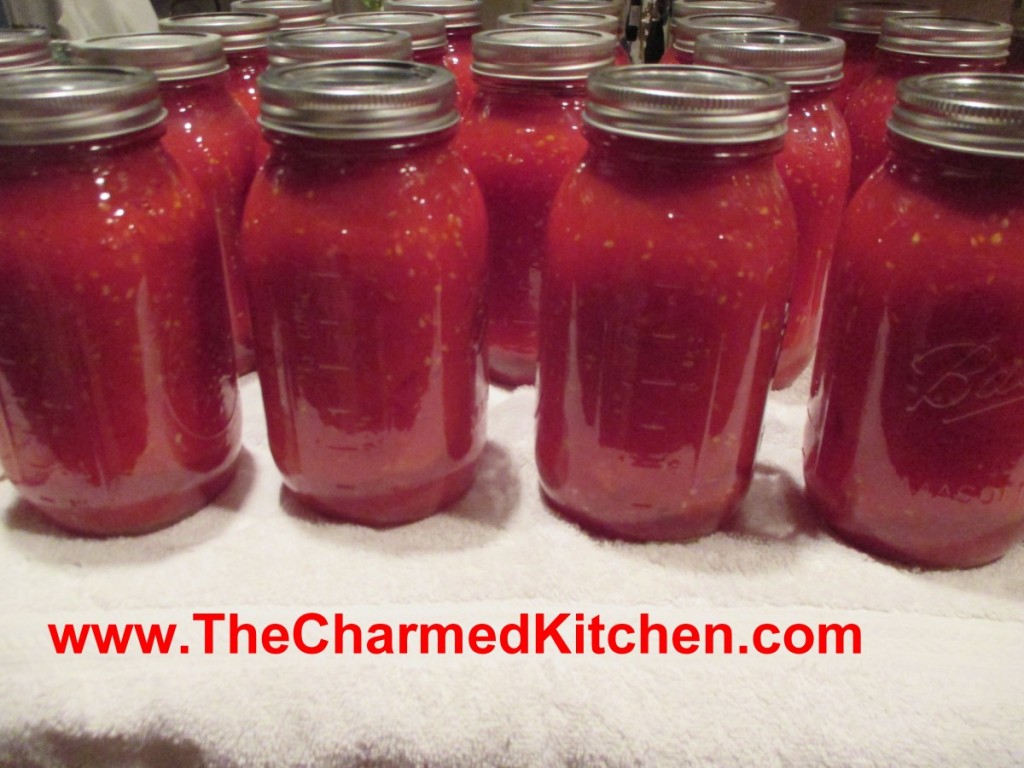
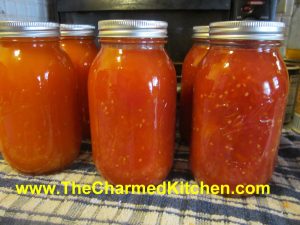
I love my home-canned tomatoes. They taste so much better than anything than comes in a can. Worth the effort.
You have options when canning tomatoes- crushed, juice, sauce- and more. The one option you won’t see for home- canned tomatoes is diced. There is a reason for that. When tomatoes are canned commercially, calcium is added to keep them firm. That is why commercially canned diced tomatoes hold their shape. Home canned diced tomatoes will just cook down, get very soft and not hold their shape. Canning tomatoes whole will give you a firmer end product, if that is what you want.
I have been asked several times in canning classes, if it is safe to can yellow or orange tomatoes. We have all heard that yellow and orange tomatoes are lower in acid, so are they still safe to can? The answer is yes, they are safe to can.
Why?
In spite of you might have been told, orange and yellow tomatoes are not acid free or low acid.
Truth is, that yellow and orange tomatoes have just as much acid as red tomatoes.
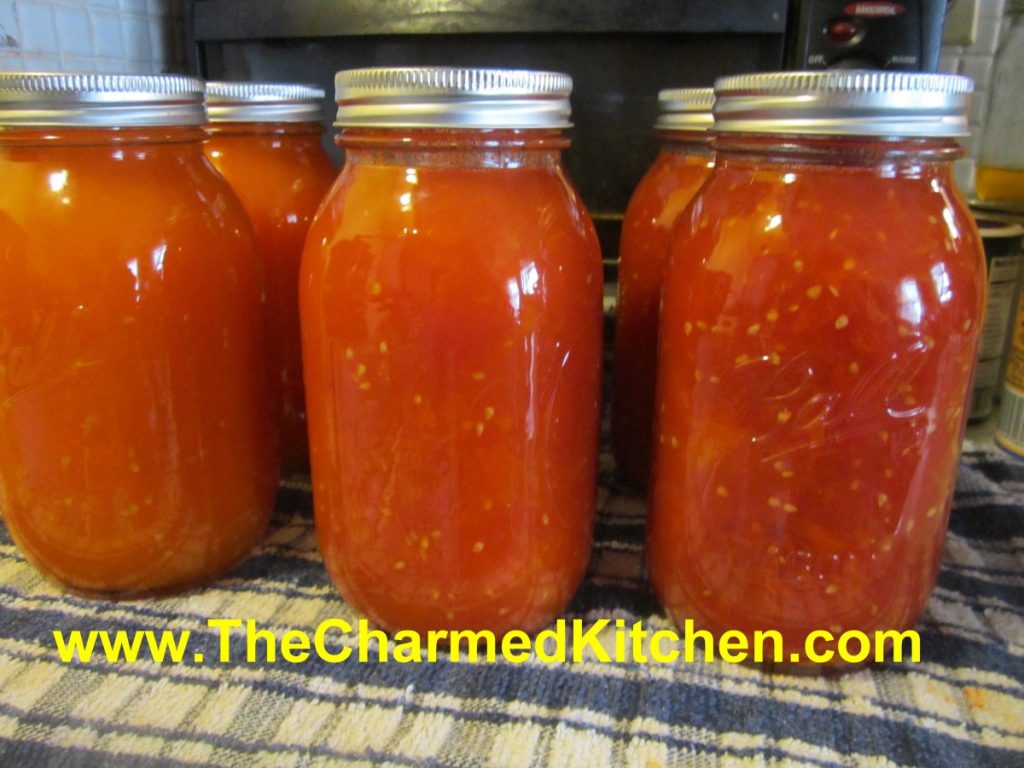
Well, for the most part at least. In terms of acidity or Ph, yellow and orange tomatoes are about average. Some cultivars have more, some less. Bottom line is that all tomatoes are safe to can- as long as you acidify them.
Adding salt is optional, and is for flavor only. Use canning/pickling salt or non-iodized salt when canning.
Here are some popular canning recipes to get you started.
All follow the NCHFP (National Center for Home Food Preservation) recommended procedures.
Crushed Tomatoes
Peel and core tomatoes , trim off any bad spots and quarter. Place about 1/4 of your prepared tomatoes in the kettle and cook, stirring constantly over high heat. Use a potato masher to crush tomatoes and extract juices. Once they are boiling add remaining tomatoes, stirring constantly. You don’t need to crush these tomatoes. Bring to a boil and boil for 5 minutes. In clean, hot jars add needed acidity listed below. You can also add 1 teaspoon of canning salt per quart if desired. Ladle in hot tomatoes, leaving 1/2-inch headspace. Wipe jar rims clean and adjust lids. Process in boiling water bath. Pints 35 minutes, quarts, 45 minutes. 1,000-3000 ft over sea level add 5 minutes. Twenty-two pounds of tomatoes will yield about 7 quarts of tomatoes.
Whole Tomatoes in Juice
Use any extra tomatoes to make juice. I use tomatoes that are too big to can whole, or those that have blemishes that need to be trimmed. Cut up clean, unpeeled tomatoes in a kettle and cook, stirring often until tomatoes are mushy. Strain mixture, pressing on solids or run through a food mill or tomato juice extractor. Set aside,. Place peeled, whole tomatoes in kettle and add enough tomato juice to cover them. Heat to a simmer and simmer gently 5 minutes. Add lemon juice or citric acid to jars, using amounts listed below. Add salt, if desired. Add tomatoes and cover with hot juice, leaving 1/2 -inch headspace. Wipe rims and adjust lids. Process both pints and quarts 85 minutes in a boiling water bath.
Tomato Juice
Wash, stem and trim bruises off tomatoes. Cut into chunks. Add about 1 pound of tomatoes to kettle and bring to a boil while crushing. Continue to add additional cut up tomatoes slowly, keeping mixture boiling. This will keep the juice from separating later. Simmer an additional 5 minutes once the tomatoes have all been added. Press mixture through a strainer , sieve or food mill to remove seeds and skins. Add lemon juice or citric acid to jars according to directions listed below. Add salt if desired. Return juice to boil and add to prepared jars leaving 1/2-inch headspace. Wipe rims and adjust lids. Process n a boiling water bath pints 35 minutes and quarts 40 minutes. Add 5 minutes processing time at elevations between 1,001 and 3,000 ft.
Tomato Sauce
Prepare as for juice. After juice is made return to pot and start cooking down to desired thickness. You’ll lose about 1/3 of the volume for thin sauce and 1/2 of the volume for thick. Add lemon juice or citric acid to prepared jars as described below. Add salt if desired. Add boiling sauce leaving 1/4 -inch headspace. Wipe rims and adjust lids. Process in a boiling water bath 35 minutes for pints and 40 minutes for quarts. Add five minutes at 1,001-3,000 ft. elevation.
Acidity and Tomatoes
Tomatoes must be acidified before canning. When canning either whole, crushed or juiced tomatoes you must add either 2 T. bottled lemon juice per quart or 1/2 t. citric acid . For pint use 1 T. lemon juice or 1/4 t. citric acid. You can also use 4 T. (5%) vinegar per quart, but it will alter the flavor and is not recommended. You can add a little sugar to offset the flavor, if you like.
Safe Canning Basics

A lot more people are canning this year. That’s great, but maybe not so great if they are not canning safely. Following are some facts you might want to know before you can. When you follow the rules, home canning is very safe.
Canning isn’t cooking. The rules are stricter. Not a lot of room to be creative. But you can be creative later on, when cooking with the foods you canned.
Before canning there are some basics you should know. There are general guidelines that need to be followed and some equipment that will make the job easier.
Great sources for safe canning recipes are NCHFP (National Center for Home Food Preservation) and recipes from Ball. There are a few reputable sources for information on social media. My own website has many safe, canning recipes. My friend, Debbie Seagraves, has a YouTube channel with safe canning recipes. There is also a lot of bad information out there. Be careful about who you listen to.
The USDA recommends that all jams and jellies be processed in a boiling water bath, unless it is a recipe that is frozen or unless all the preserves are to be kept refrigerated. Sealing jars with paraffin is no longer considered to be a safe way to preserve jams and jellies.
Other high acid foods, like tomatoes (when acidified), fruits and fruit products, and pickled foods can also be canned in a hot water bath. Tomatoes are acidified with bottled lemon juice or food grade citric acid.
Low acid foods, like vegetables (not pickled) and meats and seafood must always be processed in a pressure canner. Contrary to what some people might tell you, there is no safe canning time for water bathing green beans. The water will never get hot enough to kill botulism.
Just because someone didn’t get sick from incorrectly canned food does not mean they were right. They were just lucky. There was a case in Ohio a few years ago where a woman who served improperly canned potatoes, made people sick. At least one person died. Botulism has no taste or smell.
Rice, pasta, flour and most starches should not be used in home-canned foods. Clear -Gel, a modified corn starch, can be used in homemade pie fillings.
Dairy and eggs are also not recommended in home canning. No canned butter!!! However, there is an NCHFP tested recipe for canned lemon curd, using eggs and butter. It has a very short shelf-life- use in 3-4 months!! The lesson here- use a tested recipe. It has been tested over and over to be sure it is safe.
Just because it seals, it does not mean it is safe. You have to process properly, using a safe recipe. I can pour almost any boiling hot food in a jar and get it to seal. Does not mean what I did is safe. Don’t risk your family’s health.
Since the jars are sterilized in the canning process (of at least 10 minutes), there is no need to sterilize jars as a rule. They should be freshly washed in hot, soapy water, rinsed and kept warm until ready to use. You can also run them through the dishwasher and keep them in there until ready to fill. Because jams and jellies are packed when hot, cold jars might crack. Before starting make sure the jars are free of nicks and cracks, being extra careful to check the rims.
Note: the only time you must sterilize a jar is if it contained food that had spoiled. When I get jars second-hand I also sterilize them before use. To sterilize jars submerge them in boiling water for twenty minutes.
To prepare to water bath, have a canner (large kettle with a wire rack) filled with enough water to cover the jars by 1-2 inches and have it almost boiling when the jars are added. Turn up heat and cover the canner. Timing begins when the water comes to a boil (usually only a minute or two when hot jelly-filled jars are added). I get the water in the canner boiling first and turn it down to a high simmer until just before it is needed. Keep it covered to heat up faster and to prevent evaporation. If you do not have a canner, a kettle deep enough to accommodate the jars can be used. However, you must cover the bottom with a towel. Jars that touch the bottom of the pan directly can break during processing. You can also cover the bottom of the kettle with a small cooling rack. I have known people to wire canning jar rings together to make a sort of trivet for the bottom of a stock pot.
Pressure canners for use in the home were extensively redesigned beginning in the 1970’s. Models made before the 1970’s were heavy-walled kettles with clamp-on or turn-on lids. They were fitted with a dial gauge, a vent pipe in the form of a petcock or covered with a counterweight, and a safety fuse. Most modern pressure canners are lightweight, thin-walled kettles; most have turn-on lids fitted with gaskets. At least one style is still made with heavy cast aluminum, has screw-down knobs around the canner and does not have a gasket, however.
Modern pressure canners have removable racks, an automatic vent/cover lock, a vent pipe (steam vent), and a safety fuse. Use only canners that have the Underwriter’s Laboratory (UL) approval to ensure their safety.
Today’s pressure canner may have a dial gauge for indicating the pressure or a weighted gauge, for indicating and regulating the pressure. Weighted gauges are usually designed to “jiggle” several times a minute or to keep rocking gently when they are maintaining the correct pressure. Read your manufacturer’s directions to know how a particular weighted gauge should rock or jiggle to indicate that the proper pressure is reached and then maintained during processing. Dial gauge canners will usually have a counterweight or pressure regulator for sealing off the open vent pipe to pressurize the canner. This weight should not be confused with a weighted gauge and will not jiggle or rock as described for a weighted gauge canner. Pressure readings on a dial gauge canner are only registered on the dial and only the dial should be used as an indication of the pressure in the canner. One manufacturer now makes a dual-gauge canner; read the manufacturer’s user manual for information on when and how to use either the weighted gauge or the dial.
Pressure canners come deep enough for one layer of quart or smaller size jars, or deep enough for two layers of pint or smaller size jars. The USDA recommends that a canner be large enough to hold at least 4 quart jars, upright, to be considered a pressure canner for the USDA published processes. Smaller pressure cookers are NOT safe for use as pressure canners.
To prepare a pressure canner add several inches of hot water in the bottom of the canner that has a rack in the bottom. The canner will usually come with specific directions or a fill line. Some will have a specific amount of water that is added, like 3 or 4 quarts. Water will not cover your jars in pressure canning the way it does in water bath canning. After jars are added to the canner the lid is secured and the heat is turned on. Once steam starts to come out of the vent on top, the canner is vented for 10 minutes. The gauge is applied and the canner will start to increase in pressure. When proper pressure is attained timing begins.
To know when proper pressure is attained, you will just look at your gauge- if your pressure canner has a dial gauge. When using a weighted gauge, pressure is achieved when the weight begins to rock gently. Once you get up to pressure, you will be able to turn the heat down a little. Be careful not to reduce heat too much. If you go below the proper pressure, you have to get back up to pressure and start the timing over.
When the timed process is completed, turn off the heat, remove the canner from the heat (electric burner) if possible, and let the canner cool down naturally. (Lift the canner to move it; do not slide the canner. It is also okay to leave the canner in place after you have turned off the burner. It is better to do so than to let jars inside the canner tilt or tip over if the canner is too heavy to move easily.)
While the canner is cooling, it is also de-pressurizing. Do not force cool the canner. Forced cooling may result in food spoilage. Cooling the canner with cold running water or opening the vent pipe before the canner is fully depressurized are types of forced cooling. They will also cause loss of liquid from jars and seal failures. Forced cooling may also warp the canner lid. When the pressure is back down to zero, wait another few minutes before removing the lid. Always remove the lid away from you- the steam in the canner could burn you.
Prepare foods for canning in enamel, non-stick or stainless steal pans. Never use aluminum or copper, or enamel cookware that has chips.
Today, lids are two pieces consisting of the ring and a flat lid with a rubber ridge. Lids should be prepared according to the manufacturer’s instructions. Some ask you to boil them, others may just ask you to wash them and hold in warm water until ready to use. The rings can be used over and over, but the flat lids should only be used once. They may fail to seal if processed a second time. There are silicone lids, which can be used over and over. They are a little pricey, but you don’t have to replace them.
Jar-lifters are a handy tool to have. They allow you to place and remove the jars easily, with little risk of dropping them. They are available at many grocery stores and in cookware and department stores as well. A wide-mouth funnel (or canning funnel) is also handy when trying to ladle hot liquids into jars. Be sure to wipe off jar rims before putting the lid on to prevent food from causing the jars not to seal.
Screw the ring on firmly, but not too tight, or the jars will not seal properly. The term you will often hear is finger tip tight. Suggesting you tighten the ring using your fingertips only. That actually works well.
Jars removed from the water bath should be placed on a wire rack or on a towel to cool. You should hear them “plink” as the jars seal. Keep them away from drafts until cooled down. When completely cooled check to make sure that the jars have sealed. Press down on the middle. If the lid makes a “plink” noise it is not sealed. After jars have sealed and cooled remove ring, wipe with a damp cloth and store in cupboard until ready to use. I like to put dates on my jars, so I know when I canned them.
Always start with top quality produce. Bruises and blemishes will lead to spoilage. Small blemishes can be cut off, but be sure to remove all areas of spoilage.
If you are canning tomatoes and have a lot of imperfect fruit you are better off trimming off any bad spots and using this produce in recipes that will be frozen rather than canned.
When canning, always use canning salt or pickling salt. Iodized salt will cause an off-flavor in canned foods. Non-iodized salt can be used in a pinch. Sea salts contain minerals that will make liquids cloudy.
When using older canning books always check with your local Extension Office or the USDA for most current information and canning times. Periodically, times are changed or ingredients are adjusted for maximum safety. If you have old family recipes also check with your local Extension Office to find out if the recipe is still considered safe. You can also email NCHFP with questions about the safety of your recipe.
Never can in an oven. There are no safe canning times for home canning in ovens. Plus, thermal shock can cause the jars to shatter.
Nothing beats planning. When getting ready to can read the recipe all the way through and get all your equipment out. It is often easier and more fun to can with a friend or two. The extra hands always come in handy and when time is critical the extra help will make errors less likely.
In tomato-based products herbs can be added for flavor but do not randomly start adding other vegetables (like onion, peppers etc.). They will reduce the acidity and may make the product unsafe to can in a water bath.
When you do follow the proper rules, home canning is very safe and fun, too. It is a way of preserving your garden produce to enjoy all year long. Homemade jams and jellies make lovely, thoughtful gifts.
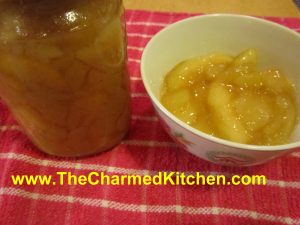
Apple Pie Filling
While I think the best pie is made with fresh apples, I also like making and canning my own apple pie filling. It is a handy way for me to enjoy local apples throughout the year. It is also a whole lot better than any commercial pie filling I have tried. Loaded with plenty of big chunks of apples and seasoned with cinnamon and nutmeg- I think it the next best thing to fresh apples for baking.
I am picking up a couple of bushels of apples this weekend, so I know I will be using some of them to make pie filling.
I use my canned filling to make pies, but I also use it for kolachy, blintzes, cakes and more.
The hard part, for some, is getting a hold of Clear Gel. It is a special type of cornstarch. I buy mine on line, but you can find it in stores where the Amish shop. Clear Gel stays thick, even if it is reheated. Regular cornstarch will not.
Here is the recipe I use. You can tweak the seasonings to suit your own taste, but keep in mind that spices sometimes get stronger when canned, so don’t go too crazy!!
Apple Pie Filling
6 qts. apples, sliced and blanched
5 1/2 c. sugar
1 1/2 c. Clear Gel- modified cornstarch available on line and in Amish stores
1 T. cinnamon
1 t. nutmeg
2 1/2 c. cold water
5 c. apple juice
3/4 c. lemon juice
If apples lack tartness use an additional 1/4 cup of lemon juice. Wash, peel and core apples and cut into 1/2 thick slices. Place in water treated with either lemon juice, citric acid or ascorbic acid to prevent darkening. Remove from solution and drain well. Blanch in boiling water- 2 quarts at a time- for 1 minute. As you finish each batch place in a bowl and cover to keep warm. In large pot combine sugar, Clear Gel, cinnamon, nutmeg, water and apple juice. Stir over medium heat until mixture begins to bubble and thicken. Add lemon juice and boil 1 minute. Add drained apples and stir gently to combine. Ladle into hot, clean jars leaving 1 1/2 inches of headspace. Remove air bubbles. Wipe rims and adjust lids. Process in a boiling water bath- pints or quarts for 25 minutes. After the time is up, turn off canner and let jars sit in water bath for 5 minutes before removing. This will reduce the chance of siphoning. Makes 7 quarts or 14 pints.
For only 1 quart
3 1/2 c.apples
3/4 plus 2 T. sugar
1/4 c. Clear Gel
1/2 t. cinnamon
1/8 t. nutmeg
1/2 c. cold water
3/4 c. apple juice
2 T. lemon juice
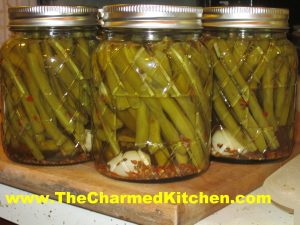
Dilly Green Beans
In a pickle making class last night, we made dilly green beans. These are one of my favorite pickles. I like pretty much any type of pickle, and I love green beans, so no surprises there. They have a great, tart flavor.
If you have an abundance of green beans, you might consider making a batch of these to enjoy year round. Green beans are also at local farm markets now, and are at their peak.
These are great just eaten like other pickles, as a side. But they are also a fun addition to a Bloody Mary- or so I am told. I also like to serve them as an appetizer with cheeses, crackers and olives. Who am I kidding? I just eat them right out of the jar.
While the recipe calls for 1/4 teaspoon of red pepper flakes per jar- feel free to add more, for a spicier version.
Dilly Green Beans
4 lbs. table‑perfect whole green beans
1 3/4 t. crushed dried hot red pepper
3 1/2 t. dried dill seed or seven fresh dill heads
7 cloves of fresh garlic, peeled
5 c. vinegar
5 c. water
1/2 c. less 1 T. pickling salt
Wash beans thoroughly. Remove stems and tips, and cut them as much as possible in uniform lengths to allow them to stand upright in canning jar, coming to the shoulder of the jar. have jars clean and very hot, and lids and sealers ready in scalding water. In each jar place one dill head or 1/2 t. dill seed, add one garlic clove, and 1/4 t. crushed hot red pepper. Pack beans upright in jars, leaving 1 inch of head room. Heat together the water, vinegar and salt. When the mixture boils, pour it over the beans, filling each jar to 1/2 inch from the top. Run a plastic knife down and around to remove trapped air. Adjust lids, and process in a boiling water bath for 10 minutes, start timing after the water in the canner returns to a boil. Remove jars. …Wait at least 2 weeks for these beans to develop their flavor. Yield: 7 pints
Source: Putting Food By
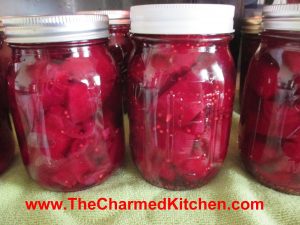
Spicy Pickled Beets
Beets are just one of those foods. People seem to love them, or hate them. I am a beet lover. I enjoy them in all sorts of dishes. The nice thing about making a batch of pickled beets is being able to open up a jar whenever you want.
This recipe is a pretty classic way to preserve beets. The brine is a sweet and sour mixture with pickling spice, salt and red pepper flakes for added flavor. You could play around with the seasonings a little. Maybe adding more heat.
Pickled beets are great served as a side dish with all sorts of foods. I like them served with cheeses, crackers and other pickled foods as an appetizer. If you don’t want to can them- you can store them in the fridge for up to a couple of months.
Spicy Pickled Beets
4 lbs. beets, smaller sizes preferred
3 c. thin sliced onions
2 c. sugar
2 T. Pickling spice
1 T. canning salt
2 t. red pepper flakes
2½ c. cider vinegar- 5% acidity
1½ c. water
Wash and trim beets, leaving a couple inches of stem attached. Cook in boiling water until tender. Cool beets down so you can handle them. Peel beets and cut into 1½- 2-inch diameter pieces, if beets are large. Leave whole if beets are small. Set aside. Combine the rest of the ingredients in a pot and bring to a boil. Reduce to simmer and simmer 5 more minutes. Add beets and cook a few minutes, until beets are warmed through. Ladle hot beets into clean pint jars, leaving ½ inch headspace. Ladle in hot liquid, leaving ½-inch headspace. Remove air bubbles, wipe off rim, screw on lid to finger-tip tightness. Repeat with remaining beets and liquid. You should fill about 5 pint jars. Process in a boiling water bath for 30 minutes. Turn off the heat and leave jars in water bath 5 minutes before removing to counter to cool. Yield: 5 pints.
Adapted from The Ball Blue Book
Blueberry Pie Filling
I recently came across a wonderful price on blueberries. A really wonderful price. Being the thrifty person that I am, I stocked up. I put some in the freezer and placed some in vodka for liqueur. I made cupcakes and syrup, muffins and pancakes. I have been eating plenty of them, too. I decided to use some of them to make pie filling.
There is something very satisfying in making your own pie filling. It is so much better than anything you would find in a can. It is a convenient ingredient to have on hand, too. A good quality pie filling can be turned into any number of desserts in no time- even pie!!
You do need to have Clear Gel to can pie filling. It is modified cornstarch. You can’t use regular cornstarch and you can’t use other thickeners. You could just can the berries, then thicken them later, but the Clear Gel makes it so much more convenient to use. I just order mine online, but it is available in some stores- primarily in Amish communities.
I opted to can my filling in pints. I find that size more convenient for me. Let the jars stay in the canner 5 or 10 minutes after they finish processing. It will reduce siphoning. Some foods, hot in the jars- will leak out of removed from the heat too quickly. Pie fillings are known for issues with siphoning.
Blueberry Pie Filling
6 qts. Blueberries
6 c. sugar
2 1/4 c. Clear Gel (modified cornstarch, not regular cornstarch)
7 c. water
1/2 c. lemon juice
Wash and drain berries. In large sauce pot combine sugar and Clear Gel. Stir in water and cook on high heat until mixtures bubbles and thickens. It is going to be really thick- don’t panic, just keep stirring so it won’t stick. Add lemon juice and boil 1 minute, stirring constantly. Fold in berries and ladle in hot, clean canning jars immediately. Leave 1/2 -inch headspace and remove any air bubbles with a knife. Wipe rims clean and put on lids. Place jars in boiling water bath and process for 30 minutes. Start timing when water returns to the boil. Turn off heat and let jars sit in the water bath 5-10 minutes before removing to counter to cool. Cool jars on counter on rack or towel, free from drafts. Check seals next day. remove rings and wipe down jars with a soft, damp cloth before storing. Makes 14 pints or 7 quarts.
Source NCHFP
Can You Can Yellow and Orange Tomatoes?
I have been asked several times in canning classes, if it is safe to can yellow or orange tomatoes. We have all heard that yellow and orange tomatoes are lower in acid, so are they still safe to can? The answer is yes, they are safe to can.
Why?
In spite of you might have been told, orange and yellow tomatoes are not acid free or low acid.
Truth is, that yellow and orange tomatoes have just as much acid as red tomatoes.
Well, for the most part at least. In terms of acidity or Ph, yellow and orange tomatoes are about average. Some cultivars have more, some less. Bottom line is that all tomatoes are safe to can- as long as you acidify them.
Adding salt is optional, and is for flavor only. Use canning/pickling salt or non-iodized salt when canning.
Here are some popular canning recipes to get you started.
All follow the NCHFP (National Center for Home Food Preservation) recommended procedures.
Crushed Tomatoes
Peel and core tomatoes , trim off any bad spots and quarter. Place about 1/4 of your prepared tomatoes in the kettle and cook, stirring constantly over high heat. Use a potato masher to crush tomatoes and extract juices. Once they are boiling add remaining tomatoes, stirring constantly. You don’t need to crush these tomatoes. Bring to a boil and boil for 5 minutes. In clean, hot jars add needed acidity listed below. You can also add 1 teaspoon of canning salt per quart if desired. Ladle in hot tomatoes, leaving 1/2-inch headspace. Wipe jar rims clean and adjust lids. Process in boiling water bath. Pints 35 minutes, quarts, 45 minutes. 1,000-3000 ft over sea level add 5 minutes. Twenty-two pounds of tomatoes will yield about 7 quarts of tomatoes.
Whole Tomatoes in Juice
Use any extra tomatoes to make juice. I use tomatoes that are too big to can whole, or those that have blemishes that need to be trimmed. Cut up clean, unpeeled tomatoes in a kettle and cook, stirring often until tomatoes are mushy. Strain mixture, pressing on solids or run through a food mill or tomato juice extractor. Set aside,. Place peeled, whole tomatoes in kettle and add enough tomato juice to cover them. Heat to a simmer and simmer gently 5 minutes. Add lemon juice or citric acid to jars, using amounts listed below. Add salt, if desired. Add tomatoes and cover with hot juice, leaving 1/2 -inch headspace. Wipe rims and adjust lids. Process both pints and quarts 85 minutes in a boiling water bath.
Tomato Juice
Wash, stem and trim bruises off tomatoes. Cut into chunks. Add about 1 pound of tomatoes to kettle and bring to a boil while crushing. Continue to add additional cut up tomatoes slowly, keeping mixture boiling. This will keep the juice from separating later. Simmer an additional 5 minutes once the tomatoes have all been added. Press mixture through a strainer , sieve or food mill to remove seeds and skins. Add lemon juice or citric acid to jars according to directions listed below. Add salt if desired. Return juice to boil and add to prepared jars leaving 1/2-inch headspace. Wipe rims and adjust lids. Process n a boiling water bath pints 35 minutes and quarts 40 minutes. Add 5 minutes processing time at elevations between 1,001 and 3,000 ft.
Tomato Sauce
Prepare as for juice. After juice is made return to pot and start cooking down to desired thickness. You’ll lose about 1/3 of the volume for thin sauce and 1/2 of the volume for thick. Add lemon juice or citric acid to prepared jars as described below. Add salt if desired. Add boiling sauce leaving 1/4 -inch headspace. Wipe rims and adjust lids. Process in a boiling water bath 35 minutes for pints and 40 minutes for quarts. Add five minutes at 1,001-3,000 ft. elevation.
Acidity and Tomatoes
Tomatoes must be acidified before canning. When canning either whole, crushed or juiced tomatoes you must add either 2 T. bottled lemon juice per quart or 1/2 t. citric acid . For pint use 1 T. lemon juice or 1/4 t. citric acid. You can also use 4 T. (5%) vinegar per quart, but it will alter the flavor and is not recommended. You can add a little sugar to offset the flavor, if you like.
Beet Relish
Beets are one of those foods that people either love- or hate. I love beets, and enjoy them in all sorts of dishes. One of my favorite beet recipes is this relish.
It is a great way to preserve beets to enjoy all year long. Beets are in season, and I thought I would share this recipe. I love this relish, and make several batches every year.
Beet relish is like a sweet pickle relish, only made with beets. You can add it to sandwiches or salads, and if you put some in your chicken or pasta salads, it turns them the nicest shade of pink. Yummy on a hot dog or hamburger, too.
I like to serve beet relish with cheeses and crusty bread as an appetizer. If you love beets like I do, you might want to try it.
While I have always made this relish with traditional, red beets, you can also make it with golden beets, if you prefer.
Beet Relish
1 qt. chopped cooked beets, about 12 medium
1 quart chopped cabbage, about 1 small head
1 c. chopped onion
1 c. chopped red sweet pepper
1 1/2 c. sugar
1 T. prepared horseradish
1 T. canning salt ( non-iodized)
3 c. vinegar, white or cider- I prefer cider vinegar
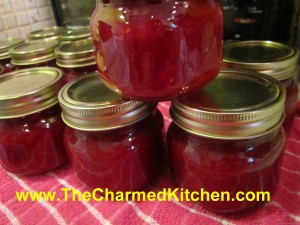
Combine all ingredients in a pot and bring to a boil. Simmer 10 minutes. Bring mixture to a boil. Pack hot relish into hot jars leaving 1/4 -inch head space. Seal jars and process in a boiling water bath 15 minutes. Yield about 10 half-pint jars.
Source: Ball Blue Book
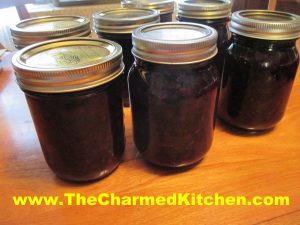
Homemade Blackberry Jelly
I was recently gifted some beautiful blackberries. I was busy, so a lot of them ended up in the freezer to use and enjoy later.
I decided to use some of them to make blackberry jelly. These were smallish berries, and I knew they had a lot of seeds in them. I could make seedless jam, but if I were going to the bother of getting out the seeds, I figured I could also make jelly.
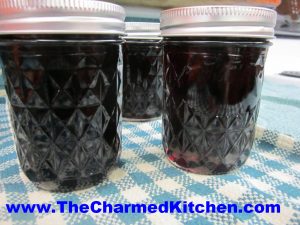
It came out perfect. Sweet and tart, and full of the flavor of summer. Jelly was a little more work than jam, but worth every bit of effort.
I first cooked the berries to extract the juice, then used that juice to make the jelly. While it was a hot day to be making jelly- the aroma in the house made it all worth it.
I also saved the seeds and solids. I placed them in a jar and covered them with vodka. I can strain it in a few weeks, sweeten it a little, and I’ll have some blackberry liqueur as a bonus.
Blackberry Jelly
3 quarts blackberries*
1/2 c. water
1 box powdered pectin
5 c. sugar
Place the berries in a pot and use a potato masher to crush the berries. Add the water and simmer until the berries are soft. Strain out the solids and then pour the juice through several layers of cheesecloth to clarify. You should end up with about 4-5 cups of juice. Place juice in a pot and add the pectin. Bring mixture to a boil stirring constantly. Add the sugar and return mixture to the boil, again stirring constantly. Boil for 1 minute. Remove from heat and skim off any foam. Ladle mixture into clean, hot jelly jars and fill to 1/4 inch from the top. Seal and repeat with remaining jelly. Place in a boiling water bath and process 10 minutes. Makes 6-7 half pints.
* Best if some of the berries are a little under ripe. Under ripe fruit is higher in natural pectin.
Cinnamon Vanilla Blueberry Jam
It seems to be a great year for blueberries. The ones in my yard are starting to ripen, and I have more than ever before. So far, the netting is keeping birds and chipmunks away.
Prices at the market have been good, too. I have been eating berries, freezing berries and made some blueberry liqueur. I also wanted to make jam.
I often make blueberry jam with a little added vanilla, but decided to add cinnamon this time, as well. The result was so tasty.
I used the basic berry jam recipe from the Ball Blue Book, but I added both vanilla and a cinnamon in this batch. The flavors worked really well together. I am making more of this one, for sure. Enjoy.
Cinnamon- Vanilla Blueberry Jam
9 c. crushed blueberries
6 c. sugar
1 T. ground cinnamon
1 T. vanilla
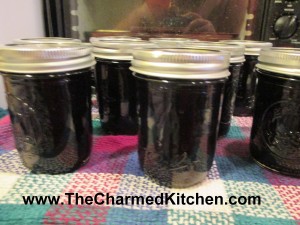
Pick over berries getting any stems. Rinse , drain and crush. Place berries, sugar, cinnamon and vanilla in a large saucepan and heat slowly until sugar has melted. Bring up heat and cook over high heat, stirring often. Stir more as mixture thickens. It will take 20-30 minutes to get to the gel stage. To check for gel stage dip a metal spoon in blueberry mixture and hold it up sideways. Allow mixture to drip off and when two drops come together to form one larger drop- you are at gel stage. You can also use a candy thermometer. When the jam reaches 220 degrees- or 8 degrees over the temp of boiling water- you are at gel stage. Ladle hot jam into clean, hot jelly jars. Fill to within 1/4 inch of the top. Wipe rims and place on lids prepared according to directions on box. Screw lids comfortably tight. Place jars in boiling water bath with water at least 1-2 inches over the tops of the jars. Cover pot and start timing when water returns to the boil. Process 15 minutes. Remove jars to towel, cutting board or cooling rack in a draft-free location. Check seals once jars are cooled. Makes 8-10 jelly jars.
Source: Adapted from Ball Blue Book
