Goblin Goo Drink
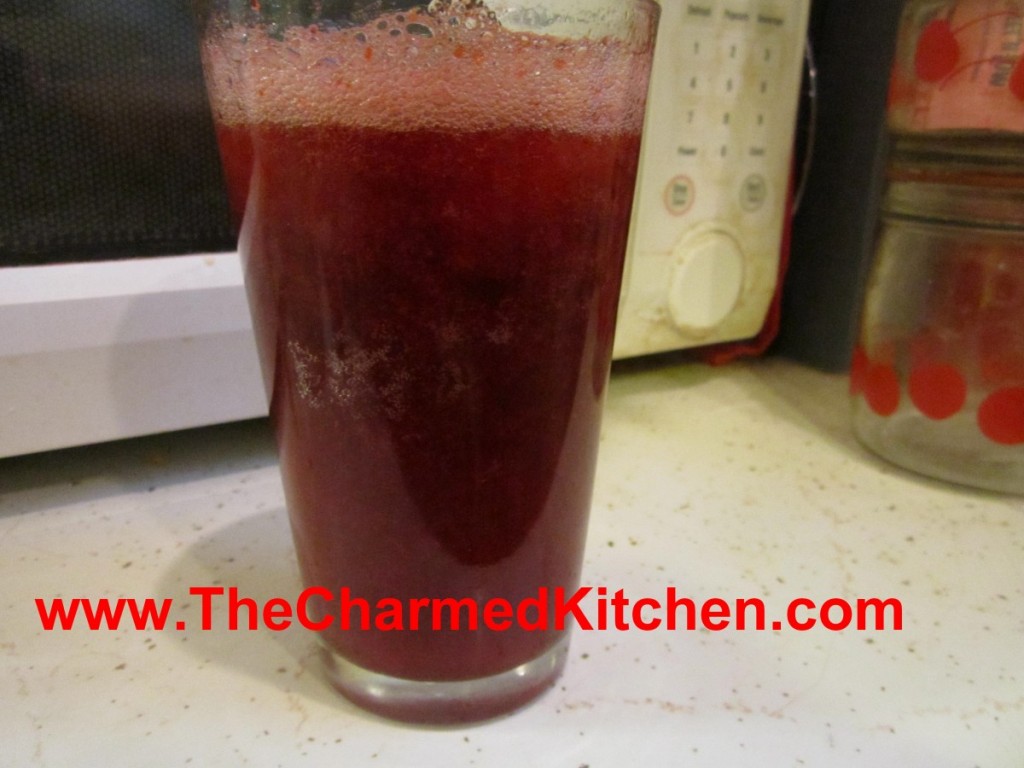
If you want a fun beverage to serve for Halloween, try this Goblin Goo Drink. It’s easy to make and will give guests a start. It’s fun for kids and adults.
The secret is Jell-o. Make whatever flavor Jell-o you like. Once it is firm, mash it with a fork into small pieces.
Place some of the mashed up Jell-o in a glass and add ice and whatever beverage you like. I used cherry Jell-o with sour cherry soda. The Jell-o is invisible that way.
When your guests take a drink, they get little gobs of Jell-o in every sip. You can also play with color combinations for fun. Grape Jell-o with orange soda looks like little black globs in the drink. Kids love it.
You can make it with Jell-o shots, for the grown-ups. Or add the mashed up Jell-o to adult beverages. You can also add the Jell-o to a punch bowl or pitcher of drinks.

Mash Jell-o with a fork

Add some Jell-o to the glass before adding ice and soda
Bat Wings
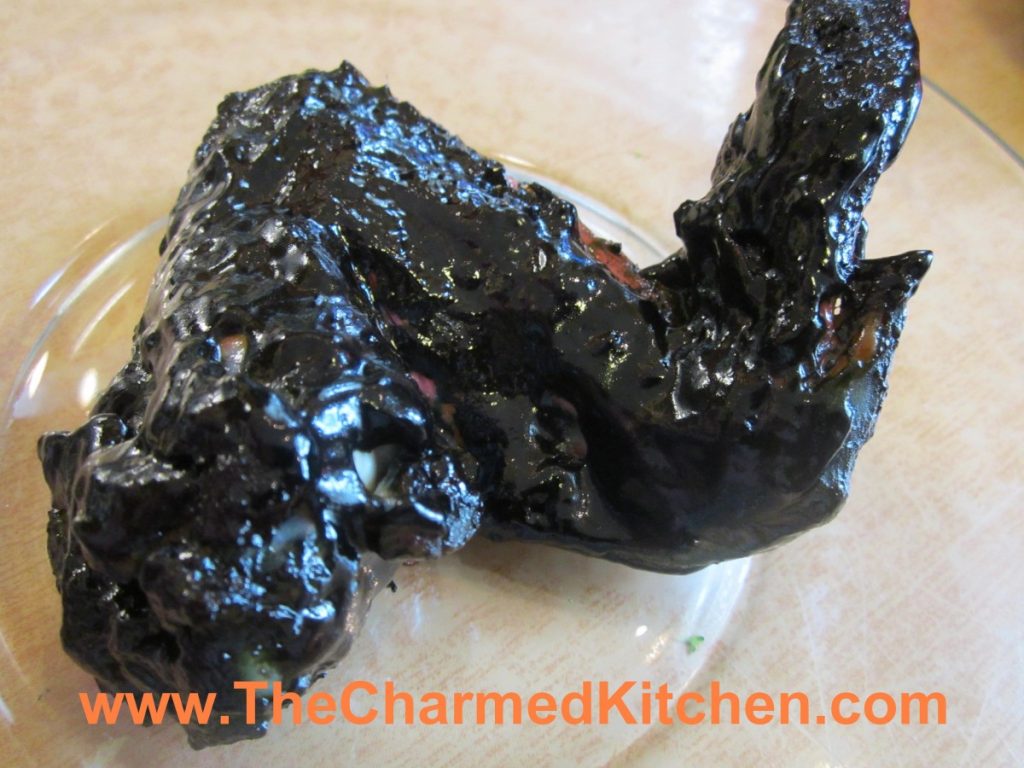
With Halloween fast approaching I thought I’d share this recipe for bat wings. OK, not really bat wings, but you already knew that. I just add black food coloring to barbecue sauce and use it to color chicken wings.
I made a batch for a Halloween party a few years ago and someone actually asked if they were real bat wings.
A word of warning- when you use black food coloring it will transfer to you. No matter how careful you are when you eat the wings, you’ll end up with purple fingers. Also, for the best effect, keep the wings intact- no trimming off of the tips. You can separate the drums before serving, if you like. Makes eating a little easier. They look pretty cool when set out on the table. Creepy- but very tasty.
Bat Wings
2-3 lbs. whole chicken wings
salt and pepper
1 c. barbecue sauce- store bought or home made
black food coloring- handle carefully- it stains
Place chicken wings in a roasting pan, season with salt and pepper and bake in a preheated 400 degree oven for 30 minutes. Meanwhile in medium bowl combine sauce with food coloring. Add just a little black food coloring at a time. Too much will alter the flavor of the food. Remove wings from the oven and dip them in the bowl of sauce. Turn to coat. Place wings on a clean baking sheet and return to the oven. Bake an addition 45 minutes. You can baste them with additional sauce during the baking, if you like. Place on a serving platter and provide plenty of napkins.
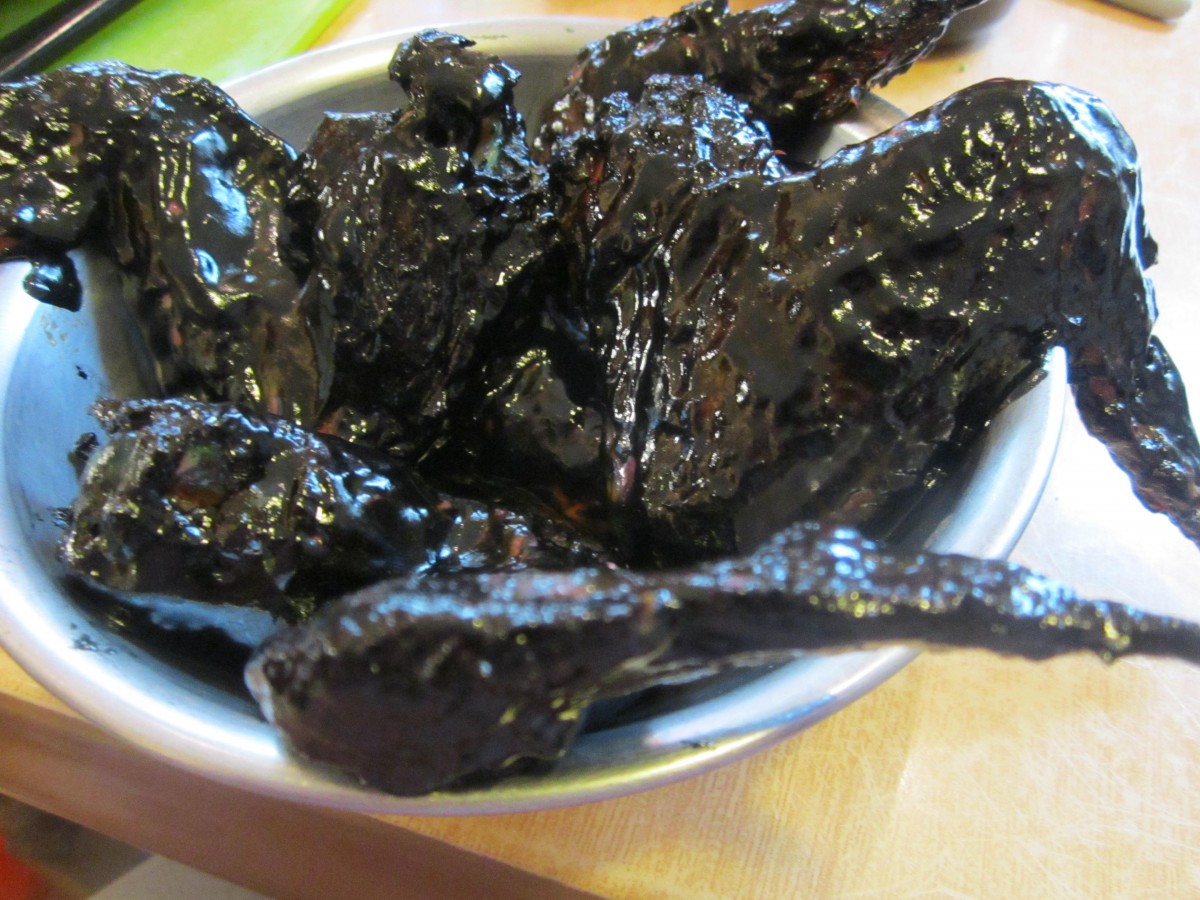
A pile of “bat” wings
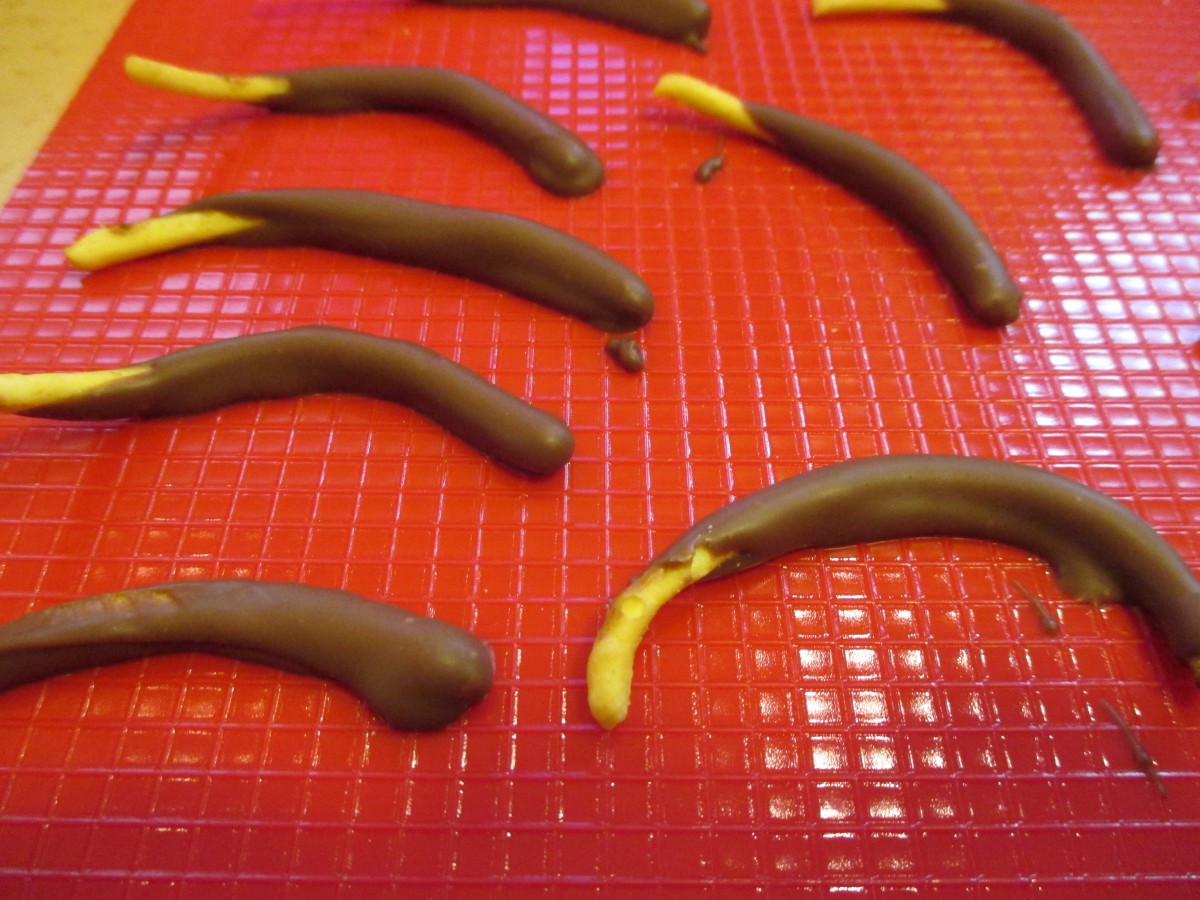
Candy Spiders
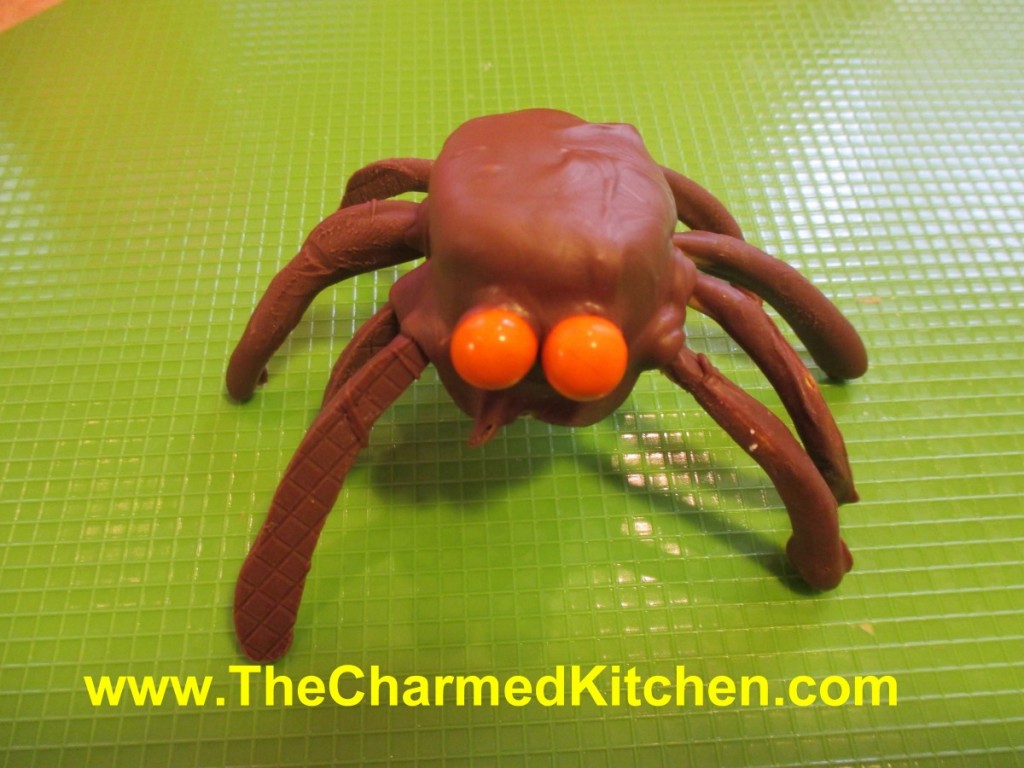
If you are looking for a quick spooky decoration/treat idea, you might want to make some candy spiders. These are about the size of a tarantula. Super simple, and kids can make them, too. You only need a few ingredients.
The body is made from marshmallows, the legs are chow mein noodles and the eyes are small candies. Sixlets work well.
I used melting chocolate, but you can use any kind of chocolate you like. To start, melt some chocolate. Dip the chow mein noodles in the chocolate and tap gently to remove excess. I leave one end un-dipped to make it easier to stick in the marshmallow later. Allow to harden up before going to the next step. I set them on a flexible cutting board, but wax paper is good, too. You have to peel them off later, a flexible surface is best. You’ll need 8 for each spider- so be sure to make enough. Allow for breakage. Set a marshmallow flat side down and poke 4 holes in each side, 8 total. I used a bamboo skewer. Stick a noodle “leg” in each hole. Spoon chocolate over the marshmallow until coated. Whatever drips off can be re-melted and used again. While the chocolate is still soft, press 2 candy eyes into place. Hold them for a minute to be sure they are secure. Now, you can decorate cakes with them, use them on a dessert tray- or just eat them.
Chow mein noodle legs

Insert legs into marshmallow
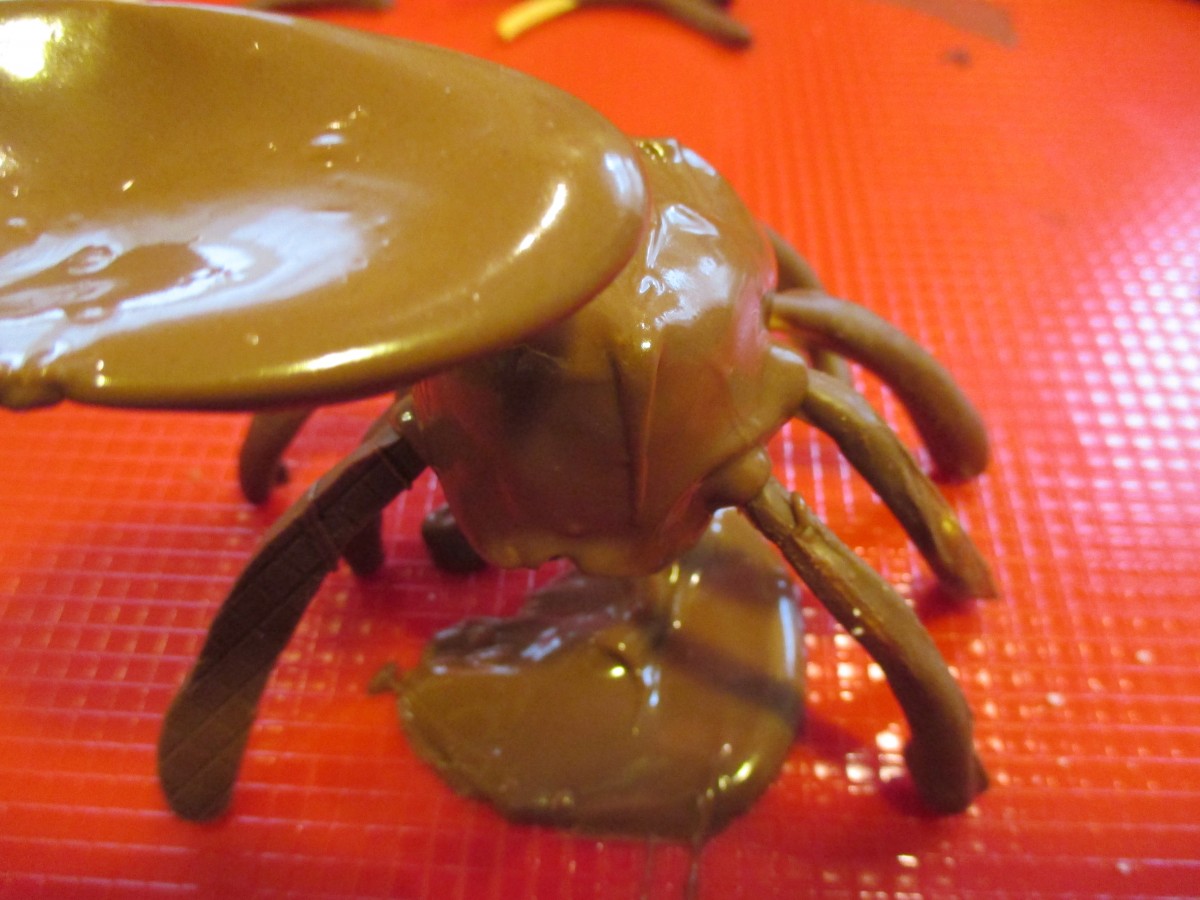
Spoon chocolate over the marshmallow to cover it.
Cheesy Pumpkin Dip
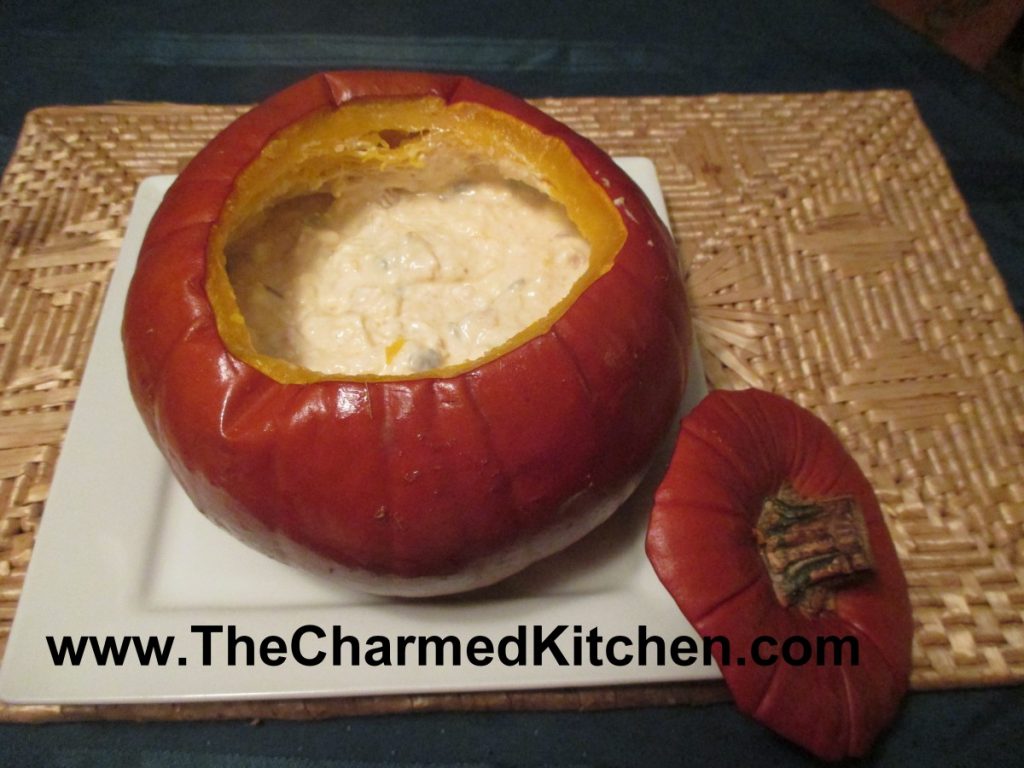
This is a pretty way to serve dips this time of year. The dip bakes inside the pumpkin- and the pumpkin bakes, too. It is served hot. Fun for Halloween, Thanksgiving, or just movie night with the family.
It really is simple and could be filled with any number of combinations of cheesy goodness. I have included the recipe I used in the picture. I also included my recipe for Spinach and Artichoke Dip, to give you another option.
You could also add a hot cheese sauce and serve like fondue, with long forks and pieces of bread.
You just get a pie pumpkin, about 2-3 lbs. Cut off the top to make a lid and scoop out the seeds, like you would if you were making a Jack-o-Lantern. Wipe off the outside and then just fill it up with the dip mixture. Put the lid back on, bake for an hour, and you are good to go. The fun part is scraping some of the cooked pumpkin in with the cheese dip. More detailed directions follow.
So here is the recipe for making the cheesy filled pumpkin. I think it is simple enough to serve anytime, not just on a holiday. Enjoy!!
“Pumpkin” Cheese Dip
Directions: Preheat oven to 350 degrees. Cut off top of pumpkin. Cut in at an angle, so top will fit like a lid and not fall in. Set top aside. Scoop out seeds and clean out any stringy bits*. Set pumpkin on a baking sheet. Combine cheese filling of your choice and place inside the pumpkin. Place the top of the pumpkin back on the pumpkin, and place in oven. Bake for 1 hour. Remove pumpkin and place on heat proof dish. I used a glass pie plate. Remove lid. Serve with crusty bread or crackers.
Smoky Cheese Dip
8 oz. cream cheese, cubed
4 oz. extra sharp cheddar cheese, shredded
8 oz. bacon, cooked and crumbled
½ c. sour cream
¼ c. mayo
¼ c. chopped parsley
½ t. each cumin and smoked paprika
Pinch of nutmeg
½ c. hulled pumpkin seeds
In medium bowl, stir together all ingredients, except the seeds. Place this mixture in the pumpkin when ready to bake. Don’t add the pumpkin seeds until right before serving. Stir them in a little, if you like.
Another nice choice…….
Spinach and Artichoke Dip
1 (12-14 oz.) can artichoke hearts, drained and coarsely chopped
10 oz. package frozen spinach, thawed and squeezed dry
8 oz. cream cheese, cubed
4 oz. shredded cheddar cheese
½ c. diced onion
¼ c. Italian dressing
Dash of hot sauce
In medium bowl, combine dip ingredients, stirring to combine. Place in pumpkin when ready to bake.
* You can rinse off the seeds, lightly salt them and toast them, if you like. Then serve with the pumpkin dip. If you aren’t interested in eating them- please put them outside for the birds to eat.
Flaming Ghost Cake
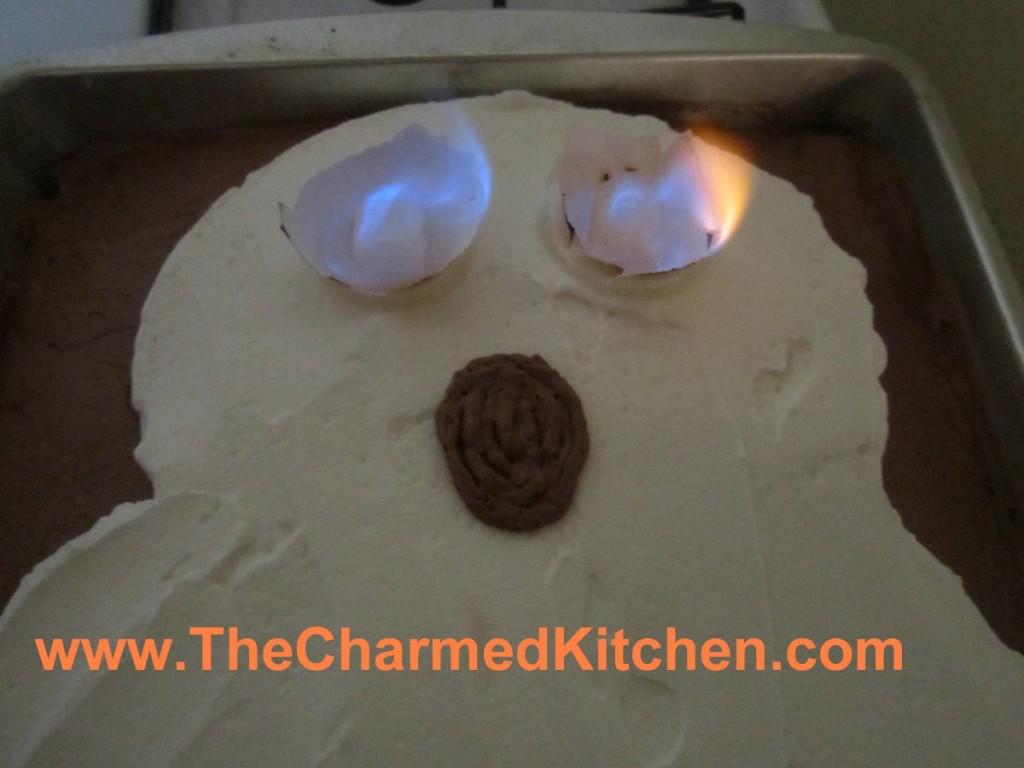
I have posted this recipe before, but thought it might be a good time to post it again. This one is fun for Halloween. You start with a baked 9×13-inch cake. Frost it with chocolate frosting and then use white frosting to draw a ghost on the cake.
You can make all sorts of images- cats, bats, pumpkins. When ready to serve the cake, the eyes are set on fire. Fun effect. Kids and grown-ups both will get a kick out of it.
Just be sure to have proper adult supervision for the kids. The picture doesn’t do it justice. Very cool blue flames. Don’t forget to turn down the lights!
Flaming Ghost Cake
1 prepared 9×13- inch cake, any flavor
2 c. chocolate frosting, I prefer homemade
1 c. vanilla frosting, I prefer homemade
3 oz. semi sweet chocolate, optional
2 empty eggshell halves, washed well and dried
2 sugar cubes
Lemon extract
Frost cake with chocolate frosting, then spread vanilla frosting in the shape of a ghost. Melt chocolate in a small plastic bag. When chocolate is melted snip off the corner of the bag and use to outline ghost. Place eggshell halves in cake, round side down where the ghost’s eyes would be. Soak sugar cubes in lemon extract and place in eggshells. When ready to serve light sugar cubes and turn off the lights. Serve 12-16.
Variations: You can use the flaming eyes effect on cat shapes, pumpkins or even bats. Practice drawing the shape on paper before frosting the cake. If you bake a larger round cake the whole thing can be the pumpkin. Just frost it with orange tinted frosting.
Flaming Ghost Cake
I have posted this recipe before, but thought it might be a good time to post it again. This one is fun for Halloween. You start with a baked 9×13-inch cake. Frost it with chocolate frosting and then use white frosting to draw a ghost on the cake.
You can make all sorts of images- cats, bats, pumpkins. When ready to serve the cake, the eyes are set on fire. Fun effect. Kids and grown-ups both will get a kick out of it.
Just be sure to have proper adult supervision for the kids. The picture doesn’t do it justice. Very cool blue flames. Don’t forget to turn down the lights!
Flaming Ghost Cake
1 prepared 9×13- inch cake, any flavor
2 c. chocolate frosting, I prefer homemade
1 c. vanilla frosting, I prefer homemade
3 oz. semi sweet chocolate, optional
2 empty eggshell halves, washed well and dried
2 sugar cubes
Lemon extract
Frost cake with chocolate frosting, then spread vanilla frosting in the shape of a ghost. Melt chocolate in a small plastic bag. When chocolate is melted snip off the corner of the bag and use to outline ghost. Place eggshell halves in cake, round side down where the ghost’s eyes would be. Soak sugar cubes in lemon extract and place in eggshells. When ready to serve light sugar cubes and turn off the lights. Serve 12-16.
Variations: You can use the flaming eyes effect on cat shapes, pumpkins or even bats. Practice drawing the shape on paper before frosting the cake. If you bake a larger round cake the whole thing can be the pumpkin. Just frost it with orange tinted frosting.
Vampire Chasers- Cheesy Garlic Toast
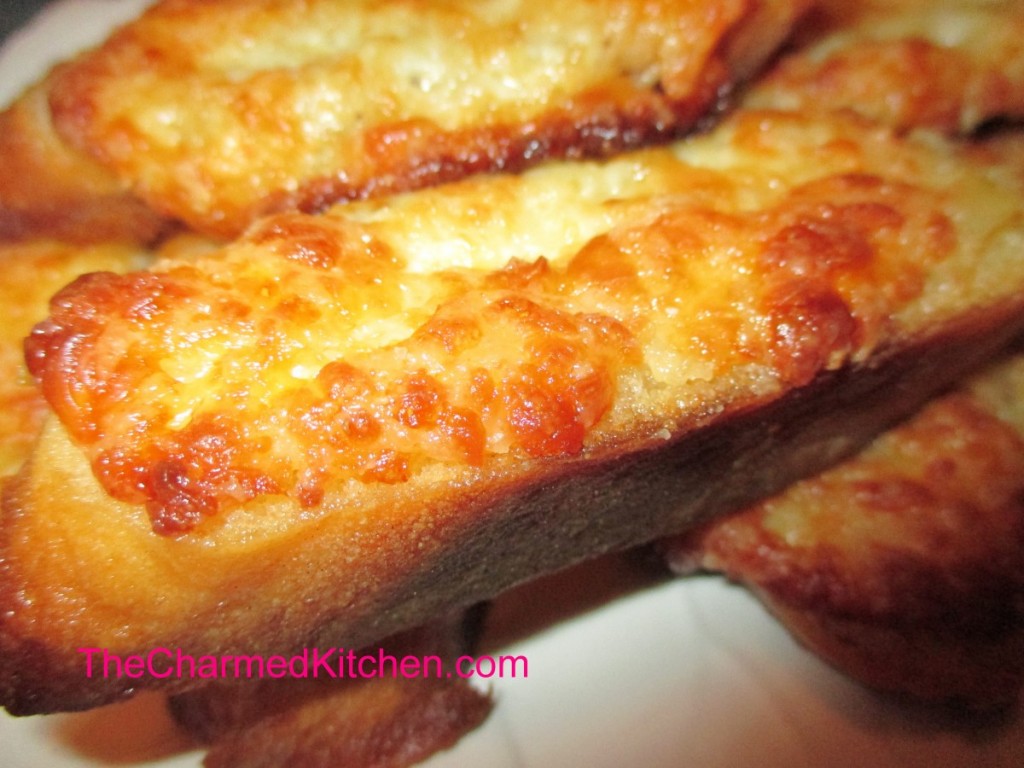
If you are concerned about keeping away vampires this Halloween, you might want to make this recipe for cheesy garlic toast. Garlic is widely accepted as a repellent for vampires- and a lot less messy than a stake through the heart.
This is one of my favorite appetizers. I make them a few times a year, but they are extra fun to serve at a Halloween party.
A mixture of garlic and onions are cooked in butter, then spread over the bread slices. That would be plenty for most garlic bread- but you take it up a notch with a cheesy/ mayo mix on top. They are baked for just a few minutes to get all toasty. These are always a hit. They can be served as an appetizer, or as a side with dinner. We had them last night with our mushroom barley soup.
Vampire Chasers
1 French baguette, cut into 3/4 inch diagonal slices
1 large onion, minced
8 cloves minced garlic
1/4 cup butter
2 cups shredded mozzarella cheese
1/2 cup grated Parmesan cheese
1 cup mayonnaise
Slice the French baguettes diagonally into 3/4 inch slices. In a medium skillet, over medium heat, melt the butter. Combine the onions and garlic in the skillet. Cook and stir until tender. Set aside to cool. In a mixing bowl, combine the mozzarella cheese, Parmesan cheese and mayonnaise. On a cookie sheet, arrange the French bread slices in a single layer. Spread the onion and garlic mixture on the bread slices. Spread the cheese and mayonnaise mixture over the onion and garlic mixture on the bread slices. Bake in a 400 degree oven for 10 minutes or broil about 5 minutes, until the cheese is bubbly and slightly browned. Serve immediately.
Pumpkin Cheese Dip
This is a pretty way to serve dips this time of year. The dip bakes inside the pumpkin- and the pumpkin bakes, too. It is served hot. Fun for Halloween, Thanksgiving, or just movie night with the family.
It really is simple and could be filled with any number of combinations of cheesy goodness. I have included the recipe I used in the picture. I also included my recipe for Spinach and Artichoke Dip, to give you another option.
You could also add a hot cheese sauce and serve like fondue, with long forks and pieces of bread.
You just get a pie pumpkin, about 2-3 lbs. Cut off the top to make a lid and scoop out the seeds, like you would if you were making a Jack-o-Lantern. Wipe off the outside and then just fill it up with the dip mixture. Put the lid back on, bake for an hour, and you are good to go. The fun part is scraping some of the cooked pumpkin in with the cheese dip. More detailed directions follow.
So here is the recipe for making the cheesy filled pumpkin. I think it is simple enough to serve anytime, not just on a holiday. Enjoy!!
“Pumpkin” Cheese Dip
Directions: Preheat oven to 350 degrees. Cut off top of pumpkin. Cut in at an angle, so top will fit like a lid and not fall in. Set top aside. Scoop out seeds and clean out any stringy bits*. Set pumpkin on a baking sheet. Combine cheese filling of your choice and place inside the pumpkin. Place the top of the pumpkin back on the pumpkin, and place in oven. Bake for 1 hour. Remove pumpkin and place on heat proof dish. I used a glass pie plate. Remove lid. Serve with crusty bread or crackers.
Smoky Cheese Dip
8 oz. cream cheese, cubed
4 oz. extra sharp cheddar cheese, shredded
8 oz. bacon, cooked and crumbled
½ c. sour cream
¼ c. mayo
¼ c. chopped parsley
½ t. each cumin and smoked paprika
Pinch of nutmeg
½ c. hulled pumpkin seeds
In medium bowl, stir together all ingredients, except the seeds. Place this mixture in the pumpkin when ready to bake. Don’t add the pumpkin seeds until right before serving. Stir them in a little, if you like.
Another nice choice…….
Spinach and Artichoke Dip
1 (12-14 oz.) can artichoke hearts, drained and coarsely chopped
10 oz. package frozen spinach, thawed and squeezed dry
8 oz. cream cheese, cubed
4 oz. shredded cheddar cheese
½ c. diced onion
¼ c. Italian dressing
Dash of hot sauce
In medium bowl, combine dip ingredients, stirring to combine. Place in pumpkin when ready to bake.
* You can rinse off the seeds, lightly salt them and toast them, if you like. Then serve with the pumpkin dip. If you aren’t interested in eating them- please put them outside for the birds to eat.
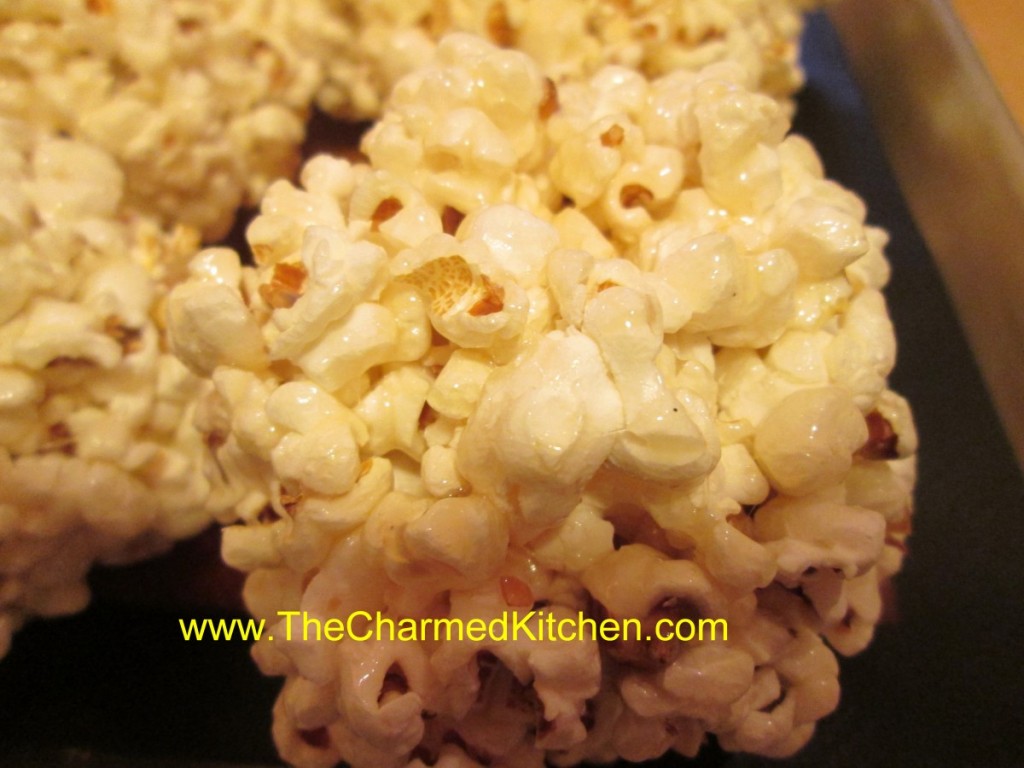
Homemade Popcorn Balls
I have fond memories of eating popcorn balls when I was a kid. One memory was during the summer. An amusement park near my home was famous for their popcorn balls. Every time we went there, we would end the day with popcorn balls.
The other memory was making our own, around Halloween. They seem to be a part of more than a few Halloween parties when I was younger.
I don’t make them often, but popcorn balls are always a special treat for friends and family. This recipe is pretty easy. Kids, supervised, could help make them. You just have to make sure the mix cools down enough before you let them form the popcorn into balls.
I am a bit of a purist and enjoy them plain, but you can add Halloween themed candies to the mix, to dress them up for a party. Candy corn or black and orange M&M’s would both work.
The recipe calls for corn syrup. If you don’t want to use corn syrup, my recipe for a corn syrup substitute, (sugar syrup) is listed below.
Homemade Popcorn Balls
9 c. popped popcorn
1 c. sugar
1 T. butter
1 T. vanilla
1 c. corn syrup*
Place popcorn in large bowl and set aside. Combine sugar, butter, vanilla and corn syrup in a saucepan. Heat and boil until thick, about 4 minutes. Pour over popcorn. Stir until well coated. Let cool until safe enough to handle. With buttered hands form mixture into balls. Store wrapped tightly in plastic wrap until ready to eat. Best eaten within a few days of making. Makes about 8.
*If you don’t have corn syrup- or don’t want to use it here is a way to make a substitute for it.
Sugar Syrup- corn syrup substitute
3 cups granulated sugar
1 cup Water
1/2 tsp. Cream of Tartar
1/4 t. salt
Combine ingredients in a large saucepan. Bring to a boil and cover the pot. Reduce to a simmer and cook covered for 5 minutes. Uncover and cook to soft-ball stage. Stir frequently.
Soft ball stage occurs at 235-245 degrees. This stage can be determined by dropping a spoonful of hot syrup into a bowl of very cold water. In the water, use your fingers to gather the cooled syrup into a ball. If it has reached soft-ball stage, the syrup easily forms a ball while in the cold water, but flattens once removed from the water.
Remove from heat. Cool and store at room temperature. It will keep well for a month or two.
“Bat” Wings
With Halloween fast approaching I thought I’d share this recipe for bat wings. OK, not really bat wings, but you already knew that. I just add black food coloring to barbecue sauce and use it to color chicken wings. I made a batch for a Halloween party a few years ago and someone actually asked if they were real bat wings.
A word of warning- when you use black food coloring it will transfer to you. No matter how careful you are when you eat the wings, you’ll end up with purple fingers. Also, for the best effect, keep the wings intact- no trimming off of the tips. You can separate the drums before serving, if you like. Makes eating a little easier. They look pretty cool when set out on the table. Creepy- but very tasty.
Bat Wings
2-3 lbs. whole chicken wings
salt and pepper
1 c. barbecue sauce- store bought or home made
black food coloring- handle carefully- it stains
Place chicken wings in a roasting pan, season with salt and pepper and bake in a preheated 400 degree oven for 30 minutes. Meanwhile in medium bowl combine sauce with food coloring. Add just a little black food coloring at a time. Too much will alter the flavor of the food. Remove wings from the oven and dip them in the bowl of sauce. Turn to coat. Place wings on a clean baking sheet and return to the oven. Bake an addition 45 minutes. You can baste them with additional sauce during the baking, if you like. Place on a serving platter and provide plenty of napkins.
A pile of “bat” wings


