Lemon Italian Ice
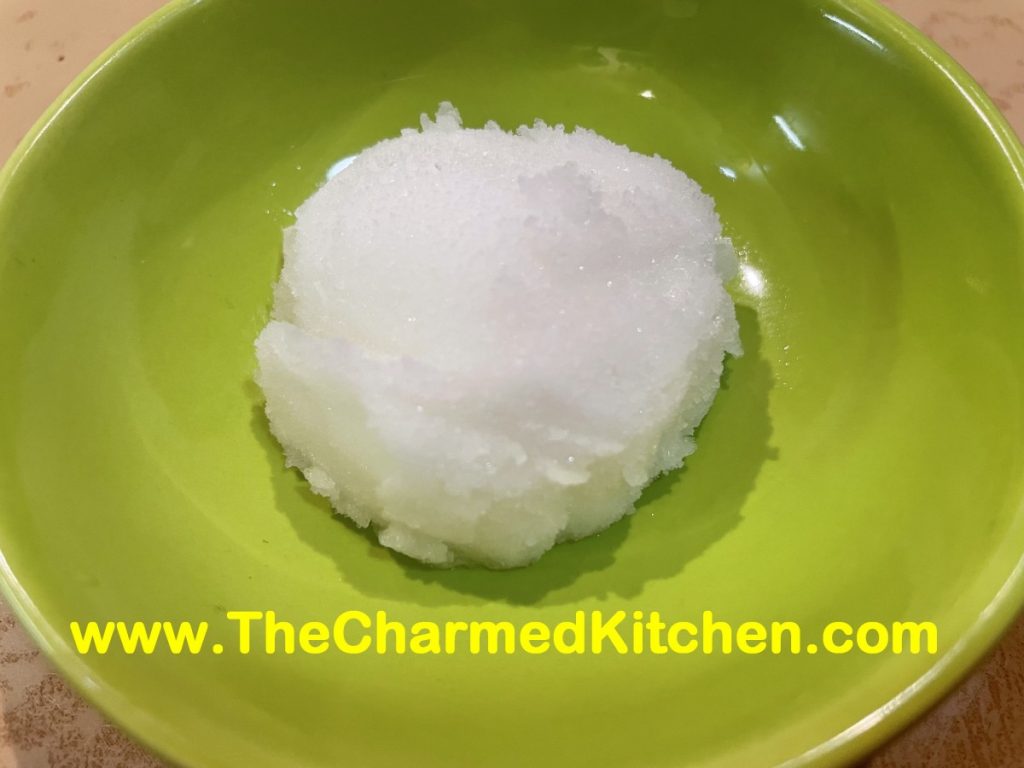
I hadn’t made Italian ice in a long time. As a kid, I remember getting little cups of this treat in the summer and I loved it. I decided it was time to make some again.
The recipe couldn’t be simpler. Just water, sugar and juice. You can also add zest. You don’t even need any special equipment. Lemon is more traditional, but lime works great, too. You can add more juice or less or more sugar to suit your own taste. I like my lemon ice to have a nice strong lemon flavor. Taste it before you freeze it to make it to suit your taste.
Italian ice is a great, light dessert or it can be served as a palate cleanser. Make more than you think- it goes fast. A neighbor stopped over last night and we added scoops to our vodka cocktails. Very tasty!!
Enjoy!!
Lemon Italian Ice
2½ c. water
1½ c. sugar
1¼ c. lemon juice*
Zest of 2 lemons, optional
Combine water and sugar in bowl and stir until sugar dissolves. Add lemon juice and zest, if adding, and stir until well combined. Freeze.
You have options here. You can place the mixture in a shallow tray- preferably one with a tight lid- and place in the freezer. Or you can put the mixture in any shape container with a tight lid and freeze. It kind of depends on how you plan to serve your ice, once it is frozen. Some recipes call for stirring the mixture every 30 minutes as it freezes. Then to serve it, you just scrape over the surface with a heavy spoon for a grainy ice- a granita. This is one option and a tasty one. Works best in the flatter, longer container.
Another option is to just freeze it. Once frozen, allow the lemon ice to soften a few minutes, then break into chunks and place in a food processor. Run the processor until the mixture is smooth- then serve or put back in the freezer until you want to serve it. You can even repeat the food processing part another time for a smoother end product. This is what I did with this batch. I wanted a sorbet – like texture.
If you didn’t have enough choices already, you can also put the lemon juice mixture in an ice cream machine to freeze. This method will also give you a sorbet like final product.
No one way is best- it is just what you like. Makes about a quart.
* you can use lime juice and zest instead, for lime ice- or even use them together.
Lemon Italian Ice

I hadn’t made Italian ice in a long time. As a kid, I remember getting little cups of this treat in the summer and I loved it. I decided it was time to make some again.
The recipe couldn’t be simpler. Just water, sugar and juice. You can also add zest. You don’t even need any special equipment. Lemon is more traditional, but lime works great, too. You can add more juice or less or more sugar to suit your own taste. I like my lemon ice to have a nice strong lemon flavor. Taste it before you freeze it to make it to suit your taste.
Italian ice is a great, light dessert or it can be served as a palate cleanser. Make more than you think- it goes fast. A friend stopped over last night and we added scoops to our vodka cocktails. Very tasty!!
Enjoy!!
Lemon Italian Ice
2½ c. water
1½ c. sugar
1¼ c. lemon juice*
Zest of 2 lemons, optional
Combine water and sugar in bowl and stir until sugar dissolves. Add lemon juice and zest, if adding, and stir until well combined. Freeze.
You have options here. You can place the mixture in a shallow tray- preferably one with a tight lid- and place in the freezer. Or you can put the mixture in any shape container with a tight lid and freeze. It kind of depends on how you plan to serve your ice, once it is frozen. Some recipes call for stirring the mixture every 30 minutes as it freezes. Then to serve it, you just scrape over the surface with a heavy spoon for a grainy ice- a granita. This is one option and a tasty one. Works best in the flatter, longer container.
Another option is to just freeze it. Once frozen, allow the lemon ice to soften a few minutes, then break into chunks and place in a food processor. Run the processor until the mixture is smooth- then serve or put back in the freezer until you want to serve it. You can even repeat the food processing part another time for a smoother end product. This is what I did with this batch. I wanted a sorbet – like texture.
If you didn’t have enough choices already, you can also put the lemon juice mixture in an ice cream machine to freeze. This method will also give you a sorbet like final product.
No one way is best- it is just what you like. Makes about a quart.
* you can use lime juice and zest instead, for lime ice- or even use them together.
Lemon Cheesecake with Lemon Curd

This dessert was inspired by a bag of lemons. I had picked them up with no real plan. I wanted a dessert for a dinner and decided to use them to make a cheesecake. I wanted to really amp up the lemon flavor, so besides the lemon juice and zest in the cheesecake, I added a layer of lemon curd on the top.
It worked out even better than I thought. Lots of lemon flavor in a creamy cheesecake. The lemon curd brought even more lemon to the party. Just wonderful.
So here is the recipe. I used a 9×9 inch glass pan to bake the cheesecake- rather than the normal spring form pan. It worked out really nicely. Kind of made me think about lemon bars, too.
Lemon Cheesecake with Lemon Curd
Crust:
1½ c. graham cracker crumbs
3 T. sugar
4 T. melted butter
Filling:
2 (8oz.) packages cream cheese, softened
¾ c. sugar
2 T. flour
2 eggs
3 T. lemon juice
2 t. grated lemon peel
Lemon Curd: recipe below
Heat oven to 350-degrees. Grease a 9×9-inch baking pan- I used a glass pan. In medium bowl, combine crumbs and sugar, then add melted butter. Toss to distribute butter evenly. Press into bottom of prepared pan and bake 10 minutes. Beat cream cheese, sugar and flour until fluffy. Beat in eggs one at a time. Stir in juice and peel. Pour over crust and bake for 30 minutes, or until set. Cool then top with lemon curd. Chill well before cutting. Store covered in fridge. Serves 8-10.
Lemon Curd
Lemon Curd
1/2 c. lemon juice
zest from one good sized lemon- you should have 2-3 teaspoons
1/2 c. sugar
3 eggs
6 T. unsalted butter- cut into little cubes
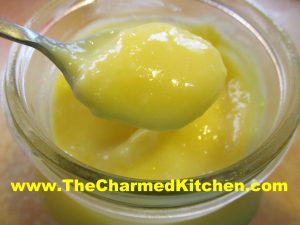
In medium saucepan, combine all ingredients. Whisk the mixture until the eggs are well blended. Cook over medium low heat, whisking often, until the mixture thickens. This will take 5-7 minutes. Whisk more often as mixtures warms and starts to thicken. Better to heat over lower heat and take longer than cook over too high a heat. You don’t want the eggs to scramble. Once the mixture is thickened , transfer to a bowl or jar. Cover the surface with a piece of plastic wrap to keep the surface from developing a skin- like any pudding will do. Chill until ready to use. Makes about 2 cups. Will keep in fridge a week or two.
Note: For using with this cheesecake, just make the lemon curd while the cheesecake is baking. Pour over the cheesecake while the curd is still a little warm, to make it easier to spread.
Lemon Italian Ice

I hadn’t made Italian ice in a long time. As a kid, I remember getting little cups of this treat in the summer and I loved it. I decided it was time to make some again.
The recipe couldn’t be simpler. Just water, sugar and juice. You can also add zest. You don’t even need any special equipment. Lemon is more traditional, but lime works great, too. You can add more juice or less or more sugar to suit your own taste. I like my lemon ice to have a nice strong lemon flavor. Taste it before you freeze it to make it to suit your taste.
Italian ice is a great, light dessert or it can be served as a palate cleanser. Make more than you think- it goes fast. A friend stopped over last night and we added scoops to our vodka cocktails. Very tasty!!
Enjoy!!
Lemon Italian Ice
2½ c. water
1½ c. sugar
1¼ c. lemon juice*
Zest of 2 lemons, optional
Combine water and sugar in bowl and stir until sugar dissolves. Add lemon juice and zest, if adding, and stir until well combined. Freeze.
You have options here. You can place the mixture in a shallow tray- preferably one with a tight lid- and place in the freezer. Or you can put the mixture in any shape container with a tight lid and freeze. It kind of depends on how you plan to serve your ice, once it is frozen. Some recipes call for stirring the mixture every 30 minutes as it freezes. Then to serve it, you just scrape over the surface with a heavy spoon for a grainy ice- a granita. This is one option and a tasty one. Works best in the flatter, longer container.
Another option is to just freeze it. Once frozen, allow the lemon ice to soften a few minutes, then break into chunks and place in a food processor. Run the processor until the mixture is smooth- then serve or put back in the freezer until you want to serve it. You can even repeat the food processing part another time for a smoother end product. This is what I did with this batch. I wanted a sorbet – like texture.
If you didn’t have enough choices already, you can also put the lemon juice mixture in an ice cream machine to freeze. This method will also give you a sorbet like final product.
No one way is best- it is just what you like. Makes about a quart.
* you can use lime juice and zest instead, for lime ice- or even use them together.
Spring Lemon Tart

This would make a lovely dessert for any Spring dinner. It would be a nice dessert for Easter, too. Since the first day of Spring is tomorrow, I thought it was a perfect time to share this recipe.
I was leaning towards making a cheesecake. Then I discovered I only had one box of cream cheese. Not enough for a cheesecake. While searching my fridge for cream cheese, I found a couple of lemons. I suppose I could have made a lemon pie, but I decided to just make something up with what I had, including the cream cheese. This lemon tart was the result.
Before I get to the actual recipe, let me talk about the lemons, and including fresh lemon juice in recipe directions. Recipes will often list the “juice of a lemon” in the ingredients. There is about the same amount of lemon juice in all lemons, so that a little difference, one way or the other, is no big deal. The amount is anywhere from 2-3 tablespoons of juice in a lemon. You might get 4 tablespoons, if the lemon is really big. I have used that phrase in recipes myself.
Sometimes, however, you have to recognize when you have lemons that aren’t “average”.
The two lemons I had on hand were big, really big. When I juiced them, I ended up with 2/3 of a cup of lemon juice. So, in this recipe I used the actual measurement of the juice, rather than saying, “the juice of 2 lemons.” Three or four average sized lemons should give you 2/3 cup of juice.
So here is the recipe for my lemon tart, the happy end result of using what I had, and making it work.
Spring Lemon Tart
Crust:
1½ c. crushed vanilla cookies
4 T. melted butter
Filling:
1 (8oz.) container cream cheese, softened
½ c. sugar
2/3 c. lemon juice
Zest of two lemons
3 eggs
¼ c. cornstarch
Combine crust ingredients in medium bowl. Press crumb mixture into a 9–inch springform or tart pan. Bake in a preheated 350-degree oven for 10 minutes. While the crust is baking, make the filling. In mixing bowl combine the cream cheese with the sugar and beat until fluffy. Add the lemon juice and zest and beat well. Add the eggs and cornstarch and beat until smooth. Pour filling over the baked crust and return to oven. Bake for 35 minutes, or until golden on top. Center will be soft, but firms as the tart cools. Cool, then refrigerate until ready to serve. You can dust with powdered sugar, if you like. Serves 6.
Lemon Drop Mini Cheesecakes

Don’t let their small size fool you. These little cheesecakes pack a punch of lemon flavor. There is lemon zest in the batter and a topping full of lemony tartness. Not too sweet, either, which is a plus in my mind.
I wanted a dessert but didn’t want to make anything too big. These mini cheesecakes were the right solution. The recipe only uses one package of cream cheese and only makes 6. For the crust you can use vanilla wafers, but since I didn’t have any, I just trimmed off the edges of some graham crackers, so they would fit in the muffin tins. You can even omit a crust and they are gluten free.
So here is the recipe. I hope you enjoy it.
Lemon Drop Cheesecakes
6 vanilla wafers or graham crackers
1 (8 oz.) cream cheese, softened
1/4 c. sugar
Zest of one lemon
1 t. vanilla
1 egg
Topping:
½ c. lemon juice or a combination of lemon juice and pieces of lemon*
½ c. sugar
2 t. cornstarch
Zest of a lemon
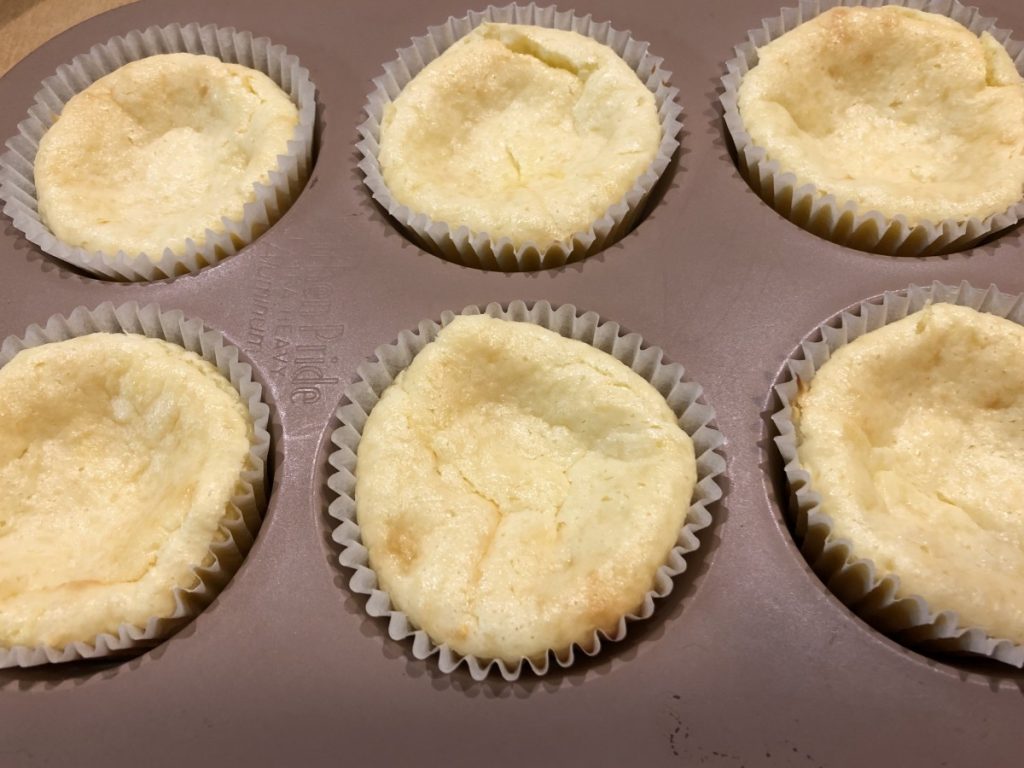
Line 6 muffin tins with paper liners. Place 1 wafer in each. If using graham crackers, trim them to fit the muffin tins. Beat together remaining ingredients for 1 minute with electric mixer. Divide this mixture in the muffin tins, filling each almost full. Bake 25 minutes at 325 degrees. Cheesecakes will puff up, then deflate as they cool. While cheesecakes are baking, make the lemon topping. Combine all topping ingredients in a small saucepan. Cook over medium heat, stirring, until mixture thickens and gets bubbly. Set aside. Once the cheesecakes have cooled down, spoon over the lemon topping. Chill before serving. Store leftovers in fridge. Makes 6. These can be frozen. Serves 2-3.
* I only had 2 lemons, so to get the most from them, I removed the peel and white membrane and used the lemon segments in the topping. I was still a little short, so I added some extra lemon juice to get to ½ cup. You could just use all juice.
Spring Lemon Tart

This would make a lovely dessert for any Spring dinner. It would be a nice dessert for Easter, too.
I was leaning towards making a cheesecake. I already had cookie crumbs, I could use for the crust. Then, I discovered I only had one box of cream cheese. Not enough for a cheesecake. While searching my fridge for cream cheese, I found a couple of lemons. I suppose I could have made a lemon pie, but I decided to just make something up with what I had, including the cream cheese.
What I ended up with is a sweet/tart lemon dessert. Really nice, actually.
Before I get to the actual recipe, let me talk about the lemons, and including fresh lemon juice in recipe directions.
Recipes will often list the “juice of a lemon” in the ingredients. There is about the same amount of lemon juice in all lemons, so that a little difference, one way or the other, is no big deal. The amount is anywhere from 2-3 tablespoons of juice in a lemon. You might get 4 tablespoons, if the lemon is really big. I have used that phrase in recipes myself.
Sometimes, however, you have to recognize when you have lemons that aren’t “average”.
The two lemons I had on hand were big, really big. When I juiced them, I ended up with 2/3 of a cup of lemon juice. So, in this recipe I used the actual measurement of the juice, rather than saying, “the juice of 2 lemons.” Three or four average sized lemons should give you 2/3 cup of juice.
So here is the recipe for my lemon tart, the happy end result of using what I had, and making it work.
Spring Lemon Tart
Crust:
1½ c. crushed vanilla cookies
4 T. melted butter
Filling:
1 (8oz.) container cream cheese, softened
½ c. sugar
2/3 c. lemon juice
Zest of two lemons
3 eggs
¼ c. cornstarch
Combine crust ingredients in medium bowl. Press crumb mixture into a 9–inch springform or tart pan. Bake in a preheated 350-degree oven for 10 minutes. While the crust is baking, make the filling. In mixing bowl combine the cream cheese with the sugar and beat until fluffy. Add the lemon juice and zest and beat well. Add the eggs and cornstarch and beat until smooth. Pour filling over the baked crust and return to oven. Bake for 35 minutes, or until golden on top. Center will be soft, but firms as the tart cools. Cool, then refrigerate until ready to serve. You can dust with powdered sugar, if you like. Serves 6.
Spring Lemon Tart

I wasn’t sure what to call this dessert. It started out as one thing, but sort of ended up somewhere else. I finally decided to just call it a tart. This is a perfect example of using what you have on hand. I was so pleased with the result.
I was leaning towards making a cheesecake. I already had cookie crumbs, I could use for the crust. Then, I discovered I only had one box of cream cheese. Not enough for a cheesecake.
While searching my fridge for cream cheese, I found a couple of lemons.
I suppose I could have made a lemon pie, but I decided to just make something up with what I had, including the cream cheese.
What I ended up with is a sweet/tart lemon dessert. Really nice, actually.
Before I get to the actual recipe, let me talk about the lemons, and including fresh lemon juice in recipe directions.
Recipes will often list the “juice of a lemon” in the ingredients. There is about the same amount of lemon juice in all lemons, so that a little difference, one way or the other, is no big deal. The amount is anywhere from 2-3 tablespoons of juice in a lemon. You might get 4 tablespoons, if the lemon is really big. I have used that phrase in recipes myself.
Sometimes, however, you have to recognize when you have lemons that aren’t “average”.
The two lemons I had on hand were big, really big. When I juiced them, I ended up with 2/3 of a cup of lemon juice. So, in this recipe I used the actual measurement of the juice, rather than saying, “the juice of 2 lemons.” Three or four average sized lemons should give you 2/3 cup of juice.
So here is the recipe for my lemon tart, the happy end result of using what I had, and making it work.
Spring Lemon Tart
Crust:
1½ c. crushed vanilla cookies
4 T. melted butter
Filling:
1 (8oz.) container cream cheese, softened
½ c. sugar
2/3 c. lemon juice
Zest of two lemons
3 eggs
¼ c. cornstarch
Combine crust ingredients in medium bowl. Press crumb mixture into a 9 –inch springform or tart pan. Bake in a preheated 350-degree oven for 10 minutes. While the crust is baking, make the filling. In mixing bowl combine the cream cheese with the sugar and beat until fluffy. Add the lemon juice and zest and beat well. Add the eggs and cornstarch and beat until smooth. Pour filling over the baked crust and return to oven. Bake for 35 minutes, or until golden on top. Center will be soft, but firms as the tart cools. Cool, then refrigerate until ready to serve. You can dust with powdered sugar, if you like.
