vegetable side dish

Martha’s Beets

Martha’s Beets

I had picked up some beets from a local farmer the other day. I have made this dish many times and it seemed like a good time to make it again.

This is a recipe that my friend, Martha, made for us one chilly autumn afternoon. The amounts are random for a reason. Just use what you have- more or less – and let the flavors blend together gently. It is perfect for warming you up on a chilly day.

Full of earthiness and great fresh flavors it is always a favorite of mine. I always think of her, with great affection, when I make it. Love you, Martha. So glad we got together over the weekend.


Martha’s Beets

Oil

2 Onions, chopped

Potatoes, cut in big chunks, peeled, if desired

1 bunch beets, with greens*

Chicken or vegetable  stock

Parsley

Salt and pepper

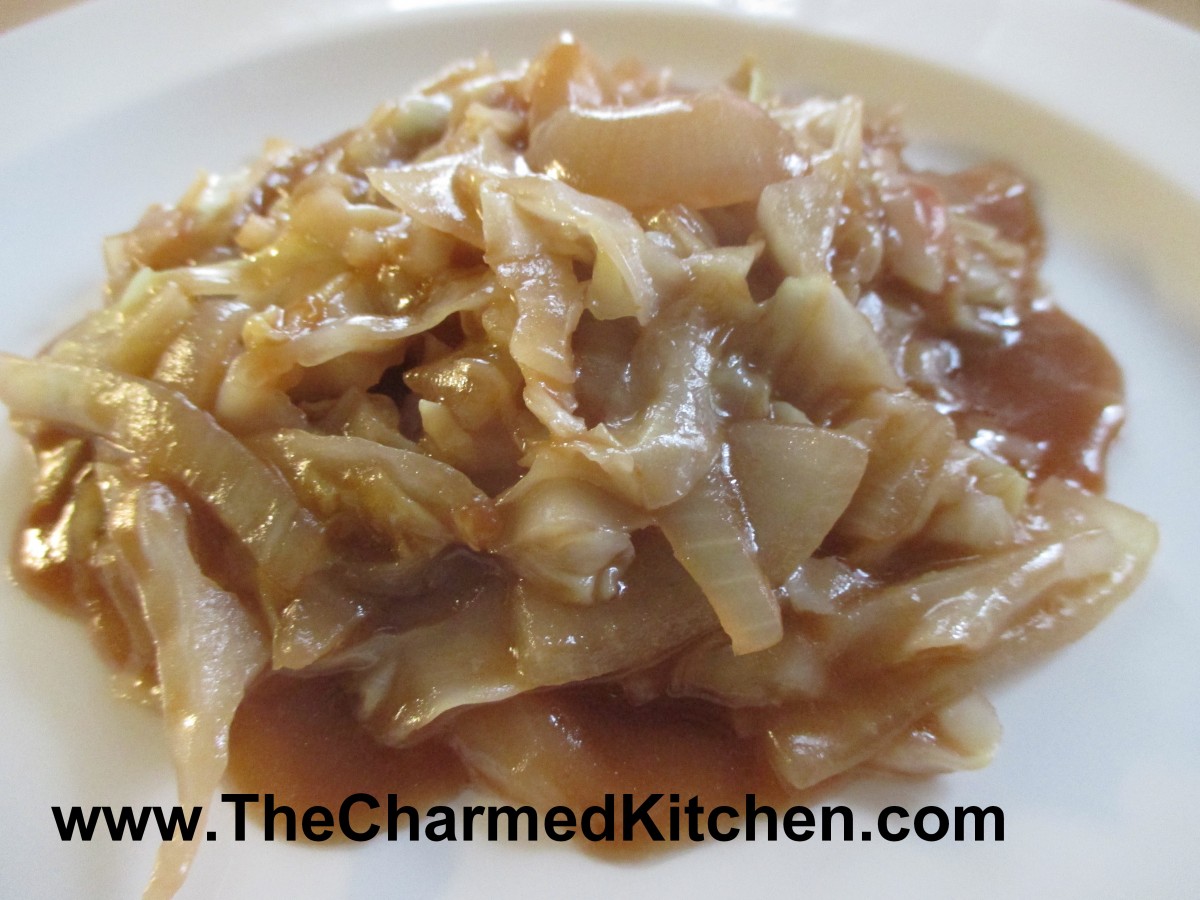
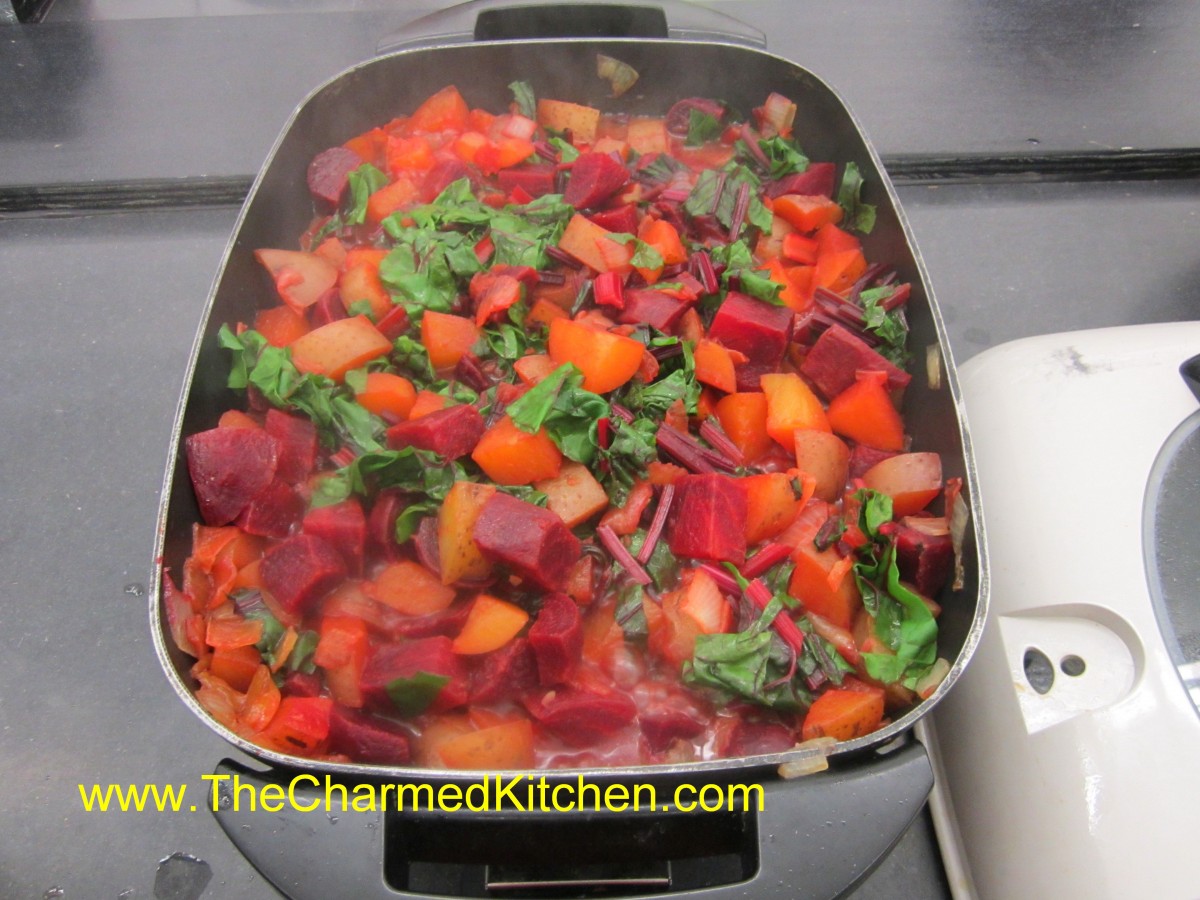
Cook beets in boiling water for 20 minutes. Cool and slip off skins. Cut up larger beets, if desired. In large pot cook onions in oil until tender. Add potatoes and prepared beets with just enough stock to keep them from sticking. Cover and cook over medium-low heat until vegetables are tender. Meanwhile chop up the beet greens. Add them to the pot and stir in. Cover and continue cooking until greens are tender. Toss in fresh parsley and cook 5 minutes longer.

* If you can’t find beets with greens, or if you like more greens, you can also add red Swiss chard in place of the beet greens.

Ratatouille Salad

Ratatouille Salad

I had all the ingredients for ratatouille, a lovely French vegetable stew. I had eggplant, tomatoes, summer squash, peppers, onions and fresh herbs. But I was in the mood for a salad. I decided to use the same ingredients that I would use for the ratatouille, but transform them into a salad. It came out quite nice. I could see serving it on toasted bread, or using it like a dip. It reminded me of caponata, in a way.

I decided to cook the eggplant and onion, but leave the rest of the vegetables raw. I also decided to leave the skin on the eggplant. I did not salt the eggplant beforehand. The eggplant was fresh and tender- I saw no need for peeling or salting, but you could do both, if you like.

I also always have roasted garlic on hand. I make a big batch and store in smaller containers in the freezer, until needed.The directions are after the recipe. If you don’t have roasted garlic, you could add several cloves of garlic, peeled and minced. I invited a neighbor to try it- and she ended up taking the rest home.

Ratatouille Salad

1 medium eggplant, cubed. I had about 3 cups of eggplant.

3 T. oil

½ t. salt

1 medium onion, sliced

2 T. roasted garlic*

½ c. red wine vinegar

1 med. zucchini, cut in matchstick pieces, about 3 cups

1 sweet pepper, seeded and diced

1½ c. diced fresh tomato, seeded, if desired


Dressing:

1/3 c. red wine vinegar

1/3 c. olive oil

2-3 T. honey, or to suit your taste

2 T. chopped parsley

1 t. chopped basil

2 t. thyme leaves

Hot sauce to taste

Salt and pepper to taste


In skillet, heat oil and saute eggplant until tender and just starting to brown. Season with salt. Remove from skillet and set in a mixing bowl. In same skillet, saute onion and cook until wilted and tender. Add the garlic and vinegar to the skillet and cook until most of the liquid has evaporated. While liquid is cooking down, place remaining veggies in mixing bowl with the eggplant. When most of the liquid is cooked off, place onion in mixing bowl with eggplant mixture.  Combine dressing ingredients in a small bowl or jar and whisk to combine. Pour over the eggplant mixture and toss to coat. Adjust seasonings. Chill until ready to serve. Serves 6-8 as a side.


*Once you have roasted garlic on hand for cooking, you will wonder how you did without it before. I get large amounts of freshly peeled cloves. Place the peeled garlic cloves in a roasting pan and pour a generous amount of olive oil over the garlic. Cover tightly with foil and  bake at 350 until garlic is tender and golden. This will take at least 30 minutes, but up to 40 minutes. It depends on how much garlic you are roasting at a time. Be careful not to burn it. Once cooled, place the garlic cloves, and oil, in small freezer containers. Store in freezer.

Mushroom Lovers Pasta

Mushroom Lovers Pasta

It would be hard to fit more mushrooms into this dish. I started by making fresh pasta and included mushroom powder in the dough. Then I sauteed up onions, garlic and a pound of fresh mushrooms for the sauce. My dinner guest loved it, and so did I.

Start by making the pasta dough. It has to rest before rolling. It will only take a couple of minutes to cook. I rolled and cut the pasta, then set it aside. Once my sauce was ready, I boiled the pasta and added it to the sauce.

I think the only thing I forgot, was to dust the top of the dish with mushroom powder before serving. I served it as a side dish, but it could easily be a main dish. I used a combination of button and Crimini mushrooms. Use what mushrooms you like.

So, we will start with the recipe for the mushroom pasta.

Mushroom  Pasta


3 c. flour, more if using electric pasta machine. See note.

½ c. mushroom powder- made from dried mushrooms*

1½ t. salt

4 eggs

Water, as needed


Mix flour, mushroom powder and salt. Stir in eggs, kneading until dough is smooth and elastic. Dough will be very stiff. Add a little water, as needed, to hold dough together. You may wish to mix the dough in a mixer or food processor. Cover dough and let rest  at least 15-20 minutes before rolling. Under kneading your dough will result in coarse, crumbly pasta. This batch makes about 1 pound. Serves 4-6.


Roll dough out on a well-floured board or with a pasta machine until desired thickness in reached. Add flour as needed to prevent sticking. Cut into strips or whatever shapes are desired. You might want to let the noodles dry 1-hour or more before cooking, but this is not necessary. Pasta can be hung to dry or separated and allowed to dry flat on a table. When pasta is not hanging to dry it must be turned occasionally to dry evenly. Although you may hear otherwise, homemade pasta, even when dried, should be frozen for long term storage. Storing at room temperature can lead to spoilage. Fresh pasta can also be stored in the refrigerator for a day or two.

Cooking fresh pasta happens quickly. For most noodles you are looking at 2-3 minutes at the most. Thicker cuts and ravioli would take a little longer. Watch it carefully. Drain after cooking, and toss with your favorite sauce.

Mushroom powder

*You might be tempted to powder up some store bought dried mushrooms. I would advise against that. Commercially dried mushrooms have not been washed before drying, so you might get dirt in your mushroom powder. I clean my mushrooms thoroughly before dehydrating.

Note: All electric pasta machines vary slightly and you should use their recipes as much as possible. Still, for most models, adding 1/4 c. flour for each cup in a hand rolled recipe works the best. Also recipes that contain seeds and vegetables may clog an electric pasta maker. Follow your manufacturer’s instructions.


The Mushroom Sauce

3 T. oil- I used avocado, but olive oil would be nice, too

3 c. sliced onions

4-5 cloves garlic, minced

1 lb. fresh mushrooms, washed and sliced

4 T. flour

1 c. chicken stock, or a bit more

1 c. half and half

salt and pepper to taste

2 t. fresh thyme leaves

Heat oil in a very large skillet and saute onions until golden. add the garlic and cook another minute. add the mushroom and cook until mushroom are tender. Mushrooms have a lot of water in them. Don’t freak if you start to get some in your pan. Add flour and stir until smooth. Stir in stock, half and half and seasonings. Reduce heat and simmer until mixture is thickened and bubbly. You might want a little more stock, if you like a thinner sauce. remember, the pasta will absorb some of the liquid, too.

Cook mushroom pasta. I only boiled mine for a minute, then drained it and added it to the mushroom sauce. Toss the pasta and sauce together. Keep on low heat for a minute or two before serving. Serves 4-6.

Four Fresh Tomato Salads

Marinated Tomato Salad

Tomato season is too short around here. I can never get enough of what my mom called “real tomatoes”. The first few tomatoes never make it in the house. Warm from the sun, they are too tempting. I just pick them right off the plant and eat them.

Then, I start to think about preserving some for after the season is over. So I start drying and canning tomatoes.

Sometimes, in the excitement of canning and dehydrating tomatoes, I find I haven’t remembered to eat enough of them. So anxious to get as many as possible put away for winter, I have denied  myself the pleasure of  fresh, juicy, vine-ripened tomatoes.

Well, not this year. I have been having tomatoes with my eggs for breakfast, creamy tomato soup for lunch and plenty of tomato sandwiches and salads. I thought I would share a few of my favorite tomato salad recipes with you.

They are pretty simple. I think that is how it should be. When you have something as close to perfection as a ripe tomato, little more is needed.


Marinated Tomato Salad


3 large tomatoes, cut in wedges, or 2 pints cherry tomatoes, halved
1 T. olive oil
1 clove garlic, minced
2-3 basil leaves, cut into thin strips
2 T. balsamic vinegar
salt and pepper to taste

Combine ingredients and serve at room temperature. Serves 4-6.

Tomato and Feta Salad

3 tablespoons crumbled feta cheese
12 cherry tomatoes, thinly sliced
1/2 sweet onion, diced
1 tablespoon olive oil -I used a lemon infused olive oil
1 tablespoon lemon juice
Salt and pepper to taste

In a bowl, mix the feta cheese, cherry tomatoes, onion, olive oil, and lemon juice. Add salt and pepper to taste. Serve immediately. Serves 2.

Warm Pasta Salad


1 lb. Plum tomatoes, chopped

1 medium sweet onion, chopped

4 oz. Fresh mushrooms, sliced

2 cloves garlic, minced

¼ c. fresh parsley, chopped

1 T. dried basil or 1/4 c. chopped fresh basil

1 T. capers, optional

1 t. dried oregano

½ c. olive oil

¼ c. red wine vinegar

3 T. balsamic vinegar

Dash of hot red pepper flakes

Salt to taste

1 lb. Uncooked pasta


Combine all ingredients, except pasta and chill overnight. Cook pasta, drain and toss with tomato mixture. Mixture should be served right away . Serves 6.


BLT Salad


6-8 slices bacon

2 slices rye bread

2 slices Swiss cheese

5 c. torn up lettuce or mixed greens

3 T. olive oil

2 T. apple cider vinegar

1 T. balsamic vinegar

Salt and fresh ground pepper

2-3 tomatoes, diced


Cook bacon until crisp. Remove from pan, drain and crumble. Remove most of the bacon grease from the pan. Make a sandwich with the rye bread and the Swiss cheese. Toast in the skillet over medium heat until golden brown and cheese is melted. Set aside. Place lettuce in bowl and toss with the oil to coat the leaves. Toss with the vinegars and season with salt and pepper to taste. Add the tomatoes and the bacon and toss. Cut the sandwich into cubes and place on the top of the salad. Serves 2.

Note: you can make two sandwiches if you want more bread and cheese in the salad.

Tomato Feta Salad

Tomato Feta Salad

Warm Pasta Salad

Warm Pasta Salad

BLT Salad

BLT Salad

Breaded Eggplant

Breaded Eggplant

Even though I love eggplant prepared in a lot of different ways, this dish is one of my favorites. I think it is because it reminds me of my parents.  My mother used to make eggplant this way. My dad loved it- and he was not a big eggplant fan. I guess pretty much anything tastes better when breaded. She would top the eggplant with some cheese and sometimes with some marinara sauce.

I cut the eggplant in slices, but you could also cut them in strips and serve like French fries, if you prefer.

One of the problems  with eggplant is about how much oil it will absorb when cooking. If you fry these slices in a skillet- they will soak up the oil like a sponge. I prefer to bake the eggplant, with a drizzle of oil. They come out crispy, but not greasy.

They make a nice side dish or even main dish. I topped mine with Asiago cheese, but a lot of other cheeses would be good, too. Mozzarella was what my mom used. I often use Parmesan cheese or a Pecorino Romano.

Breaded Eggplant

1 large eggplant or 2 medium

salt

1 egg

1/2 c. milk or half and half

pepper

1 T. Tuscan seasoning* recipe follows or use another blend of Italian herbs

1 t. garlic powder

about 1 cup of bread crumbs

1/2 c. oil

1/2 c. Asiago cheese, or more

Peel and slice eggplant. Place in a large bowl and sprinkle generously with salt. Let sit for 20 minutes. Drain, rinse and pat dry. Prepare egg wash by mixing the egg with the milk or half and half, pepper, a little more salt, Tuscan seasoning and garlic powder. Place in a shallow bowl. Place bread crumbs in another shallow bowl. Preheat oven to 400 degrees. One slice at a time, dip eggplant in egg wash, then in the bread crumbs, turning to coat evenly. Place on a baking sheet. Repeat with remaining eggplant. Drizzle with the oil and bake for about 25 minutes. Turn slices after 15 minutes and continue baking until eggplant slices are golden brown and tender. Sprinkle with cheese and return to oven for 5 minutes longer. Serve as is, or with a marinara sauce. Serves 3-4.


*Tuscan Seasoning

½ c. dried basil

½ c. dried oregano

½ c. dried marjoram

3 T. dried minced onion

2 T. dried minced garlic

2 T. dried rosemary

2 T. dried parsley

1 t. crushed red pepper


Rainbow Carrot and Raisin Salad

Rainbow Carrot and Raisin Salad

I love a good carrot and raisin salad.  It’s one of those salads I remember from when I was a kid. Carrots work so well in a salad, because they retain crispness. So this is also a salad you can make and eat right away, or make ahead of time and enjoy even a few days after making it.

I used rainbow carrots for this version of carrot and raisin salad. I love the vibrant colors that the rainbow carrots add to the dish. I can’t always find them, so when my local produce market has them, I take advantage and stock up.

I kept it pretty simple: shredded carrots, raisins, a honey dressing and some herbs. A lot of carrot salads are made with mayonnaise based dressings. That’s fine, but I wanted something lighter with this salad.

This is a recipe you can toss together in just a few minutes. Great for last minute summer parties.

Of course, you can use any carrots in this recipe. It will taste just as nice.


So here is my recipe. Hope you will give it a try.

Rainbow Carrot and Raisin Salad

3-4 good sized carrots- peeled and shredded fine- you want 4 cups of shredded carrots

1/2 c. raisins

1/2 c. apple cider vinegar

1/3 c. oil- I used avocado oil- use what you like

3 T. honey

2 T. chopped parsley

1 t. celery seed

1 t. salt, or to taste

1 t. hot sauce, or to taste

In mixing bowl, combine the carrots and raisins. In smaller bowl combine the rest of the ingredients, whisking until well mixed. Toss the honey mixture over the carrots and raisins until evenly coated. Cover salad, and chill until ready to eat. Serves 4-6.

Note: You can eat the salad right away, but I prefer to make it at least 30 minutes ahead and give the flavors a chance to mingle.

These rainbow carrots are purple on the outside and orange in the middle!

Marinated Mushrooms and Peppers

Marinated Mushrooms and Peppers

This dish combines two of my favorites- mushrooms and peppers. They are cooked together in an herb-rich brine, then allowed to chill in the brine, absorbing even more flavor.  Think of it like a fresh pickle.

Once finished, the marinated veggies will keep for several weeks in the fridge.

This is a great dish to have on hand. You can serve it as an appetizer, with cheese and crackers, or as part of an antipasto tray. I have been known to eat them right out of the container as a snack.

You can also serve it on a bed of lettuce, as a salad, using some of the brine as the dressing. I sometimes double the brine ingredients, just so I have extra “liquid” to use as a dressing.

I kept it fairly mild, but you can add hot sauce for a spicier version, if you prefer.

I know 2 pounds of mushrooms sounds like an awful lot. It really isn’t. The mushrooms cook down a lot.


     Marinated Mushrooms with Peppers

1/2 cup red wine vinegar

1/3 cup water

2 tablespoons oil

1 teaspoon sugar

1 tablespoon chopped onion

1 tablespoon chopped fresh parsley

1/2 teaspoon dried basil

2 cloves garlic, minced

1/4 teaspoon salt

1/4 teaspoon fresh ground black pepper

2 lbs. fresh mushrooms, stems removed

2 sweet peppers, seeded and diced


Combine the vinegar, water, oil, sugar, onion, parsley, basil, garlic, salt, and pepper; bring to a boil. Stir in the mushrooms and red bell pepper; return mixture to a boil; reduce heat and simmer until the mushrooms are tender, 5 to 10 minutes. Remove from heat and allow to cool to room temperature. Transfer to a covered container and store in refrigerator at least 4 hours before serving.

Veggie “Roses” Tart

Veggie “Roses” Tart

This tart is sure to get some attention at your next party. A flaky crust and cheese filling are topped with veggies. The special part, is that the vegetables are rolled up to resemble roses. Simple and elegant.

It really is easy to make, although a bit time consuming. It can be made a day or two ahead, baked, and then just reheated when you want to serve it. There are three parts to it. The crust- which I made using a favorite pie crust recipe. The filling- a mix of cheeses, eggs and some herbs. Finally the topper. Various veggies, peeled into thin ribbons, wound into little “roses”, and placed on the cheese layer. My friend, Kat, saw a similar creation and posted it. I loved it, and decided to try and create one of these tarts myself. I switched some things from the one she posted. I made my own crust and used some different veggies. So here is how I did it.

The crust:

This is an old family recipe. Simple and flaky. It makes 2 crusts- so I used the other one for another dish. You could make two tarts or freeze the rest for another time.

Flaky Pie Crust

2 c. flour
1 t. salt
3/4 c. shortening, chilled, or use lard or coconut oil, I used coconut oil
1 T. cider vinegar
4-5 T. cold water
Combine flour and salt and cut in shortening. Toss in vinegar and water, 1 tablespoon at a time, until dough holds together. Use a fork to toss the ingredients together and as soon as the mixture holds together stop adding water. Makes 2. Chill well before using.

The crust was rolled out, using half the dough,  and fitted into a 9-inch tart pan. I blind baked it- to insure it would be cooked through- because the tart doesn’t cook that long. I poked the crust all over with a fork, then I topped the crust with a sheet of foil and then a pound of dry pinto beans. You can use pie weights, if you have them or uncooked rice. I have a jar of pinto beans that I keep just for blind baking. The crust is placed in a 425 degree oven and baked for 15- 20 minutes. It should be taken out of the oven before the edges get too brown. Set aside until you are ready to fill it.


The Filling:

I used a combination of cheeses and eggs, with some seasonings. I am not sure I needed the eggs- but I wanted the cheese to set up.

1 (15 oz.) container ricotta cheese

1/2 c. Parmesan cheese

2 eggs

1 t. salt- or to taste

1 t. dried oregano

1 t. dried basil- or 1 T. fresh basil

healthy dash of hot sauce

Combine all ingredients and spread over the crust.

The veggies:

Even though these are listed last, you might want to get them ready ahead of time. I used a vegetable peeler to make “ribbons” out of the veggies I used. You could also use a mandolin, if you have one. Some were going to be hard to roll- so I steamed them in the microwave, in batches, for several minutes. That softened them up and partially cooked them.  They should be tender- they don’t get much softer in the baking process. Dry them off on paper towels.  When I was ready to use them- I grabbed a “ribbon” and rolled it up, adding more ribbons until I had a little “blossom”. As I made them I stuck them in the cheese mixture- already spread over the crust. Sometimes I used 2 veggies in one flower to make it look more interesting. Once the surface was covered, I pressed them down a little so they would all be the same height, roughly. Season with some salt.

I used

2 zucchini

2 yellow summer squash

2 really big carrots – made for wider ribbons

1 really big beet*

I had some pieces left over and just made a stir fry with them.

Baking the tart:

Place the tart on a baking sheet and bake in a 350 degree oven for about an hour. Crust should be nice and golden around the edges and the veggies should be tender.

* The beet was the trickiest- but I wanted that pop of red. I peeled the skin off first, then tried to peel the longest pieces I could. Some were a little short, but once steamed, they still worked pretty well. sometimes I’d finish a beet center off with a longer zucchini ribbon to hold it together.


Spread cheese mixture over the crust

Spread cheese mixture over the crust

Start placing the "roses" on the cheese mixture

Start placing the “roses” on the cheese mixture

Keep filling in the tart until full.

Keep filling in the tart until full.

Colcannon

Colcannon

I am not sure you can find a more comforting comfort food than colcannon. This traditional Irish dish is a combination of potatoes, cabbage, onions, parsley and butter. I was inspired to make it when my friend, Jill, mentioned she was making it for St. Patrick’s Day. It certainly doesn’t have to be St. Patrick’s Day to enjoy this traditional Irish dish, though. This dish is always a crowd pleaser.

I changed it up a bit by using Brussels sprouts, in place of the cabbage. It was for a dinner with a friend of mine, and since she doesn’t eat bacon, I left it out. But a lot of people do add some bacon to colcannon.

The recipe is pretty simple. I used a combination of chicken stock and half and half to cook the potatoes, but you  could use all milk, if you prefer.

Colcannon 

4 T. butter

1 onion, peeled and chopped

2 lbs. of potatoes, peeled and sliced

1 c. chicken stock

1 c. milk or half and half- I used half and half

1 lb. Brussels sprouts, ends trimmed and quartered

1/2 c. chopped green onions

1/2 c. chopped fresh parsley

salt and pepper to taste

extra butter for adding when serving

I large sauce pan or skillet, heat the butter and cook the onion until tender. Add the potatoes and cook a few minutes. Add the stock and milk or half and half and cook, uncovered over medium low heat, for about 10 minutes, stirring occasionally. The potatoes should be pretty tender. Add the Brussels sprouts, cover, and continue cooking until the sprouts are tender. This will take 10-15 minutes. If the mixture is soupy, remove the lid. Most of the liquid should cook off. You should mash the potatoes a bit before serving, so use a potato masher or a large fork to smash them up a bit. This will also thicken the dish up a bit more.  Add the green onions and parsley and cook a few more minutes, over low heat, stirring to keep mixture from burning.  Adjust seasonings and serve with extra butter on top. Serves 4-6.

Subscriber to our Mailing List

Follow us on Social Media

Support This Site

Donate Now

New Release: