Sous Vide Ribs

I have this fun kitchen machine called an immersion circulator, also known as a sous vide immersion circulator. They are used to cook food at very exact temperatures. It is a kitchen tool that is becoming more popular, but still unknown to a lot of people. They can be expensive, although prices seem to be coming down as more models hit the market. The one I have costs around $200, but you can find them for a lot less these days.
So why would you want to use/invest in one and how exactly is the food cooked?
Sous vide involves cooking your food in a bag, submerged in water. I know that doesn’t initially sound all that appealing, but it is pretty cool and has some advantages.
Have you ever fretted about overcooking a really expensive cut of meat? Or do you have trouble with the ends getting too done before the middle is cooked?
In an immersion circulator, you set the temperature that the water will be. If you like medium rare beef, you would set the temp at around 135 degrees F (57 Celsius). That means the water would maintain a temp of 135 degrees. When you put the meat in the circulator it can’t overcook. It will only get to a max of 135 degrees, or whatever temperature you like. The meat can’t overcook, even if you leave it in for several hours. It also will be cooked the same from one end the the other. This gives you the opportunity to cook less expensive cuts of meats for long periods, making them tender, but still rare. The leg of lamb we had for Easter was wonderful. When a guest was delayed, I didn’t have to worry about it getting overdone, either.
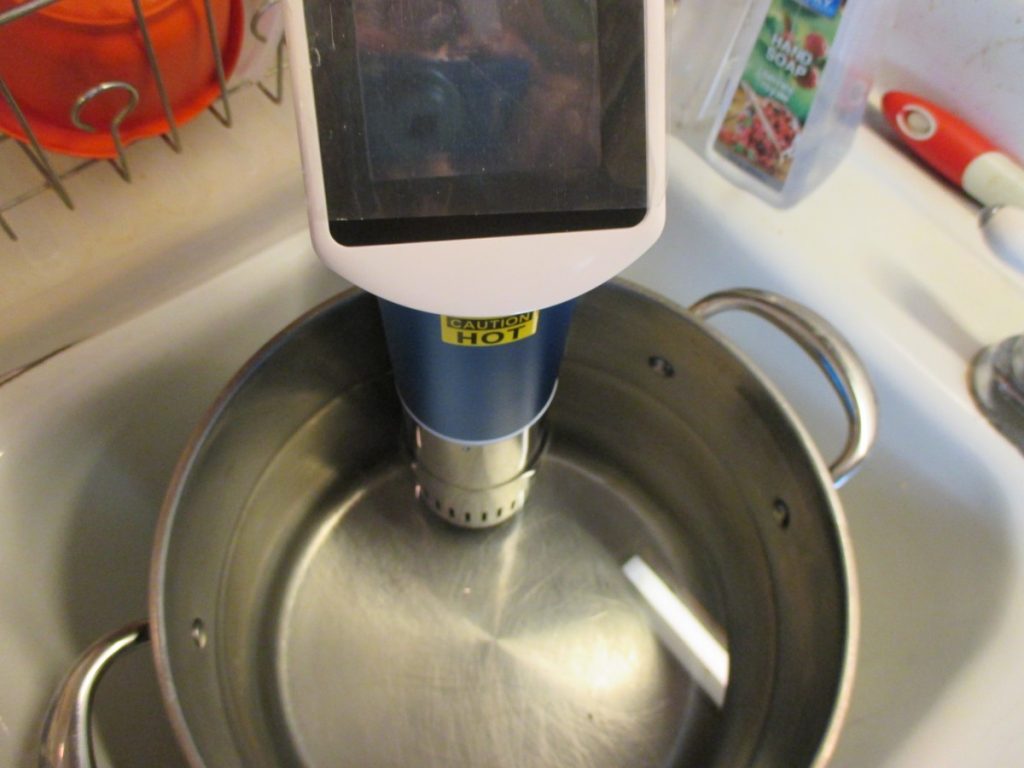
The sous vide machine is attached to a pot that is filled with water. Once you set it to the temperature you want, you place the bag with the meat in it, in the water. Set the timer and let the circulator do its job. You can also buy machines that are self contained. Check water levels once in awhile, but they don’t go down very much, even after long cooks.
One disadvantage is that the meat will not get that nice sear on the outside that comes from more traditional methods of cooking. To remedy that, you remove the meat from the bag, once it has cooked, and brown it then. I like to use a smoking hot skillet for this. You brown the meat over high heat, turning it until it looks the way you want it to look. This actually worked great for the ribs. You could also place the meat under the boiler for a few minutes or even on a hot grill.
Another slight disadvantage, is not smelling the meat cook. Because everything is sealed up in bags, there are no yummy aromas in the house. At least, not until you open the bags to brown the meat. I have confused guests, who arrived for dinner, but smelled nothing cooking.
It is a nice way to cook in hot weather. Sous vide does not nearly generate the heat that an oven would.
Cooking the Ribs
So for my spare ribs, I wanted them to be very tender, but not mushy. I set the pork to cook at 145 degrees Fahrenheit or 60 degrees Celsius. That is the minimum safe temperature for pork. You can cook it at a slightly higher temperature- but not lower. I seasoned the meat with salt and my Ethiopian seasoning. I used a freezer Ziploc bag. I made sure I got as much air out of the bag as I could, and made sure it was sealed. I then double bagged the ribs, to be safe. Using a vacuum sealer or pump will help remove more air. Nice, but not a must.
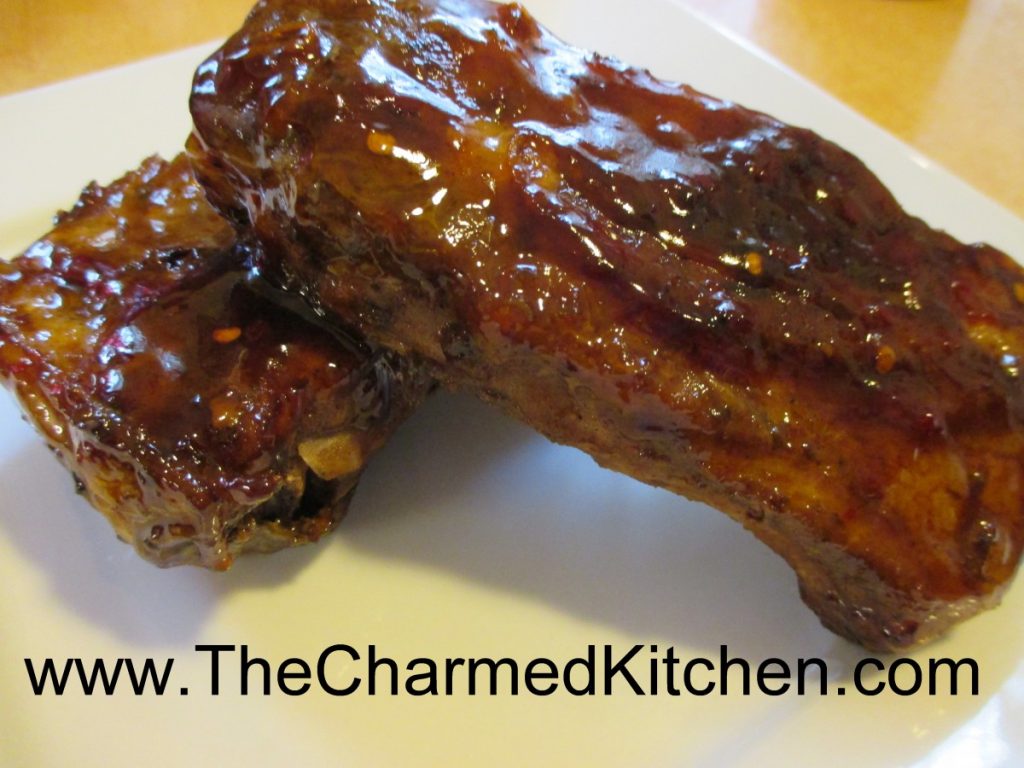
I cooked my ribs for 12 hours the first time I made them. I have cooked them for as long as 24 hours. There is a lot of leeway for how long you have to sous vide meat. Tougher cuts should be cooked longer, to make them more tender. The 12 hour ribs were very tender, but the 24 hour ribs were better. Once the time was up, I took the ribs out, heated up my skillet, and browned the ribs on both sides. This is when you can add sauce, if you like. I added a sweet and sour sauce to this batch. They were tender and very juicy.
Unlike poaching, the meat is never in contact with the water, so all the flavor stays in the meat. Because you have such precise control, you don’t end up with overcooked meat, either.
There are videos all over the internet that discuss and share sous vide cooking as well as groups on Facebook. I am still learning and don’t consider myself an expert. I just wanted to try cooking my ribs this way. I was very happy with the result. I can’t say whether an immersion circulator is a good investment for you or not. I will say that I love mine and am using it several times a week.

Sous Vide Ribs
 I have this fun kitchen machine called an immersion circulator, also known as a sous vide immersion circulator. They are used to cook food at very exact temperatures. It is a kitchen tool that is becoming more popular, but still unknown to a lot of people. They can be expensive, although prices seem to be coming down as more models hit the market. The one I have costs around $200, but you can find them for a lot less these days.
So why would you want to use/invest in one and how exactly is the food cooked?
Sous vide involves cooking your food in a bag, submerged in water. I know that doesn’t initially sound all that appealing, but it is pretty cool and has some advantages.
Have you ever fretted about overcooking a really expensive cut of meat? Or do you have trouble with the ends getting too done before the middle is cooked?
In an immersion circulator, you set the temperature that the water will be. If you like medium rare beef, you would set the temp at around 135 degrees F (57 Celsius). That means the water would maintain a temp of 135 degrees. When you put the meat in the circulator it can’t overcook. It will only get to a max of 135 degrees, or whatever temperature you like. The meat can’t overcook, even if you leave it in for several hours. It also will be cooked the same from one end the the other. This gives you the opportunity to cook less expensive cuts of meats for long periods, making them tender, but still rare. The leg of lamb we had for Easter was wonderful. When a guest was delayed, I didn’t have to worry about it getting overdone, either.
The sous vide machine is attached to a pot that is filled with water. Once you set it to the temperature you want, you place the bag with the meat in it, in the water. Set the timer and let the circulator do its job. You can also buy machines that are self contained. Check water levels once in awhile, but they don’t go down very much, even after long cooks.
One disadvantage is that the meat will not get that nice sear on the outside that comes from more traditional methods of cooking. To remedy that, you remove the meat from the bag, once it has cooked, and brown it then. I like to use a smoking hot skillet for this. You brown the meat over high heat, turning it until it looks the way you want it to look. This actually worked great for the ribs. You could also place the meat under the boiler for a few minutes or even on a hot grill.
Another slight disadvantage, is not smelling the meat cook. Because everything is sealed up in bags, there are no yummy aromas in the house. At least, not until you open the bags to brown the meat. I have confused guests, who arrived for dinner, but smelled nothing cooking.
It is a nice way to cook in hot weather. Sous vide does not nearly generate the heat that an oven would.
Cooking the Ribs
So for my spare ribs, I wanted them to be very tender, but not mushy. I set the pork to cook at 145 degrees Fahrenheit or 60 degrees Celsius. That is the minimum safe temperature for pork. You can cook it at a slightly higher temperature- but not lower. I seasoned the meat with salt and my Ethiopian seasoning. I used a freezer Ziploc bag. I made sure I got as much air out of the bag as I could, and made sure it was sealed. I then double bagged the ribs, to be safe. Using a vacuum sealer or pump will help remove more air. Nice, but not a must.
I cooked my ribs for 12 hours the first time I made them. I have cooked them for as long as 24 hours. There is a lot of leeway for how long you have to sous vide meat. Tougher cuts should be cooked longer, to make them more tender. The 12 hour ribs were very tender, but the 24 hour ribs were better. Once the time was up, I took the ribs out, heated up my skillet, and browned the ribs on both sides. This is when you can add sauce, if you like. I added a sweet and sour sauce to this batch. They were tender and very juicy.
Unlike poaching, the meat is never in contact with the water, so all the flavor stays in the meat. Because you have such precise control, you don’t end up with overcooked meat, either.
There are videos all over the internet that discuss and share sous vide cooking as well as groups on Facebook. I am still learning and don’t consider myself an expert. I just wanted to try cooking my ribs this way. I was very happy with the result. I can’t say whether an immersion circulator is a good investment for you or not. I will say that I love mine and am using it several times a week.


