Monthly Archives: May 2017

Pancake and Waffle Recipes

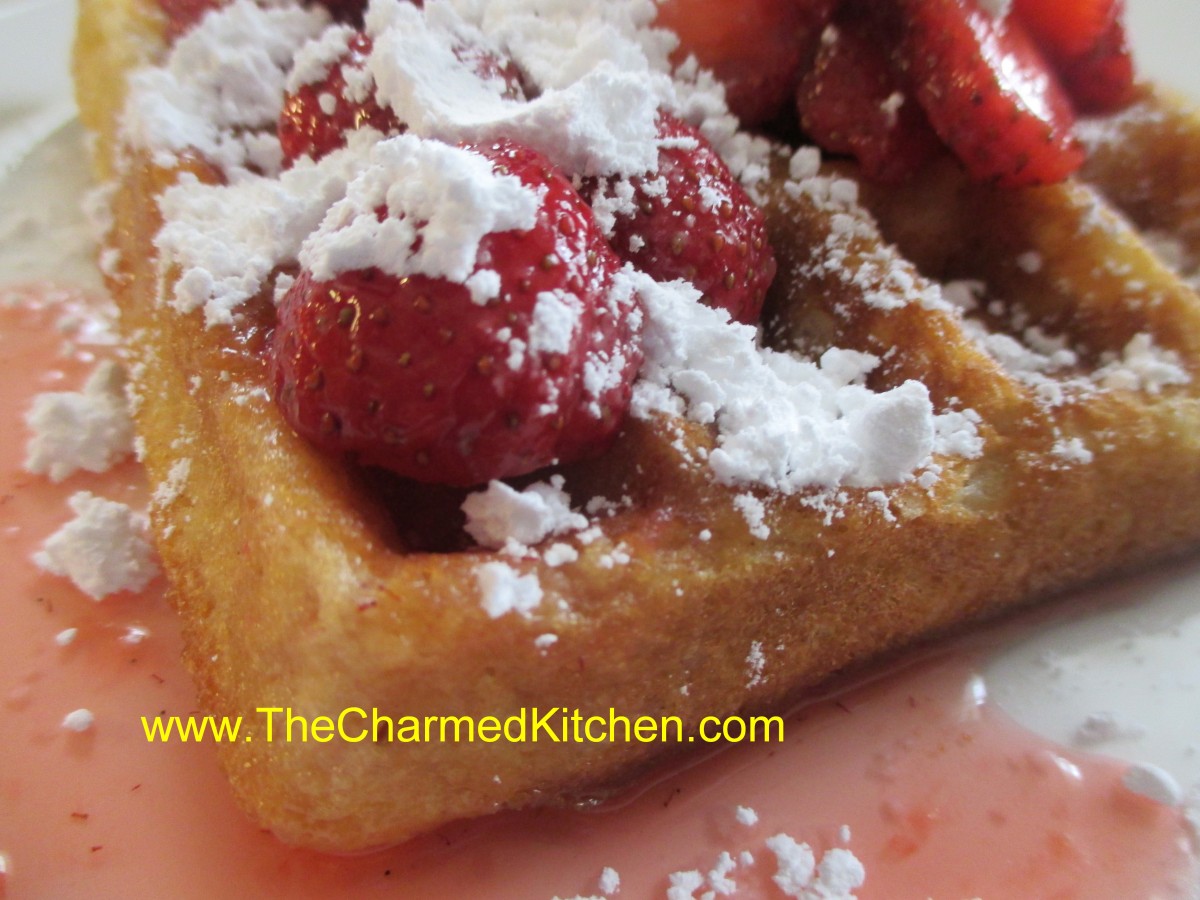
Vanilla and Cinnamon Belgian Waffles

Breakfast in bed is a great way to thank Mom. You don’t have to wait for Mother’s Day, either.

Whether eaten in bed, or around the table, nobody complains when you make waffles or pancakes for breakfast. I  assembled some of my favorite waffle and pancake recipes, so you could pick the one just right for Mom.

I also included recipes for some of the fruit toppings and syrups. Some of the recipes call for baking mix, so I included a recipe to make your own.


Vanilla and Cinnamon Belgian Waffles

2 c. all-purpose flour
3/4 cup sugar
3-1/2 teaspoons baking powder
2 t. cinnamon
2 eggs, separated
1-1/2 cups half and half- or milk
1 cup butter, melted
2 t. vanilla extract

Sliced fresh strawberries, powdered sugar or syrup

In a bowl, combine dry ingredients. In another bowl, lightly beat egg yolks. Add milk, butter and vanilla; mix well. Stir into dry ingredients just until combined. Beat egg whites until stiff peaks form; fold into batter. Bake in a preheated waffle iron according to manufacturer’s directions until golden brown. Serve with strawberries, powdered sugar or syrup. Yield: 10 waffles (about 4-1/2 inches).


Pumpkin Waffles

¾ c. mashed, cooked pumpkin or winter squash
½ c. flour
1 egg, beaten
¾ c. half and half or milk
1 T. melted butter or oil
1 tsp. baking powder
1 t. cinnamon
½ t. nutmeg
½ tsp. salt
Pinch of cloves

Combine all ingredients, mixing until smooth. Cook in prepared waffle iron until golden brown.

Chocolate Therapy Waffles

 2 eggs, room temperature

1/2 stick butter, melted and cooled

1 t. vanilla

1 c. buttermilk

1 c. flour

3/4 c. sugar

1/2 c. cocoa

1 t. cinnamon

1/2 each baking powder and baking soda

1/4 t. salt

1/4 t. nutmeg

Beat first three ingredients until light and foamy, about 2 minutes. Stir in milk. Beat in dry ingredients just until blended. Bake until waffles are cooked through. Makes 4 cups batter. Serve with whipped butter or sour cream and fresh fruit. I like them just dusted with powdered sugar, too.

Bacon Waffles

1 pound sliced bacon
1 3/4 cups all-purpose flour
1 tablespoon sugar
2 teaspoons baking powder
1/2 teaspoon salt
3 eggs, separated
1½ cups milk
¼ cup butter, melted
In a skillet, cook bacon until crisp. Drain; crumble and set aside. In a mixing bowl, combine the flour, sugar, baking powder and salt. Beat egg yolks, milk and butter; stir into dry ingredients until smooth. Beat egg whites until stiff peaks form; fold into batter. Add bacon. Before making each waffle, stir batter. Bake in a preheated waffle iron according to manufacturer’s directions until golden brown.

Orange Pecan Waffles

2 cups flour
4 teaspoons baking powder
2 tablespoons sugar
1 teaspoon salt
1 t. orange zest
2 eggs
1 cup orange juice
½ c. milk
½ c. melted butter
1 T. vanilla
¾ c. pecans. Note: Probably would have been better to chop them up a little. I just tossed them in the batter whole.

Whisk together dry ingredients and set aside. Beat together remaining ingredients and add to dry ingredients mixing until smooth. Cook in a waffle iron until crisp.

Blueberry Pancakes

2 c. biscuit mix*
1 c. milk
2 eggs
1 c. fresh or frozen blueberries

Combine mix, milk and eggs until just blended. Fold in berries. Pour batter by scant 1/4 cups in lightly greased griddle or skillet over moderate heat. Turn when pancakes are dry around the edges. Cook until golden brown. Makes about 13.

* Like Bisquick or Jiffy Mix or home made- recipe follows

Biscuit Mix*

8 c. flour
1 c. powdered milk
1 c. powdered buttermilk (or 1 more cup powdered milk)
1/4 c. baking powder
1 T. salt
1 1/2 c. shortening*

Combine dry ingredients and cut in shortening until well mixed. Store in tightly covered container. Makes 10 cups.

* You can substitute coconut oil or butter for the shortening- but mix will have to be kept cool. Refrigerate if using butter and use within 3 months.

Blueberry Syrup

4 c. blueberries
1 c. water
1½ c. sugar

In saucepan heat berries and water to a boil and boil 2 minutes. Crush berries with a potato masher as they cook. Add sugar and cook for 10- 15 minutes on medium heat until mixture thickens.  Process syrup with an immersion blender or in a blender until smooth.  Cool, then refrigerate. Keeps a couple of weeks. Makes about 3½ cups.


Pumpkin Pancakes

2 c. baking mix – like Bisquick or Jiffy Mix – I make my own*
3 T. brown sugar
2 t. cinnamon
1 t. nutmeg
1 1/2 c. evaporated milk
1 c. solid pack pumpkin
2 eggs, beaten
2 t. vanilla

Combine dry ingredients in mixing bowl and set aside. Whisk together wet ingredients and stir into dry ingredients. Lightly grease a skillet and cook over moderate heat. Use about 1/3 c. of batter per pancake. Turn when edges appear dry. Makes 16.


Peanut  Butter Pancakes

1 c. buttermilk baking mix, like Bisquick or Jiffy mix, I make my own

2 T. sugar

1 egg

1/3 c. peanut butter

2/3 half and half

1/4 c. water

Combine baking mix and sugar and set aside. Whisk together remaining ingredients until smooth and add the dry ingredients, stirring until just combined. Heat and lightly oil skillet and use 1/4 c. of better for each pancake. Cook over medium heat. Turn when edges appear dry. Makes 8.

Red Grape Syrup

  I took about 2 cups of frozen grapes and set them in a small skillet with about 1/4 cup of sugar. I let this mixture cook over medium high heat until the grapes were tender and the liquid in the pan had created a syrup. I didn’t need to add water as the frozen grapes gave off their juices as soon as they started to heat up. With fresh grapes you might want to add a little water to get the whole process going. It took about 15 minutes in all. While the grapes were cooking I made the pancake batter and began cooking the pancakes. When the pancakes were done I topped them with a few grapes and a drizzle of the pretty grape syrup.
 

Food Gifts for Mom

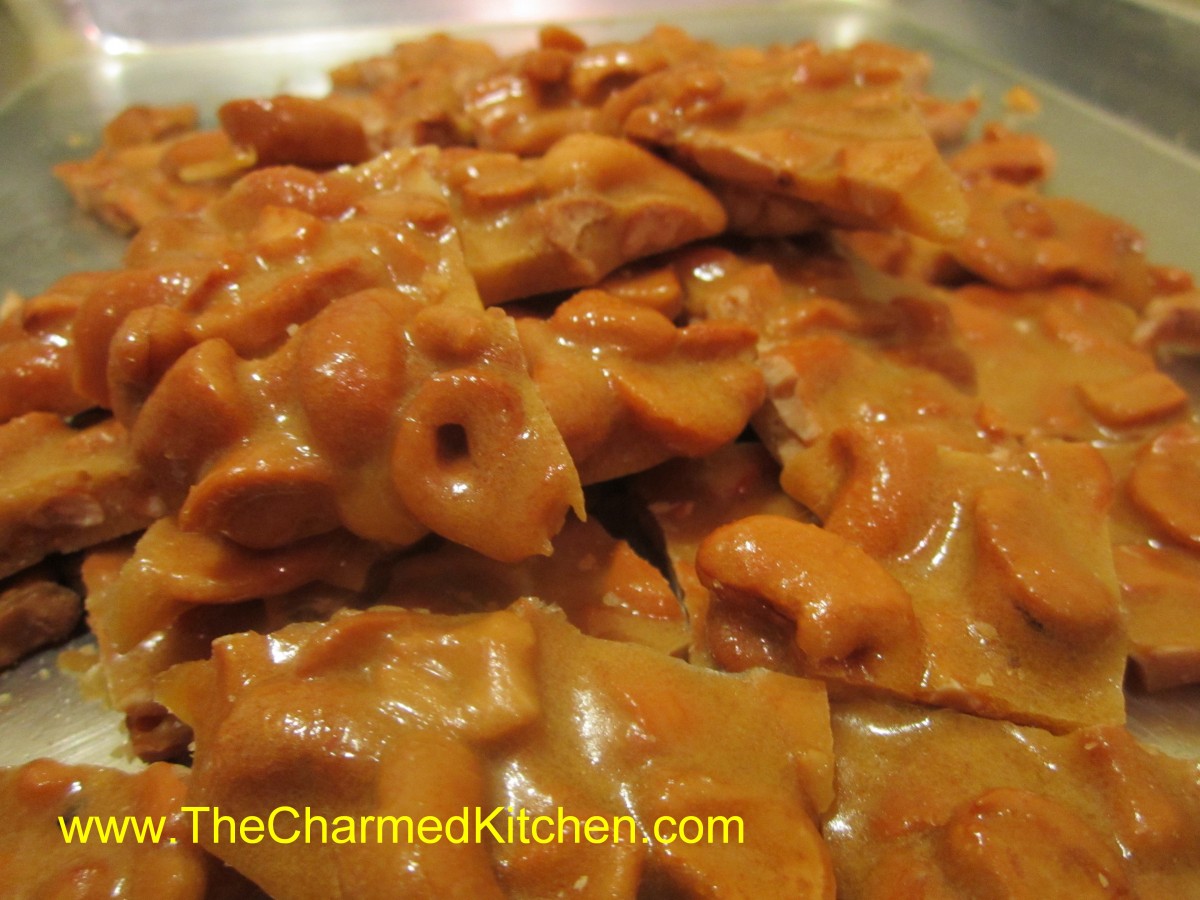
Homemade Cashew Brittle

Homemade gifts are always special. For Mother’s Day, I think homemade is even more appreciated. I’ve assembled some of my favorite food gift recipes. While some will require adult hands, there are a few kid- friendly options, too. None of these take a lot of time- so you still can make them for her special day. For all the moms out there- Happy Mother’s Day.


We will start with this cashew brittle recipe. Brittle was a special favorite of my own mother. I always think of her when I make it. This recipe is a breeze. Cooked in the microwave, this recipe is ready before you know it. You can, of course, use different nuts.


Homemade Cashew Brittle

2 c. cashews*

1 c. sugar

1/2 c. corn syrup

1/8 t. salt

1 t. butter

1 t. vanilla

1 t. baking soda

Butter or oil a large baking sheet and set aside. In a 3-4 quart glass bowl combine the nuts, sugar, corn syrup and salt. Microwave on high for 3 minutes. Remove from microwave, stir well and return to microwave. Cook 3 more minutes in microwave. Remove and stir in butter and vanilla, stirring until butter has melted. Return to microwave and cook for 2 more minutes. Remove from microwave and stir in baking soda. Stir until well blended and pour mixture onto prepared baking sheet. Spread out quickly, then allow to cool. Once cool, break into pieces. Store in a cool, dry place. I normally store it in a tin or plastic container with a tight-fitting lid.

* I used salted cashews but feel free to experiment with other nuts

Note: Use high power setting on microwave.


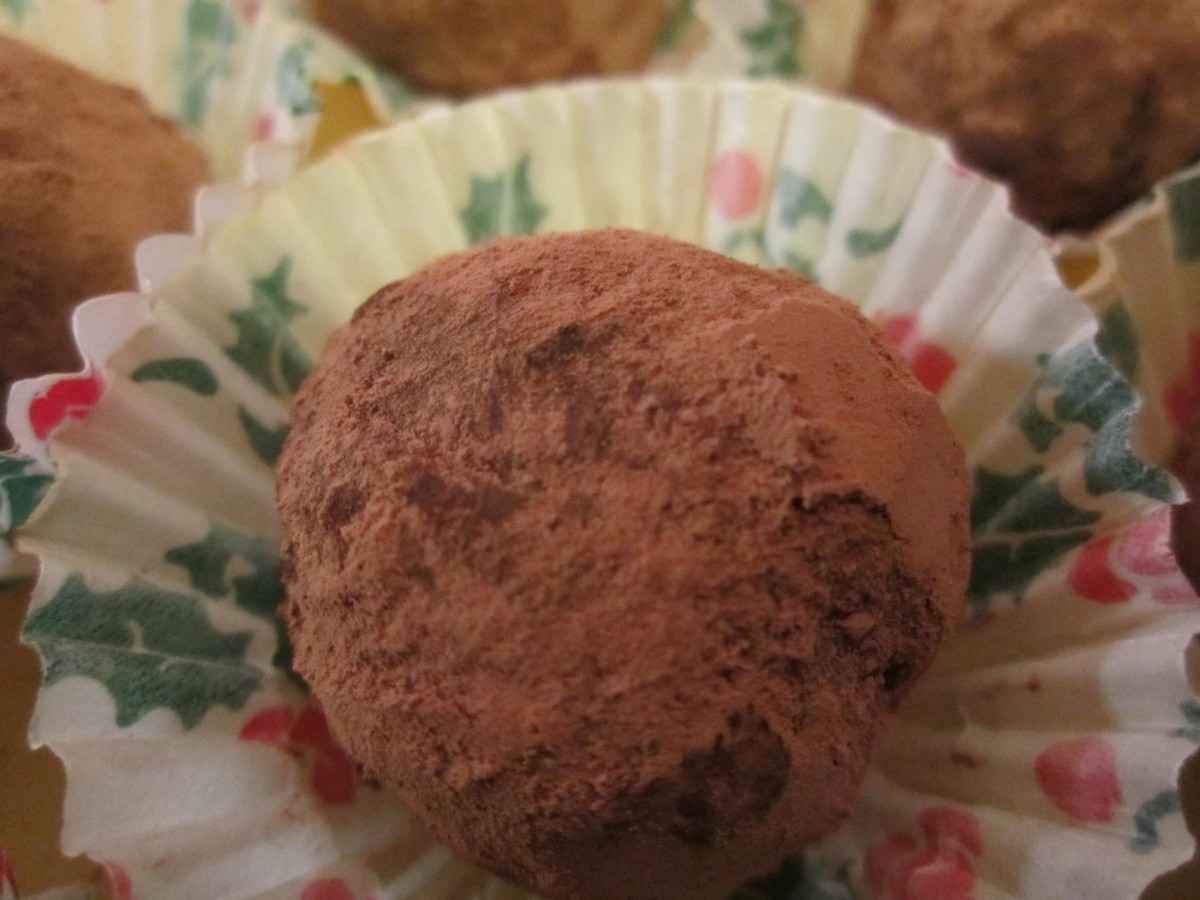
Truffles

1/3 c. Whipping cream

6 T. butter, cut into small pieces

2 c. chocolate chips- or 12 oz. chocolate, grated or chopped coarsely

Unsweetened cocoa

Heat cream to boiling in small saucepan. Stir in butter and cook until melted. Remove from heat and stir in chocolate until melted. Place in shallow bowl and chill until firm, at least a couple of hours. Roll mixture into 1-inch balls and roll in cocoa. Sometimes the mixture is quite firm and hard to roll into perfectly smooth balls. You can roll them out as smooth as you can, roll in cocoa and then roll again to smooth out. You might want to give them another roll in the cocoa after that.  Makes about 30.

Chocolate Truffles

Chocolate Truffles

Minty Cocoa Hearts

Minty Cocoa Hearts

Sugared Nuts

Sugared Nuts

Homemade Bavarian Mustard

Homemade Bavarian Mustard


Minty Cocoa Hearts

If you are looking for a simple chocolate treat- that requires no cooking – try Minty Cocoa Hearts. This easy to make candy is made with just a few ingredients. The “dough” is mixed and rolled out. Then you just cut them out into little hearts. They taste great and they are also a nice project for kids. There is no special equipment needed other than a tiny heart-shaped cookie cutter. So if time is short and you really want to make something homemade this Mother’s Day- these could be the answer.

9 c. powdered sugar
1 c. cocoa
1/2 c. butter, softened
1/2 c. water
2 t. peppermint extract

In large bowl combine ingredients until well blended. You can add more water, if needed, 1 teaspoon at a time. Divide mixture into 2 pieces and shape in balls. Place each between sheets of wax paper and roll out to 1/4 -inch thickness. Cut out with tiny cutters and place on foil-lined tray. Chill several hours, then wrap up in colored foil or place in tiny candy bags. Makes 80 (1-inch) candies.


Sugared Nuts

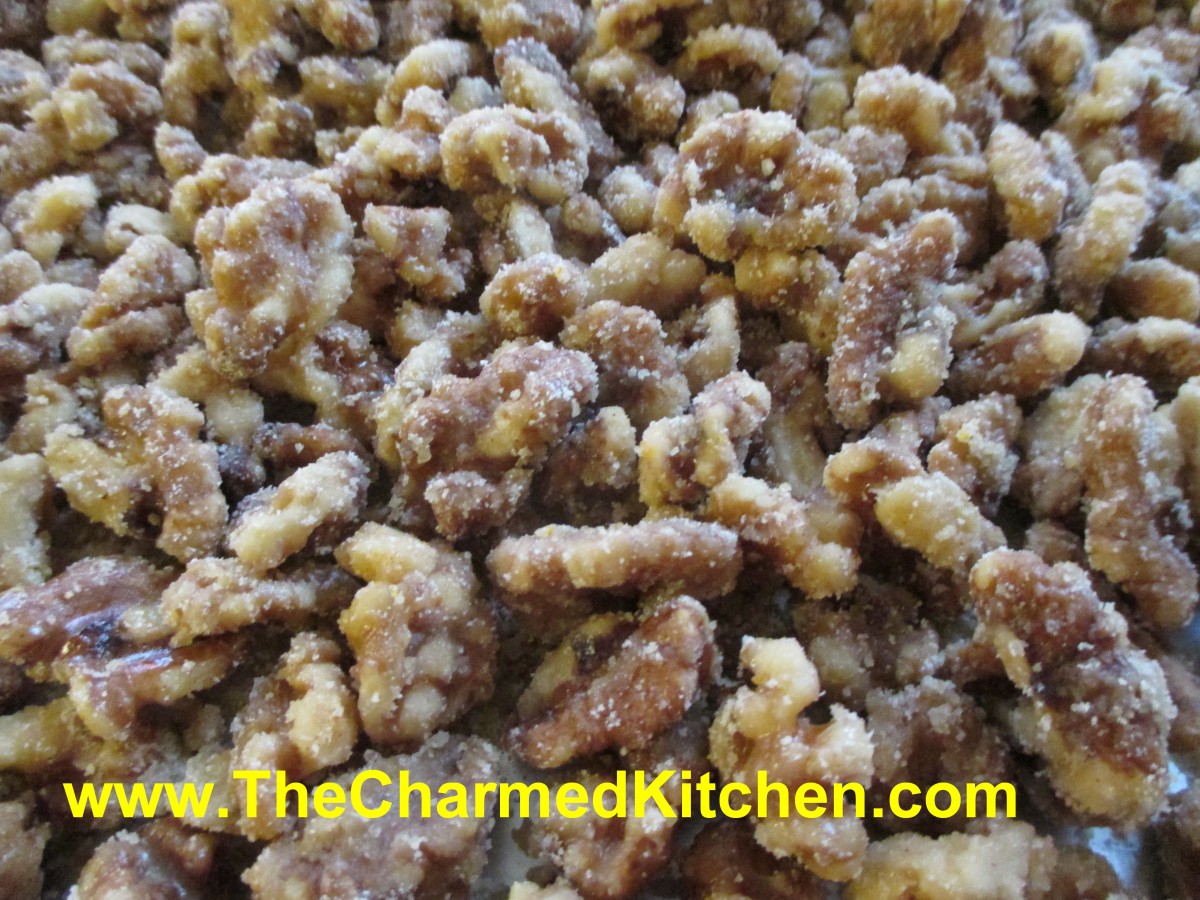
Many years ago, my sister Cindy gave me the recipe for making these nuts. I make at least a few batches every year, and they are always a big hit. I will admit to tweaking the recipe a little over time, but the basics are still the same. Nuts are placed in a heavy skillet with sugar, water and seasonings. The mixture is then brought to a boil and cooked until most of the liquid cooks off. This takes about 10 minutes, give or take. You dump the nuts onto a cookie sheet, and start stirring immediately. If you don’t stir them, they will stick together.  This is where the magic happens. The nuts look wet when you pour them out and start stirring, but in a few minutes, they cool and dry, and the sugar crystallizes on the nuts. Once cooled, the nuts are crunchy and sweet and very tasty. You can use them as a snack, or in all sorts of recipes. This is a really fast confection to make, and is a nice gift, too.

4-5 c. nuts, I like walnuts or pecans
2 c. sugar
1 c. water
1 t. cinnamon
1 t. orange peel
1 t. salt, optional
Place all ingredients in heavy skillet and cook over medium heat, stirring often, until all the water disappears. Whatever liquid in the pan will be clinging to the nuts and syrupy. Dump nuts onto a large cookie sheet and break apart with a wooden spoon to prevent clumping. As nuts cool, stir once or twice to remove any remaining clumps, and to cool faster. Nuts will lose their glossy appearance and attain a sugary crust. If it looks like nut soup, you didn’t cook them long enough, and you must return all to the skillet and cook longer. As the nuts start to get drier during cooking, you can turn down the heat a little to prevent burning. Once you’ve made a few batches, though, you will get good at judging when to stop cooking. You can also make a spicy version by adding a teaspoon of cayenne pepper along with the other ingredients. Store in cool, dry place to keep nuts fresh longer.

Horseradish Mustard

1 c. dry mustard
3/4 c. white wine vinegar
1/3 c. dry white wine or dry sherry
1/4 c. brown sugar
1/4 c. granulated sugar
1 T. dried minced onion
2 t. caraway seeds
1 1/2 t. salt
1/4 t. coarse ground mustard
2 eggs, slightly beaten
1 T. prepared horseradish

Combine all ingredients, except eggs and horseradish in top of double boiler and let stand at room temperature for 2 hours. Whisk in eggs and cook over simmering water until mixture has thickened and eggs are cooked, about 10 minutes. Remove from heat and stir in horseradish. Pour into sterilized jar, cool and cover. Store in fridge for up to 3 months. Makes 2 cups.

Bavarian Mustard

3/4 c. beer
2/3 c. dry mustard
2 T. sugar
2 T. cider vinegar
2 t. salt
1-t. celery seeds
1/2 t. fresh grated ginger or 1/4 t. dry
1 egg, beaten

Combine all but the egg in the top of a double boiler and let stand 2 hours at room temperature. Stir in egg and cook over simmering water. stirring constantly until mixture thickens and egg is cooked, about 10 minutes. Pour into sterilized jars and cool before covering. Store in fridge for up to 2 months. Makes 2 cups.


Spicy Mustard

1 c. dry mustard
2/3 c. dry white wine
1/2 c. vinegar, flavored with herbs or garlic
1/2 c. sugar
2 t. salt
1 t. basil
1 t. chili powder
1 t. dried minced garlic
1 t. oregano
1/2 t. cracked pepper
2 eggs, slightly beaten

Mix all ingredients, except eggs, in top of double boiler and let stand 2 hours at room temperature. Add eggs and cook over simmering water, stirring constantly until mixture thickens and eggs are cooked, about 10 minutes. Pour into sterilized jars and cool down before covering and refrigerating. Keeps in fridge for up to 2-3 months. Makes 2 cups.

French Herb Mustard

1/4 c. dry mustard
1/4 c. white wine vinegar
1/4 c. white wine or dry sherry
1/4 c. brown sugar
1/2 t. salt
1/2 t. tarragon
1/4 t. dill seed
1/4 t. celery seed
1/4 t. ground cloves
3 egg yolks or 1 whole egg

Combine all ingredients, except eggs, in top of double boiler and let stand at room temperature 2 hours. Whisk in eggs and cook over simmering water, stirring constantly, until mustard thickens and eggs are cooked, about 5 minutes. Store in crock or jar in fridge for up to 1 month. Makes 1 cup, recipe can be doubled.

Cookie Pops

These are a fun and easy gift to make with kids. I used white “chocolate” discs, but you can use real chocolate, too. Kids can make Mom an edible “bouquet”.

All you need are vanilla wafers, peanut butter or frosting to stick the cookies together, Popsicle sticks, some sort of chocolate you can melt and candies to decorate. After that it’s pretty easy.  Dip the end of a stick into the peanut butter. Press 2 cookies together on the end of the stick. Press firmly. Melt the chocolate- I used a glass bowl in the microwave,but be careful not to burn the chocolate. Dip the cookies into the melted chocolate until covered. Allow excess to drip off.  Place cookies on wax paper. Decorate your “pops” to look like flowers- I used M&M’s. Allow them to dry/cool then you can just peel them off the wax paper.

You can get M&M’s in so many colors, the “chocolate” discs, too, that color combinations are pretty limitless.  If there are nut allergies to consider use frosting to stick the cookies together.

Cookie Pops

Cookie Pops


Hot Fudge Sauce


If Mom is a chocolate lover, this sauce makes a great gift. Don’t forget the ice cream!

1 c. unsweetened cocoa powder
¾ c. sugar
½ c. brown sugar
1/8 t. salt
1-c. heavy or whipping cream
½ c. butter, cut into pieces
1 t. vanilla extract

In saucepan , stir together dry ingredients then stir in cream and butter. Heat to boiling and boil 1 minute. Remove from heat, cool 5 minutes and stir in vanilla. Store leftovers in fridge. Rewarm before using.  Makes 2 ½ cups.


Posted in Cooking |

Pepperoni Pizza Bread

Pepperoni Pizza Bread

I had a special request from my brother for this bread. It is one of his favorites. These breads are kind of like Stromboli.  You can fill them with all sorts of ingredients.

I have made them with Reuben sandwich fillings, spinach with cheese, and have even made a breakfast version with scrambled eggs, cheese and sausage.

This one just happens to be his favorite, so I made pepperoni pizza this time. I also made a double batch of the recipe, so I would have 2 loaves. This way, he can freeze one for later.

Here is the recipe for one loaf.


Pepperoni Pizza Bread

3 ¼ c. flour

1 T. sugar

1 t. salt

1 package quick-rising yeast

1 c. hot water

1 T. oil

Extra oil for brushing on the dough

1/2 c. marinara sauce

6 oz. mozzarella or provolone cheese

2 oz. sliced pepperoni, about

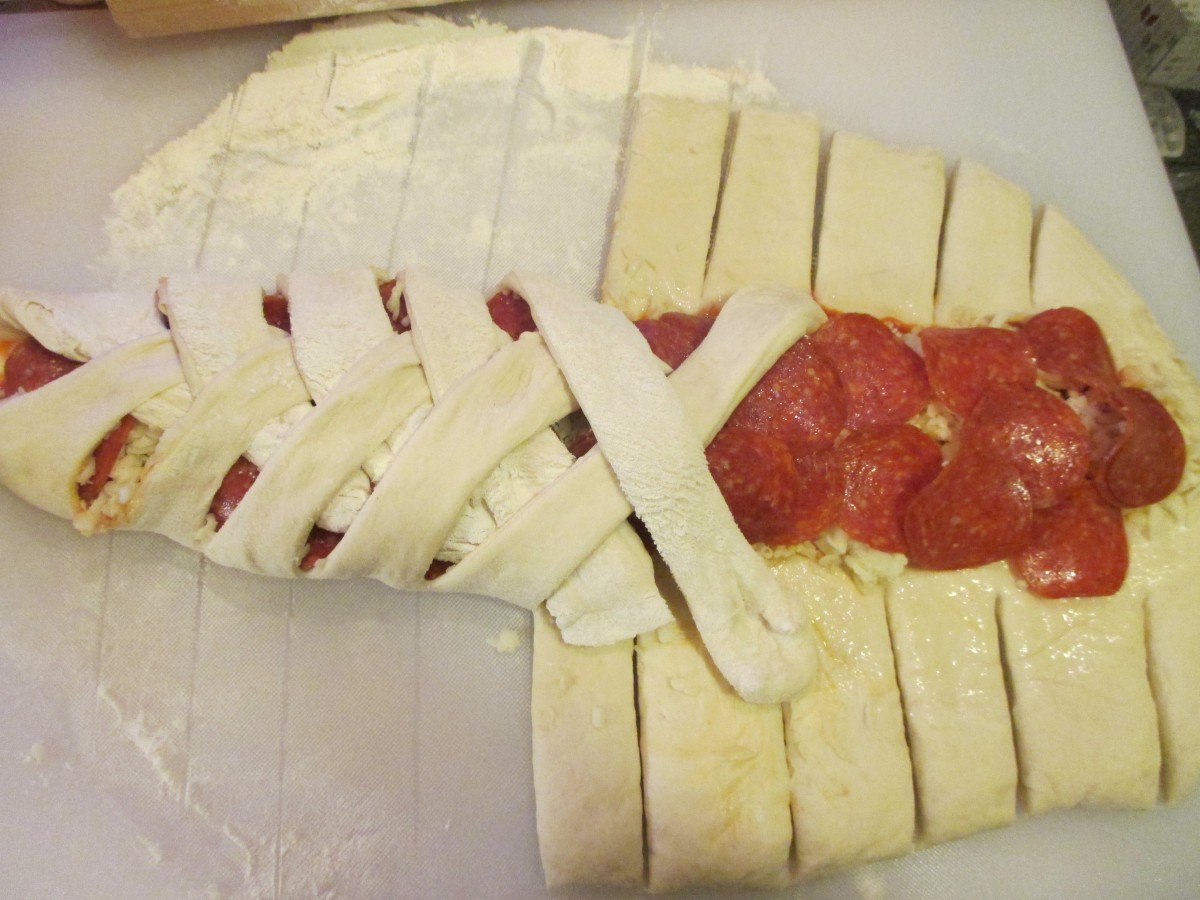
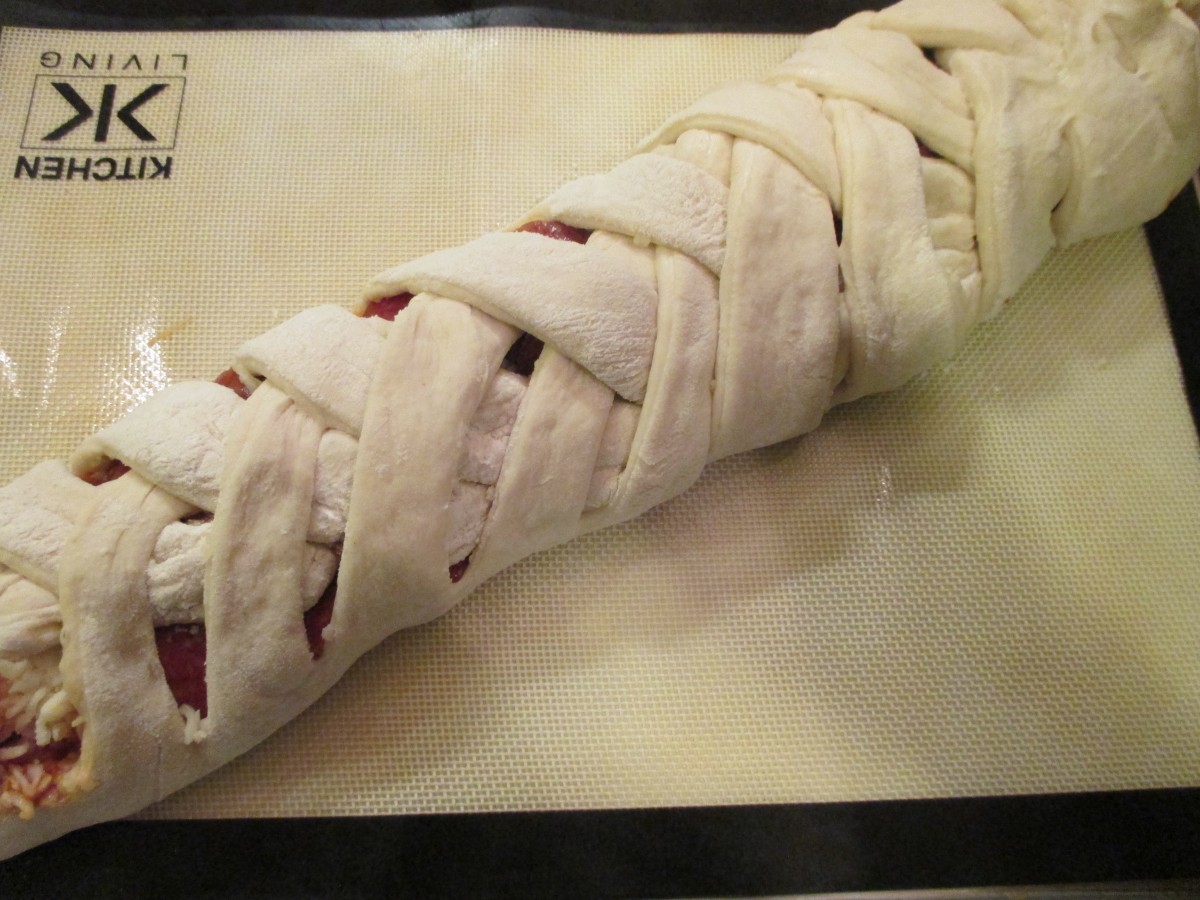
Set aside 1 cup of the flour. Combine remaining flour with the other dry ingredients in a medium bowl. Stir in water and oil and gradually stir in enough flour to make a soft dough. Turn onto lightly floured surface and knead until dough is smooth and elastic, about 5 minutes. Roll dough into a rectangle about 16 x 8. Brush with oil down center middle of dough. Top with sauce, cheese and pepperoni. Cut one-inch wide strips of dough from filling to edge on both sides. It will sort of look like fringe. Alternating sides, fold strips up and over the filling at an angle. Carefully lift loaf onto greased baking sheet and place at an angle. Cover with a towel and place sheet on top of a roasting pan half-filled with simmering water for 15 minutes. Bake in a preheated 400-degree for 20-25 minutes or until golden brown. Cool slightly before slicing. Serve warm and refrigerate leftovers. Makes one loaf.

Note: The variations for this bread are almost endless. Some favorite combinations are ham and Swiss with mustard, roast beef and cheddar, chicken, broccoli and cheese, spinach with ricotta or feta and onions, curried veggies . You get the idea. Use your imagination and have fun. Just be careful not to overfill, or the bread will be hard to move, use fillings that aren’t too runny and always use cold fillings.

If you want to use regular yeast, use warm, rather than hot water.  After kneading cover dough and let rise 45 minutes. Punch down and assemble as in original recipe. Cover with a towel and let rise until dough looks puffy, about 40 minutes. Bake as directed above. These breads can also be frozen.

Cut strips of dough and fold over the filling

Cut strips of dough and fold over the filling

Transfer to baking sheet to rise.

Transfer to baking sheet to rise.

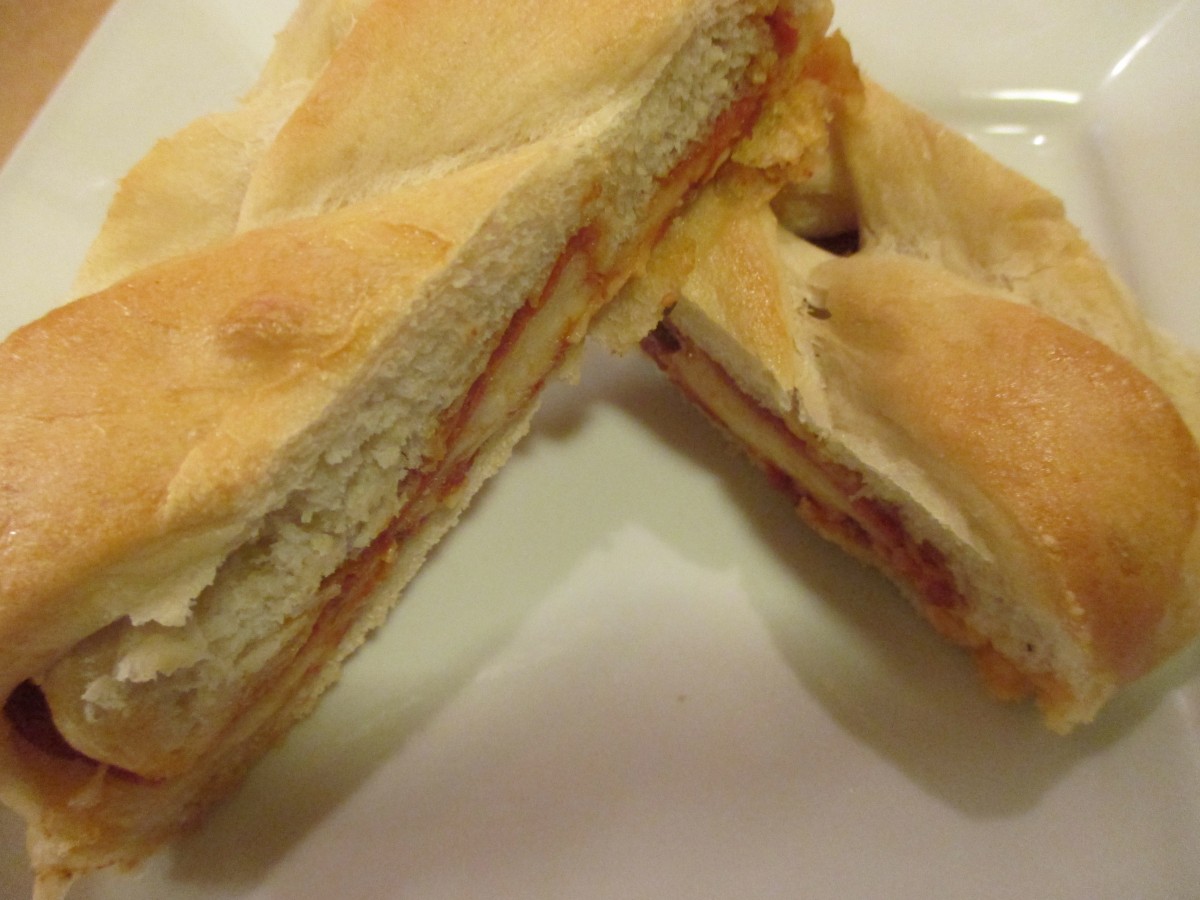
Cool a few minutes before slicing

Cool a few minutes before slicing

Posted in Cooking | Tagged |

Bath Salts for Mom

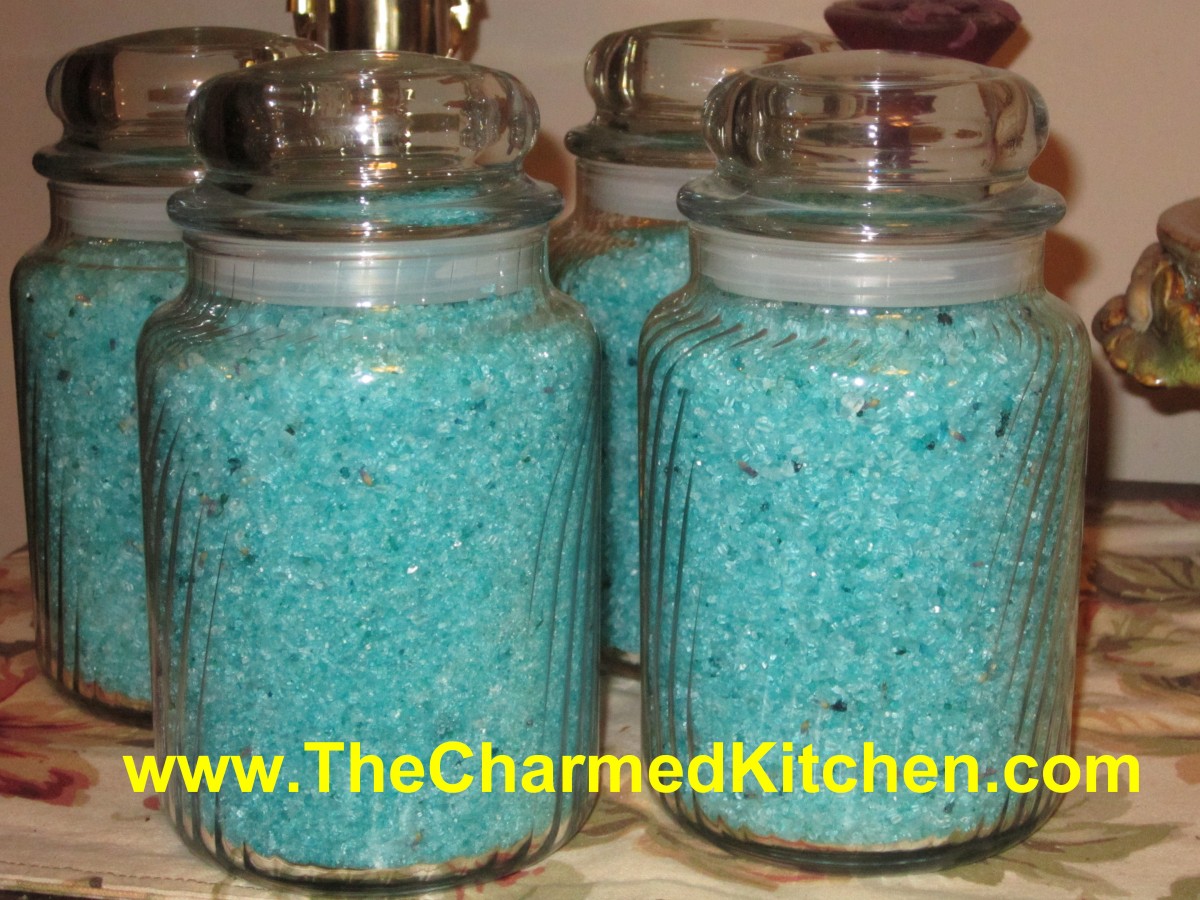
Homemade Bath Salts

This is a wonderfully simple gift, that kids can make for Mom. How sweet it is, when even younger kids, can help do something for Mom.

The ingredients are fairly easy to find. Epsom salts can be found at any drug store. Essential oils can be found at most craft stores. Food coloring- grocery stores. Try to find pretty jars to put them in, and finish with a homemade label.

I like using essential oils, but you could use perfume, too. Sometimes I add small amount of dried flower petals. If you do that- just small amounts of the petals and crumbled pretty fine. You don’t want to be clogging up drains!!!


Here are the directions.


Homemade Bath Salts

Epsom Salts

Fragrant oils

Food coloring- optional

Flower petals


Place 2 cups Epsom salts in a non-reactive bowl and add a few drops of scented oils and a few drops of food coloring, if desired. Toss to distribute, or place in a jar with a tight fitting lid or even in a plastic bag and shake mixture well. Take a whiff. If you can’t smell them, add more. You can add more coloring, too if needed. Add a few petals, broken up, for additional fragrance and for color. Place salts in a glass jar with a lid or in a plastic bag and let stand 1 week. Smell again and adjust fragrance as needed. Fragrances mature and you may find them too weak or strong. Add more oil or cologne to heighten aroma or add more salts to cut down on intensity. Keep in mind that the bath salts will be diluted a lot in a bath, so a little strong is good.


The oils are available at many craft stores and by mail. See the section on mail order in the back of the book. Choosing the fragrance you want to use can be a little trickier. Most of the florals are a safe bet, but you may want to get more creative. Citrus, herb, spice and woody fragrant oils can add a dimension to your bath salts that make them really outstanding.


To present them as a gift salts can be put in a wide-mouth jar, with a lid. Decorate with ribbon and attach a small scoop, if you like. Discount and dollar stores are a good place to find attractive jars at a reasonable price as well as garage sales and resale shops. You can also package them for individual use in lollipop bags with a card board header, like the herb packets. I like to make different fragrances and label them  (relaxing bath, earthly delights, sweet dreams, etc. I then package them in the bags and add a few to a gift basket.

Posted in Cooking | Tagged , |

Baklava with Chocolate

Baklava with Chocolate Drizzle

If you are looking for an extra special dessert for Mother’s Day- you could make Mom baklava. Baklava isn’t hard to make. You just have to move quickly while assembling it. The phyllo leaves (or sheets), dry out quickly, and can get brittle. Just have everything ready before you open the package of dough and get started.

Baklava is a dessert made from layers of phyllo, finely chopped nuts, melted butter and spices. It is baked until golden. Then a sugar/honey syrup is poured over it. This recipe is dressed up a bit, with the addition of melted chocolate, drizzled over the baklava after it is baked and cooled.

The phyllo sheets I used are pretty big so I folded them in half to fit the pan I used. There was a little trimming to do, but not much.  Well worth the effort.


 Baklava with Chocolate Drizzle

1 lb. phyllo
½ lb. butter, preferably unsalted
¾ lb. walnuts or blanched almonds, chopped fine
¼ c. sugar
½ t. cinnamon
Syrup, recipe follows
½ c. melted chocolate – I used dark chocolate
Combine nuts, sugar and seasonings and set aside. Brush a 9×13-inch pan with butter and line bottom with 8 phyllo sheets, folded in half to fit pan, brushing each with butter as you go. Spread ½ of the nut mixture on phyllo leaves. Top with 3-4 buttered sheets of phyllo. Spread with the rest of the nut mixture. Add the rest of the leaves for the top. Brush top layer of leaves with remaining butter. With a sharp pointed knife score the top sheets in whatever shapes and sizes you want. Bake in a preheated 350-degree oven for 45 minutes to an hour. Baklava should be golden brown. Meanwhile prepare syrup. When baklava has cooled, warm up the syrup and pour over. Drizzle with melted chocolate. Allow chocolate to set, before cutting into squares to serve.

Syrup:
1 c. sugar
½ c. honey
1 c. water
zest of 1 lemon or orange
Bring to a boil and simmer 10 minutes. Strain and set aside.

Posted in Cooking | Tagged , , |

Mom’s Strawberry Crepes

Mom’s Strawberry Crepes

Since Mother’s Day is fast approaching, I thought I would share some of my favorite “Mom” recipes.

My mother was a great cook. I learned a lot from her. I still make many of her recipes. When I make crepes, I always think of her.

I have fond memories of watching my mother make crepes when I was a little girl. She would add the batter and tilt the pan to get the crepes smooth and thin. She made it look effortless. With a little practice, they actually are.  Crepes are easy to make and versatile, too.

They can be served for breakfast, brunch or dessert and can be sweet or savory.  I made a slightly sweet crepe batter, perfect for a fruit filling. I used strawberries – you can use your imagination to fill them any way you like. These make a wonderfully elegant dessert, yet are really easy to make.


Strawberry Crepes

1 recipe dessert crepe batter- see below

2 lbs. fresh strawberries, washed, hulled and sliced

sugar to taste- start with 1/2 cup, then adjust to your taste

1 t. vanilla

1 t. grated orange peel

powdered sugar

whipped cream, optional

Make the crepe batter (recipe below) and cook the crepes. Toss the berries with the sugar, vanilla and orange peel. Place a crepe on your work surface and spoon berries down the middle. Fold up the sides of the crepe and move to serving dish. Repeat with remaining ingredients until you run out of something. I tend to put a lot of the berries in each crepe so I run out of berries and have left over crepes. How much fruit you put in each one is completely up to you and your taste. Dust filled crepes with powdered sugar and top with extra berries- if you have any left. You can also add some whipped cream on the top. I list it as optional- but I really think you’re going to want that whipped cream. Makes about 12 crepes, give or take.

Dessert Crepes

1 c. flour

4 eggs

1 1/2 c. milk

1 T. sugar

2-T. orange-flavored liqueur or orange juice concentrate

1/4 c. butter, melted and cooled

Mix all ingredients in blender (except butter) until smooth, scraping sides often. Add butter and blend well. Let stand for 30 minutes before using, or batter can be refrigerated, covered, over night. Beat again, just before using.Heat 6 or 7 inch skillet. Brush with butter or oil and pour in about 2 teaspoons of batter, tipping pan to cover bottom of pan completely with batter. Cook until edges start to brown, turn over and cook until lightly browned (about 2 minutes per side.)Crepes can be made day ahead or even frozen between sheets of waxed paper and frozen.Makes 20.

Posted in Cooking | Tagged , , |

Busha’s Pierogi

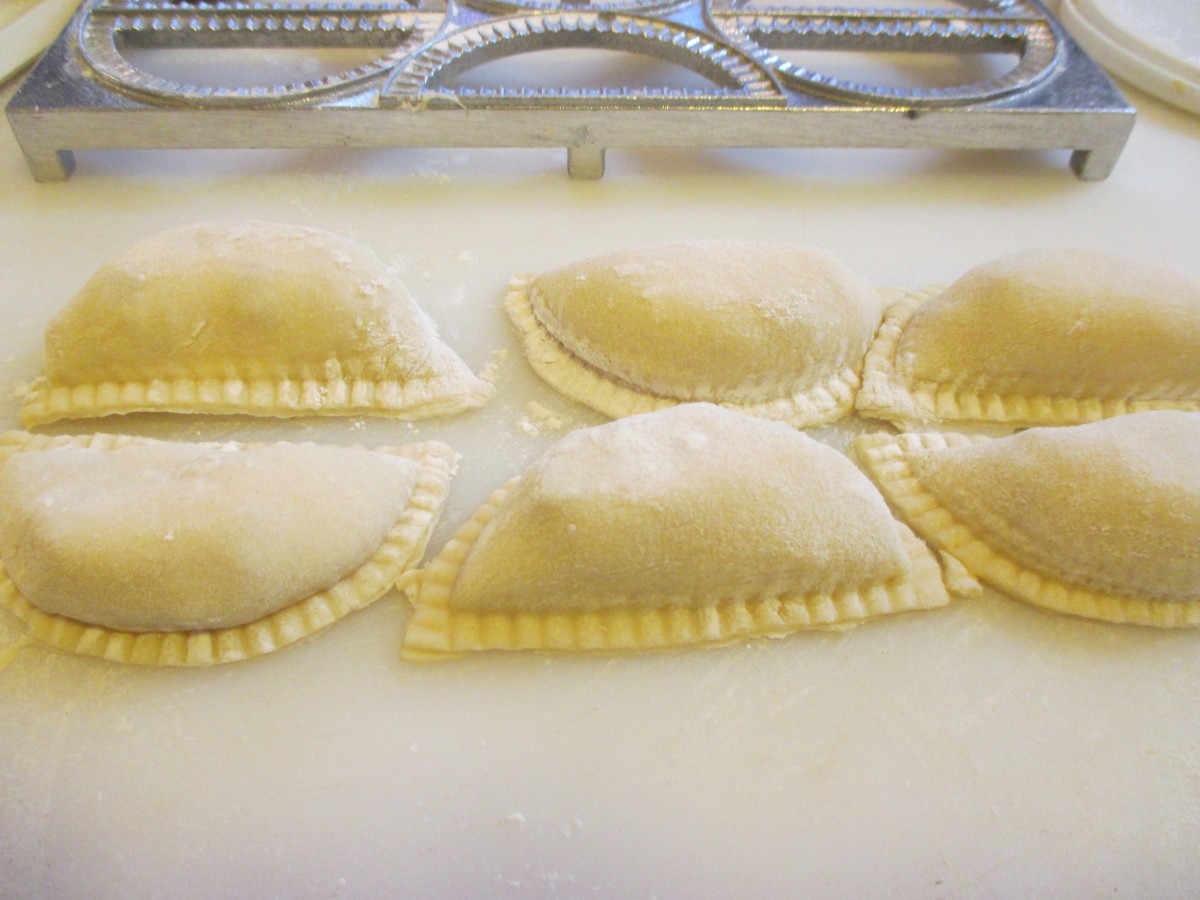
Pierogi

I taught a class earlier this week called My Mother’s Polish Kitchen. We all got a chance to make pierogi in class. It was a great way to honor her memory- and have some great food. Also honors the memory of my Busha (Polish grandmother).

Pierogi, if you didn’t know, are pasta filled with different fillings, often potato based.  They are also sometimes stuffed with prune filling or sauerkraut. Today you can find pierogi filled with all sorts of fillings. There are variations in the dough, too. Some use just eggs, flour, water and salt. Others add some dairy in the form of milk or sour cream.

Once the pierogi are made, you can boil them and just serve them up, or brown the boiled pierogi in butter and serve with caramelized onions and sour cream. My mother used to make sweet and sour cabbage and serve it with the pierogi, or sometimes even use it as a filling. I can’t make them without remembering her.


Pierogi

Dough:
2 c. flour
1 t. salt
½ c. water (you can also use half milk and half water)
1 egg
Mix all ingredients together and knead on floured surface until smooth. Cover and let rest at least 15 minutes. Roll out thin and cut into circles. Re-roll scraps. You should get between 20-30. Spoon filling of your choice on center of dough circle. Fold dough in half over filling and press edge with fork to seal. Wetting the edge of the dough will help the dough to stick. Don’t overfill or the pierogi will split. Test a couple first to get the hang of it. Place a few at a time into salted boiling water and cook until they float. You can eat them as is or brown cooked pierogi in butter in a skillet. Serve with grilled onions and/or sour cream. We would often make a larger batch and then freeze them, uncooked on wax paper-lined baking sheets. When frozen they would be transferred to a freezer bag or container. Place right from the freezer into boiling water when ready to use.

Potato filling:
2 lbs. Potatoes, peeled and boiled
½ onion, minced
2-3 T. cottage cheese or farmer’s cheese, optional
salt and pepper to taste
Mash potatoes with other ingredients and season to taste.
Note: you can also add cheddar cheese if you like. In class we had some with cheddar cheese and added ham, too.

Fresh made pierogi

Fresh made pierogi


Posted in Cooking |

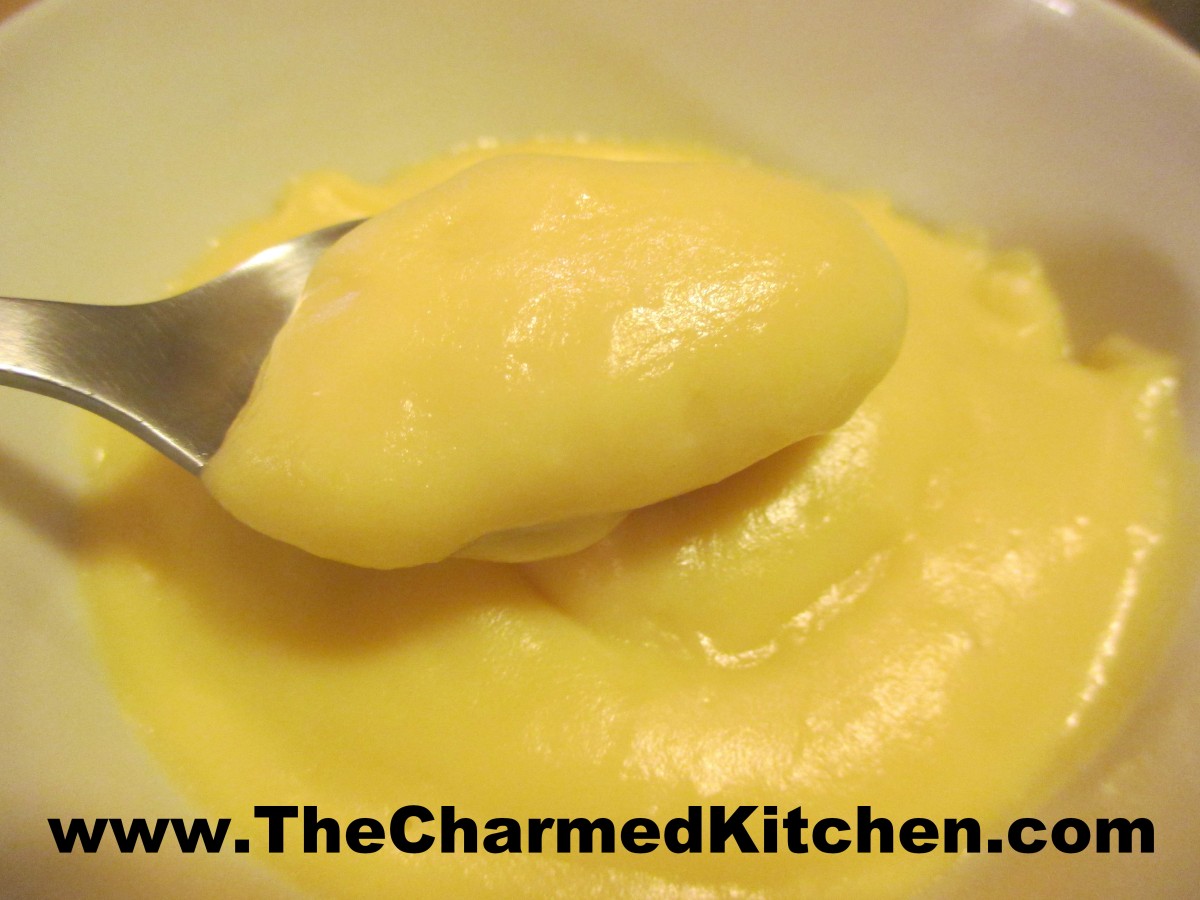
Homemade Vanilla Pudding

Vanilla Pudding

Homemade pudding is easy to make and tastes great. If you never made pudding before- the effort is well worth it. The actual cooking only takes a few minutes. The most difficult part is waiting for the pudding to cool down.

I was making white cupcakes and had some egg yolks leftover. It seemed like a perfect time to use them to make pudding.

To keep your pudding from getting lumpy- don’t heat it up too quickly. You want the egg yolks to cook slowly, to thicken the pudding, without turning into scrambled eggs. Cooking over medium heat will give you perfect, creamy results every time. Also, whisk the whole time the pudding is on the heat to give you the best results.


Vanilla Pudding


4½ c. milk or half and half

1 c. sugar

5 T. cornstarch

6 large egg yolks, beaten

1 T. vanilla extract

Heat 4 cups of the milk in a large saucepan, over medium heat, until milk starts to steam. Whisk the sugar and cornstarch together in a  bowl. Whisk in the egg yolks and the remaining ½ cup of milk. Whisk half of the hot milk into the egg mixture until smooth, then gradually whisk the egg-milk mixture into the saucepan. Cook over medium heat, whisking constantly, until the mixture boils. Continue to cook, whisking constantly, until it has thickened. about 3 minutes. Remove from the heat and stir in the vanilla. Cool slightly, stirring a few times to prevent a skin from forming. Place a piece of plastic wrap directly on top of the pudding and refrigerate until completely cooled and thickened, about 4 hours. Whisk before serving. Makes about 5 cups.


Orange Oatmeal Scones

Orange Oatmeal Scone

I just love fresh scones, still warm from the oven. These scones have a nice, crunchy outside and crumbly, tender middle. The orange juice and orange zest gives them a wonderful flavor. The oatmeal gives them a lovely texture and the raisins add just a bit if sweetness.

These are great served warm, topped with sweet butter and jam. They are perfect for breakfast or brunch.

You can also use these scones as the base for a berry shortcake. Split, topped with sweetened berries and some whipped cream, they turn into a simple and tasty dessert.


Orange Oatmeal Scones

2 1/2 cups flour
2 cups rolled oats
1 cup sugar
1 teaspoon salt
1 tablespoon baking powder
1/2 teaspoon baking soda
1/2 cup very cold, unsalted butter – cut into chunks
1 egg
1/2 cup orange juice
2 t. grated orange peel
1 cup raisins – plumped and well dried
Glaze
milk, sugar, orange zest

Line a large baking sheet with parchment paper (double two sheets if you have them – one inside the other). Preheat oven to 425 F. In a large bowl, place flour, oatmeal, sugar, salt, baking powder, baking soda and mix together. Cut or rub in butter to make a mealy mixture. Stir in egg and orange juice. Add orange peel and raisins. Mix to make a soft dough. Turn out onto a lightly floured board and knead for a few minutes. Roll or pat out into a thickness of 1/2 inch. Using a serrated cookie cutter cut into disks or rounds. Brush with milk and sprinkle with sugar and orange zest. Bake until nicely browned – about 14 minutes. Makes about 24.

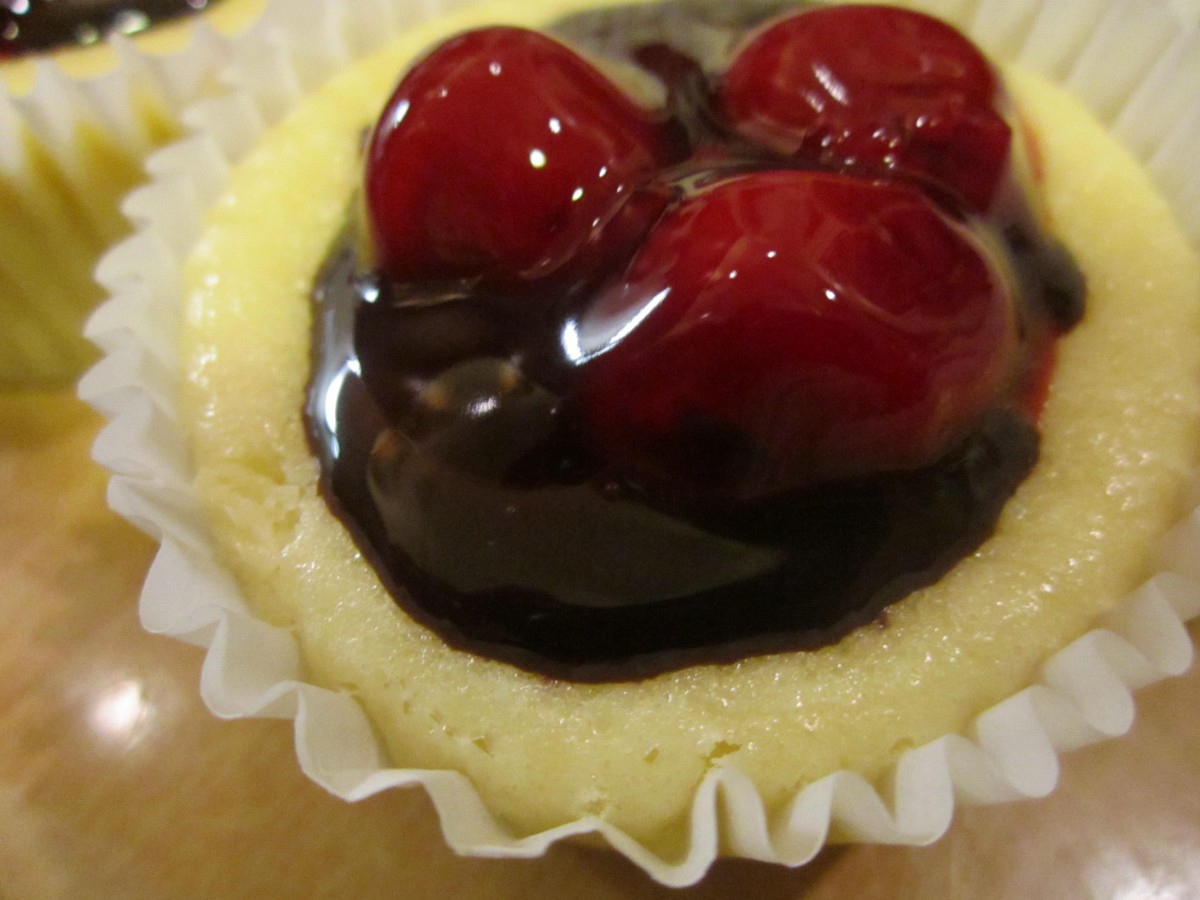
Black Forest Mini Cheesecakes

Black Forest Mini Cheesecakes

I love when things just fall into place. I had some cherry pie filling left over from making Danish. I wanted to use it up. I also needed a dessert for dinner with a friend. These little cheesecakes worked out as the perfect dessert for us.

To start with, it’s cheesecake, which is always a good thing. It is also a really quick recipe, and simple to make. Finally, the recipe just makes 6 little cheesecakes. Perfect for when you don’t need a whole cheesecake. Nothing stopping you from doubling, or tripling the recipe, if you need a few more. I used cherry pie filling (homemade), but you could top these with almost any pie filling or fresh fruit you liked, or even eat them plain.


Black Forest Mini Cheesecakes

6 vanilla wafers

8 oz. cream cheese, softened

1/3 c. sugar

1 t. vanilla

1 egg

chocolate syrup or sauce

cherry pie filling

Preheat oven to 350 degrees. Place paper liners in 6 muffin tins and place a vanilla wafer in each one. Set aside. In medium mixing bowl beat together cream cheese, sugar and vanilla until smooth. Beat in egg until just mixed. Spoon batter into prepared muffin tins.  Bake for 15- 20 minutes. Cheesecakes will puff up and then deflates a little when cooled. Once cooled top each cheesecake with a little chocolate syrup and a spoonful of cherry pie filling. Chill. Makes 6. Serves 2-3.