Monthly Archives: September 2020

Sweet and Sour Pork

Sweet and Sour Pork

For dinner with friends last night, I decided to make sweet and sour pork. It takes a bit of work- but it is worth the effort. I used a fresh pineapple, which I prefer, but canned pineapple could be used, too.

I have to admit to loving all things sweet and sour. You can buy sweet and sour sauce in most grocery stores, but I like my own better.

Make the sauce first, so you can just toss it over the pork and veggies when ready to serve.

The pork is cubed and marinated overnight in a mixture of soy sauce, cornstarch and an egg. The pork comes out very tender, when prepared this way. You could substitute cubed chicken, for the pork, if you prefer.

Sweet and Sour Pork

1-2 lbs. boneless pork

1 egg

1 t. cornstarch

2 t. soy sauce

Additional cornstarch for dredging

oil for frying

1 medium onion, chopped

1 sweet red or yellow pepper, seeded and chopped

2 cups peeled and cubed fresh pineapple,  or 1 can pineapple in juice, drained, reserving juice for sauce

Sweet and Sour Sauce, recipe follows

Chopped green onions

Cut meat into cubes and place in bowl. Combine egg, 1-t. cornstarch and soy sauce and pour over the meat, stirring to coat. Allow marinating at least 1 hour in fridge, but best if done the day before, or early in the day.

When ready to cook, heat  1-2 inches of oil in a medium sauce pan to 350 degrees. Dredge the pork in corn starch to coat. Set aside. Heat 1T. oil in large skillet or wok. In wok, sauté onions on high until tender. While you are cooking the onions and other vegetables, start cooking the cubed pork in the sauce pan in the 1-2 inches of hot oil. It will take several batches to cook the pork. As the pork cooks- it will take about three minutes per batch- remove the pork from the pan and drain on paper towels. Continue to cook the pork in batches while finishing the veggies and pineapple in the wok.  Add pepper to onion and sauté 3 minutes more. Add pineapple and cook until pineapple starts to brown a little. Add the cooked pork to the onion mixture. Then and some of the sweet and sour sauce and toss until coated. There is usually extra sauce for a later use. Serve over rice,  and top with some green onions. Makes 4-6 servings.

Sweet and Sour Sauce- see note

1/2 c. apple cider vinegar

1/2 c. sugar

1/2 c. pineapple juice

3 T. ketchup

2 T. soy sauce

2 T. cornstarch

1 t. dried minced garlic

1-t. fresh grated ginger

Hot pepper flakes to taste

In saucepan combine all ingredients. Cook over medium heat, stirring as mixture gets hot, until sauce begins to bubble. It will also get much clearer. Boil gently 1 minute, stirring constantly before removing  You may also want to use only some of the sauce and save the rest for another use.from heat. Makes 1 1/2 c. Keeps in the fridge for a couple of weeks.

Note: If you make the sweet and sour sauce ahead of time it will get runny when reheated if made with regular cornstarch. Either use modified cornstarch (Clear Gel ) or make sauce just before using.


Honey Ice Cream

Honey Ice Cream

I love this ice cream. The richness of the custard works wonderfully with the sweet flavor of the honey. I don’t use all that much honey in this recipe. It is sweet, but not overly so. You could make it sweeter if you like.

I was recently given some local honey (thanks, Richard). I wanted to use some of it in a special dish. This ice cream is certainly special. I am pairing it with coffee waffles for dessert.

So here is the recipe. I hope you give it a try.

Honey Ice Cream

1 ½ c. whipping cream

1 ½ c. half and half

2/3 c. honey

6 large egg yolks

pinch of salt

Heat together cream and half-and-half to simmer . Whisk honey, yolks and salt in a medium bowl. Gradually whisk in hot cream mixture. Return to pan and heat until mixture thickens (about 170 degrees). Do not boil. Strain into large bowl. Chill until cold. Process in ice cream maker. Makes 4 ½ c.

Honey Ice cream with a Coffee Waffle

Copper Pennies-Carrot Salad

Copper Pennies

A very long time ago, I was served a salad called copper pennies. The name came from the rounds of carrots that were the main ingredient. I know the salad had a sweet and sour tomato-based dressing. I liked it a lot.

The original dressing was made from canned tomato soup. I didn’t have tomato soup, but I had tomato sauce. I winged it and came up with a dressing I really like. It reminds me of a sweet French dressing. There is enough dressing that I spooned some out and used it on a lettuce salad.

So here is my version of copper pennies. Fun name, tasty salad.

Marinated Carrot Salad- Copper Pennies

1½- 2 lbs. of carrots, peeled and sliced

1 sweet pepper, seeded and chopped

1 small sweet onion, chopped

1-2 green onions, chopped, optional

Dressing

1 c. tomato sauce

¾ c. apple cider vinegar

¾ c. sugar

½ c. oil

2 T. prepared mustard- I like Dijon

2 t. salt

1 t. hot pepper sauce, or to taste

pepper to taste

Steam or boil carrots until just tender. While carrots are cooking place veggies in a large bowl. In a medium bowl, combine dressing ingredients and whisk until smooth. When carrots are cooked, drain and place them in the bowl with the veggies. While carrots are still hot, pour over the dressing and stir to cover them well. Allow carrots to cool down a little before covering the bowl and placing in the fridge to chill thoroughly. Serves 10-12. Keeps for a couple of weeks.

Coffee Waffles

Coffee Waffles

Yes, you read that right. Coffee waffles. Waffles with coffee already inside them. They are quite wonderful actually. Great for breakfast, which is obvious, I suppose. These waffles also make a fun base for desserts. I am serving them with honey ice cream as a dessert later this week.

I wanted to add coffee flavor to waffles, but I knew even strong coffee would water down the batter too much. The only solution was to use either instant coffee or espresso powder. I knew I could get enough coffee flavor into them, without affecting the batter in a negative way.

It worked!! Plenty of coffee flavor and a nice, crispy waffle. I was thinking it might be fun to add cinnamon to the next batch. I got 10 rectangular waffles out of the recipe. Froze most of them for later.

You can serve them topped with butter, syrup, whipped cream or powdered sugar.

So here is the recipe. Hope you give them a try.

Coffee Waffles

1¾ c. flour

¼ c. brown sugar

1½ t. baking powder

½ t. salt

1½ c. half and half or milk

1 egg, beaten

1/3 c. oil

1 T. instant coffee or espresso powder   

1 T. vanilla

Non-stick spray or oil for coating the waffle iron

In medium mixing bowl, mix dry ingredients together and set aside. In a separate bowl, combine the half and half with the remaining ingredients. The dry coffee granules will not dissolve right away. You can let the wet ingredients sit a few minutes and whisk again, if you like. While they are just sitting there, you can heat up the waffle iron. Coat the waffle iron with a non-stick cooking spray or brush with a little oil. Add the wet ingredients to the dry ingredients and stir until mixed together. Don’t get crazy over mixing. That will give you tough waffles, and nobody wants that. Just stir until you don’t see any dry bits in the mix. I like to use a rubber scraper to get to the bottom of the bowl. Ladle some batter into the waffle iron and cook until golden brown. When the steam stops coming out of the waffle iron, or lessens a lot, it is usually good indicator that your waffles are done. Yield depends on the size of your waffle iron. I got 10 waffles, about 4×5 inches.  

Note: The instant coffee breaks down more when mixed with the dry ingredients. Espresso powder will dissolve quickly, but if you use instant coffee like I did, expect a few “flecks” of coffee in the batter. I kind of liked the way it looked. 

Spelt Dinner Rolls

Spelt Rolls

Spelt flour is one of my favorites for making yeast breads and rolls. Spelt is a whole grain flour,  with all the fiber and nutrition of whole wheat flour. Spelt has a softer texture than whole wheat flour. It is easy to work with and rises light and tender.

Spelt also doesn’t require as much kneading as other flours.

For this recipe, I just divided the dough into 12 pieces for pretty good sized rolls. You could divide the dough into up to 18 pieces if you prefer smaller dinner rolls. If you have family members who aren’t crazy about the heavier texture of whole wheat you might want to give spelt flour a try.

Spelt Dinner Rolls

3 ¼ c. whole spelt flour
1 pkt. Active dry yeast
1 c. water
¼ c. honey
¼ c. oil
1 t. salt
1 egg
Place 2 c. flour, yeast and salt in a medium bowl. Heat together water, honey and oil until warm (120-130 degrees) Add water mixture to spelt mixture and beat on low speed of electric mixer for 30 seconds, or until moistened. Add egg and beat on high 3 minutes. Stir in enough spelt to make a soft dough. Cover bowl with a towel and allow to rise until doubled, about 1 hour. Grease a baking sheet and set aside. Use a rubber scraper to transfer dough onto floured surface. Divide dough into 12 pieces. Shape each piece into dinner roll shapes, using extra flour to prevent sticking. Place on baking sheet and cover with a towel. Allow to rise until doubled, about 1 hour. Cover and let rise until doubled, another hour. Bake in a pre-heated 375 degree oven for 15 minutes or until rolls are light brown on top. Remove from pan and cool on wire rack. Makes 12 rolls.

Martha’s Beets

Martha’s Beets

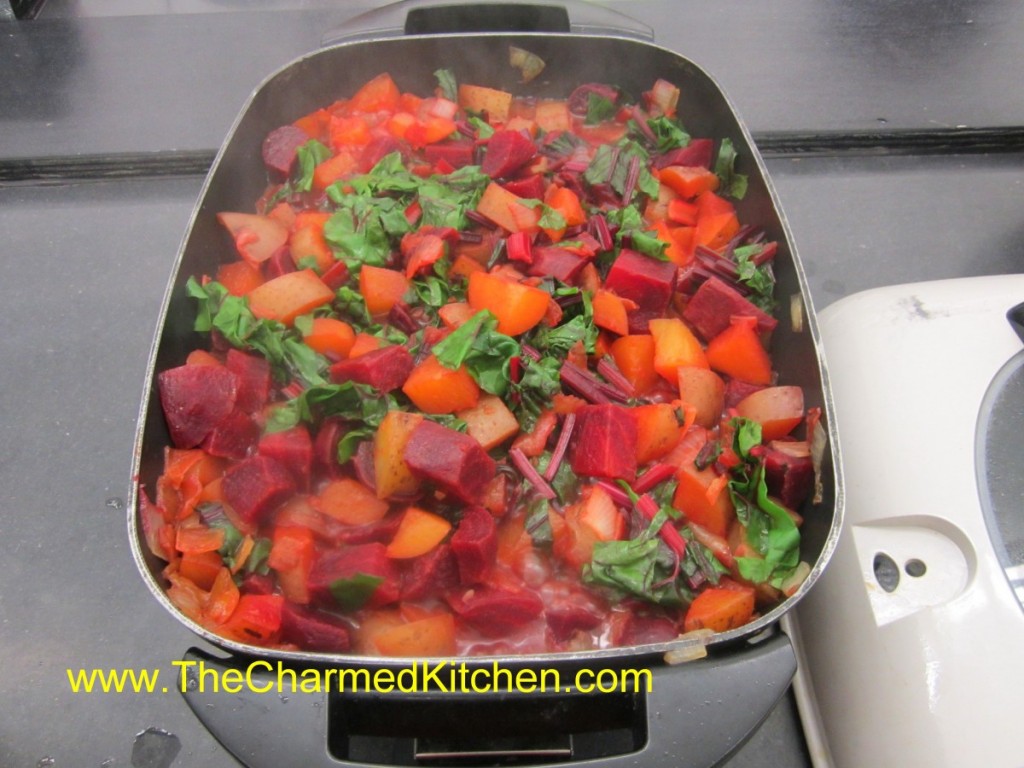
I had picked up some beets from a produce market the other day. I have made this dish many times and it seemed like a good time to make it again. It is so tasty and easy to make. You just have to give the flavors time to develop.

This is a recipe that my friend, Martha, made for us one chilly autumn afternoon, many years ago. The amounts are random for a reason. Just use what you have- more or less – and let the flavors blend together gently. That is what Martha did.

Full of earthiness and great fresh flavors it is always a favorite of mine. I always think of her, with great affection, when I make it. Miss you, my beloved friend.

Martha’s Beets

Oil

2 Onions, chopped

Potatoes, cut in big chunks, peeled, if desired

1 bunch beets, with greens*

Chicken or vegetable  stock

Parsley

Salt and pepper

Cook beets in boiling water for 20 minutes. Cool and slip off skins. Cut up beets into chunks. In large pot, cook onions in oil until tender. Add potatoes and prepared beets with just enough stock to keep them from sticking. Cover and cook over medium-low heat until vegetables are tender. Meanwhile, chop up the beet greens. Add them to the pot and stir in. Cover and continue cooking until greens are tender. Toss in fresh parsley and cook 5 minutes longer.

* If you can’t find beets with greens, or if you like more greens, you can also add red Swiss chard in place of the beet greens.

Zucchini Quesadilla

Zucchini Quesadilla

If you are looking for a fast and easy new way to prepare zucchini this dish really works well. Somewhere between a quesadilla and a frittata it can be a main dish, side dish, brunch dish or even a great breakfast. The hardest part is getting it turned over once it starts to set.

Don’t worry if it isn’t perfect. Once you sandwich it between two tortillas any mistakes are covered up. All cheesy and gooey in the middle, with crisp tortillas on the top and bottom, it might even get your kids to eat their veggies. You just cut it in wedges to serve.

Zucchini Quesadilla

2-3 c. shredded zucchini
2 eggs
1 medium onion, minced or grated
1 carrot, shredded
1/2 c. flour
2 t. dried basil or 2 T. fresh
2 t. dried parsley
1/2 t. salt, or to taste
1/2 t. chili powder
Oil
2 (10- inch) tortillas – I used whole wheat
1 c. shredded cheese, cheddar or Monterey Jack work well, but use what you like or have on hand.
Pepper confetti (finely minced sweet peppers, mixed colors if you can)
Salsa, optional

Combine first nine ingredients in bowl and set aside. Heat 10-inch skillet and add a small amount of oil. Pour in zucchini mixture and spread out evenly. Turn down heat to medium-low and cook until edges start to firm up and brown. With spatula turn over zucchini pancake and cook 3 minutes longer. It should be set. Place 1 tortilla on top of “pancake” and turn over again, so tortilla is in bottom of pan. Place cheese on top of pancake and place second tortilla on top of the cheese. Press down lightly. Cook a couple of minutes before turning again. Tortilla should be lightly browned. Cook long enough for the second tortilla to also brown. You can flip them back if to want to make them crispier. Remove to serving dish and sprinkle with the peppers. Cut into wedges and serve. Serve with salsa, if desired. You can also add a dollop or sour cream or some sliced ripe olives if you like.
Makes 2 luncheon servings or 4 appetizers. You can also make them ahead of time and keep them warm or reheat them in a 350-degree oven for about 15 minutes.

Variations: You can use 1-2 cups cooked mashed beans (kidney, black, chickpeas etc. in place of the zucchini, or even use cooked lentils.

Spicy Golden Beet Soup – Vegan

Spicy Golden Beet Soup

I picked up some beautiful golden beets at a local produce market. I wanted to do something fun with them. I opted to make a soup. Since a vegetarian friend was stopping by, I decided to make the soup vegan.

I added other veggies to add more flavor- and a generous amount of hot sauce. The soup has a nice kick of heat- perfect for a chilly evening. This soup can also be served chilled- so it works no matter the weather.

I used my immersion blender to puree the soup. That way, I didn’t have to remove the hot soup from the pot to puree it. Using a blender is fine, but be careful when pureeing a hot liquid. It will splash up in the blender.

To prevent a mess and possible burns, remove the center piece of the blender lid. Place lid on the blender. Place a folded kitchen towel over the hole when blending. That way, when the liquid splashes up, the towel will prevent it from going everywhere. Also, don’t try to mix too much at a time. Several smaller loads are easier.

The 2 quarts of stock should be plenty, but depending on how much your soup cooks down, you might need a little more. How thick you like your soup is a personal preference. If you like a thicker soup, use less stock, or allow it to cook down more. Once the soup is pureed, you will know. You can adjust the thickness once the soup is pureed.

While this version is vegan, you can serve sour cream on the side, for those who like sour cream with beet soup.

Spicy Golden Beet Soup

4 T. oil

2 onions, chopped

5 carrots, peeled and sliced

3-4 golden beets, peeled and cubed – about 2 lbs.

1 medium cauliflower, chopped

8 c. vegetable stock – you might need a little more- if finished soup is too thick

1 c. tomato sauce

2 T. Tuscan seasoning* recipe follows

¼-⅓ c. Sriracha sauce- or to taste

handful of fresh parsley

Salt and pepper to taste

In large pot, heat oil and cook onions until tender. Add carrots and cook a few minutes longer. Add remaining vegetables, stock, and seasonings (except the parsley) and simmer, covered for an hour or longer. Add the parsley, then puree soup in a blender in batches until smooth. You can also use an immersion blender to puree the soup. Return to pot and add more stock, if needed. Adjust seasonings and serve. Makes a lot of soup – but freezes well.

*Tuscan Seasoning

½ c. dried basil

½ c. dried oregano

½ c. dried marjoram

3 T. dried minced onion

2 T. dried minced garlic

2 T. dried rosemary

2 T. dried parsley

1 t. crushed red pepper

Combine all ingredients and store in an air tight container. Use this blend in tomato sauce or other Italian dishes.

Dehydrating Vegetables

Dehydrated Vegetables

Do you ever buy a bag of potatoes, only to toss half of them away because they got mushy? Maybe your onions starting sprouting well before you could go through the whole bag? I hate when that happens. An easy solution could be to dehydrate them.

I have dehydrating on my mind this week. I found myself with some extra produce and I didn’t want it to go to waste. Dehydrating is an easy way to save it. It is a great way to preserve some of those wonderful tomatoes, too.

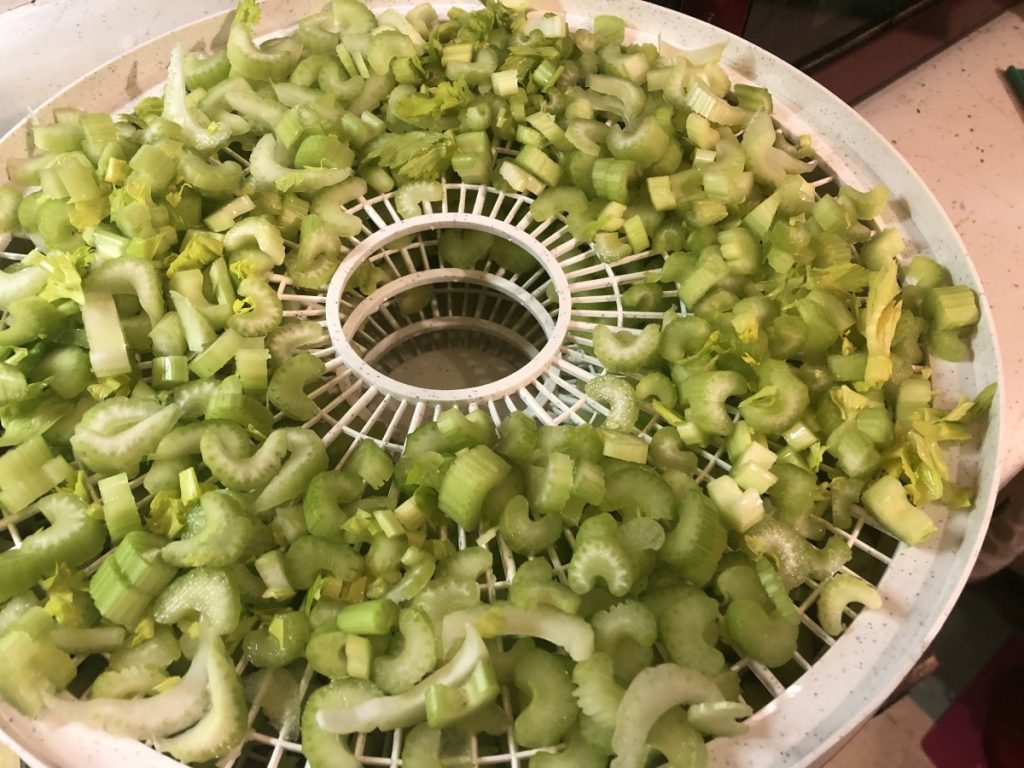
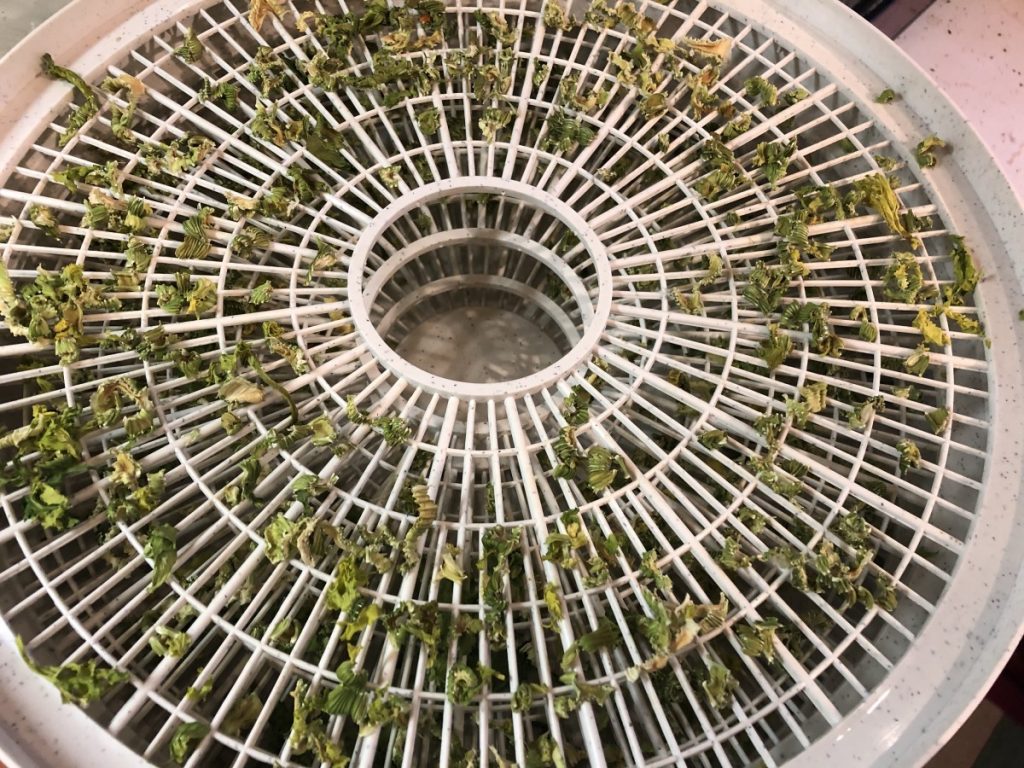
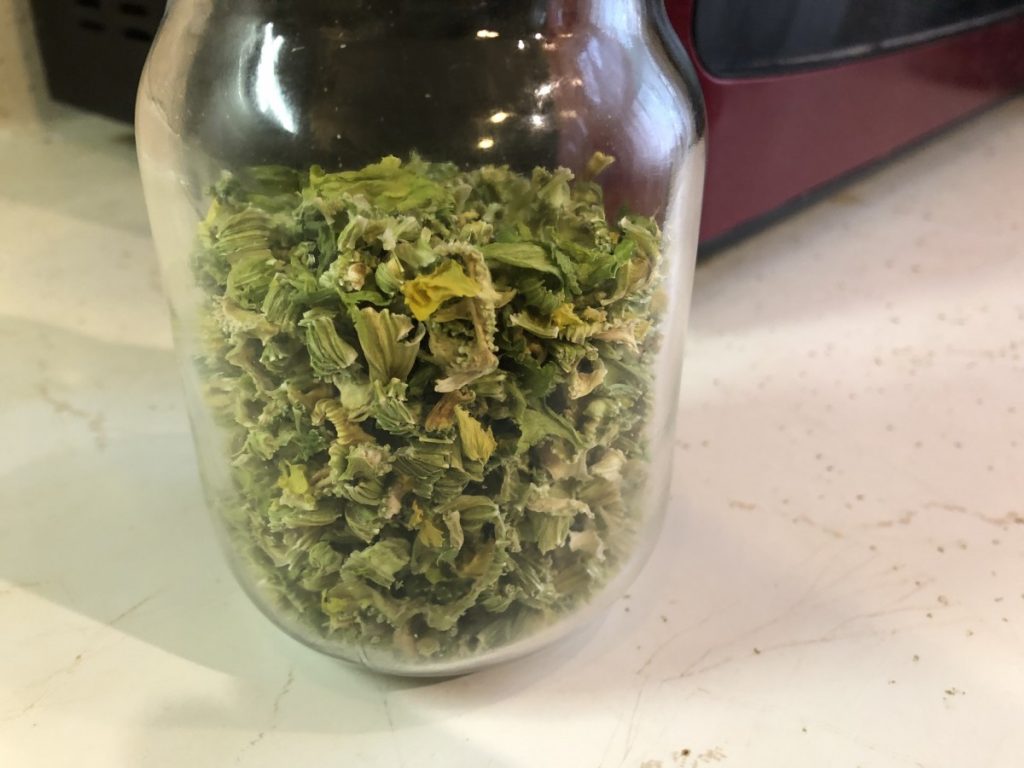
I started by dehydrating 2 large stalks of celery. I just washed them well, chopped them up, and placed them on the dehydrator trays. They filled my dehydrator, but once dried, I had little more than a cup. In case you were wondering- an entire bunch of celery is a stalk- one individual piece of celery is called a rib. I can use my celery in soups, sauces and stews. I can also powder it up and use it in salad dressings, marinades, rubs, and dips.

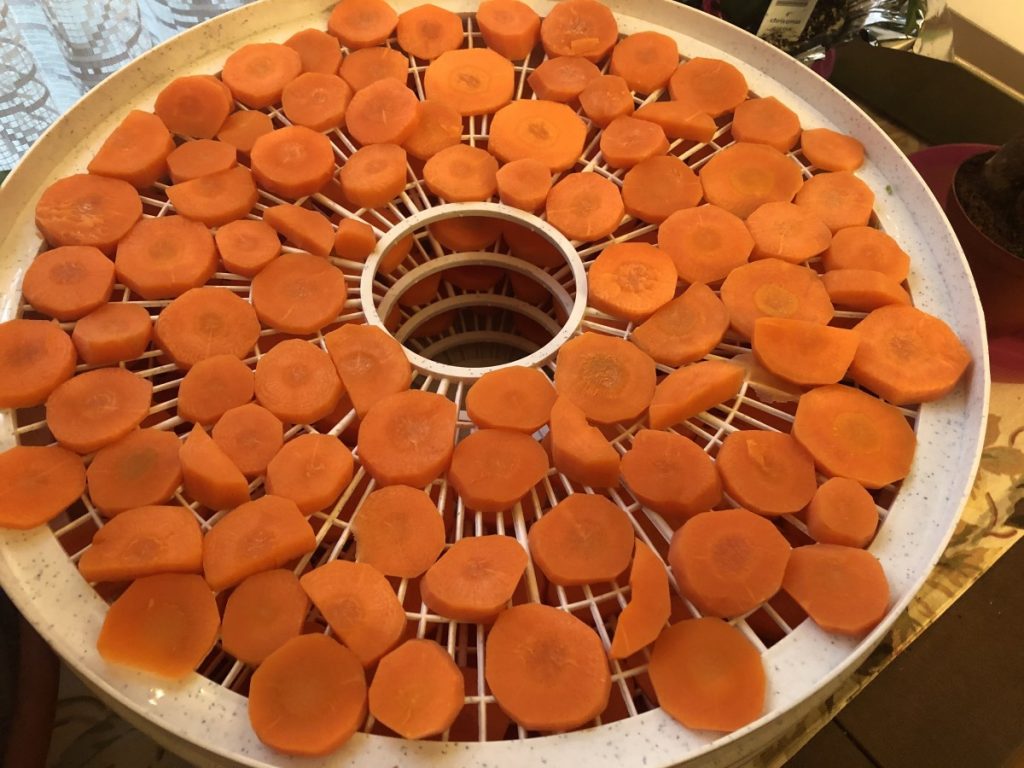
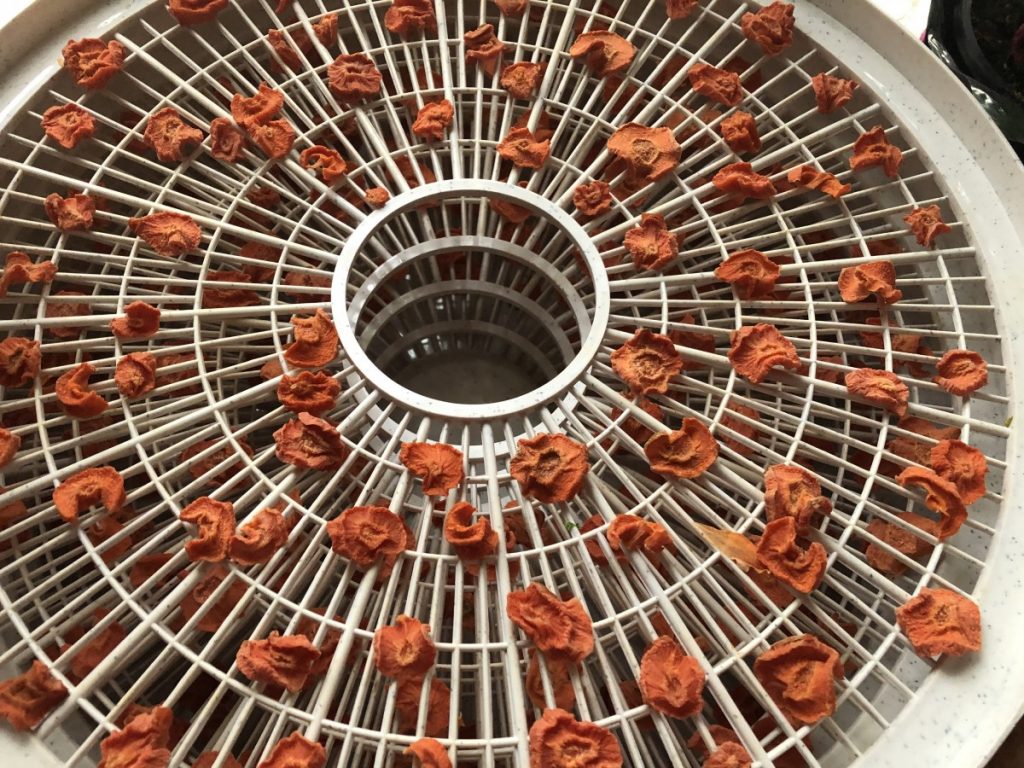
After dehydrating celery, I decided to dry some carrots. Unlike the celery, carrots need to be blanched before dehydrating. That helps the carrots to hold their color better and gives you a better finished product. I peeled and sliced the carrots. Then I steamed them for about 6 minutes. Once cool enough to handle, I placed the carrots in the dehydrator. Left them in over night and woke up to crispy carrot slices. These can also be added to soups, when making stock, stews, etc.

I preserve a lot of food by dehydrating it. Once you get over the initial investment in a dehydrator, the cost to dry food and to store dried food is pretty minimal. I got a very nice dehydrator for $30. Not a big investment at all.

Dried fruits are probably the most common home-dried foods. Apples, grapes, pineapple, strawberries and cherries are among my favorites. Because the dried vegetables are so useful and versatile, I enjoy them as much as dried fruits. I think you will, too.

Drying Vegetables

Most vegetables should be dried at the lower range if you have an adjustable thermometer on your dehydrator-around 125-degrees. Important to know with vegetables, is that some of them need to be blanched first. Blanching is just steaming or boiling the vegetables for a few minutes, before drying. Blanching kills certain enzymes, prevents browning and assures a better end product.

Vegetables that need blanching include green beans, cabbage, carrots, potatoes, greens, winter squash, corn and beets; this is not a complete list, but a good start.

Vegetables that do not require blanching include onions, celery, mushrooms, peppers, tomatoes, spinach, zucchini, cucumbers, garlic and also herbs.

Broccoli and cauliflower do not dehydrate well.

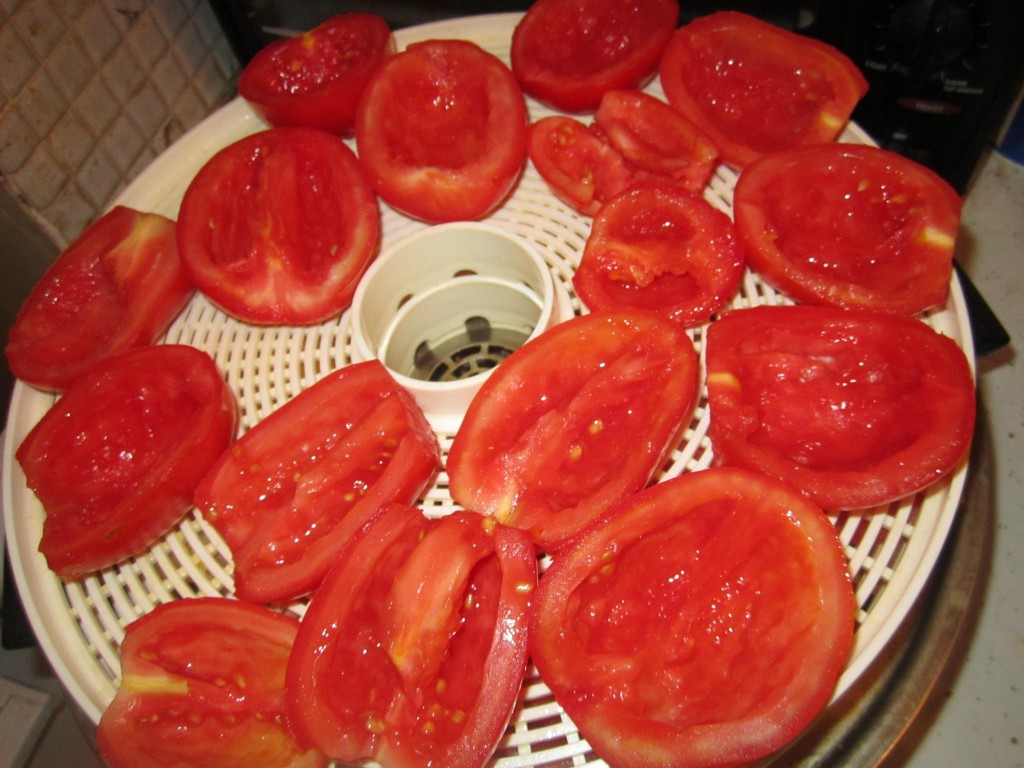
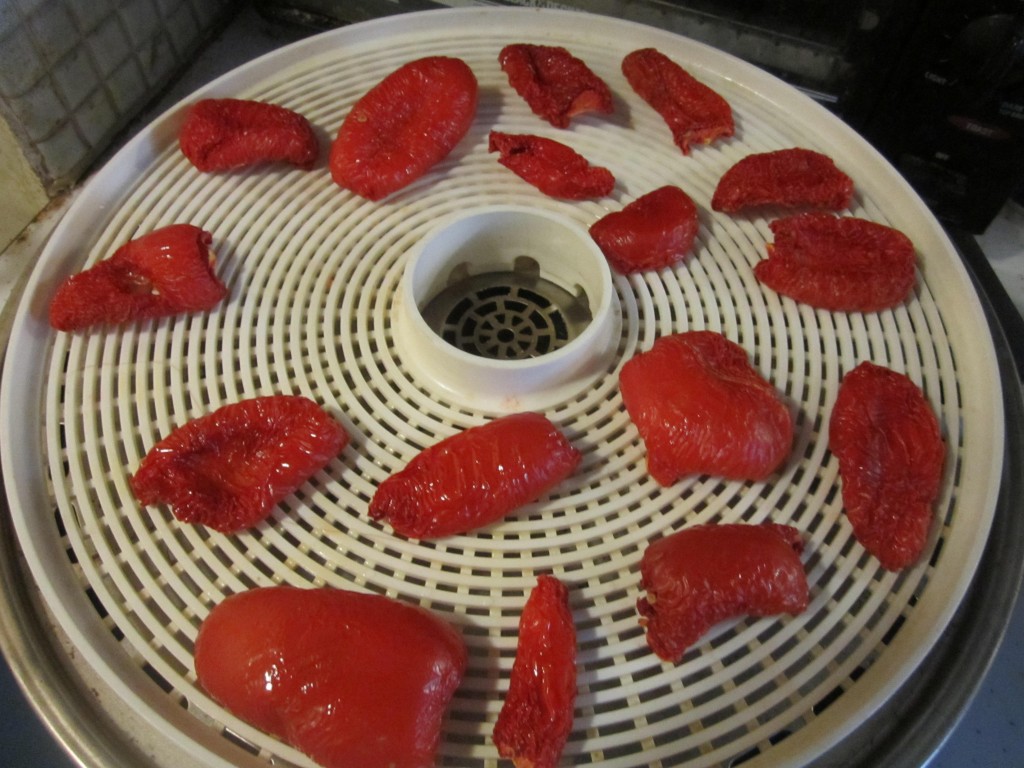
Tomatoes are probably the best vegetable to dry for the home gardener and cook. They are so easy to make and so tasty. Just cut plum tomatoes in half and scoop out the seeds. Lightly spray the trays with non-stick spray or rub with a little oil, and place the tomatoes cut side up for the first 12 hours. Turn them over after that until they are dried. I like them pretty crispy, so I dry them thoroughly. Still, just to be safe, I keep them in the freezer to keep their color and flavor longer. After a year tomatoes will darken if stored at room temperature. Larger tomatoes can also be dried. Just cut them in slices and squeeze out the seeds. Cherry tomatoes are just cut in half and squeezed to get out the seeds. With small cherry tomatoes I just make a cut large enough to get out the seeds and leave them whole.

How do you use them?

Veggie chips-zucchini and cucumber slices can be used instead of chips in dip.

Powders- Tomatoes, celery, onion, pumpkin and garlic can all be powdered and used to flavor soups, stews sauces, cheeses, dips and more. I add powdered veggies to pasta dough. Mushroom powder is one of my favorite ingredients.

Reconstituted as fresh- potatoes in casseroles are wonderful. Corn, onions, celery, and carrots all re-hydrate exceptionally well.

Dips- Peppers, onion and celery all add great flavor.

To thicken sauces- Shredded zucchini, peppers, onions, celery and tomatoes all work well this way. If you want a lower carb or gluten free alternative to thicken a sauce, dehydrated veggies, especially in powder form, work great.

Soups and Stews- almost any dried vegetable is used this way. Easy to just let them simmer together until tender and all their flavors will enrich your stock

Chowders- Corn and potatoes are great in these dishes

Dried vegetables are best stored in a cool, dry place- I often freeze or refrigerate them for best shelf life. They can also be vacuum sealed to retain freshness. Just be sure that your veggies are dry enough. Moisture leaves you open to the risk of mold and spoilage. An old test is to hit a piece of dried veggie with a hammer. It should shatter. Doesn’t really work with my dried tomatoes, but that is part of the reason I store my dried tomatoes in the freezer or fridge.

Vegetables in photo: Starting left with bright green and going clockwise: Celery, potatoes, red peppers, mushrooms, carrots, cucumbers, onions and tomatoes. In the center- mixed sweet peppers.

Tomatoes before
Tomatoes after 12 hours in the dehydrator- will get even smaller before finished
celery before drying
celery after drying
2 large bunches of celery
Carrots before dehydrating
Carrots after dehydrating

Pineapple Cake Roll

Pineapple Cake Roll

This cake roll makes a great dessert for almost any occasion. The tender sponge cake is filled with a mixture of sweetened pineapple, chopped nuts and coconut. Then it is topped with more pineapple and toasted coconut.

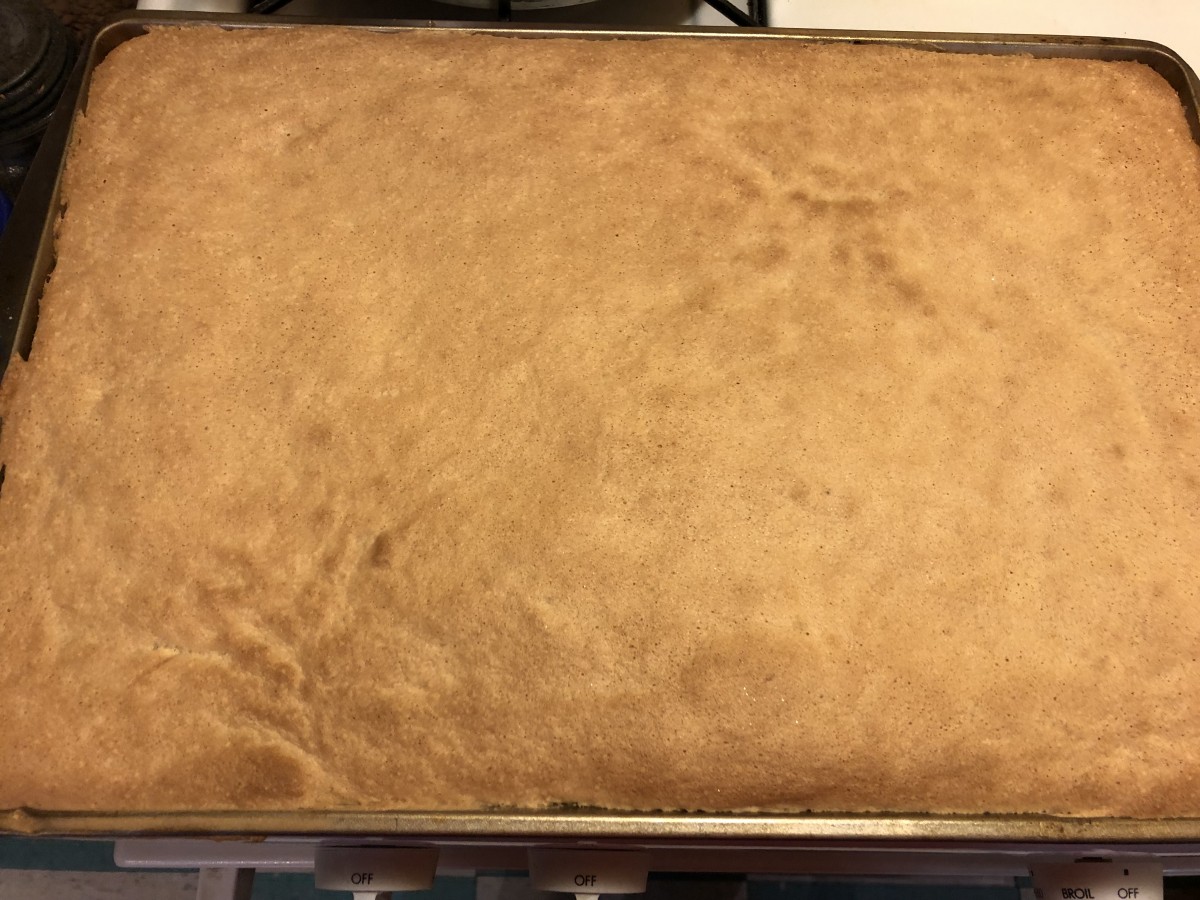
It looks difficult, but it is really easy to make. Most cake rolls are baked, then rolled,  cooled and filled. In this recipe, the filling is baked in the roll. The pineapple mixture is placed in the baking pan, then the batter is  spread on top, before baking. Once baked, the cake is rolled up and cooled. Once cooled, it is topped with the pineapple sauce and toasted coconut. You can make the cake a day or two ahead, wrap and pop in the fridge, then just add the toppings before serving. It also freezes well.

Here is the recipe. Hope you will give this one a try. I think you will love it as much as I do.

Pineapple Cake Roll

1 can (20 ounces) crushed pineapple, unsweetened

1 cup packed light brown sugar

1/3 cup flaked coconut

1/4 cup chopped nuts

1 1/2 teaspoons vanilla extract

3/4 teaspoon ground cinnamon

1/4 teaspoon ground cloves

4 large eggs

2/3 cup sugar

3/4 cup all-purpose flour

1 teaspoon double-acting baking powder

1/2 teaspoon salt

Powdered sugar

Topping, see below

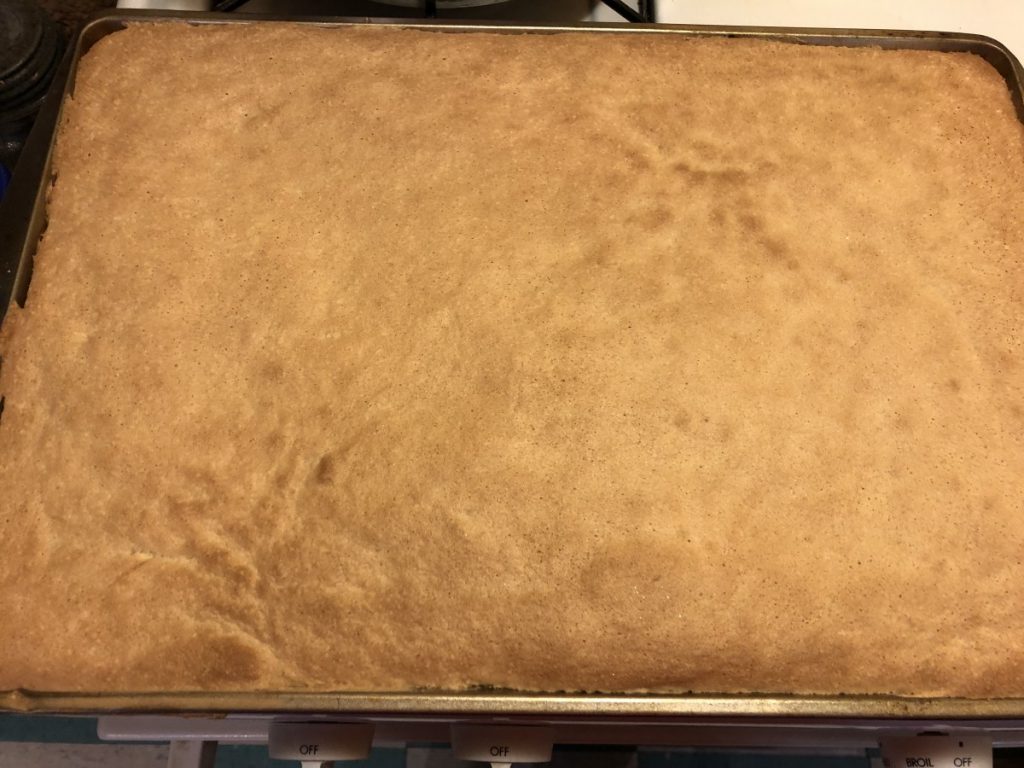
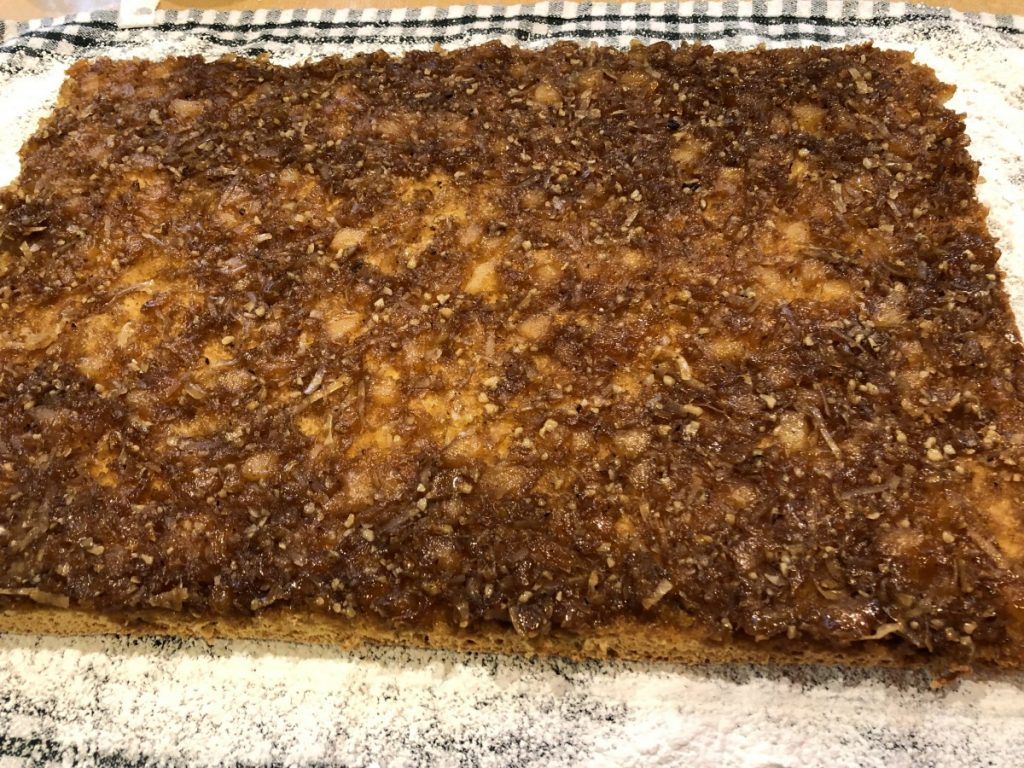
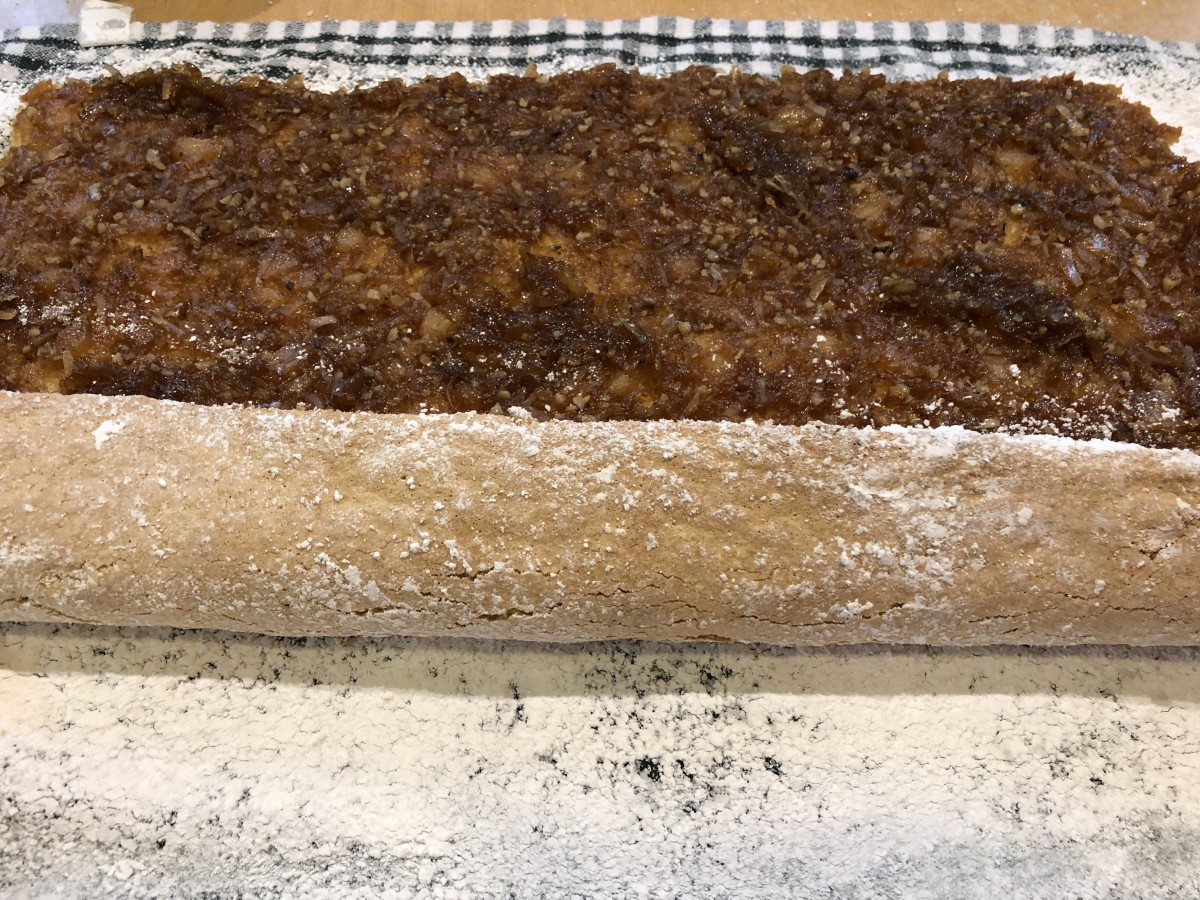
Drain pineapple well; reserve 3/4 cup juice and 1/2 cup crushed pineapple for topping. Combine in a large mixing bowl the drained pineapple, brown sugar, coconut, nuts (your choice), 1 teaspoon vanilla extract, cinnamon and cloves. Mix well and spread over the bottom of an ungreased 15 × 10 × 1-inch jelly-roll pan. Set aside. Place egg whites in a bowl and beat until soft peaks form. Gradually add 1/3 cup sugar and beat until stiff but not dry. Set aside. In a separate bowl, beat egg yolks until thick and pale yellow; gradually beat in remaining 1/3 cup sugar and 1/2 teaspoon vanilla. Gently fold egg whites into egg yolk mixture. Sift flour with baking powder and salt. Gently fold flour mixture into egg mixture. Spread batter evenly over pineapple mixture in pan. Bake in preheated 375° oven for 20-25 minutes. Carefully loosen cake around edges. Invert cake onto kitchen towel which has been sprinkled with powdered sugar. Let stand 3-4 minutes then roll up, jelly-roll fashion. Cool cake then garnish with pineapple topping.

Topping: Combine 3/4 cup reserved pineapple juice, 2 tablespoons sugar and 1 tablespoon cornstarch in saucepan; blend well. Cook until thick and clear. Stir in reserved pineapple; cool. Spoon on cake roll and sprinkle with toasted coconut.

To toast coconut- place about a cup of coconut on a baking sheet . Bake in a 350 degree oven for about 5-8 minutes, or until coconut turns a nice golden color. Watch carefully, so you don’t burn it. I like to use large flake coconut.

Fresh out of the oven
Inverted onto powdered sugar coated towel
Roll up gently
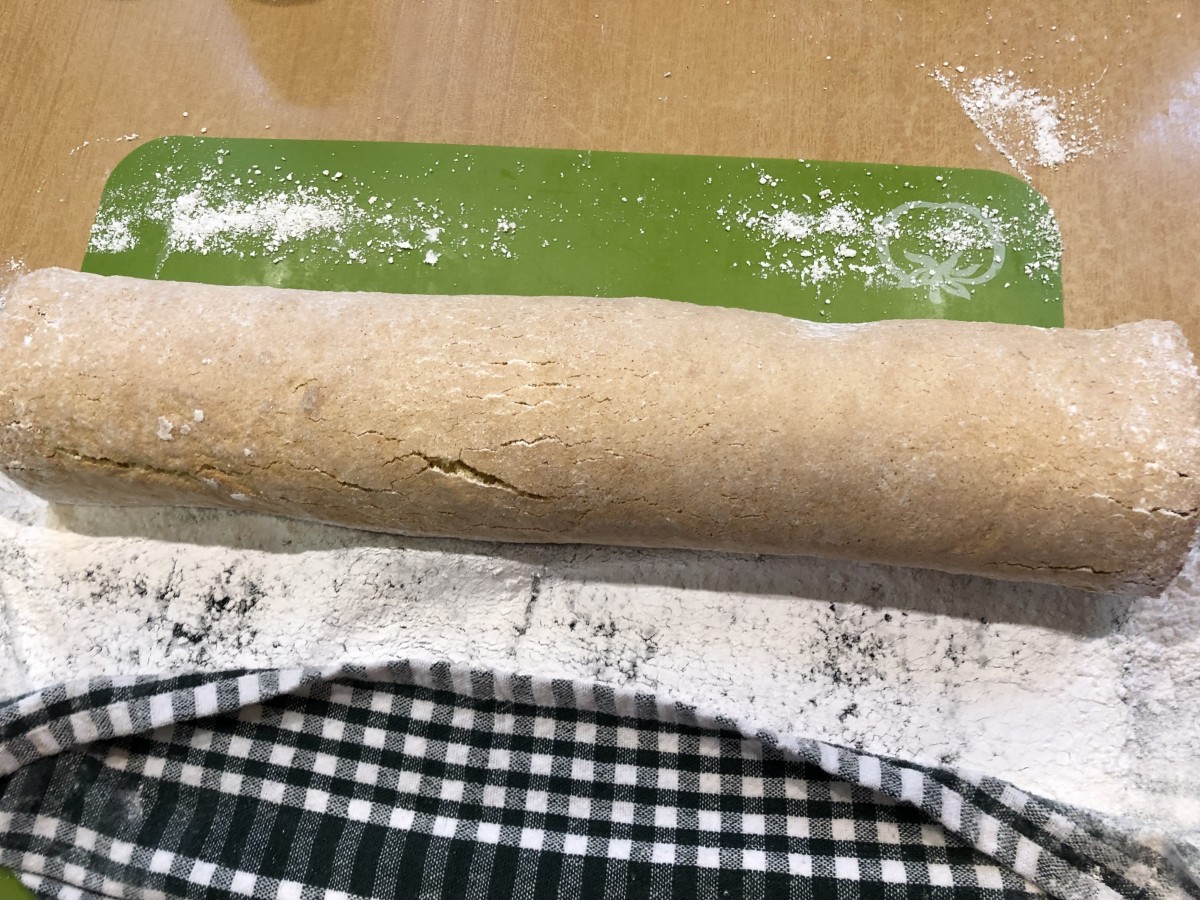
Ready for the topping