Pickled Rainbow Carrot Salad
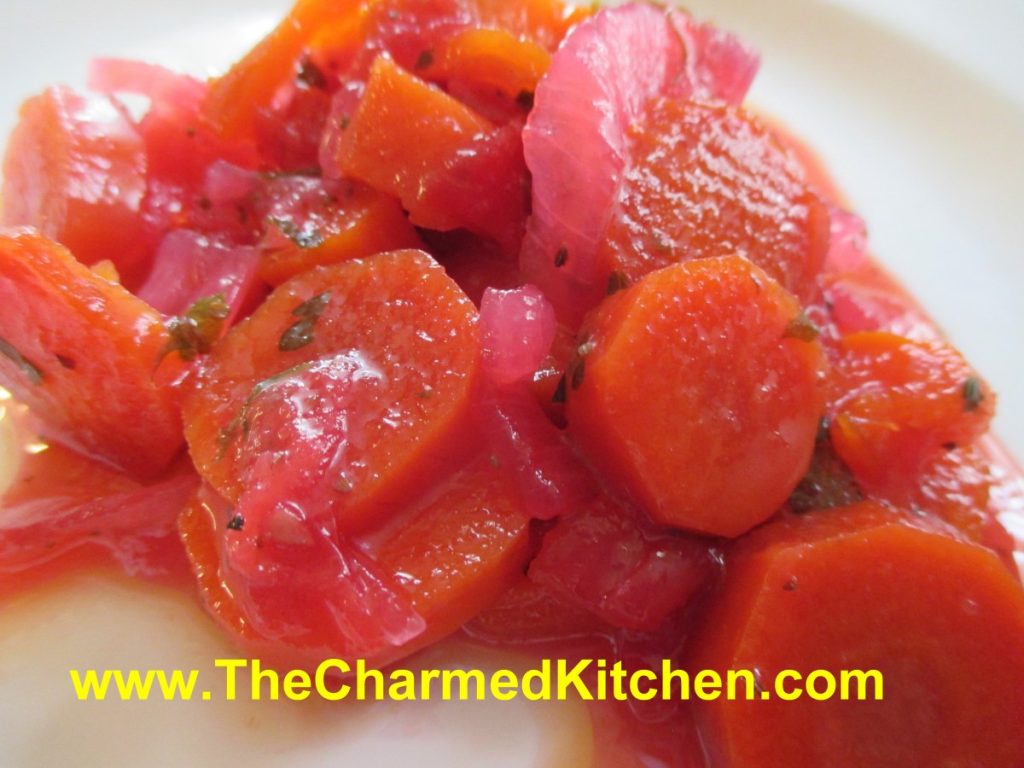
This was one of those dishes where it came out great, but was not what I had planned in the beginning. Let me explain.
I had picked up some beautiful rainbow carrots at a local market. They come in colors ranging from yellow to purplish red. I wanted to make something special with them, highlighting their vibrant colors. I liked the idea of a kind of pickled carrot. Made up the recipe as I went along. I knew the flavors would go well with the rest of the dinner that was planned. The carrot salad worked out so well. Great flavors- but there was a problem.
I had used a red wine vinegar and by the time everything was done cooking, the color of the carrots had changed. They all looked, well, like regular carrots. No one knew the difference, except me. I felt bad that I had cooked all the color out of the rainbow carrots, but the flavor was good. I guess, in the end, that is what really matters.
So here is the recipe. Feel free to use what ever color carrots you like- it won’t matter in the end!!
Pickled Rainbow Carrot Salad
2 medium onions, peeled and sliced
3-4 cloves garlic, peeled
1 c. vinegar- red wine or cider vinegar preferred
1 c. water
1 ½ lbs. carrots, peeled and sliced
1 sweet pepper, seeded and chopped
2 small tomatoes, seeded and chopped
½ c. sugar
1/4 c. chopped fresh parsley
2 t. salt, or to taste
Fresh ground pepper to taste
1 t. ground ginger
Hot sauce to taste
1 bay leaf
In saucepan, combine onions and garlic with the water and vinegar and bring to a boil. Prepare other veggies while onions simmer for 10 minutes. Add remaining ingredients and simmer, covered about 20 minutes. Adjust seasonings. Let salad cool down, then store in fridge until ready to serve. Best served the next day. Remove bay leaf and garlic cloves before serving.
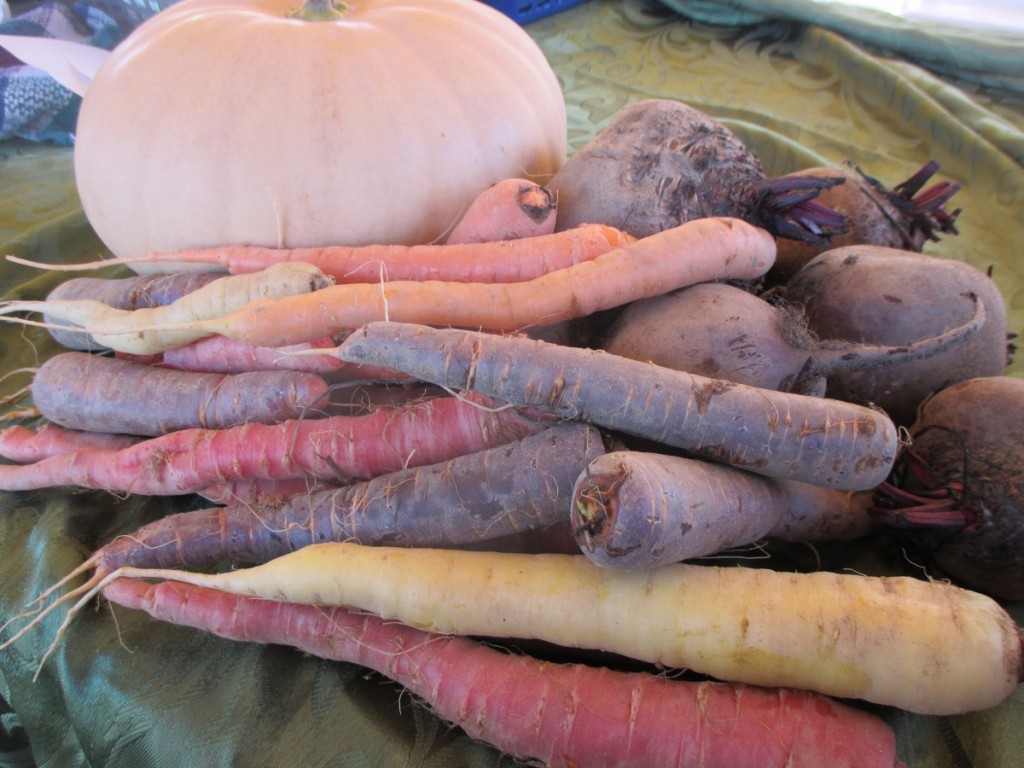
Martha’s Beets
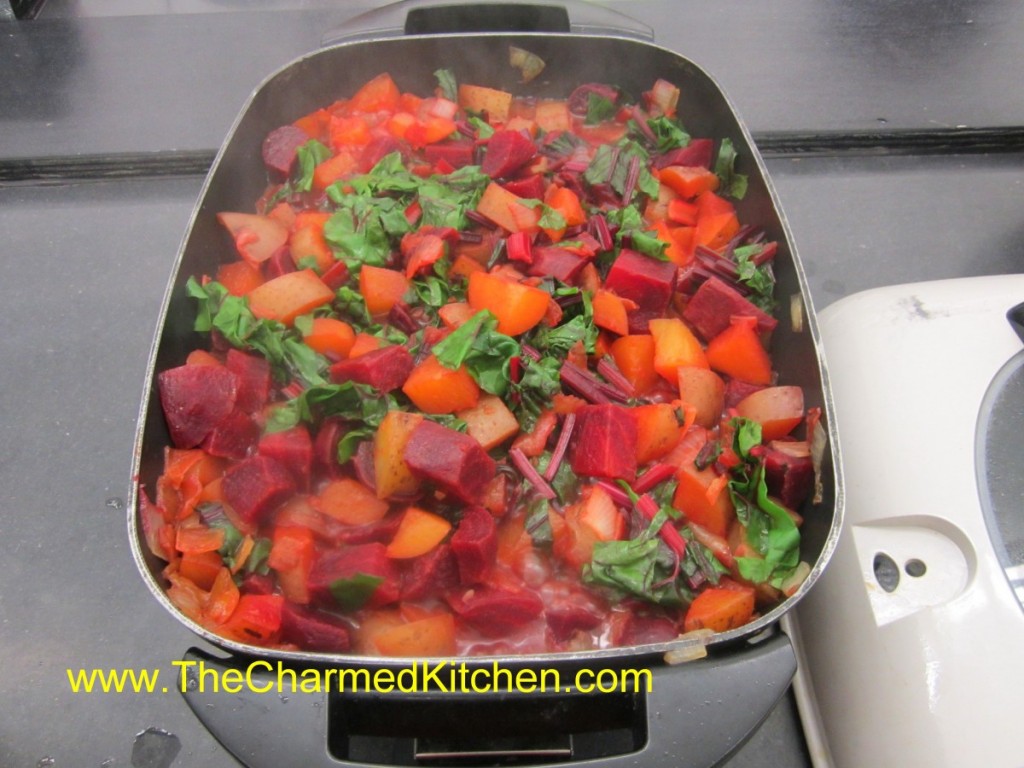
I had picked up some beets from a produce market the other day. I have made this dish many times and it seemed like a good time to make it again. It is so tasty and easy to make. You just have to give the flavors time to develop.
This is a recipe that my friend Martha, made for us one chilly autumn afternoon, many years ago. The amounts are random for a reason. Just use what you have- more or less – and let the flavors blend together gently. That is what Martha did.
Full of earthiness and great fresh flavors it is always a favorite of mine. I always think of her, with great affection, when I make it. Miss you, my beloved friend.
Martha’s Beets
Oil
2 Onions, chopped
Potatoes, cut in big chunks, peeled, if desired, about 2 lbs.
1 bunch beets, with greens*
Chicken or vegetable stock, 2-4 cups, using as needed
Parsley
Salt and pepper
Cook beets in boiling water for 20 minutes. Cool and slip off skins. Cut up beets into chunks. In large pot, cook onions in oil until tender. Add potatoes and prepared beets with just enough stock to keep them from sticking. Cover and cook over medium-low heat until vegetables are tender. Meanwhile, chop up the beet greens. Add them to the pot and stir in. Cover and continue cooking until greens are tender. Toss in fresh parsley and cook 5 minutes longer.
* If you can’t find beets with greens, or if you like more greens, you can also add red Swiss chard in place of the beet greens.
Amaretto Pear Blintzes with Candied Almonds
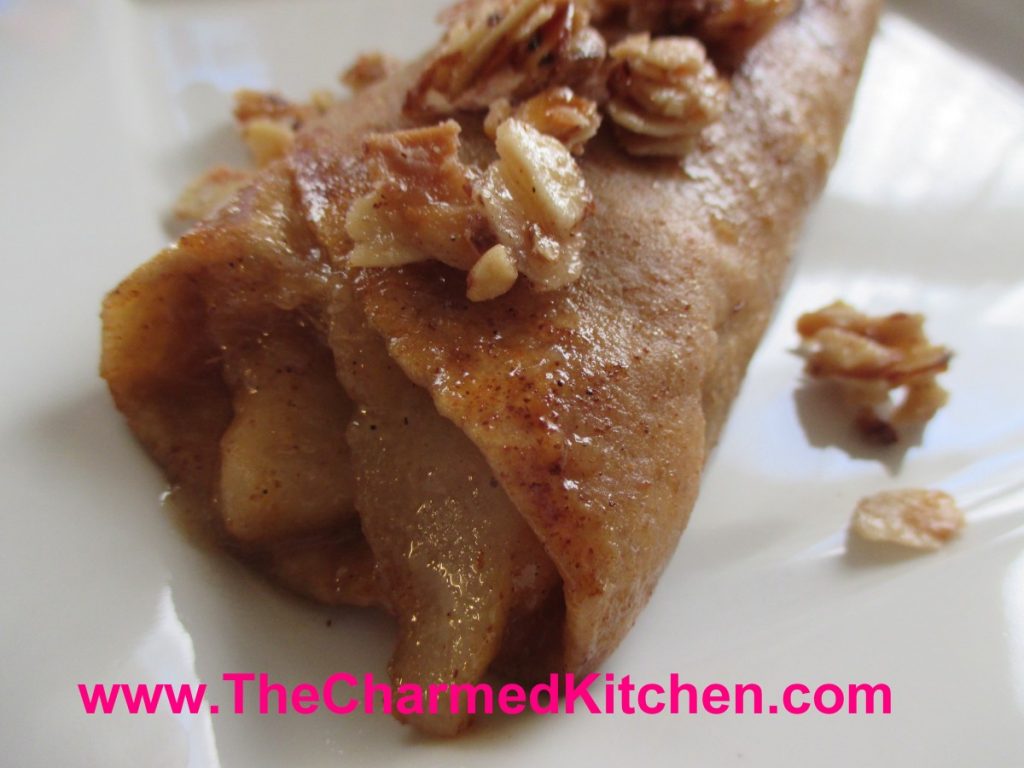
Sometimes you can start with the simplest ingredients and end up with something special. This recipe is a perfect example. I had fresh pears and flour tortillas. I wanted to make a brunch dish for a friend so I added a few more ingredients and ended up with these pear blintzes. I make fruit blintzes with tortillas pretty often. I wanted these to be different. I added Amaretto to the pears and made candied almonds as a topper.
They look like a lot more work than they are. They were simple to make.
My friend said they reminded her of apple pie. In fact, she didn’t believe me at first, when I said they were pears. If you like the taste of homemade fruit pie, but don’t have the time to bake, these are a nice option. Because they are barely cooked, the pears retain some shape. In a pie, pears tend to fall apart.
Since we had them for brunch, I left them plain, but these would make a great dessert topped with whipped cream or ice cream. Even a dusting of powdered sugar or a drizzle of caramel. Simple and quite flavorful.
Amaretto Pear Blintzes with Candied Almonds
Blintzes:
4 (8-inch) flour tortillas, I used whole wheat
2 oz. milk
2 T. butter
Filling:
4 pears, peeled, cored and sliced
½ c. brown sugar
2 T. butter
2 T. Amaretto
1 t. cinnamon
1 t. vanilla
Pinch of salt
Candied Almonds
¾ c. sliced almonds
½ c. sugar
¼ c. water
½ t. cinnamon
Place tortillas in shallow dish and drizzle the milk over them. Try to get some milk on each of the tortillas to soften them. While the tortillas are softening, prepare the filling. In medium skillet, combine pears with the rest of the filling ingredients and bring to a simmer. Cook on low heat for 3-4 minutes. Set aside. Combine almonds with the sugar, water and cinnamon in medium skillet. Bring mixture to a boil, stirring often. Cook until liquid is evaporated, about 5 minutes. Pour almonds onto a baking sheet lined with a silicone baking sheet or foil. Spread out and allow nuts to cool.
Place butter in skillet and start to heat up the pan. While pan is heating, divide pear filling among the 4 tortillas. Place filling along center of tortilla and fold up edges over, to cover the filling. Heat the tortillas, seam side down, in the pan until golden, turning to toast evenly on both sides. Remove from pan and place on serving plate. Top with some of the candied almonds. Serves 4.
Molasses Applesauce Cake
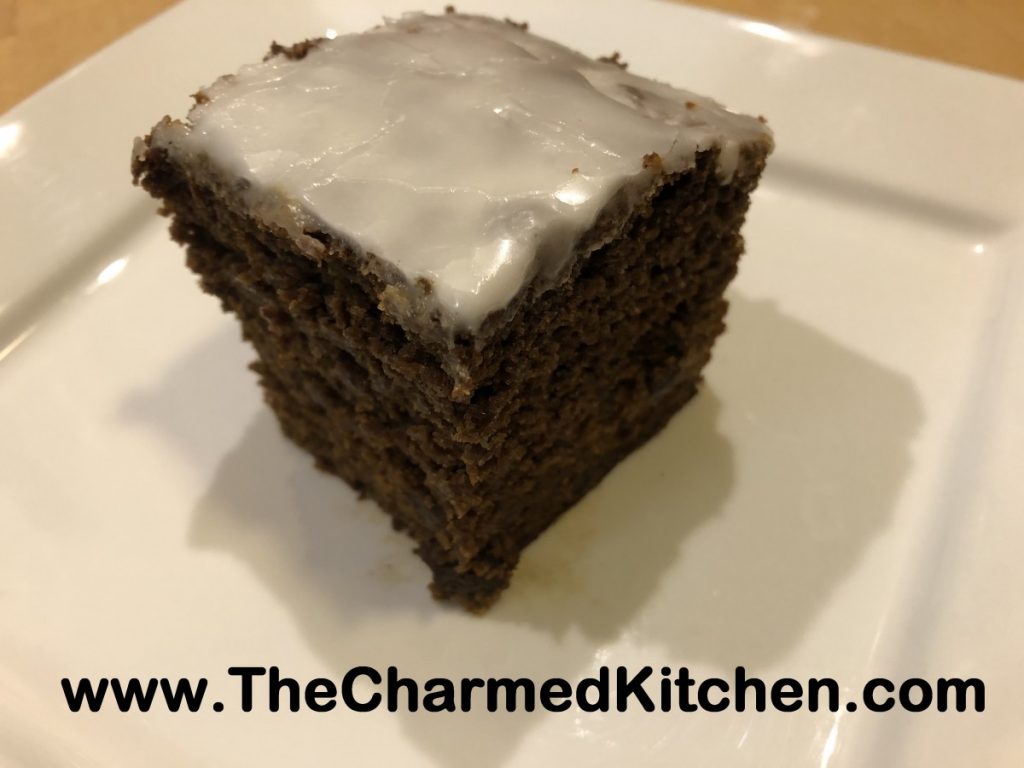
I can remember the first time I made a molasses cake. I was about 17. The recipe was in one of my Mom’s “women’s magazines”. I loved the earthy flavor that the molasses gave the cake.
I also remembered that the cake had applesauce in it. I canned a lot of applesauce last fall and have been looking for recipes using applesauce.
I found the original recipe last night and decided to make the cake. I did change a few ingredients around. The recipe I originally used had shortening in it. I swapped it out for butter. I also added more spices.
It is every bit as wonderful as before. Moist, not too sweet, with just a kiss of spices. So, if you have a jar of molasses and some applesauce, give this cake a try.
Molasses Applesauce Cake
2¼ c. flour
1 t. baking soda
1 t. cinnamon
1 t. salt
½ t. nutmeg
Pinch of cloves
4 oz. butter, softened, 1 stick
1 c. applesauce
1 c. molasses
1 egg
¾ c. raisins, plumped in warm water, then drained well, optional
Glaze:
1½ c. powdered sugar
2 T. lemon juice
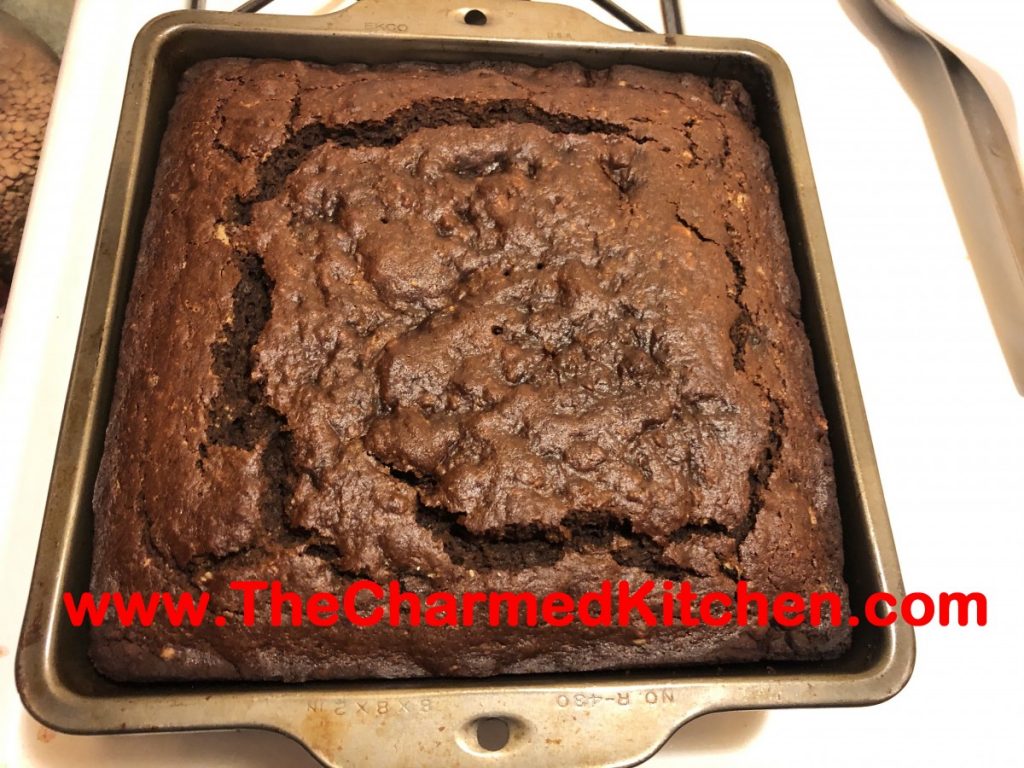
Preheat oven to 350. Grease an 8-inch square baking dish. Set aside. In mixing bowl combine dry ingredients and stir to blend. Cut in butter to resemble coarse crumbs. Add remaining ingredients to flour mixture and stir until blended. Pour batter into prepared pan. Spread out evenly. Bake for 40-45 minutes, or until toothpick inserted into cake comes out clean. Cool cake then top with glaze. To make glaze, combine powdered sugar and lemon juice in small bowl, stirring until smooth. Pour over the cake. Serves 8.
Cheesy Pumpkin Dip
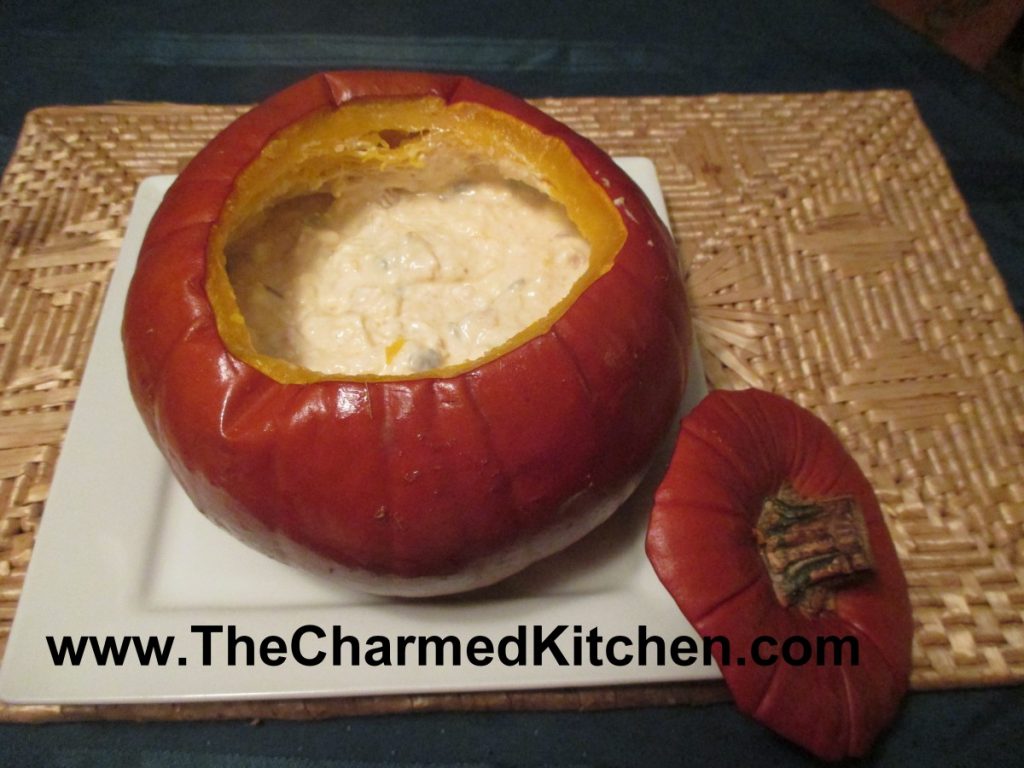
This is a pretty way to serve dips this time of year. The dip bakes inside the pumpkin- and the pumpkin bakes, too. It is served hot. Fun for Halloween, Thanksgiving, watching football games or just movie night with the family.
It really is simple and could be filled with any number of combinations of cheesy goodness. I have included the recipe I used in the picture. I also included my recipe for Spinach and Artichoke Dip, to give you another option.
You could also add a hot cheese sauce and serve like fondue, with long forks and pieces of bread.
You get a pie pumpkin, about 2-3 lbs. Cut off the top to make a lid and scoop out the seeds, like you would if you were making a Jack-o-Lantern. Wipe off the outside and then just fill it up with the dip mixture. Put the lid back on, bake for an hour, and you are good to go. The fun part is scraping some of the cooked pumpkin in with the cheese dip. More detailed directions follow.
So here is the recipe for making the cheesy filled pumpkin. I think it is simple enough to serve anytime, not just on a holiday. Enjoy!!
“Pumpkin” Cheese Dip
Directions: Preheat oven to 350 degrees. Cut off top of pumpkin. Cut in at an angle, so top will fit like a lid and not fall in. Set top aside. Scoop out seeds and clean out any stringy bits*. Set pumpkin on a baking sheet. Combine cheese filling of your choice and place inside the pumpkin. Place the top of the pumpkin back on the pumpkin, and place in oven. Bake for 1 hour. Remove pumpkin and place on heat proof dish. I used a glass pie plate. Remove lid. Serve with crusty bread or crackers.
Smoky Cheese Dip
8 oz. cream cheese, cubed
4 oz. extra sharp cheddar cheese, shredded
8 oz. bacon, cooked and crumbled
½ c. sour cream
¼ c. mayo
¼ c. chopped parsley
½ t. each cumin and smoked paprika
Pinch of nutmeg
½ c. hulled pumpkin seeds
In medium bowl, stir together all ingredients, except the seeds. Place this mixture in the pumpkin when ready to bake. Don’t add the pumpkin seeds until right before serving. Stir them in a little, if you like.
Another nice choice…….
Spinach and Artichoke Dip
1 (12-14 oz.) can artichoke hearts, drained and coarsely chopped
10 oz. package frozen spinach, thawed and squeezed dry
8 oz. cream cheese, cubed
4 oz. shredded cheddar cheese
½ c. diced onion
¼ c. Italian dressing
Dash of hot sauce
In medium bowl, combine dip ingredients, stirring to combine. Place in pumpkin when ready to bake.
* You can rinse off the seeds, lightly salt them and toast them, if you like. Then serve with the pumpkin dip. If you aren’t interested in eating them- please put them outside for the birds to eat.
Pear and Oatmeal Muffins

It is pear season. While apples seem to get more attention, pears are a wonderful, versatile fruit.
Pears will ripen off the tree and are often picked unripe and allowed to ripen after harvest. Unlike a lot of other fruits, pears do not suffer from being picked before they are ripe. As they ripen, pears become very sweet.
I like to pick out both ripe and unripe pears at the local market. That way, I’ll have ripe pears over a longer period of time.
I had some ripe pears and wanted to do something with them. Since I had a friend coming for over breakfast, I thought muffins. It’s always nice to have an easy breakfast option on hand.
I started with a basic muffin recipe, and added some diced pears, cinnamon, orange zest, nutmeg and a cinnamon sugar topping, to make them special. And yes, you could substitute apples for the pears!!!
I was really happy with how they turned out. Not overly sweet, moist and tender. Here is the recipe.
Pear and Oatmeal Muffins
1 ½ c. flour
1 c. rolled oats
1 T. grated orange peel
2 t. baking powder
1 t. cinnamon
½ t. each nutmeg and salt
½ t. baking soda
1 egg, beaten
1/3 c. honey
1/3 c. oil
¼ c. orange juice
1½ cups of peeled, diced pears – 2 or 3 pears should do it
2 T. melted butter, optional
cinnamon sugar, optional
Combine flour with the dry ingredients. Set aside. Combine egg with the honey, oil and juice. Add egg mixture to flour mixture and stir until flour is just moistened. Fold in pears. Batter will be thick. Divide batter among 12 greased muffin cups. Bake in a preheated 375- degree oven for 20-25 minutes. While the muffins are warm, dip tops in melted butter and then dip in the cinnamon sugar, if you like. They are tasty, with or without the cinnamon sugar topping, but I like to add this last step. Makes 12.
Pear Sweet and Sour Sauce

I love sweet and sour sauce. I have made many versions over the years and have used different fruits in them. I decided to try to make sweet and sour sauce with a ripe pear. It worked out wonderfully. Even better than I expected, actually. The sweetness of the pear was a great addition to the sauce. It came out a rich, mahogany color and is full of flavor. I will make a double batch the next time. I have already enjoyed it with egg rolls. Thinking of making sweet and sour chicken next.
I try to be as exact in measuring as I can. I had a pretty big Bartlett pear, but use 2 small pears, if that is what you have. Any pear will work in this recipe- just be sure it is ripe. As the sauce cooks the pear pretty much falls apart and disappears into the sauce. I also used Sriracha sauce, which is hot, but not as hot as some other hot sauces. Depending on the brand you are using, you might want to add less. Then again, heat is a matter of personal preference. Spice it up according to your own taste. That is one of the perks of making it yourself.
When I make a sweet and sour sauce- I use Clear Gel, instead of traditional corn starch. It is modified cornstarch (non-waxy) and when you reheat the sauce, it will stay thick. Regular cornstarch will often thin out when reheated. Clear Gel is used in pie fillings and a lot of frozen foods and condiments. Often listed on the label as modified food starch. It looks just like regular cornstarch. I buy mine online or when I am in stores in Amish communities.
So here is the recipe for a sweet and sour sauce I will surely make again. Planning on making some to freeze, too.
Pear Sweet and Sour Sauce
1 large pear, (about 8 oz.) peeled and diced fine
½ c. cider vinegar
½ c. sugar
3 T. soy sauce
1 T. minced garlic
1 T. Sriracha sauce- or other hot sauce- add to suit your taste
2 t. grated ginger
3 T. water
2 T. cornstarch or Clear Gel*
2 t. sesame oil
In medium saucepan, combine all ingredients, except the water, cornstarch and sesame oil . Simmer mixture, covered about 5-7 minutes, or until pear becomes tender. Stir occasionally. Combine cornstarch with water and stir until smooth. Pour slowly into simmering pear sauce, stirring to prevent sticking. Sauce with thicken. Stir in sesame oil. Makes about 2 cups. Keeps in fridge for weeks.
* If you use a type of cornstarch called Clear Gel, you can reheat the sauce without it becoming runny. Clear Gel, also called modified food starch, or modified cornstarch, is available online and at some specialty food stores. I find it in Amish communities.
Chicken Florentine Soup
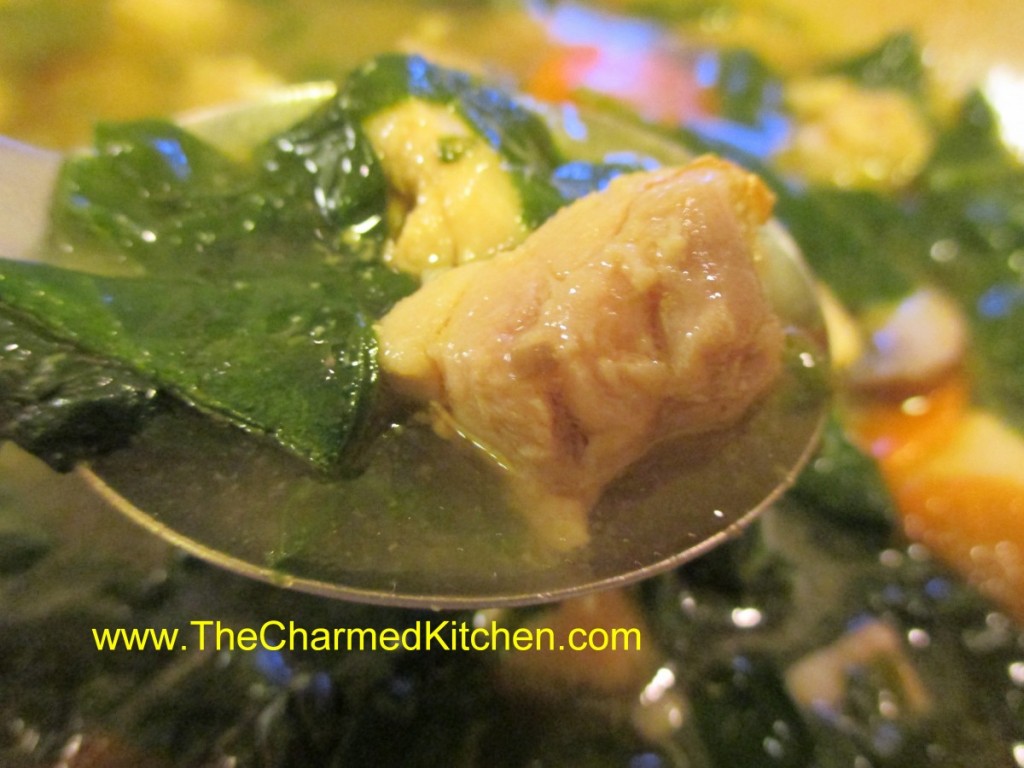
This soup is warm and comforting. It was a nice choice for a chilly evening. It was one of those spur of the moment recipes that really exceeded expectations. I just had a few ingredients to start with- one of those times when you look through the fridge for inspiration and get lucky.
I knew I was making soup, and that I had chicken and chicken stock. Adding onions and carrots to soup- pretty standard for me. I’ve been on a spinach kick lately so that seemed like a natural addition as well. Found a few mushrooms I’d forgotten about, and put them in, too.
For some reason it was such a perfect combination. I love when it works that way. I am also happy when I remember to write down what I did so I can make it again someday- and share the recipe with all of you. Since the soup has spinach as a central ingredient, I decided to call it Chicken Florentine Soup. So here is the recipe.
Chicken Florentine Soup
2 T. oil
1 medium onion, sliced
1 large carrot, peeled and sliced thin
6-8 cups chicken stock
1½ lbs. boneless, skinless chicken, cubed – I used thighs
1-2 c. sliced mushrooms – I used the baby Bellas
8 oz. fresh spinach, washed well
¼ c. chopped fresh parsley
Salt and pepper to taste
Dash of hot sauce
Heat oil in soup pot and cook onion until tender. Add carrot and cook a few minutes more. Add stock and bring to a boil. Reduce to simmer and cook 10 minutes. Add chicken and mushrooms and cook 10 minutes longer. Add spinach and cook 5 minutes more. Adjust seasonings and serve. Makes 6 servings
Fresh Plum Cake
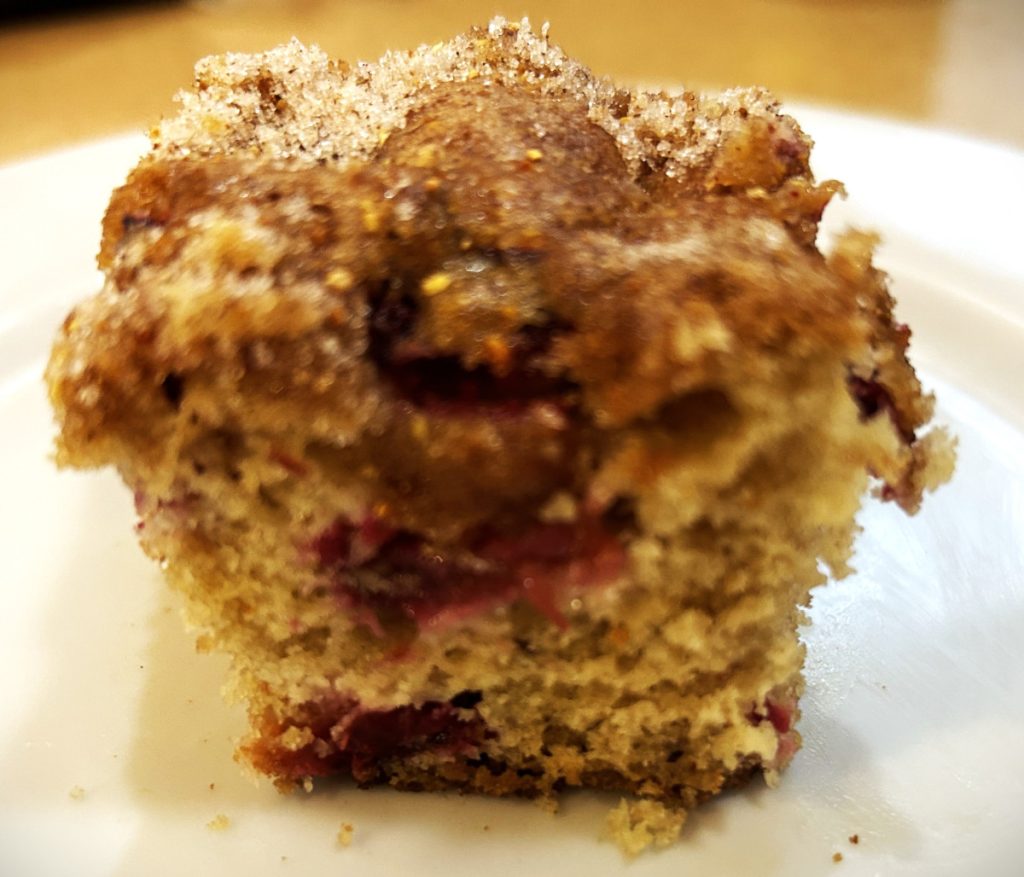
This cake came about after I found myself with a bunch of prune plums. I wanted to use them in a dessert. I recently shared a recipe for a plum torte recipe I got from a friend. I love that recipe, but I wanted something a little different. So here is the recipe I came up with.
The cake is moist and not real sweet. I think it makes a great dessert, but it could easily be served at breakfast or brunch. I took it to work and got a some valuable feedback from my coworkers. It disappeared pretty quickly. One person mentioned she wanted more plums, so in the final version I added more plums. So here is the recipe. Enjoy.
Fresh Plum Cake
2 c. flour
¾ c. sugar
1 t. baking powder
1 t. baking soda
1 t. cinnamon
½ t. salt
½ c. milk
1/3 c. oil
2 eggs
1 t. vanilla
1 ½ c. pitted and chopped fresh plums
Cinnamon orange sugar*
Preheat oven to 350 degrees. Grease a 9–inch baking pan and set aside. In medium bowl, combine the dry ingredients and set aside. In smaller bowl combine the milk, oil, eggs and vanilla. Pour the wet ingredients into the flour mixture and beat by hand until well combined. Fold in the plums and pour batter into prepared pan. Sprinkle with the cinnamon orange sugar and bake for 35-40 minutes or until cake tests done, using a toothpick. Toothpick inserted into cake and removed should have a few dry crumbs attached.
Cinnamon Orange Sugar
4 T. sugar
1 t. cinnamon
1 t. grated orange zest
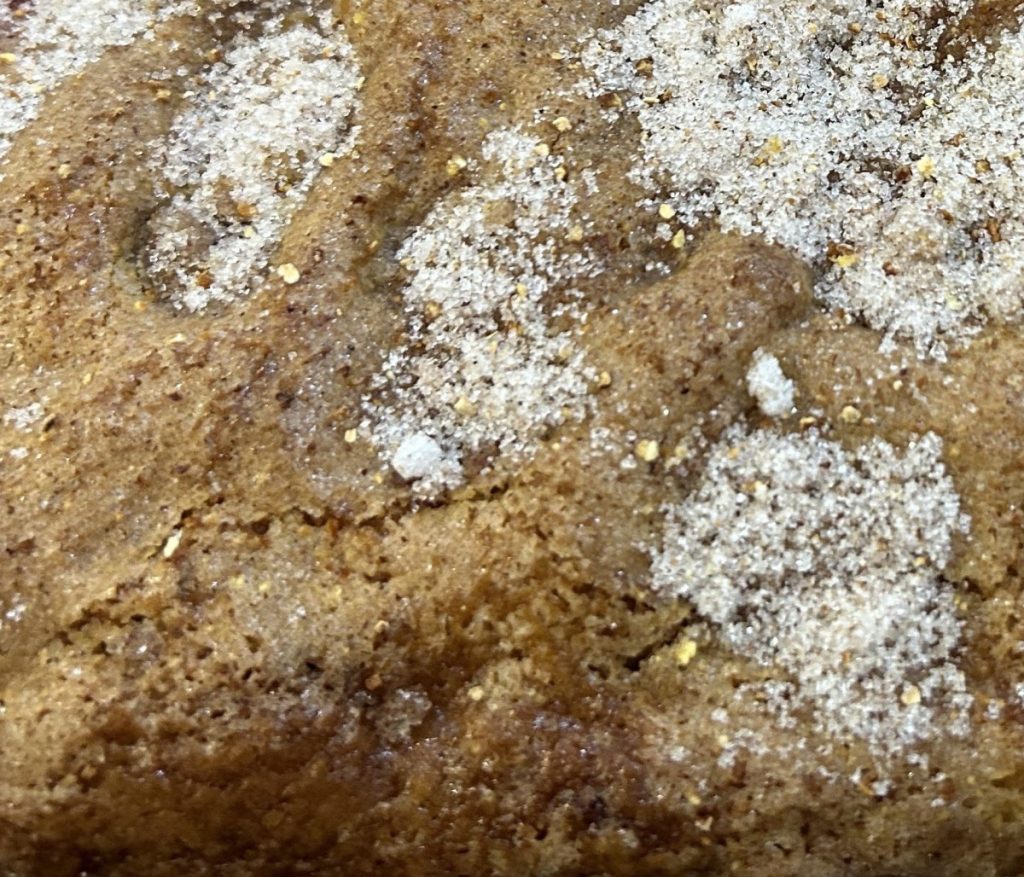
Combine all ingredients and sprinkle on cake before baking.
Beet Dumplings

I had beets that I wanted to use in something different. So I made these dumplings with cooked beets. The color came out so vibrant. We had them in soup last night.
The flavor of the beet is somewhat muted in this little dumpling. These would be a nice side dish for all sorts of dishes. I will make more and serve them with a roast chicken this weekend.
I do a very rustic version- just slice dough off into 1/2 -inch thick pieces and boil them up. These could be made ahead and frozen, too.
Beet Dumplings
2 small russet potatoes, 11-12 oz. total, peeled, diced into 1/2-inch cubes
2 medium/small beets, roasted, skin on, cooled
1 egg
1/4 c. whipping cream or half and half
1 1/4 t. salt
¼ t. dill weed
1 1/2 c. (about) flour
Steam potatoes over boiling water until tender, about 12 minutes. Place in bowl and mash or put potatoes through a ricer. Place in bowl and cool about 10 minutes. Remove skins from cooled beets and dice. Place beets in a food processor or blender. Add the cream and process until smooth. Combine beet mixture with potatoes, egg, salt and dill and mix well. Stir in flour and combine until slightly sticky dough forms. Add more flour a tablespoon at a time if the mixture is too moist. Turn dough onto lightly floured work surface and divide into 6 equal portions. Roll out 1 piece into a rope about 20-inches long by 3/4 inch. Cut dough into 3/4 -inch pieces and arrange finished dumplings in a single layer on a floured baking sheet and repeat the process with the remaining dough. Boil the dumplings in well-salted boiling water, about 1/3 at a time. Boil for 4-5 minutes. They will come to the surface and be tender. Check after 4 minutes. Serve with butter or with your favorite sauce or in a soup. Serves 6.


