Fried Green Tomatoes
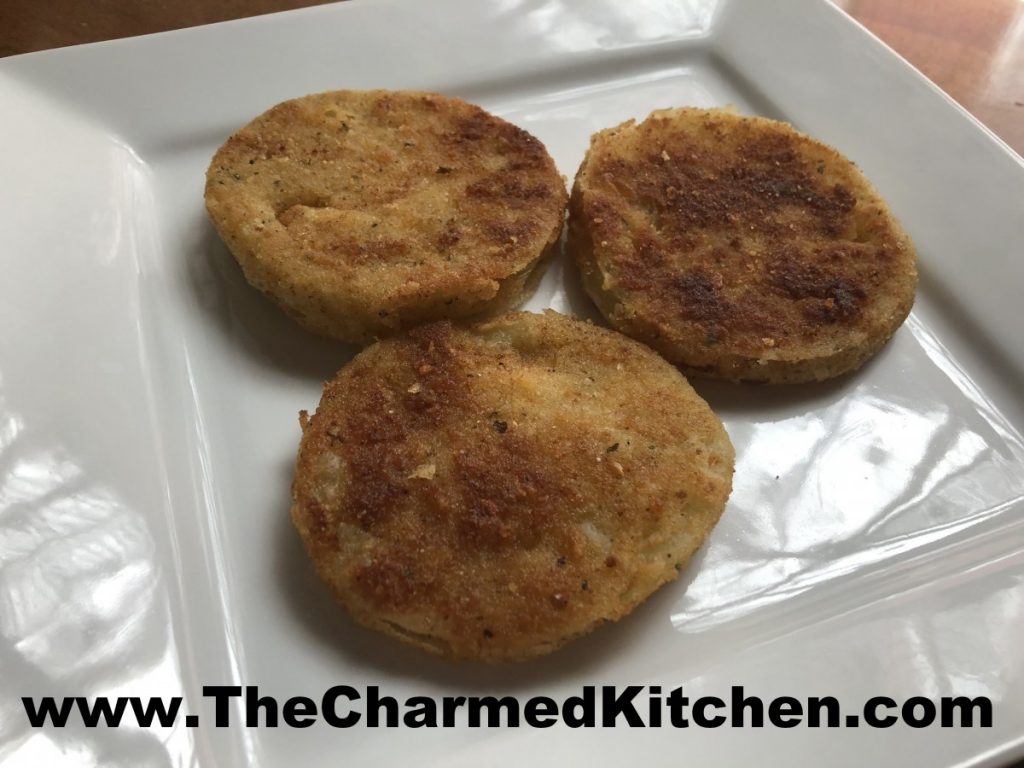
Tomato season is all about those firm, ripe, juicy tomatoes. For me, tomato season is also about fried green tomatoes.
Green tomatoes have a very different flavor than ripe tomatoes. It is like tomatoes and lemons had a baby. There is a distinct citrus-like tartness in green tomatoes.
Green tomatoes are pretty hard, compared to ripe tomatoes, which makes them great for frying. They soften, but don’t fall apart when fried.
There are a number of variations on exactly how to fry your tomatoes. I do a traditional breaded method, flour, egg wash and cracker crumbs. Then I pan-fry them.
I like using cracker crumbs, but you could use bread crumbs instead. I have friends that love to use cornmeal instead.
So here is my recipe. I hope you give it a try.
Fried Green Tomatoes
1 c. flour, or 1/2 c. flour and 1/2 c. cornmeal
1 t. salt
1 t. pepper
5 green tomatoes, sliced 1/2-inch thick
1-2 c. cracker crumbs, saltines preferred
2 eggs, beaten
butter or oil for pan frying
Place flour and seasonings in small bowl. Place crumbs in second bowl and eggs in a third bowl. Dip tomato slices in eggs then in flour. Dip slice in egg again and then in crumbs. Fry slices in hot oil until golden and tender in the middle, turning to cook evenly. Drain and serve warm. Serves 4-6.
History of Pressure Canners/Cookers
Did you ever wonder when people started pressure cooking/canning? The answer might surprise you. The first known pressure cooker was invented by Denis Papin, French physicist and mathematician (1647-1712). In 1679 he made a large cast iron vessel with a tightly fitted lid that locked. His invention raised the boiling point of water and at this higher temperature, bones softened and meat cooked in quick time. It was promoted as a “digester” because it cooked food so quickly. Sadly, it was difficult to control the pressure and explosions were common. Eventually he added a valve to release extra pressure.
Canning the food in jars came somewhat later. In 1795, Napoleon Bonaparte offered a reward for whomever could develop a safe, reliable food preservation method for his constantly traveling army. Nicholas Appert took on the challenge, and about 15 years later introduced a method that involved heat-processing food in glass jars reinforced with wire and sealing them with wax.
The next breakthrough was the first true “canning” (as opposed to “bottling” or “jarring”) method. By 1810, Englishman Peter Durand had introduced a method for sealing food in “unbreakable” tin cans. Interesting fact: The can opener was not invented until 48 years later. Before that cans were opened with hammer and chisels. The first commercial canning establishment in the U.S. was started in 1912 by Thomas Kensett. One problem with these early cans was the lead solder used to seal them. Excessive eating of canned foods would result in lead poiusoning.
It wasn’t until much later that Louis Pasteur was able to demonstrate how the growth of microorganisms causes food to spoil. Prior to that, people knew that canning methods worked, but not why.
At the time of the U.S. Civil War glass food preservation jars with metal clamps and replaceable rubber rings had been invented. These jars are still available today, although they are no longer recommended for canning are are used for storing dry goods and for decorative purposes.
In 1858, John Mason invented a glass jar with a screw-on thread molded into its top, and a lid with a rubber seal. Most canning jars are still referred to as Mason jars.
Meanwhile in the late 1800’s, William Charles Ball and his brothers got into the food preservation jar business and began buying up smaller companies. They quickly became leaders in the industry. Ball jars are today one of the most widely used jars for canning.
Alexander Kerr invented the easy-to-fill widemouth canning jar in 1903 (an innovation that the Ball brothers quickly duplicated). Later, in 1915, Kerr developed the idea of a metal lid with a permanently attached gasket that a man named Julius Landsberger had invented. Kerr came up with a metal disk with a similar gasket, held in place by a threaded metal ring. The modern 2-piece canning lid was born.
We’ve come a long way since the early days of pressure cooking and canning. With the more recent introduction of Instant Pots, pressure cooking certainly seems more popular. This year, there has been a renewed interest in home canning as well. The good news is that with all the efforts that came before, both pressure cooking and pressure canning are safe and easier than ever.
Versatile Bean Dip

If you only use bean dip as an appetizer you are really missing out. Bean dip is often served with chips and veggies and it is always a hit. But, it can be used for a lot more than that.
Certainly in other Tex-Mex dishes like burritos or enchiladas. I like to spread it on fresh tortillas and top with cheese, chopped peppers, onions and olives- then bake until hot and cheese has melted. It can also be spread inside pita bread and then the bread filled with sprouts or sliced veggies for a quick sandwich. You can also add the bean dip to hot cooked veggies like corn, green beans, or carrots, in place of, or in addition to, the butter. It also can be added to stir-fries for extra flavor or to soup as a thickener. I sometimes add it to chili, too. I often make a big batch and freeze some for later use.
Bean Dip
2 cans kidney beans, drained and rinsed – you can use other beans
1 c. salsa, store bought or homemade
¼ c. olive oil
2 T. cider vinegar
2 t. chili powder
1 t. cumin
Healthy dash of hot sauce
Salt and pepper to taste
In food processor blend all ingredients until smooth. I usually start the beans first for 30 seconds or so and then add everything else. If you want it thinner you can add some extra oil. Makes 3 cups. Freezes well.
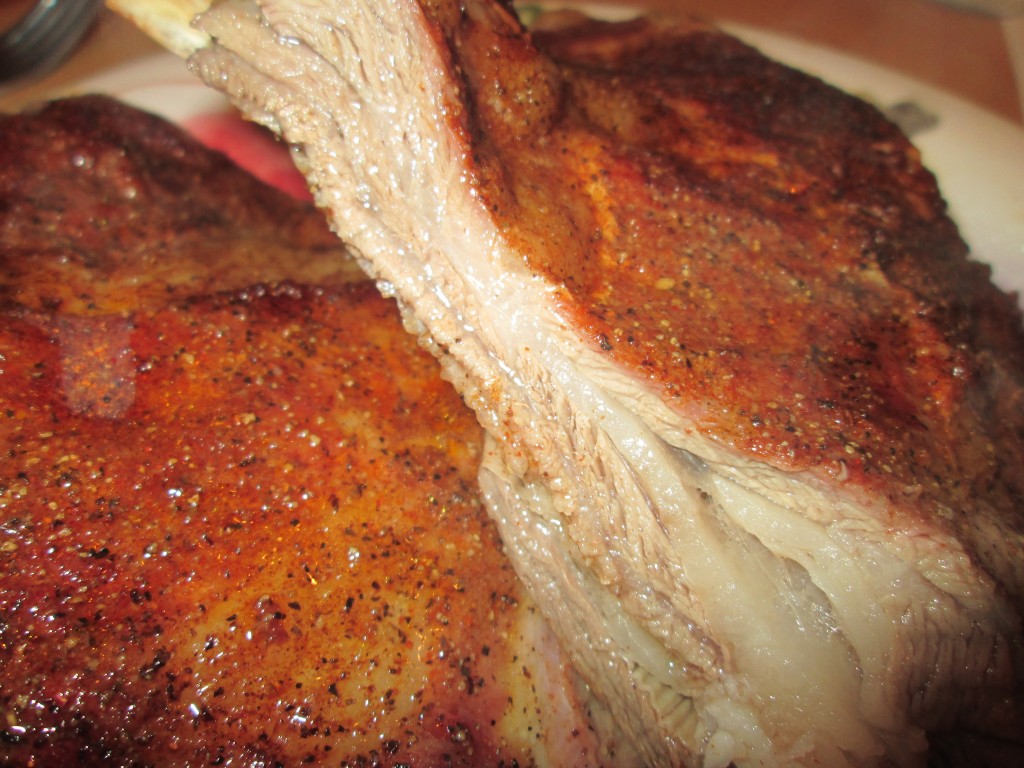
Lamb Ribs
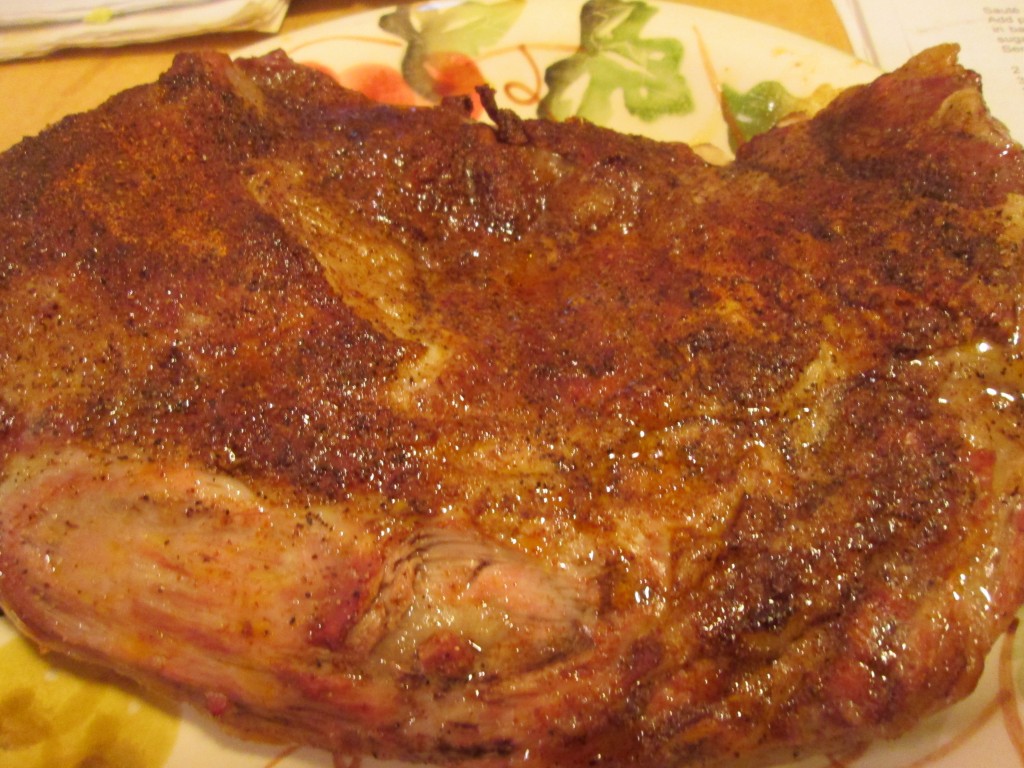
If you haven’t tried these before, lamb ribs are a fun and easy dish to make. They are often a lot less expensive than other cuts of lamb. They are frequently labeled as lamb riblets. A slab of lamb riblets run about 2 pounds and will feed two. You can treat them a lot like other ribs.
I marinated these in sherry overnight. I just like the flavor sherry adds. To cook the ribs, I rubbed them all over with Ethiopian seasoning-recipe follows- and I sprinkled with pink salt. I started them out at 400 degrees for about an hour and then turned them down to 300 for 30 minutes more. They were juicy and tender.
Ethiopian Seasoning
1 T. paprika
1 t. each cayenne pepper, cumin, garlic powder and ginger
1/2 t. allspice
1/4 t. cinnamon
You probably won’t need all of the seasoning for 1 rack of ribs. Refrigerate the rest for later use.
Blueberry Cheesecake Pie
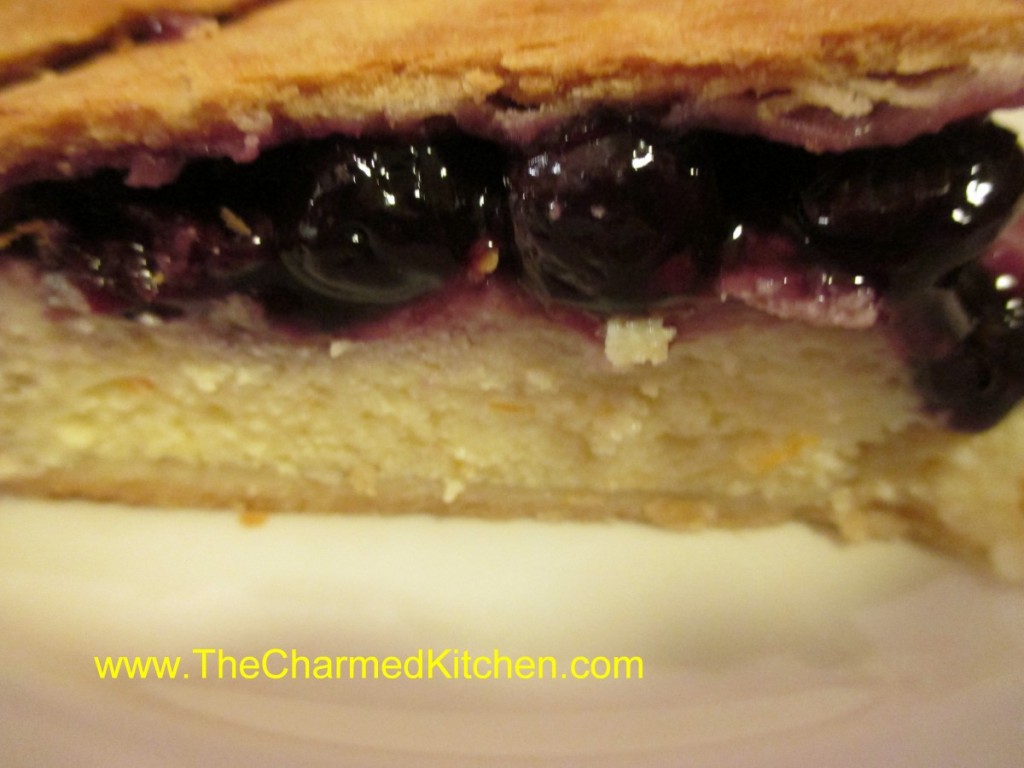
This dessert came about by accident. A very happy accident, indeed. I had been canning blueberry pie filling, and had some left over. It wasn’t quite enough for another jar or a whole pie. A carton of ricotta cheese I had in the fridge, inspired me to combine two of my favorite desserts into one, fruit pie and cheesecake! I used the ricotta to make a cheesecake-like layer and then used the pie filling as a topper. It worked out great. It is perfect just the way it is, or serve with whipped cream or a scoop of ice cream.
Blueberry Cheesecake Pie
Pastry for 2 crust pie- recipe- The crust recipe I used is at the bottom of the page
Cheesecake filling:
1 (15 oz.) carton ricotta cheese, full fat preferred
½ c. sugar
2 eggs
Zest of half an orange
Combine cheese and sugar and mix until smooth. Stir in eggs and zest and set aside.
Blueberry filling:
1½c. blueberry pie filling- I used homemade
Roll out half of the crust and place in 8 or 9-inch pie pan. You can roll out the top crust ahead of time, or even cut into strips for a lattice top. Cover remaining crust to keep it from drying out. Spoon cheese mixture into prepared crust. Spoon the blueberry pie filling over the cheese mixture. Top with the second crust or place strips on in a lattice design. If using a whole crust cut in decorative slits for ventilation. Moisten then crimp edges and shape decoratively or use a fork to seal. Place pie in lower half of hot oven. Bake in a preheated 425-degree oven for 15 minutes. Reduce heat to 375 and bake an additional 40-50 minutes or until crust is brown and juices begin to bubble through the slits. It edges start to brown too quickly, cover them with foil. Cool, then chill, before serving.
Flaky Pie Crust
2 c. flour
1 t. salt
3/4 c. butter, chilled – you could also use chilled coconut oil, lard or shortening
1 T. cider vinegar
4-5 T. cold water
Combine flour and salt and cut in shortening. Toss in vinegar and water 1 tablespoon at a time until dough holds together. Use a fork to toss the ingredients together and as soon as the mixture holds together stop adding water. Makes 2. Chill well before using.
Curry Cauliflower Salad

Long before cauliflower became trendy, I was a fan. I love it steamed, served with a little butter and salt or pan fried and mixed with garlic and a bit of Parmesan cheese. I have enjoyed cauliflower in any number of salads as well.
I picked up a huge cauliflower from a local produce market. I decided to turn it into a salad. I was not disappointed.
Here is the recipe I made with a head of cauliflower.
I used curry powder- I make my own- but you can use a store bought one. The recipe for curry powder is at the end of the recipe. I also added some green onions and peanuts for crunch. It came out quite nice.
I have used curry powder in hot cauliflower dishes before, but the salad was a pleasant change of pace.
Curry Cauliflower Salad
1 head cauliflower, cooked
½ c. chopped green onions
¾ c. mayo – or less or more depending in the size of the head of cauliflower
1 T. curry powder- or to taste
1 t. hot sauce, or to taste
Salt and pepper to taste
1 c. peanuts
First break the cauliflower into florets. Cook the cauliflower any way you like. I steamed mine for about 5 minutes. You could roast it, or sauté it in a little oil. You want it tender, but still a little crisp. Don’t cook it to mush. I would also advise against boiling it, as it gets too wet. Once the cauliflower is cooked, let it cool down before proceeding. Combine the cauliflower with the green onions, the mayo and seasonings. It was hard to be exact because your head of cauliflower might be bigger or smaller than mine. I could have said 5 cups of cooked cauliflower- but would that really help? Then you’d have leftover cooked cauliflower. Or perhaps not enough. So add a little more mayo, if needed, and adjust the seasonings to suit your taste and the amount of cauliflower you have. Chill and toss the peanuts in closer to serving time. If you add the peanuts at the end, they stay crunchier.
Curry Powder
2 t. ground cumin
2 t. ground coriander
2 t. ground turmeric
1 t. nutmeg
1 t. salt
½ t. cinnamon
¼ t. cayenne pepper
¼ t. ground black pepper
Combine all ingredients and store in a cool, dry place.
A Trio of Potato Salads
If you are looking for a side dish for Labor Day, why not bring a potato salad? Everybody loves potato salad. I love potato salad.
Actually, I love potatoes pretty much any way they are prepared. With so many cookouts and picnics, you can never have enough potato salad recipes, right? I am sharing three of my favorite potato salad recipes. The first one is really simple, enhanced with fresh thyme leaves. Thyme pairs well with the potatoes. The second one uses some of my fresh basil in a pesto sauce that is tossed with the potatoes. Who says pesto is just for pasta? The third salad is the way I remember my Mom making potato salad. She never wrote down her recipe, but I think I got it right.
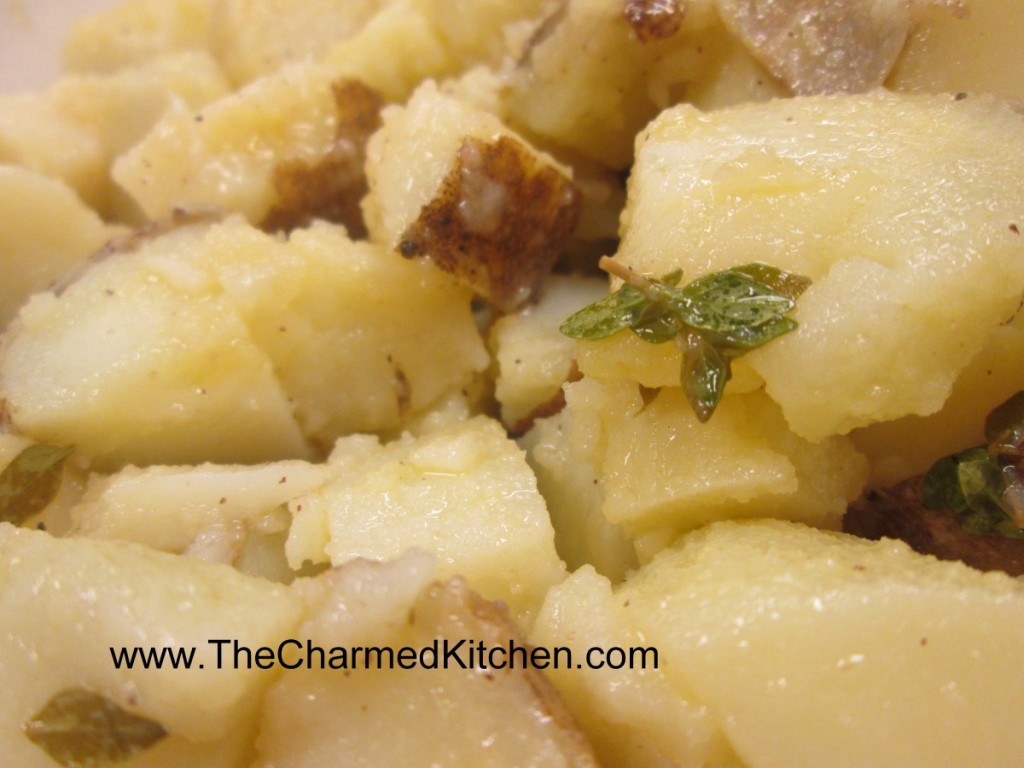
Just in Thyme Potato Salad
With my herb garden growing like crazy right now I thought this was the perfect dish to make. This salad can be served warm or cold and goes well with so many dishes. I find when I have leftovers, I’ll even brown it in a skillet and serve it like hash browns with eggs for breakfast.
2 lbs. boiling potatoes, cut into bite sized pieces*
½ c. olive oil
¼ c. red wine vinegar
1 T. fresh lemon juice
2 t. fresh thyme leaves
Salt and pepper to taste
Cook potatoes until tender. Drain and toss with the rest of the ingredients and serve right away or chill to serve later. Serves 6-8.
* You can really use any potato you like. I often bake the potatoes whole and then peel and cut up. Cook them any way you prefer.
Pesto Potato Salad
This salad always makes me think of a warm summer day. I think it’s because of the basil. During the summer, my driveway is lined with pots of basil. I cook with it almost every day. Pesto can be used in a lot of different dishes beyond pasta. Here I’ve paired it up with potatoes. The combination works great together. I always freeze extra basil so I can enjoy it year round.
2 lbs. Boiling potatoes, cut into bite sized pieces
1 c. basil leaves
3 T. pine nuts
3 T. olive oil
2 garlic cloves, minced
1/3 c. Parmesan cheese
Salt to taste
Cook potatoes until tender. Cool. In blender combine remaining ingredients, except 1 tablespoon of the pine nuts. Pour blended mixture over potatoes and sprinkle with the reserved nuts. Chill. Serves 6-8.
Mom’s Mustard Potato Salad
When I was a kid I did not like the taste of mustard- except in this recipe. It adds such a wonderful flavor.
4 lbs. potatoes- I used Klondike Rose and I did not peel them
4 hard cooked eggs, peeled and chopped
1 sweet pepper, seeded and chopped, optional
1 c. mayo- maybe a little less
1/4 c. prepared mustard- I like a grainy brown mustard
salt and pepper to taste
dash of hot sauce
Bake whole potatoes until tender and allow to cool. Cube potatoes into large bowl and combine with remaining ingredients. Chill until ready to serve. Serves 8.

Pesto Potato Salad

Mustard Potato Salad
Lavender Vanilla Shortbread

I really enjoy cooking with lavender. It goes well in savory dishes, but also in desserts and sweets. Seemed only natural to add some lavender to shortbread. It is one of my go-to recipes. This time I added some vanilla sugar, too. The combination of lavender and vanilla is one of my favorites. The slightly spicy flavor of the lavender blossoms pairs well with the sweeter, sort of floral flavor of the vanilla. If you don’t have vanilla sugar (directions follow), you can add 2 teaspoons of vanilla to the dough.
Lavender and Vanilla Shortbread
1 c. vanilla sugar, plus extra for sprinkling*
2 c. butter
4 c. flour
2-3 T. lavender blossoms
Cream together the one-cup of sugar and butter. Stir in the flour and lavender blossoms. Press mixture in to a greased 9×13 inch-baking dish. Cut or score into small squares, or on the diagonal for diamond shapes. Sprinkle with extra sugar and bake in a preheated 300-degree oven for 50-55 minutes or until lightly browned around the edges. Re-cut the squares as soon as you remove the shortbread from the oven. Cool before removing from pan. Make about 100 small squares.
* If you don’t have vanilla sugar just use granulated sugar and add 2 teaspoons of vanilla extract to the dough.
Making Vanilla Sugar
Some specialty stores sell vanilla sugar and it is expensive. I find it easy to just make my own. Vanilla sugar can be used in baking or to top desserts, in tea, and other drinks. I love to sprinkle vanilla sugar on sugar cookies and on muffins, too.
I buy vanilla beans by the pound online and use them in cooking and to make my own vanilla extract.
To make vanilla sugar just cut vanilla beans in half lengthwise and then into 1 inch pieces. Place granulated sugar in a jar and add the vanilla beans. Cover jar and shake once in awhile. The sugar is fragrant in about a week but will get stronger the longer it sits. I use one vanilla bean per cup of sugar. You can add more sugar to the jar as you use it. The beans will continue to flavor new sugar added to the jar for some time.
Vegetable “Roses” Tart
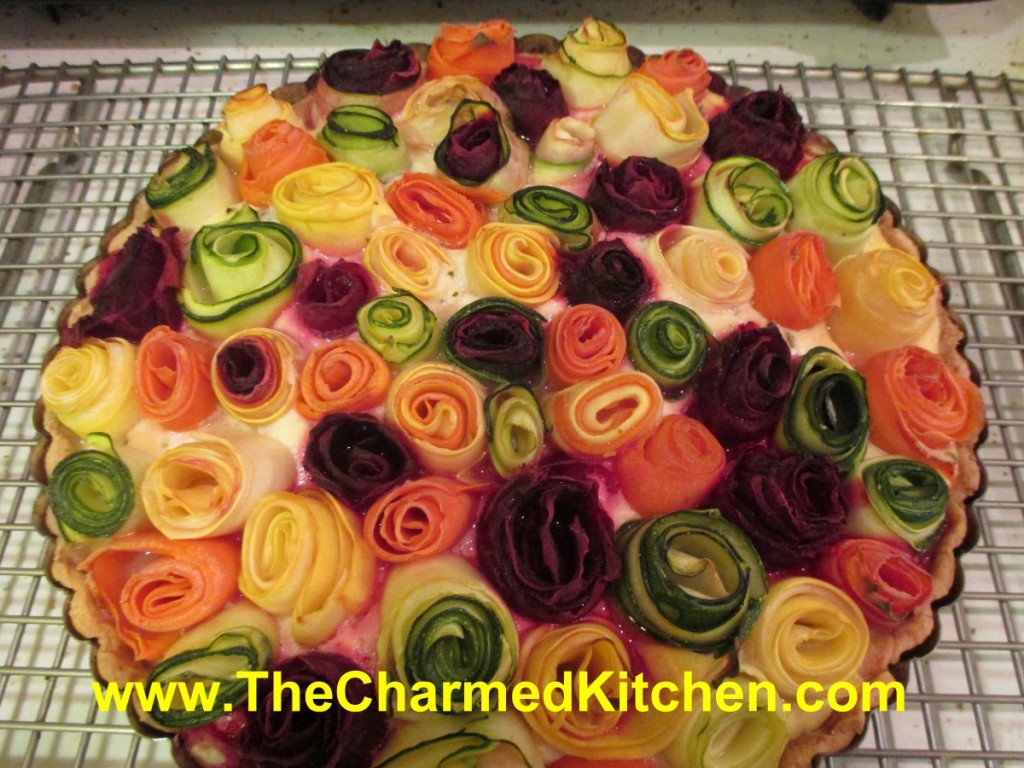
This tart is sure to get some attention at your next party. A flaky crust and cheese filling are topped with veggies. The special part, is that the vegetables are rolled up to resemble roses. Simple and elegant. Plus it is a nice way to use up some of those zucchini.
It really is easy to make, although a bit time-consuming. It can be made a day or two ahead, baked, and then just reheated when you want to serve it. There are three parts to it. The crust- which I made using a favorite pie crust recipe. You could use a store-bought crust, if you prefer. That will save some time. The filling- a mix of cheeses, eggs and some herbs. Finally the topping. Various veggies, peeled into thin ribbons, wound into little “roses”, and placed on the cheese layer.
The crust:
This is an old family recipe. Simple and flaky. It makes 2 crusts- so I used the other one for another dish. You could make two tarts or freeze the rest for another time.
Flaky Pie Crust
2 c. flour
1 t. salt
3/4 c. shortening, chilled, or use lard or coconut oil, I used coconut oil
1 T. cider vinegar
4-5 T. cold water
Combine flour and salt and cut in shortening. Toss in vinegar and water, 1 tablespoon at a time, until dough holds together. Use a fork to toss the ingredients together and as soon as the mixture holds together stop adding water. Makes 2. Chill well before using.
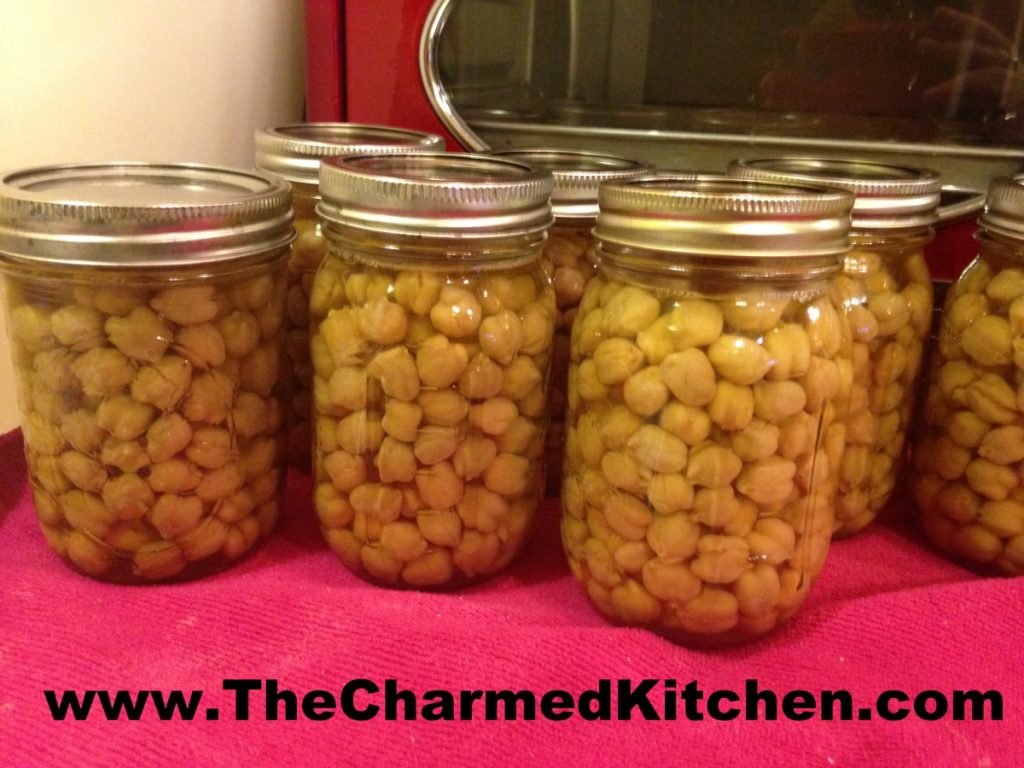
The crust was rolled out, using half the dough, and fitted into a 9-inch tart pan. I blind baked it- to insure it would be cooked through- because the tart doesn’t cook that long. I poked the crust all over with a fork, then I topped the crust with a sheet of foil and then a pound of dry pinto beans. You can use pie weights, if you have them or uncooked rice. I have a jar of pinto beans that I keep just for blind baking. The crust is placed in a 425 degree oven and baked for 15- 20 minutes. It should be taken out of the oven before the edges get too brown. Set aside until you are ready to fill it.
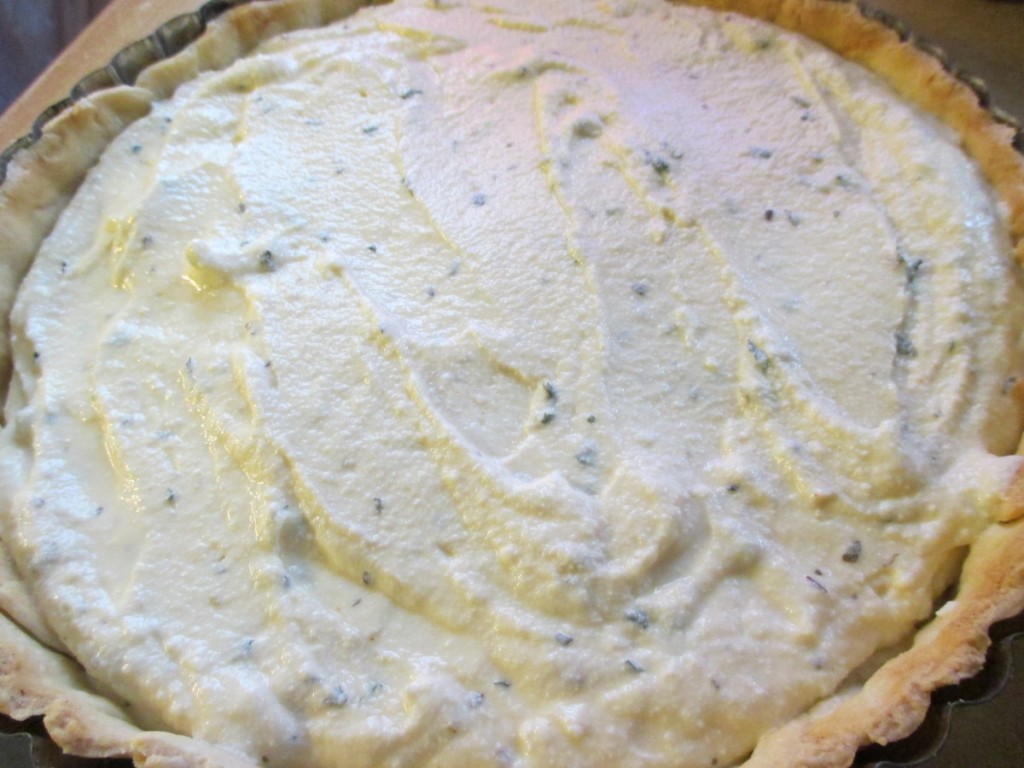
The Filling
I used a combination of cheeses and eggs, with some seasonings. I am not sure I needed the eggs- but I wanted the cheese to set up.
1 (15 oz.) container ricotta cheese
1/2 c. Parmesan cheese
2 eggs
1 t. salt- or to taste
1 t. dried oregano
1 t. dried basil- or 1 T. fresh basil
healthy dash of hot sauce
Combine all ingredients and spread over the crust.
The Veggies
Even though these are listed last, you might want to get them ready ahead of time. I used a vegetable peeler to make “ribbons” out of the veggies I used. You could also use a mandolin, if you have one. Some were going to be hard to roll- so I steamed them in the microwave, in batches, for several minutes. That softened them up and partially cooked them. They should be tender- they don’t get much softer in the baking process. Dry them off on paper towels. When I was ready to use them- I grabbed a “ribbon” and rolled it up, adding more ribbons until I had a little “blossom”. As I made them I stuck them in the cheese mixture- already spread over the crust. Sometimes I used 2 veggies in one flower to make it look more interesting. Once the surface was covered, I pressed them down a little so they would all be the same height, roughly. Season with some salt.
I used
2 zucchini
2 yellow summer squash
2 really big carrots – made for wider ribbons
1 really big beet*
I had some pieces left over and just made a stir fry with them.
Baking the tart:
Place the tart on a baking sheet and bake in a 350 degree oven for about an hour. Crust should be nice and golden around the edges and the veggies should be tender.
* The beet was the trickiest- but I wanted that pop of red. I peeled the skin off first, then tried to peel the longest pieces I could. Some were a little short, but once steamed, they still worked pretty well. sometimes I’d finish a beet center off with a longer zucchini ribbon to hold it together.


Succotash Salad
I remember having succotash a few times when I was a kid. I didn’t like Lima beans all that much- but I did like saying succotash.
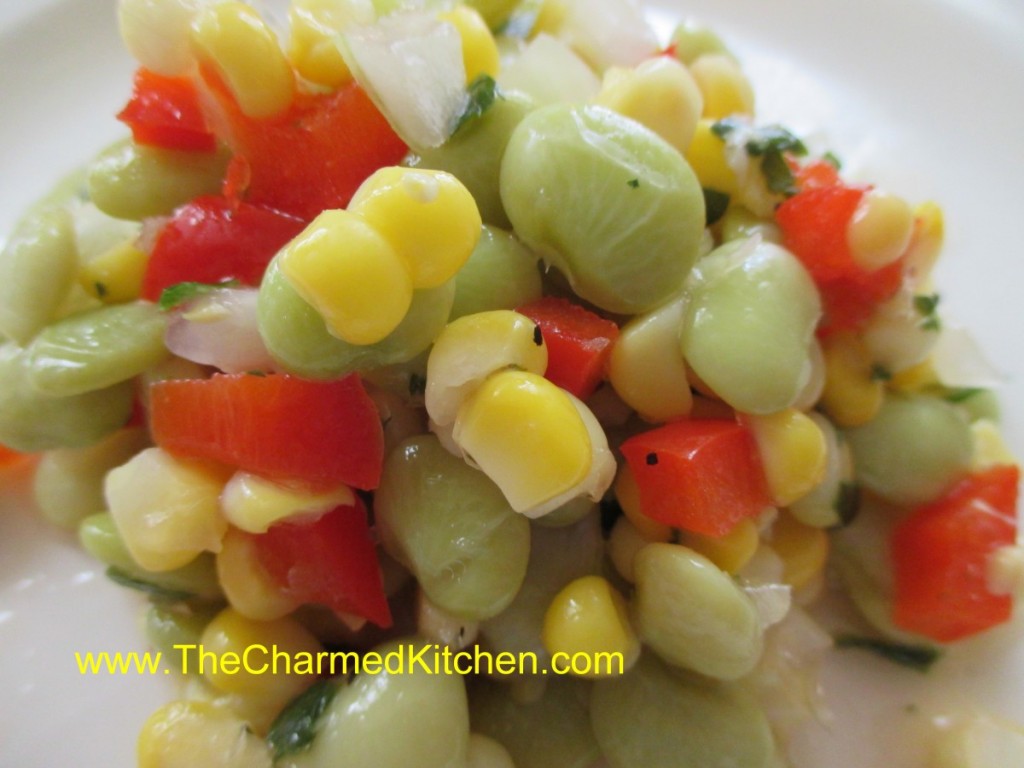
I like Lima beans now, and use them often in soups and stews. I had several ears of sweet corn and a bag of Lima beans in the freezer so it seemed natural to make this salad. The addition of sweet pepper, sweet onion, fresh chopped parsley and a simple apple cider vinegar dressing and it was good to go.
Here is the recipe. This might be a fun salad for your Labor Day picnic.
Succotash Salad
1 lb. lima beans, cooked and cooled
4 ears of corn, cooked, and kernels cut off the cobs
1 sweet pepper, seeded and diced
1 small sweet onion, diced
3-4 T. chopped fresh parsley
Dressing:
2/3 c. apple cider vinegar
1/3 c. oil
1/4 c. honey
1 t. cumin
dash of hot sauce
salt and pepper to taste
Combine veggies and parsley in a medium bowl. In small bowl whisk together dressing ingredients. Adjust seasonings and pour over the Lima bean mixture. Cover and chill for at least several hours before serving. Serves 6-8.


