Parsley Lover
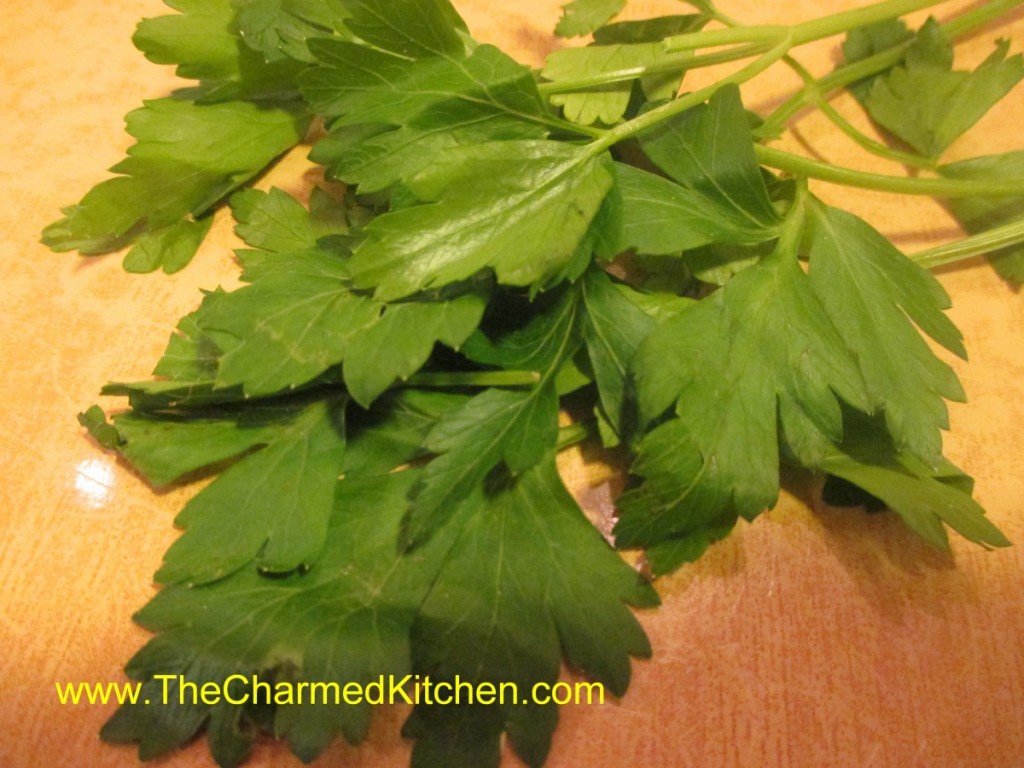
Parsley is one of those herbs everyone seems comfortable using- and with good reason. The clean, green flavor goes well with so many foods. Even people who rarely cook with herbs, seem OK using parsley. Because it is used so commonly, I think it often gets overlooked. Parsley is loaded with Vitamin C and chlorophyll for starters. It is also easy to grow.
While thought of as more of a garnish by some, the flavor can often brighten up a dish. Parsley goes well with meats, veggies, pasta, rice and more. I sometimes use it as a base for pesto. It is also essential to add when making soup stocks.
Since the leaves are so tender- you don’t need to cook parsley to use it. In fact, you should be careful not to overcook it in dishes. Adding chopped parsley right at the end of cooking, most times, is best. It will add a fresh flavor and a burst of green color to your food.
There are three main types of parsley- the flat leaved or Italian parsley. This is the best one for cooking. It has so much flavor. There is also the curly leaved type. This one is cute and often best suited for garnish. Tasty, but not nearly as much flavor as its flat-leafed cousin. The third type is root parsley. This one produces a pretty big tap root that is great for using in soup stocks. The plants are dug up and roots are used fresh- or frozen for later use.
Here are some recipes featuring parsley.

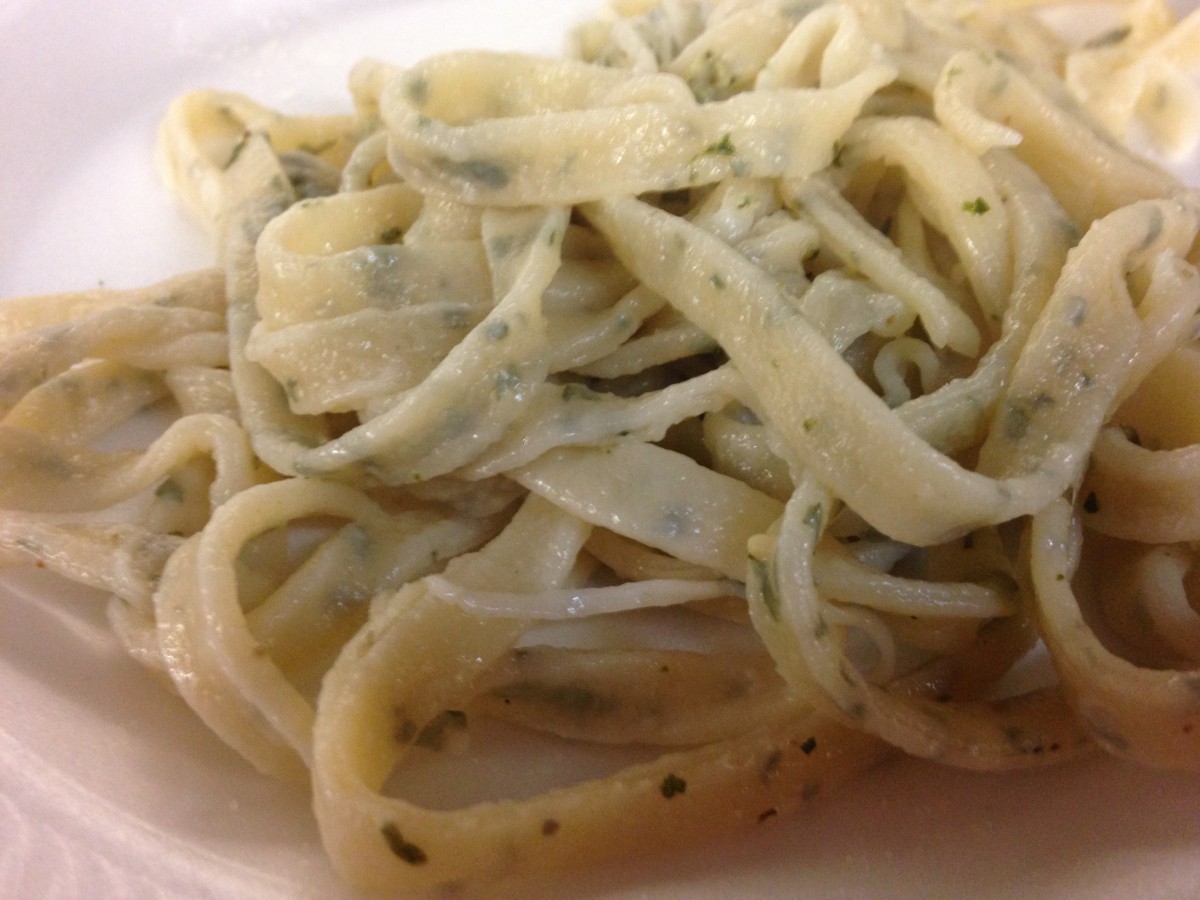
Parsley Pasta- Linguine
1 c. flour
2 T. chopped fresh parsley
1 egg
1 T. oil, (optional)
2-4 T. water, if needed
Combine the ingredients in a food processor, then let the dough rest before rolling. Once you are ready to roll out your pasta, the shape is up to you. You can hand roll the pasta, and cut into noodles. I use a pasta maker to roll the dough, and then a cutting attachment for linguine. Fresh pasta cooks fast. Cook in boiling water 1-2 minutes. Drain and toss with butter, oil, or your favorite sauce.
Zucchini Soup with Herbs
2 medium onions, chopped
2 T. oil or butter
2 qts. chicken or vegetable stock
6 cups cubed zucchini
¼ c. raw brown or white rice
2 T. flour
1T. oil
½ c. fresh chopped parsley
2 T. fresh basil, chopped
1 t. oregano
½ t. thyme
salt and pepper to taste
Sauté onion in 2 T. oil or butter until slightly browned. Add stock, zucchini, and rice. Simmer until rice is cooked, about 40 minutes for brown, or 15 – 20 minutes for white rice. In small bowl combine flour with remaining oil and blend until smooth. Add a little hot soup and whisk until smooth. Pour flour mixture into the soup then add herbs and other seasonings. Simmer for 3 – 4 minutes and serve. Serves 6 – 8.
Parsley Potatoes
2 lbs. potatoes, I prefer Yukon Gold or red-skinned
2-3 c. chicken or vegetable stock
4 T. butter or oil
½ c. fresh chopped parsley, or a bit more to taste
Salt and pepper to taste
Prep potatoes: Peel potatoes, if desired. Large potatoes can be cut into quarters, medium potatoes in half. Small potatoes can be left whole. You want them in chunks about 2 inches in size. Place potatoes in a pot with the stock. Over medium heat, bring to a simmer. Cook, uncovered, until the potatoes are tender and most of the liquid is cooked off. Reduce heat so they don’t scorch. Add butter, parsley and seasonings and cook over low heat until the butter has melted. Adjust seasonings and serve. Serves 6.
Grow Your Own
Lets look at growing parsley for a minute. Parsley likes a sunny location, but will tolerate some shade and does very well in pots and hanging baskets. Its fern- like leaves can be planted among flowers and look quite nice.
Parsley is a biennial. That means it produces only leaves the first year. The second year it makes flowers and seeds, then dies. For my part of the world that means I get a harvest of parsley leaves all summer long. Right up until frost I am harvesting. When Spring arrives it sprouts early, with beautiful leaves. Soon after it will produce flowers and seeds. Since I know the plant is going to die anyway I harvest all the leaves that second year – as soon as they start emerging – and freeze and dehydrate them for later use. This gives me a great harvest early in the year.
General Use
Parsley holds most of its flavor when dried and freezes great, too. In milder climates, parsley may defy the odds and produce for a third year, before making seeds.
Don’t discard those stems, either. While the leaves and small stems are chopped up for fresh eating, the stems can be used to flavor stocks. I often freeze them- then add to the pot when making a stock. Too tough for eating, they are still full of flavor and are getting strained out anyway.
The tradition of using a sprig of parsley to garnish a plate was not just to decorate the plate. It was placed there to be nibbled as a way to freshen your breath after dinner.
So don’t dismiss parsley as just a garnish. It really is a great, simple and clean tasting herb that can brighten up most any dish it is added to.
Rosemary

I love cooking with rosemary. It adds such a wonderful, unique taste to foods. Rosemary has a spicy flavor with pine notes. It is a strong flavor, though, and needs to be used with a light hand. Subtle is the key to successfully cooking with this herb.
I must admit, I had to learn to love rosemary. The first time I cooked with fresh rosemary, I used too much. I ended up with lamb chops that tasted like menthol cough drops. I decided I didn’t like rosemary. Eventually, I tried it again and decided I had been too quick to dismiss rosemary.
Rosemary pairs well with lamb and pork. I like it in tomato sauce and it goes great in breads and baked goods. It also goes well with poultry and is an ingredient in poultry seasoning.
I grow rosemary in pots and bring the pots in for the winter. I live in a climate where rosemary may- or may not- survive winter. I don’t take the chance. It is easier to just bring the potted plants in for winter. I keep them in the basement, under grow lights. That way I have the added bonus of enjoying fresh rosemary year round. If you live in a more temperate area, you can plant rosemary right in the ground. It needs a fair amount of sunlight and well drained soil. Rosemary really is easy to grow.
So here are a few of my favorite rosemary recipes.
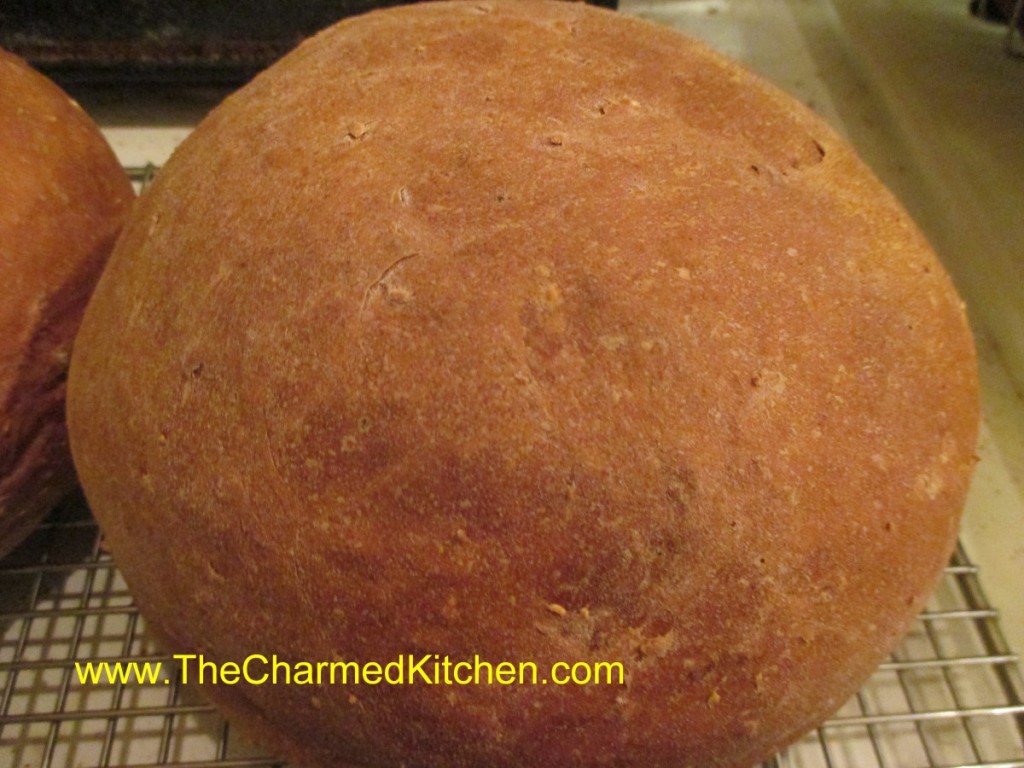
Rosemary Oatmeal Bread
5-5 ½ c. flour
1 package active dry yeast
3 T. fresh rosemary or 1 T. dried, chopped
1 ½ t. salt
1 1/3 c. water
¼ c. milk
¼ c. molasses
¼ c. butter
1 egg
1 c. old fashioned oatmeal
In large bowl mix 1 cup of the flour with yeast and salt. In small pan heat together next 4 ingredients until warm. Pour into bowl with flour mixture and beat 2 minutes. Stir in 1 cup additional flour and egg and beat 2 minutes longer. Stir in oatmeal and 1 cup more flour and stir, adding enough flour to form soft dough. Turn onto lightly floured surface and knead, adding flour as needed until dough is smooth and elastic. Place dough on a greased bowl, turning to grease top and cover, allowing to rise in warm place until doubled in bulk, about 1 hour.
Grease a large baking sheet and set aside. Punch dough down and divide in half. Shape each half into a ball and place on prepared sheet. Cover with towel and allow to rise until doubled, about 1 hour. Bake in a preheated 375 degree oven for 30 minutes or until done. Loaves are done when they sound hollow when tapped lightly. Makes 2 loaves.
This versatile dough can also be shaped into loaves and places in 8×4-inch greased loaf pans. Baking time will remain the same. Dough can also be divided into 24 equal pieces and shaped into dinner rolls. Bake rolls at 375 for 15 minutes.
Rosemary Biscuits
3 oz. cream cheese, cubed
1 ¾ c. biscuit mix, like Bisquick, I use homemade.
½ c. milk
2 t. minced fresh rosemary or ¾ t. dried
In mixing bowl cut cream cheese into biscuit mix until it resembles coarse crumbs. Stir in milk and rosemary and stir until soft dough forms. Turn dough onto lightly floured surface and knead until dough holds together, about ten times. Shape dough into a 6-inch square and cut into 4 3-inch squares. Cut each square in half diagonally and place on a lightly greased baking sheet. Bake in a preheated 400-degree oven for 10-12 minutes or until light brown. Makes 8.
Cranberry-Rosemary Vinegar
This is a favorite food gift of mine. It is so festive and it tastes good, too.
All you need are bottles with corks or screw top lids. If using corks, be sure they are food grade. You’ll also need cranberries, bamboo skewers, fresh rosemary and vinegar- 5% acidity. I use red wine vinegar. Other vinegar will work, too. If you use white vinegar or cider vinegar they will pick up color from the berries and turn a pretty reddish shade. Not as red as with the wine vinegar, but still very pretty.
Since I bring my rosemary plants inside for the winter, I have access to fresh rosemary. Your local grocery store probably has some in the produce department. You can use other herbs, if you can’t find rosemary.
Make sure the skewers will fit in the bottles. Cut them down to fit, if needed. Skewer the berries on the skewers leaving a little room on the top of the skewer. If your cranberries are really big, test to make sure they will fit the neck of the bottle. The skewers keep the berries from floating around.
Place a few sprigs of rosemary in each bottle and then add the berry- filled skewers. Pour in the vinegar, leaving a little room for the cork. Sometimes you need to add a little more vinegar the next day as some will absorb into the cranberries and the skewers. I make decorative labels and give them as gifts. Ready to use in a week.
Poultry Seasoning
¼ c. dried parsley
3 T. dried marjoram
3 T. dried rosemary
3 T. dried thyme
2 T. dried savory
1 T. celery seed
1 T. dried sage
2 t. dried oregano
2 t. dried basil
1 t. ground allspice
1 t. fresh ground pepper
Combine all ingredients in a blender. Store in a cool, dry place to maintain freshness.
Hummus with Greek Olives
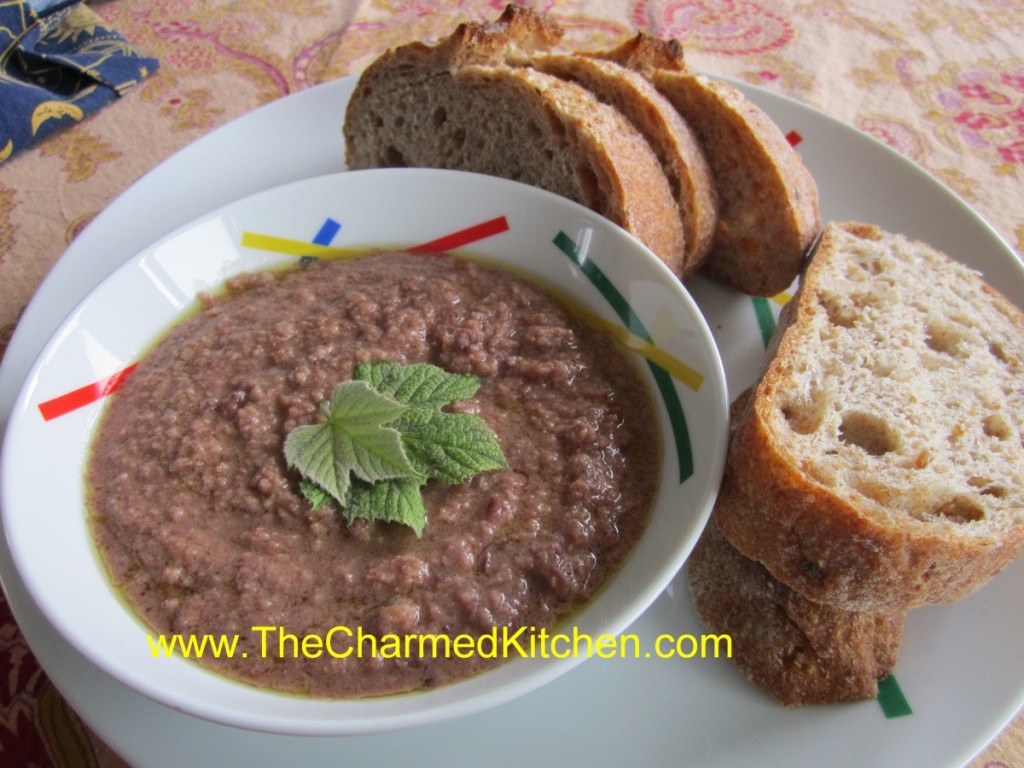
My friend, Jared, was the one who first suggested I add olives to my hummus. Like me, he likes “regular” hummus, too. The addition of olives adds another layer of flavor. Salty, briny and that unique olive taste. Makes sense when you think about it. You are already adding olive oil to hummus, why not add olives, too? I have a big jar of Kalamata olives (thanks, Costco), so I have been looking for ways to use them.
Hummus with Greek Olives
1 can garbanzo beans, drained- or about 2 c. cooked garbanzos
1 c. Greek olives, drained, pitted and chopped
1/4 c. olive oil
2 T. lemon juice
2 T. tahini (sesame seed paste)
2 cloves garlic
salt and hot pepper sauce to taste
Combine all ingredients in a blender or food processor until smooth. Adjust seasonings. Chill. Serve with pita bread, crackers or fresh vegetables. Also nice spread in a pita bread with sliced tomatoes, cucumbers and lettuce. Freezes well.
Loving Lovage
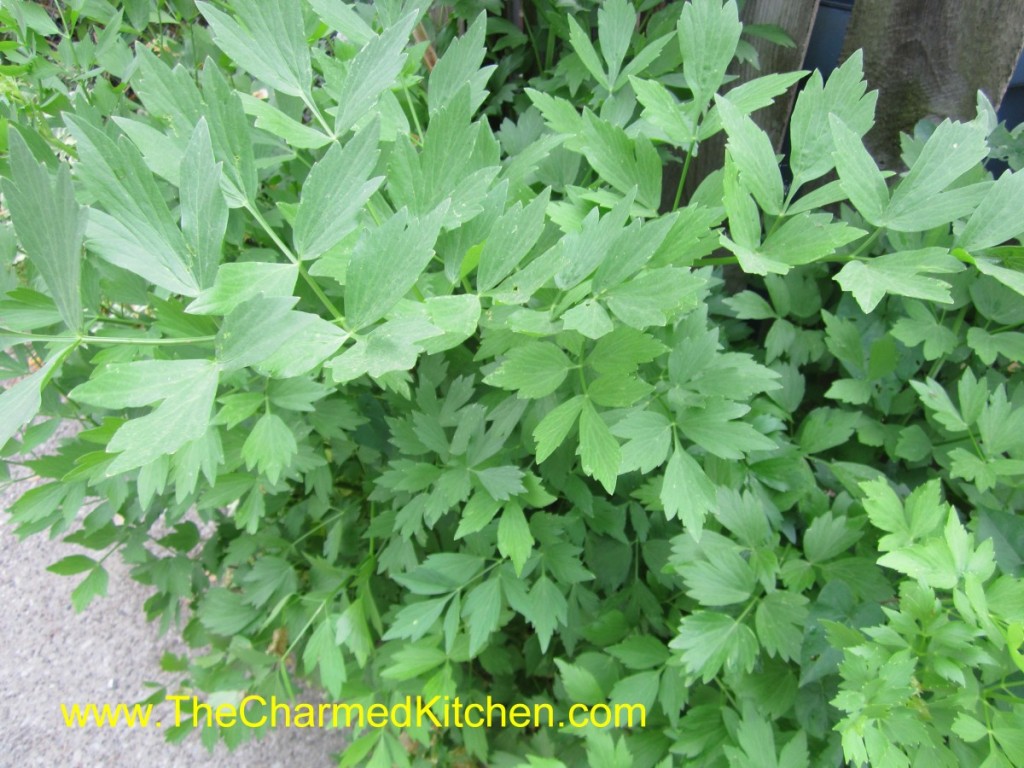
Lovage is one of my favorite herbs. I feel like it doesn’t get enough attention. So many people have never even heard of lovage. It’s leaves taste just like celery leaves, so it is very useful in the kitchen. As an added bonus, it is very easy to grow- and it is a perennial.
I love celery in so many foods. I don’t think you can make a decent stock without it. I especially like using celery leaves. Problem is, often the celery I see in the store has few, if any, really nice leaves. The solution? Lovage.
Lovage leaves can be used in any dish you would use celery leaves: soups, stews, stocks and salads. The seeds can also be used as a substitute for celery seeds in recipes.
Lovage grows to a height of a couple of feet, except when it is in bloom. When blooming, lovage sends up stems that can reach 6 feet!
The stems of lovage are tough, almost woody. While they can’t be used chopped like celery, the stems are hollow and can be cut to size and used as straws in drinks like Bloody Marys or vegetable juices.
I’ve never seen lovage sold as a fresh herb. As far as I know, the only way you can enjoy this lovely plant is to grow it yourself. It thrives in sun, but will tolerate some shade. For a little effort you can have fresh “celery” leaves whenever you want. I also freeze plenty for use throughout the year.
Here is a favorite recipe of mine using lovage. Perfect for Spring.
Fresh Pea Soup with Lovage
2 T. butter or oil
1 medium onion, chopped
2 c. fresh English peas, pea pods (sliced), or sugar snaps (sliced)
¼ –½ c. fresh lovage leaves, chopped fine
3 c. chicken stock or veggie stock
salt and pepper to taste
1 c. sour cream
Heat butter or oil in medium saucepan. Sauté onion until tender. Add peas, lovage, stock, and salt and pepper. Cook until peas are the desired tenderness, about 3 – 7 minutes. Puree soup in batches until smooth. Place sour cream in a small bowl. Ladle 1 cup of hot soup into the sour cream, and stir to smooth. Pour this mixture into the soup and cook, barely simmering, until soup is heated through, about 2 minutes. To serve, ladle into bowls and garnish with lovage sprigs. Serves 3 – 4.
Note: You can also serve this soup cold.

Old Fashioned Molasses Cookies

I really enjoy cookies made with molasses and spices. They have a unique flavor and texture that I like. A friend recently posted pictures of these molasses cookies. I wanted to try them, so I asked him for the recipe. Keith was kind enough to send me the recipe. Thanks Keith!!!
I made a batch yesterday. I can see why Keith says these are a family favorite. They are crispy on the edges, with just a touch of chewiness in the middle. The spices are a perfect balance. They remind me of the gingersnaps I make at the holidays, but with a more tender texture. I LOVE these cookies. I shared them with some friends yesterday and everyone agreed with just how good they are.
I am not sure where the recipe came from originally. Keith said the recipe came from a jar of molasses a long time ago. He has memories of making these with his grandmother.
One difference I found was that I got a lot more cookies from the recipe than I thought I would. The recipe said 5-6 dozen, based on cookies made from 1-inch balls of dough. I suspect Keith’s balls were bigger than mine. I ended up with more like 8 dozen!
With dark cookie dough, people are often worried about how to tell when their cookies are done baking. These are also a soft cookie out of the oven, so you might be worried they aren’t baked long enough. They firm up as they cool. I did 8 minutes on all but one of the batches, and they were perfect. I did a 10 minute batch, just to compare. They were also fine, if a bit darker on the bottom and crisper. If you are concerned, take one cookie off the baking sheet and flip it over. It should be a little darker than the top of the cookie. Don’t worry if they are soft when you try to take them off the baking sheet. They firm up nicely after cooling down. If it is too hard to move them right away, you can leave them on the baking sheet for a minute, before removing them.
So here is the recipe. Enjoy!!
Keith’s Molasses Cookies
1½ c. butter (3 sticks)
2 c. sugar
½ c. dark molasses
2 eggs
4 t. baking soda
4 c. sifted flour
1 t. ground cloves
1 t. powdered ginger – I used fresh grated ginger instead, adding 2 teaspoons to the dough
2 t. cinnamon
2 t. salt
Extra sugar for rolling
Melt butter. Set aside to cool. Beat sugar, eggs and molasses together until well mixed. Add cooled butter. Mix well. Sift dry ingredients together and stir into butter mixture. Dough will be on the soft side. Refrigerate dough for at least a few hours, or overnight. Preheat oven to 375. Grease baking sheets and set aside, or use silicone liners. Roll dough into approximately 1″ balls. Roll balls in granulated sugar. Place 2 inches apart on prepared baking sheets. Bake at 375 for 8-10 minutes. Re-grease sheets after each use.
Cool on flat surface covered with wax paper. I actually used a cooling rack. Cookies are very soft, but firm up a lot as they cool. Transfer carefully or allow to cool a few minutes on the baking sheet before removing. Makes approximately 5 to 6 dozen cookies.
Note: I got more like 8 or 9 dozen, but I think my balls were smaller.
If you like a softer cookie, remove at the 8 minute mark. 10 minutes will give you a crisper cookie.

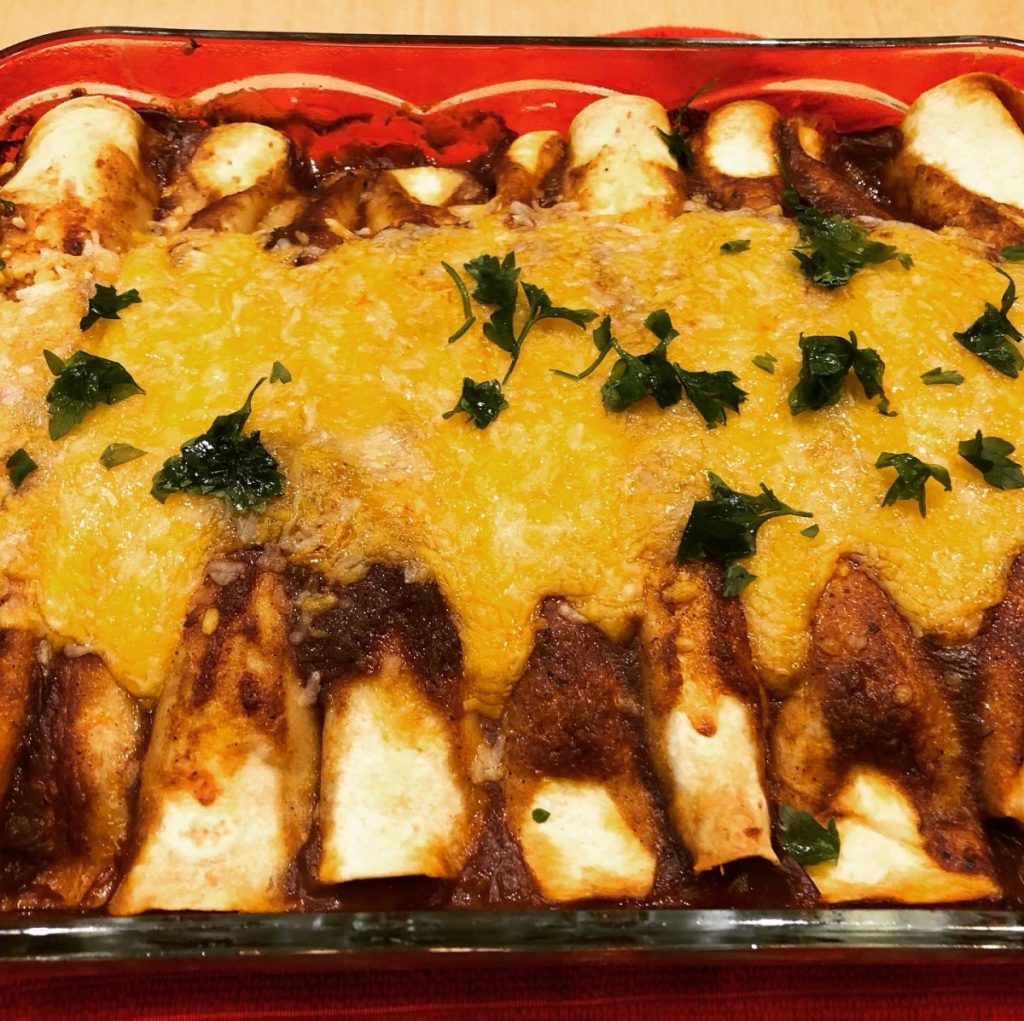
Pork Enchiladas

I love a good enchilada, all warm and cheesy. I really should make them more often. A few weeks ago, I shared my brunch enchilada recipe. Today, I went more traditional.
These pork enchiladas were the perfect dinner last night. I had loaded them up with pork, black beans, corn and cheese, then topped them with enchilada sauce. They were so tasty. I made my own enchilada sauce. It was easy to make and well worth the effort.
Pork enchiladas are often made with a green enchilada sauce. I went with red, since I like red. I had a bottle of green enchilada sauce in my pantry, but opted to go with a homemade sauce. I love how simple the sauce is to make- and how good it tastes. Plus, when you make your own sauce, you can tweak it to suit your taste.
Same thing with the filling. I used what I had and what I like together. The pork, corn and beans are pretty traditional. I had planned on added canned green chilies, until I realized I was out. I did add some fine chopped onion and some sweet red pepper, just for flavor and texture.
That’s the nice thing about enchiladas. You can play around with fillings, based on your likes and what ingredients you have. You could just as easily make this recipe with chicken, beef or even turkey.
Just be sure to fill them up!! I used just about a cup of filling in each tortilla, when you factor in the pork mixture and the cheese. I had planned on using eight tortillas, but needed a ninth one to use up the last of the filling. Rolled them tight and crammed them in the pan. It worked out just fine.
After baking, when I went to cut them, I thought the bottom was a little tough. It tasted fine, though, just hard to cut into squares without using a knife. I thought, in hindsight, I should have put a little sauce on the bottom of the pan, before adding the rolled tortillas. I had plenty of sauce. So that is what I would suggest for you to do. Just 1/4 cup or so, to add a little moisture to the bottom of the dish. Other than that, I wouldn’t change much on this one.
So here is the recipe for my pork enchiladas. I also include the recipe for enchilada sauce. Hope you give them a try.
Pork Enchiladas
2-3 c. cubed or shredded cooked pork
1½ c. corn, cooked and drained well, I used frozen corn
1 can (15.5 oz.) black beans, rinsed and drained well
½ c. minced onion
1 c. diced sweet pepper
1 recipe enchilada sauce- recipe follows- or 2 c. bottled enchilada sauce
3 c. shredded cheese- I used a cheddar/Monterey Jack blend
8-9 (8-inch) flour tortillas
Non-stick spray or enough oil to grease the pan
Chopped parsley or cilantro, optional
Lightly grease or spray with cooking spray a 9×13-inch baking pan. You can put ¼ cup of the enchilada sauce in the bottom of the pan, if you like. Set aside. In mixing bowl, combine the meat with the veggies and ½ cup of the enchilada sauce. Stir to blend. Add salt, if needed. Place about ¾ of a cup of the mixture down the center of a tortilla. Add about 3 tablespoons of the cheese. Roll up tightly and place seam side down in the pan. Repeat with remaining ingredients until all the filling is used up. I was planning on using 8 tortillas, but had enough filling for an extra one. As the pan gets full, you have to kind of push them together to get them all in. You will have leftover cheese. Pour the remaining sauce down the center of the tortillas and cover with foil. Bake in a preheated 350 degree oven for 30 minutes. Remove foil and bake 15 minutes longer. Remove from oven, sprinkle the remaining cheese down the middle and return to the oven to melt the cheese. You can turn off the oven at this point. Just let the enchiladas sit in the oven for about 10 minutes. Remove from oven and let sit at least 10 minutes before serving. You can add a sprinkle of chopped parsley or cilantro just before serving. Serves 6-8.
Enchilada Sauce
3 T. oil
3 T. flour
1 T. chili powder, or a bit more to taste
1 t. paprika
1 t. cumin
1 t. garlic powder
½ t. oregano
½ t. salt, or more to taste
2 T. tomato paste
1 t. apple cider vinegar
Fresh crushed black pepper
2 c. stock- chicken, veggies, I used pork
Combine oil and flour in a small saucepan. Cook over medium low heat until mixture warms and thickens. Add spices, tomato paste and vinegar. Heat a few minutes, stirring constantly. This will add a toasted flavor to the spices. You should smell them more as they warm up. Slowly add the stock, whisking until smooth. Keep cooking, turning heat up to medium. Once mixture thickens and gets bubbly, turn down to low and simmer a few more minutes. Makes 2 cups.
Classic Key Lime Pie

I picked up a bag of key limes, knowing I’d be making a pie with at least some of them. I figure any way I can get more Vitamin C is a good thing, right?
I had decided to go with a classic version: graham crust, creamy filling and a little meringue to top it off. The pie itself is simple and fast to make, although it does need time to chill. I think it took more time to juice all those tiny limes, than it did to make the actual pie.
One of the traditional ingredients in key lime pie is sweetened condensed milk. You can, if needed, make your own sweetened condensed milk, instead of using store bought. I’ve included the recipe at the bottom of this post.
Key Lime Pie
Crust:
1 ¼ c. graham cracker crumbs
⅓ c. melted butter
¼ c. brown sugar
Filling:
2 cans sweetened condensed milk*
1 c. key lime juice
Topping:
2 eggs whites
½ t. cream of tartar
2 T. sugar
In medium bowl, combine crust ingredients and toss until mixed well. Press crust into the bottom and sides of a pie pan. I use a 9-inch deep dish pan. Bake crust in a preheated 375 degree oven for 10 minutes. Cool. Reduce oven to 325 degrees. Combine filling ingredients in a medium bowl. Stir until well mixed. It will look sort of soupy, but as you stir, the filling becomes pretty thick- like pudding. Pour into crust. Prepare topping. Beat egg whites with cream of tartar until foamy. Slowly add the sugar, while still beating the eggs whites, until stiff peaks form. Spread or pipe the egg whites over the filling. Bake pie 25-28 minutes- or until meringue topping is golden brown. Chill at least 6 hours before serving. Serves 6-8.
* You can make your own sweetened condensed milk, if you prefer. Here is the recipe.
Homemade Sweetened Condensed Milk
1 c. dry non-fat milk
2/3 c. sugar
1/2 c. boiling water
3 T. butter, melted and hot
Combine all ingredients in a blender until smooth. Can be stored in the fridge and used within 3 days. This is the same as 1 (14 oz.) can.
Pork Ragout

I wanted something for dinner last night using ingredients I had on hand. I decided to make a ragout. Ragouts are almost like a stew, but with less gravy. A traditional ragout is an assortment of meat with veggies cooked together in some liquid. They can be simmered for hours, or cooked fairly quickly, depending on your preference and the protein you pick. Not the same as a Ragu, which is an Italian tomato-based sauce.
If you use a cut of beef or pork that needs longer cooking to become tender, then allow more time to cook. I marinated the pork in sherry for a few hours, which made it more tender- and added flavor to the final dish. You can also make a ragout using chicken, on or off the bone, lamb, veal or even turkey. Ragouts are fun because they are so versatile.
I used water for my liquid. You can use stock, if you prefer. I just didn’t this time- and the ragout had plenty of flavor from both the pork and the veggies. Plus, I cooked mine until much of the liquid had cooked off. I wanted some sauce, but not a stew or soup.
Ragouts can be pretty spicy. I used sriracha. Mine had a little kick. Go with a spice level that works for you. You can always serve extra hot sauce on the side, for those who like their food a little spicier.
So here is the recipe I made last night.
Pork Ragout
1-1½ pounds pork, cubed- I used pork shoulder
½ c. dry sherry
½ t. salt
2 T. oil
2 medium onions, peeled and chopped
2 medium carrots, peeled and sliced
3-4 medium potatoes, cubed- peeling is optional
1 sweet pepper, seeded and chopped
3-4 cloves minced garlic
¼ c. flour- I used rice flour, but wheat flour would also work
1-2 c. water- you could use chicken or veggie stock, if you have it
2 c. peas
2 c. corn
Salt and pepper to taste
Hot sauce to taste
Parsley
Earlier in day, or even the night before, place pork in a bowl and add the sherry and salt. Cover and allow to marinade in fridge until ready to use. In large skillet or soup pot, heat oil and sauté onions and carrots until tender and a little golden. Stir occasionally. Add the potatoes and reduce heat to medium. Cook about 5 minutes, stirring often. Add the peppers and pork (undrained) and cook another 10 minutes, stirring often. The more you are willing to stir, the higher the heat you can use. If you want to just stir now and then, cook at a lower heat, but cook longer. Add the garlic and cook a few more minutes. Sprinkle on the flour and stir until you don’t see any dry flour. Add one cup of water and the remaining ingredients, and cook, stirring until mixture starts to bubble. The liquid will thicken. I started by just adding a cup of the water, then adding more as the mixture thickened up. Add more water so the sauce is thickened to your liking. Cook, uncovered, until everything is heated through. I was using frozen peas and corn, so I cooked long enough for them to thaw and heat up. I let the ragout simmer, over low heat for about 5 more minutes. I also adjusted the seasonings before serving and added more fresh parsley. Serves 4-5.
Note: I made this using veggies I had on hand. Feel free to use what you have around or prefer. I made an effort to pick veggies with different colors and flavors, which I thought made for a better finished dish.
Braided Herb Breads
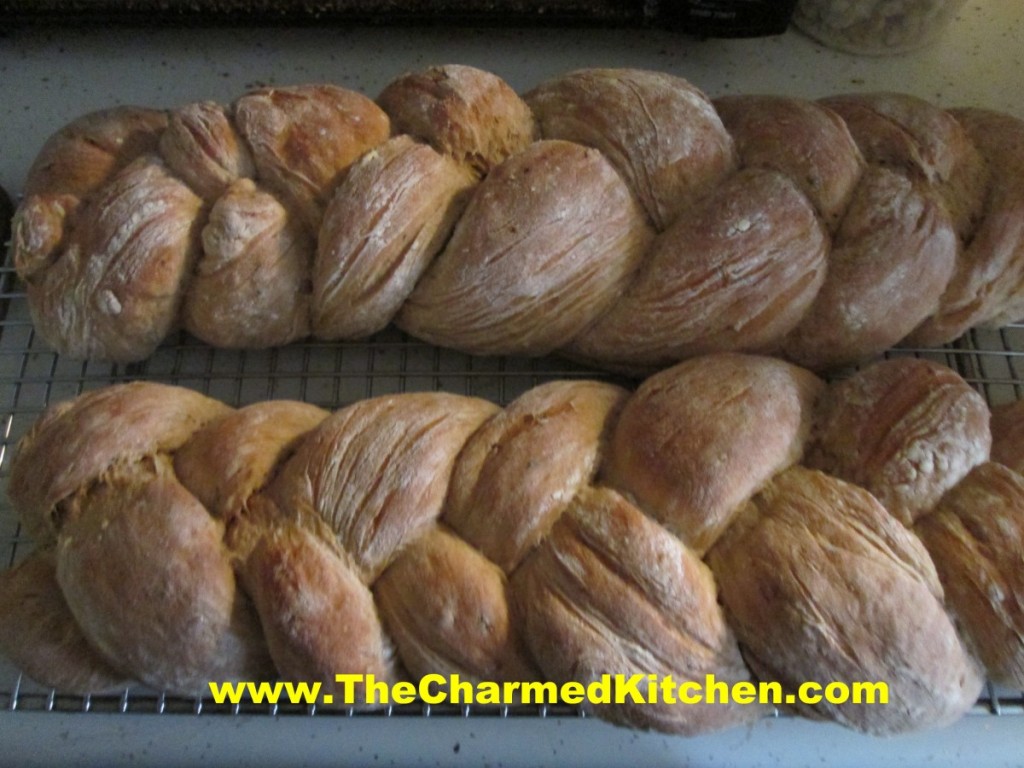
One of the benefits about baking your own bread is the aroma. The house gets filled with the most wonderful smells. In this case, the experience is even better because the breads I baked are filled with herbs and shallots, so those fragrances are also in the mix.
I like to make these loaves in braids and place them on a baking sheet- but they could just as easily be baked in bread pans for more traditional loaves. Great for sandwiches.
I like to toast some of this bread, and use as croutons or as a base for stuffing.
You can also slice the bread, brush with softened butter, then toast, for a twist on garlic bread. The garlic is already in the bread, but feel free to add more to the butter, before brushing it on the bread.
Braided Herb Bread
5 ½ -6 ½ c. flour
2 packages quick rising yeast
¼ c. sauteed shallots
2 T. each dried marjoram and parsley
1 T. each dried oregano and minced garlic
1 T. honey
2 t. dried thyme
2 t. salt
¼ c. olive oil
2 ¼ c. hot water
In a mixing bowl combine 2 c. of flour with the rest of the ingredients and mix until smooth. Beat with electric mixer 4 minutes then add 1-cup additional flour and beat 1 minute longer. Stir in flour ½ cup at a time until soft dough forms. Turn onto surface and knead, adding flour gradually until dough is smooth and elastic. Place dough in lightly greased bowl and turn to cover. Cover with a towel and let rise until doubled, about 30 minutes. Turn dough onto surface and cut in half. Cut each half into thirds. Roll each piece of dough into an 18-inch rope. Loosely braid three ropes together and repeat with the remaining dough. Place on greased baking sheet and cover until doubled in size, about 20 minutes.
Bake in a preheated 375-degree oven for 25-30 minutes, or until bread sounds hollow when tapped lightly. Makes 2.
Variation: Whole wheat: Add 2 cups of whole-wheat flour to replace 2 cups of white flour. Also try adding ¼ c. of wheat germ, oat bran or 2 tablespoons of seeds (sesame, pumpkin, sunflower, poppy, etc.)
Regular yeast can be used, but rising times will be longer and water should be warm, not hot.
Curry Pea Soup

With a lot of rain lately, I was in the mood for soup today. I wasn’t in the mood for a soup that takes all day to make.
This soup is fast and easy to make- and full of flavor. Unlike a lot of pea soups- this one is made with fresh peas- not dried split peas. Technically, frozen peas. It cuts down on cooking time and gives a very different taste to the soup.
I made this soup on a chilly morning, but I could see eating it in warmer weather, too. It would be very nice with some mint or maybe a little tarragon. It makes for a lovely Spring meal.
While peas were the center of the soup, taste wise – I added extra veggies for more depth of flavor.
The curry powder added lots of flavor, too. Curry powder is a mix of different spices. Some can be quite spicy, others are milder. I make my own.
I added the peas near the end of cooking time, to preserve as much of their natural color as possible.
Once the veggies were tender, I pureed the soup. It ended up the most beautiful shade of green.
Curry Pea Soup
3 T. olive oil
1 large onion, chopped
3 ribs celery, chopped
2 c. cauliflower- I had some in the freezer
6-8 c. stock- I used chicken, but vegetable stock would work, too.
1 lb. peas- I used frozen- you could use fresh shelled peas, if you have them
2 T. curry powder – or more to taste
2 T. fresh parsley
Salt and pepper to taste
Hot sauce to taste
Heat oil in soup pot. Add onion, and cook over medium heat, until tender. Add the celery and cauliflower and cook a few minutes longer. Add 6 cups of the stock and bring to a simmer. Cover and simmer until veggies are tender, about 10-15 minutes. Add the peas and seasonings and continue cooking 5-10 minutes more. Puree soup, adding more stock if it is too thick. Adjust seasonings and serve. Serves 6. Freezes well.


