Peanut Soup- Vegan

My goddaughter was in town for an unexpected visit. It is always a joy to spend time with her. I was planning dinner for us and wanted to make it special. Gwen is vegan, and this peanut soup came to mind as a perfect first course.
It’s a simple soup with a creamy texture and just a hint of heat. You could make it spicier, of course. Gwen likes spicy foods, so I knew she would like it. She even added extra hot sauce to hers.
If your only experience with eating peanut butter is on a sandwich or in cookies, you might be surprised at just how good this soup tastes. I have made it with almond butter, but still prefer it made with peanut butter. This is a vegan recipe, but you could use chicken stock, if you like. It freezes well, too.
Peanut Soup
2 c. chopped onions
1 T. oil
cayenne pepper to taste
1 t. grated fresh ginger
1 c. chopped carrots
1 c. chopped sweet potatoes
1 c. chopped white potatoes
5 c. vegetable stock or water
1 c. tomato sauce
1 c. smooth peanut butter
1 T. sugar, optional
1 c. chopped green onions
Sauté onions in oil until tender. Add seasonings and carrots and sauté 3 minutes more. Add potatoes and stock and simmer until vegetables are tender. Puree soup in blender in batches until smooth. Return to pot and add tomato sauce and peanut butter. Add sugar if soup is not sweet enough. I never add the sugar, but some people do. Warm gently and serve with green onions on top. You could also top with chopped peanuts, for a little crunch. Serves 6-8.
Spicy Bread and Butter Pickles
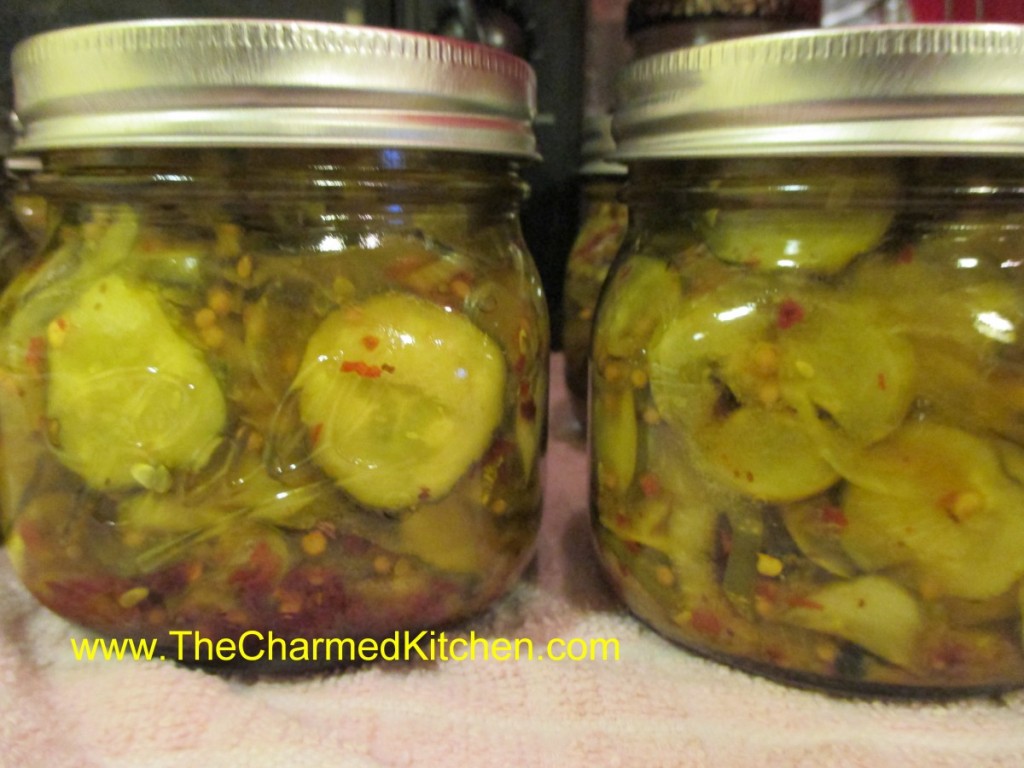
I am a big fan of homemade bread and butter pickles. I make several batches every year. Friends and family really like them, too. I get requests, every year, for these Spicy Bread and Butter Pickles.
While you should follow recipes for pickles carefully- those amounts of vinegar, salt, sugar etc., all are important for safety and a good end product, you can play around with seasonings a little.
In this case, I just add a teaspoon of red pepper flakes to each pint jar for the spicy version. Just enough of a kick. You might want to add a little more or less, according to your taste.
So here is the recipe for classic Bread and Butter Pickles- with the variation for Spicy included.
Bread and Butter Pickles*
6 quarts thinly sliced pickling cucumbers
6 medium onions, peeled and sliced thin
½ c. pickling salt
1½ quarts vinegar
4½ c. sugar
½ c. whole mustard seed
1 T. Pickling spice
1 T. celery seeds
Wash cucumbers and trim off ends before slicing. Place in non-reactive bowl
(stainless steel, enamel, plastic) add the onions and then salt and
stir. Allow cucumbers and onions to sit in the salt for 3 hours. After 3
hours drain well, but do not rinse. Meanwhile combine remaining
ingredients and bring to a boil. Add cucumbers and onions and return to
the boil. As soon as the mixture is boiling ladle into clean, hot pints
jars, leaving a good ½ -inch of headspace. Wipe rims and screw on lids
firmly. Place in boiling water bath and process for 10 minutes. Remove
to counter and allow to cool naturally. Makes 12 pints.
* For Spiced Bread and Butter Pickles add 1 teaspoon of red pepper flakes to each pint jar just before filling.
Note: These need a couple of weeks for the flavors to develop. They can also be made with firm, small zucchini.
Source: Putting Food By
Homemade Dill Pickles
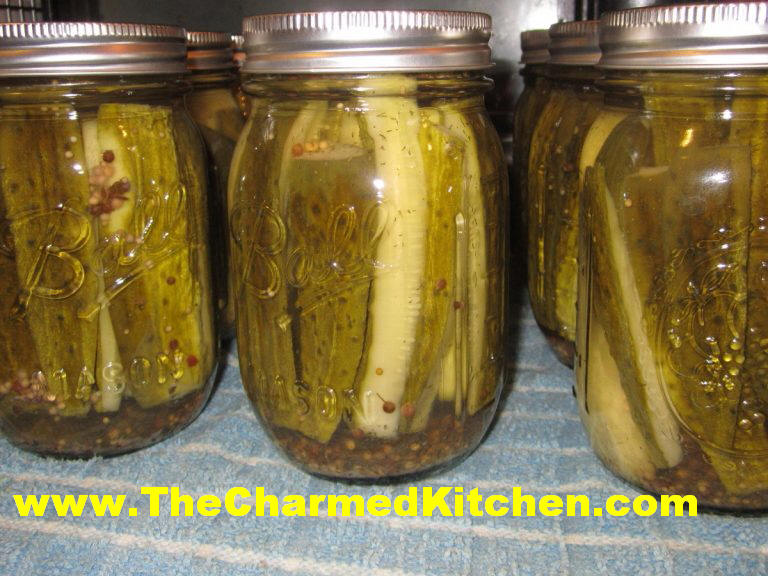
People think homemade pickles are difficult to make. They really aren’t. These dill pickles are easier than most.
To make them, you start by putting dill and garlic in clean jars. Then you add the cukes, cover them with the brine, and process. Can’t get much simpler.
You can play around with the seasonings a bit. To make the dill pickles a little more fun, I added 1 teaspoon of red pepper flakes to about half of the jars, for a spicy version.
To make the pickles crisper, you can add a fresh grape leaf to each jar with the spices. For best results, use really fresh cucumbers. Pickle them as soon after harvest as possible.
If you didn’t grow pickling cucumbers, they are available at most farm markets. Buying from a local farmer means you are likely to get a fresher product than what might be at the grocery store.
Easy Dill Pickles
30-40 pickling cucumbers, 5 inches long, scrubbed and ends trimmed off
¾ c. sugar
¾ c. canning or pickling salt (non-iodized)
1 quart vinegar
1 quart water
7 fresh dill heads
3 T. pickling spice
7 garlic cloves, peeled, optional
Mix together the sugar, salt, vinegar, water and pickling spices and bring to a boil. Cook 10 minutes. Place a dill head in the bottom of seven clean, hot pint jars. Add the garlic, if using. Meanwhile cut trimmed and washed cucumbers into halves or quarters lengthwise and pack upright into the jars. Trim the length, if needed to fit no higher than to the shoulder of the jar. Pour over the hot brine leaving ½ -inch of headspace. Wipe rims and screw on lids. Place in a simmering water bath and bring to a boil. Process for 10 minutes. Remove and cool. Makes 7 pints.
Fresh Mango Chutney

If you never had mango chutney, it might be a little hard to describe. When you look at the list of ingredients, it might also seem like an odd combination. Fruit with garlic? Sounds funny, but it works well together- really!!
Chutney is a condiment that has its roots in India. There are plenty of variations out there-but I am partial to mango chutney. Mango chutney is sort of like a sweet pickle relish, but not exactly like a sweet pickle relish. There is the element of sweet and sour, through the combination of fruit, sugar and vinegar. The addition of ginger, garlic and hot sauce just add to the wonderful flavor of the chutney.
Chutney can be used as a side sauce- so it can be served with whatever food you are eating- sort of like cranberry sauce. You can also add chutney to a food before serving- like folding some into your favorite chicken salad. I find myself just spreading some on bread when making a sandwich. It can also be used to cool down the flavor of spicier foods.
Chutney is actually pretty easy to make. Just keep an eye on it so it doesn’t scorch. Once cooled, keep in a jar in the fridge. You could freeze it, if needed. I never seem to have a problem using it up before I have a chance to freeze it.
So here is my recipe.
Fresh Mango Chutney
2 large unripe mangoes, peeled, seeded and diced- about 2 cups
½ c. water
½ c. cider vinegar
1 ½ c. sugar
2 T. peeled, freshly grated ginger root
½ c. raisins
3-4 cloves of garlic, minced
1-2 t. hot sauce- or to taste
Salt to taste
Place diced mango in saucepan and add the water and vinegar. Simmer for 10 minutes, to soften the mango a little. Add the rest of the ingredients and cook over medium/low heat until mixture thickens. This will take about 20 minutes. Stir more often as mixture thickens. Adjust seasonings. Cool, then store in fridge until ready to use. Makes about 1½ cups. Will keep in fridge a few weeks.
Cauliflower Gratin
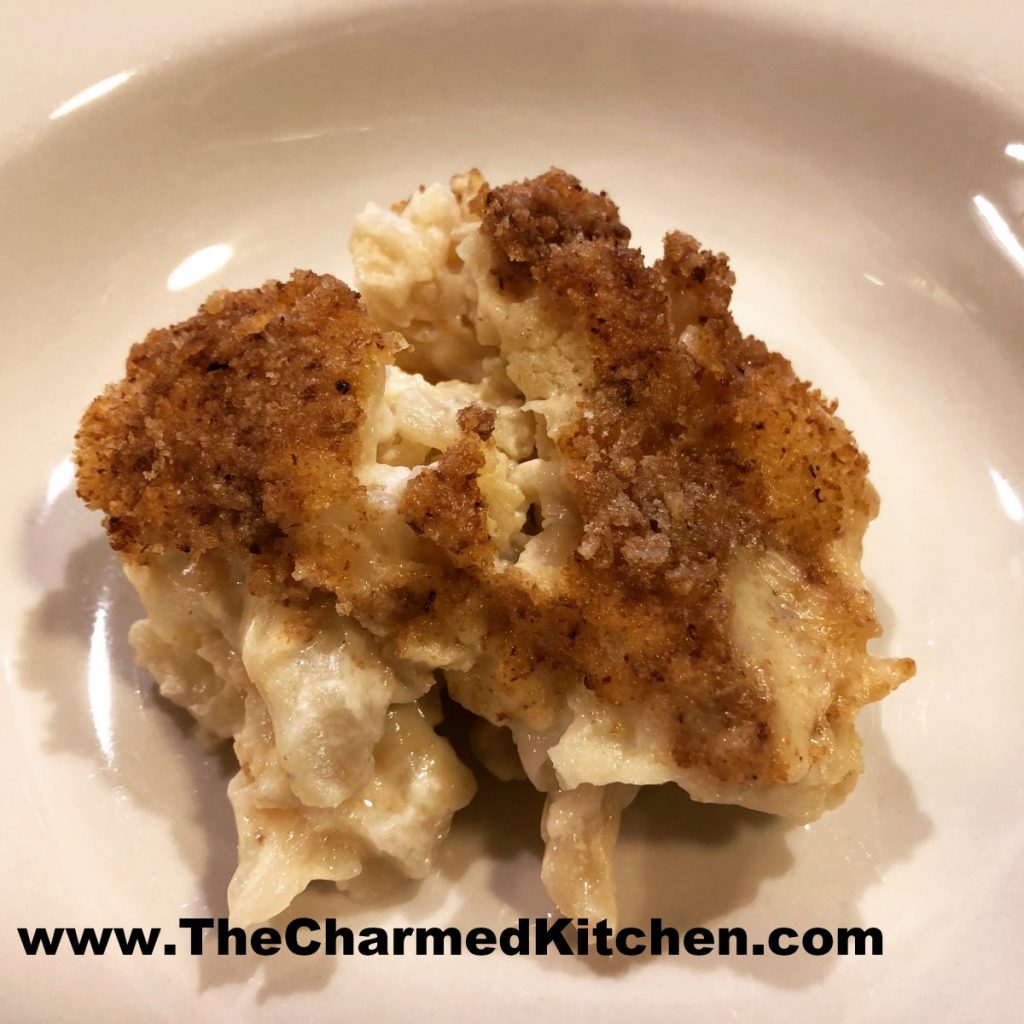
Gratin is just another way of saying cheesy cauliflower. I love cauliflower. I also love cheese. Bringing the two of them together is a classic combination.
I decided to make a cauliflower gratin for dinner the other day. When I started, I remembered one I had made a few weeks ago. It was for a dinner with a couple of my friends. It tasted great, but was a little too watery.
The problem is, I wanted the cauliflower to be cooked, but not cooked to mush. I just steamed it for a few minutes. It was tender, but still pretty firm.When it cooked in the cheese sauce, it cooked a little more and became more tender. This is a good thing. Unfortunately, it gave off water as it cooked and thinned the sauce too much.
I wanted to try again, with a thicker base sauce, to offset the water in the cauliflower. We were so pleased with the final dish. Creamy, cheesy and not watery at all.
I have to admit, I almost chickened out when I saw how thick the base sauce was. But, I figured if it was too thick, it would still taste good.
I forgot to measure the cauliflower before and after steaming. I had to take a good guess at how much chopped up cauliflower there was. A little more or less won’t matter that much. I had a pretty good size head of cauliflower. I guessed at 8 cups raw, but it could have been 10 cups.
So here is the recipe- I hope you give it a try.
Cauliflower Gratin
1 medium head of cauliflower, stems trimmed off and cut into bite sized pieces- you should have about 8 cups
6 T. butter
6 T. flour
1 c. half and half- you could use cream or milk, if you prefer
6-8 oz. cheese- cubed, shredded or sliced- any cheese that melts will work. I used a combination of cheddar and Muenster
Salt and pepper to taste
Hot sauce to taste
½ c. bread crumbs
2 T. butter
Steam the cauliflower until just tender. I steamed mine in the microwave for 6 minutes. It took me two batches to steam it all. Place cauliflower in a mixing bowl and set aside. In pot, heat the butter until melted and stir in the flour until smooth. Add the half and half and cook, over medium heat, stirring often, until mixture thickens. It is going to get REALLY thick. Don’t freak out. When the mixture cooks with the cauliflower, the cauliflower will give off more liquid which will thin out the sauce. Once the mixture gets bubbly, cook over very low heat another couple of minutes, stirring constantly. Turn off the heat and add the cheese. Stir occasionally, until the cheese has melted. You can turn the heat on if you need to for a minute or so. Trust me, be patient, the cheese will melt. Spoon the cheese sauce over the cauliflower and mix it together as best you can. Add seasonings, if you like. Place cauliflower mixture in a baking dish. I used a deep dish pie pan- and it fit, but I had to push it down a little. Sprinkle with the bread crumbs and dot with the 2 tablespoons of butter. Bake in a preheated 350 degree oven until it gets all bubbly and starts to brown a little. This takes about 25-30 minutes.
Let it sit a few minutes before you try to eat it. It is really hot.
Corn and Black Bean Salad
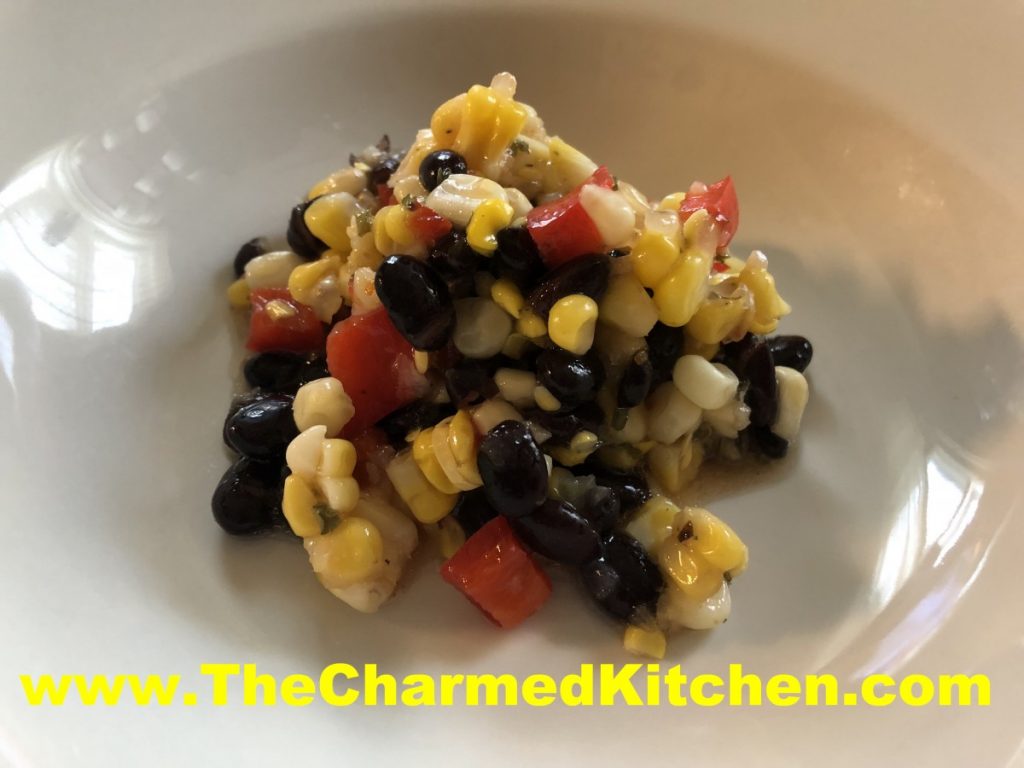
This salad was inspired by ingredients I had on hand. I had picked up some beautiful local sweet corn the other day. I also had some sweet peppers and home canned black beans. I knew the trio would work well together.
I used fresh corn in this dish. You could use frozen corn, if that was all you had. Fresh corn season is too short around here. I always buy extra corn for freezing. I just blanch the shucked corn for a few minutes in boiling water, then drop into ice water. Once the corn is cool enough to handle, I cut the corn off the ears. Then I package up the corn and freeze it.
You could also grill corn and cut it off the cob to freeze.
I like to boil the cobs after the corn is cut off, for a corn stock, which I also freeze. The cobs have a lot of flavor.
If using the frozen corn in a salad, you’ll want to drain it after thawing.
So here is the recipe. Pretty simple. You could add some sweet onion, if you like, too.
Corn and Black Bean Salad
4 c. cooked corn
1 can black beans, rinsed and drained
1 sweet pepper, seeded and chopped
¼ c. olive oil
3 T. red wine vinegar
1 T. Balsamic vinegar
2 t. Italian seasoning- I used my Tuscan blend
Salt and pepper to taste
Hot sauce to taste, optional
Combine all ingredients in medium bowl. Stir to combine well. Chill before serving. Serves 6-8.
Blueberry Pancakes with Blueberry Syrup

For breakfast I can’t think of a better dish than blueberry pancakes with fresh made blueberry syrup. I treated my self this morning and made both. The pancakes were light and very fluffy.
I was talking to a friend yesterday about some of our favorite breakfast foods. Blueberry pancakes were at the top of both our lists.
This is why I freeze blueberries. So I can have these wonderful pancakes whenever the mood strikes.
The secret is to fluffy pancakes is not to over mix the batter. The ingredients are stirred until just combined. I used a homemade biscuit mix as the base. The recipe follows.
The baking mix is normally made with shortening, but I use coconut oil. You can use the mix in any recipe that calls for baking mixes, like Bisquick or Jiffy mix. When using coconut oil, you might want to store the mix in the fridge in hot weather. Normally I store it at room temperature, but pop it in the fridge during the summer. You could also make the baking mix with butter- store in the fridge.
The syrup is pretty simple. Just three ingredients; blueberries, sugar and a little water. Sometimes I add some vanilla or a little lemon zest. I served it warm over the pancakes.
Blueberry Pancakes
2 c. biscuit mix*
1 c. milk – I used half and half
2 eggs
1 c. fresh or frozen blueberries
Combine mix, milk and eggs until just blended. Fold in berries. Pour batter by scant 1/4 cups in lightly greased griddle or skillet over moderate heat. Turn when pancakes are dry around the edges. Cook until golden brown. Makes about 13.
* Like Bisquick or Jiffy Mix or home made- recipe follows
Biscuit Mix
8 c. flour
1 c. powdered milk
1 c. powdered buttermilk (or 1 more cup powdered milk)
1/4 c. baking powder
1 T. salt
1 1/2 c. shortening* I use coconut oil
Combine dry ingredients and cut in shortening until well mixed. Store in tightly covered container. Makes 10 cups.
* You can substitute coconut oil or butter for the shortening- but mix will have to be kept cool. Refrigerate if using butter and use withing 3 months.
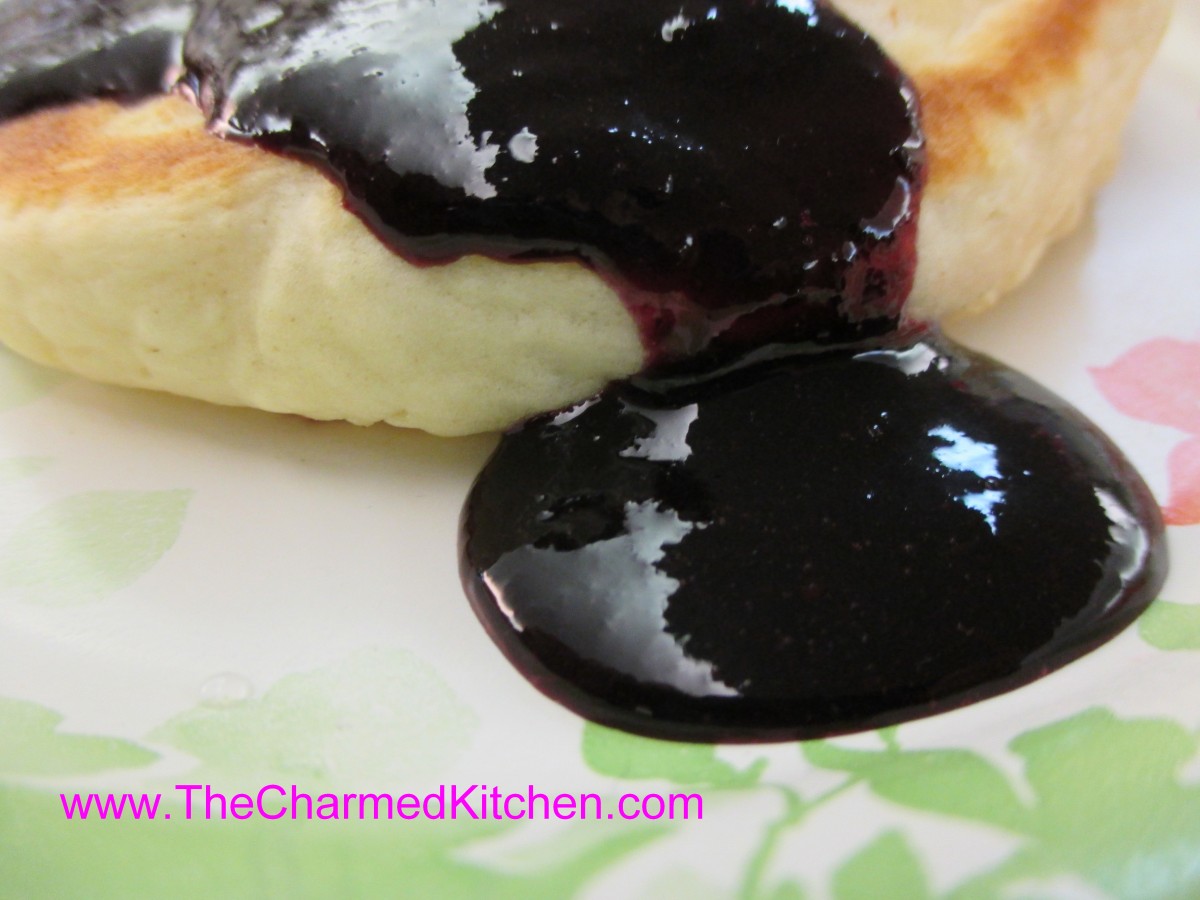
Blueberry Pancakes with Blueberry Syrup
Blueberry Syrup
4 c. blueberries
1 c. water
1½ c. sugar
In saucepan heat berries and water to a boil and boil 2 minutes. Crush berries with a potato masher as they cook. Add sugar and cook for 10- 15 minutes on medium heat until mixture thickens. Process syrup with an immersion blender or in a blender until smooth. Cool, then refrigerate. Keeps a couple of weeks. Makes about 3½ cups.
Mom’s Macaroni Salad
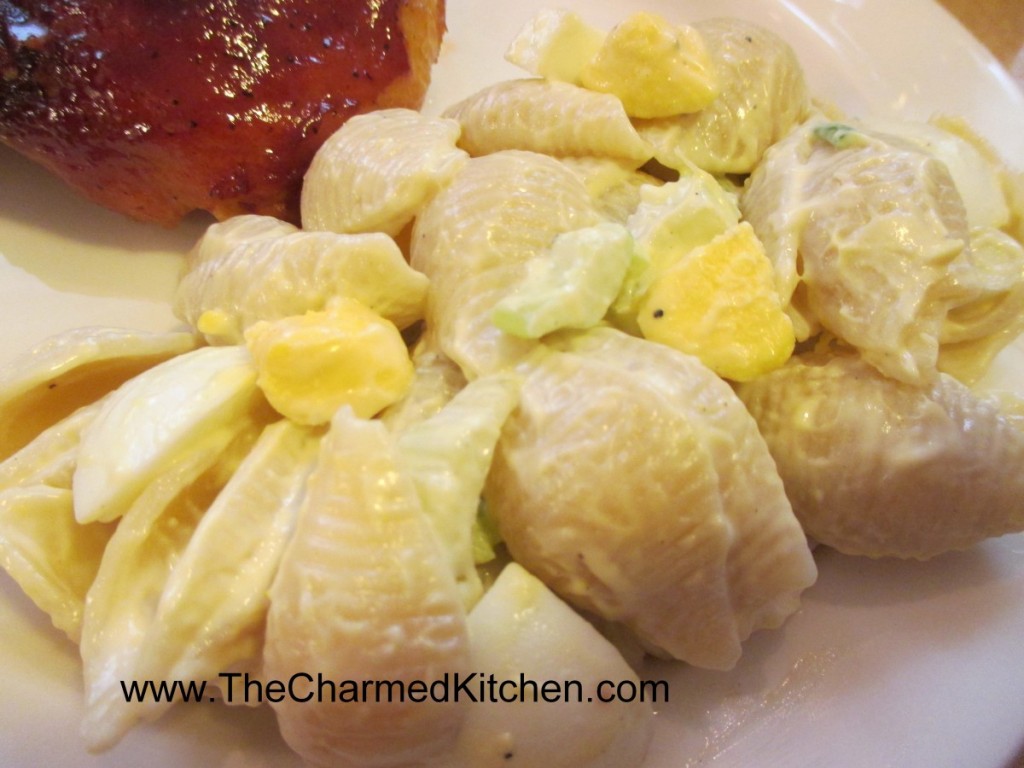
I’ve been in a nostalgic mood this week. Remembering, fondly, the picnics and cookouts from my childhood. For summer cookouts, we always had this salad. Long enough ago that it was called macaroni salad, not pasta salad. I loved it then, and I love it now.
I won’t say I don’t make other pasta salads. I do. I make all sorts of combinations, but this is the salad that brings me home.
Mom used mostly mayo, with a little salad dressing like Spin Blend. She felt it gave the salad just a little more zing. I use straight mayo, but that part of the recipe is flexible.
She added quite a few hard cooked eggs and I think they add a richness to the dish. My dad would cut up the celery and green onions for her. Mom liked the veggies cut into a fairly small dice in this dish, and Dad had great knife skills. I love the image of them cooking together.
So here it is- a family recipe wrapped up nicely with some memories, too.
Mom’s Macaroni Salad
1 lb. uncooked pasta, shells are preferred
Salt and pepper
Mayonnaise, about 1 cup
Salad dressing, like Miracle Whip, about ½ cup or more mayo
3-4 ribs celery, sliced thin
4-5 green onions, trimmed and sliced thin
8-12 hard-cooked eggs, cooled and peeled
Cook pasta according to package directions, but do not overcook. Rinse with cold water and drain well. Place drained pasta in a large bowl and sprinkle with salt and pepper to taste. Add dressings and vegetables and stir until well mixed. You may want to add more dressing to suit your taste. Chop eggs and stir into salad. Adjust seasonings if needed and chill before serving. Serves 8-10.
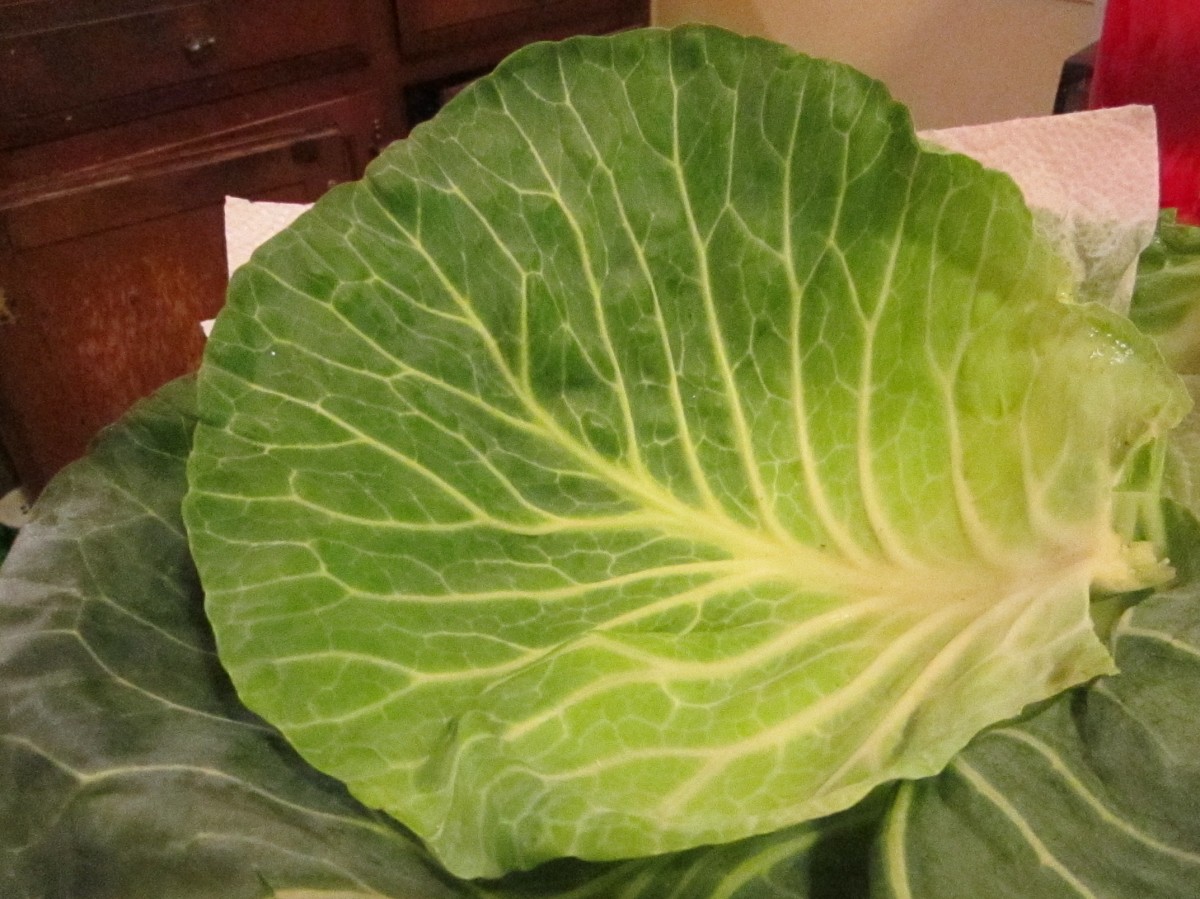
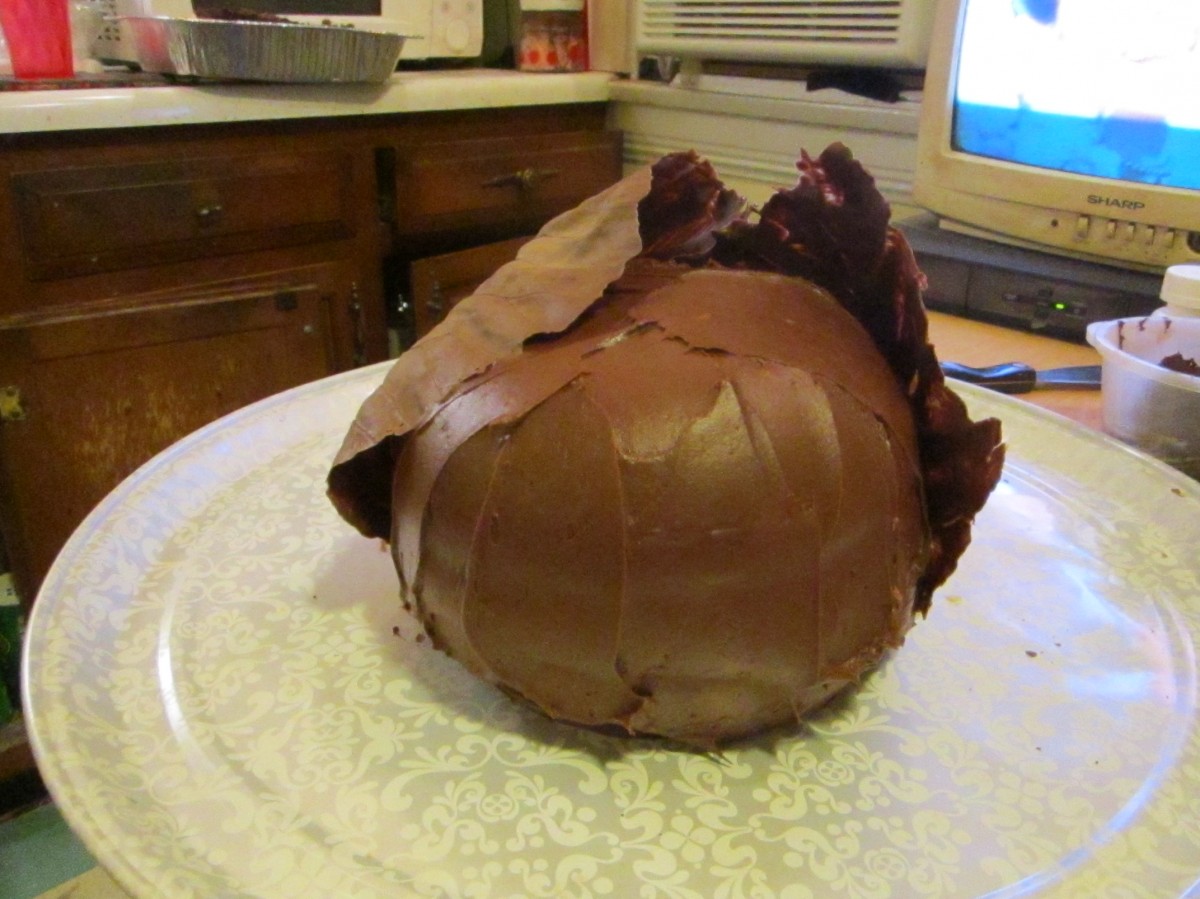
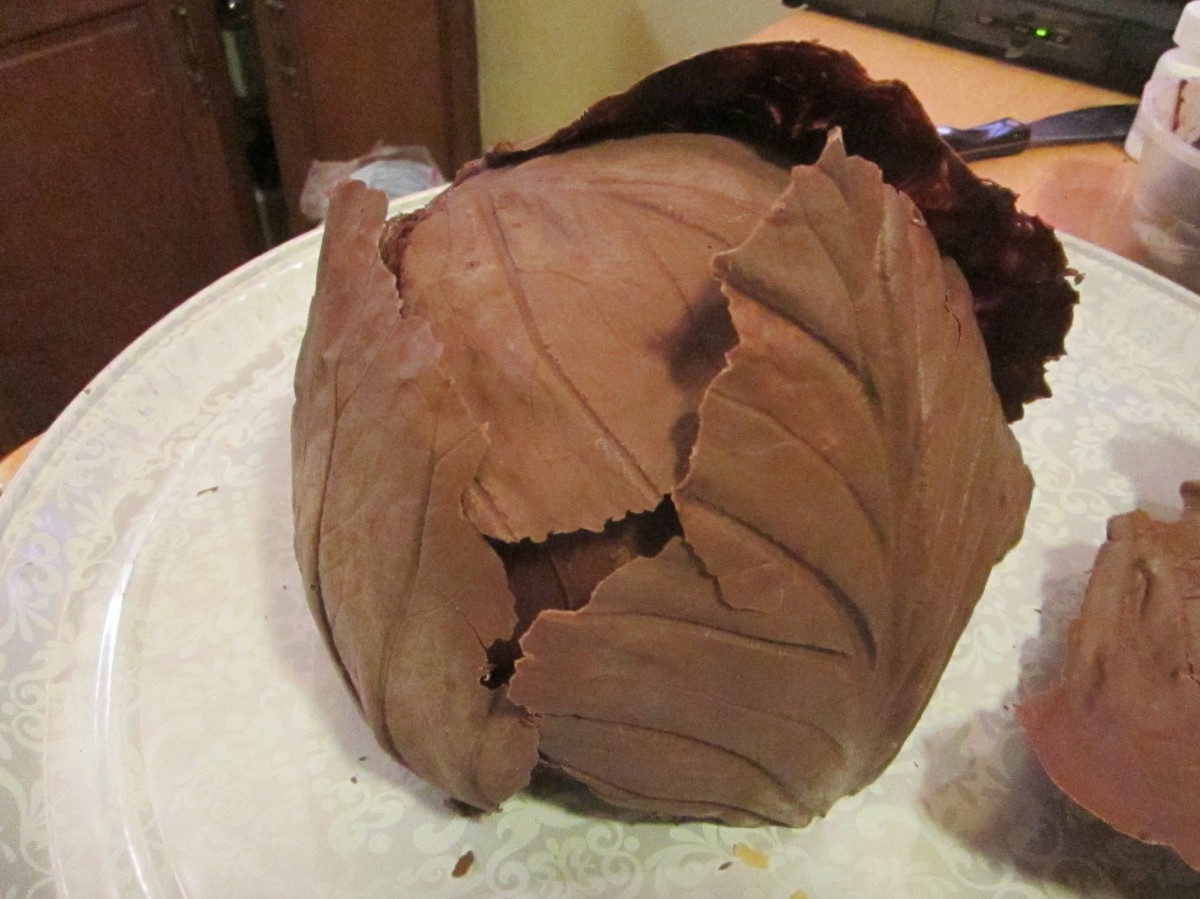
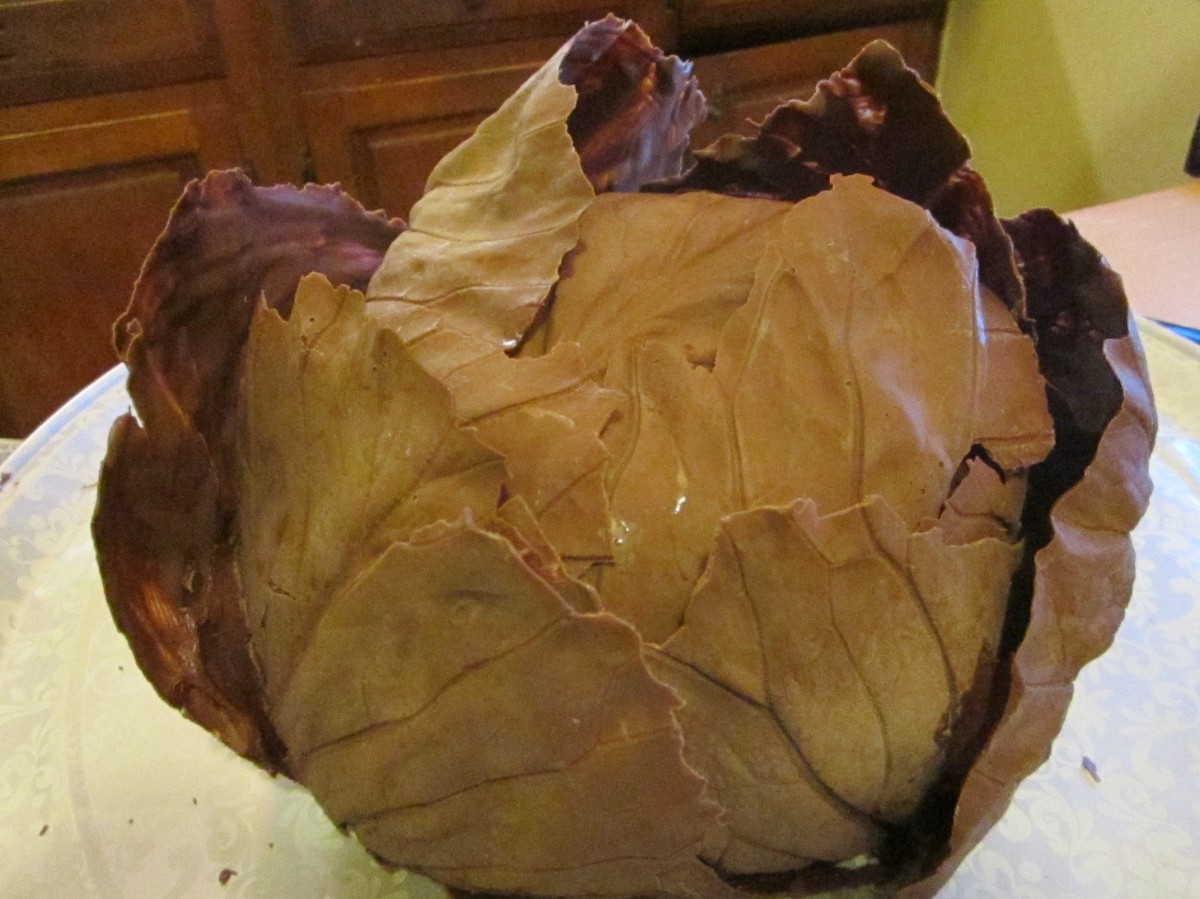
Chocolate Cabbage Cake

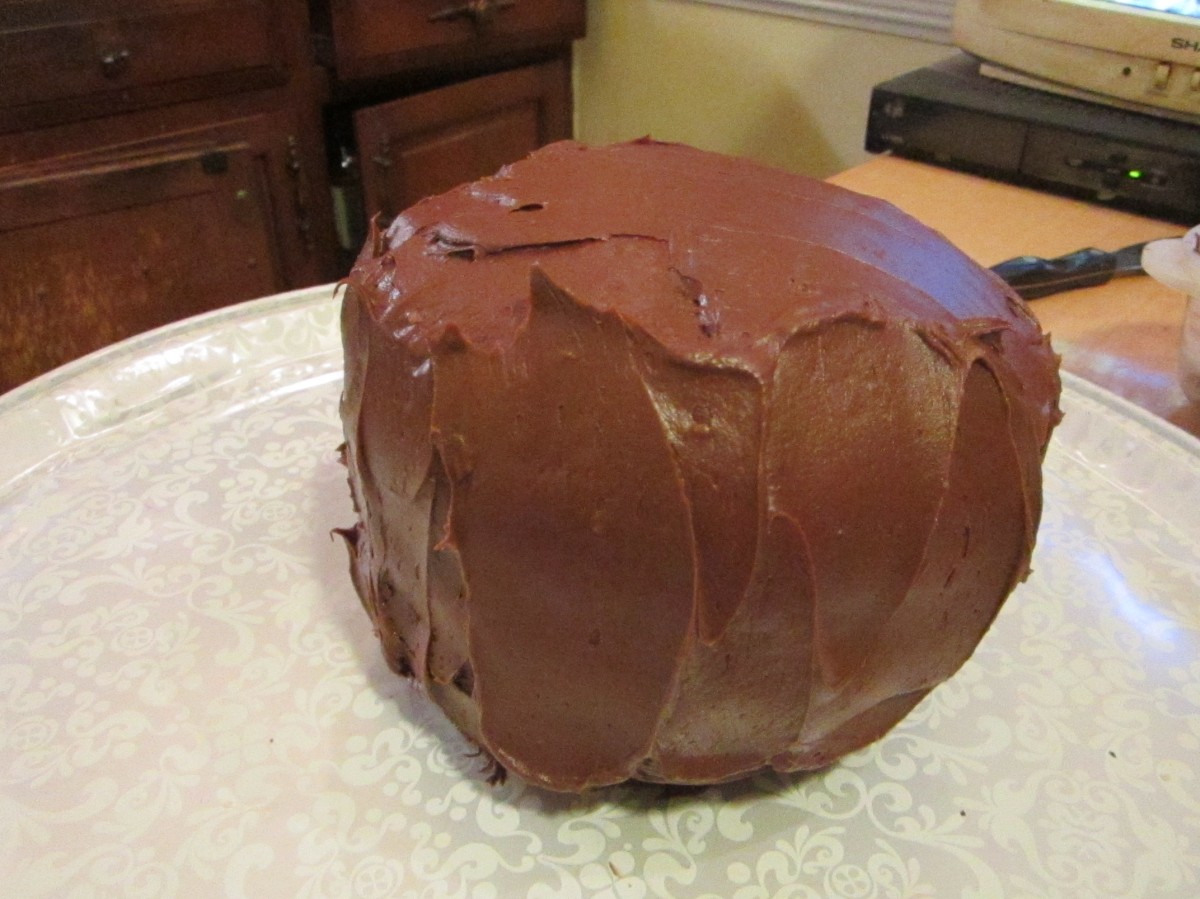
When you make a cake that looks like a giant head of cabbage- people are going to notice. We were celebrating a friend’s birthday and I wanted to bring a special cake for the occasion. While the cake looks like a head of cabbage- there is no cabbage in the cake.
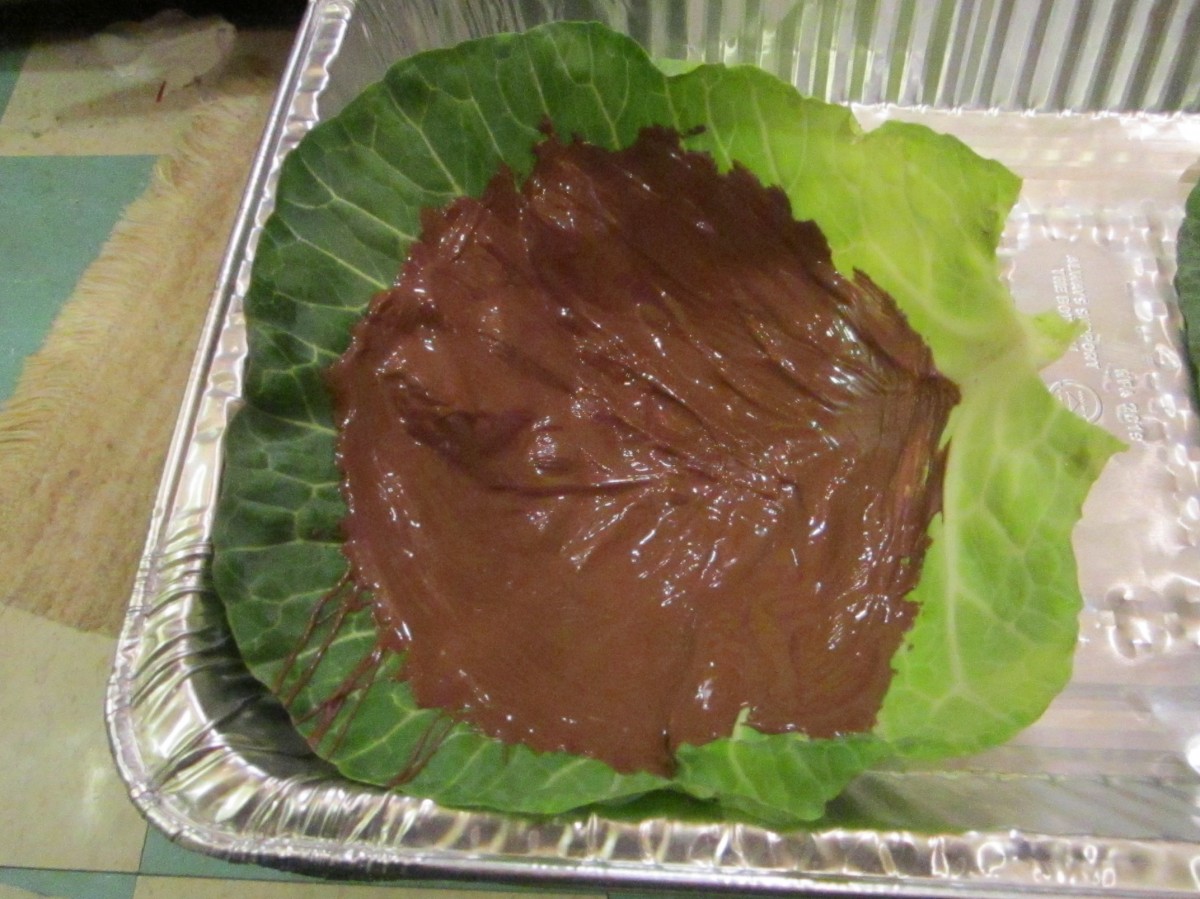
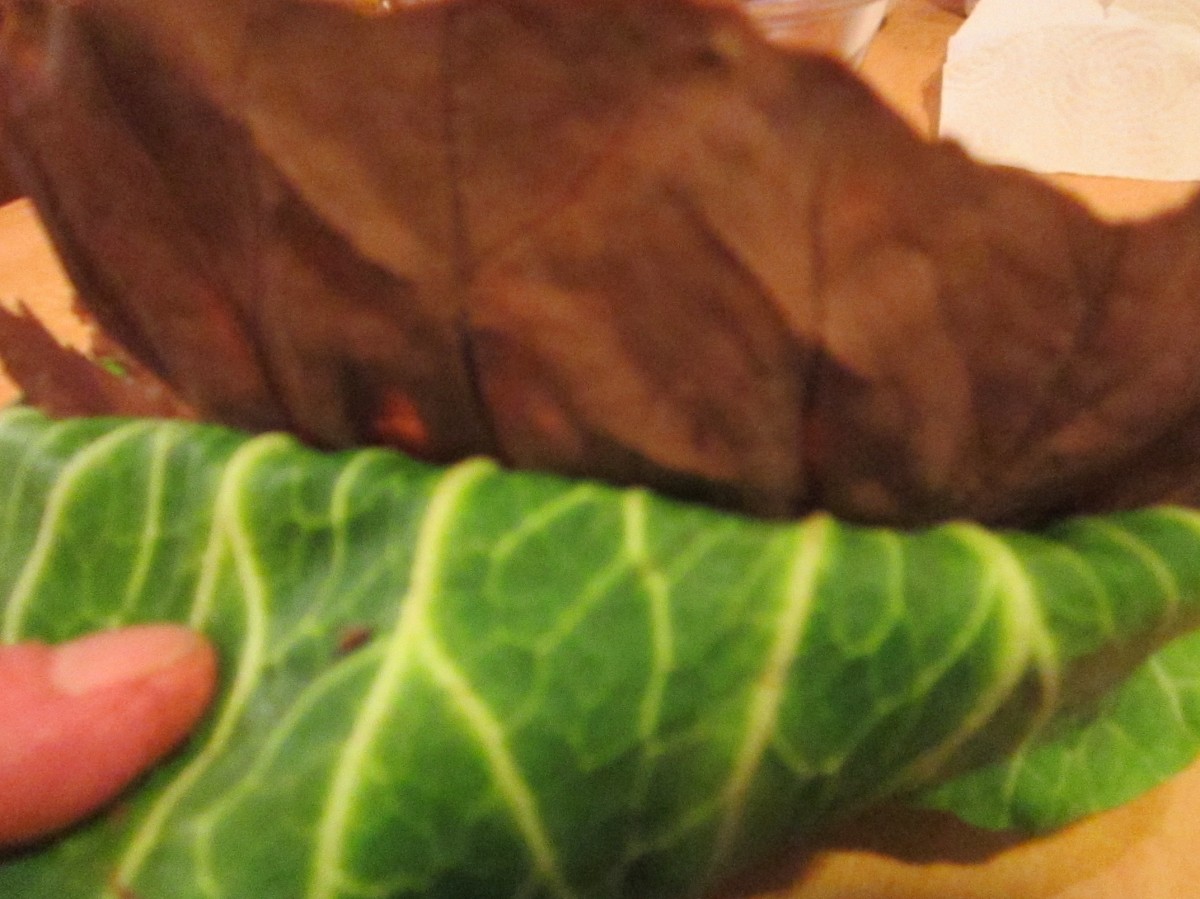
The cake is a round, chocolate cake covered in chocolate leaves. To make the leaves, melted chocolate is painted on cabbage leaves, cooled and then the leaves are peeled off.
While it takes some work, the cake is not as hard to make as you might think. You just have to be patient.
Start by making a round cake. Use 2 stainless steel bowls that are the same size. Bake them and after they are cooled, frost them together into a round cake. Recipe for cake and frosting follow.
The fun starts when you paint large, clean cabbage leaves with melted chocolate. You will need a pound of chocolate. Maybe more. Ok, for sure more than a pound. I melt my chocolate in the microwave. Double boiler works , too.
Once the chocolate is painted on the leaves, I put the leaves in the fridge to set the chocolate faster. Hint: Leave a little leaf showing all around the edges. Easier to remove later. After they are cooled, I carefully peel off and discard the cabbage leaves. What I am left with are chocolate “leaves”. Press the chocolate leaves all around the cake until it is covered. Make a few extra leaves to decorate the plate and to allow for breakage and the chocolate you are going to eat. Also keep extra frosting on hand to use to affix the leaves.
Old-Fashioned Chocolate Cake
2 c. sugar
1¾ c. all-purpose flour
¾ c. cocoa
1½ t. baking powder
1½ t. baking soda
1 t. salt
2 eggs
1 c. milk
½ c. oil – I like avocado or olive oil
2 t. vanilla
1 c. boiling water
Heat oven to 350°F. Grease and flour two (1 qt.) metal bowls. Set aside. Stir together sugar, flour, cocoa, baking powder, baking soda and salt in large bowl. Add eggs, milk, oil and vanilla; beat on medium speed of mixer 2 minutes. Stir in boiling water (batter will be thin). Pour batter into prepared pans. Bake 35 to 40 minutes or until wooden pick inserted in center comes out clean. Cool 10 minutes; remove from pans to wire racks. Cool completely.
Chocolate Butter Cream
12 T. butter, softened
1½ c. cocoa, or more, depending on how dark you want your frosting.
5 c. powdered sugar
¼ c. milk
1 T. vanilla
Cream butter. Combine cocoa and sugar. Beat cocoa mixture in alternately with the milk until frosting is spreading consistency. Beat in vanilla. You may need an additional tablespoon of milk. Makes about 4 cups. You need a good amount of frosting for the cabbage cake. You should have frosting left over.


Zucchini Pancakes

You can never have too many zucchini recipes. Especially this time of year. This simple recipe uses zucchini to make tender and flavorful pancakes.
They aren’t the type of pancake you would pour maple syrup over. They are wonderful topped with some fresh salsa, though. I would- and have- eaten them for breakfast. These pancakes make a nice lunch or main dish meal. They can also be served as a side dish. Similar to potato pancakes.
I think they taste best when golden on the outside, a little crisp. They will still be tender inside.
So if you have more zucchini than you know what to do with, and you don’t want to bake zucchini bread, here is a recipe you might want to try.
Zucchini Pancakes
2 c. shredded zucchini
1 medium onion, diced
2 eggs
1/2 c. flour- you made need a little more or less depending on how moist your zucchini is
2 t. hot pepper sauce, or to taste
1 t. baking soda
salt to taste
oil for cooking
Combine all ingredients, except the oil, in a medium bowl. Heat oil in skillet and spoon batter in. I used a little over 1/4 cup for each. Cook over medium heat until lightly browned around the edges. Flip and cook until golden on both sides and pancake springs back when touched lightly. Remove to platter and keep warm. Repeat with remaining batter. Serve with salsa or sour cream. Makes 8.


