Ratatouille Salad

Ratatouille Salad
I had all the ingredients for ratatouille, a lovely French vegetable stew. I had eggplant, tomatoes, summer squash, peppers, onions and fresh herbs. But we were planning on going on a picnic. The stew was not going to work. I decided to use the same ingredients that I would use for the ratatouille, but transform them into a salad. It came out really good. I could see serving it on toasted bread or using it like a dip.
I decided to cook the eggplant and onion, but leave the rest of the vegetables raw. I also decided to leave the skin on the eggplant. Did not salt the eggplant beforehand. The eggplant was fresh and tender- I saw no need for peeling or salting, but you could do both, if you like.
I also always have roasted garlic on hand. I make a big batch and store in smaller containers in the freezer, until needed.The directions are after the recipe. If you don’t have roasted garlic, you could add several cloves of garlic, peeled and minced. I invited a neighbor to try it- and she ended up taking the rest home.
Ratatouille Salad
1 medium eggplant, cubed. I had about 3 cups of eggplant.
3 T. oil
½ t. salt
1 medium onion, sliced
2 T. roasted garlic*
½ c. red wine vinegar
1 med. zucchini, cut in matchstick pieces, about 3 cups
1 sweet pepper, seeded and diced
1½ c. diced fresh tomato, seeded, if desired
Dressing:
1/3 c. red wine vinegar
1/3 c. olive oil
2-3 T. honey, or to suit your taste
2 T. chopped parsley
1 t. chopped basil
2 t. thyme leaves
Hot sauce to taste
Salt and pepper to taste
In skillet, heat oil and saute eggplant until tender and just starting to brown. Season with salt. Remove from skillet and set in a mixing bowl. In same skillet, saute onion and cook until wilted and tender. Add the garlic and vinegar to the skillet and cook until most of the liquid has evaporated. While liquid is cooking down, place remaining veggies in mixing bowl with the eggplant. When most of the liquid is cooked off, place onion in mixing bowl with eggplant mixture. Combine dressing ingredients in a small bowl or jar and whisk to combine. Pour over the eggplant mixture and toss to coat. Adjust seasonings. Chill until ready to serve. Serves 6-8 as a side.
*Once you have roasted garlic on hand for cooking, you will wonder how you did without it before. I get large amounts of freshly peeled cloves. Place the peeled garlic cloves in a roasting pan and pour a generous amount of olive oil over the garlic. Cover tightly with foil and bake at 350 until garlic is tender and golden. This will take at least 30 minutes, but up to 40 minutes. It depends on how much garlic you are roasting at a time. Be careful not to burn it. Once cooled, place the garlic cloves, and oil, in small freezer containers. Store in freezer.
Fall Cooking Class Schedule
Cherry Vanilla Liqueur
As I was updating my schedule for Fall, I noticed something funny. I have a class on Election Day, which isn’t funny. I normally schedule a class on Election Day. It is which class I scheduled that day that struck me as funny- Homemade Liqueurs. So I guess whether you are celebrating, or drowning your sorrows, I can help. I expect that class to sell out quickly.
Some exciting news. I will be teaching classes in Mayfield Village this Fall. These are daytime classes, for those of you who can’t get to evening classes.
Hope to see you at a class.
A Dozen Seasonal Salads

Purple and Pink Potato Salad
Between cookouts and picnics, it seems there is always a need for more salads. Sometimes I am in the mood for old favorites. Other times I am looking for something a little different. Here are some salads I have made that my friends and family really enjoyed. If you are looking for a salad for the holiday weekend – or any time – I think you will find one here that you and your family will enjoy.
Purple and Pink Salad
1 lb. purple potatoes
1 lb. red onions
1 c. apple cider vinegar
1/2 c. sugar
1/4 c. water
salt and pepper to taste
1 t. celery seed
1/4 c. oil
Bake potatoes until tender. I used the microwave and it took about 7 minutes, but you can bake in a conventional oven, too. While potatoes are baking, peel, then slice onions thin and place in a saucepan with the rest of the ingredients, except the oil. Bring to a boil, then simmer for about 5-8 minutes until onions are just tender. Some of the liquid will cook off. Peel and cube potatoes and place in a bowl. Drizzle with the oil. Add the onion mixture and stir gently. Adjust seasonings, if needed. Chill. Serves 4.
Curry Cauliflower Salad
1 head cauliflower, cooked
½ c. chopped green onions
¾ c. mayo – or less or more depending in the size of the head of cauliflower
1 T. curry powder- or to taste
1 t. hot sauce, or to taste
Salt and pepper to taste
1 c. peanuts
First break the cauliflower into florets. Cook the cauliflower any way you like. I steamed mine for about 5 minutes. You could roast it, or sauté it in a little oil. You want it tender, but still a little crisp. Don’t cook it to mush. I would also advise against boiling it, as it gets too wet. Once the cauliflower is cooked, let it cool down before proceeding. Combine the cauliflower with the green onions, the mayo and seasonings. It was hard to be exact because your head of cauliflower might be bigger or smaller than mine. I could have said 5 cups of cooked cauliflower- but would that really help? Then you’d have leftover cooked cauliflower. Or perhaps not enough. So add a little more mayo, if needed, and adjust the seasonings to suit your taste and the amount of cauliflower you have. Chill and toss the peanuts in closer to serving time. They are fine, even when in the salad for a while, but the peanuts crunchier when first put in.

Curry Cauliflower Salad
Succotash Salad

Cauliflower and Broccoli Salad
Sweet Potato Salad
Multi Bean Salad
Cucumber and Carrot Salad

Pesto Potato Salad

Artichoke and Edamame Salad
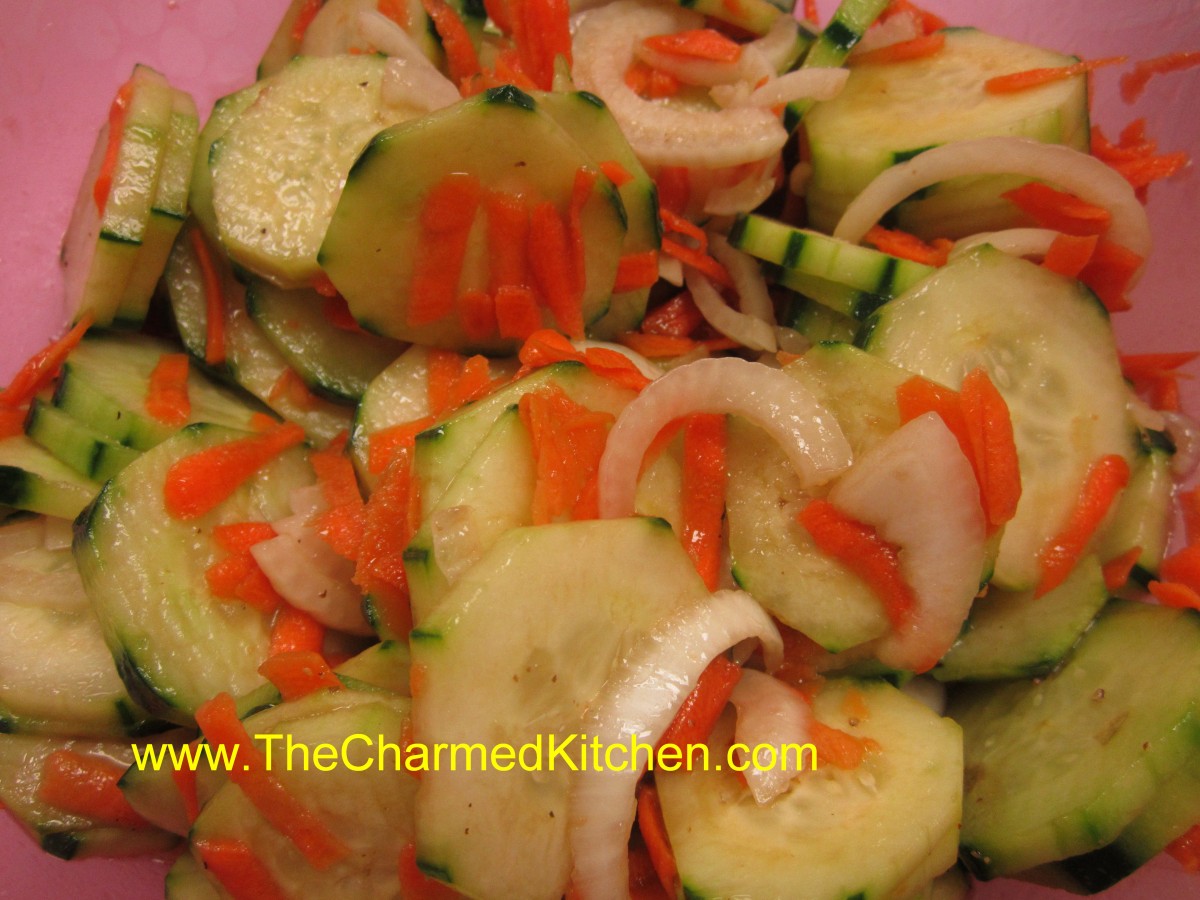
Cucumber and Carrot Salad
This refreshing salad combines carrots and cucumbers in a simple dressing. So easy and fast. Perfect side for your picnic or barbecue.
4 cucumbers, peeled, leaving strips of skin
1 c. coarsely shredded carrots
1 c. thin sliced sweet onion
1/3 c. vinegar- I like cider vinegar in this dish
2 T. Balsamic vinegar
¼ c. oil
1 T. sugar
1 ½ t. salt
Fresh ground pepper
Slice cucumbers. Combine vegetables in bowl. Combine dressing ingredients and pour over the vegetables, tossing to coat well. Chill at least 1 hour before serving, Spoon over lettuce, if desired. Serves 4-6.
Cornbread Salad
A little different- people always seem to like this salad. A nice way to use up stale cornbread, too. ?
4 c. crumbled cornbread or corn muffins
1 c. shredded mild cheese
1 sweet red pepper seeded and diced
1 c. diced celery
½ c. diced green onion
4 hard-cooked eggs, peeled and chopped
¼ c. chopped parsley
1-1 ½ c. mayonnaise or salad dressing, sometimes I use potato salad dressing or even slaw dressing
2 c. diced fresh tomatoes
1 c. toasted pecans
paprika for sprinkling on the top, optional
Place cornbread and next 6 ingredients in a medium bowl. Stir in dressing until desired moistness is achieved. Chill and stir in tomato and nut just before serving. Sprinkle with paprika if you like. Serves 6.
Note: You can add whole kernel corn also if you like.
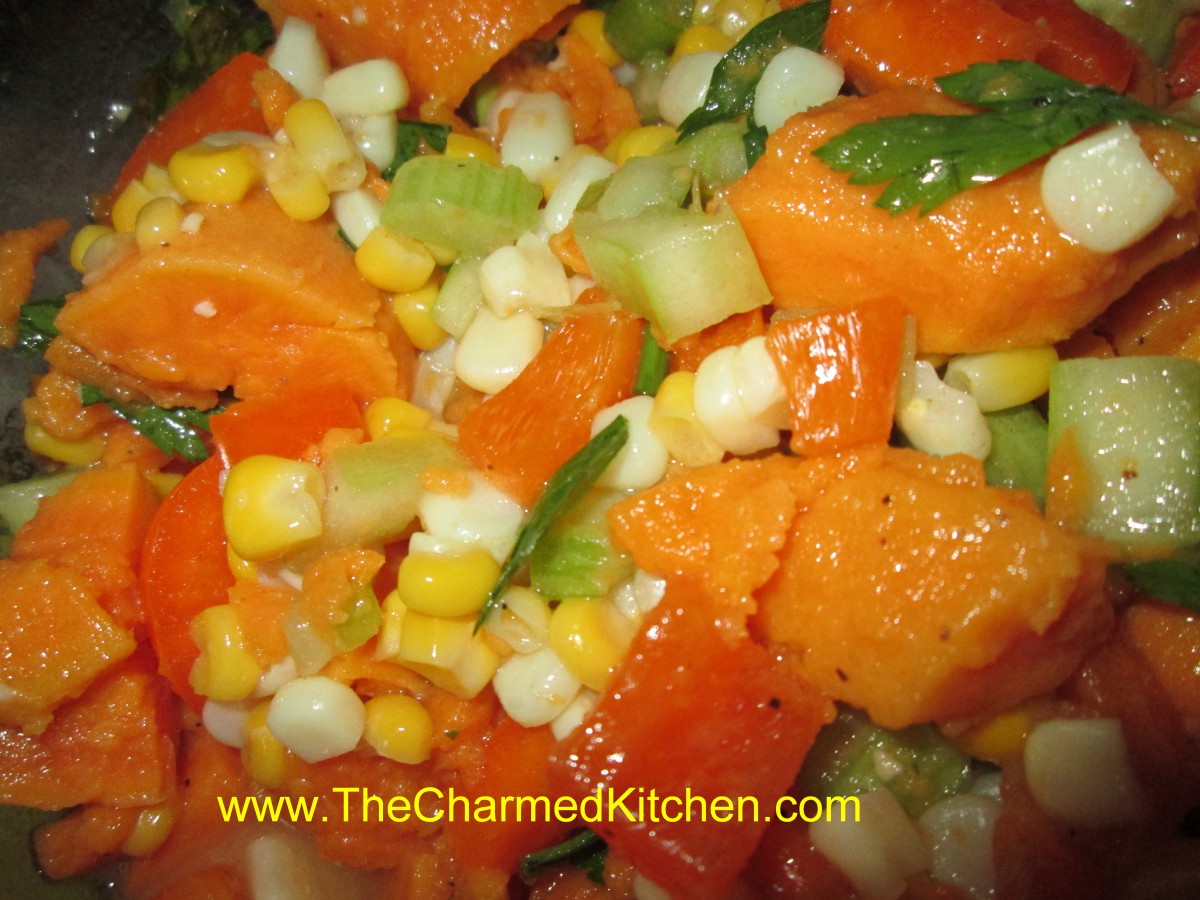
Sweet Potato Salad
A nice twist on potato salad.
3 large sweet potatoes
2 c. corn kernels, fresh off the cob preferred but frozen is O.K.
2 ribs celery, sliced
1 sweet onion, diced
1 c. sweet pepper, seeded and chopped
2-3 T. fresh parsley
1/3 c. oil
1 t. Dijon mustard
3 T. apple cider vinegar
1 T. lemon juice
1 clove garlic, minced
Salt and pepper to taste
½ c. cashews
In medium saucepan boil or steam potatoes until tender, about 20-25 minutes. Remove with slotted spoon and place in a large bowl of ice water. Add corn to saucepan and cook until just tender about 2-3 minutes. Drain corn and add to ice water with the potatoes. Once the vegetables have cooled down drain them and peel and cut the potatoes into bite-sized pieces. Place potatoes and corn in a mixing bowl with remaining vegetables. Combine remaining ingredients, except cashews, in a jar with a tight-fitting lid and shake well before pouring over the sweet potato mixture. Toss to blend and chill until ready to serve. Add cashews just before serving. Serves 6.
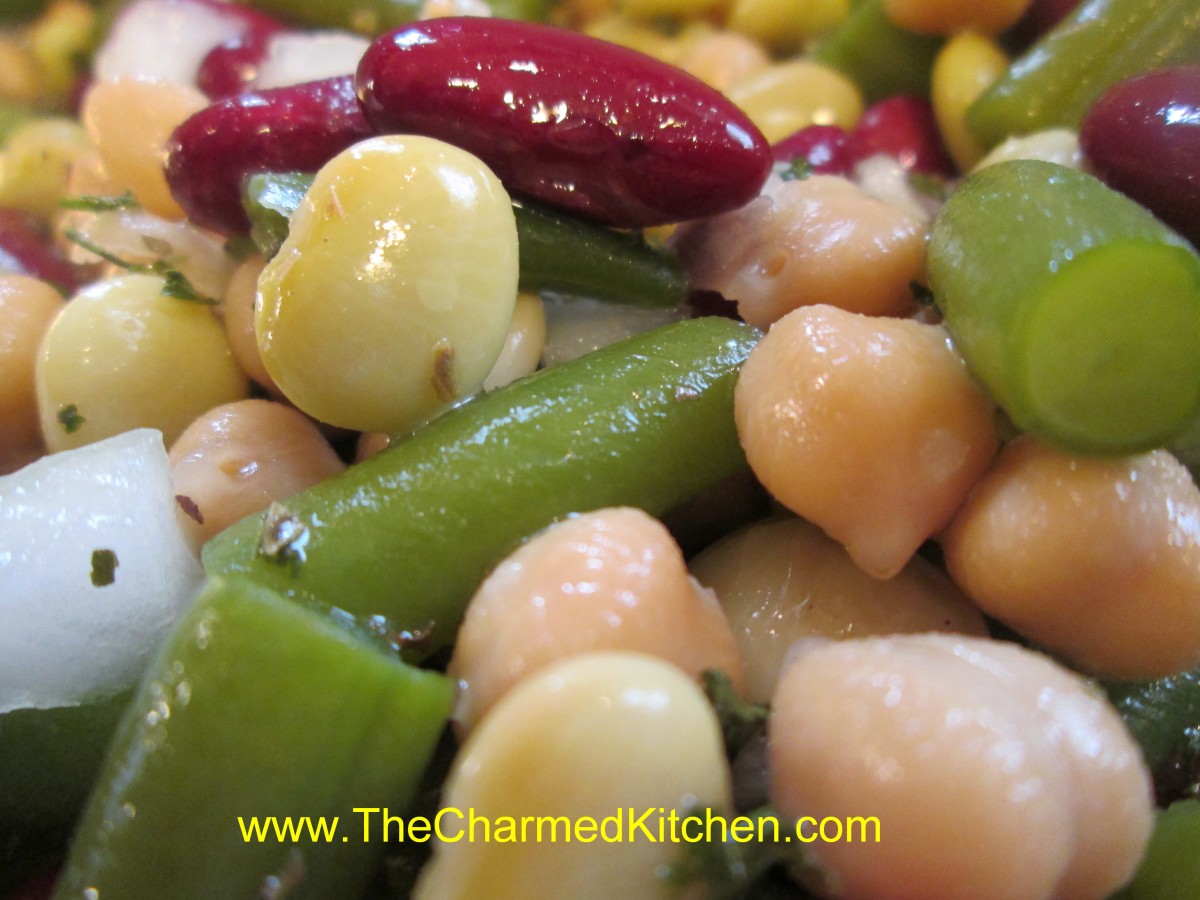
Multi- Bean Salad
1 lb. cooked green beans, sliced
1 can lima beans, rinsed and drained
1 can dark red kidney beans, rinsed and drained
1 can garbanzo beans, rinsed and drained
1 medium sweet onion, chopped
1/2 c. chopped fresh parsley
1 c. apple cider vinegar
1/4 c. sugar
1/4 c. oil
2 T. Italian seasoning- or whatever herb blend you like
1 T. hot sauce, or to taste
Salt and pepper to taste
Combine beans with onions and parsley in a medium bowl. Combine remaining ingredients in a small bowl and pour over the bean mixture. Stir well and chill a couple of hours before serving. Serves 8.
Pesto Potato Salad
2 lbs. Boiling potatoes, cut into bite sized pieces
1 c. basil leaves
3 T. pine nuts, walnuts or pecans
3 T. olive oil
2 garlic cloves, minced
1/3 c. Parmesan cheese
Salt to taste
Cook potatoes until tender. Cool. In blender combine remaining ingredients, except 1 tablespoon of the nuts. Pour blended mixture over potatoes and sprinkle with the reserved nuts. Chill. Serves 6-8.
Just in Thyme Potato Salad
2 lbs. boiling potatoes, cut into bite sized pieces*
½ c. olive oil
¼ c. red wine vinegar
1 T. fresh lemon juice
2 t. fresh thyme leaves
Salt and pepper to taste
Cook potatoes until tender. Drain and toss with the rest of the ingredients and serve right away or chill to serve later. Serves 6-8.
* You can really use any potato you like. I often bake the potatoes whole and then peel and cut up. Cook them any way you prefer.
Mustard Potato Salad
4 lbs. potatoes- I used Klondike Rose and I did not peel them
4 hard cooked eggs, peeled and chopped
1 sweet pepper, seeded and chopped
1 c. mayo- maybe a little less
1/4 c. prepared mustard
salt and pepper to taste
dash of hot sauce
Bake whole potatoes until tender and allow to cool. Cube potatoes into large bowl and combine with remaining ingredients. Chill until ready to serve. Serves 8.
Artichoke and Edamame Salad
1 lb. edamame (fresh soybeans)*
1 can artichoke hearts, drained and chopped
2 c. cooked corn
1 c. chopped sweet onion
1/3 c. olive oil
1/2 c. cider vinegar
1 t. sugar, optional
fresh chopped parsley
fresh chopped basil
salt and pepper to taste
To prepare edamame steam them, in their pods, until tender, about 8 minutes. Place in cold water. Once cool enough to handle slip the edamame out of their pods. Discard pods and place edamame into a mixing bowl. Add remaining ingredients and stir to mix well. Chill until ready to serve. Serves 4-6.
* A lot of stores have them in the freezer section. They are in the pods. The pods are not edible. If you don’t have edamame you can substitute fresh lima beans.
Cauliflower and Broccoli Salad
1 small head cauliflower, trimmed and broken into bite- sized pieces
2 broccoli crowns, cut into bite- sized pieces
1 sweet pepper, seeded and chopped
1 c. shredded cheese- I used a sharp cheddar
8- 10 slices of bacon, cooked and chopped
1/2 cup of mayo – or more according to your taste
salt and pepper to taste
Steam the cauliflower and broccoli until just tender/crisp. About 5 minutes in a microwave steamer, 6 minutes in a conventional steamer. Place in a bowl to cool down then combine with remaining ingredients and stir to combine well. Adjust seasonings, if needed. Serves 6-8.
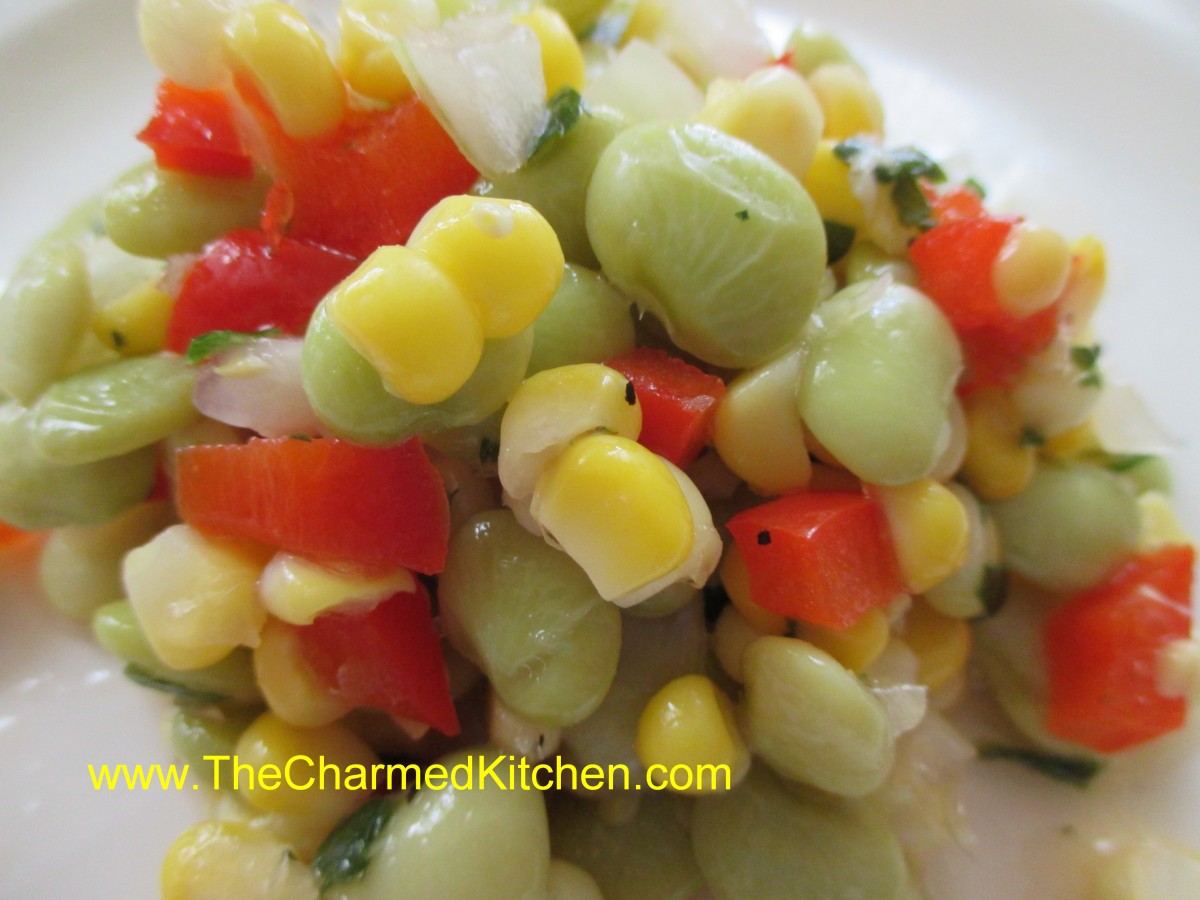
Smoky Succotash Salad
1 lb. lima beans, cooked and cooled
4 c. corn off the cob, cooked and cooled
1 sweet pepper, seeded and chopped
1-2 c. cooked ham, diced
Dressing:
2/3 c. sour cream
3 T. apple cider vinegar
2 T. sugar
1 t. grated ginger
1 t. hot sauce, or to taste
salt and pepper to taste
Combine veggies with the ham in medium bowl. In small bowl stir together dressing ingredients until smooth and toss with the veggie mixture. Chill until ready to serve. Serves 6.
Dehydrating Veggies

Dehydrated Vegetables
While I love canning, I also preserve a lot of food by dehydrating it. Once you get over the initial investment in a dehydrator, the cost to dry food and to store dried food is pretty minimal. Dried fruits are probably the most common home dried foods. Apples, grapes, pineapple, strawberries and cherries are among my favorites. But the dried vegetables are so useful and versatile I think I enjoy them even more than dried fruits.
Drying Vegetables
Most vegetables should be dried at the lower range if you have an adjustable thermometer on your dehydrator-around 125-degrees. The big thing to know with vegetables is that some of them need to be blanched first. Blanching is just steaming the vegetables for a few minutes and draining, if needed, before drying. Blanching kills certain enzymes, prevents browning and assures a better end product.
Vegetables that need blanching include green beans, cabbage, carrots, potatoes, greens, winter squash, corn and beets; this is not a complete list, but a good start.
Vegetables that do not require blanching include onions, celery, mushrooms, peppers, tomatoes, spinach, zucchini, cucumbers and garlic and also herbs.
Broccoli and cauliflower do not dehydrate well.
Tomatoes are probably the best vegetable to dry for the home gardener and cook. They are so easy to make and so tasty. Just cut plum tomatoes in half and scoop out the seeds. Lightly spray the trays with non-stick spray and place the tomatoes cut side up for the first 12 hours. Turn them over after that until they are dried. I like them pretty crispy, but keep them in the freezer to keep their color and flavor longer. After a year they will turn black if stored at room temperature. Larger tomatoes can also be dried. Just cut them in slices and squeeze out the seeds. Cherry tomatoes are just cut in half and squeezed to get out the seeds. With small cherry tomatoes I just make a cut large enough to get out the seeds and leave them whole.
How do I use them?
Veggie chips-zucchini and cucumber slices can be used instead of chips in dip.
Powders- Tomatoes, celery, onion, pumpkin and garlic can all be powdered and used to flavor soups, stews sauces, cheeses, dips and more.
Reconstituted as fresh- potatoes in casseroles are wonderful.
Dips- Peppers, onion and celery all add great flavor.
To thicken sauces- Shredded zucchini, peppers, onions celery and tomatoes all work well this way.
Soups and Stews- most any dried vegetable is most often used this way. Easy to just let them simmer together until tender and all their flavors will enrich your stock
Chowders- Corn and potatoes are great in these dishes
Dried vegetables are best stored in a cool, dry place- I often freeze them for best shelf life.
Vegetables in photo: Starting left with bright green and going clockwise: Celery, potatoes, red peppers, mushrooms, carrots, cucumbers, onions and tomatoes. In the center- mixed sweet peppers.
Spiced Chocolate Zucchini Cupcakes

Spiced Chocolate Zucchini Cupcakes
These are wonderfully spiced, moist cupcakes. Instead of frosting them, I decided to top them with melted butter and cinnamon sugar. It’s something I’ve done with muffins, in the past. I didn’t see why I couldn’t do the same thing with cupcakes. It was a really good idea. The cupcakes were baked for a picnic, and in the heat, frosting would have melted. Besides, not everyone likes frosting. As an added bonus- it is a another recipe using zucchini, and that is never a bad thing.
Spiced Chocolate Zucchini Cupcakes
2 cups all-purpose flour
1 t. baking soda
½ t. salt
1 t. cinnamon
½ t. nutmeg
Pinch of cloves
¼ c. unsweetened cocoa
½ cup butter, softened
½ cup olive oil
1½ c. sugar
2 eggs
½ c. buttermilk
1½ t. vanilla
2½ c. grated zucchini
1 cup chocolate chips
Topping:
½ c. butter, melted
½ c. sugar
2 t. cinnamon
Preheat oven to 325 degrees. Grease and flour 24 muffin cups or use paper liners. Mix together the dry ingredients. Set aside. In a large bowl, cream together the butter, olive oil and sugar until light and fluffy. Beat in the eggs one at a time, then stir in the buttermilk and vanilla. Beat in the flour mixture, just until incorporated. Stir in the grated zucchini and chocolate chips. Pour batter into prepared pans. Bake for 25 to 30 minutes, or until the top of the cupcakes spring back when lightly pressed. Cool in pans over a wire rack for at least 10 minutes or until cool enough to handle. Dip top of cupcakes in melted butter, then dip in the cinnamon sugar. Place on rack to finish cooling off. Makes 24.
Spiced Pickled Beets

Spiced Pickled Beets
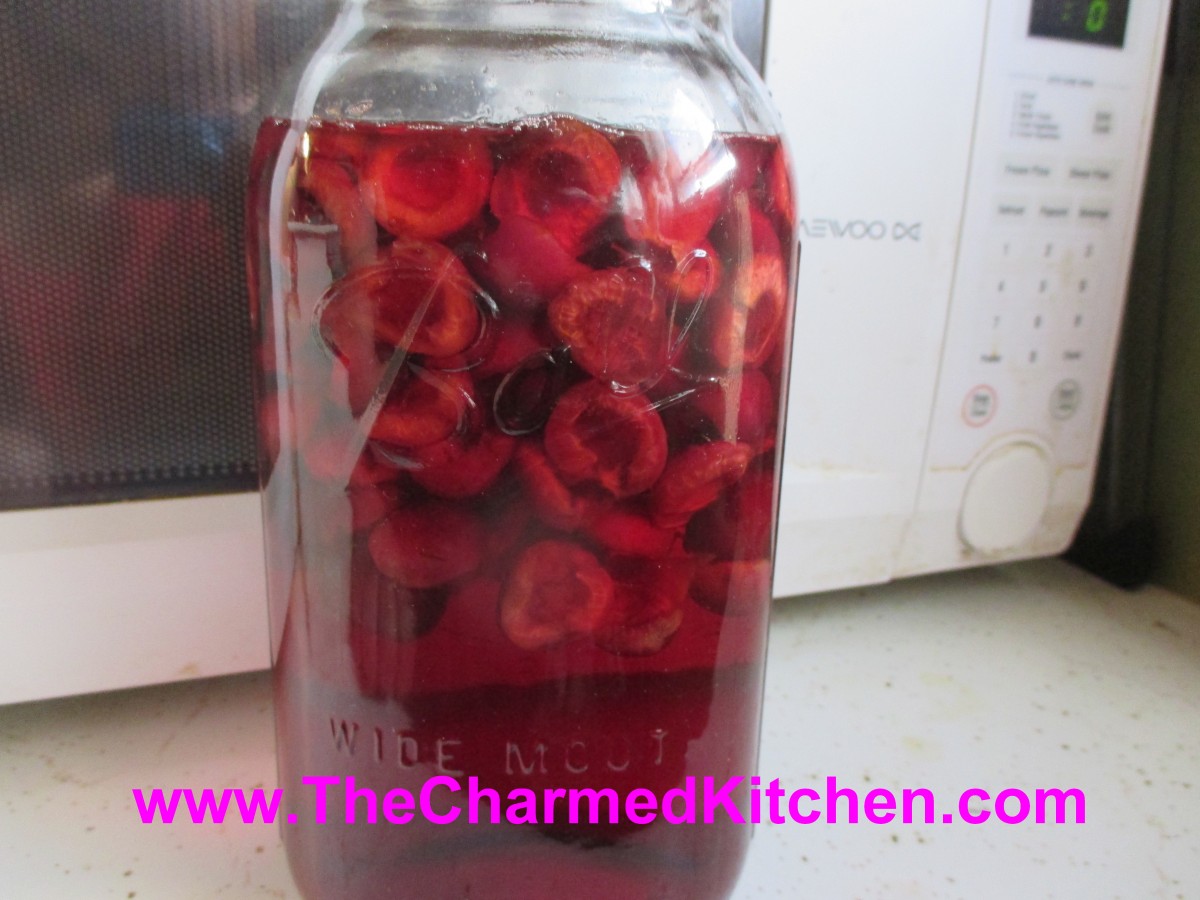
Beets are just one of those foods. People seem to love them or hate them. I am a beet lover. I also have a dear friend who is a beet lover. Her birthday is later this month, so I made her a batch of pickled beets. Trust me, she will be thrilled. This recipe is a pretty classic way to preserve beets. The brine is a sweet and sour mixture with pickling spice, salt and red pepper flakes for added flavor. You could play around with the seasonings a little. Maybe adding more heat. For my friend, these will be spicy enough. Pickled beets are great served as a side dish with all sorts of foods. I like them served with cheeses, crackers and other pickled foods as an appetizer. If you don’t want to can them- you can store them in the fridge for up to a couple of months.
Spicy Pickled Beets
4 lbs. beets, smaller sizes preferred
3 c. thin sliced onions
2 c. sugar
2 T. Pickling spice
1 T. canning salt
2 t. red pepper flakes
2½ c. cider vinegar- 5% acidity
1½ c. water
Wash and trim beets, leaving a couple inches of stem attached. Cook in boiling water until tender. Cool beets down so you can handle them. Peel beets and cut into 1½- 2-inch diameter pieces, if beets are large. Leave whole if beets are small. Set aside. Combine the rest of the ingredients in a pot and bring to a boil. Reduce to simmer and simmer 5 more minutes. Add beets and cook a few minutes, until beets are warmed through. Ladle hot beets into clean pint jars, leaving ½ inch headspace. Ladle in hot liquid, leaving ½-inch headspace. Remove air bubbles, wipe off rim, screw on lid to finger-tip tightness. Repeat with remaining beets and liquid. You should fill about 5 pint jars. Process in a boiling water bath for 30 minutes. Turn off the heat and leave jars in water bath 5 minutes before removing to counter to cool. Yield: 5 pints.
Adapted from Ball Blue Book
Breaded Chicken- Mom’s Version

Mom’s Breaded Chicken
I made this chicken recipe recently. It was for a group of friends that cook and eat together all the time. Some how, I had never made breaded chicken for them before. It was really well received. With the holiday weekend approaching I thought I would share this recipe again. Always brings back great memories of childhood picnics/cookouts with my family. I love this recipe and I hope you do, too.
I miss the big family picnics we had when I was a kid. My Dad and I would go early in the morning to pick out our favorite location and get tables arranged. Then he would start a fire in the grill and make us bacon and eggs in the cast iron skillet. Everyone started arriving soon after that. Well, not everyone. My Mom and one of my aunts would always come a little later. That is because they were finishing up the breaded chicken that was always a part of these picnics. She wanted it to be served nice and warm. It would have been breaded the day before. My mom felt that when you breaded the chicken ahead of time it seemed to help the breading to stick better. I do it the same way today. This isn’t fried chicken. The breaded chicken is lightly browned in a skillet then finished off in the oven. It is crispy on the outside and nice and juicy inside. It is also a lovely memory for me of time spent with family. Here are the directions for how she made it.
Mom’s Breaded Chicken
Chicken pieces, I often use a whole bird, cut into pieces, or just thighs and drumsticks.
salt and pepper to taste
flour
Parsley
Paprika
Garlic powder
eggs
Milk
Bread crumbs
oil
Pat chicken pieces dry. Season with salt and pepper. In a bag, combine flour- about ½ c. per 8 pieces of chicken should be about right. Season flour with a little salt and pepper. In bowl combine milk and eggs with the rest of the seasonings, including more salt and pepper. I use 1 egg with enough milk to make a thin batter for every 4-5 pieces of chicken. Keep in mind that the size of the pieces matters. Wings will need less batter than legs. Place bread crumbs in a shallow dish or in a plastic bag. Place a few pieces of chicken in bah with the flour and shake to coat, dipping off the excess. Then dip chicken pieces (1-2 at a time) in egg mixture, turning to moisten completely. Then place in crumbs and turn or shake to coat evenly. Repeat with remaining chicken until all of it is breaded.
At this time you can cover and refrigerate the chicken for several hours or overnight if desired. You can also go ahead and cook it right away. Mom suggests you bread the chicken the night before so it will stick better, but hey, you’re an adult, do what you want.
To cook the chicken, heat ½- inch of oil in a heavy skillet and preheat the oven to 400 degrees. Foil a roasting pan and then place a rack inside. Once the oil is hot, brown the chicken pieces several at a time, turning to brown evenly. Place the browned chicken on the rack in the baking dish and continue to brown remaining chicken. Place chicken in oven and bake until chicken is cooked and juices run clear when chicken is poked. Cooking time will vary depending on the size of the pieces, how much you browned them and how many you are cramming in one pan. Baking time will be about 45 minutes. Check a large piece of chicken, near the middle of the pan to be sure.
This is a real summer favorite and the baking on the rack helps fat to drip off, giving you fried chicken flavor with fewer calories. This chicken can be served hot, warm or cold.
Pickled Carrot Salad
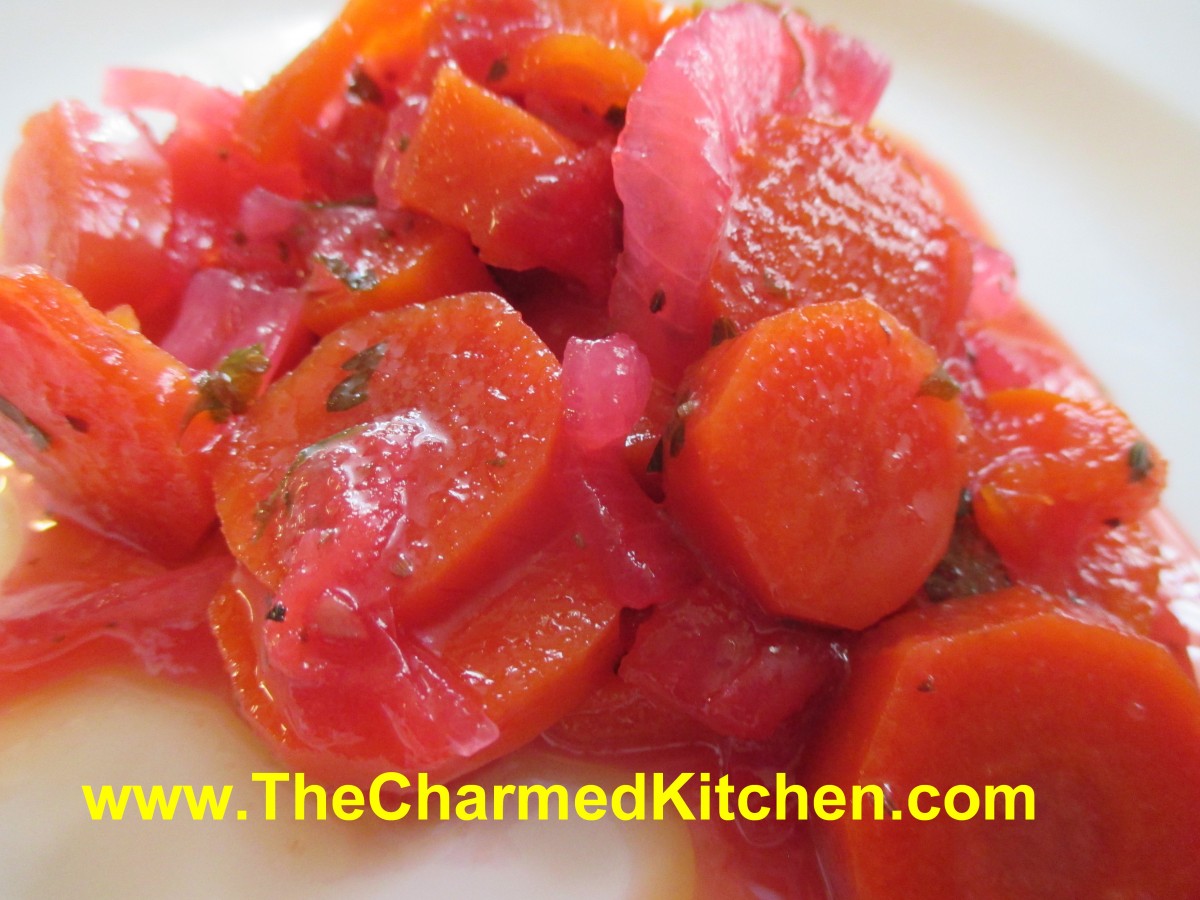
Pickled Carrot Salad
This was one of those dishes where it came out great, but was not what I had planned in the beginning. Let me explain.
I had picked up some beautiful rainbow carrots at a local market. They come in colors ranging from yellow to purplish red. I wanted to make something special with them, highlighted their vibrant colors. I liked the idea of a kind of pickled carrot. Made up the recipe as I went along. I knew the flavors would go well with the rest of the dinner that was planned.
The carrots worked out so well. Great flavors- but there was a problem. I had used a red vinegar and by the time everything was done cooking, the color of the carrots had changed. They all looked, well, like regular carrots. No one knew the difference, except me. I felt bad that I had cooked all the color out of the rainbow carrots, but the flavor was good. I guess, in the end, that is what really matters.
Pickled Carrot Salad
2 medium onions, peeled and sliced
3-4 cloves garlic, peeled
1 c. vinegar- red wine or cider vinegar preferred
1 c. water
1 ½ lbs. carrots, peeled and sliced
1 sweet pepper, seeded and chopped
2 small tomatoes, seeded and chopped
½ c. sugar
1/4 c. chopped fresh parsley
2 t. salt, or to taste
Fresh ground pepper to taste
1 t. ground ginger
Hot sauce to taste
1 bay leaf
In saucepan, combine onions and garlic with the water and vinegar and bring to a boil. Prepare other veggies while onions simmer for 10 minutes. Add remaining ingredients and simmer, covered about 20 minutes. Adjust seasonings. Let salad cool down, then store in fridge until ready to serve. Best served the next day. Remove bay leaf and garlic cloves before serving.
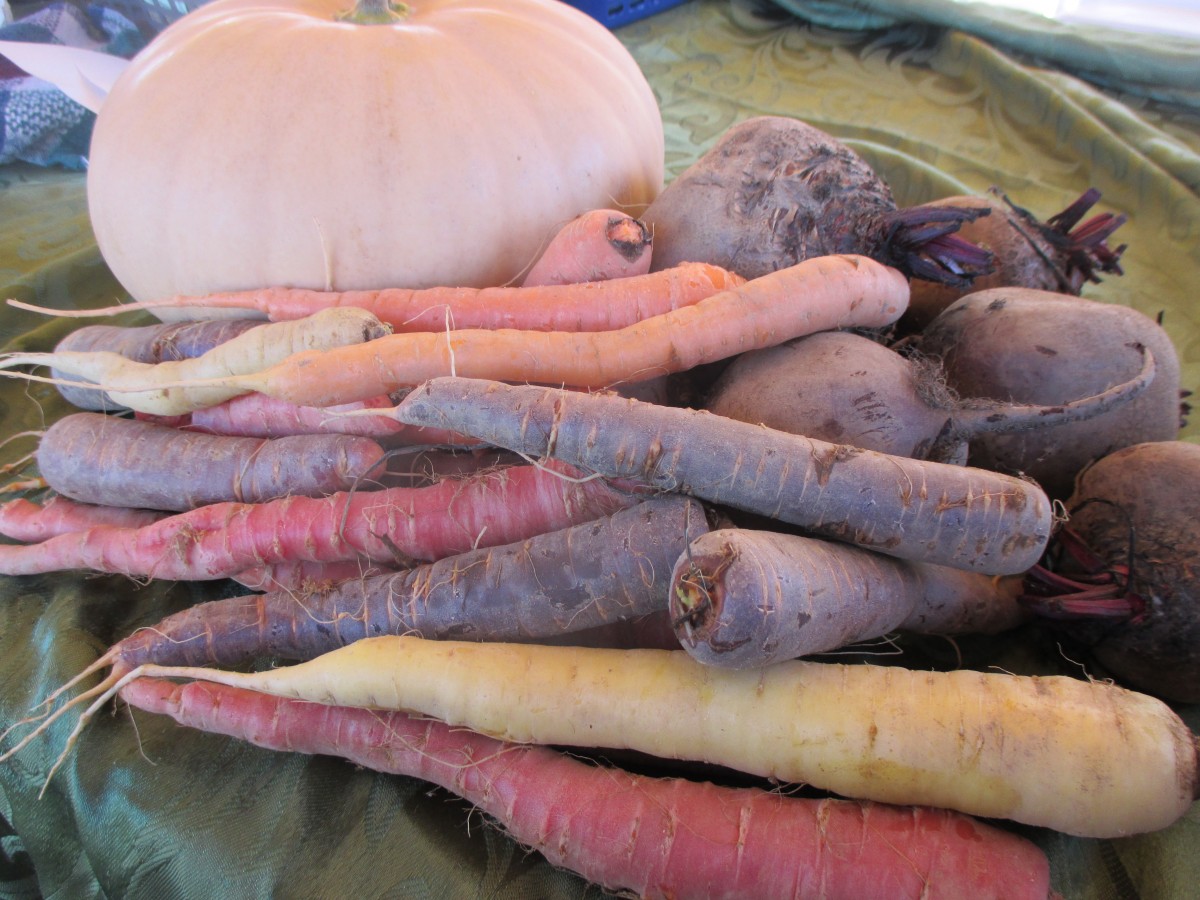
Rainbow Carrots
Madeleines

Madeleines
These classic French butter cakes are baked in tiny scallop shaped molds. They are always a special treat, both for their flavor and appearance. Once baked, they are dusted with powdered sugar. Madeleines are wonderful served on their own. I made them for a dinner party and paired them up with ice cream and fresh berries. I added vanilla and lemon zest, which is pretty traditional. You can play with the flavorings. I have also made them with orange zest. You can make a spiced version with a little cinnamon and allspice, too.
Madeleines
2 large eggs, room temp
3/4 c. sugar
1 t. vanilla extract
½ t. grated lemon peel
Pinch of salt
1 c. flour
10 tablespoons (1¼ sticks) unsalted butter, melted, cooled slightly
Powdered sugar
Preheat oven to 375°F. Generously butter and flour pans for large madeleines (about 3 x 1 1/4 inches).* Using electric mixer, beat eggs and 3/4 cup sugar in large bowl just to blend. Beat in vanilla, lemon peel and salt. Add flour; beat just until blended. Gradually add cooled melted butter in steady stream, beating just until blended. Spoon 1 tablespoon batter into each indentation in molds. Bake until puffed and brown, about 16 minutes. Cool 5 minutes. Gently remove from pan. If you don’t have enough molds, repeat process, buttering and flouring pans before each batch. Can be made 1 day ahead. Dust cookies with powdered sugar. Makes about 20.
*A metal mold with scallop-shaped indentations, sold at cookware stores.
Raspberry Bread
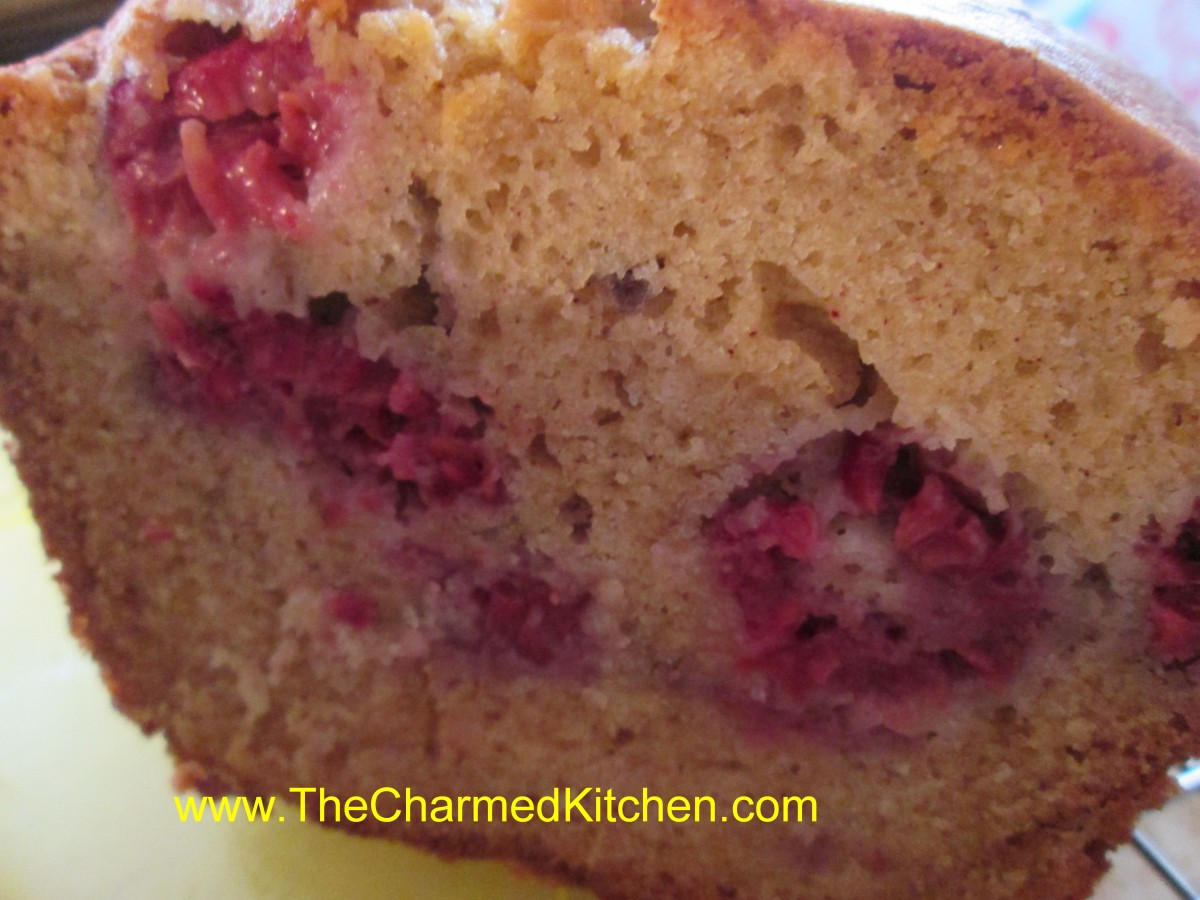
Raspberry Bread
This bread is a favorite of mine. It is not too sweet and pairs nicely with coffee or tea, so it can be a breakfast or brunch dish. It makes a nice dessert, too. The bread is studded with fresh raspberries and the flavor is so good. It can be eaten plain or served up with fruit topping or maybe some whipped cream. I have used it as the base for a pretty good shortcake. I topped slices of the raspberry bread with ice cream, more berries and a dollop of whipped cream. Like most quick breads, it is better if you wrap it up in plastic or foil, once cooled, and eat it the next day, if you can wait that long!!
Raspberry Bread
1 ¾ c. flour
½ t. baking powder
½ t. baking soda
½ t. salt
½ t. cinnamon
½ c. butter, at room temperature
¾ c. sugar
2 eggs, room temperature
½ c. sour cream, room temperature
1 t. vanilla
1 c. fresh raspberries
¾ c. chopped nuts, optional
Grease an 8×4 inch loaf pan and preheat oven to 350 degrees. In a large bowl combine dry ingredients. Set aside. In small bowl beat butter until creamy. Add sugar and beat 1 minute. Beat in eggs one at a time. Beat in sour cream and vanilla. Stir in flour mixture until just moistened. Fold in berries and nuts and place batter in prepared pan. Bake 60-65 minutes, or until toothpick inserted in center comes out clean. Let stand in pan 10 minutes. Remove from pan and cool on wire rack. Makes 1 loaf. Freezes well.


