Spelt “Pumpkin” Rolls

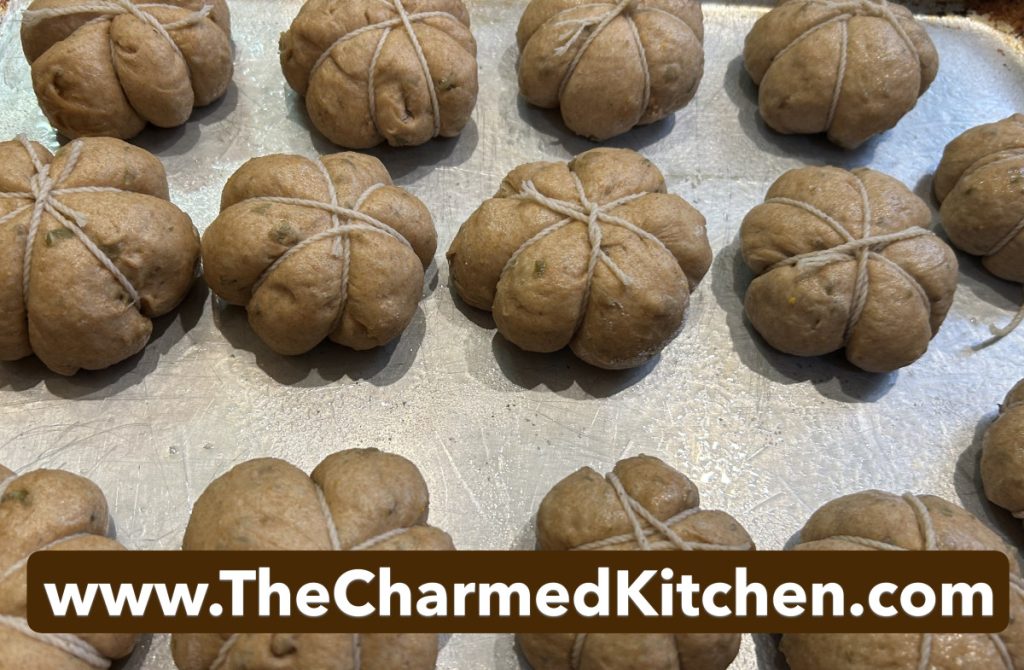
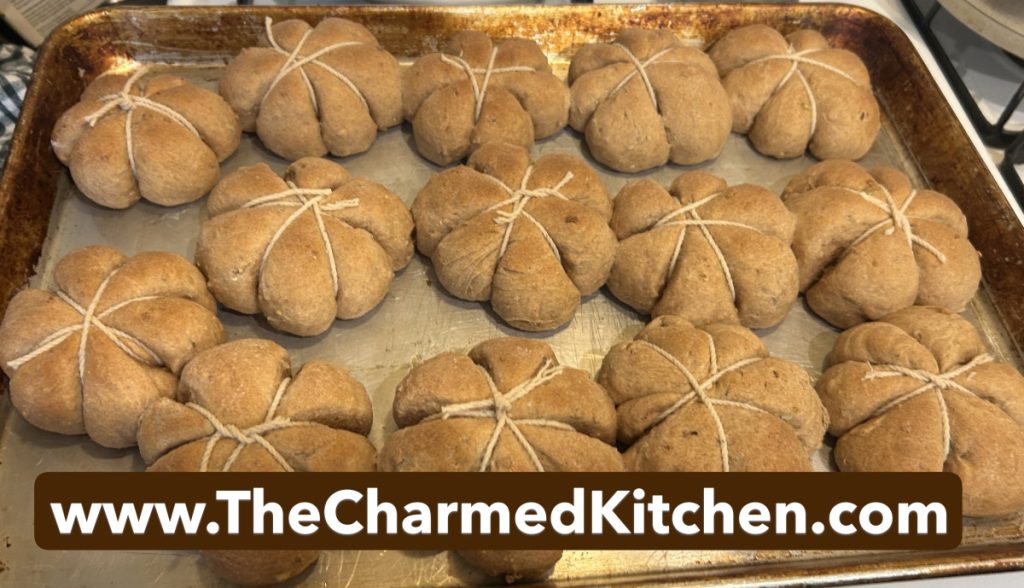
This is one of those little things you can do to make a dish special. I was making rolls for a diner with friends. I wanted something to fit the Halloween theme so I used twine to help the rolls rise and look like little pumpkins. I used spelt flour because I like it. I also did NOT use pumpkin pie seasoning. I just added a bit of grated orange zest and chopped up pumpkin seeds. They were so simple to make.
Of course, you can make the little pumpkins with any roll dough you like. You can also make a large loaf instead of rolls. For a large loaf I would definitely wind the twine around 4 times. For these rolls, which weren’t that big, I rolled the twine around 3 times. Trying to space it evenly.
These were a fun addition to the dinner that night. These would also be great for Thanksgiving or any fall dinner, really. I can give you one really solid hint on this recipe – oil the twine before wrapping it around the roll dough. Removing it later was a breeze. And you don’t have to wrap it crazy tight. The dough will rise and the twine won’t and you’ll get the pumpkin ridges you seek. I also thought about adding a small pretzel stick piece as a stem after they had baked, but never got around to doing it. I think they would look cute with the pretzels. Maybe next time.
So enough chatter, here is the recipe. Enjoy!
Spelt “Pumpkin” Rolls
3 ¼ c. whole spelt flour
1 pkt. Active dry yeast
1 c. water
¼ c. honey
¼ c. oil
1 T. orange zest
1 t. salt
¼ c. chopped pumpkin seeds
Oil for the twine
12-15 pieces of white or brown twine
Place 2 c. flour, yeast and salt in a medium bowl. Heat together water, honey, oil and zest until warm (120-130 degrees) Add water mixture to spelt mixture and beat on low speed of electric mixer for 30 seconds, or until moistened. Beat on high 3 minutes. Stir in pumpkin seeds. Stir in enough spelt to make a soft dough. Cover bowl with towel and allow to rise until doubled, about 1 hour. Grease a baking sheet and set aside. Use a rubber scraper to transfer dough onto floured surface. Divide dough into 12- 15 pieces, depending on the size of the rolls you want. Shape each piece into rolls, using extra flour to prevent sticking. Dip twine in oil and then wrap around the rolls 3-4 times to make even segments. Tuck ends of twine under each roll as you make them. Repeat with remaining rolls. Place on baking sheet and cover with a towel. Allow to rise until doubled, about 1 hour. Bake in a pre-heated 375 degree oven for 15 minutes or until rolls are light brown on top. Remove from pan and cool on wire rack. When rolls are still warm, but cool enough to handle, gently unwind and remove the twine. Makes 12 “pumpkin”rolls.
Note: I would be lying if I said I remembered to measure the twine before using it. I cut a pieces of twine, rolled it around a roll three times and it was perfect. The next one, and several other times I cut the twine a little too short. When that happened I just cut another piece of twine to finish that roll. I’ll guess at about 15-18 inches, but I’m not trustworthy, so measure your first one and adjust from there. I also started tying the twine on the first couple of rolls then it occurred to me to just tuck the twine under. So much easier.
Pan de Muertos (Mexican Bread of the Dead)
Halloween isn’t the only holiday this week. Many people will be celebrating Dia de los Muertos (Day of the Dead). It is a holiday to remember and honor loved ones who have passed. It traditionally runs from October 31 to November 2.
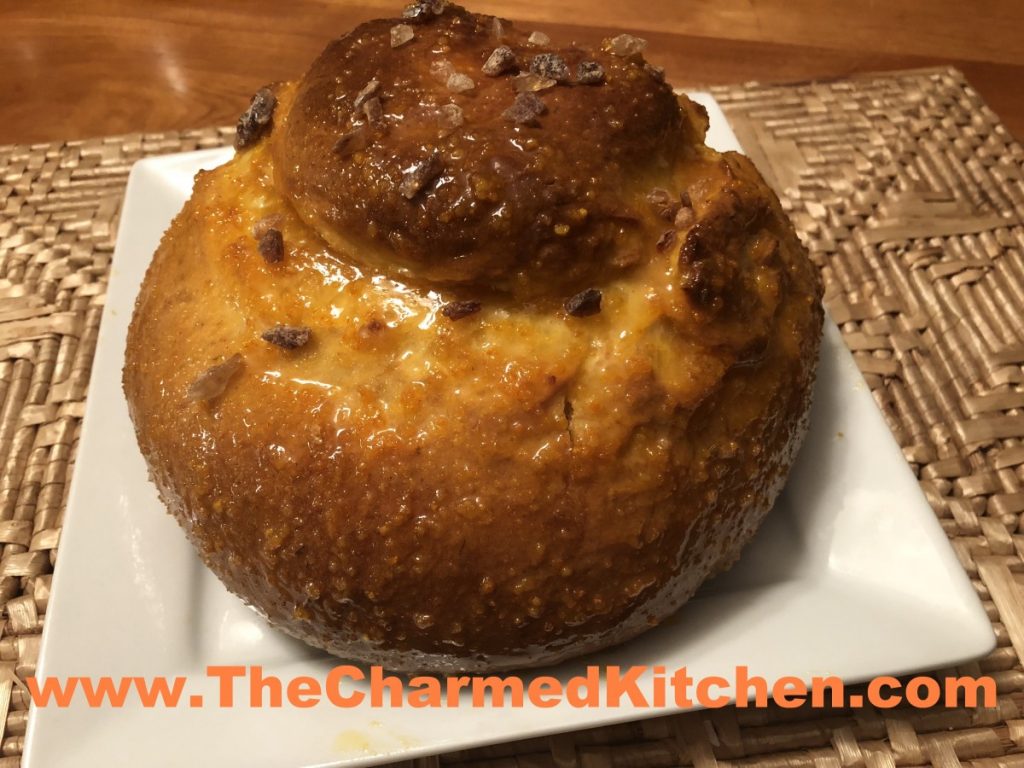
Pan de Muertos is a traditional bread made for this holiday. This is a version of that bread that is flavored with anise (or fennel) and orange. It is glazed, after baking, with an orange sauce, then sprinkled with a little extra sugar. I like to use rock sugar, which, as the name implies, is a large sugar that looks like small rocks.
I shaped the dough into a round shape, with a knob of dough on the top. You can also mold the bread into different shapes like angels or animals.
The bread itself is so tasty. It is a rich dough with a lovely fragrance and texture.
Here is the recipe.
Pan de Muertos (Mexican Bread of the Dead)
1/4 c. each butter, milk and water
3 c. all-purpose flour
1 1/2 t. active dry yeast (half a packet)
1/2 t. salt
2 t. anise seed or fennel seed
1/3 c. sugar
2 eggs, beaten
2 t. orange zest
Glaze:
1/4 c. each sugar and orange juice
1 T. orange zest
Topping:
2 T. sugar, I used rock sugar
Heat together butter, water and milk until the butter melts. Cool to warm. In a large bowl combine 1cup of the flour, yeast, salt, anise seed and 1/3 c. sugar. Beat in the milk mixture then add the eggs and orange zest and beat until well combined. Stir in 1/2 cup of flour and continue adding more flour until the dough is soft. Turn the dough out onto a lightly floured surface and knead until smooth and elastic. Place the dough into a lightly greased bowl cover with plastic wrap and let rise in a warm place until doubled in size, about 1- 2 hours. Punch the dough down and shape it into a large round loaf with a round knob on top. Place dough onto a baking sheet, loosely cover with plastic wrap and let rise in a warm place for about 1 hour or until just about doubled in size. Bake in a preheated 350-degree oven for about 35 to 45 minutes. Cool on rack 5 minutes then brush with glaze. To make glaze: In a small saucepan combine the 1/4 cup sugar, orange juice and orange zest. Bring to a boil over medium heat and boil for 2 minutes. Brush over top of bread while still warm. Sprinkle glazed bread with 2 T. sugar.
Ready to bake
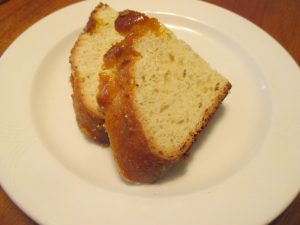
Eat plain, or lightly toasted with butter
Pear and Oatmeal Muffins
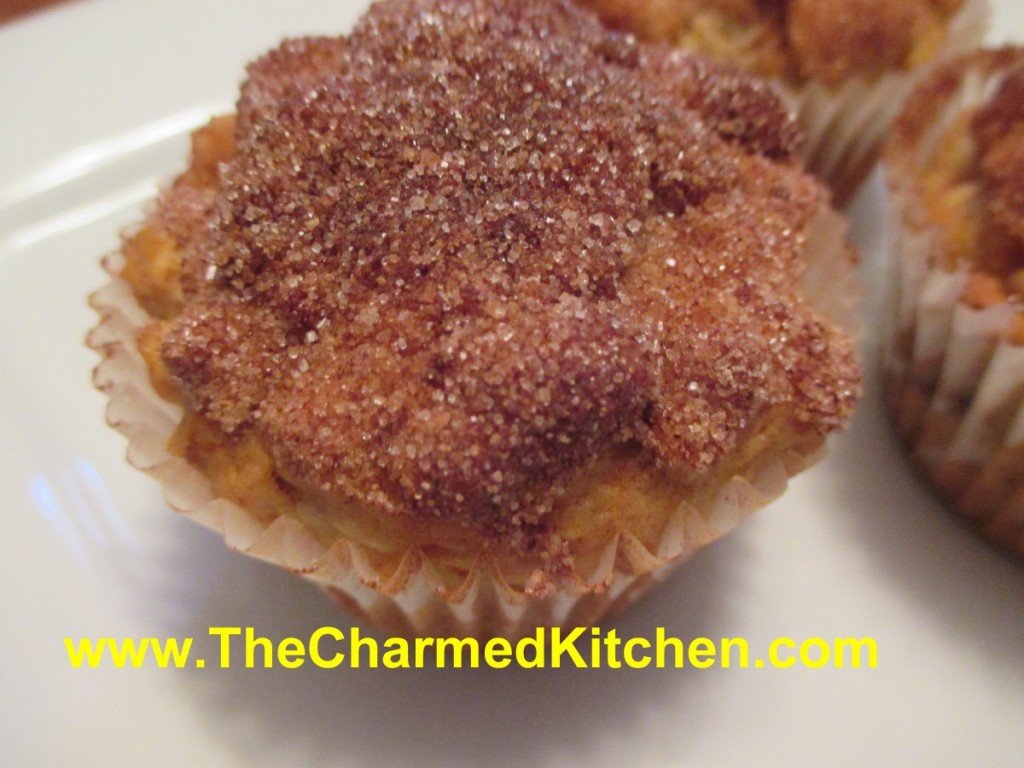
It is pear season. While apples seem to get more attention, pears are a wonderful, versatile fruit.
Pears will ripen off the tree and are often picked unripe and allowed to ripen after harvest. Unlike a lot of other fruits, pears do not suffer from being picked before they are ripe. As they ripen, pears become very sweet.
I like to pick out both ripe and unripe pears at the local market. That way, I’ll have ripe pears over a longer period of time.
I had some ripe pears and wanted to do something with them. Since I had a friend coming for over breakfast, I thought muffins. It’s always nice to have an easy breakfast option on hand.
I started with a basic muffin recipe, and added some diced pears, cinnamon, orange zest, nutmeg and a cinnamon sugar topping, to make them special. And yes, you could substitute apples for the pears!!!
I was really happy with how they turned out. Not overly sweet, moist and tender. Here is the recipe.
Pear and Oatmeal Muffins
1 ½ c. flour
1 c. rolled oats
1 T. grated orange peel
2 t. baking powder
1 t. cinnamon
½ t. each nutmeg and salt
½ t. baking soda
1 egg, beaten
1/3 c. honey
1/3 c. oil
¼ c. orange juice
1½ cups of peeled, diced pears – 2 or 3 pears should do it
2 T. melted butter, optional
cinnamon sugar, optional
Combine flour with the dry ingredients. Set aside. Combine egg with the honey, oil and juice. Add egg mixture to flour mixture and stir until flour is just moistened. Fold in pears. Batter will be thick. Divide batter among 12 greased muffin cups. Bake in a preheated 375- degree oven for 20-25 minutes. While the muffins are warm, dip tops in melted butter and then dip in the cinnamon sugar, if you like. They are tasty, with or without the cinnamon sugar topping, but I like to add this last step. Makes 12.
Doughnuts 101
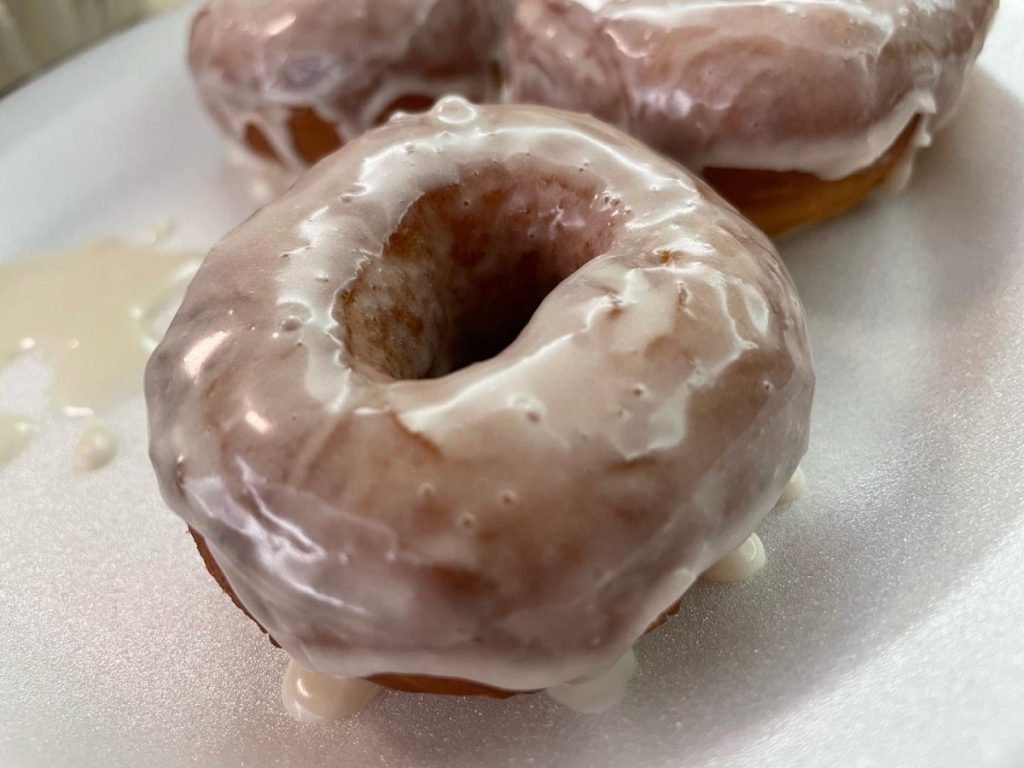
I remember how fun it was to watch my parents making doughnuts. The making of the dough, then cutting the dough into circles. The dough circles would then rise on the counter, under linen towels until puffed up. Gently they would be fried, then set on paper towels to drain. Once cooled, the filling would be piped into them through a pastry bag filled with some wonderful jelly or jam.
I also remember learning to fill them. Squeezing the jelly from the pastry bag into the doughnut was tricky. You wanted to make sure there was enough filling, but not so much that they split open. After a couple of tries, I realized you could figure it out by the weight of the filled doughnut in your hand.
My parents were both excellent bakers. My father had even been a professional baker at one time. I thought it was normal to have parents who made doughnuts. It was the norm in my family.
My folks only made them for special occasions. Unless my Mom got a taste for homemade jelly doughnuts. Then, my dad would make them for her. She loved jelly doughnuts. More than pretty much anyone else I knew.
You can fill them with any number of jellies, jams and cream fillings. You can also use a doughnut cutter to create a round doughnut and a doughnut hole. These can be glazed or rolled in powdered sugar, instead of being filled.
Light and Fluffy Classic Doughnuts
1 ¼ c. milk
2 ¼ teaspoons (one package) active dry yeast
2 eggs
½ c. butter, melted and cooled (1 stick)
¼ cup granulated sugar
1 teaspoon salt
4 ¼ cups all-purpose flour, plus more for rolling out the dough
2 quarts oil, for frying, plus more for the bowl.
Heat the milk until it is warm but not hot, about 90 degrees. In a large bowl, combine it with the yeast. Stir lightly, and let sit until the mixture is foamy, about 5 minutes. Using an electric mixer or a stand mixer fitted with a dough hook, beat the eggs, butter, sugar and salt into the yeast mixture. Add half of the flour (2 cups plus 2 tablespoons), and mix until combined, then mix in the rest of the flour until the dough pulls away from the sides of the bowl. Add more flour, about 2 tablespoons at a time, if the dough is too wet. If you’re using an electric mixer, the dough will probably become too thick to beat; when it does, transfer it to a floured surface, and gently knead it until smooth. Grease a large bowl with a little oil. Transfer the dough to the bowl, and cover. Let rise at room temperature until it doubles in size, about 1 hour. Turn the dough out onto a well-floured surface, and roll it to 1/2-inch thickness. Cut out the doughnuts with a doughnut cutter, concentric cookie cutters or a drinking glass and a shot glass (the larger one should be about 3 inches in diameter), flouring the cutters as you go. Reserve the doughnut holes. If you’re making filled doughnuts, don’t cut out the middle. Knead any scraps together, being careful not to overwork, and let rest for a few minutes before repeating the process. Put the doughnuts on two floured baking sheets so that there is plenty of room between each one. Cover with a kitchen towel, and let rise in a warm place until they are slightly puffed up and delicate, about 45 minutes. If your kitchen isn’t warm, heat the oven to 200 at the beginning of this step, then turn off the heat, put the baking sheets in the oven and leave the door ajar. About 15 minutes before the doughnuts are done rising, put the oil in a heavy-bottomed pot or Dutch oven over medium heat, and heat it to 375. Meanwhile, line cooling racks, baking sheets or plates with paper towels.
Carefully add the doughnuts to the oil, a few at a time. If they’re too delicate to pick up with your fingers (they may be this way only if you rose them in the oven), use a metal spatula to pick them up and slide them into the oil. It’s O.K. if they deflate a bit; they’ll puff back up as they fry. When the bottoms are deep golden, after 45 seconds to a minute, use a slotted spoon to flip; cook until they’re deep golden all over. Doughnut holes cook faster. Transfer the doughnuts to the prepared plates or racks, and repeat with the rest of the dough, adjusting the heat as needed to keep the oil at 375. Glaze or fill as follows, and serve as soon as possible.
To fill doughnuts use a pastry bag fitted with a long tube tip for filling. I have these handy plastic syringes which are easy to use. Insert tube tip into doughnut and squeeze gently until doughnut is filled with jam. Be careful not to overfill or doughnut will split. Once filled doughnuts are topped with a powdered sugar glaze or rolled in powdered sugar.
Apricot Filling
12 oz. dried apricots, chopped up
2 c. water
2 c. sugar, or to taste
Combine apricots with water in saucepan and simmer, covered until apricots are really tender. This will take at least an hour- add more water, if needed. Add sugar to taste and cook until thickened. Puree mixture in a blender.
Strawberry Filling
1 lb. strawberries
1½ c. sugar
½ c. water
3 T. cornstarch
Crush berries and place in saucepan with the sugar. Cook until berries are tender, about 10 minutes. Combine water with cornstarch and add to strawberries. Cook until thickened and bubbly. Cool. , Puree. Makes 2 cups.
Classic Glaze
2 c. powdered sugar
¼ c. milk
1 t. vanilla
Whisk together sugar, milk and vanilla until smooth. When the doughnuts are cool enough to handle, dip into the glaze. Put on racks to let the glaze harden.

Cheesy Pumpkin Dip
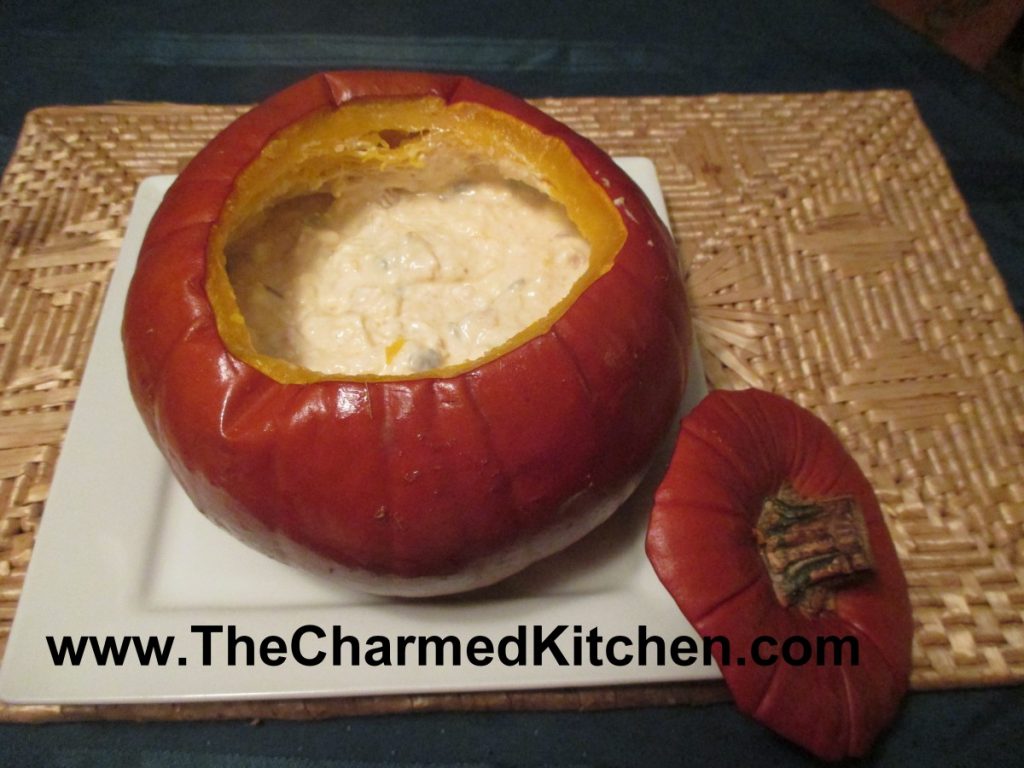
This is a pretty way to serve dips this time of year. The dip bakes inside the pumpkin- and the pumpkin bakes, too. It is served hot. Fun for Halloween, Thanksgiving, watching football games or just movie night with the family.
It really is simple and could be filled with any number of combinations of cheesy goodness. I have included the recipe I used in the picture. I also included my recipe for Spinach and Artichoke Dip, to give you another option.
You could also add a hot cheese sauce and serve like fondue, with long forks and pieces of bread.
You get a pie pumpkin, about 2-3 lbs. Cut off the top to make a lid and scoop out the seeds, like you would if you were making a Jack-o-Lantern. Wipe off the outside and then just fill it up with the dip mixture. Put the lid back on, bake for an hour, and you are good to go. The fun part is scraping some of the cooked pumpkin in with the cheese dip. More detailed directions follow.
So here is the recipe for making the cheesy filled pumpkin. I think it is simple enough to serve anytime, not just on a holiday. Enjoy!!
“Pumpkin” Cheese Dip
Directions: Preheat oven to 350 degrees. Cut off top of pumpkin. Cut in at an angle, so top will fit like a lid and not fall in. Set top aside. Scoop out seeds and clean out any stringy bits*. Set pumpkin on a baking sheet. Combine cheese filling of your choice and place inside the pumpkin. Place the top of the pumpkin back on the pumpkin, and place in oven. Bake for 1 hour. Remove pumpkin and place on heat proof dish. I used a glass pie plate. Remove lid. Serve with crusty bread or crackers.
Smoky Cheese Dip
8 oz. cream cheese, cubed
4 oz. extra sharp cheddar cheese, shredded
8 oz. bacon, cooked and crumbled
½ c. sour cream
¼ c. mayo
¼ c. chopped parsley
½ t. each cumin and smoked paprika
Pinch of nutmeg
½ c. hulled pumpkin seeds
In medium bowl, stir together all ingredients, except the seeds. Place this mixture in the pumpkin when ready to bake. Don’t add the pumpkin seeds until right before serving. Stir them in a little, if you like.
Another nice choice…….
Spinach and Artichoke Dip
1 (12-14 oz.) can artichoke hearts, drained and coarsely chopped
10 oz. package frozen spinach, thawed and squeezed dry
8 oz. cream cheese, cubed
4 oz. shredded cheddar cheese
½ c. diced onion
¼ c. Italian dressing
Dash of hot sauce
In medium bowl, combine dip ingredients, stirring to combine. Place in pumpkin when ready to bake.
* You can rinse off the seeds, lightly salt them and toast them, if you like. Then serve with the pumpkin dip. If you aren’t interested in eating them- please put them outside for the birds to eat.
Pumpkin Cupcakes

I made these cupcakes for a class the other day. They are easy to make, moist, not too sweet and a perfect seasonal dessert. The recipe makes 30-36 cupcakes. I got 36 out of this batch, I don’t mind a smaller cake. For a larger cupcake, go for just 30.
In class we talked about winter squash and how to cook with them. Truth is, almost any winter squash can be used in recipes calling for pumpkin. Most of the time I am using butternut squash or Hubbard squash. Spaghetti squash is really the only winter squash that doesn’t work for pumpkin recipes. Its fibrous texture just isn’t best for this application.
I kept the colors of the frosting subtle. I used a standard buttercream- recipe follows. I divided up the frosting and tinted them and left about half of the frosting un-tinted.
When it was time to frost the cupcakes I used plastic wrap to make the job of filling the piping bags easier. I had already placed a large star tip in a piping bag. Then I laid a piece of plastic wrap on my work surface. I added some of each of the colors and some of the white frosting. I rolled up the plastic wrap over the frosting, forming it into a tube. I snipped off one end with scissors and dropped the frosting into the prepared piping bag. Its easier to fill the piping bag this way. Easy to pop out an empty tube of plastic wrap when it is empty and to drop a new one in.
You could add sprinkles or other seasonal decorations, too.
So here is the recipe for the cupcakes and the frosting. Enjoy.
Pumpkin Cupcakes
4 eggs, slightly beaten
3/4 c. oil
2 c. sugar- I use less
2 c. cooked pumpkin or 1 (15 oz.) can
1 3/4 c. flour
1/4 c. cornstarch
3 t. cinnamon
1 t. nutmeg
1/4 t. cloves
2 t. baking powder
1 t. baking soda
3/4 t. salt
Blend together in large bowl eggs, sugar, pumpkin and oil and set aside. In another bowl combine dry ingredients. Add dry ingredients to egg mixture and beat until well blended. Pour into paper-lined muffin tins, filling about 2/3 full. Bake in a preheated 350-degree oven for 25-30 minutes or until cupcakes spring bake when touched lightly. Cool 30 minutes before frosting. Makes 30-36. Frost with Cream Cheese Frosting or Butter Cream. I used butter cream frosting recipe.
Classic Butter Cream
1½ c. butter
5-6 cups sifted confectioners’ sugar
2T. vanilla extract
In a bowl beat butter until fluffy. Gradually add 2 cups of the confectioners’ sugar, beating well. Slowly beat in the vanilla. Slowly beat in remaining sugar. Beat in a little milk, if needed, to make of spreading consistency. Tint with food color, if desired.
Homemade Popcorn Balls
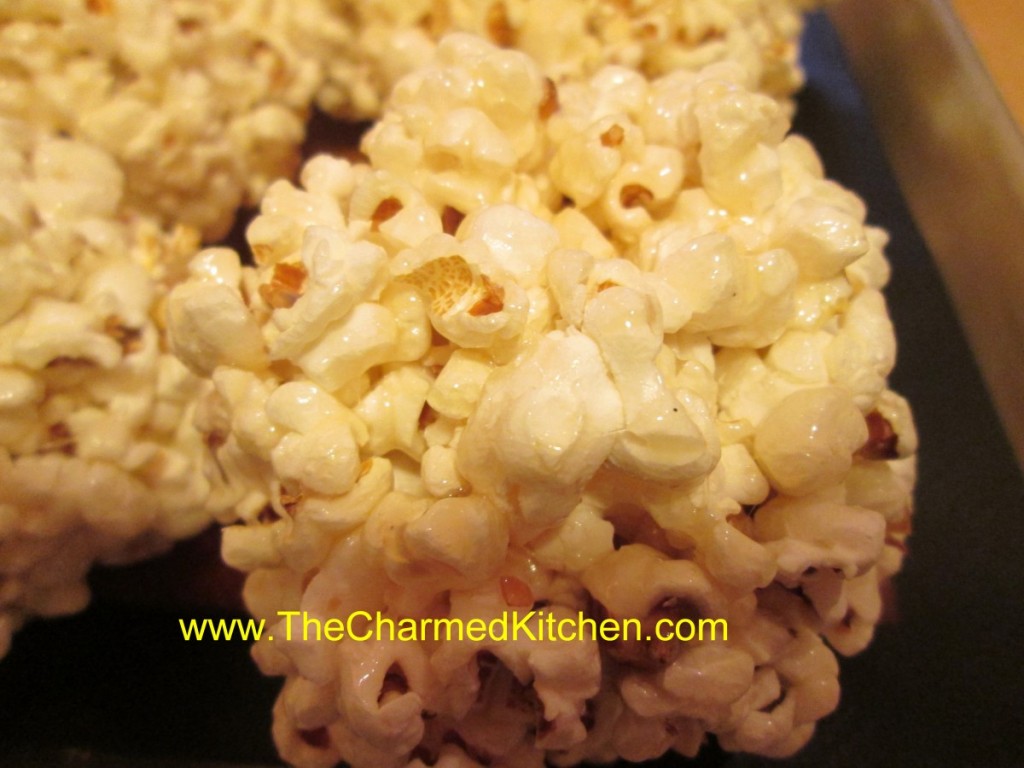
I have fond memories of eating popcorn balls when I was a kid. One memory was during the summer. An amusement park near my home was famous for their popcorn balls. Every time we went there, we would end the day with popcorn balls.
The other memory was making our own, around Halloween. They seem to be a part of more than a few Halloween parties when I was younger.
I don’t make them often, but popcorn balls are always a special treat for friends and family. This recipe is pretty easy. Kids, supervised, could help make them. You just have to make sure the mix cools down enough before you let them form the popcorn into balls.
I am a bit of a purist and enjoy them plain, but you can add Halloween themed candies to the mix, to dress them up for a party. Candy corn or black and orange M&M’s would both work.
The recipe calls for corn syrup. If you don’t want to use corn syrup, a recipe for a corn syrup substitute, (sugar syrup) is listed below.
Homemade Popcorn Balls
9 c. popped popcorn
1 c. sugar
1 T. butter
1 T. vanilla
1 c. corn syrup*
Place popcorn in large bowl and set aside. Combine sugar, butter, vanilla and corn syrup in a saucepan. Heat and boil until thick, about 4 minutes. Pour over popcorn. Stir until well coated. Let cool until safe enough to handle. With buttered hands form mixture into balls. Store wrapped tightly in plastic wrap until ready to eat. Best eaten within a few days of making. Makes about 8.
*If you don’t have corn syrup- or don’t want to use it here is a way to make a substitute for it.
Sugar Syrup- corn syrup substitute
3 cups granulated sugar
1 cup Water
1/2 tsp. Cream of Tartar
1/4 t. salt
Combine ingredients in a large saucepan. Bring to a boil and cover the pot. Reduce to a simmer and cook covered for 5 minutes. Uncover and cook to soft-ball stage. Stir frequently.
Soft ball stage occurs at 235-245 degrees. This stage can be determined by dropping a spoonful of hot syrup into a bowl of very cold water. In the water, use your fingers to gather the cooled syrup into a ball. If it has reached soft-ball stage, the syrup easily forms a ball while in the cold water, but flattens once removed from the water.
Remove from heat. Cool and store at room temperature. It will keep well for a month or two.
Pear Coffeecake
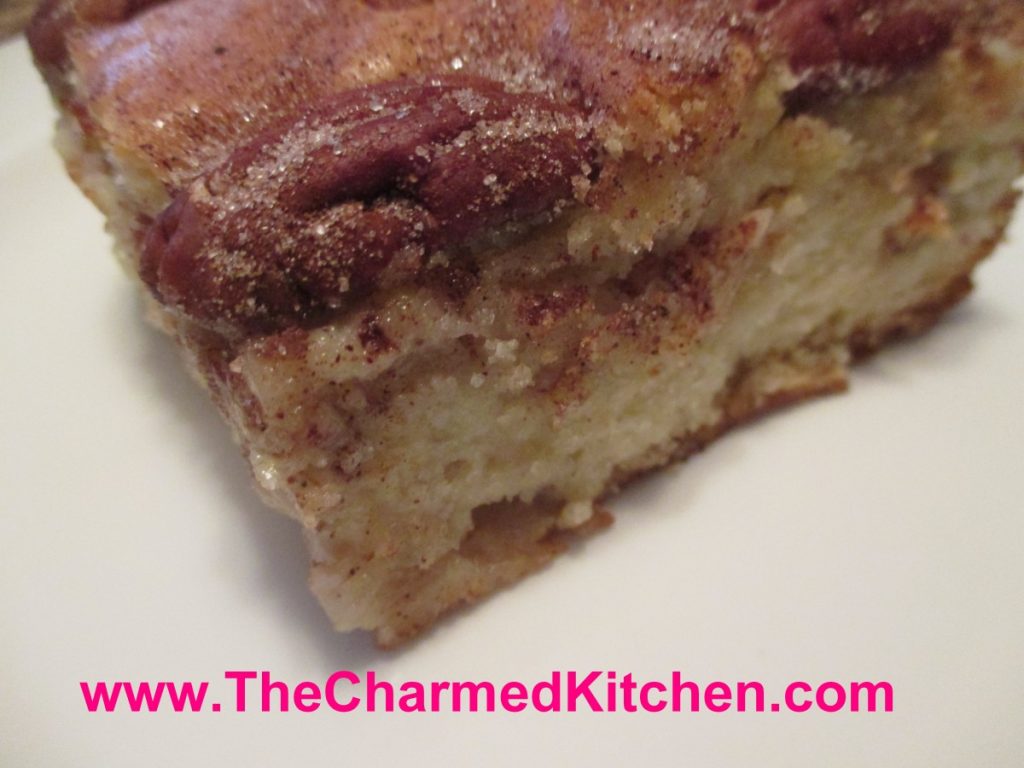
This may be one of my favorite pear desserts. I combined ripe pears with pecans and cinnamon sugar to create this moist and flavorful cake. I had Bartlett pears, but use whatever pears you have on hand. They should be ripe, but still firm. In the recipe directions I say to have the pears peeled and sliced, and ready to go in the cake. I actually made the batter first, then prepped the fruit. Mostly because I was distracted and forgot. It worked out just fine. The upside was that the pears did not have a chance to discolor, and I didn’t have to put them in lemon water until ready to use.
The cake is wonderful served all on its own, but I also enjoy topping it with a scoop of ice cream or whipped cream.
Pear Coffee Cake
1 c. oil- I like to use olive oil or avocado oil
4 eggs
1 t. vanilla
1/3 c. orange or lemon juice
3 c. flour
2 c. sugar
3 t. baking powder
¼ t. salt
3-4 pears, peeled, cored and sliced
½ c. sugar
1 T. cinnamon
¾ c. toasted pecan halves or pieces, optional
Grease a 9×13 inch pan. Preheat oven to 350-degrees. Combine oil with eggs, vanilla and juice until well blended. In a separate bowl, mix dry ingredients and add to egg mixture. Beat together until batter is smooth. Batter will be thick. Combine the ½ cup sugar with the cinnamon. Set aside. Place ½ of batter in prepared pan. Arrange pear slices on batter and sprinkle on ½ of the cinnamon mixture. Pour on remaining batter and top with the pecans, if using. Sprinkle with remaining sugar mixture. Bake 50- 60 minutes or until toothpick inserted in cake comes out clean. Cool before slicing. Serves 10-12.
Pear Sweet and Sour Sauce

I love sweet and sour sauce. I have made many versions over the years and have used different fruits in them. I decided to try to make sweet and sour sauce with a ripe pear. It worked out wonderfully. Even better than I expected, actually. The sweetness of the pear was a great addition to the sauce. It came out a rich, mahogany color and is full of flavor. I will make a double batch the next time. I have already enjoyed it with egg rolls. Thinking of making sweet and sour chicken next.
I try to be as exact in measuring as I can. I had a pretty big Bartlett pear, but use 2 small pears, if that is what you have. Any pear will work in this recipe- just be sure it is ripe. As the sauce cooks the pear pretty much falls apart and disappears into the sauce. I also used Sriracha sauce, which is hot, but not as hot as some other hot sauces. Depending on the brand of hot sauce you are using, you might want to add less. Then again, heat is a matter of personal preference. Spice it up according to your own taste. That is one of the perks of making it yourself.
When I make a sweet and sour sauce- I use Clear Gel, instead of traditional corn starch. It is modified cornstarch (non-waxy) and when you reheat the sauce, it will stay thick. Regular cornstarch will often thin out when reheated. Clear Gel is used in pie fillings and a lot of frozen foods and condiments. Often listed on the label as modified food starch. It looks just like regular cornstarch. I buy mine online or when I am in stores in Amish communities.
So here is the recipe for a sweet and sour sauce I will surely make again. Planning on making some to freeze, too.
Pear Sweet and Sour Sauce
1 large pear, (about 8 oz.) peeled and diced fine
½ c. cider vinegar
½ c. sugar
3 T. soy sauce
1 T. minced garlic
1 T. Sriracha sauce- or other hot sauce- add to suit your taste
2 t. grated ginger
3 T. water
2 T. cornstarch or Clear Gel*
2 t. sesame oil
In medium saucepan, combine all ingredients, except the water, cornstarch and sesame oil . Simmer mixture, covered about 5-7 minutes, or until pear becomes tender. Stir occasionally. Combine cornstarch with water and stir until smooth. Pour slowly into simmering pear sauce, stirring to prevent sticking. Sauce with thicken. Stir in sesame oil. Makes about 2 cups. Keeps in fridge for weeks.
* If you use a type of cornstarch called Clear Gel, you can reheat the sauce without it becoming runny. Clear Gel, also called modified food starch, or modified cornstarch, is available online and at some specialty food stores. I find it in Amish communities.
Halloween Sushi
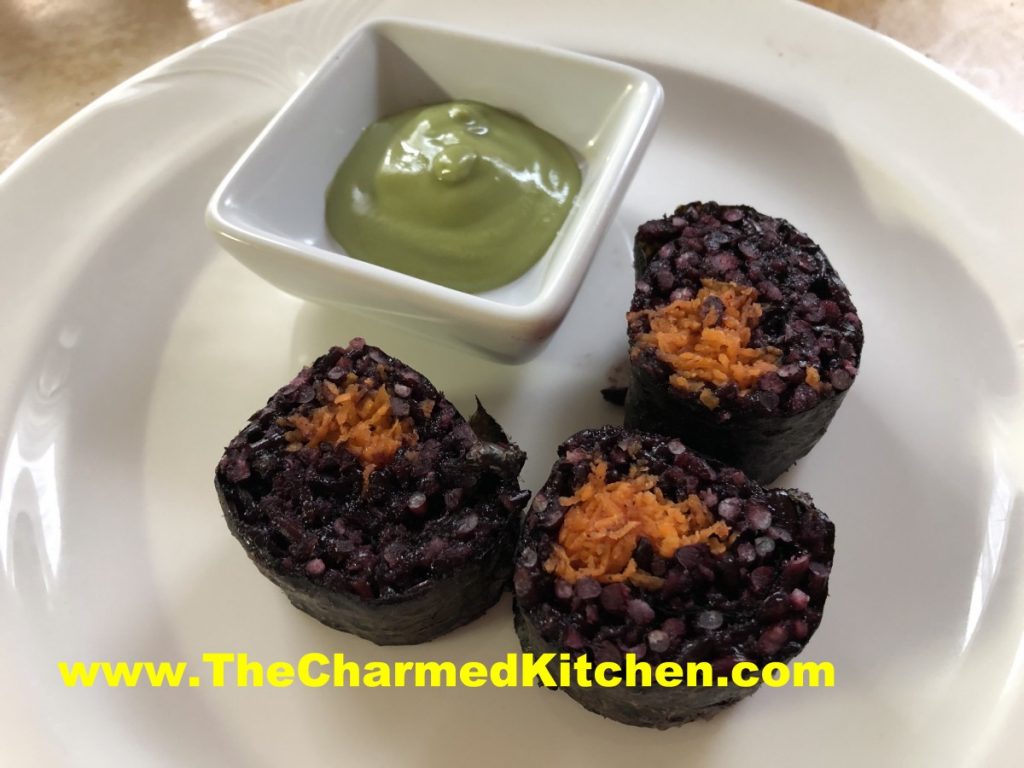
When I make sushi, I often use brown or black sticky (sweet) rice. I actually prefer the texture over the white rice. It occurred to me that the black sticky rice might make fun sushi for Halloween. I find black sweet rice at my local Asian grocery store. That is also where I get nori, rolling mats and wasabi.
To add a pop of color, I finely shredded carrots and added them to the sushi roll, too. The black rice actually cooks to a dark purple color. The color combination is fun for Halloween.
You’ll need a rolling mat, but beyond that, not a lot of special equipment is needed. I served my sushi with wasabi. You could serve with pickled ginger, too. Here is the recipe and directions.
“Spooky” Sushi
To make the rice:
4 c. black sweet rice, uncooked
4 c. water, or a little more
1 recipe Sushi Su, recipe follows
finely shredded carrots
In strainer, rinse the rice repeatedly with cold water until the water runs clear. Place rice in microwave safe container with the 4 cups of cold water. Cover container with a lid and place in microwave. I use a large Pyrex casserole dish that has a lid. Cook 20 minutes. Check for doneness and add a little more water, if needed. Cook another 10-15 minutes. Don’t stir the rice. Black rice takes longer to cook than white sushi rice. You want it to be cooked, but not mushy. Cooking times vary by microwave. Remove from the microwave once cooked and let stand, covered, for 10 minutes. Place rice in a large, cool bowl and pour on the Sushi Su, tossing in. Fan rice while tossing to give it a shiny look. Makes enough for 8 rolls.
Sushi Su:
1/2 cup rice vinegar
4 T. sugar
1/2 t. salt
msg, optional
Combine all and set aside until ready to use. You can also buy a dry powder of Sushi Su and you can use that instead. It is a 2.65 oz. packet.
Assembling Sushi
Place a sheet of nori ( dried seaweed sheets) on mat and spread about 1 cup of the rice over the nori, leaving about 1-2 inches empty on the far side. Place fillings in a strip a little off center away from the side with no rice. Start rolling up the mat using it to press the sushi roll and keeping the fillings in the nori. Once rolled, press the mat once more to seal and make the fillings stick together. Wetting the edge of the nori with a little water can also make the sushi stick better. Slice each piece using a sharp knife dipped in water.
Wrapping the sushi takes practice. Don’t be discouraged if the first few are a little less that perfect, Still, with a little practice it gets pretty easy. Just be careful not to overfill the rolls as it makes the job harder


