Fresh Peach Scones


I’ve really been in the mood to make scones lately. Since I had some beautiful peaches, I decided to use them in this recipe.
They worked out even better than I had hoped. I added cinnamon, nutmeg and cloves into the dough, for a little extra flavor. Nicely complimented the sweetness of the peaches.
These are wonderful for breakfast, brunch or with tea or coffee. They would also make a nice base for shortcake. I could see them with berries and whipped cream for a perfect dessert.
I used a 2 oz. cookie scoop and got 25 scones. You could make them bigger, just increase the baking time a couple of minutes. I also placed only one baking sheet in the oven at a time. You could put both in at once, but reverse the rack you have them on- half way through baking- so they bake more evenly. Also, if both trays are in the oven at once, increase baking time a couple of minutes.
Peach Scones
3 cups flour
½ c. sugar
1 tablespoon baking powder
1 t. cinnamon
1 t. nutmeg
Pinch of cloves
½ t. salt
10 T. cold butter (1 stick plus two tablespoons)
¾ c. half and half or milk
1 egg
1½ t. vanilla
1½ c. peeled, chopped peaches – about 3-4 peaches
Glaze:
2 c. powdered sugar
About 2-3 T. half and half
1 t. vanilla
Preheat oven to 425. Line 2 baking sheets with parchment paper, or use silicone liners. In a bowl, place the dry ingredients and stir to mix. Cut in butter to resemble coarse crumbs. Make a well in the center and stir in half and half, vanilla and egg. Stir to make a soft dough. Fold in peaches. Use ice cream scoop to make scones, placing scoops of dough onto baking sheets. Bake until browned – 14-16 minutes. Cool on a rack. Make glaze and dip tops of scones in glaze or drizzle it over them. Makes 22-25 depending on size.
Homemade Plum Jam

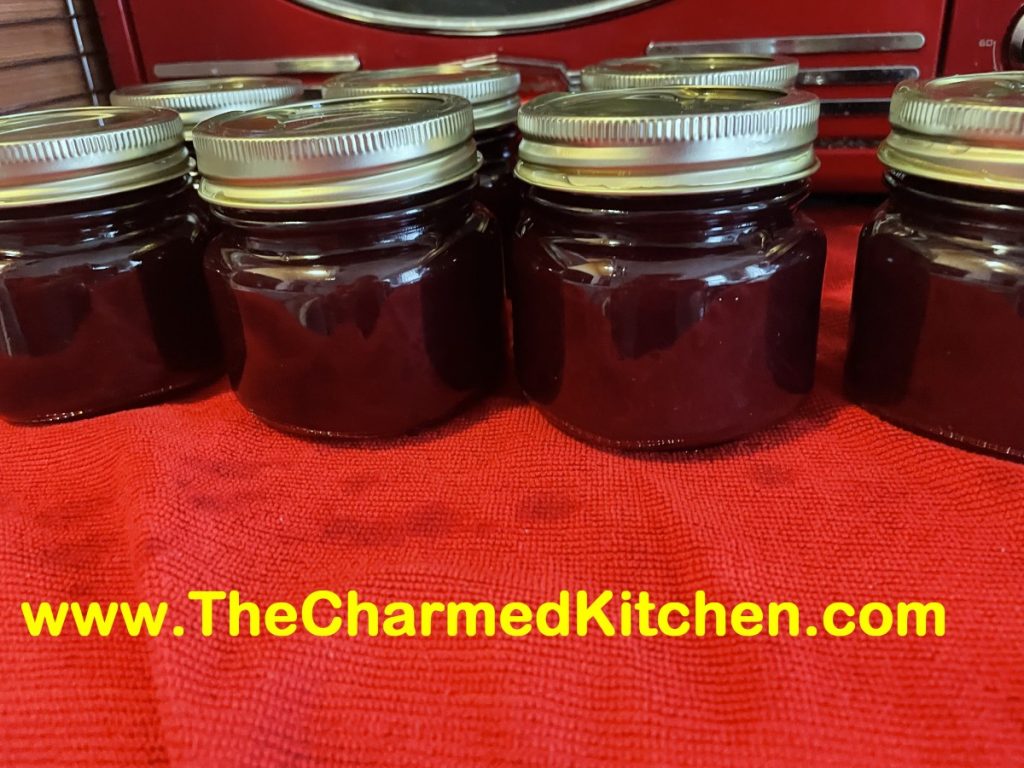
This is one of the easiest jams you can make. You don’t need pectin and it cooks pretty quickly into sweet, thick jammy goodness. I prefer a softer set, so I stopped cooking mine a little sooner than you might prefer. I like a jam that spreads easily, even after it has been opened and stored in the fridge. I love this jam.
When I hand chopped the plums in the past some of the pieces of the peel seemed too big. I could see them in the finished jam. To insure the skins got chopped up, I chopped the plums in a food processor this time. I did not puree them, but pulsed enough times to have fine chopped plums This is just a cosmetic preference. You can just cook down chopped up plums and they will be fine. Or use an immersion blender after the plums have cooked a bit to smooth it out more.
So here is the recipe. I got it from the NCHFP website. The only changes I made was to up the processing time to 10 minutes, so I didn’t have to sterilize the jars. I also let the jam sit in the canner a few extra minutes to prevent siphoning.
Plum Jam
2 quarts chopped, pitted tart plums (about 4 pounds) – any plums will work
6 cups sugar
1½ cup water
¼ cup lemon juice
Combine all ingredients; bring slowly to boiling, stirring occasionally until sugar dissolves. Cook rapidly to, or almost to, the jellying point (which is 8°F above the boiling point of water, or 220°F at sea level). Stir constantly to prevent sticking or burning.
Pour hot jam into hot jars, leaving ¼ inch headspace. Wipe rims of jars with a dampened clean paper towel; adjust two-piece metal canning lids. Process in a boiling water bath canner for 10 minutes. Turn off the heat and allow jars to remain in canner 5 minutes before removing. Set jars on cooling rack or towel in a draft free place while they cool down. Check seals once jars are cool. Yield: About 8 half-pint jars.
Dehydrating Vegetables


Vegetables in photo: Starting left with bright green and going clockwise: Celery, potatoes, red peppers, mushrooms, carrots, cucumbers, onions and tomatoes. In the center- mixed sweet peppers.
Do you ever buy a bag of potatoes, only to toss half of them away because they got mushy? Maybe your onions starting sprouting well before you could go through the whole bag? I hate when that happens. An easy solution could be to dehydrate them. This time of year gardens are producing like crazy around here. While I can a lot of produce, I also enjoy the ease of dehydrating.
I have dehydrating on my mind this week. I found myself with some extra produce and I didn’t want it to go to waste. Dehydrating is an easy way to save it. It is a great way to preserve some of those wonderful tomatoes, too.
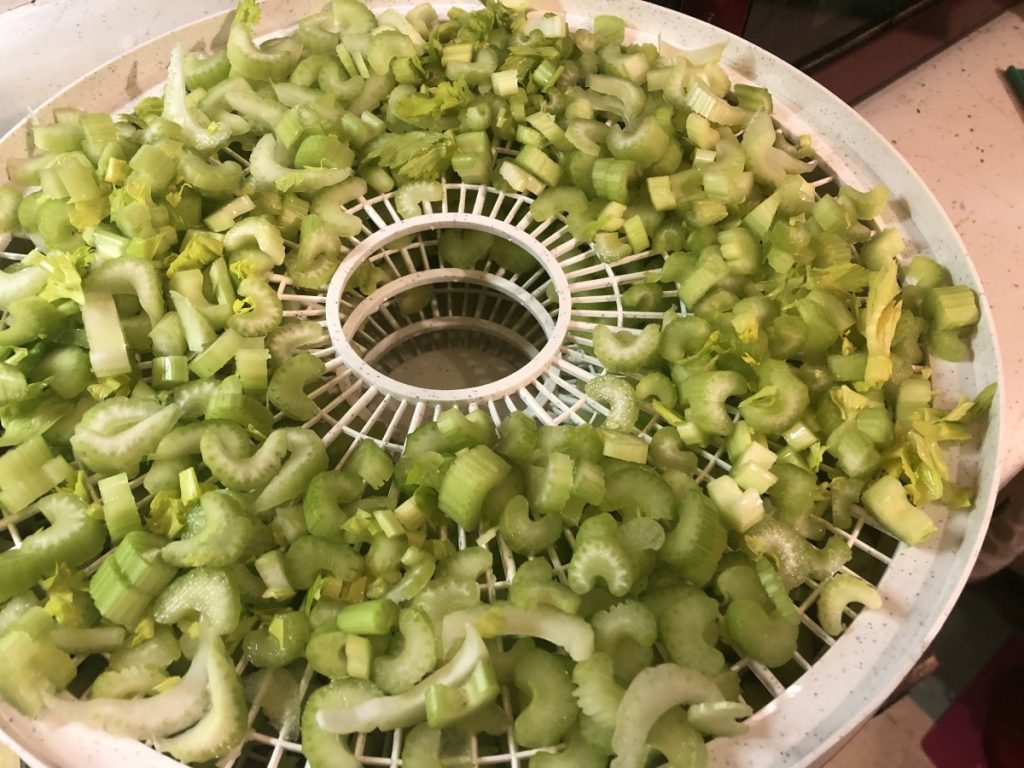
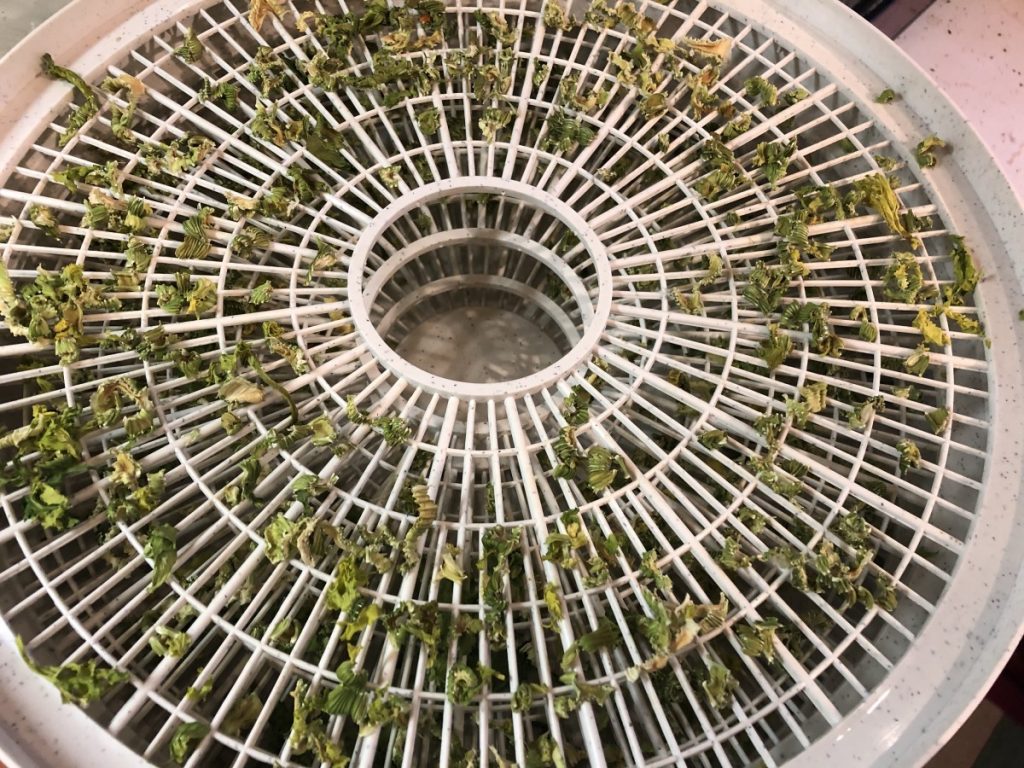
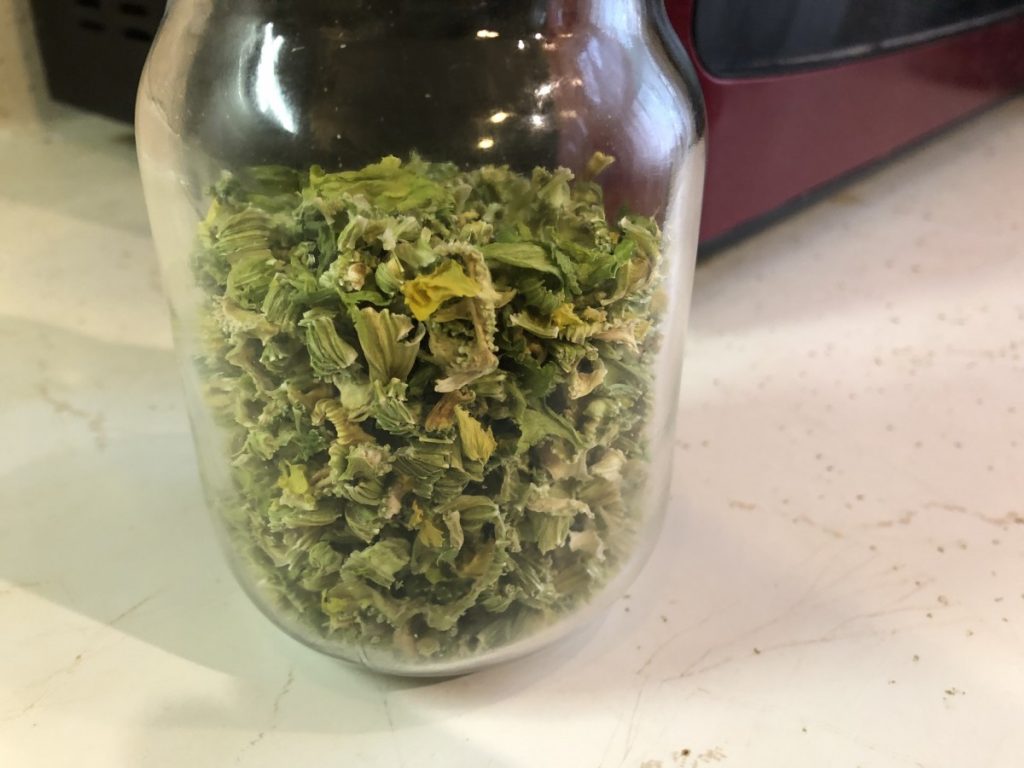
I started by dehydrating 2 large stalks of celery. I just washed them well, chopped them up, and placed them on the dehydrator trays. They filled my dehydrator, but once dried, I had little more than a cup. In case you were wondering- an entire bunch of celery is a stalk- one individual piece of celery is called a rib. I can use my celery in soups, sauces and stews. I can also powder it up and use it in salad dressings, marinades, rubs, and dips.
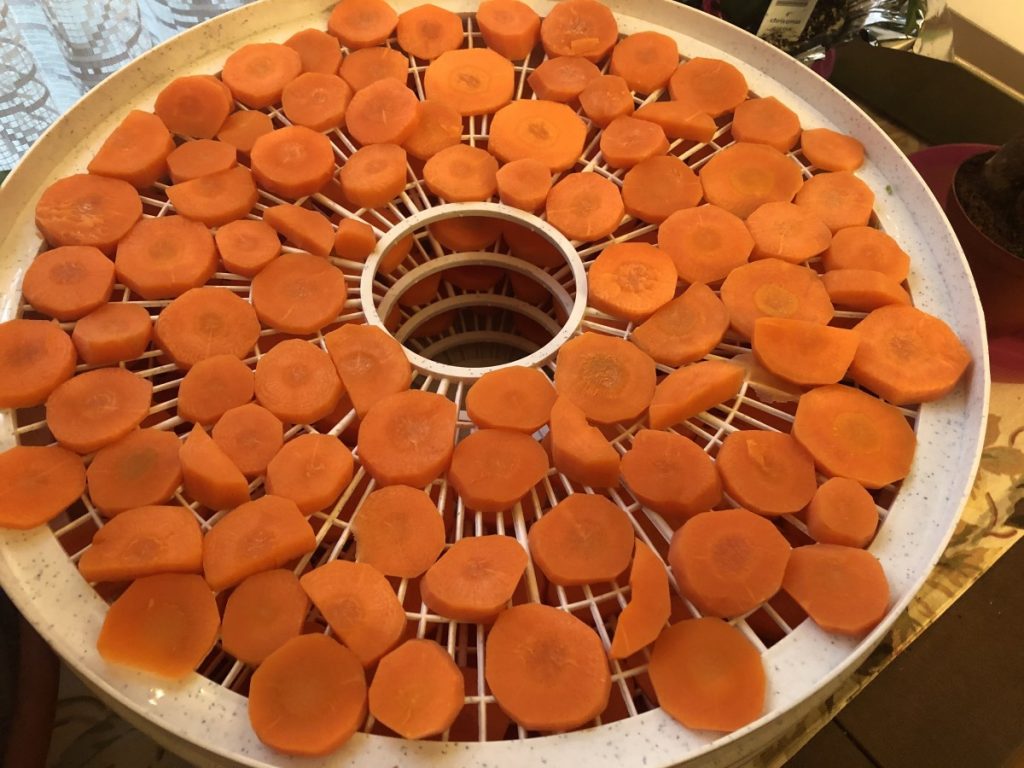
After dehydrating celery, I decided to dry some carrots. Unlike the celery, carrots need to be blanched before dehydrating. That helps the carrots to hold their color better and gives you a better finished product. I peeled and sliced the carrots. Then I steamed them for about 6 minutes. Once cool enough to handle, I placed the carrots in the dehydrator. Left them in over night and woke up to crispy carrot slices. These can also be added to soups, when making stock, stews, etc. The carrots can be cubed instead of sliced, if you prefer.
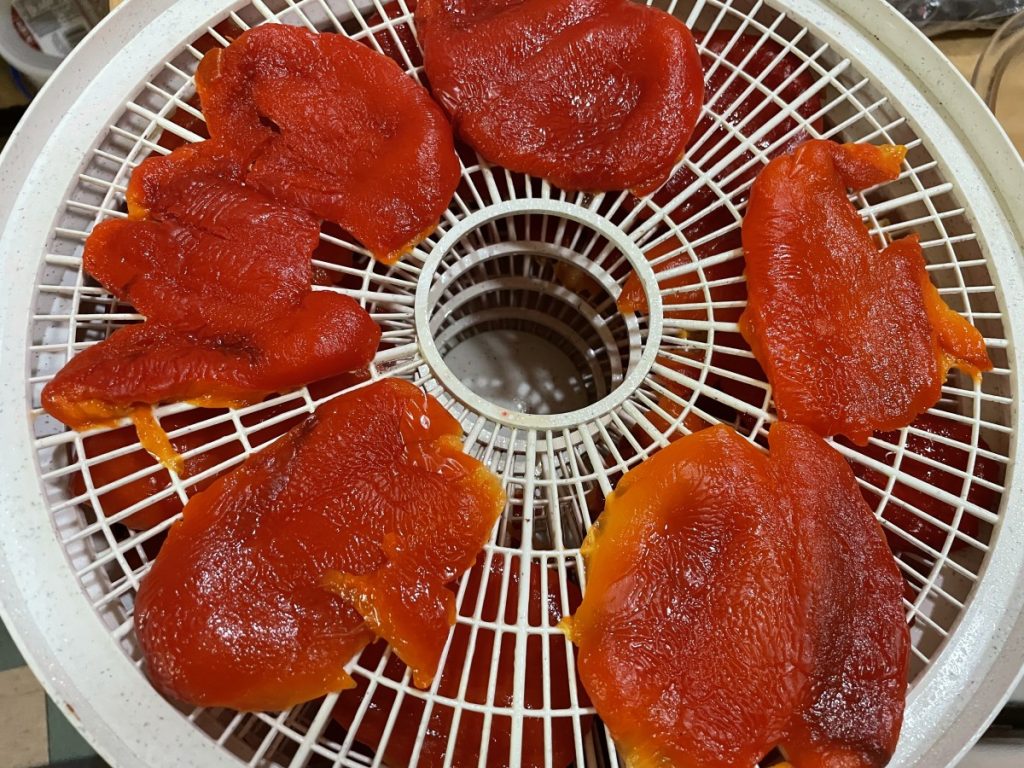
I also dried some peppers. I got a big bag of peppers at a local Asian market. Normally I just cut them up and dry them. A few had some wrinkles on their skin, so I wanted to remove the skins. I also thought the roasting would add more flavor. It worked great. I dried them until they were crispy and powdered them up afterward.
I preserve a lot of food by dehydrating it. Once you get over the initial investment in a dehydrator, the cost to dry food and to store dried food is pretty minimal. I got a very nice dehydrator for $30. Not a big investment at all. That was a new one. You can also sometimes find them cheaper at estate and garage sales.
Dried fruits are probably the most common home-dried foods. Apples, grapes, pineapple, strawberries and cherries are among my favorites. Because the dried vegetables are so useful and versatile, I enjoy them as much as dried fruits. I think you will, too.
Drying Vegetables
Most vegetables should be dried at the lower range if you have an adjustable thermometer on your dehydrator-around 125-degrees. Important to know with vegetables, is that some of them need to be blanched first. Blanching is just steaming or boiling the vegetables for a few minutes, before drying. Blanching kills certain enzymes, prevents browning and assures a better end product.
Vegetables that need blanching include green beans, cabbage, carrots, potatoes, greens, winter squash, corn and beets; this is not a complete list, but a good start.
Vegetables that do not require blanching include onions, celery, mushrooms, peppers, tomatoes, spinach, zucchini, cucumbers, garlic and also herbs.
Broccoli and cauliflower do not dehydrate well.
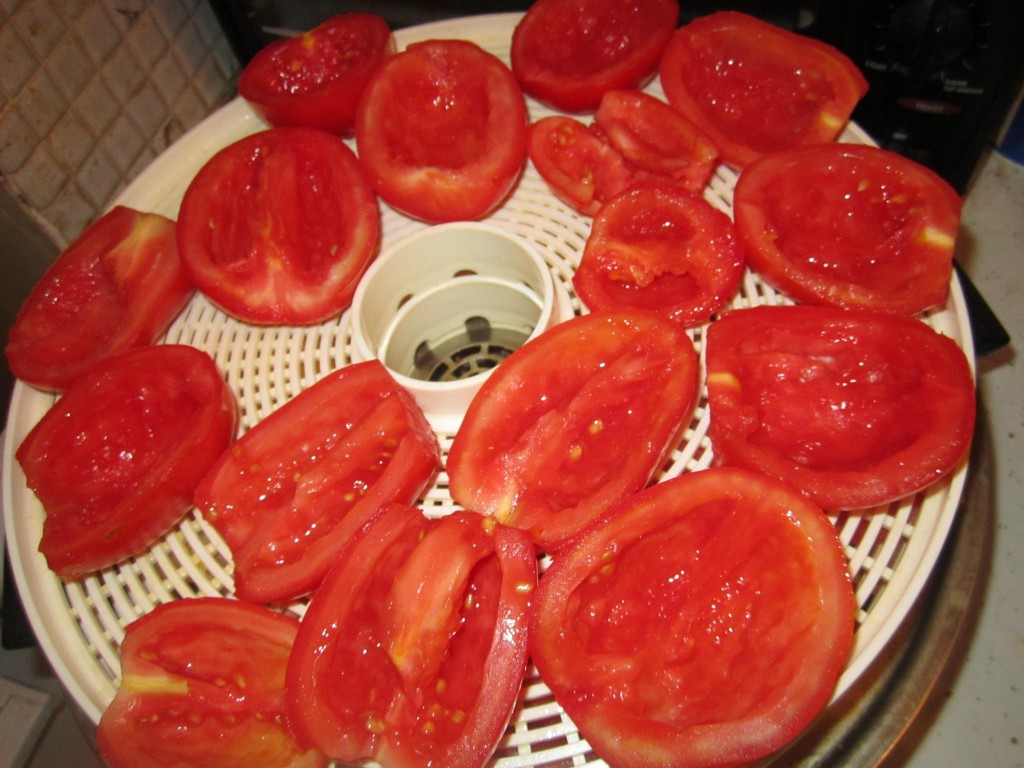
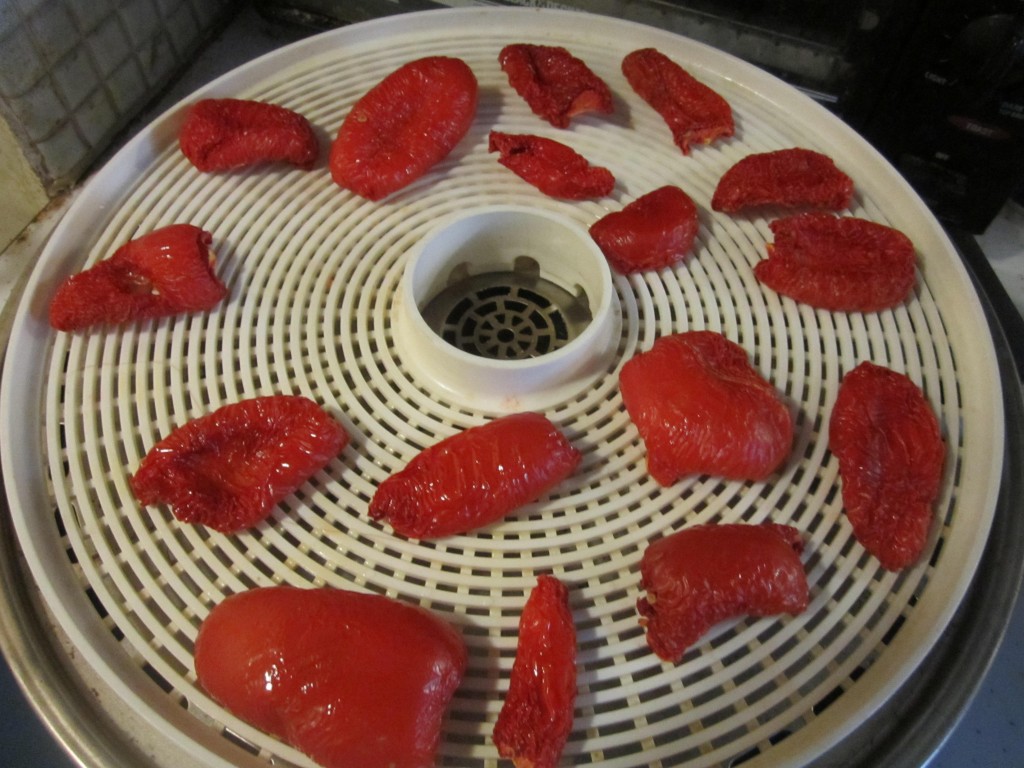
Tomatoes are probably the best vegetable to dry for the home gardener and cook. They are so easy to make and so tasty. Just cut plum tomatoes in half and scoop out the seeds. Lightly spray the trays with non-stick spray or rub with a little oil, and place the tomatoes cut side up for the first 12 hours. Turn them over after that until they are dried. I like them pretty crispy, so I dry them thoroughly. Still, just to be safe, I keep them in the freezer to keep their color and flavor longer. After a year tomatoes will darken if stored at room temperature. Larger tomatoes can also be dried. Just cut them in slices and squeeze out the seeds. Cherry tomatoes are just cut in half and squeezed to get out the seeds. With small cherry tomatoes I just make a cut large enough to get out the seeds and leave them whole.
How do you use them?
Veggie chips-zucchini and cucumber slices can be used instead of chips in dip.
Powders- Tomatoes, celery, peppers, onion, pumpkin and garlic can all be powdered and used to flavor soups, stews sauces, cheeses, dips and more. I add powdered veggies to pasta dough. Mushroom powder is one of my favorite ingredients. I use beet powder as a natural food coloring.
Reconstituted as fresh- potatoes in casseroles are wonderful. Corn, onions, celery, and carrots all re-hydrate exceptionally well.
Dips- Peppers, onion, scallions and celery all add great flavor.
To thicken sauces- Shredded zucchini, peppers, onions, mushrooms, celery and tomatoes all work well this way. If you want a lower carb or gluten free alternative to thicken a sauce, dehydrated veggies, especially in powder form, work great.
Soups and Stews- almost any dried vegetable is used this way. Easy to just let them simmer together until tender and all their flavors will enrich your stock
Chowders- Corn and potatoes are great in these dishes. Carrots and mushrooms, to.
Dried vegetables are best stored in a cool, dry place- I often freeze or refrigerate them for best shelf life. They can also be vacuum sealed to retain freshness. Just be sure that your veggies are dry enough. Moisture leaves you open to the risk of mold and spoilage. An old test is to hit a piece of dried veggie with a hammer. It should shatter. Doesn’t really work with my dried tomatoes, but that is part of the reason I store my dried tomatoes in the freezer or fridge.


Velvet Crumb Cake

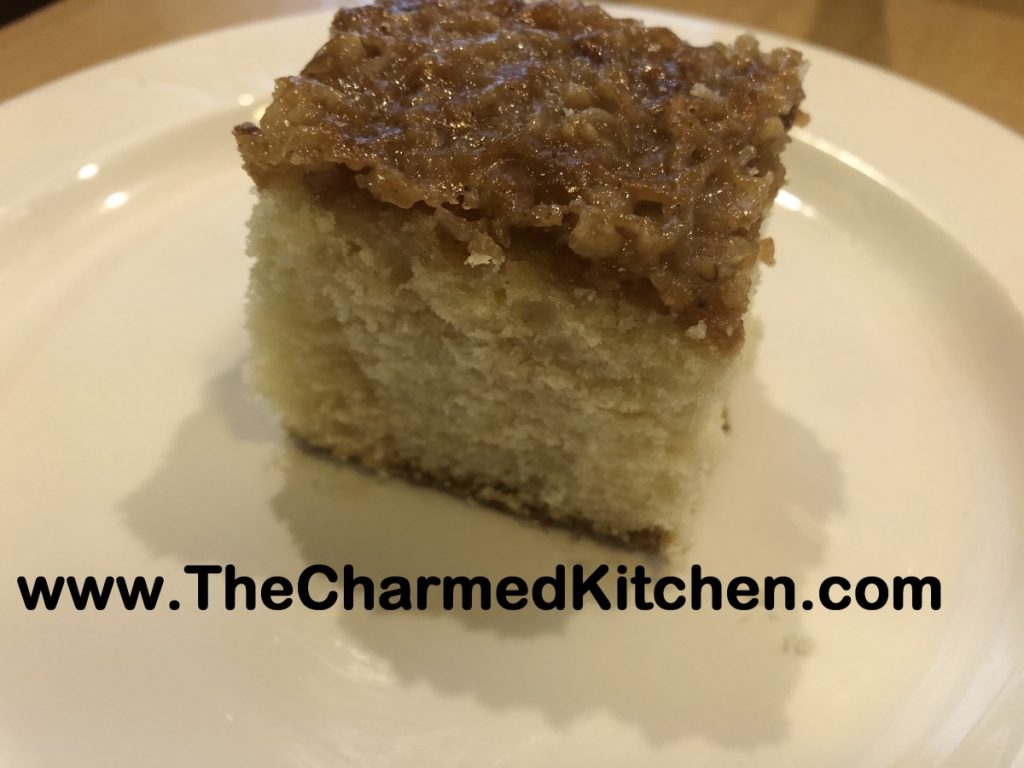
This cake has a soft, delicate texture and a crunchy, coconut-nut topping. For added fun- the cake is finished under the broiler to toast the topping. Probably not the way you finish most cakes!
When I was a child, my Mom made this cake pretty often. I am not sure I ever remember having it as an adult. It was probably the only way I would eat anything coconut as a kid. I had a couple of friends over for dinner last night and decided to make it for dessert. They loved it. One friend said she wasn’t a big coconut fan, but loved it on this cake. The cake is not overly sweet and could easily be served at breakfast or brunch as a coffee cake.
I found the recipe in a Bisquick cookbook. I tweaked it a little from the original. I wondered if I would like it as much as I did when I was a child. I was not disappointed. It was every bit as good as I remember.
Here is the recipe.
Velvet Crumb Cake
Cake:
1½ c. baking mix- like Bisquick or Jiffy Mix
½ c. sugar
½ c. milk or half and half
2 T. butter, softened
1 t. vanilla
1 egg
Topping:
½ c. flaked coconut
1/3 c. brown sugar
¼ c. finely chopped nuts
3 T. butter, softened
2 T. milk or half and half
1 t. cinnamon
Preheat oven to 350 degrees. Grease an 8×8-inch baking pan or 9-inch cake pan. Set aside. In medium bowl, combine all of the cake ingredients. Combine with electric mixer for 30 seconds on low to mix. Then bring speed up to medium and continue beating batter for 4 minutes. Pour batter into prepared pan and bake 30-35 minutes or until wooden pick comes out clean when inserted into cake. While cake is baking, combine topping ingredients in small bowl, mixing until well mixed. Let cake cool a few minutes before spreading topping over the cake. Place cake under the broiler- about 4 inches away, until topping gets golden brown. This only takes 3-4 minutes. Watch carefully. Remove from broiler and cool cake before slicing.
Peanut Butter Cupcakes

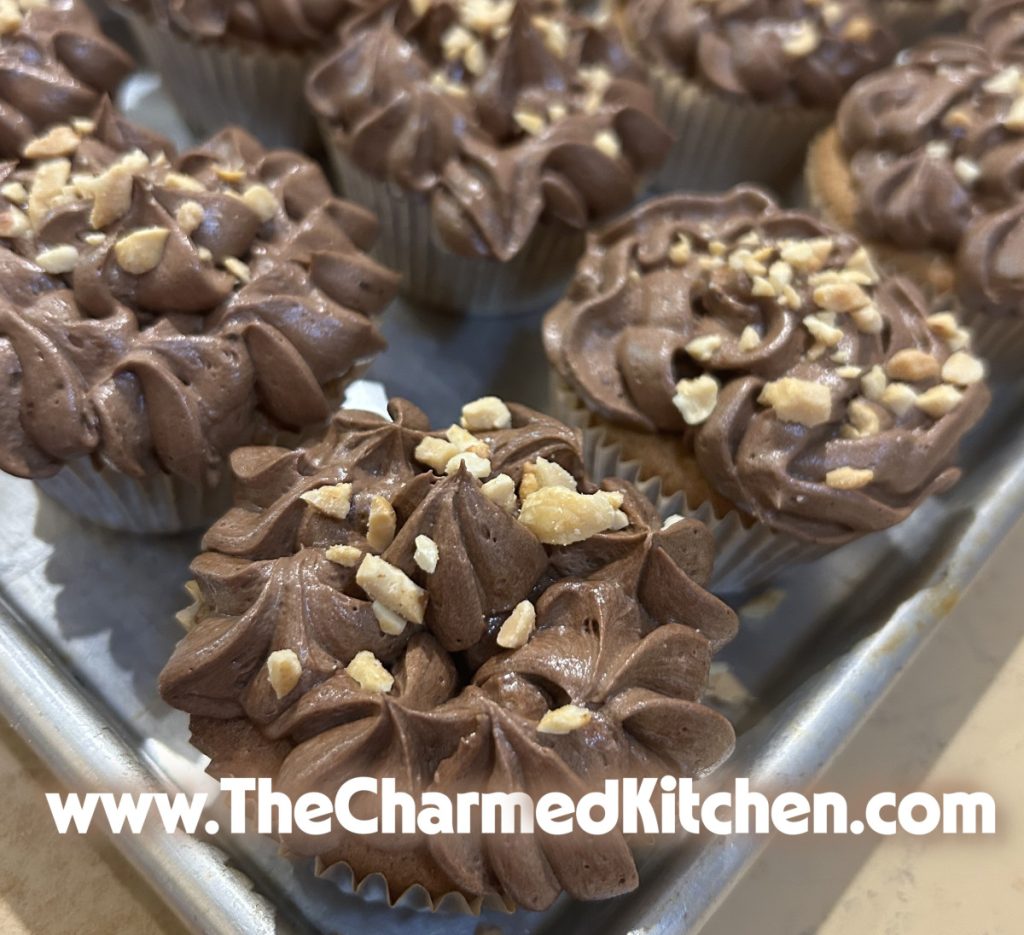
These cupcakes are tasty and easy to make. I topped them with chocolate frosting this time, but I have also used a vanilla buttercream and a peanut butter frosting. We made them in class recently. Everyone liked them. If you want to go for a peanut butter and jelly vibe, you can use a piping bag to add jelly or jam to baked cupcakes before frosting. You can also cut some of the cupcake out and spoon in jelly.
Below is the recipe and some frosting recipes you might want to use. Enjoy.
Peanut Butter Cupcakes
1½ c. brown sugar
½ c. butter, softened
1 c. peanut butter
2 eggs
1 1/2 cups milk
1 teaspoon vanilla extract
2 1/2 cups all-purpose flour
1 teaspoon baking soda
2 teaspoons cream of tartar
1 pinch salt
Preheat the oven to 350 degrees. Line cupcake pans with paper liners, or grease and flour cups. In a large bowl, mix together the brown sugar, butter and peanut butter until light and fluffy. Beat in the eggs one at a time, then stir in the vanilla. Combine the flour, cream of tartar, baking soda and salt; stir into the batter alternately with the milk. Spoon into the prepared muffin cups, filling half full. Bake for 15 to 20 minutes in the preheated oven, until the top of the cupcakes spring back when lightly pressed. Cool in the pan for at least 10 minutes before removing to a wire rack to cool completely. Makes 30-36.
I like to frost, then top with fine chopped peanuts. When using chocolate frosting, I sometimes also top with mini chocolate chips.
Easy Chocolate Butter Cream
6 T. butter, softened
1/3 – 3/4 c. cocoa, depending on how dark you want your frosting.
2 2/3 c. powdered sugar
1/3 c. milk
1 t. vanilla
Cream butter. Combine cocoa and sugar. Beat cocoa mixture in alternately with the milk until frosting is spreading consistency. Beat in vanilla. You may need an additional tablespoon of milk. Makes about 2 cups.
Super Fluffy Frosting
1 cup butter
1/2 cup shortening
1 1/2 tablespoons vanilla extract
2 pounds confectioners’ sugar
1/8 teaspoon salt
4 tablespoons water or milk
In a heavy duty mixer combine the shortening, butter or margarine, vanilla and water or milk. Add the sugar and salt, beat until well mixed. Add a tablespoon or two more of water or milk if needed. Turn mixer to the highest speed and beat for 15 minutes.
Fluffy Peanut Butter Frosting
1 cup creamy peanut butter
½ cup butter, softened
2 cups confectioners’ sugar
3 tablespoons milk, or as needed
Beat peanut butter and butter in a medium bowl until creamy and combined.
Gradually blend in sugar; when the mixture thickens, begin incorporating milk, 1 tablespoon at a time, until frosting is thick and spreadable. Beat on high speed until light and fluffy, at least 3 minutes. Scrape down the sides of the bowl with a spatula. Use it to frost a peanut butter cake or cupcakes, pipe it onto chocolate cupcakes, or spread it on cookies or brownies.
Easy Chocolate-Peanut Butter Frosting
12 oz. semi-sweet chocolate chips
1/2 c. peanut butter
Melt both together in microwave and stir until smooth. Spread while warm on bar cookies, brownies or cupcakes. Firms up at it cools.
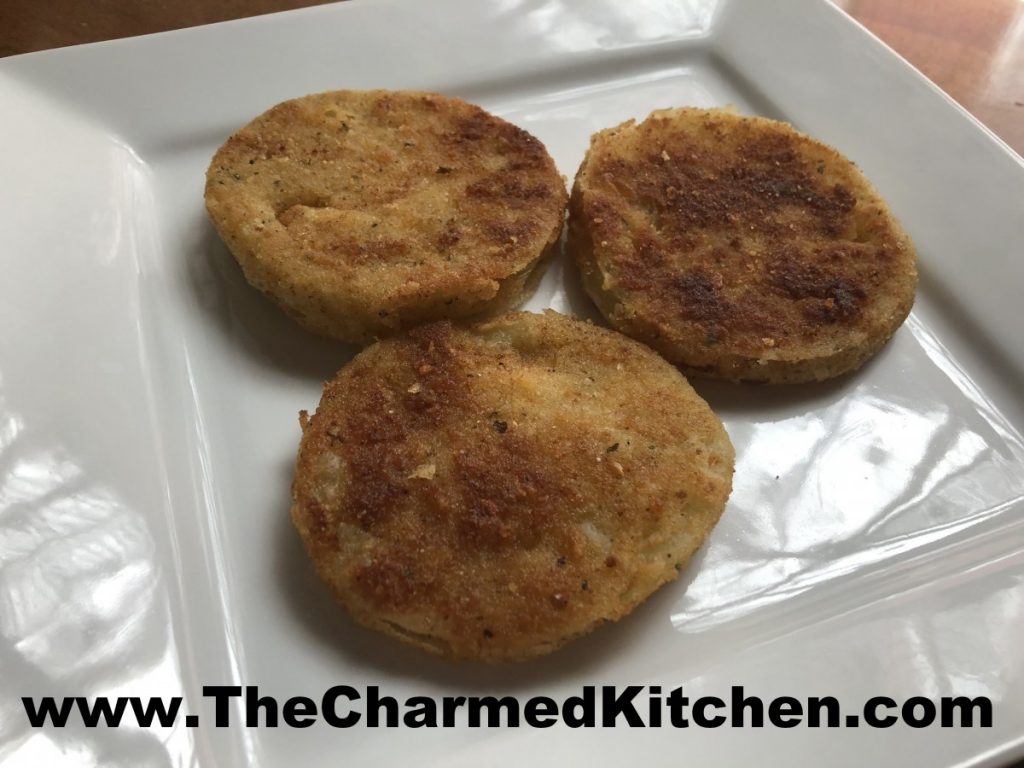
Fried Green Tomatoes

Tomato season is all about those firm, ripe, juicy tomatoes. For me, tomato season is also about fried green tomatoes.
Green tomatoes have a very different flavor than ripe tomatoes. It is like tomatoes and lemons had a baby. There is a distinct citrus-like tartness in green tomatoes. I made some recently for a friend. She really enjoyed them.
Green tomatoes are pretty firm, compared to ripe tomatoes, which makes them great for frying. They soften, but don’t fall apart when fried.
There are a number of variations on exactly how to fry your tomatoes. I do a traditional breaded method, flour, egg wash and cracker crumbs. Then I pan-fry them.
I like using cracker crumbs, but you could use bread crumbs instead. I have friends that love to use cornmeal instead.
So here is my recipe. I hope you give it a try.
Fried Green Tomatoes
1 c. flour, or 1/2 c. flour and 1/2 c. cornmeal
1 t. salt
1 t. pepper
5 green tomatoes, sliced 1/2-inch thick
1-2 c. cracker crumbs, saltines preferred
2 eggs, beaten
butter or oil for pan frying
Place flour and seasonings in small bowl. Place crumbs in second bowl and eggs in a third bowl. Dip tomato slices in eggs then in flour. Dip slice in egg again and then in crumbs. Fry slices in hot oil until golden and tender in the middle, turning to cook evenly. Drain and serve warm. Serves 4-6.
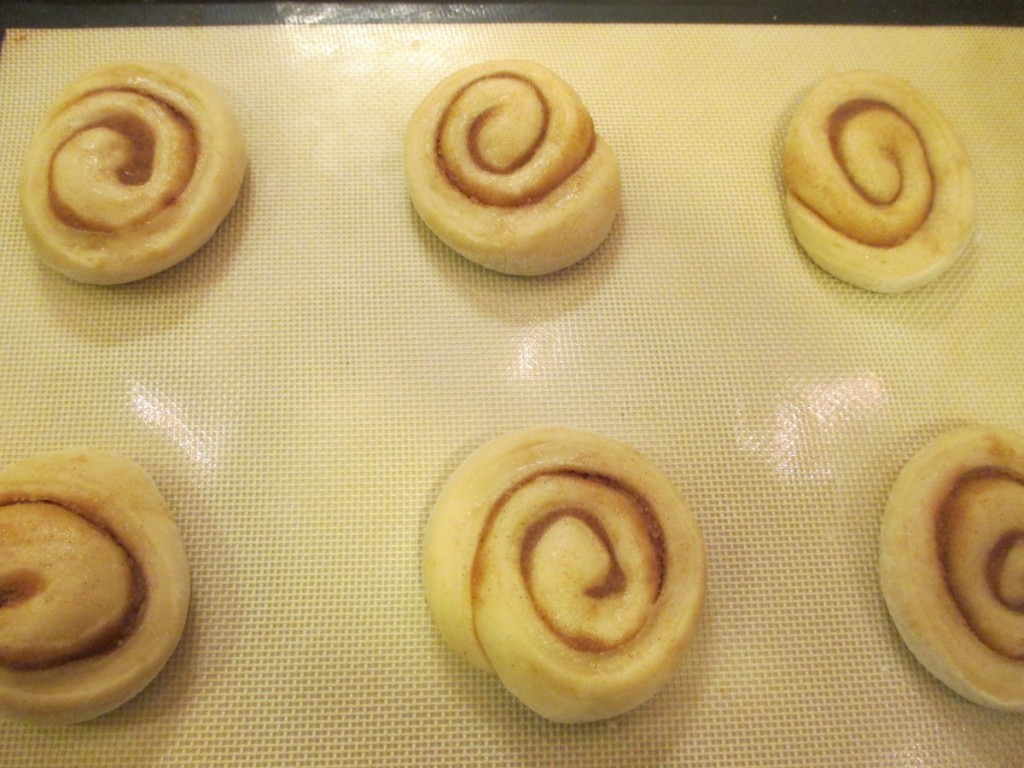
Cinnamon Pecan Crisps

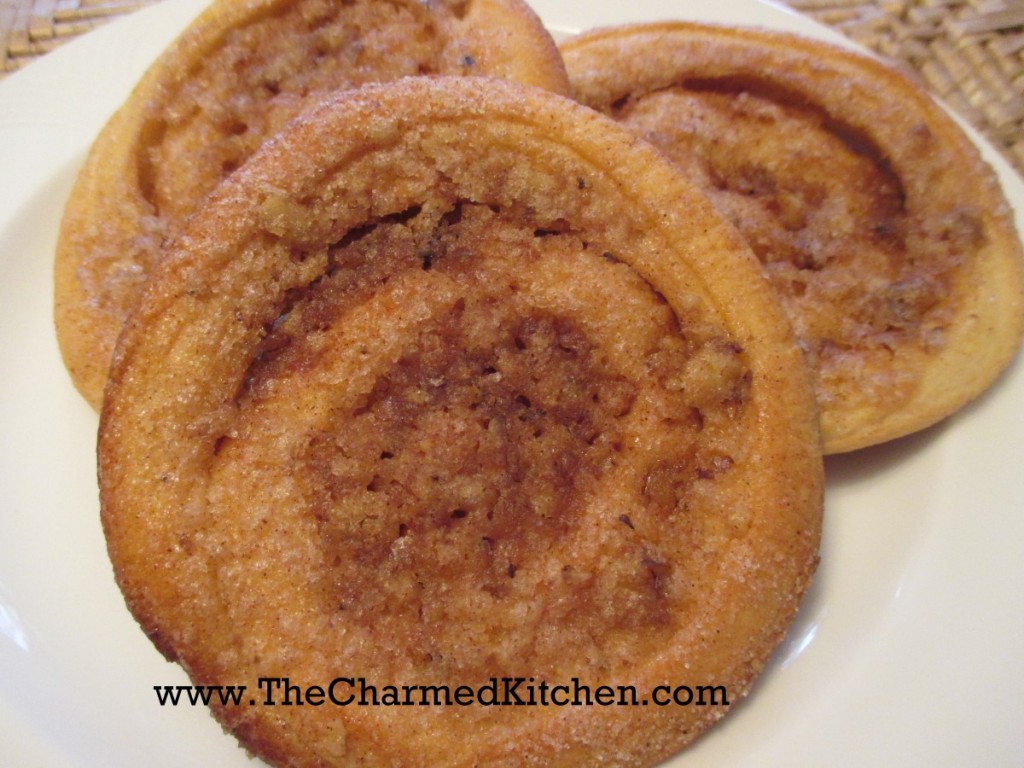
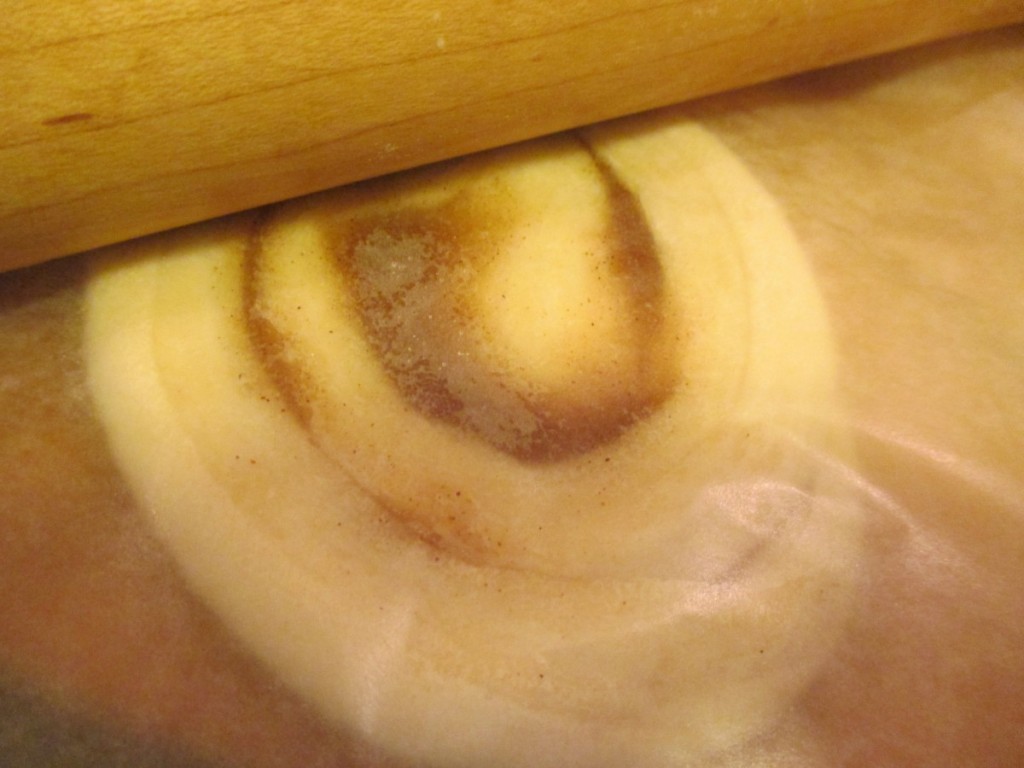
Imagine a cinnamon roll, but crispy. These pastries start out being made like a cinnamon roll, but then they are rolled flat, before baking, to create a crispy texture.
Reminds me of elephant ears. You know, those yummy fried treats from your local fair or carnival. If you are craving fair foods, why not make a batch of these? Unlike elephant ears you get at the fair, these are baked, not fried. They still give you the yummy cinnamon flavor and crispy texture of traditional elephant ears.
I serve them as they are, but you could top them with powdered sugar, a powdered sugar glaze, or a drizzle of melted chocolate.
I love them. I think you will, too.
Cinnamon Pecan Crisps
3½ – 4 c. flour
¼ c. sugar
1 pkt. Active dry yeast
1 t. salt
1¼ c. milk
¼ c. butter
1 egg
Filling:
½ c. brown sugar
½ c. sugar
¼ c. butter, melted
1 t. cinnamon
Topping:
¼ c. butter, melted
1 c. sugar
½ c. chopped pecans
1½ t. cinnamon
In mixing bowl combine 2 cups of the flour with the sugar, yeast and salt. Heat together the milk and butter until warm. Add to the flour mixture and beat for 3 minutes. Add another cup of flour and the egg and beat another 3 minutes. Gradually add enough of the flour to make a soft dough. Knead until dough is smooth- 3-5 minutes. Place dough in lightly oiled bowl and turn dough to coat in oil. Cover and let rise until doubled, about 1½ hours. Punch dough down and allow to rest 10 minutes. Meanwhile, prepare filling by combining sugars with cinnamon and stir in the melted butter. Divide dough in half. Roll one half into a square about 12 inches big. Let’s be honest here- rolling dough into a perfect square is pretty hard. Don’t freak out if it isn’t perfect, just shoot for sort of square. Spread half of the filling over the dough and roll it up. Slice the dough into 12 pieces. Prepare 2 baking sheets for these 12 pieces of dough. You’ll need 2 more for the rest of the dough. Line the baking sheet with parchment paper or a silicon baking mat. Place 6 of the dough circles on each sheet- spacing them at least 3 inches apart. Flatten them to be about 3 inches across. I tuck the end under so they stay in a nice circle. Cover and let rise until doubled, about 30 minutes. Repeat this with the second half of the dough. You will end up with 4 baking sheets and 24 rolls in all. After the rolls have doubled preheat the oven to 400 degrees. Prepare the topping by combining the sugar, nuts and cinnamon in a bowl. Slide the parchment paper or silicone baking mat off the cookie sheet and on to your work surface. Place a piece of wax paper over the rolls and roll then out pretty flat. Remove the wax paper and brush each of them with the butter and add a sprinkling of the sugar and pecan mixture to each one. I find a slightly rounded tablespoonful is about right. Put the wax paper back on the rolls and use a rolling pin to roll them again, pressing the nut mixture into them. Remove the wax paper. Repeat with the remaining rolls. I start baking the first 12 rolls while prepping the last 2 trays. It just saves me some time. Bake for 10-12 minutes. I put 2 in at a time and switch them halfway through the baking time. They should be a pretty golden brown color- top and bottom. Cool on a wire rack. Don’t be tempted to taste one when they are hot- the sugar will burn your mouth. Besides, they get crisper as they cool. Makes 24.

Honey Ice Cream


I love this ice cream. The richness of the custard works wonderfully with the sweet flavor of the honey. I don’t use all that much honey in this recipe. It is sweet, but not overly so. You could make it sweeter if you like. I think about ice cream as a summertime treat, but honestly, I would eat ice cream in a blizzard!!!
I enjoyed my honey ice cream with a coffee waffle. It was a nice combo. The recipe for the coffee waffles is at the bottom of my post.
Thanks, Dee, for all the honey!!
So here is the recipe.
Honey Ice Cream
1 ½ c. whipping cream
1 ½ c. half and half
2/3 c. honey
6 large egg yolks
pinch of salt
Heat together cream and half-and-half to simmer . Whisk honey, yolks and salt in a medium bowl. Gradually whisk in hot cream mixture. Return to pan and heat until mixture thickens (about 170 degrees). Do not boil. Strain into large bowl. Chill until cold. Process in ice cream maker. Makes about 5½ c.
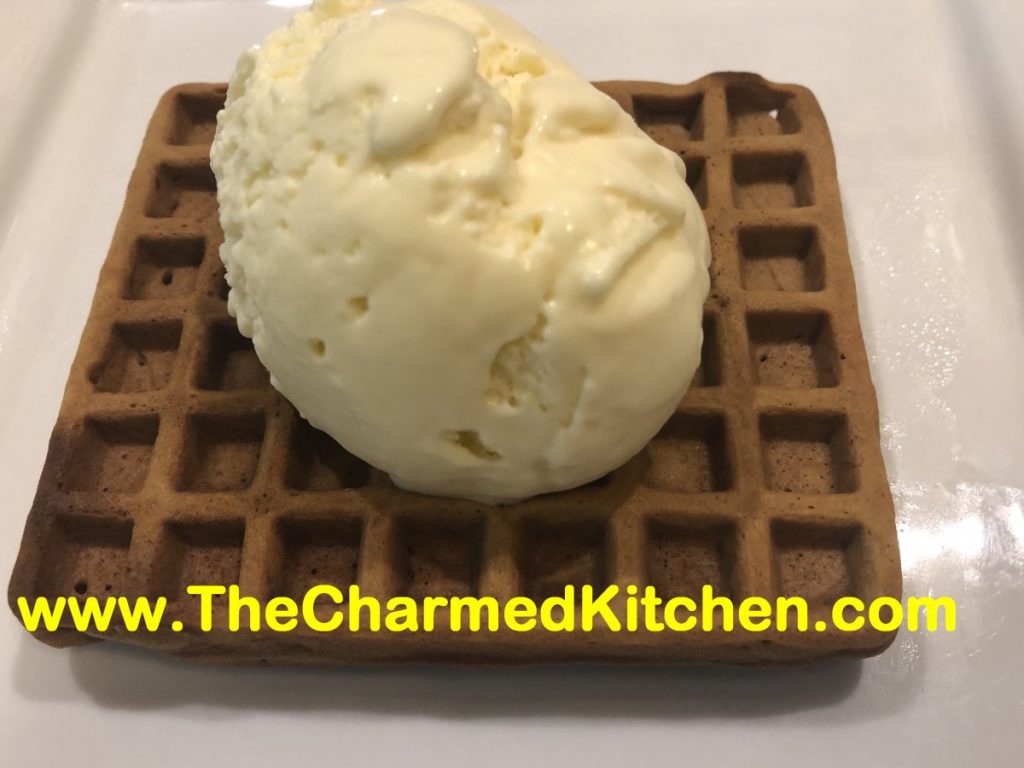
Coffee Waffles
1¾ c. flour
¼ c. brown sugar
1½ t. baking powder
½ t. salt
1½ c. half and half or milk
1 egg, beaten
1/3 c. oil
1 T. instant coffee or espresso powder
1 T. vanilla
Non-stick spray or oil for coating the waffle iron
In medium mixing bowl, mix dry ingredients together and set aside. In a separate bowl, combine the half and half with the remaining ingredients. The dry coffee granules will not dissolve right away. You can let the wet ingredients sit a few minutes and whisk again, if you like. While they are just sitting there, you can heat up the waffle iron. Coat the waffle iron with a non-stick cooking spray or brush with a little oil. Add the wet ingredients to the dry ingredients and stir until mixed together. Don’t get crazy over mixing. That will give you tough waffles, and nobody wants that. Just stir until you don’t see any dry bits in the mix. I like to use a rubber scraper to get to the bottom of the bowl. Ladle some batter into the waffle iron and cook until golden brown. When the steam stops coming out of the waffle iron, or lessens a lot, it is usually good indicator that your waffles are done. Yield depends on the size of your waffle iron. I got 10 waffles, about 4×5 inches.
Note: The instant coffee breaks down more when mixed with the dry ingredients. Espresso powder will dissolve quickly, but if you use instant coffee like I did, expect a few “flecks” of coffee in the batter. I kind of liked the way it looked.
Zucchini and Carrot Cupcakes

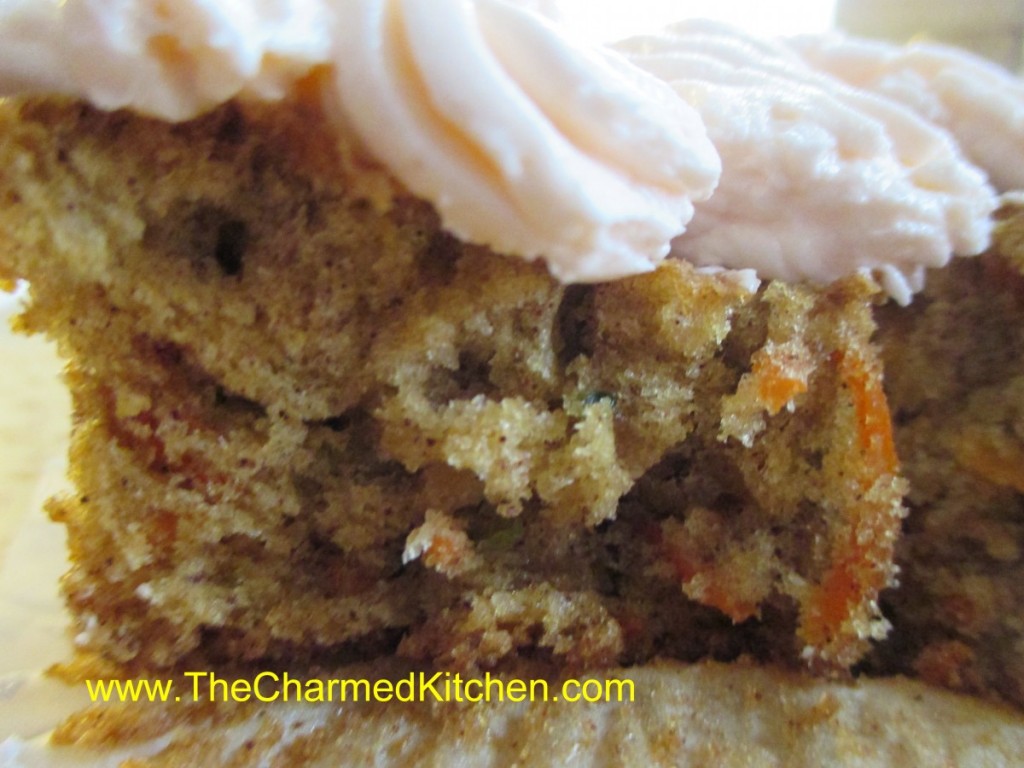
These are really good cupcakes. They are moist and not too sweet with a slightly dense texture. Sort of a cross between carrot cake and zucchini bread, they have more texture than a traditional cupcake and plenty of flavor. I had an abundance of zucchini and carrots and figured they might play well together.
I got 24 cupcakes out of the recipe but they were a little small. Perhaps 18 would be a better way to go. I used simple vanilla buttercream to finish them off. I whipped the frosting a long time so it was extra fluffy. Here are the recipes for both the cupcakes and the frosting.
Zucchini Carrot Cupcakes
2 eggs
1 c. sugar
2/3 c. oil
1¼ c. flour
1 t. baking powder
1 t. baking soda
1 t. cinnamon- I think I would use a little more next time
½ t. salt
1 c. grated carrot
1 c. grated zucchini, squeezed dry and packed tightly
½ c. chopped nuts, optional
Beat eggs with sugar until frothy. Beat in oil then add dry ingredients. Beat on high for 4 minutes. Stir in veggies and nuts. Pour batter into 18- 24 paper lined muffin tins, filling them 2/3 full. Bake in a 350-degree oven for about 15 minutes or until top springs back when lightly touched. Cool and frost. Makes 24.
Note: These cupcakes deflate a little while cooling.
Classic Vanilla Buttercream
3/4 cup butter
6 cups confectioners’ sugar
1/3 cup milk
1 1/2 teaspoons vanilla extract
1/4 teaspoon salt
2 tablespoons milk
Beat butter in a large bowl until fluffy. Don’t skip this step. The butter needs to be fluffy. Gradually add 3 cups of the sifted confectioners’ sugar, beating well. Slowly beat in the vanilla, salt, and 1/3 cup of the milk. Gradually beat in the 3 remaining cups of confectioner’s sugar. Beat in additional milk (1 to 2 tablespoons) if needed, to make frosting of spreading consistency. You can also tint the frosting with juice (like pomegranate or raspberry) or food coloring, if you like.
Mom’s Macaroni Salad

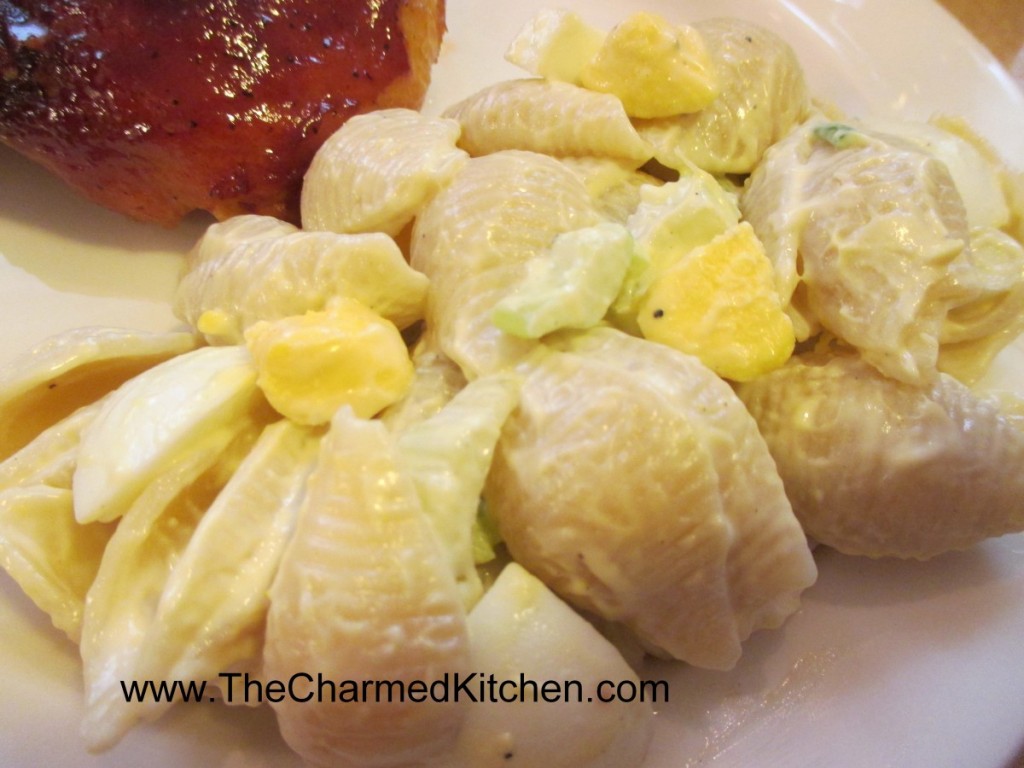
I’ve been in a nostalgic mood this week. Remembering, fondly, the picnics and cookouts from my childhood. For summer cookouts, we always had this salad. Long enough ago that it was called macaroni salad, not pasta salad. I loved it then, and I love it now.
I won’t say I don’t make other pasta salads. I do. I make all sorts of combinations, but this is the salad that brings me home.
Mom used mostly mayo, with a little salad dressing like Spin Blend. She felt it gave the salad just a little more zing. I use straight mayo, but that part of the recipe is flexible.
She added quite a few hard cooked eggs and I think they add a richness to the dish. My dad would cut up the celery and green onions for her. Mom liked the veggies cut into a fairly small dice in this dish, and Dad had great knife skills. I love the image of them cooking together.
So here it is- a family recipe wrapped up nicely with some memories, too.
Mom’s Macaroni Salad
1 lb. uncooked pasta, shells are preferred
Salt and pepper
Mayonnaise, about 1 1/2 cups
3-4 ribs celery, sliced thin
4-5 green onions, trimmed and sliced thin
8-12 hard-cooked eggs, cooled and peeled
Cook pasta according to package directions, but do not overcook. Rinse with cold water and drain well. Place drained pasta in a large bowl and sprinkle with salt and pepper to taste. Add mayo and vegetables and stir until well mixed. You may want to add more dressing to suit your taste. Chop eggs and stir into salad. Adjust seasonings if needed and chill before serving. Serves 8-10.


