Classic Eggs Benedict


If you are looking for a special breakfast or brunch recipe, Eggs Benedict would be a top choice for me.
Eggs Benedict are English muffins, split and toasted, topped with some lightly browned slices of ham, or more traditionally, Canadian bacon. That is topped with poached eggs and then the Hollandaise sauce. There are a lot of variations. You can add wilted spinach, bacon, crab or even lobster, if you really want to splurge. I have a vegetarian friend who subs out the meat with some asparagus or cauliflower. Whatever makes you happy, works for me.
I do make a less traditional Hollandaise sauce though. Its cooked in the microwave. Yes, I admitted to making Hollandaise in the microwave and I’m okay with it. Its fast and I haven’t had any issues with it. I have a friend who makes hers in the blender and that works, too. I’ve included the recipes for both versions.
Here are the directions for making a classic Eggs Benedict.
Eggs Benedict
English Muffins allow one per serving
Eggs – for poaching – you’ll need 2 for each serving
Ham or Canadian bacon
Hollandaise Sauce- recipes follow
Get all your ingredients ready. You’ll need a skillet with water boiling in it to poach the eggs. Add a couple of teaspoons of vinegar- it helps hold the eggs together better. Slice the ham, if needed, and brown it in a skillet. Keep warm until needed. I put the split English muffins in the toaster oven, so I could start toasting them when I started poaching the eggs. Next, make the Hollandaise sauce. I have included two ways to make your Hollandaise. One version is made in the microwave, the other with a traditional double boiler. Both come out great. For traditional Hollandaise you’ll need either a double boiler, or a pot with simmering water for this, so get it ready with hot water. For the microwave, just a glass bowl and a whisk. Recipes and directions for both versions follow.
Microwave Hollandaise
1 stick butter ( 1/2 cup)
3 egg yolks
1/2 T. lemon juice
pinch of salt
fresh ground pepper, optional
In microwave safe bowl, soften butter. This will take 10-15 seconds. Don’t melt the butter, just soften it. Watch carefully. It may take less time if the butter is already room temperature, longer if butter is cold. I often make a double batch, so allow a few more seconds for larger quantities. Whisk together the egg yolks and lemon juice. Whisk the yolk mixture into the softened butter. Let stand on the counter a minute or two. Place in microwave and cook on high heat for 15 seconds. Be careful- only 15 seconds at a time. Whisk the mixture and return to the microwave, cooking 15 seconds. Repeat this process until sauce is thickened, smooth and shiny. It should take 3-4 of these 15 second cooking sessions, but ovens vary. It takes a little longer if you double the batch. Don’t worry if the sauce doesn’t look smooth the first time you whisk all the ingredients together. It gets smoother upon further cooking/whisking. Season with salt and pepper to your own taste. Enjoy with Eggs Benedict or as a sauce for steamed veggies.
Classic Hollandaise Sauce
4 egg yolks
1 T. lemon juice
½ cup butter, melted
Salt and cayenne to taste- just a pinch of each will do.
Since I used a bowl over a pot with simmering water, I put the egg yolks in a stainless steel bowl with the lemon juice and whisked until kind of frothy. If you are using a double boiler- do that step in the pot from the double boiler. Once the mixture looked thick, I placed the bowl over the pot of simmering water and whisked it for a couple of minutes to warm the eggs. The simmering water in the pot should not be deep enough to touch the bottom of the bowl. While whisking, slowly drizzle in the melted butter. Keep whisking so the mixture stays smooth. If you don’t, the eggs scramble and get all lumpy. Once all the butter is in, cook about a minute longer- or until sauce is thick and smooth. Remove from the heat, season to taste, and keep warm until ready to use. Don’t wait too long. Hollandaise is best used pretty soon after you make it. If it gets too thick, add a little warm water to thin it out.
To poach the eggs, place eggs, gently, in the simmering water- the stuff in the skillet that you added vinegar to. Some people like to have the water swirling when they do this by stirring it just before adding the eggs. I just put the eggs in gently, and it seems to work just fine. Use a slotted spoon to sort of fold the whites up over the eggs. Poach for about 3½ minutes. Whites should be set, but yolks will be runny. Remove from the pan with a slotted spoon and place on a folded towel to get off some of the water.
To assemble the eggs Benedict, place toasted English muffins halves on a plate. Top with a slice, or two, of the ham. Then gently add a poached egg on top of the ham. Spoon over the Hollandaise and serve. A little more work than most egg dishes, but worth the effort.
Aunt Josie’s Clam Chowder


It is clambake season around here and it seemed like a great time to share this recipe. Aunt Josie’s clam chowder is a favorite of mine. I have loved it from the first time I had it. It is pretty easy to make and full of flavor. We have it at every family clambake.
You have the option of adding some stock or water at one point. I sometimes have seafood stock in the freezer, but a bottle of clam juice would work great, too.
So here is the recipe. I hope you enjoy it as much as I do.
Aunt Josie’s Clam Chowder
2 T. butter
1 onion, chopped
1 rib celery, chopped
2-3 small potatoes, cubed
1 c. water or stock
2 (10 oz.) cans clams, undrained*
1 T. butter
2 T. flour
2 c. milk – I use half and half
salt and pepper to taste
Sauté onions and celery in butter until tender, but not browned. Add potatoes and water or stock and cook, covered until potatoes are tender. Stir in clams and set aside. In another saucepan, combine butter and flour over low heat and stir in milk, stirring to make a white sauce. Cook mixture until it thickens and starts to bubble. Add it to the clam mixture and adjust seasonings. Bring to a gentle simmer. I added some parsley right before serving. Serves 4.
* You can also add clam meat and a little extra stock. I often buy frozen clam meat.
This post is dedicated, with love, to Aunt Josie.
Cottage Cheese Spinach Dip


I don’t think you can ever have too many dip recipes. This recipe is definitely a keeper. It bakes up quickly and tastes great. It was a big hit in the cottage cheese class the other night.
Cottage cheese can be a hard sell. I get that. There are plenty of folks who just don’t like it. The appearance is certainly part of the reason. I like cottage cheese, but I understand why others don’t. Because the cottage cheese is pureed there is really no way to tell what is in the dip. It is just a nice creamy base for the spinach, spices and cheese.
You could easily add some artichoke hearts to this recipe, if you like. While it is traditionally served with crackers or bread, you can serve it with vegetables. You can also serve it over baked potatoes for a simple meal. We added diced sweet pepper for color and texture, but other add-ins could include water chestnuts, green onions, sweet onions or of course, artichokes.
Here is the recipe. I hope you will try it.
Spinach Cottage Cheese Dip
1 c. frozen chopped spinach
1 c. cottage cheese
1 tablespoon olive oil
½ teaspoon garlic powder
¼ teaspoon onion powder
salt and black pepper to taste
¼ cup red bell pepper chopped, optional
2 tablespoon cheese of choice, shredded
⅛ teaspoon red pepper flakes, optional for spice
Preheat your oven to 400°F. Defrost your spinach. You can place your frozen spinach package in a bowl of warm water or microwave for about 2-3 minutes. Once your spinach is defrosted, use a cheese cloth, paper towel or a small strainer to squeeze out any excess water. Add your cottage cheese, olive oil and spices to a food processor or high-powered blender and blend until smooth. Pour your blended cottage cheese mixture into a greased oven safe dish, add your spinach and chopped red bell pepper and mix until evenly distributed. Top with shredded cheese. Bake for 15-20 minutes or until to cheese begins to brown. Serve with pita, chips, crackers or veggies.
Note: This recipe could also be baked in an air fryer at 400 degrees for 5 minutes.
This dip is best eaten immediately however it will store in an airtight container for up to two days. Just reheat in the microwave.
Cottage Cheese “Bagels”


Versions of this recipe have been floating around for some time. I decided to make them and was pleasantly surprised. They were easy to make and ready in no time at all. They are not like traditional bagels. These aren’t made with a yeast dough and they are not boiled. The chewy texture of a classic bagel is not there, but there is a bit of a chew and they still taste good. The addition of cottage cheese spikes up their protein content. I thought of maybe calling them something else, but for now, bagels it is.
The original recipe I saw called for 2 ingredients- self-rising flour and cottage cheese. Since most people I know don’t keep self-rising flour around I made the recipe adding baking powder and salt to allow for using regular all purpose flour.
We made these in the cooking with cottage cheese class the other night and the everyone really liked them. In class we topped them with everything bagel seasoning. You can leave them plain or perhaps top with sesame seeds, poppy seeds or caraway. They toast nicely, too.
My next plan to make these with different flours. Spelt and whole wheat flour for sure. Maybe add more ingredients to the dough, too. Other flavorings that I like in more traditional bagels.
So here is the recipe. If you make these, I’d love to know what you think. More recipes from the cottage cheese class will be posted soon.
Cottage Cheese Bagels
1 cup all-purpose flour, plus more for dusting
2 teaspoons baking powder
1 teaspoon salt
1 cup cottage cheese
1 egg, beaten
optional, sesame seeds, everything bagel seasoning or poppy seeds
Preheat the oven to 375 and position the rack to the top position. Line a large baking sheet with parchment paper or silicone liner. In medium bowl combine flour with baking powder and salt and stir to blend. Set aside. Place the cottage cheese in the food processor or blender and pulse or blend on high until smooth, stopping to scrape down the sides as needed. Add the cottage cheese to the flour mixture. Mix until completely combined and the dough starts to pull away from the sides of the bowl. Transfer the dough to a generously floured work surface and knead the dough 8-10 times, until smooth. Add more flour to the work surface as needed until the dough is no longer sticky. Roll the dough into a ball and divide it into 4 equal balls. If you want them to be the exact same size you can weigh out each piece of dough to approximately 80g or just under 3 ounces. Roll each ball out into a 6-7-inch rope, about 1-inch thick. Join the ends to make a circle and pinch the seam tightly to seal. Brush the tops with a beaten egg and top with your seasoning of choice. Bake in the preheated oven until puffed and golden brown, 25-30 minutes. Allow to cool for 15 minutes before slicing and serving. Bagels stay fresh in an airtight container at room temp for up to 4 days. Makes 4.
Air Fry Directions Preheat the air fryer to 350 for 5 minutes. Spray the air fryer basket with nonstick spray and air fry for 12-14 minutes, until golden brown and no longer doughy in the center.
Note: You can use 1 cup of self- rising flour in place of the flour, baking powder and salt.

Frozen Lemon Cheesecake

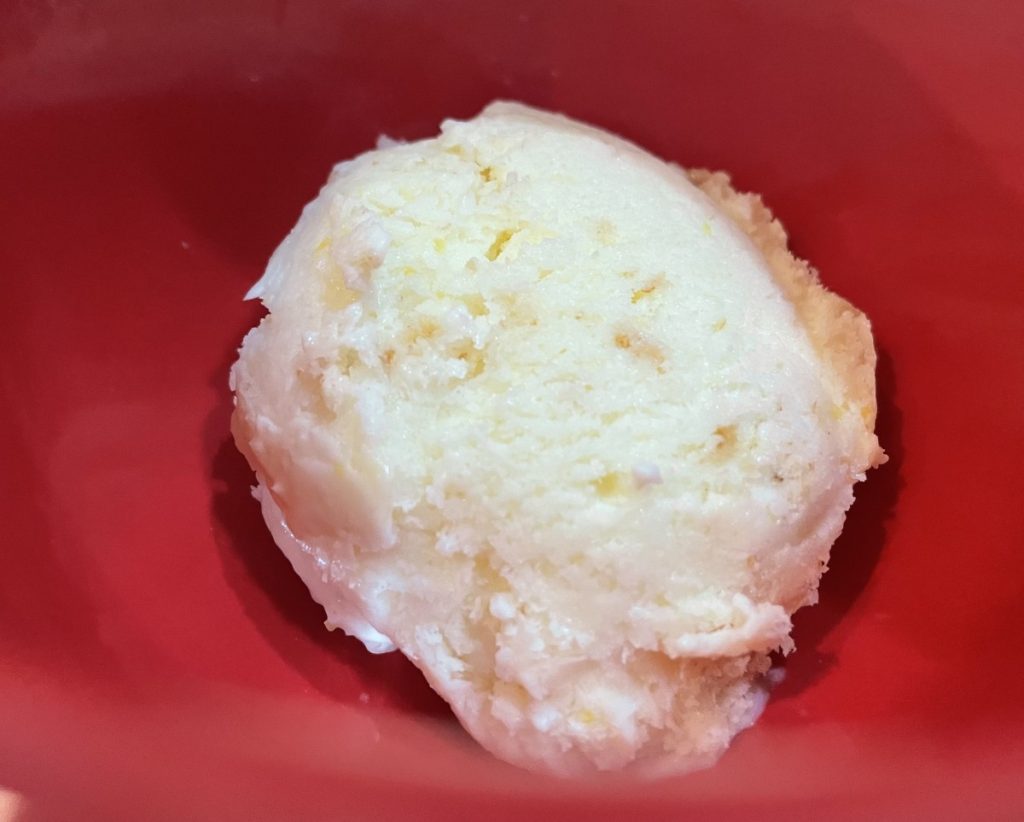
This is a great dessert for any time. It is refreshing and very easy to make. No special equipment, other than a blender or food processor. No ice cream maker required. The result is sweet and creamy with just enough lemony tang. We enjoyed it in class the other night. The surprise ingredient is cottage cheese.
I couldn’t really call it ice cream, so I called it a frozen cheesecake. It kind of reminded me of cheesecake. It is a combination of cottage cheese and lemon curd, with a few other ingredients. Crumbled graham crackers are stirred in before freezing. You can make it without the graham crackers, if you like. I used homemade, egg free lemon curd, but you could use a jar of store bought. The recipe for the lemon curd is below the cheesecake recipe.
So here is the recipe.
Frozen Lemon Cheesecake
1 (28 oz.) carton of cottage cheese
Sugar to taste, I used about ½ cup
1 recipe lemon curd- recipe follows, or 2 cups store bought lemon curd
2-4 T. lemon juice
1 T. vanilla extract
6-9 graham crackers, crumbled, optional
Combine first 5 ingredients in a food processor or blender until very smooth. Taste to see if you want to add more sugar or lemon juice. Pour into a 2 quart bowl and stir in the crushed crackers. Place mixture in a freezer safe container that has a lid. Affix the lid and freeze. Makes 5-6 cups.
Egg Free Lemon Curd
½ c. sugar
1½ T. cornstarch
½ c. milk, or non-dairy ”milk”
1/3 c. lemon juice, or the juice from 2 lemons
Zest from 2 lemons, about 1½ tablespoons
¼ c. oil
¼ t. turmeric, for color, optional
Place sugar and cornstarch in a small saucepan and whisk together. Stir in remaining ingredients, then place over medium heat and cook, stirring continually, until mixture thickens and gets bubbly. Cook another minute or so, then remove from heat and cool down before serving. Makes about 1¼ cups. Serve with cakes, scones or cookies. Store in fridge.
Pork with Plum Chutney

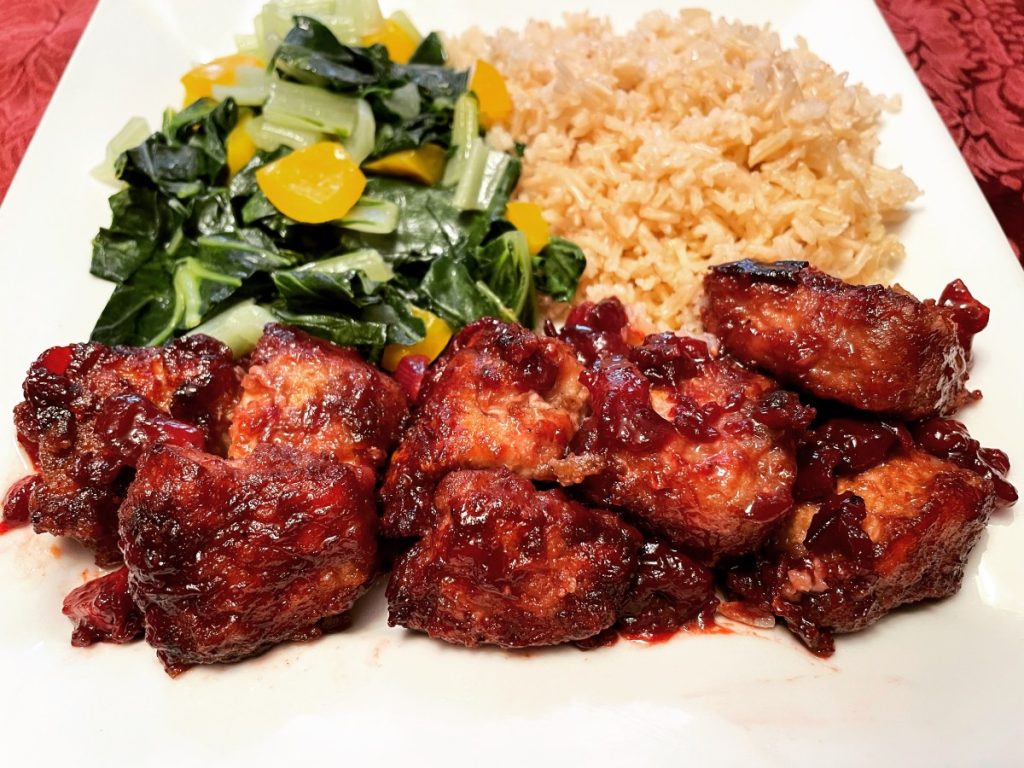
I had very ripe plums and wanted to use them in a savory dish rather than a dessert. I had made a pear chutney before, so that gave me the idea of using the plums in a chutney. I had some pork loin defrosted and I thought they would work well together. I was not disappointed.
I started by pitting and chopping up the plums. They were very ripe. I say in the recipe it was 2 cups, but let’s say a generous 2 cups. You can be off a little bit here. A few more plums aren’t going the hurt anything. I threw everything in a pot and let it cook until the mixture thickened. After it was finished I added a little honey because it seemed too tart. Trust your taste here for how much sweetening it needs.
Here is the recipe for the chutney and for the pork.
Plum Chutney
2 c. pitted chopped plums
1 small onion, minced
4 cloves garlic, sliced thin
¼ c. balsamic vinegar
¼ c. brown sugar
2 T. honey
1 t. cinnamon
Salt, pepper and cayenne to taste
Combine all ingredients, except the seasonings in a medium saucepan and s= cook over medium heat until thickened. This took about 20 minutes, maybe a bit longer. As the mixture gets thicker, stir more often to prevent sticking. I added the honey later as the chutney seemed too tart when it was finished. That is partly based on how sweet the fruit is and your personal taste. Makes about 2 cups. Will keep in fridge for weeks. Great on pork, duck and chicken or served with cheese and crackers as an appetizer.
Pork with Plum Chutney
1 lb. boneless pork, cubed
2 T. cornstarch
2 T. sherry, not cooking sherry
1 T. soy sauce
Oil
Additional cornstarch for dredging
Salt and pepper
About ¾ c. plum chutney
Place cubed pork in a small bowl and combine with the cornstarch, sherry and oil. Chill several hours, if possible. Heat oil in skillet. Dredge the pork in cornstarch and sauté until cooked through. Season with salt and pepper and spoon any excess oil out of the pan. Add the chutney and simmer until heated through. Serves 3-4.

Homemade Raspberry Jam

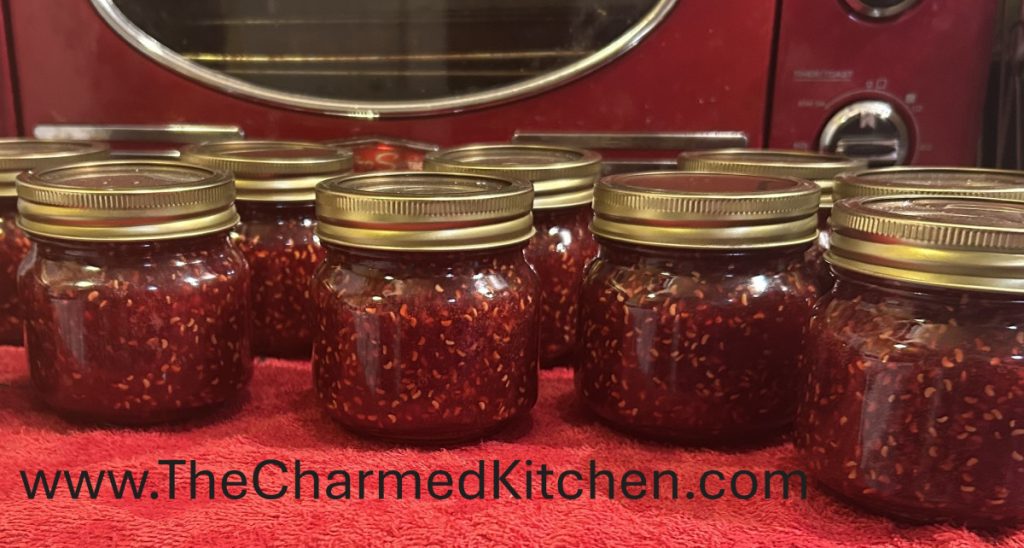
When I got a good deal on raspberries recently I decided to turn some of them in to jam. That way I can enjoy the taste of summer any time I want. I love the flavor and bright red color.
The recipe is simple. I opted to use pectin this time. You don’t have to use pectin, but these berries were very ripe, so I used pectin for extra insurance that the jam would set up. It also reduces the cooking time, so the color stays a bit brighter. I used fresh berries, but frozen berries could also be used. Just thaw them before crushing.
Raspberry Jam
10 cups raspberries – or enough to produce 5 cups crushed berries
¼ c. lemon juice
1 package powdered pectin- or 6 Tablespoons dry pectin
7 cups sugar
Fill water bath canner with enough water to cover jars by at least an inch. Start heating up the water. Wash 8-9 jelly jars and set aside. Prep the lids and set aside. Rinse and crush berries. Crush enough berries to yield 5 cups. Place berries in a large pot and add the lemon juice and pectin. Bring to a rapid boil over medium high heat. Stir to keep the mixture from sticking or burning. Once the mixture comes to a full rolling boil, boil 1 minute longer. Add the sugar and continue stirring until mixture reaches a full, rolling boil. Boil 1 minute, then remove from the heat. Skim off any foam. Sometimes with raspberries, there is a lot of foam. Don’t’ worry, just try to get it all out. I use a metal slotted spoon. Ladle hot jam into jars, leaving ½-¼ inch headspace. Wipe rims of the jars with a clean damp cloth or paper towel. Screw on lids until fingertip tight. Place jars in the water bath canner and start timing when water returns to the boil. Process 10 minutes. Turn off heat and let jars stay in the canner for 5 minutes before removing the jars from the canner. Place jars on a cooling rack of towel on the counter, away from drafts. Once jam has cooled down, check that they have all sealed. Yield 8-9 jars. Note: Sometimes with raspberries there is so much foam to remove. In my most recent batch there was over a cup of foam. I saved it and put it in the fridge. I used it on toast and it tasted great. You can reduce the amount of foam by adding ½ teaspoon of butter when you start cooking the berries. I didn’t use it in case I wanted to share the jam with anyone who doesn’t consume dairy.
Milk and Honey Rolls


These roils are rich, soft and a little sweet. They can be served with any meal or can be split and used to make a sandwich. These are a favorite with family and friends. The honey glaze makes them so shiny. The recipe makes 18 large rolls. Feel free to makes them smaller, if you like. Just bake them a few less minutes. The dough is sweetened with honey and contains evaporated milk which produces a soft, tender roll.
The dough also requires no kneading!!! The dough is made, then chilled for a couple of hours, or even for a day or two. I like to make the dough a day ahead, and then shape and bake them the next day. Because the dough is chilled it requires less flour. It really is more of a thick batter. The chilling firms it up so it can be handled easily. You don’t even have to use a mixer, if you don’t mind mixing the batter by hand.
If you want to freeze some, don’t brush with the honey glaze. You can always brush them with glaze after you defrost them.
So here is the recipe. I hope you will give it a try.
Milk and Honey Rolls
4-5 c. flour
2 packages yeast
1 t. salt
2/3 c. evaporated milk
½ c. each water, honey and butter
2 eggs
Honey glaze
1/2 c. honey and 1/4 c. butter, heated together until warm.
In bowl combine 1 c. flour, yeast and salt. Heat together milk, water, honey and butter until very warm and beat into the flour mixture. Beat 2 minutes on high speed. Beat in 1 cup flour and eggs. Beat 2 more minutes, until batter thickens. Stir in enough flour to make a stiff batter and chill, covered with plastic wrap for 2-48 hours.
Place dough on lightly floured surface and divide into 18 equal pieces. Roll each into a 12- inch rope. Shape each rope of dough into a coil and place on greased cookie sheet or use a silicone baking sheet. Let rise, covered until doubled, about 1 hour, or longer. Bake in a 375-degree oven for 15-18 minutes. Rolls should be golden brown. Remove to cooling rack and brush with honey glaze. Brush with additional glaze before serving, if desired. Makes 18 rolls.
Note: You don’t need to use a mixer if you prefer to mix by hand. Just beat in the ingredients by hand until a stiff batter forms.
Spiced Blackberry Muffins

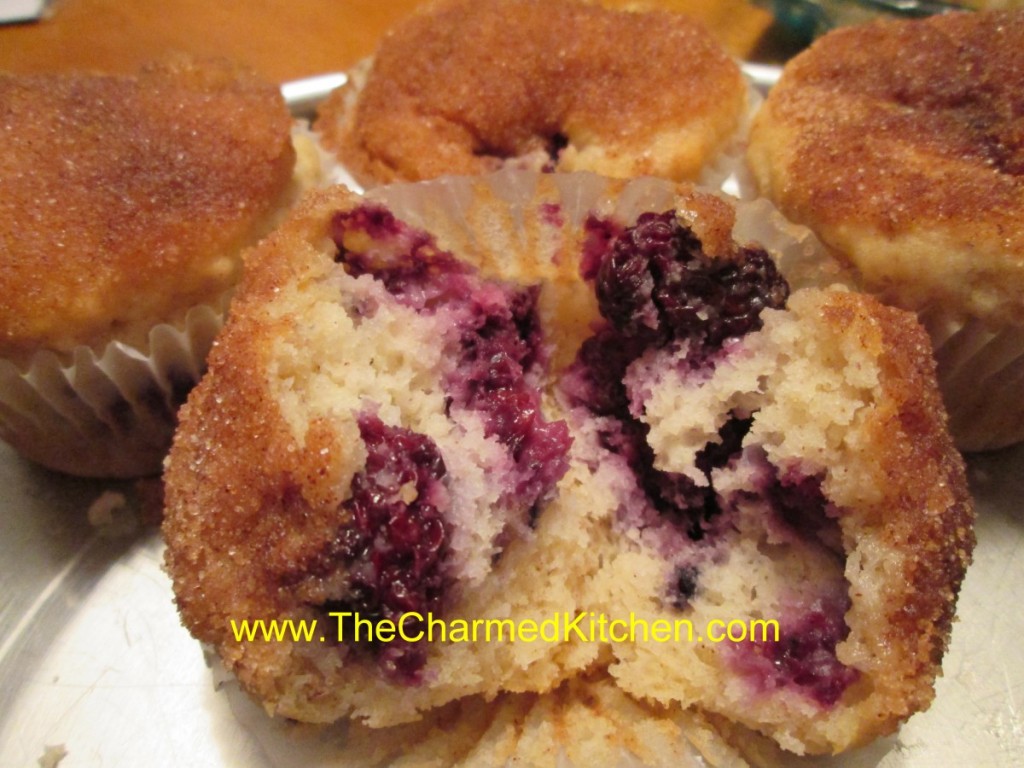
Sometimes, little things can just improve your day. For me, it was starting the day with a mug of tea and a warm blackberry muffin. I had some beautiful fresh blackberries, and decided to make muffins with some of them. So happy that I did.
I used a recipe I had made before, but decided to add cinnamon and nutmeg to the batter. I also dipped the tops of the warm muffins in melted butter and a spiced sugar mixture to finish them off. So good. So very, very good.
I used fresh blackberries, but frozen would work, too. Don’t thaw frozen berries before adding them to the batter- and give the muffins a few extra minutes in the oven.
Spiced Blackberry Muffins
1 c. milk
1 egg
¼ c. oil
2 c. flour
1/3 c. sugar
1 T. Baking powder
¾ t. salt
½ t. each cinnamon and nutmeg
1 c. blackberries, I used fresh but frozen would work, too.
Topping:
1/2 c. sugar
1 t. each cinnamon and nutmeg
4 T. butter, melted
Beat together milk, egg and oil. Combine dry ingredients and add to milk mixture, stirring to just moisten flour. Fold in blackberries. Fill 12 paper lined muffin cups to 3/4 full. Bake in preheated 400-degree oven for 20 minutes or until golden brown. Combine sugar and spices in a small bowl. Place melted butter in another bowl. When muffins are removed from the oven carefully dip the top of a muffin in the melted butter and then in the spiced sugar. If muffins are too hot to hold wait a few minutes before dipping. Repeat with remaining muffins. Serve warm. Makes 12.
Homemade Blackberry Ice Cream

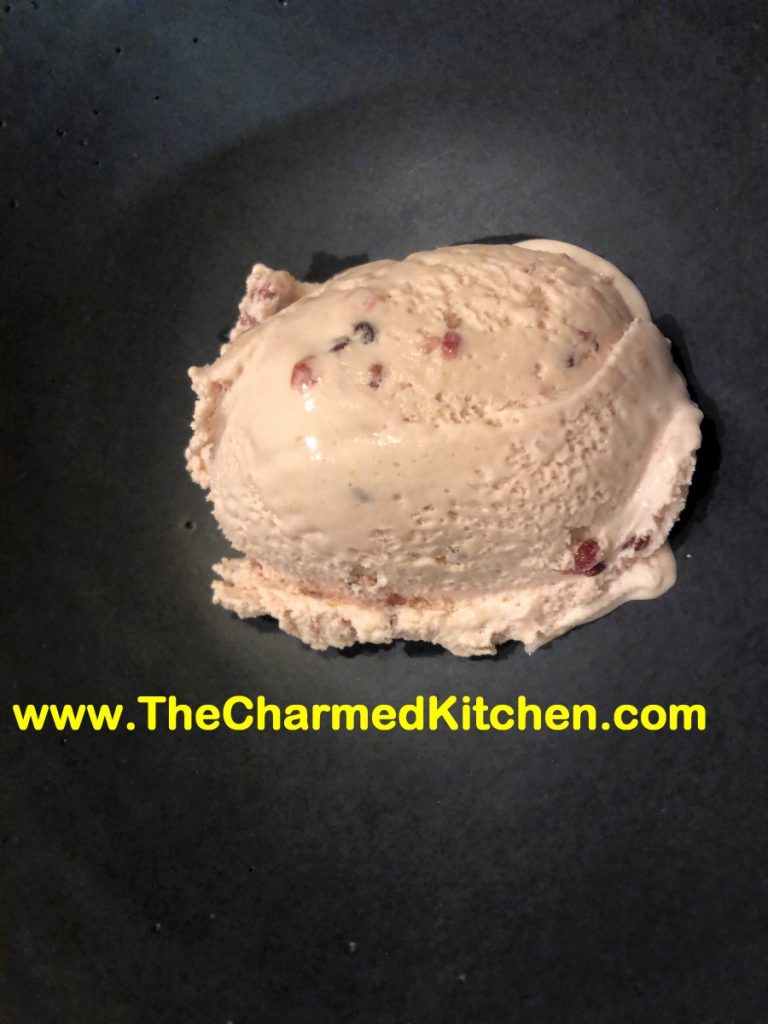
I am so happy with this ice cream. The flavor came out just right. The texture is super creamy and not too sweet. The chunks of blackberry add just the right amount of tartness. I love fruit based ice creams, but I never made blackberry ice cream before. I will be making it again, for sure.
I have had the inspiration to make a new recipe for all sorts of reasons. Sometimes creative reasons, or sometimes nostalgic feelings. This ice cream came about because of expiration dates. I had both heavy whipping cream and half and half that needed to be used up soon. I didn’t want to freeze them and I wasn’t going to waste them. Since I had a carton of blackberries in the fridge, it seemed only natural to make a blackberry ice cream. I don’t always add eggs to my ice cream, but I had a dozen eggs that needed to be used, too.
Whatever the motivation, this ice cream is one of my favorites. There is a little more work to making an egg-based custard ice cream. But the extra effort is worth it. The texture is so creamy.
With any fruit based ice cream, you don’t want to just put raw fruit in the mixture and freeze it. That will cause the fruit to get big ice crystals. Fruit can be cooked first, like I did with the berries in this recipe, or the fruit can be frozen, then thawed before being added to ice cream base.
So here is the recipe. I used an orange because I had an orange. I could see using a lemon instead, or perhaps lime. I left a little wiggle room on the amount of sugar you add to it. Before someone asks- yes- you can sweeten with honey, if you prefer. Just use a light hand. Honey is sweeter than sugar. Enjoy!!
Blackberry Ice Cream
6 oz. blackberries, washed
1 large orange
½ c. sugar
1½ c. half and half
1 c. heavy whipping cream
3 egg yolks
¾ c. sugar- or a little more or less to taste
1 t. vanilla
In medium saucepan, place the blackberries. Zest the orange and add the zest to the berries. Juice the orange and add the juice to the berries along with the ½ cup of sugar. Heat until mixture comes to a boil. Reduce heat and simmer until mixture starts to thicken, about 6-8 minutes. Stir occasionally. Don’t let it burn. Remove mixture to a bowl to cool down. You can use the same saucepan to heat the half and half and cream to a low boil. In a small bowl, beat together the egg yolks, sugar and vanilla. Add ½ cup of the hot cream mixture to the eggs, whisking in well. Add another ½ cup of the cream mixture, whisking again. Add one last ½ cup of the hot cream and again, whisk until smooth. Pour the egg mixture into the saucepan with the cream and while whisking, simmer until mixture starts to thicken and will coat the back of a spoon. This will take about 5 minutes. Don’t use too high a heat, or you will scramble your eggs. Mixture should reach 160 degrees to be sure eggs are cooked. Remove from heat, stir in reserved blackberry mixture. Pour mixture into a bowl. Allow ice cream base to cool down, then chill in fridge. Chilled mixture can be frozen in an ice cream maker once cold- in a few hours- or even the next day. Once mixture has been frozen in ice cream maker, place in a container and freeze until ready to serve. Makes about 5-6 cups of ice cream.


