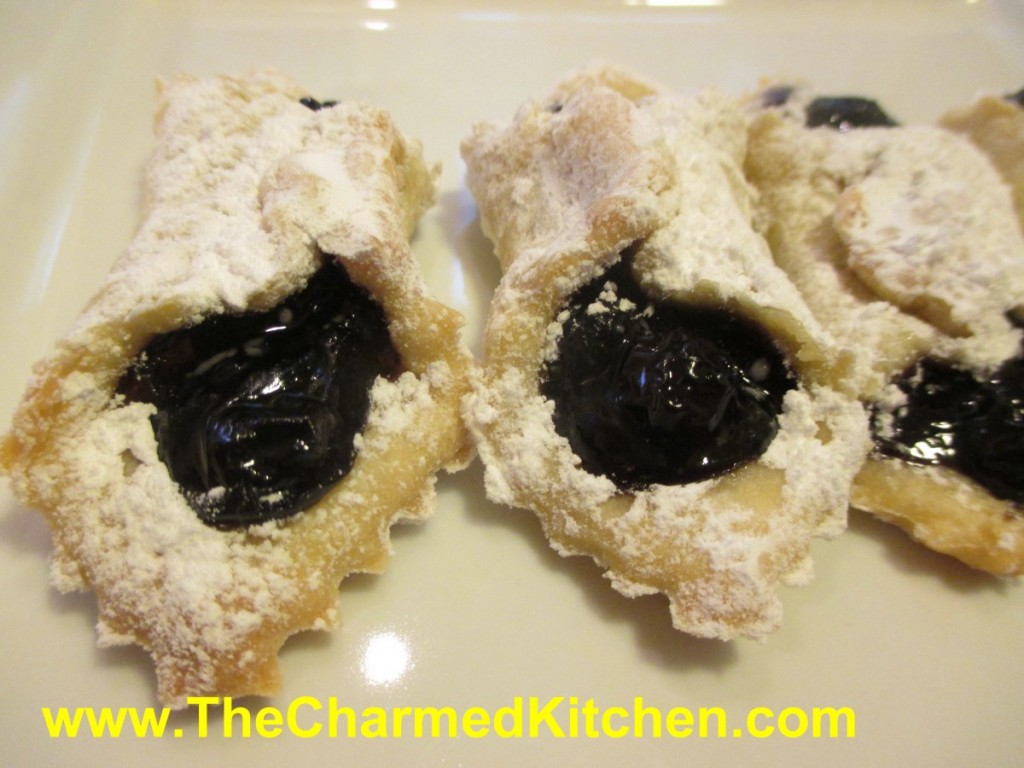
Blueberry Pie Filling
I recently came across a wonderful price on blueberries. Being the thrifty person that I am, I stocked up. I put some in the freezer and placed some in vodka for liqueur. I made cupcakes and syrup, muffins and pancakes. I have been eating plenty of them, too. I decided to use some of them to make pie filling.
There is something very satisfying in making your own pie filling. It is so much better than anything you would find in a can. It is a convenient ingredient to have on hand, too. A good quality pie filling can be turned into any number of desserts in no time- even pie!!
You do need to have Clear Gel ( cook type) to can pie filling. It is modified cornstarch. You can’t use regular cornstarch and you can’t use other thickeners. You could just can the berries, then thicken them later, but the Clear Gel makes it so much more convenient to use. I just order mine online, but it is available in some stores- primarily in Amish communities.
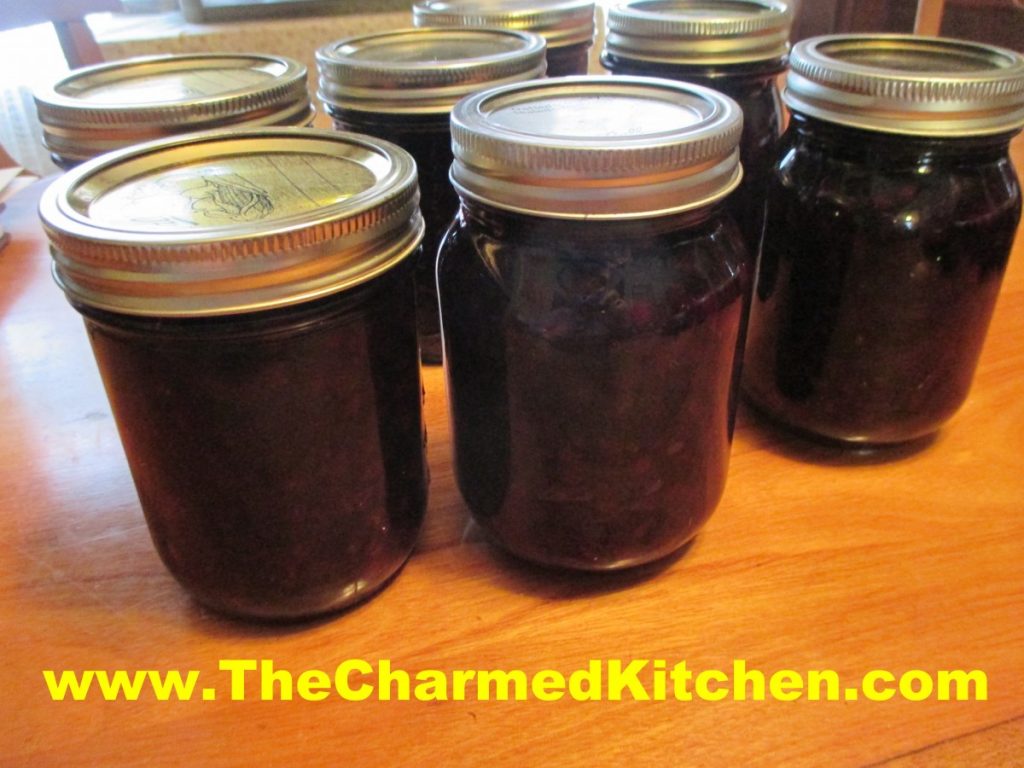
I opted to can my filling in pints. I find that size more convenient for me. Let the jars stay in the canner 5 or 10 minutes after they finish processing. It will reduce siphoning. Some foods, hot in the jars- will leak out of removed from the heat too quickly. Pie fillings are known for issues with siphoning.
Blueberry Pie Filling
6 qts. Blueberries
6 c. sugar
2 1/4 c. Clear Gel, cook type (modified cornstarch, not regular cornstarch)
7 c. water
1/2 c. lemon juice
Wash and drain berries. Boil a large pot of water. Place berries in the water and blanch for 1 minute. Drain berries, cover them with a towel, set aside and keep warm. In large sauce pot combine sugar and Clear Gel. Stir in water and cook on high heat until mixtures bubbles and thickens. It is going to be really thick- don’t panic, just keep stirring so it won’t stick. Add lemon juice and boil 1 minute, stirring constantly. Fold in berries and ladle in hot, clean canning jars immediately. Leave 1/2 -inch headspace and remove any air bubbles with a knife. Wipe rims clean and put on lids. Place jars in boiling water bath and process for 30 minutes. Start timing when water returns to the boil. Turn off heat and let jars sit in the water bath 5-10 minutes before removing to counter to cool. Cool jars on counter on rack or towel, free from drafts. Check seals next day. Remove rings and wipe down jars with a soft, damp cloth before storing. Makes 14 pints or 7 quarts.
Source NCHFP
Mini Blueberry Cheesecakes
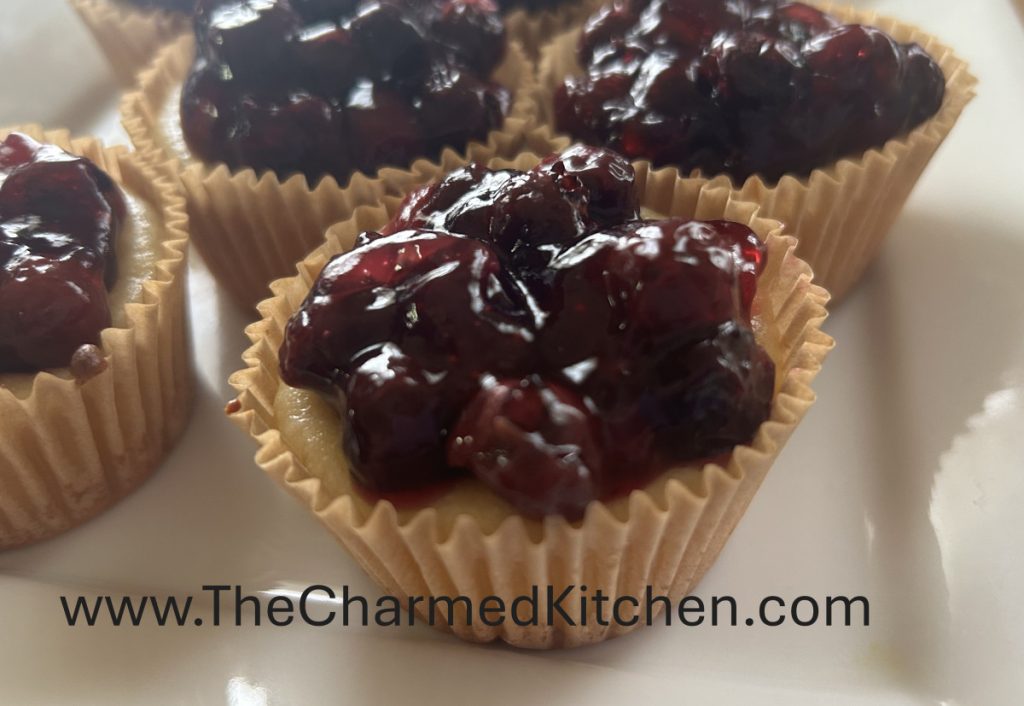
These are a great dessert when you don’t have a lot of time. They can be ready in no time. No crust to make- you use vanilla wafers. The recipe just makes 6, so you can make these anytime you get a craving for cheesecake. I made these for lunch with a friend. I had recently made blueberry pie filling and wanted to use some in a dessert. It worked out so well. So here is the recipe for the cheesecakes and the pie filling. Of course, you could use other pie fillings that you prefer. I could see making more and using a few different toppings.
Mini Blueberry Cheesecakes
6 vanilla wafers
1 (8 oz.) cream cheese, softened
1/3 c. sugar
1 t. vanilla
1 egg
1 cup blueberry pie filling- store bought or homemade – recipe follows.
Line 6 muffin tins with paper liners. Place 1 wafer in each. Beat together remaining ingredients for 1 minute with electric mixer. Divide this mixture in the muffin tins, filling each 3/4 full. Bake 25 minutes at 325 degrees. Cool and decorate with fruit topping, if desired. Makes 6. These can be frozen. Serves 2-3.
Blueberry Pie Filling
6 qts. Blueberries fresh or frozen (thawed)
6 c. sugar
2 1/4 c. Clear Gel (modified cornstarch, not regular cornstarch)
7 c. water
1/2 c. lemon juice
Wash and drain berries. If using fresh berries, blanch berries in boiling water for 1 minute- only 2 quarts at a time. Drain and keep berries warm. In large sauce pot combine sugar and Clear Gel. Stir in water and cook on high heat until mixtures bubbles and thickens. It is going to be really thick- don’t panic, just keep stirring so it won’t stick. Add lemon juice and boil 1 minute, stirring constantly. Fold in berries and ladle in hot, clean canning jars immediately. Leave 1/2 -inch headspace and remove any air bubbles with a knife. Wipe rims clean and put on lids. Place jars in boiling water bath and process for 30 minutes. Start timing when water returns to the boil. Turn off heat and let jars sit in the water bath 5-10 minutes before removing to counter to cool. Cool jars on counter on rack or towel, free from drafts. Check seals next day. Remove rings and wipe down jars with a soft, damp cloth before storing. Makes 14 pints or 7 quarts. Note: You can easily cut this recipe in half. If you only want to make 1 quart the ingredient list follows.
For 1 quart
3 ½ c. blueberries
¾ c. sugar
¼ c. plus 1 T. clear gel*
1 c. cold water
3 ½ t. lemon juice
Note: If you are not canning the pie filling you can use regular cornstarch instead of clear gel. Store in fridge. Use within a week or freeze.
Source NCHFP
Blueberry Pie Filling

I recently came across a wonderful price on blueberries. Being the thrifty person that I am, I stocked up. I put some in the freezer and placed some in vodka for liqueur. I made cupcakes and syrup, muffins and pancakes. I have been eating plenty of them, too. I decided to use some of them to make pie filling.
There is something very satisfying in making your own pie filling. It is so much better than anything you would find in a can. It is a convenient ingredient to have on hand, too. A good quality pie filling can be turned into any number of desserts in no time- even pie!!
You do need to have Clear Gel to can pie filling. It is modified cornstarch. You can’t use regular cornstarch and you can’t use other thickeners. You could just can the berries, then thicken them later, but the Clear Gel makes it so much more convenient to use. I just order mine online, but it is available in some stores- primarily in Amish communities.
I opted to can my filling in pints. I find that size more convenient for me. Let the jars stay in the canner 5 or 10 minutes after they finish processing. It will reduce siphoning. Some foods, hot in the jars- will leak out of removed from the heat too quickly. Pie fillings are known for issues with siphoning.
Blueberry Pie Filling
6 qts. Blueberries
6 c. sugar
2 1/4 c. Clear Gel (modified cornstarch, not regular cornstarch)
7 c. water
1/2 c. lemon juice
Wash and drain berries. In large sauce pot combine sugar and Clear Gel. Stir in water and cook on high heat until mixtures bubbles and thickens. It is going to be really thick- don’t panic, just keep stirring so it won’t stick. Add lemon juice and boil 1 minute, stirring constantly. Fold in berries and ladle in hot, clean canning jars immediately. Leave 1/2 -inch headspace and remove any air bubbles with a knife. Wipe rims clean and put on lids. Place jars in boiling water bath and process for 30 minutes. Start timing when water returns to the boil. Turn off heat and let jars sit in the water bath 5-10 minutes before removing to counter to cool. Cool jars on counter on rack or towel, free from drafts. Check seals next day. Remove rings and wipe down jars with a soft, damp cloth before storing. Makes 14 pints or 7 quarts.
Source NCHFP
Blueberry Pie Filling

I recently came across a wonderful price on blueberries. Being the thrifty person that I am, I stocked up. I put some in the freezer and placed some in vodka for liqueur. I made cupcakes and syrup, muffins and pancakes. I have been eating plenty of them, too. I decided to use some of them to make pie filling.
There is something very satisfying in making your own pie filling. It is so much better than anything you would find in a can. It is a convenient ingredient to have on hand, too. A good quality pie filling can be turned into any number of desserts in no time- even pie!!
You do need to have Clear Gel to can pie filling. It is modified cornstarch. You can’t use regular cornstarch and you can’t use other thickeners. You could just can the berries, then thicken them later, but the Clear Gel makes it so much more convenient to use. I just order mine online, but it is available in some stores- primarily in Amish communities.
I opted to can my filling in pints. I find that size more convenient for me. Let the jars stay in the canner 5 or 10 minutes after they finish processing. It will reduce siphoning. Some foods, hot in the jars- will leak out of removed from the heat too quickly. Pie fillings are known for issues with siphoning.
Blueberry Pie Filling
6 qts. Blueberries
6 c. sugar
2 1/4 c. Clear Gel (modified cornstarch, not regular cornstarch)
7 c. water
1/2 c. lemon juice
Wash and drain berries. In large sauce pot combine sugar and Clear Gel. Stir in water and cook on high heat until mixtures bubbles and thickens. It is going to be really thick- don’t panic, just keep stirring so it won’t stick. Add lemon juice and boil 1 minute, stirring constantly. Fold in berries and ladle in hot, clean canning jars immediately. Leave 1/2 -inch headspace and remove any air bubbles with a knife. Wipe rims clean and put on lids. Place jars in boiling water bath and process for 30 minutes. Start timing when water returns to the boil. Turn off heat and let jars sit in the water bath 5-10 minutes before removing to counter to cool. Cool jars on counter on rack or towel, free from drafts. Check seals next day. Remove rings and wipe down jars with a soft, damp cloth before storing. Makes 14 pints or 7 quarts.
Source NCHFP
Blueberry Lemon Trifle
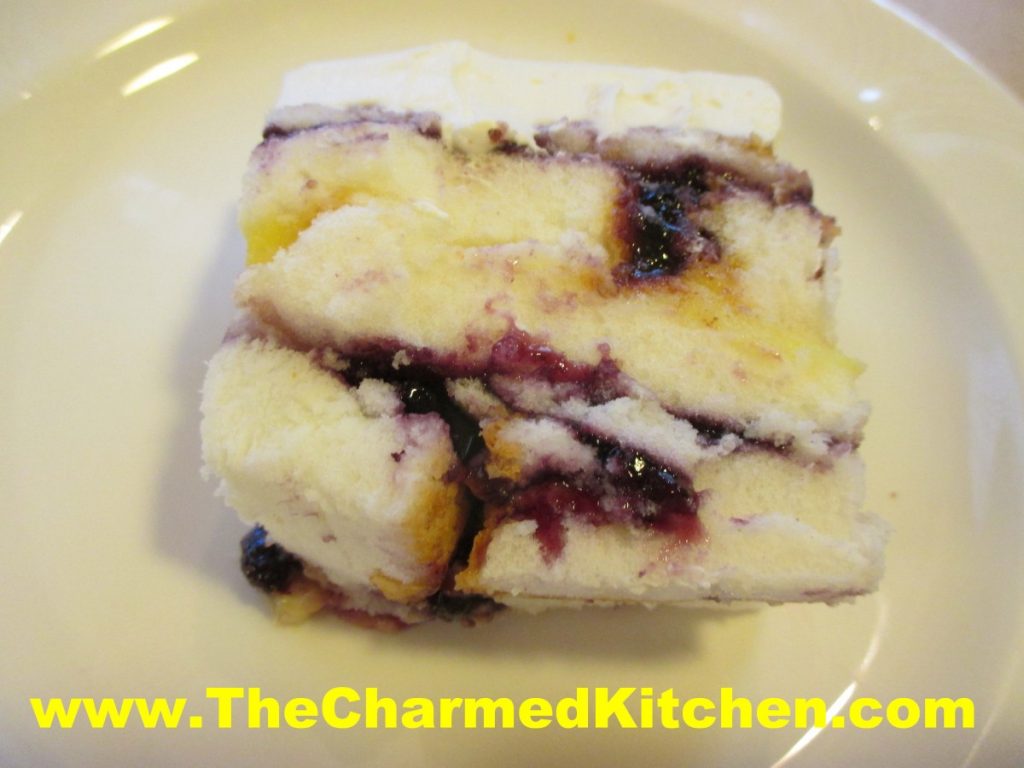
Trifle is one of those desserts that can be whatever you want it to be. The basics of a traditional trifle are sponge cake, layered with some sort of pudding or custard and fruit. The cake is sometimes soaked in sherry or some other alcohol. Trifles are often topped with whipped cream.
This trifle combines angel food cake with blueberry pie filling and lemon curd. I love the combination of flavors.
Once you have all the ingredients, the trifle is simple to assemble. Pick a nice, glass bowl, so you can see the layers in the trifle. It is best to put your trifle together a bit in advance, so the cake can soak up some of the moisture from the berries and the lemon curd. It also helps the trifle to stay together. You can actually slice the trifle to serve it.
So here is the recipe. I made the pie filling and the lemon curd, but you can use store bought, to save time.
Blueberry Lemon Trifle
1 angel food cake, sliced thin
2 c. blueberry pie filling- homemade or store bought- recipe follows
2 c. lemon curd- recipe follows
1 c. whipping cream
1/4 c. powdered sugar
Place a layer of cake slices in the bottom of the bowl. Spread half of the blueberry mixture on top of the cake. Place another layer of cake slices on top of the blueberry layer and press down a little to even it out. Cut cake pieces to fit as best you can. Add half of the lemon curd and top with more cake. Repeat the process one more time. Don’t worry if something isn’t perfect in the layers- that is kind of the charm of a trifle. Just be sure to get all the ingredients in the bowl. Cover and chill the trifle. When ready to serve beat the whipping cream and powdered sugar together until stiff peaks form and spread over the trifle. You can do this part ahead of time, if you prefer, Just keep trifle, covered, in the fridge, until ready to serve. Serves 6-8.
Blueberry Pie Filling
3 1/2 c. blueberries
3/4 c. sugar, or to taste
1/4 c. Clear Gel* or cornstarch
1 c. water
1 T. lemon juice
In saucepan, bring blueberries and sugar to a boil, stirring often. Combine clear gel with water and lemon juice and add to the blueberry mixture. Return to the boil and cook until thickened and bubbly. Makes 4 cups. You won’t need the whole batch for the trifle.
*Clear gel is a modified cornstarch. It is used in commercial pie fillings and in homemade pie fillings, as well. Unlike regular cornstarch, Clear Gel retains it’s thickness, even if you reheat it. You can find it online or in some specialty food stores.
Lemon Curd
1/2 c. lemon juice
zest from one good sized lemon- you should have 2-3 teaspoons
1/2 c. sugar
3 eggs
6 T. unsalted butter- cut into little cubes
In medium saucepan combine all ingredients. Whisk the mixture until the eggs are well blended. Cook over medium low heat, whisking often, until the mixture thickens. This will take 5-7 minutes. Whisk more often as mixtures warms and starts to thicken. Better to heat over lower heat and take longer than over too high a heat. You don’t want the eggs to scramble. Once the mixture is thickened , transfer to a bowl or jar. Cover the surface with a piece of plastic wrap to keep the surface from developing a skin- like any pudding will do. Chill until ready to use. Makes about 2 cups. Will keep in fridge a week or two.

Blueberry Pie Filling

I recently came across a wonderful price on blueberries. Being the thrifty person that I am, I stocked up. I put some in the freezer and placed some in vodka for liqueur. I made cupcakes and syrup, muffins and pancakes. I have been eating plenty of them, too. I decided to use some of them to make pie filling.
There is something very satisfying in making your own pie filling. It is so much better than anything you would find in a can. It is a convenient ingredient to have on hand, too. A good quality pie filling can be turned into any number of desserts in no time- even pie!!
You do need to have Clear Gel to can pie filling. It is modified cornstarch. You can’t use regular cornstarch and you can’t use other thickeners. You could just can the berries, then thicken them later, but the Clear Gel makes it so much more convenient to use. I just order mine online, but it is available in some stores- primarily in Amish communities.
I opted to can my filling in pints. I find that size more convenient for me. Let the jars stay in the canner 5 or 10 minutes after they finish processing. It will reduce siphoning. Some foods, hot in the jars- will leak out of removed from the heat too quickly. Pie fillings are known for issues with siphoning.
Blueberry Pie Filling
6 qts. Blueberries
6 c. sugar
2 1/4 c. Clear Gel (modified cornstarch, not regular cornstarch)
7 c. water
1/2 c. lemon juice
Wash and drain berries. In large sauce pot combine sugar and Clear Gel. Stir in water and cook on high heat until mixtures bubbles and thickens. It is going to be really thick- don’t panic, just keep stirring so it won’t stick. Add lemon juice and boil 1 minute, stirring constantly. Fold in berries and ladle in hot, clean canning jars immediately. Leave 1/2 -inch headspace and remove any air bubbles with a knife. Wipe rims clean and put on lids. Place jars in boiling water bath and process for 30 minutes. Start timing when water returns to the boil. Turn off heat and let jars sit in the water bath 5-10 minutes before removing to counter to cool. Cool jars on counter on rack or towel, free from drafts. Check seals next day. Remove rings and wipe down jars with a soft, damp cloth before storing. Makes 14 pints or 7 quarts.
Source NCHFP
Homemade Blueberry Ice Cream
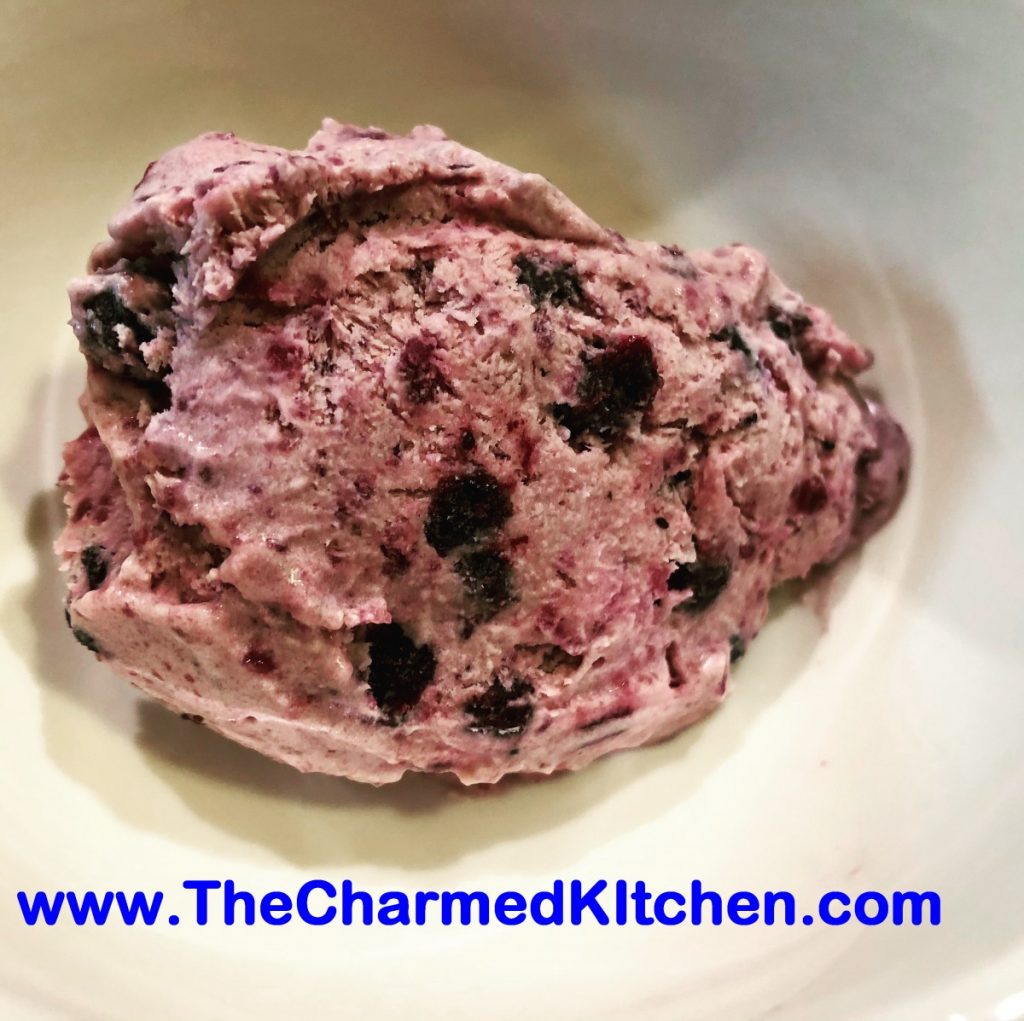
This might be the easiest ice cream you’ll ever make. It tastes pretty good, too. I almost named it Quarantine Blueberry Ice Cream. The ice cream came about because of the quarantine. I had purchased whipping cream to use in a dessert for a dinner party. Except the dinner party never happened. The whipping cream sat in my fridge, minding its own business, until I decided to give that expiration date a look. Time was up. I didn’t want it to go to waste. I could freeze it for later, or use it right away. I decided to make ice cream.
I had recently posted a recipe for a super easy ice cream, where you just combine whipped whipping cream and chocolate syrup, and freeze it. Its actually pretty good. I didn’t have chocolate syrup handy, but I did have a jar of blueberry pie filling. I used homemade, but a can from the store would be fine. It worked! The ice cream came out very nice and creamy.
I can’t say that it is as creamy as ice cream I make in the ice cream maker. But for as easy as it was to make, I have no complaints. Here is what I did.
Easy Blueberry Ice Cream
1 pint whipping cream
1 jar or can of blueberry pie filling ( other flavors should work)
powdered sugar to taste – I used about 1 cup
2 t. vanilla extract- optional
In a mixing bowl whip cream until soft peaks form. Add the pie filling and continue beating until well mixed. A stand mixer makes this easier, but a hand mixer works, too. Sweeten to taste and add the vanilla, if you are using. Put in a container with a lid- and freeze.Makes 5-6 cups.
Note: Other pie filling flavors should work fine, but you might want to cut up bigger pieces of fruit. The extra sugar really helps. When the ice cream is frozen, it will taste less sweet, so don’t be afraid to add a little extra sugar before freezing. As for the flavorings- have fun. I just added some vanilla, because I like vanilla. Other extracts, like mint or almond would be fun. I could see adding cinnamon and nutmeg to apple pie filling ice cream. Have some fun with the flavors.
Blueberry Pie Filling

I recently came across a wonderful price on blueberries. Being the thrifty person that I am, I stocked up. I put some in the freezer and placed some in vodka for liqueur. I made cupcakes and syrup, muffins and pancakes. I have been eating plenty of them, too. I decided to use some of them to make pie filling.
There is something very satisfying in making your own pie filling. It is so much better than anything you would find in a can. It is a convenient ingredient to have on hand, too. A good quality pie filling can be turned into any number of desserts in no time- even pie!!
You do need to have Clear Gel to can pie filling. It is modified cornstarch. You can’t use regular cornstarch and you can’t use other thickeners. You could just can the berries, then thicken them later, but the Clear Gel makes it so much more convenient to use. I just order mine online, but it is available in some stores- primarily in Amish communities.
I opted to can my filling in pints. I find that size more convenient for me. Let the jars stay in the canner 5 or 10 minutes after they finish processing. It will reduce siphoning. Some foods, hot in the jars- will leak out of removed from the heat too quickly. Pie fillings are known for issues with siphoning.
Blueberry Pie Filling
6 qts. Blueberries
6 c. sugar
2 1/4 c. Clear Gel (modified cornstarch, not regular cornstarch)
7 c. water
1/2 c. lemon juice
Wash and drain berries. In large sauce pot combine sugar and Clear Gel. Stir in water and cook on high heat until mixtures bubbles and thickens. It is going to be really thick- don’t panic, just keep stirring so it won’t stick. Add lemon juice and boil 1 minute, stirring constantly. Fold in berries and ladle in hot, clean canning jars immediately. Leave 1/2 -inch headspace and remove any air bubbles with a knife. Wipe rims clean and put on lids. Place jars in boiling water bath and process for 30 minutes. Start timing when water returns to the boil. Turn off heat and let jars sit in the water bath 5-10 minutes before removing to counter to cool. Cool jars on counter on rack or towel, free from drafts. Check seals next day. remove rings and wipe down jars with a soft, damp cloth before storing. Makes 14 pints or 7 quarts.
Source NCHFP
Blueberry Pie Filling
I recently came across a wonderful price on blueberries. A really wonderful price. Being the thrifty person that I am, I stocked up. I put some in the freezer and placed some in vodka for liqueur. I made cupcakes and syrup, muffins and pancakes. I have been eating plenty of them, too. I decided to use some of them to make pie filling.
There is something very satisfying in making your own pie filling. It is so much better than anything you would find in a can. It is a convenient ingredient to have on hand, too. A good quality pie filling can be turned into any number of desserts in no time- even pie!!
You do need to have Clear Gel to can pie filling. It is modified cornstarch. You can’t use regular cornstarch and you can’t use other thickeners. You could just can the berries, then thicken them later, but the Clear Gel makes it so much more convenient to use. I just order mine online, but it is available in some stores- primarily in Amish communities.
I opted to can my filling in pints. I find that size more convenient for me. Let the jars stay in the canner 5 or 10 minutes after they finish processing. It will reduce siphoning. Some foods, hot in the jars- will leak out of removed from the heat too quickly. Pie fillings are known for issues with siphoning.
Blueberry Pie Filling
6 qts. Blueberries
6 c. sugar
2 1/4 c. Clear Gel (modified cornstarch, not regular cornstarch)
7 c. water
1/2 c. lemon juice
Wash and drain berries. In large sauce pot combine sugar and Clear Gel. Stir in water and cook on high heat until mixtures bubbles and thickens. It is going to be really thick- don’t panic, just keep stirring so it won’t stick. Add lemon juice and boil 1 minute, stirring constantly. Fold in berries and ladle in hot, clean canning jars immediately. Leave 1/2 -inch headspace and remove any air bubbles with a knife. Wipe rims clean and put on lids. Place jars in boiling water bath and process for 30 minutes. Start timing when water returns to the boil. Turn off heat and let jars sit in the water bath 5-10 minutes before removing to counter to cool. Cool jars on counter on rack or towel, free from drafts. Check seals next day. remove rings and wipe down jars with a soft, damp cloth before storing. Makes 14 pints or 7 quarts.
Source NCHFP
