Asian Turnip Cakes

If you are planning a party for the Lunar (Chinese) New Year, you might want to make turnip cakes.
I first had turnip cakes at a local Asian restaurant. I loved them, and was intrigued at how to make them. They were little squares, lightly crisped on the outside, smooth and creamy in the middle.
When I first heard turnip cake- I was thinking of the purple and white turnips I knew. That is not what these turnip cakes are made from. It helped a lot when I realized the “turnip” cake was actually made from Daikon radish. Daikon radishes are also called Chinese turnips. They are really big, white radishes. They are available at Asian grocery stores and other grocery stores. Now that I knew the ingredient I needed, I had to find a recipe.
I searched the internet and found a lot of different variations for how to make them.
The first recipe I tried was more like a potato pancake. Shredded radish paired with eggs and bread crumbs. They were good, but not what I had at the restaurant. The turnip cake I had enjoyed was smooth and sort of starchy. Plus, it was a neat square shape.
I found several recipes that included the steaming step. This enabled the cakes to be set up with a starch, cooled and sliced before the final frying step. This was what I wanted!!
The most promising recipe included rice flour- but I was out of rice flour, so I improvised with cornstarch and a little wheat flour. It worked really well.
Many recipes included shrimp or Chinese sausage and sometimes green onions. I decided, this time, to make them vegetarian. That worked well, but you certainly could add meat or shrimp to yours.
I shredded the daikon pretty fine, but you could still discern the radish in the final dish. I liked that a lot. I did not grate them as some recipes suggested. So here is my version of turnip cakes. They sound like a bit of work, but it really is worth the time. I also like that all the prep can be done a day or two ahead of time, then just slice and fry when you want them.
Turnip Cakes
1 large Daikon radish- about 1¼ lbs., give or take
1 c. water
½ c. minced onion
1 t. salt
½ t. white pepper
½ c. cornstarch
2 T. flour
Oil for frying
Oyster sauce for dipping, optional
Peel and shred radish. I used a fine shredding blade. Squeeze out some of the liquid from the radish. Place shredded radish in bowl with the water and onion and steam in microwave for 4-5 minutes- you can also place radish and onion in saucepan with water and simmer 4-5 minutes. Set aside to cool. Combine the radish mixture with the cornstarch, flour salt and pepper. Oil an 8×4-inch loaf pan. Place the radish mixture in the prepared pan and steam for 50 minutes.* I placed plastic wrap over the pan to prevent water from dripping into the pan. Remove pan from steamer and cool down for at least 30 minutes. . At this point you can finish preparing the turnip cakes- or place in fridge until ready to make them. When ready to fry the turnip cakes, remove from the pan and cut into slices- about ¾ -inch thick. Heat oil in a skillet over medium high heat. Cook cakes in oil on both sides until golden brown and crisp. Drain on paper towels. Serve with oyster sauce- or whatever dipping sauce you prefer. Makes about 10.
* To steam the mixture- I just used a large stock pot with a cooling rack in it. I brought about 2 inches of water to a boil, placed the pan on the rack and covered the pan. You could also steam in the oven with a roasting pan, with an inch of boiling water in it and covered with foil.
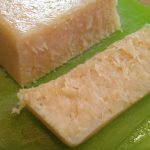
Slicing the turnip cakes before frying
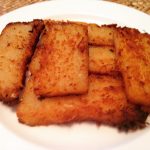
Ready to serve
Asian Turnip Cakes

If you are planning a party for Chinese New Year, you might want to make turnip cakes.
I first had turnip cakes at a local Asian restaurant. I loved them, and was intrigued at how to make them. They were little squares, lightly crisped on the outside, smooth and creamy in the middle.
When I first heard turnip cake- I was thinking of the purple and white turnips I knew. That is not what these turnip cakes are made from.
It helped a lot when I realized the “turnip” cake was actually made from Daikon radish. Daikon radishes are also called Chinese turnips. They are really big, white radishes. They are available at Asian grocery stores and other grocery stores. Now that I knew the ingredient I needed, I had to find a recipe.
I searched the internet and found a lot of different variations for how to make them.
The first recipe I tried was more like a potato pancake. Shredded radish paired with eggs and bread crumbs. They were good, but not what I had at the restaurant. The turnip cake I had enjoyed was smooth and sort of starchy. Plus, it was a neat square shape.
I found several recipes that included the steaming step. This enabled the cakes to be set up with a starch, cooled and sliced before the final frying step. This was what I wanted!!
The most promising recipe included rice flour- but I was out of rice flour, so I improvised with cornstarch and a little wheat flour. It worked really well.
Many recipes included shrimp or Chinese sausage and sometimes green onions. I decided, this time, to make them vegetarian. That worked well, but you certainly could add meat or shrimp to yours.
I shredded the daikon pretty fine, but you could still discern the radish in the final dish. I liked that a lot. I did not grate them as some recipes suggested.
So here is my version of turnip cakes. They sound like a bit of work, but it really is worth the time. I also like that all the prep can be done a day or two ahead of time, then just slice and fry when you want them.
Turnip Cakes
1 large Daikon radish- about 1¼ lbs., give or take
1 c. water
½ c. minced onion
1 t. salt
½ t. white pepper
½ c. cornstarch
2 T. flour
Oil for frying
Oyster sauce for dipping, optional
Peel and shred radish. I used a fine shredding blade. Squeeze out some of the liquid from the radish. Place shredded radish in bowl with the water and onion and steam in microwave for 4-5 minutes- you can also place radish and onion in saucepan with water and simmer 4-5 minutes. Set aside to cool. Combine the radish mixture with the cornstarch, flour salt and pepper. Oil an 8×4-inch loaf pan. Place the radish mixture in the prepared pan and steam for 50 minutes.* I placed plastic wrap over the pan to prevent water from dripping into the pan. Remove pan from steamer and cool down for at least 30 minutes. . At this point you can finish preparing the turnip cakes- or place in fridge until ready to make them. When ready to fry the turnip cakes, remove from the pan and cut into slices- about ¾ -inch thick. Heat oil in a skillet over medium high heat. Cook cakes in oil on both sides until golden brown and crisp. Drain on paper towels. Serve with oyster sauce- or whatever dipping sauce you prefer. Makes about 10.
* To steam the mixture- I just used a large stock pot with a cooling rack in it. I brought about 2 inches of water to a boil, placed the pan on the rack and covered the pan. You could also steam in the oven with a roasting pan, with an inch of boiling water in it and covered with foil.

Slicing the turnip cakes before frying

Ready to serve
Hot and Sour Soup

Many years ago, my dear friend, Martha, got me to try Hot and Sour Soup. I have been in love with it ever since. I stock up on the ingredients when I am shopping at my local Asian grocery store. Since many of the ingredients are canned or dried, it is easy to keep them on hand. The soup itself does not take that long to make. You do need to soak the black mushrooms for a little while, but once they are ready, the soup comes together pretty quickly. The black mushrooms are available already sliced in thin strips. That is what I use. You can also find them dried whole. In that case, you would soak the mushrooms first, then slice them.
Feel free to play around with the additions. Sometimes I’ll add some shredded nappa cabbage. I have also made a vegetarian version by using vegetable stock and omitting the sliced meat. It was still a very tasty bowl of soup.
You get plenty of heat from the white pepper, but you can add some hot sauce, if you like it hotter.
Hot and Sour Soup
5 c. chicken broth- or vegetable broth
2 c. pork, sliced in thin strips or you can use chicken or omit
1 T. soy sauce
¾ c. dried sliced Chinese black mushrooms, soaked 30 minutes in water and drained
1 can straw mushrooms, drained
1 c. sliced bamboo shoots – I use the braised ones in a can- nice flavor
1 can sliced water chestnuts, drained
10 oz. tofu, cubed
½ -1 t. white pepper
¼ c. cider vinegar
4 T. cornstarch mixed with 1/4 c. water*
2 beaten eggs
Sesame oil
1 green onion, sliced thin, or chives
Combine broth with pork, soy sauce, mushrooms, bamboo shoots and water chestnuts in pot and simmer 10 minutes. Add tofu, pepper, vinegar and cornstarch mixture and bring to a boil. As soup thickens and clears pour egg in slowly. Remove from heat; stir in a little oil and onions and serve.
Serves 4.
Note: For extra heat you can add hot sauce to taste.
* I use a type of cornstarch called Clear Gel. It remains thick, even after reheating. You can find it in Amish stores and on line.
Hot and Sour Soup

Many years ago, my dear friend, Martha, got me to try Hot and Sour Soup. I have been in love with it ever since. I stock up on the ingredients when I am shopping at my local Asian grocery store. Since many of the ingredients are canned or dried, it is easy to keep them on hand. The soup itself does not take that long to make. You do need to soak the black mushrooms for a little while, but once they are ready, the soup comes together pretty quickly. The black mushrooms are available already sliced in thin strips. That is what I use. You can also find them dried whole. In that case, you would soak the mushrooms first, then slice them.
Feel free to play around with the additions. Sometimes I’ll add some shredded nappa cabbage. I have also made a vegetarian version by using vegetable stock and omitting the sliced meat. It was still a very tasty bowl of soup.
You get plenty of heat from the white pepper, but you can add some hot sauce, if you like it hotter.
Hot and Sour Soup
5 c. chicken broth- or vegetable broth
2 c. pork, sliced in thin strips or you can use chicken or omit
1 T. soy sauce
¾ c. dried sliced Chinese black mushrooms, soaked 30 minutes in water and drained
1 can straw mushrooms, drained
1 c. sliced bamboo shoots – I use the braised ones in a can- nice flavor
1 can sliced water chestnuts, drained
10 oz. tofu, cubed
½ -1 t. white pepper
¼ c. cider vinegar
4 T. cornstarch mixed with 1/4 c. water*
2 beaten eggs
Sesame oil
1 green onion, sliced thin, or chives
Combine broth with pork, soy sauce, mushrooms, bamboo shoots and water chestnuts in pot and simmer 10 minutes. Add tofu, pepper, vinegar and cornstarch mixture and bring to a boil. As soup thickens and clears pour egg in slowly. Remove from heat; stir in a little oil and onions and serve.
Serves 4.
Note: For extra heat you can add hot sauce to taste.
* I use a type of cornstarch called Clear Gel. It remains thick, even after reheating. You can find it in Amish stores and on line.
Chicken (or Pork) Lo Mein

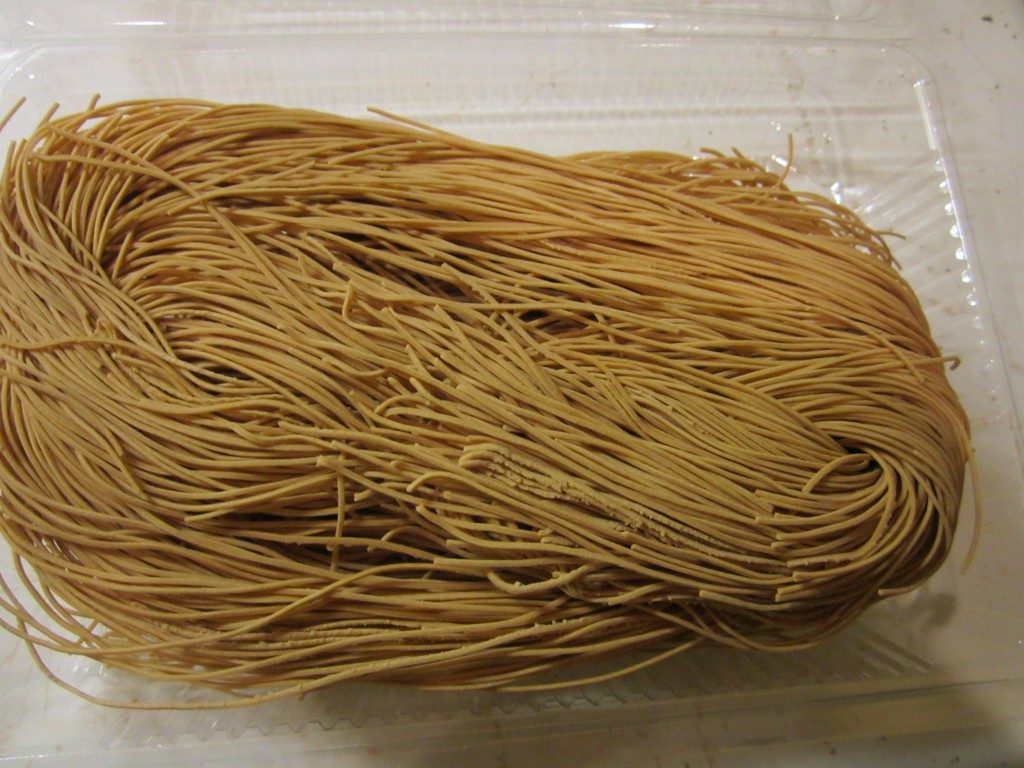
Lo Mein is an easy dish to prepare and everyone seems to love it. I used cooked chicken in this one, but pork works great. too. The real trick is to not overcook the very fine pasta traditionally used in lo mein. Follow package directions, but cook a little under done. That way, when you mix all the hot ingredients together, the noodles get a chance to soak up all those flavors and not get mushy.
Chicken Lo Mein
1 onion, chopped
2 T. oil
1 can sliced water chestnuts, drained
1/2 c. green peas- you could also use green beans
2 c. diced cooked chicken- pork works too
8 oz. angel hair pasta -I use a very fine noodle I get at the Asian market
soy sauce to taste
Hoisen sauce or oyster sauce to taste- you could also use stir-fry sauce
sesame oil
chopped green onions
Heat water for pasta. Heat oil in skillet and cook onion until browned. Add water chestnuts and cook 1 minute longer. While onion is cooking, cook pasta. Add peas to onion mixture and stir to combine. Add the chicken and heat through. Drain pasta and toss into chicken mixture. Season with soy sauce and what ever Asian sauce you have on hand. Drizzle with sesame oil and top with green onions. Serves 4.
Coconut Ginger Soup

This recipe is inspired by a favorite dish at a local Thai restaurant. The recipe is pretty simple. Coconut milk and chicken stock are the base. The soup has a few veggies added and a healthy dash of lime juice and ginger. Then it is just a matter of adding some additional seasoning and the cooked chicken.
If you are starting with raw chicken, you could add it with the initial ingredients and just simmer long enough to cook the chicken. Small slices of chicken would cook in a few minutes. Since I had cooked chicken, I added it at the end. It was in the soup just long enough to warm it up. That way the chicken wouldn’t get tough from over-cooking.
The soup is meant to have a nice, citrus flavor from the lime juice. Adding the juice from three or four limes should be plenty, but all limes are not the same. If your limes are smallish, or not really juicy, feel free to add a little more.
For a soup thrown together so quickly, it really has a wonderful flavor. It is one of my favorite quick meals. So here is the recipe. Enjoy.
Coconut Ginger Soup
1 can, (13.5 oz.), coconut milk
2 c. chicken stock
1 can sliced water chestnuts, drained
1 jar bamboo shoots, drained
2 T. fresh grated ginger
Juice of 3-4 limes
Hot sauce to taste
3 T. fresh chopped cilantro- or parsley
3 T. chopped green onions
salt to taste
8 oz. cooked chicken, sliced in bite-sized pieces
Heat first 7 ingredients in a saucepan until heated through. Simmer about 5 minutes. Add cilantro and green onions and season to taste. My limes were pretty juicy. Feel free to add a little more lime juice, if you like. Add the chicken and simmer a few minutes longer. Serves 2-3.
Asian Turnip Cakes

If you are planning a party for Chinese New Year, you might want to make turnip cakes.
I first had turnip cakes at a local Asian restaurant. I loved them, and was intrigued at how to make them. They were little squares, lightly crisped on the outside, smooth and creamy in the middle.
When I first heard turnip cake- I was thinking of the purple and white turnips I knew. That is not what these turnip cakes are made from.
It helped a lot when I realized the “turnip” cake was actually made from Daikon radish. Daikon radishes are also called Chinese turnips. They are really big, white radishes. They are available at Asian grocery stores and other grocery stores. Now that I knew the ingredient I needed, I had to find a recipe.
I searched the internet and found a lot of different variations for how to make them.
The first recipe I tried was more like a potato pancake. Shredded radish paired with eggs and bread crumbs. They were good, but not what I had at the restaurant. The turnip cake I had enjoyed was smooth and sort of starchy. Plus, it was a neat square shape.
I found several recipes that included the steaming step. This enabled the cakes to be set up with a starch, cooled and sliced before the final frying step. This was what I wanted!!
The most promising recipe included rice flour- but I was out of rice flour, so I improvised with cornstarch and a little wheat flour. It worked really well.
Many recipes included shrimp or Chinese sausage and sometimes green onions. I decided, this time, to make them vegetarian. That worked well, but you certainly could add meat or shrimp to yours.
I shredded the daikon pretty fine, but you could still discern the radish in the final dish. I liked that a lot. I did not grate them as some recipes suggested.
So here is my version of turnip cakes. They sound like a bit of work, but it really is worth the time. I also like that all the prep can be done a day or two ahead of time, then just slice and fry when you want them.
Turnip Cakes
1 large Daikon radish- about 1¼ lbs., give or take
1 c. water
½ c. minced onion
1 t. salt
½ t. white pepper
½ c. cornstarch
2 T. flour
Oil for frying
Oyster sauce for dipping, optional
Peel and shred radish. I used a fine shredding blade. Squeeze out some of the liquid from the radish. Place shredded radish in bowl with the water and onion and steam in microwave for 4-5 minutes- you can also place radish and onion in saucepan with water and simmer 4-5 minutes. Set aside to cool. Combine the radish mixture with the cornstarch, flour salt and pepper. Oil an 8×4-inch loaf pan. Place the radish mixture in the prepared pan and steam for 50 minutes.* I placed plastic wrap over the pan to prevent water from dripping into the pan. Remove pan from steamer and cool down for at least 30 minutes. . At this point you can finish preparing the turnip cakes- or place in fridge until ready to make them. When ready to fry the turnip cakes, remove from the pan and cut into slices- about ¾ -inch thick. Heat oil in a skillet over medium high heat. Cook cakes in oil on both sides until golden brown and crisp. Drain on paper towels. Serve with oyster sauce- or whatever dipping sauce you prefer. Makes about 10.
* To steam the mixture- I just used a large stock pot with a cooling rack in it. I brought about 2 inches of water to a boil, placed the pan on the rack and covered the pan. You could also steam in the oven with a roasting pan, with an inch of boiling water in it and covered with foil.

Slicing the turnip cakes before frying

Ready to serve


