


What’s not to love about chives? This allium family herb is an easy to grow perennial. With little effort, you will be rewarded with onion-flavored leaves and blossoms year after year.
When the chives are first up in my garden I want to use them in everything. They will be around all season, but that first Spring harvest is always my favorite.
Their delicate onion flavor goes well with so many dishes. I enjoy cooking with the blossoms, too. Anyplace you might use green onions, you can use chives. I add them to dips, salad dressings, soups, veggie dishes. You get the idea. Same thing with the flowers. Toss them in any dish where you want a mellow, onion flavor. I have a friend who likes to dip the blossoms in batter and deep fry them. Yum!!
Chive Crepes with Crab Filling
Chives add a pretty color and wonderful flavor when used in crepes. I made a crab filling, but you could fill them with any number of savory ingredients. This is a great dish for brunch, lunch or breakfast.
3/4 c. flour
1/8 t. salt
3 eggs, beaten
2 T. melted butter
3/4 c. milk, approximately
1/3 c. fresh chives*
Butter or oil for pan
In blender mix together flour, salt and eggs until smooth. Add butter, milk and chives and blend until batter consistency is that of cream. Let stand for 30 minutes before using, or can be refrigerated, covered, overnight. Mix well, just before using.
Heat 6 or 7 inch skillet. Brush with butter or oil and pour in about 2 teaspoons of batter, tipping pan to cover bottom of pan completely with batter. Cook until edges start to brown, turn over and cook until lightly browned (about 1-2 minutes per side.)
Crepes can be made day ahead or even frozen between sheets of waxed paper and frozen. Makes 12.
When ready to serve: Crepes can be filled ahead or guests can fill their own
* You can use other combinations of fresh herbs like parsley, thyme, cilantro.
Crab Filling – enough for 6-8 crepes
2 T. butter
1/2 c. minced onion
3 T. flour
1 c. milk
Salt and pepper to taste
1 (6-oz.) can crab meat, drained, or 1 c. cooked shrimp, if you prefer
1 c. shredded mild cheese, I used fontina
Chopped chives
Heat butter in skillet and cook onions until tender. Add flour and mix well. Stir in milk and seasonings and cook until sauce is thickened and bubbly. Stir in seafood and heat through. Spoon some of this mixture onto a crepe. Add some cheese and roll up. Garnish with chopped chives. Makes 6-8.
Chive Butter
I also like to make Chive butter. The recipe is pretty simple.
3 T. snipped chives
½ t. lemon zest
1/2 c. (1 stick) softened butter
Mix all ingredients until well combined. Chive butter can be stored in a jar, or wrapped in plastic wrap and chilled or frozen until ready to use. Good with fish, poultry, carrots, and potatoes.
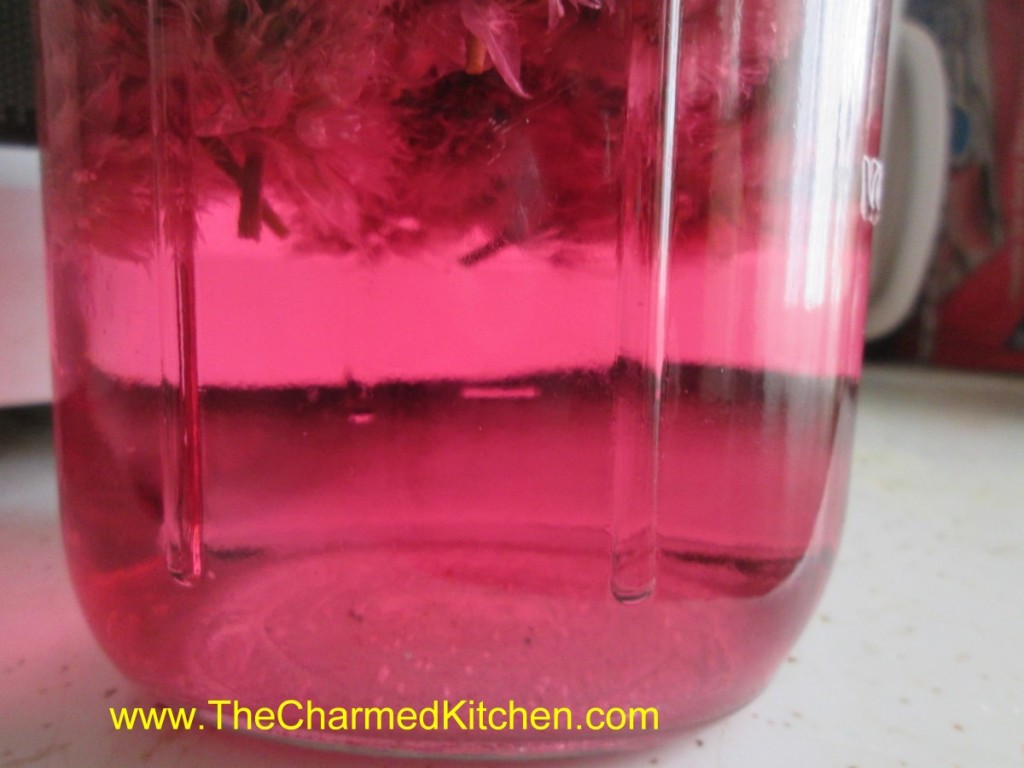
Chive Blossom Vinegar
One of the ways I preserve my herbs every year, is by using them to flavor vinegar. It is easy to do and you’ll have great flavored vinegar to use all year round. You can use the vinegar in salad dressings or in marinades and sauces. Chive blossom vinegar is one of my favorites. I often use white wine vinegar but you can use red wine vinegar, apple cider vinegar or even white vinegar. The blossoms give the vinegar a beautiful color, too.
All you need is a clean jar, chive blossoms and vinegar (5% acidity). The acidity is listed on the label. For every cup of blossoms add 2 cups of vinegar to the jar. Close the jar and put it in a cupboard for a couple of weeks, or longer. When ready to use, strain out the blossoms. Pour the strained vinegar through coffee filters or layers of cheesecloth to get out any sediment. The end result is clear and quite pretty. Store in a cool, dark place for best color and flavor.
Freezing Chives
An easy way to preserve your chives is to freeze them. Take freshly washed and dried chives and chop them up. You can use a knife, scissors or food processor. Place the chopped chives on a tray or baking sheet and place in the freezer to harden a bit, before transferring to a freezer container or freezer bag. By pre-freezing them before packaging, you keep them from clumping up and freezing into a green lump.

Growing Chives
When growing chives, a sunny, well drained spot is preferred, but chives will tolerate some shade. They prefer to be in the ground, but I have chives that are in pots and thriving. I even have chives that popped up in one of my hanging baskets. They return every year.
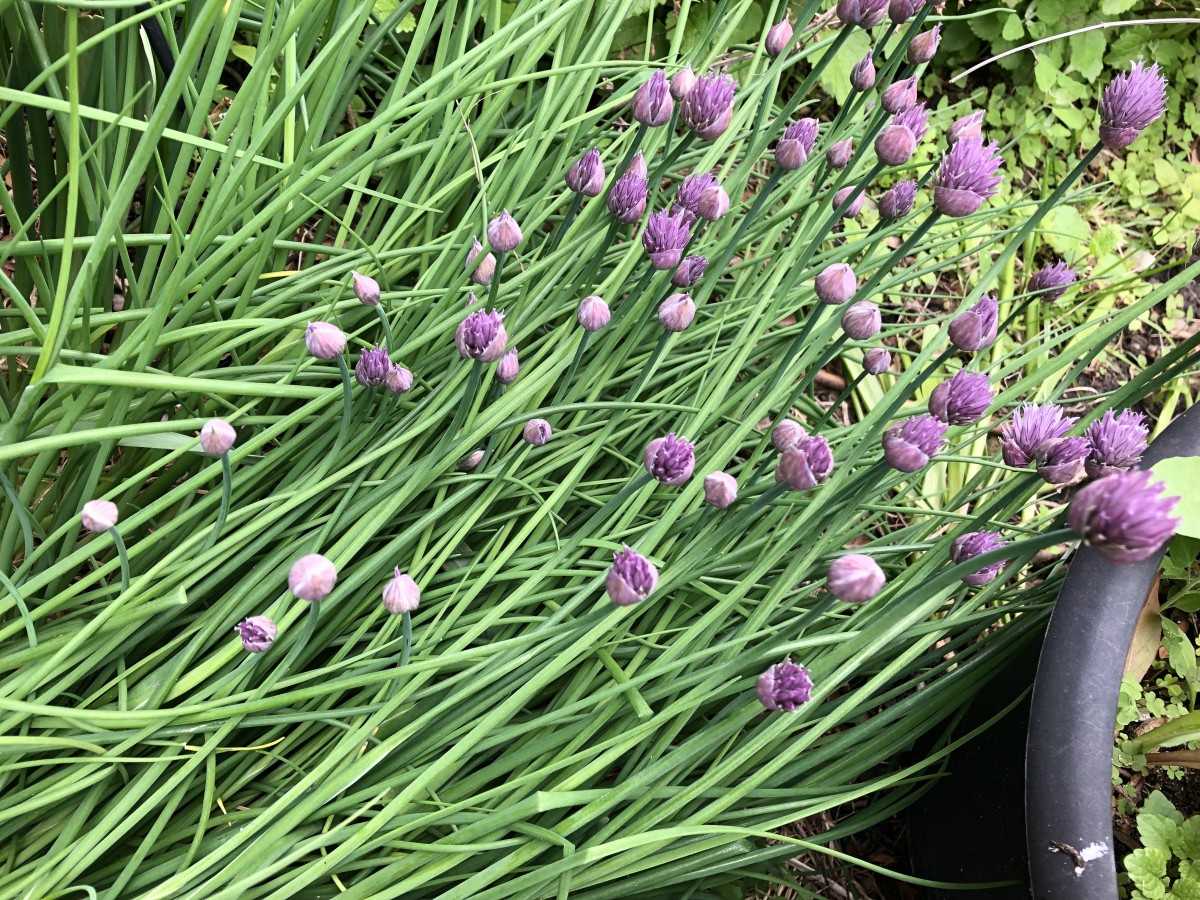
Chives require little maintenance, but there is one annual clean-up job: stem removal. At first glance, chives looks like just leaves, but there are stems in there. Each purple chive blossom that appears in Spring is on a stem. While the stems are edible, they are also tough and woody, compared to the leaves. I like to remove the stems once the chives are finished blooming. Even in a large clump of chives, this job only takes about 5 minutes.
First, identify the stems. They either have a chive blossom on them- or they will have a brown tip from where the blossom was removed. When you touch a stem, you’ll be able to tell right away that it is tougher than the leaves. Pinch the stem between your fingers and run your fingers down to the base of the stem. Give a little tug and the stem pops right out. Repeat this with the rest of the stems. Kind of boring, but only take a few minutes. Once done, your plant will be all tender leaves.