“Bat” Wings

With Halloween fast approaching I thought I’d share this recipe for bat wings. OK, not really bat wings, but you already knew that. I just add black food coloring to barbecue sauce and use it to color chicken wings. Because the barbecue sauce is already pretty dark, you don’t need much food coloring.
I made a batch for a Halloween party a few years ago and someone actually asked if they were real bat wings.
A word of warning- when you use black food coloring it will transfer to you. No matter how careful you are when you eat the wings, you’ll end up with purple fingers. Also, for the best effect, keep the wings intact- no trimming off of the tips. You can separate the drums before serving, if you like. Makes eating a little easier. They look pretty cool when set out on the table. Creepy- but very tasty.
Bat Wings
2-3 lbs. whole chicken wings
salt and pepper
1 c. barbecue sauce- store bought or home made
black food coloring- handle carefully- it stains
Place chicken wings in a roasting pan, season with salt and pepper and bake in a preheated 400 degree oven for 30 minutes. Meanwhile in medium bowl combine sauce with food coloring. Add just a little black food coloring at a time. Too much will alter the flavor of the food. Remove wings from the oven and dip them in the bowl of sauce. Turn to coat. Place wings on a clean baking sheet and return to the oven. Bake an addition 45 minutes. You can baste them with additional sauce during the baking, if you like. Place on a serving platter and provide plenty of napkins.
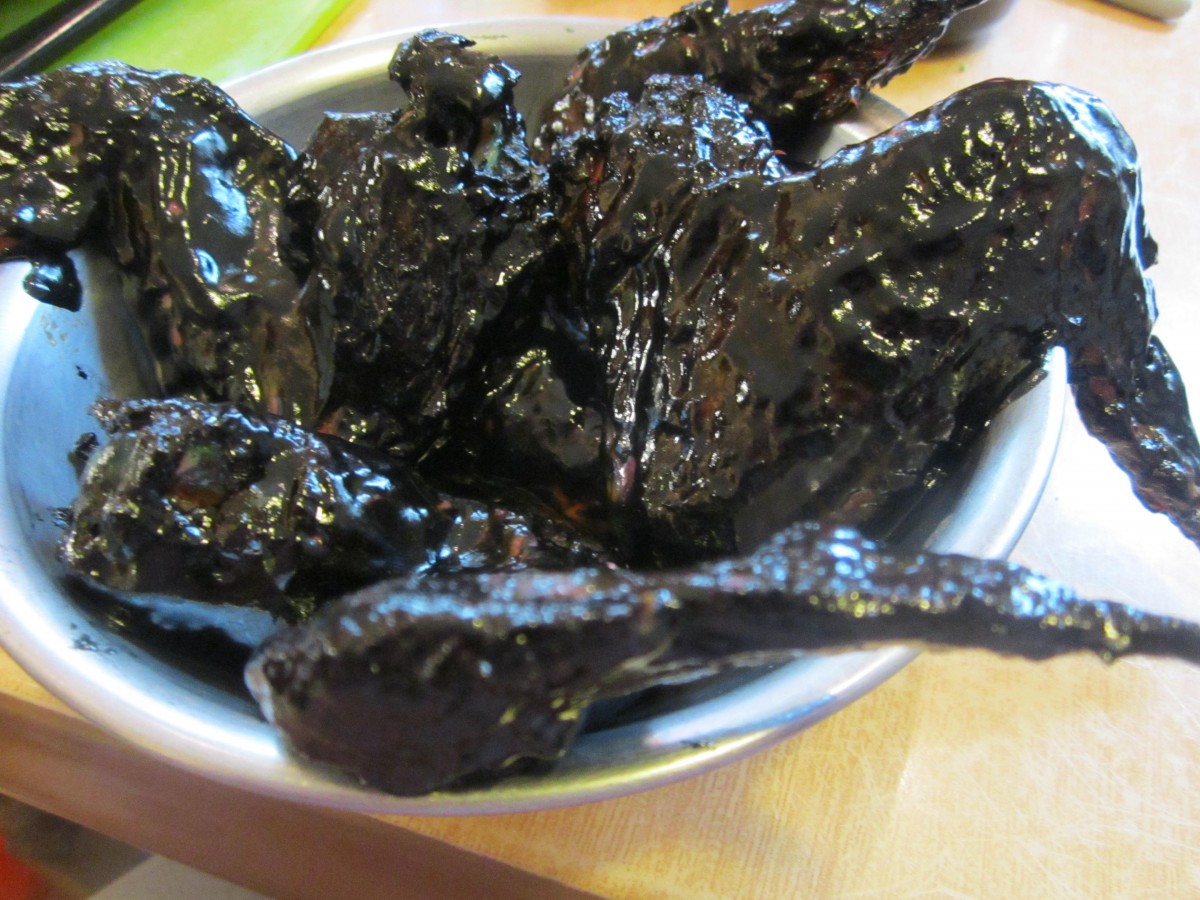
A pile of “bat” wings
Halloween Spooky Sushi
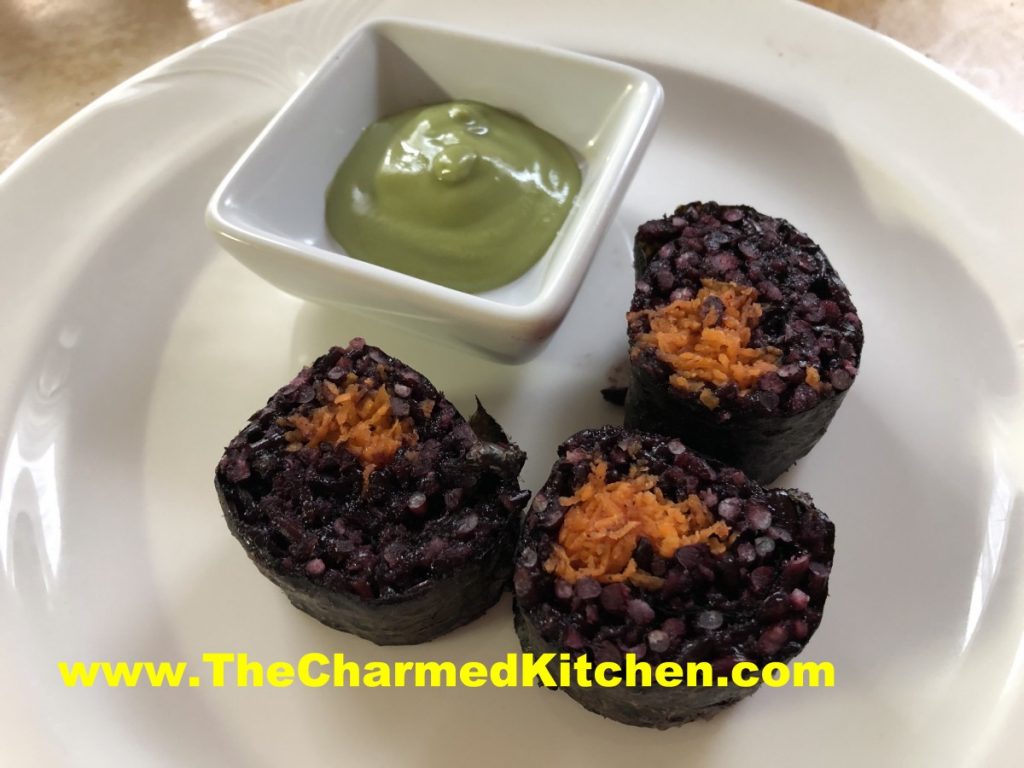
When I make sushi, I often use brown or black sticky (sweet) rice. I actually prefer the texture over the white rice. It occurred to me that the black sticky rice might make fun sushi for Halloween. I find black sweet rice at my local Asian grocery store. That is also where I get nori, rolling mats and wasabi.
To add a pop of color, I finely shredded carrots and added them to the sushi roll, too. The black rice actually cooks to a dark purple color. The color combination is fun for Halloween.
You’ll need a rolling mat, but beyond that, not a lot of special equipment is needed. I served my sushi with wasabi. You could serve with pickled ginger, too. Here is the recipe and directions.
“Spooky” Sushi
To make the rice:
4 c. black sweet rice, uncooked
4 c. water, or a little more
1 recipe Sushi Su, recipe follows
finely shredded carrots
In strainer, rinse the rice repeatedly with cold water until the water runs clear. Place rice in microwave safe container with the 4 cups of cold water. Cover container with a lid and place in microwave. I use a large Pyrex casserole dish that has a lid. Cook 20 minutes. Check for doneness and add a little more water, if needed. Cook another 10-15 minutes. Don’t stir the rice. Black rice takes longer to cook than white sushi rice. You want it to be cooked, but not mushy. Cooking times vary by microwave. Remove from the microwave once cooked and let stand, covered, for 10 minutes. Place rice in a large, cool bowl and pour on the Sushi Su, tossing in. Fan rice while tossing to give it a shiny look. Makes enough for 8 rolls.
Sushi Su:
1/2 cup rice vinegar
4 T. sugar
1/2 t. salt
msg, optional
Combine all and set aside until ready to use. You can also buy a dry powder of Sushi Su and you can use that instead. It is a 2.65 oz. packet.
Assembling Sushi
Place a sheet of nori ( dried seaweed sheets) on mat and spread about 1 cup of the rice over the nori, leaving about 1-2 inches empty on the far side. Place fillings in a strip a little off center away from the side with no rice. Start rolling up the mat using it to press the sushi roll and keeping the fillings in the nori. Once rolled, press the mat once more to seal and make the fillings stick together. Wetting the edge of the nori with a little water can also make the sushi stick better. Slice each piece using a sharp knife dipped in water.
Wrapping the sushi takes practice. Don’t be discouraged if the first few are a little less that perfect, Still, with a little practice it gets pretty easy. Just be careful not to overfill the rolls as it makes the job harder.
Pumpkin Ice Cream
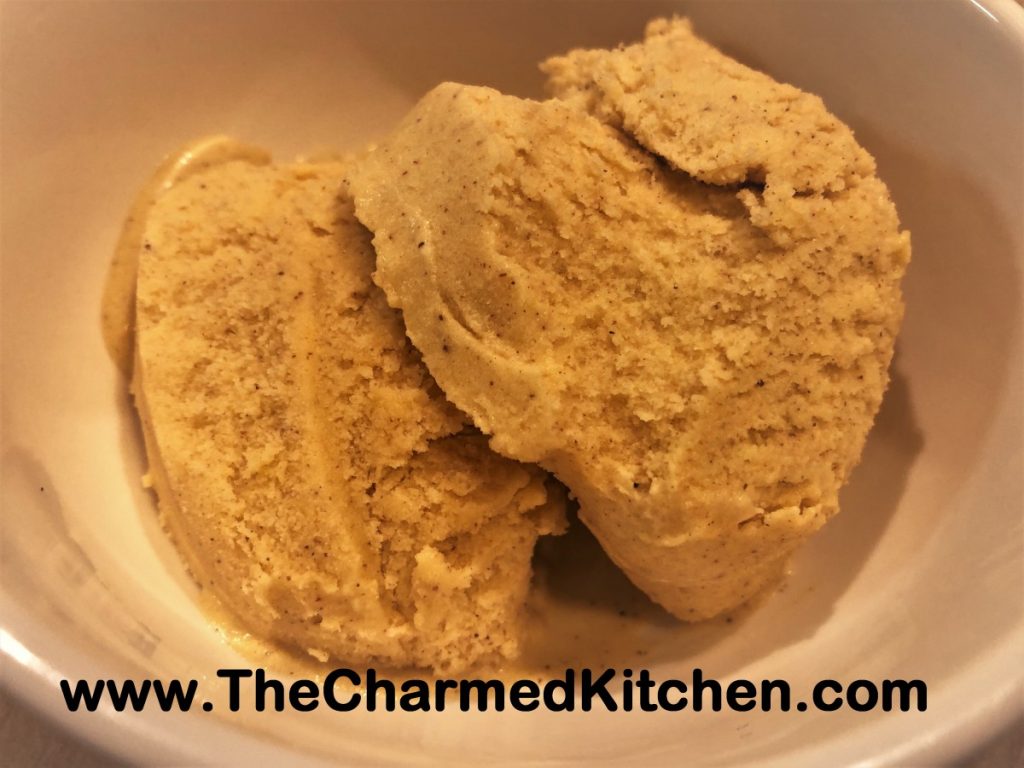
Pumpkin ice cream is such a nice addition to many fall desserts. I made a batch to serve with apple cake and butterscotch sauce for a birthday dinner. It is also a nice way to use up some of your Halloween pumpkins.
It has been a while since I made pumpkin ice cream. I think colder Fall weather makes me think less about ice cream desserts. Still, I don’t think it is ever too cold for ice cream.
This is a pretty simple recipe. I did not use eggs/custard as the base. You just mix the ingredients and freeze. Easier if you have an ice cream maker, but doable without.
Pumpkin Ice Cream
2 c. whipping cream
2 c. pumpkin puree or winter squash
1 c. sugar, or to taste
1 T. molasses
2 t. cinnamon
1 t. vanilla
1/4 t. salt
Combine all ingredients and stir until well mixed and sugar is dissolved. Place in an ice cream maker following the manufacturer’s directions. My machine can’t take the whole recipe at once so I froze it in 2 batches and kept the rest of the pumpkin mixture chilled until ready to use. Place finished ice cream in the freezer until ready to serve.
Note: If you don’t have an ice cream maker you can place the mixture in a shallow pan and freeze until solid. remove from freezer and allow to that a little- about 10 minutes then break up and place in a mixing bowl. Whip with a mixer until smooth and return to the freezer. Repeat process once more to end up with creamy ice cream.
Bat “Wings”
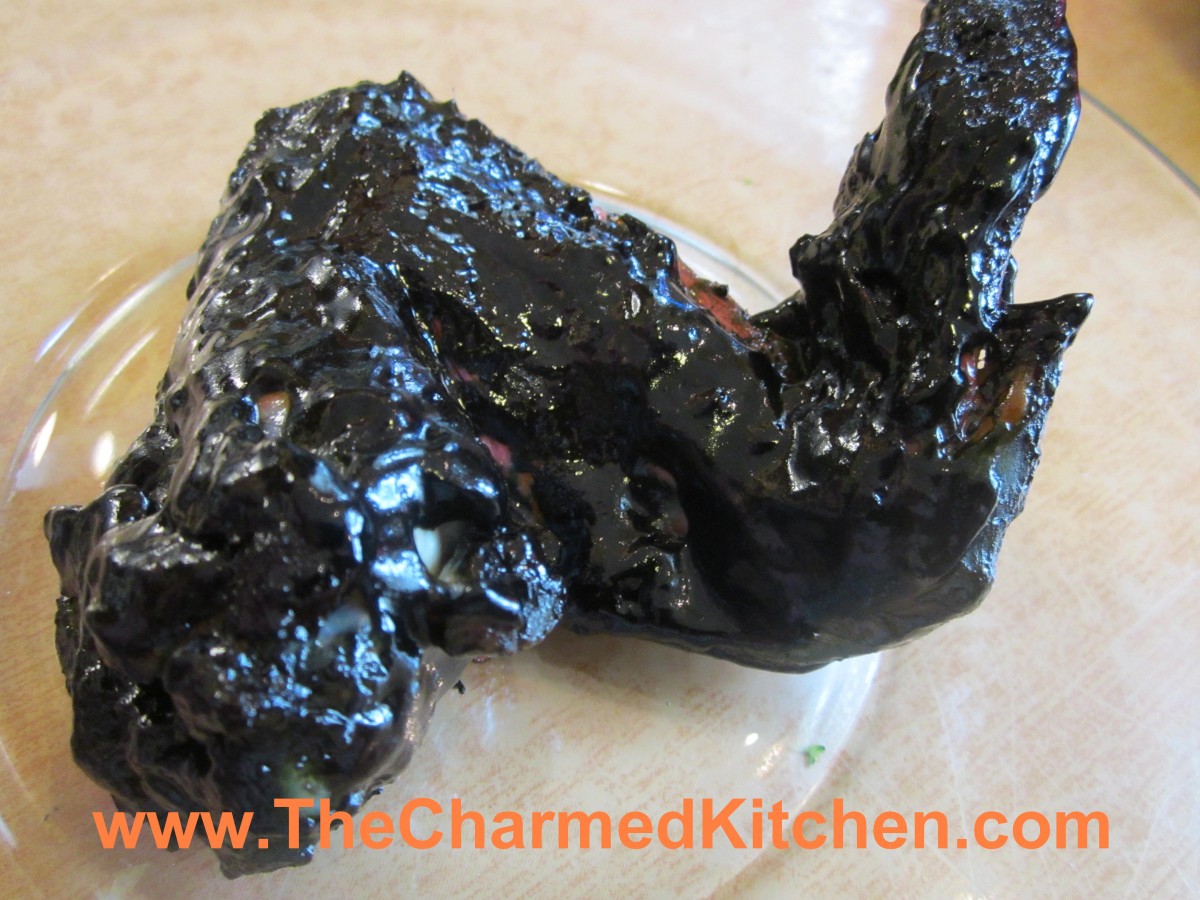
Bat “Wings”
With Halloween fast approaching I thought I’d share this recipe for bat wings. OK, not really bat wings, but you already knew that. I just add black food coloring to barbecue sauce and use it to color chicken wings. I made a batch for a Halloween party a few years ago and someone actually asked if there were real bat wings. A word of warning- when you use black food coloring it will transfer to you. No matter how careful you are when you eat the wings, you’ll end up with purple fingers. Also, for the best effect keep the wings intact- no trimming off of the tips. They look pretty cool when set out on the table. Creepy- but very tasty.
Bat Wings
2-3 lbs. whole chicken wings
salt and pepper
1 c. barbecue sauce- store bought or home made
black food coloring- handle carefully- it stains
Place chicken wings in a roasting pan, season with salt and pepper and bake in a preheated 400 degree oven for 30 minutes. Meanwhile in medium bowl combine sauce with food coloring. Add just a little black food coloring at a time. Too much will alter the flavor of the food. Remove wings from the oven and dip them in the bowl of sauce. Turn to coat. Place wings on a clean baking sheet and return to the oven. Bake an addition 45 minutes. You can baste them with additional sauce during the baking, if you like. Place on a serving platter and provide plenty of napkins.
A pile of “bat” wings
Halloween Sugar Cookies

Halloween Sugar Cookies
I had a program with 50 kids last week and we made these cookies. A simple sugar cookie, it was an easy decorating task even for the younger kids. I cut the cookies with a large pumpkin shaped cookie cutter, but you could use bats, cats or other Halloween shapes. I made a simple butter cream and added orange food coloring. I also made some chocolate frosting for the stems. The decorations are just a candy called Sixlets. I used them because they are nut- free and some of the kids have nut allergies.
Halloween Sugar Cookies
1 c. butter
1 c. sugar
1 egg
1 t. vanilla
3 c. flour
2 t. baking powder
3 T. milk
Beat butter and sugar until fluffy. Beat in egg and vanilla. Combine dry ingredients and add to butter mixture. Beat in milk. Heat oven to 375-degrees. Roll dough on lightly floured surface to about 1/3- inch thickness. Cut out with lightly floured cutters and bake on ungreased baking sheet for 10-12 minutes. Cool on baking sheet 3 minutes before placing on wire rack to cool completely. Frost when cooled. Makes about 4 dozen.
For tinted dough you can add red and yellow food coloring to butter mixture before adding flour and cut out as pumpkins. For chocolate sugar cookies you can add ½ c. cocoa to flour mixture before adding to shortening and reduce flour by ¼ cup. This dough is great for bats and cats.
Classic Butter Cream
1/3 cup butter
4 1/2 cups sifted confectioners’ sugar
1/4 cup milk
1 1/2 teaspoons vanilla extract
In a bowl beat butter or margarine until fluffy. Gradually add 2 cups of the confectioners’ sugar, beating well. Slowly beat in the 1/4 milk and vanilla. Slowly beat in remaining sugar. Beat in additional milk, if needed, to make of spreading consistency. Tint with food color, if desired.
Easy Chocolate Butter Cream
6 T. butter, softened
1/3 – 3/4 c. cocoa, depending on how dark you want your frosting.
2 2/3 c. powdered sugar
1/3 c. milk
1 t. vanilla
Cream butter. Combine cocoa and sugar. Beat cocoa mixture in alternately with the milk until frosting is spreading consistency. Beat in vanilla. You may need an additional tablespoon of milk. Makes about 2 cups.
Vampire Chasers

Vampire Chasers
Thought you might enjoy this recipe for your Halloween party. The toasted French bread is spread with a combination of roasted garlic and Parmesan cheese and then topped with caramelized onions and mozzarella cheese. Placed in the oven or under the broiler until toasty it is a fun appetizer for any time.
Vampire Chasers
2-3 heads garlic
Olive oil
½ c. grated Parmesan cheese
Sliced, toasted French or Italian bread, about 1 loaf
2 large onions, sliced thin
Salt and pepper
Shredded mozzarella cheese
Trim tops off the garlic heads, being careful not to dislodge the cloves. Brush with oil and wrap in foil. Bake in a preheated 350 degree oven for 45 minutes or until garlic is soft. Remove from oven and allow to cool a little. Squeeze roasted garlic out of skins and combine with the Parmesan cheese. Spread on the bread and keep wrapped until ready to use. Can be made a day ahead. Sauté onions in oil until browned. Season to taste. Divide onions among bread slices. Top with some of the shredded cheese and bake or broil until cheese has melted.


