Tara’s Brunch Enchiladas

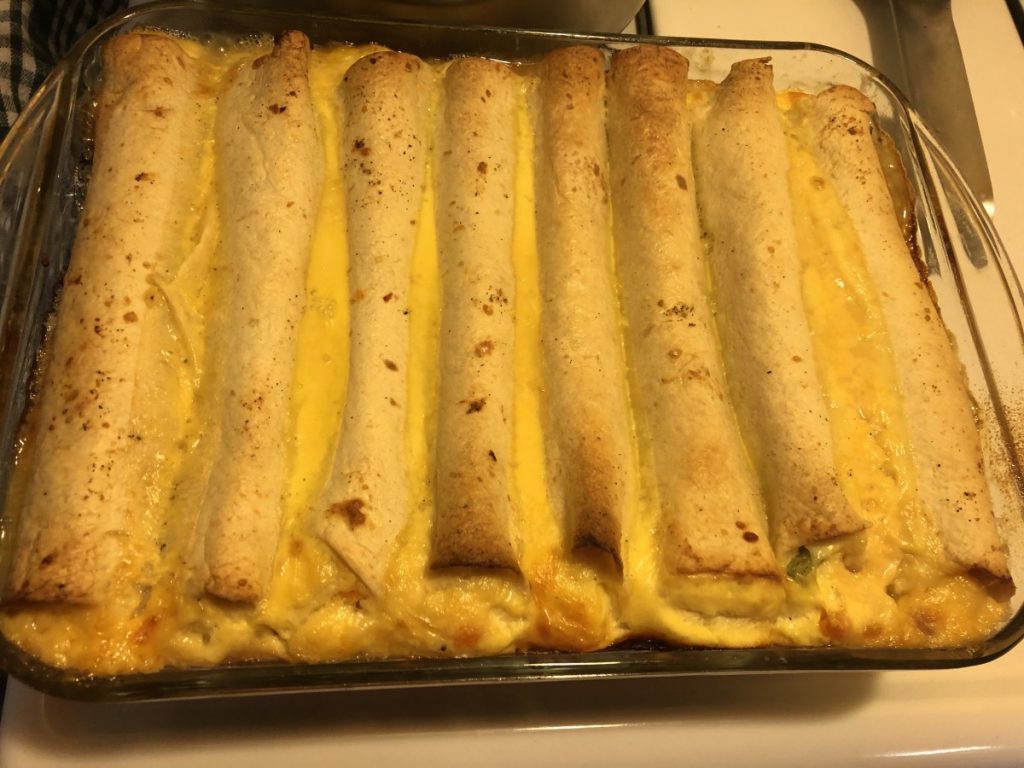
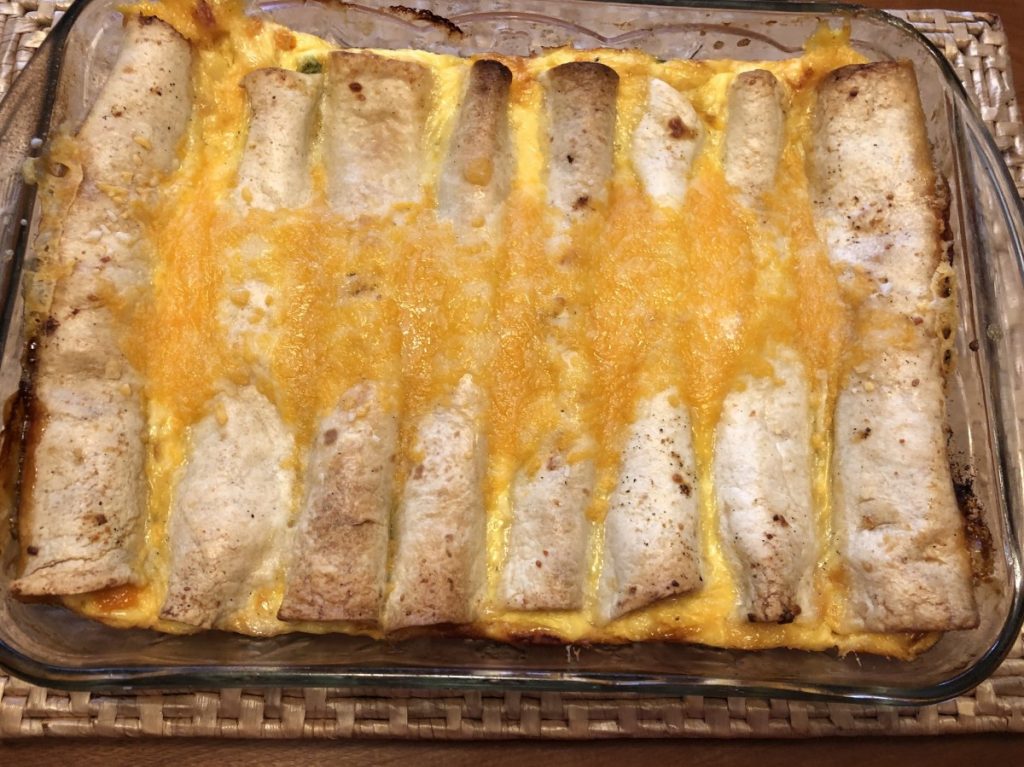
These are not traditional enchiladas, and I am OK with that. Made with a ham and cheese filling, then topped with an egg-based custard, they are a wonderful addition to any brunch menu. They would be fine served for breakfast or lunch, too. The prep in all done the day before, so you just have to pop them in the oven when ready to bake and serve. Nice for Mother’s day.
The recipe can be easily tweaked, to work with other ingredients. Maybe a corned beef and Swiss cheese version or chicken with broccoli. You could also go vegetarian with a combination of beans and veggies. You can cut the recipe in half, or freeze leftovers. I love a versatile recipe.
I started calling them Tara’s Enchiladas for my friend Tara, who needed a recipe for a Mother’s day brunch a few years ago. She made them and really loved them.
So here is the recipe. Hope you give it a try.
Tara’s Brunch Enchiladas
12 oz. fully cooked ham, chopped fine or ground
½ c. sliced green onions
½ c. chopped sweet pepper
2½ c. shredded cheddar cheese
8 (8-inch) flour tortillas
4 beaten eggs
2 c. half and half or milk
1 T. flour
salt, pepper, and garlic powder to taste- ham is salty- so go light on salt
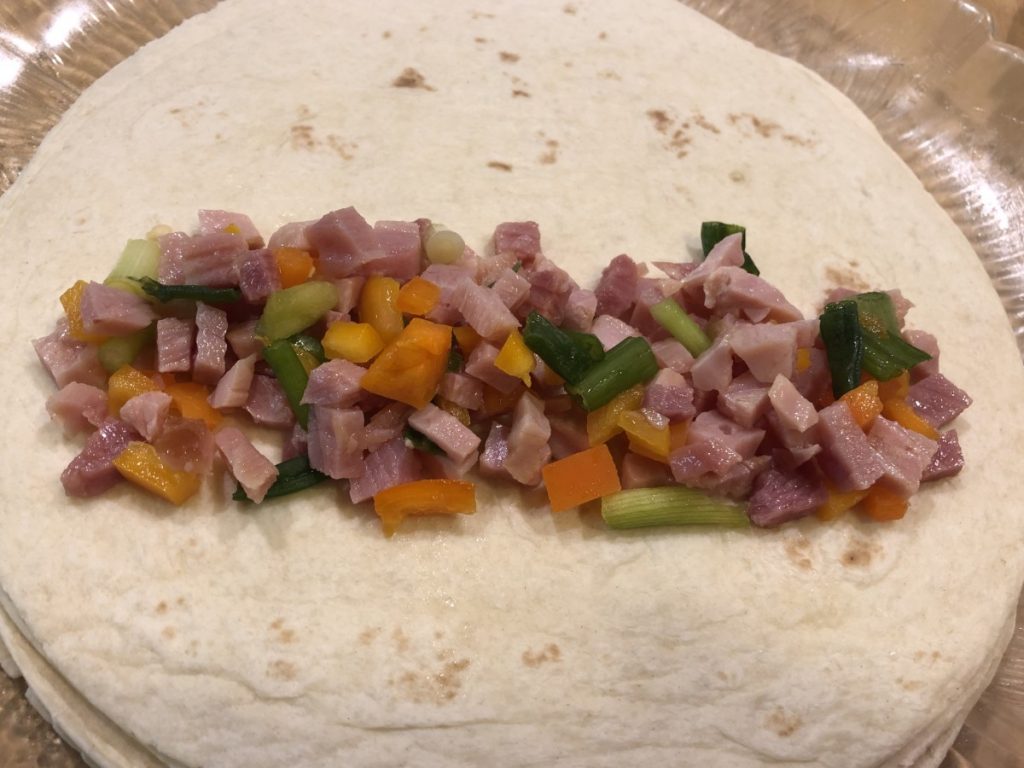
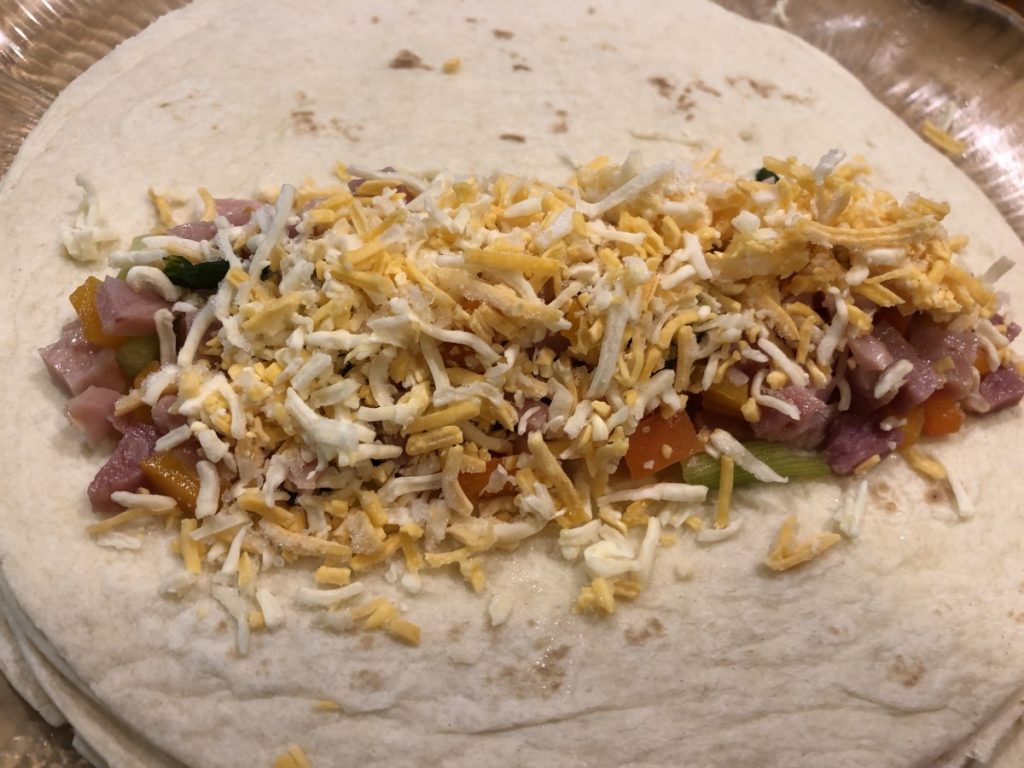
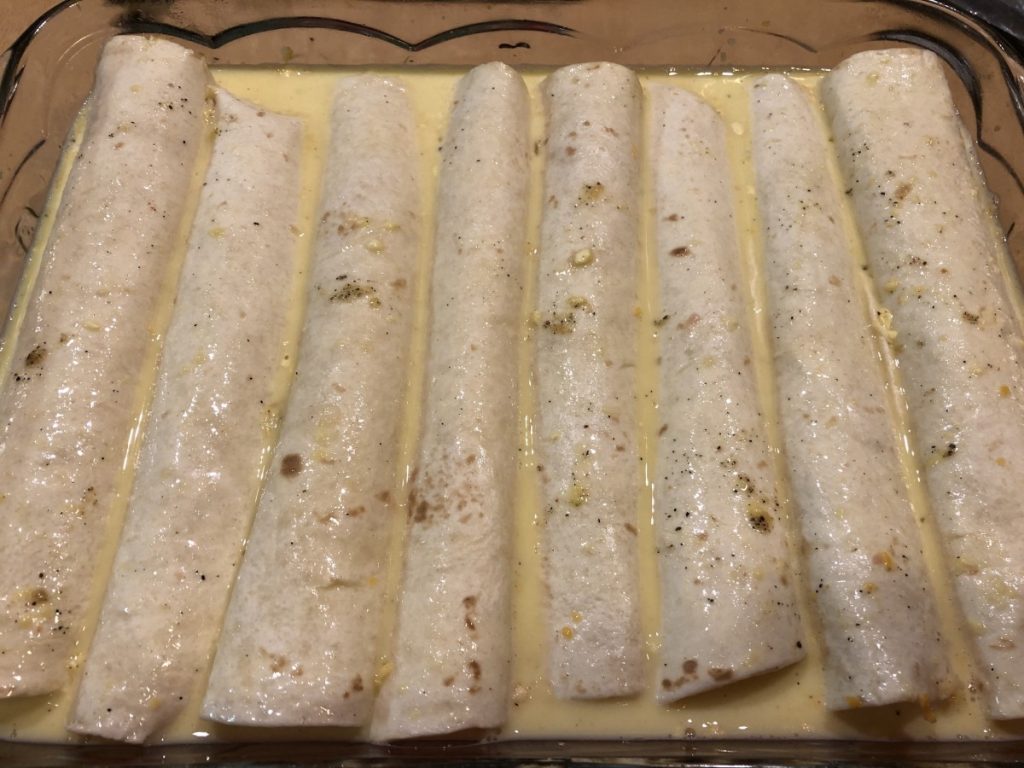
In bowl, combine ham with vegetables. Place 1/3 c. of ham mixture and 3 tablespoons of cheese in each tortilla and roll up. Place tortillas, seam side down, in greased 9×13-inch pan. Combine remaining ingredients and mix well. Pour over tortillas. Refrigerate several hours or overnight. Uncover and bake in a 350-degree oven for 45-50 minutes or until set. To check for “doneness”, insert a knife off center. Knife should come out clean. Sprinkle with remaining cheese and return to oven for 3-5 minutes to melt cheese. Serves 8.
Note: Let enchiladas sit a few minutes before serving to make cutting easier. I cut them down the middle, then into squares to serve.
Coffee Waffles
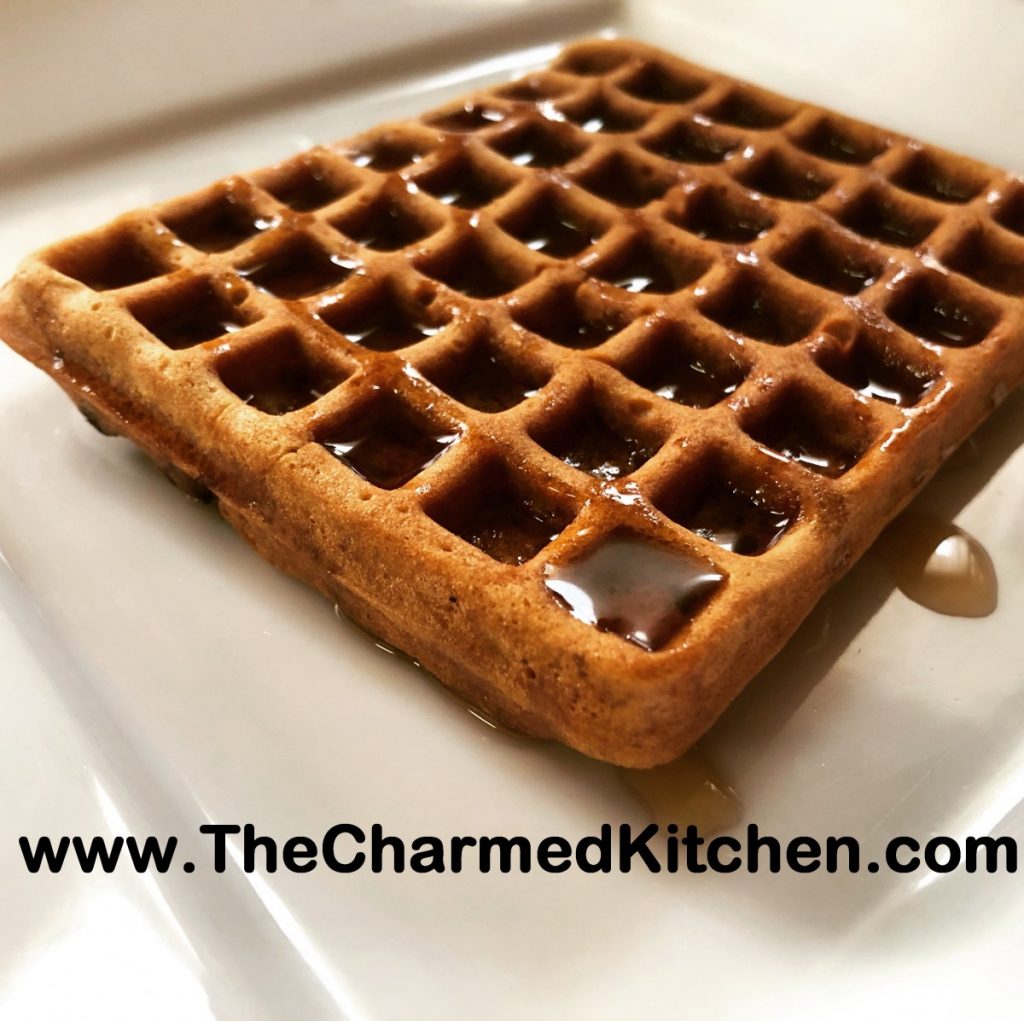
Yes, you read that right. Coffee waffles. Waffles with coffee already inside them. They are quite wonderful actually. Great for breakfast, which is obvious, I suppose. These waffles also make a fun base for desserts. I am serving them with honey ice cream as a dessert. This is a nice recipe to make for Mom on Mother’s Day.
I wanted to add coffee flavor to waffles, but I knew even strong coffee would water down the batter too much. The only solution was to use either instant coffee or espresso powder. I knew I could get enough coffee flavor into them, without affecting the batter in a negative way.
It worked!! Plenty of coffee flavor and a nice, crispy waffle. I was thinking it might be fun to add cinnamon to the next batch. I got 10 rectangular waffles out of the recipe. Froze most of them for later.
You can serve them topped with butter, syrup, whipped cream or powdered sugar.
So here is the recipe. Hope you give them a try.
Coffee Waffles
1¾ c. flour
¼ c. brown sugar
1½ t. baking powder
½ t. salt
1½ c. half and half or milk
1 egg, beaten
1/3 c. oil
1 T. instant coffee or espresso powder
1 T. vanilla
Non-stick spray or oil for coating the waffle iron
In medium mixing bowl, mix dry ingredients together and set aside. In a separate bowl, combine the half and half with the remaining ingredients. The dry coffee granules will not dissolve right away. You can let the wet ingredients sit a few minutes and whisk again, if you like. While they are just sitting there, you can heat up the waffle iron. Coat the waffle iron with a non-stick cooking spray or brush with a little oil. Add the wet ingredients to the dry ingredients and stir until mixed together. Don’t get crazy over mixing. That will give you tough waffles, and nobody wants that. Just stir until you don’t see any dry bits in the mix. I like to use a rubber scraper to get to the bottom of the bowl. Ladle some batter into the waffle iron and cook until golden brown. When the steam stops coming out of the waffle iron, or lessens a lot, it is usually good indicator that your waffles are done. Yield depends on the size of your waffle iron. I got 10 waffles, about 4×5 inches.
Note: The instant coffee breaks down more when mixed with the dry ingredients. Espresso powder will dissolve quickly, but if you use instant coffee like I did, expect a few “flecks” of coffee in the batter. I kind of liked the way it looked.
Tara’s Brunch Enchiladas

These are not traditional enchiladas, and I am OK with that. Made with a ham and cheese filling, then topped with an egg-based custard, they are a wonderful addition to any brunch menu. They would be fine served for breakfast or lunch, too. The prep in all done the day before, so you just have to pop them in the oven when ready to bake and serve. Nice for Mother’s day.
The recipe can be easily tweaked, to work with other ingredients. Maybe a corned beef and Swiss cheese version or chicken with broccoli. You could also go vegetarian with a combination of beans and veggies. You can cut the recipe in half, or freeze leftovers. I love a versatile recipe.
I started calling them Tara’s Enchiladas for my friend Tara, who needed a recipe for a Mother’s day brunch a few years ago. She made them and really loved them.
So here is the recipe. Hope you give it a try.
Brunch Enchiladas
12 oz. fully cooked ham, chopped fine or ground
½ c. sliced green onions
½ c. chopped sweet pepper
2½ c. shredded cheddar cheese
8 (8-inch) flour tortillas
4 beaten eggs
2 c. half and half or milk
1 T. flour
salt, pepper, and garlic powder to taste- ham is salty- so go light on salt
In bowl, combine ham with vegetables. Place 1/3 c. of ham mixture and 3 tablespoons of cheese in each tortilla and roll up. Place tortillas, seam side down, in greased 9×13-inch pan. Combine remaining ingredients and mix well. Pour over tortillas. Refrigerate several hours or overnight. Uncover and bake in a 350-degree oven for 45-50 minutes or until set. To check for doneness, insert a knife off center. Knife should come out clean. Sprinkle with remaining cheese and return to oven for 3-5 minutes to melt cheese. Serves 8.
Note: Let enchiladas sit a few minutes before serving to make cutting easier. I cut them down the middle, then into squares to serve.


Coffee Waffles

One more idea for something to make for Mom on Mother’s Day. Yes, you read that right. Coffee waffles. Waffles with coffee already inside them. They are quite wonderful actually. Great for breakfast, which is obvious, I suppose. These waffles also make a fun base for desserts. I am serving them with honey ice cream as a dessert.
I wanted to add coffee flavor to waffles, but I knew even strong coffee would water down the batter too much. The only solution was to use either instant coffee or espresso powder. I knew I could get enough coffee flavor into them, without affecting the batter in a negative way.
It worked!! Plenty of coffee flavor and a nice, crispy waffle. I was thinking it might be fun to add cinnamon to the next batch. I got 10 rectangular waffles out of the recipe. Froze most of them for later.
You can serve them topped with butter, syrup, whipped cream or powdered sugar.
So here is the recipe. Hope you give them a try.
Coffee Waffles
1¾ c. flour
¼ c. brown sugar
1½ t. baking powder
½ t. salt
1½ c. half and half or milk
1 egg, beaten
1/3 c. oil
1 T. instant coffee or espresso powder
1 T. vanilla
Non-stick spray or oil for coating the waffle iron
In medium mixing bowl, mix dry ingredients together and set aside. In a separate bowl, combine the half and half with the remaining ingredients. The dry coffee granules will not dissolve right away. You can let the wet ingredients sit a few minutes and whisk again, if you like. While they are just sitting there, you can heat up the waffle iron. Coat the waffle iron with a non-stick cooking spray or brush with a little oil. Add the wet ingredients to the dry ingredients and stir until mixed together. Don’t get crazy over mixing. That will give you tough waffles, and nobody wants that. Just stir until you don’t see any dry bits in the mix. I like to use a rubber scraper to get to the bottom of the bowl. Ladle some batter into the waffle iron and cook until golden brown. When the steam stops coming out of the waffle iron, or lessens a lot, it is usually good indicator that your waffles are done. Yield depends on the size of your waffle iron. I got 10 waffles, about 4×5 inches.
Note: The instant coffee breaks down more when mixed with the dry ingredients. Espresso powder will dissolve quickly, but if you use instant coffee like I did, expect a few “flecks” of coffee in the batter. I kind of liked the way it looked.
Tara’s Brunch Enchiladas

These are not traditional enchiladas, and I am OK with that. Made with a ham and cheese filling, then topped with an egg-based custard, they are a wonderful addition to any brunch menu. They would be fine served for breakfast or lunch, too. The prep in all done the day before, so you just have to pop them in the oven when ready to bake and serve. Nice for Mother’s day.
The recipe can be easily tweaked, to work with other ingredients. Maybe a corned beef and Swiss cheese version or chicken with broccoli. You could also go vegetarian with a combination of beans and veggies. You can cut the recipe in half, or freeze leftovers. I love a versatile recipe.
I started calling them Tara’s Enchiladas for my friend Tara, who needed a recipe for a Mother’s day brunch a few years ago. She made them and really loved them.
So here is the recipe. Hope you give it a try.
Brunch Enchiladas
12 oz. fully cooked ham, chopped fine or ground
½ c. sliced green onions
½ c. chopped sweet pepper
2½ c. shredded cheddar cheese
8 (8-inch) flour tortillas
4 beaten eggs
2 c. half and half or milk
1 T. flour
salt, pepper, and garlic powder to taste- ham is salty- so go light on salt
In bowl, combine ham with vegetables. Place 1/3 c. of ham mixture and 3 tablespoons of cheese in each tortilla and roll up. Place tortillas, seam side down, in greased 9×13-inch pan. Combine remaining ingredients and mix well. Pour over tortillas. Refrigerate several hours or overnight. Uncover and bake in a 350-degree oven for 45-50 minutes or until set. To check for doneness, insert a knife off center. Knife should come out clean. Sprinkle with remaining cheese and return to oven for 3-5 minutes to melt cheese. Serves 8.
Note: Let enchiladas sit a few minutes before serving to make cutting easier. I cut them down the middle, then into squares to serve.


Blueberry Pancakes and Blueberry Syrup
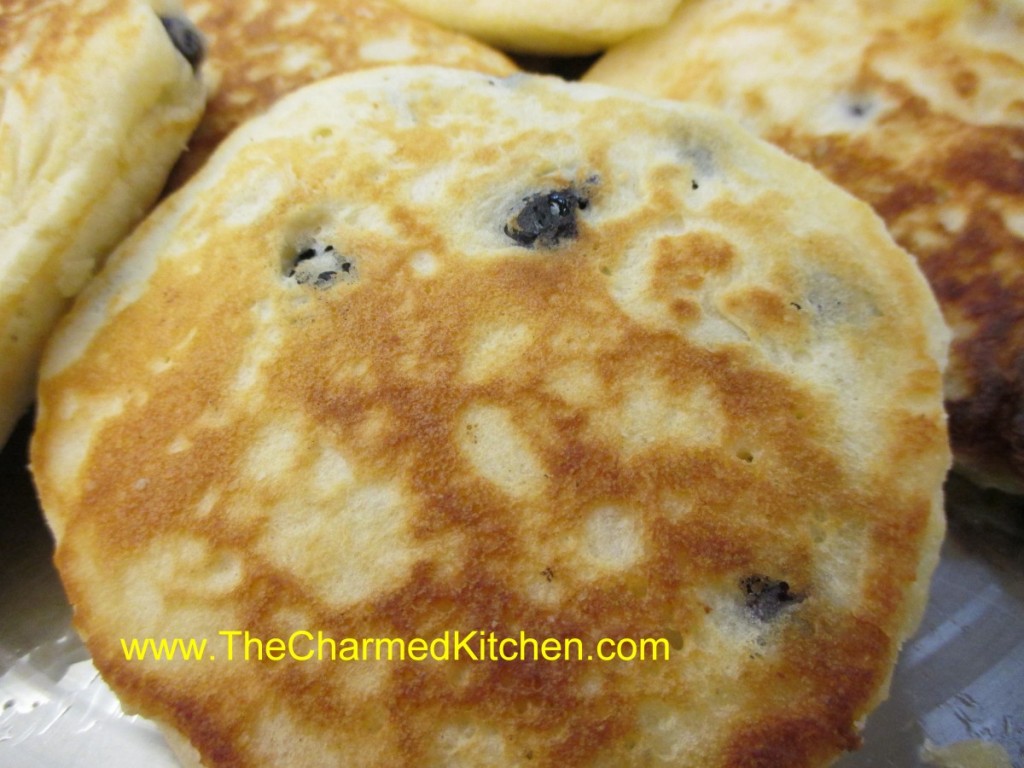
For breakfast I can’t think of a better dish than blueberry pancakes with fresh made blueberry syrup. These would make a great breakfast for Mom on Mother’s Day.
I was talking to a friend yesterday about some of our favorite breakfast foods. Blueberry pancakes were at the top of both our lists.
This is why I freeze blueberries. So I can have these wonderful pancakes whenever the mood strikes.
The secret is to fluffy pancakes is not to over mix the batter. The ingredients are stirred until just combined. I used a homemade biscuit mix as the base. The recipe follows.
The baking mix is normally made with shortening, but I use coconut oil. You can use the mix in any recipe that calls for baking mixes, like Bisquick or Jiffy mix. When using coconut oil, you might want to store the mix in the fridge in hot weather. Normally I store it at room temperature, but pop it in the fridge during the summer. You could also make the baking mix with butter- store in the fridge.
The syrup is pretty simple. Just three ingredients; blueberries, sugar and a little water. Sometimes I add some vanilla or a little lemon zest. I served it warm over the pancakes.
Blueberry Pancakes
2 c. biscuit mix*
1 c. milk – I used half and half
2 eggs
1 c. fresh or frozen blueberries
Combine mix, milk and eggs until just blended. Fold in berries. Pour batter by scant 1/4 cups in lightly greased griddle or skillet over moderate heat. Turn when pancakes are dry around the edges. Cook until golden brown. Makes about 13.
* Like Bisquick or Jiffy Mix or home made- recipe follows
Biscuit Mix
8 c. flour
1 c. powdered milk
1 c. powdered buttermilk (or 1 more cup powdered milk)
1/4 c. baking powder
1 T. salt
1 1/2 c. shortening* I use coconut oil
Combine dry ingredients and cut in shortening until well mixed. Store in tightly covered container. Makes 10 cups.
* You can substitute coconut oil or butter for the shortening- but mix will have to be kept cool. Refrigerate if using butter and use withing 3 months.
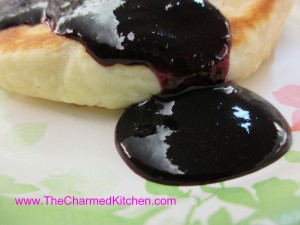
Blueberry Pancakes with Blueberry Syrup
Blueberry Syrup
4 c. blueberries
1 c. water
1½ c. sugar
In saucepan heat berries and water to a boil and boil 2 minutes. Crush berries with a potato masher as they cook. Add sugar and cook for 10- 15 minutes on medium heat until mixture thickens. Process syrup with an immersion blender or in a blender until smooth. Cool, then refrigerate. Keeps a couple of weeks. Makes about 3½ cups.
Lemon Tea Cake
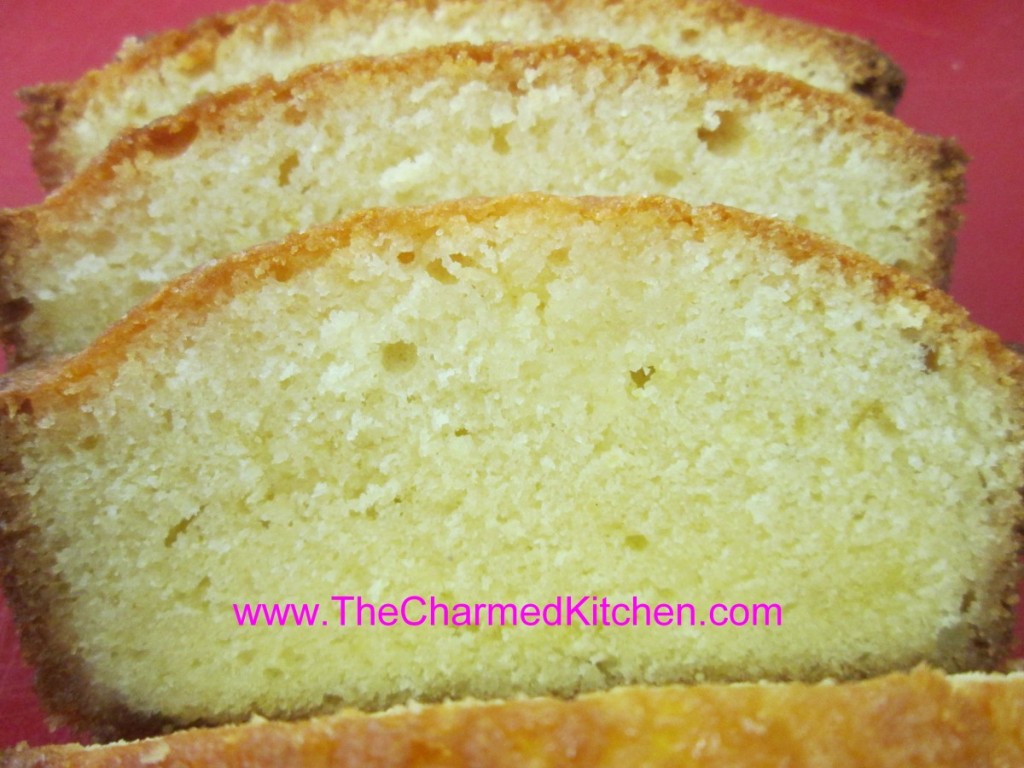
This is one of my favorite cakes of all time. It is a simple cake, enhanced with the flavor of lemon juice and lemon zest. Once out of the oven, you poke the hot cake with a large fork or a skewer, and pour a lemon syrup over it.
Moist, tangy and fragrant, it is a perfect addition to afternoon tea.
Great all on its own, this cake is also wonderful served with fresh berries and whipped cream for a Spring dessert. On a hot day, I have been known to top it with a scoop of ice cream.
Before you ask, the measurements are correct- only 3/4 cup of flour. No leaveners like baking powder or baking soda, either. The cake does not rise a whole bunch, but the texture is still very nice. The denseness of the cake helps it to stand up to the lemon syrup.
I hope you will give it a try.
Lemon Tea Cake
2 lemons
3 T. sugar for topping
½ c. butter, softened
¾ c. sugar
2 eggs, beaten
3/4 c. flour
6 T. milk or half and half
Preheat oven to 375 degrees. Grease an 8- inch loaf pan and line with wax or parchment paper. Grate the lemon rinds and set aside. Combine the juice of 1 of the lemons with the 3 tablespoons of sugar, stirring to dissolve sugar. Set aside.
Cream together the butter with the rest of the sugar and beat until fluffy. Beat in the eggs, a little at a time until well mixed. Stir in the flour and lemon peel and beat well. Add the milk and beat well. Pour batter into prepared pan and bake at least an hour. The cake should spring back when touched lightly. As soon as you remove the cake from the oven pierce it all over with a long-tined fork or a skewer. Pour over the reserved lemon juice mixture. Cool cake in pan before serving. Cake will be moist and tangy.
Asparagus Irene
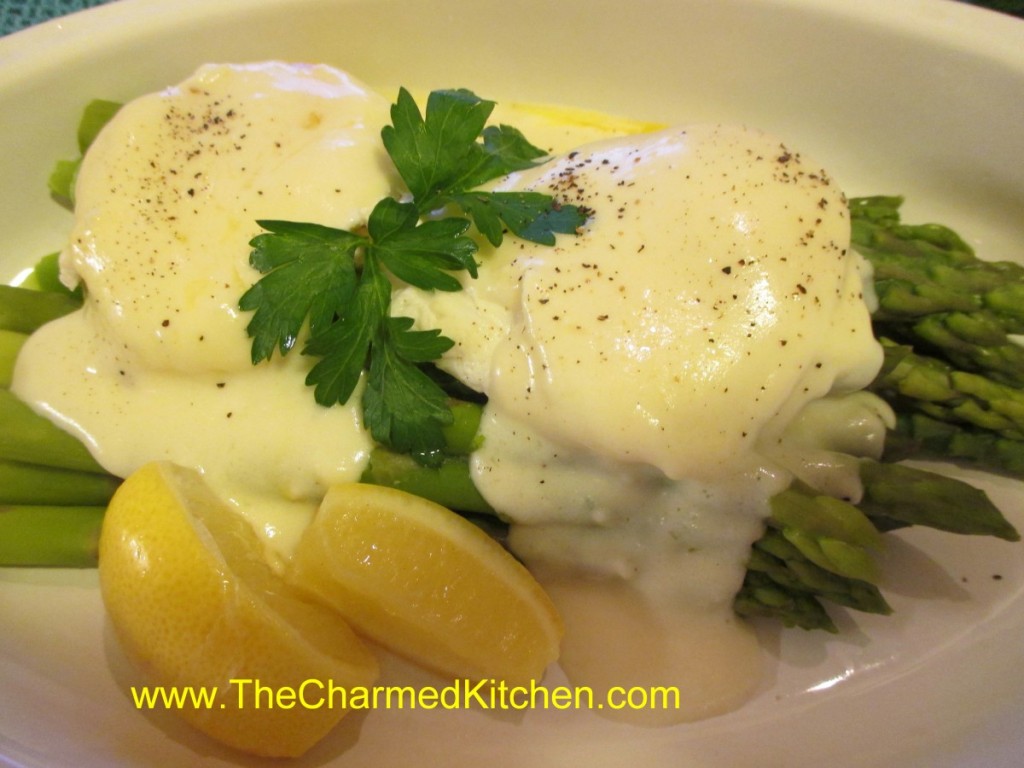
Asparagus will always be one of my favorite vegetables. I just love it. This would be a nice breakfast or lunch dish for Mother’s day.
As I started writing out the recipe for this dish, I was thinking about my Mom and how much she loved asparagus. She always wanted the bigger asparagus spears- she said they had more flavor.
I remember her showing me how to break the bottom of the stalks off and how she would cook them until they were just done- but not mushy.
She wouldn’t consider eating canned asparagus- only fresh- so the season was short. It was something to be savored while it lasted.
Most times she just placed the cooked asparagus on a plate, topped with a pat of butter and a sprinkle of salt. One time, though, she made a white sauce and poured it over the asparagus. It was bliss.
Naming a recipe can be tricky. I started out calling this Asparagus with Eggs, which was fine. Then I thought of how much my Mom loved asparagus. So in her memory- I named the dish after her.
For this version I used a white sauce, and topped the asparagus with 2 poached eggs, too. It is a lovely dish and makes a great dinner, too.
It also makes a nice meat-free meal.
Here is the recipe.
Asparagus Irene
1 lb. fresh asparagus, washed and stems trimmed
white sauce- recipe follows
fresh lemon, cut in wedges
2 eggs
vinegar- for the poaching water
salt and pepper to taste
Put the asparagus in a steamer and cook for about 5 minutes- or until almost done. Set aside. Make white sauce, but add some lemon juice to it. I just kept squeezing lemon wedges in until it tasted right to me. Set sauce aside. Boil some water in a shallow pan and add a tablespoon of vinegar to the water. Drop the two eggs in and simmer, covered until the whites are opaque and the yolks are still runny. While the eggs are cooking return the asparagus to the heat and cook until just tender. Place asparagus on a serving dish. Sprinkle with a little salt. Gently place the eggs on top of the asparagus. Spoon some of the white sauce over the eggs. You will have more sauce than you need. Save it for another use. Garnish with lemon wedges and parsley, if you like. Finish with some salt and fresh ground pepper. Serves 2.
Basic White Sauce (Bechamel)
The start of many a classic dish.
2 T. butter or oil
2 T. flour
1 1/4 c. warmed milk
salt and pepper to taste
In saucepan melt butter or heat oil and add flour, stirring until smooth. Slowly whisk in milk, stirring constantly until thickened and bubbly. Turn heat down and continue to cook, stirring constantly for a couple minutes longer. Season to taste. If you are going to store the sauce for later use place a layer of wax paper on top, store in a container with a lid or pour a little milk over the top to prevent a skin from forming. Makes about 1 c.
Lemon: Add zest of a lemon, 2 T. lemon juice and 2 T. butter just before serving.
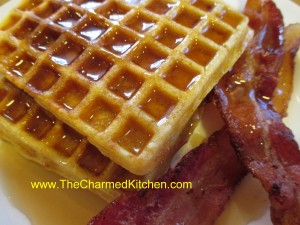
Bacon Waffles
If you are looking for a special breakfast for Mother’s Day, maybe mom would like some waffles. Even better, make her waffles with bacon inside them!!!
For me, breakfast doesn’t get much better than waffles. Well, unless maybe you add bacon to the waffle batter. Truth is, I don’t treat myself to waffles all that often, but if I am going to eat waffles, I go all out.
These are truly wonderful waffles. Light, crispy on the outside and studded with bacon. A drizzle of warm maple syrup and you are good to go.
So, if you are looking for a special treat for mom for breakfast, or lunch, or dinner or a snack… try these bacon waffles. You can thank me later.
Bacon Waffles
1 pound sliced bacon
1 3/4 cups all-purpose flour
1 tablespoon sugar
2 teaspoons baking powder
1/2 teaspoon salt
3 eggs, separated
1½ cups milk
¼ cup butter, melted
In a skillet, cook bacon until crisp. Drain; crumble and set aside. In a mixing bowl, combine the flour, sugar, baking powder and salt. Beat egg yolks, milk and butter; stir into dry ingredients until smooth. Beat egg whites until stiff peaks form; fold into batter. Add bacon. Before making each waffle, stir batter. Bake in a preheated waffle iron according to manufacturer’s directions until golden brown.
