With picnic and cook-out season here-I thought it would be a good time to post some tips to keep your picnic safe.
Common Picnic Problems
Besides ants, the biggest concern at a picnic should be food safety. While most of us know to keep cold foods cold, and hot food hot, there are some basic things we should all do to insure a safe, happy day.
Away from home and refrigeration, it is can be tricky to keep foods cold until ready to serve. Bring plenty of ice and coolers for all perishable food. Keep food cold until you are ready to cook or eat it. Get food back into coolers as soon as everyone has finished eating.
Package raw meats extra carefully. Raw meat juices, spilling on salads, will make them inedible. Pack raw meats separately if you can, or on the bottom of the cooler in a leak-proof container. You might also consider bringing meats, like burgers, frozen to thaw on the grill or in the cooler. Smoked meats are safer than their non-smoked counterparts but both types can spoil. The ideal situation is to have one cooler only for raw meats.
Don’t make burgers on site. Outdoor prep is always tricky. Better to form burgers at home, where you can wash all surfaces, as well as your hands, thoroughly. If you make them there- bring disposable gloves and a lightweight cutting board to work on.
Never use ice for drinks that has been in contact with raw meat, or even if any raw meats have been stored in the ice. Keep beverage ice in its own cooler, or keep it bagged to insure it is clean and safe.
Solid blocks of ice melt more slowly than cubes, and make good cooler inserts for long, hot summer days. Also, keep coolers in the shade to offset the power of the sun.
Meat should be cooked thoroughly and ground meat is always more at risk for contamination. Make sure your fire is hot enough. Allow for chilly, windy days and pack extra coals or other fuel, to keep the fire hot throughout the cooking process.
Make sure you don’t put cooked meats on the tray that the raw meat was on. Also have different prepping and serving utensils for both the raw and cooked meats.
You can also precook meats (like chicken pieces or ribs), cool and chill until ready for dinner. Then just heat them up over the coals. This way you don’t have the worry of bringing along raw meats and you’ll spend less time cooking and more time having fun.
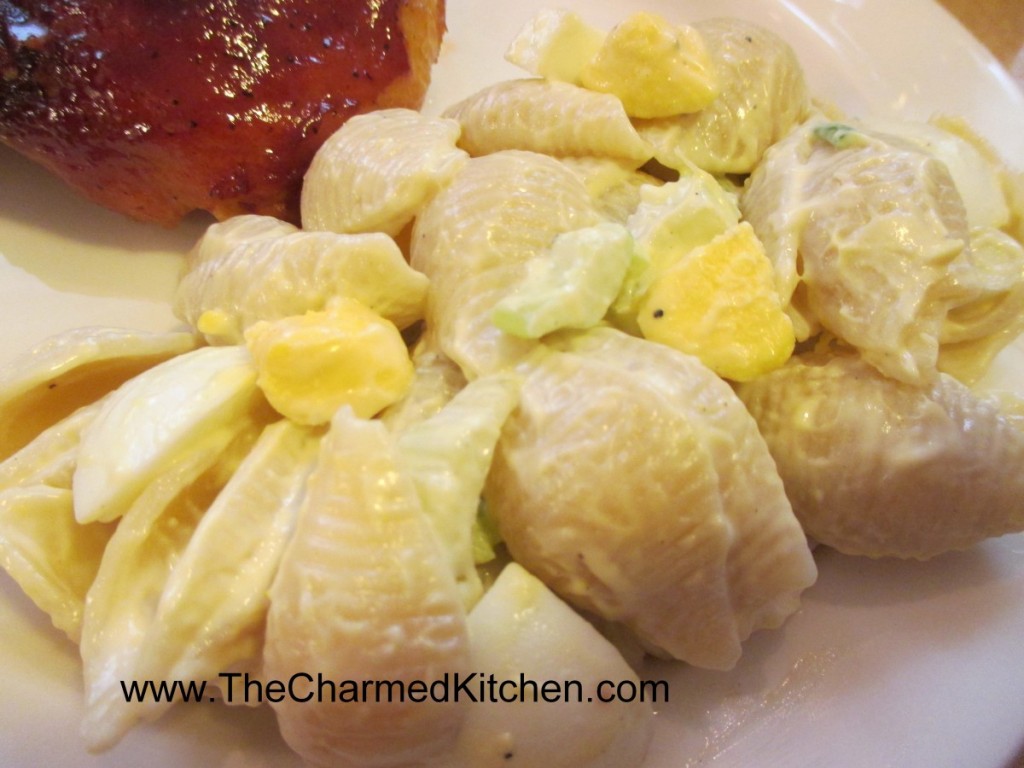
Mayo is not the evil purveyor of bacteria some people think. Mayo from a fresh jar, can actually retard the growth of bacteria. This does not mean you can leave the potato salad in the trunk for 3 hours because it has mayo in it. It just means that mayonnaise is not the culprit for food spoilage- bad handling was likely the cause.
While 2 hours is the maximum for food to be left out before being refrigerated again, use common sense. Obviously, on a 95 degree day that time is much shorter. Rather than one big bowl of pasta salad, bring several smaller ones that you can switch out. That way you always have cold salad that is safe. And bring plenty of serving spoons. It does no good to swap out the bowls of pasta salad for a fresh bowl, if you keep using the same serving spoon. Try to stay in the shade, too. Bringing some sort of canopy can keep food cooler than sitting in direct sunlight.
I am a big believer in a good hand washing being the best way to clean your hands- but you might not have running water where you are. Hand sanitizers are great when you don’t have hand washing as an option. I also bring a package of sanitizing wipes, in case a surface needs cleaning up, too.
If it is a hot day- you might want to have a large container, filled with ice, that you can put the bowls of salad into when serving, to keep them colder. That way the salads are surrounded by the ice and stay cold a lot longer. You can use a small baby pool. I like to use a container designed for under the bed storage. Nice size.
In the end, it is about using common sense, and copious amounts of ice. Remember, that if you lose track of time, forget to put something back in the cooler or leave something in the trunk, it is always better to play it safe. When in doubt-throw it out.
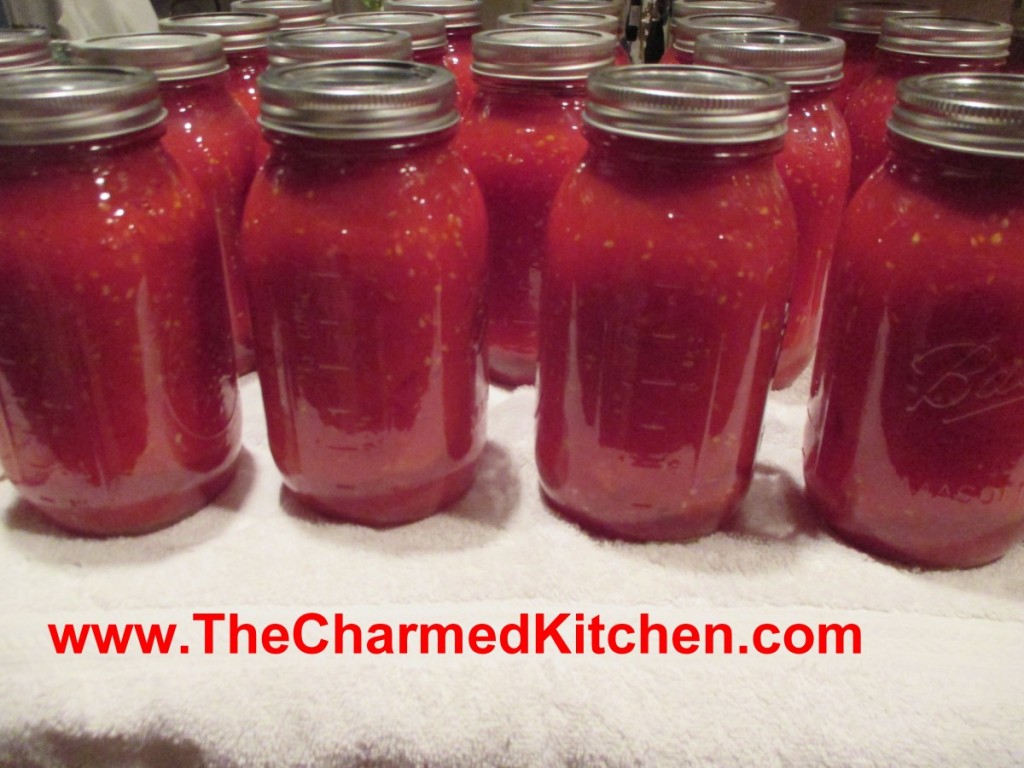
A lot more people are canning this year. That’s great, but maybe not so great if they are not canning safely. Following are some facts you might want to know before you can. When you follow the rules, home canning is very safe.
Canning isn’t cooking. The rules are stricter. I like to can ingredients to use in cooking later. I can get creative when I use my canned foods in cooking.
Before canning there are some basics you should know. There are general guidelines that need to be followed and some equipment that will make the job easier.
Great sources for safe canning recipes are NCHFP (National Center for Home Food Preservation) and recipes from Ball. There are a few reputable sources for information on social media. My own website has many safe, canning recipes. My friend, Debbie Seagraves, has a YouTube channel with safe canning recipes. There is also a lot of bad information out there. Be careful about who you listen to.
The USDA recommends that all jams and jellies be processed in a boiling water bath, unless it is a recipe that is frozen or unless all the preserves are to be kept refrigerated. Sealing jars with paraffin is no longer considered to be a safe way to preserve jams and jellies.
Other high acid foods, like tomatoes (when acidified), fruits and fruit products, and pickled foods can also be canned in a hot water bath.
Low acid foods, like vegetables (not pickled) and meats and seafood must always be processed in a pressure canner. Contrary to what some people might tell you, there is no safe canning time for water bathing green beans. The water will never get hot enough to kill botulism.
Just because someone didn’t get sick from incorrectly canned food does not mean they were right. They were just lucky. There was a case in Ohio a few years ago where a woman who served improperly canned potatoes, made people sick. At least one person died. Botulism has no taste or smell.
Rice, pasta, flour and most starches should not be used in home-canned foods. Clear -Gel, a modified corn starch, can be used in homemade pie fillings.
Dairy and eggs are also not recommended in home canning. No canned butter!!! However, there is an NCHFP tested recipe for canned lemon curd, using eggs and butter. It has a very short shelf-life- use in 3-4 months!! The lesson here- use a tested recipe. It has been tested over and over to be sure it is safe.
Just because it seals, it does not mean it is safe. You have to process properly, using a safe recipe. I can pour almost any boiling hot food in a jar and get it to seal. Does not mean what I did is safe. Don’t risk your family’s health.
Since the jars are sterilized in the canning process (of at least 10 minutes), there is no need to sterilize jars as a rule. They should be freshly washed in hot, soapy water, rinsed and kept warm until ready to use. You can also run them through the dishwasher and keep them in there until ready to fill. Because jams and jellies are packed when hot, cold jars might crack. Before starting make sure the jars are free of nicks and cracks, being extra careful to check the rims.
Note: the only time you must sterilize a jar is if it contained food that had spoiled. When I get jars second-hand I also sterilize them before use. To sterilize jars submerge them in boiling water for twenty minutes.
To prepare to water bath, have a canner (large kettle with a wire rack) filled with enough water to cover the jars by 1-2 inches and have it almost boiling when the jars are added. Turn up heat and cover the canner. Timing begins when the water comes to a boil (usually only a minute or two when hot jelly-filled jars are added). I get the water in the canner boiling first and turn it down to a high simmer until just before it is needed. Keep it covered to heat up faster and to prevent evaporation. If you do not have a canner, a kettle deep enough to accommodate the jars can be used. However, you must cover the bottom with a towel. Jars that touch the bottom of the pan directly can break during processing. You can also cover the bottom of the kettle with a small cooling rack. I have known people to wire canning jar rings together to make a sort of trivet for the bottom of a stock pot.
Pressure canners for use in the home were extensively redesigned beginning in the 1970’s. Models made before the 1970’s were heavy-walled kettles with clamp-on or turn-on lids. They were fitted with a dial gauge, a vent pipe in the form of a petcock or covered with a counterweight, and a safety fuse. Most modern pressure canners are lightweight, thin-walled kettles; most have turn-on lids fitted with gaskets. At least one style is still made with heavy cast aluminum, has screw-down knobs around the canner and does not have a gasket, however.
Modern pressure canners have removable racks, an automatic vent/cover lock, a vent pipe (steam vent), and a safety fuse. Use only canners that have the Underwriter’s Laboratory (UL) approval to ensure their safety.
Today’s pressure canner may have a dial gauge for indicating the pressure or a weighted gauge, for indicating and regulating the pressure. Weighted gauges are usually designed to “jiggle” several times a minute or to keep rocking gently when they are maintaining the correct pressure. Read your manufacturer’s directions to know how a particular weighted gauge should rock or jiggle to indicate that the proper pressure is reached and then maintained during processing. Dial gauge canners will usually have a counterweight or pressure regulator for sealing off the open vent pipe to pressurize the canner. This weight should not be confused with a weighted gauge and will not jiggle or rock as described for a weighted gauge canner. Pressure readings on a dial gauge canner are only registered on the dial and only the dial should be used as an indication of the pressure in the canner. One manufacturer now makes a dual-gauge canner; read the manufacturer’s user manual for information on when and how to use either the weighted gauge or the dial.
Pressure canners come deep enough for one layer of quart or smaller size jars, or deep enough for two layers of pint or smaller size jars. The USDA recommends that a canner be large enough to hold at least 4 quart jars, upright, to be considered a pressure canner for the USDA published processes. Smaller pressure cookers are NOT safe for use as pressure canners.
To prepare a pressure canner add several inches of hot water in the bottom of the canner that has a rack in the bottom. The canner will usually come with specific directions or a fill line. Some will have a specific amount of water that is added, like 3 or 4 quarts. Water will not cover your jars in pressure canning the way it does in water bath canning. After jars are added to the canner the lid is secured and the heat is turned on. Once steam starts to come out of the vent on top, the canner is vented for 10 minutes. The gauge is applied and the canner will start to increase in pressure. When proper pressure is attained timing begins.
To know when proper pressure is attained, you will just look at your gauge- if your pressure canner has a dial gauge. When using a weighted gauge, pressure is achieved when the weight begins to rock gently. Once you get up to pressure, you will be able to turn the heat down a little. Be careful not to reduce heat too much. If you go below the proper pressure, you have to get back up to pressure and start the timing over.
When the timed process is completed, turn off the heat, remove the canner from the heat (electric burner) if possible, and let the canner cool down naturally. (Lift the canner to move it; do not slide the canner. It is also okay to leave the canner in place after you have turned off the burner. It is better to do so than to let jars inside the canner tilt or tip over if the canner is too heavy to move easily.)
While the canner is cooling, it is also de-pressurizing. Do not force cool the canner. Forced cooling may result in food spoilage. Cooling the canner with cold running water or opening the vent pipe before the canner is fully depressurized are types of forced cooling. They will also cause loss of liquid from jars and seal failures. Forced cooling may also warp the canner lid. When the pressure is back down to zero, wait another few minutes before removing the lid. Always remove the lid away from you- the steam in the canner could burn you.
Prepare foods for canning in enamel, non-stick or stainless steal pans. Never use aluminum or copper, or enamel cookware that has chips.
Today, lids are two pieces consisting of the ring and a flat lid with a rubber ridge. Lids should be prepared according to the manufacturer’s instructions. Some ask you to boil them, others may just ask you to wash them and hold in warm water until ready to use. The rings can be used over and over, but the flat lids should only be used once. They may fail to seal if processed a second time. There are silicone lids, which can be used over and over. They are a little pricey, but you don’t have to replace them.
Jar-lifters are a handy tool to have. They allow you to place and remove the jars easily, with little risk of dropping them. They are available at many grocery stores and in cookware and department stores as well. A wide-mouth funnel (or canning funnel) is also handy when trying to ladle hot liquids into jars. Be sure to wipe off jar rims before putting the lid on to prevent food from causing the jars not to seal.
Screw the ring on firmly, but not too tight, or the jars will not seal properly. The term you will often hear id finger tip tight. Suggesting you tighten the ring using your fingertips only. That actually works well.
Jars removed from the water bath should be placed on a wire rack or on a towel to cool. You should hear them “plink” as the jars seal. Keep them away from drafts until cooled down. When completely cooled check to make sure that the jars have sealed. Press down on the middle. If the lid makes a “plink” noise it is not sealed. After jars have sealed and cooled remove ring, wipe with a damp cloth and store in cupboard until ready to use. I like to put dates on my jars, so I know when I canned them.
Always start with top quality produce. Bruises and blemishes will lead to spoilage. Small blemishes can be cut off, but be sure to remove all areas of spoilage.
If you are canning tomatoes and have a lot of imperfect fruit you are better off trimming off any bad spots and using this produce in recipes that will be frozen rather than canned.
When canning, always use canning salt or pickling salt. Iodized salt will cause an off-flavor in canned foods. Non-iodized salt can be used in a pinch. Sea salts contain minerals that will make liquids cloudy.
When using older canning books always check with your local Extension Office or the USDA for most current information and canning times. Periodically, times are changed or ingredients are adjusted for maximum safety. If you have old family recipes also check with your local Extension Office to find out if the recipe is still considered safe. You can also email NCHFP with questions about the safety of your recipe.
Never can in an oven. There are no safe canning times for home canning in ovens. Plus, thermal shock can cause the jars to shatter.
Nothing beats planning. When getting ready to can read the recipe all the way through and get all your equipment out. It is often easier and more fun to can with a friend or two. The extra hands always come in handy and when time is critical the extra help will make errors less likely.
In tomato-based products herbs can be added for flavor but do not randomly start adding other vegetables (like onion, peppers etc.). They will reduce the acidity and may make the product unsafe to can in a water bath.
When you do follow the proper rules, home canning is very safe and fun, too. It is a way of preserving your garden produce to enjoy all year long. Homemade jams and jellies make lovely, thoughtful gifts.
Besides the obvious ants, the biggest concern at a picnic should be food safety. While most of us know to keep cold foods cold and warm food warm (well, hot actually), there are some basic things we should all do to insure a safe, happy day.
Bring plenty of ice and coolers for all perishable food. Keep stuff cold until you are ready to cook or eat it. Get stuff back into coolers as soon as everyone has finished eating.
Package raw meats extra carefully, meat juices spilling on salads will make them inedible. Pack raw meats separately if you can, or on the bottom of the cooler in a leak-proof container. You might also consider bringing meats like burgers frozen to thaw on the grill or in the cooler. Smoked meats are safer than their non-smoked counterparts but both types can spoil.
Don’t make burgers on site. Outdoor prep is always tricky. Better to form burgers at home and wash all surfaces, as well as your hands thoroughly.
Never use ice for drinks that have been in contact with raw food or even if any foods have been stored in it. Keep beverage ice in its own cooler or keep it bagged to insure it is safe.
Solid blocks of ice melt more slowly than cubes and make good cooler inserts for long, hot summer days. Also keep coolers in the shade to offset the power of the sun.
Meat should be cooked thoroughly and ground meat is always more at risk for contamination. Make sure your fire is hot enough and allow for chilly, windy days and pack extra coals or other fuel to keep the fire hot throughout the cooking process.
You can also precook meats (like chicken pieces or ribs), cool and chill until ready for dinner. Then just heat them up over the coals. This way you don’t have the worry of bringing along raw meats and you’ll spend less time cooking and more time having fun.
Mayo is not automatically the evil purveyor of bacteria. Then again it can be. Mayo from a fresh jar can actually retard the growth of bacteria. Still, if you are using the dregs from the bottom of the jar and your kids tend to lick knives and re-dip you may be bringing bacteria along. Use common sense.
While 2 hours is the maximum for food to be left out before being refrigerated again, use common sense. Obviously, on a 95 degree day that time is much shorter. Rather than one big bowl of pasta salad bring several smaller ones that you can switch out. That way you always have cold salad that is safe. Try to stay in the shade, too. Bringing some sort of canopy can keep food cooler than sitting in direct sunlight.