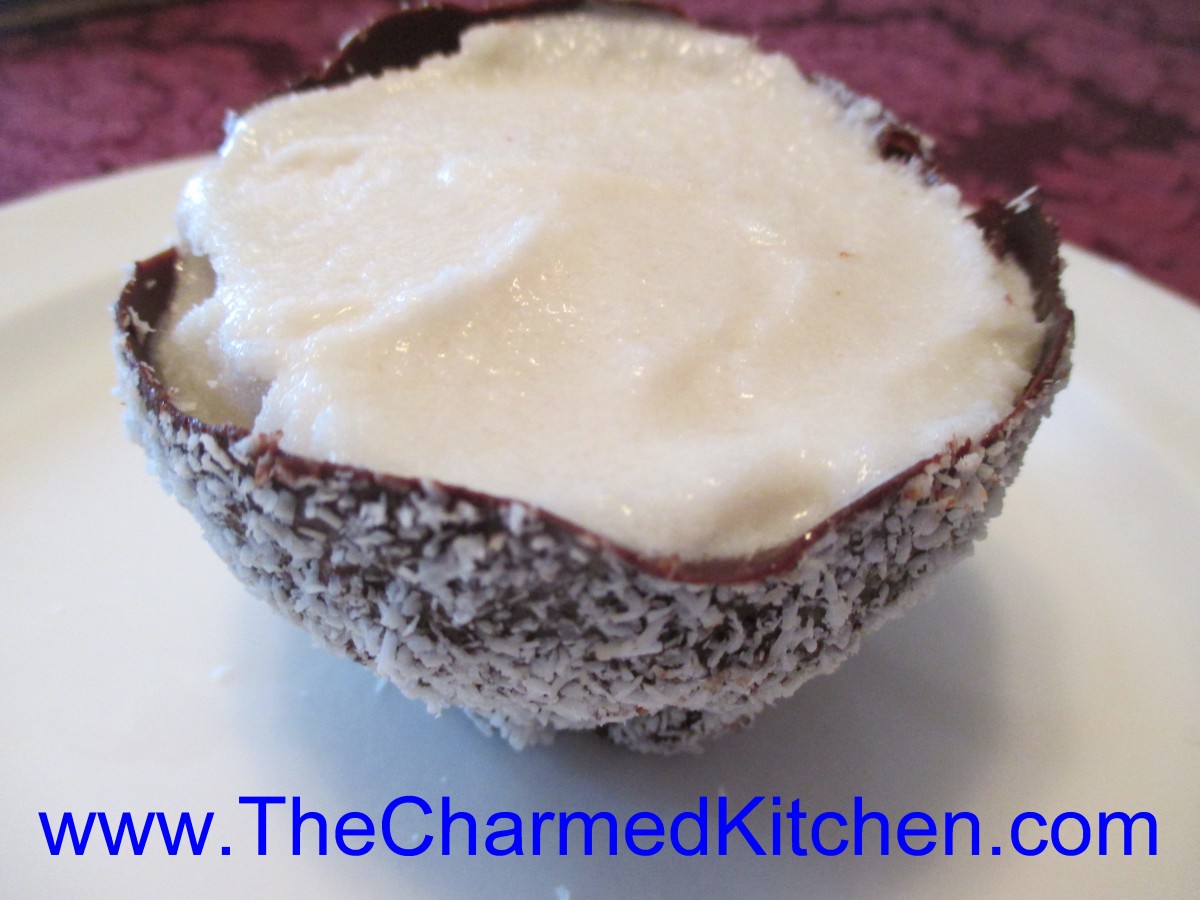
Coconut Chocolate Bowls
Now this is fun. Coconut almond sorbet served in chocolate bowls. The idea is to make the dessert look like coconuts. It worked out well and tasted great.
The whole dessert is dairy free and vegan as well. Great for people who have issues with dairy. You won’t miss the dairy in this recipe. The sorbet is smooth and creamy.
These are fun to serve for summer parties. You can make everything ahead of time, assemble and keep in the freezer until you want them.
The bowls are made by dipping inflated balloons in melted chocolate. Then you coat them is desiccated coconut to cover the chocolate. Desiccated coconut is dry and unsweetened. It looks like white bread crumbs. You can find it at Asian markets (it is the type of coconut used for coconut shrimp) . It is also found at cake decorating and candy making stores.
Let the bowls set- in fridge or freezer- until the chocolate hardens. Then you just pop the balloons and remove them. You are left with a chocolate bowl. Fill the bowls with the sorbet- you could use vanilla ice cream. I suppose, but the coconut sorbet really is better in this dish.
You can serve them as is- or top with some fresh fruit or chocolate sauce.
So here are the directions for the bowls and the recipe for the sorbet.
Chocolate “Coconut” Bowls
8 Balloons- blown up to 4-inch diameter
12 oz. Chocolate – I used bittersweet. Chocolate chips would work, too
about 1 cup of desiccated coconut- cake and candy making stores sell it- Asian markets, too.
Coconut Almond Sorbet- recipe follows
Blow up balloons and tie the ends. Melt chocolate and stir until smooth. I melt mine in a microwave, being careful not to let the chocolate burn. Allow chocolate to cool down a bit before dipping the balloons. This is really important: if the chocolate is too hot the balloons will explode before the chocolate hardens. Also, don’t get really cheap water balloons- they pop easy. I normally melt my chocolate and then add some unmelted chocolate to the bowl, which cools it down. Place some of the desiccated coconut in a shallow bowl. Dip the bottom of the bowl in the chocolate. Use a small rubber spatula to remove excess chocolate from the bottom. It is supposed to become a bowl, so leave some on the bottom, just not a huge blob. Tip the balloon and sprinkle the coconut all over the chocolate. You can set the balloon in the coconut, too. Set balloons on a small tray, lined with wax paper to set up. This is faster in the fridge or freezer. Once the chocolate is hard- pop the balloon and be sure to remove any of the left over pieces of balloon. Keep bowls in the fridge until ready to fill with sorbet. Makes 8.
When ready to fill them- scoop in some of the sorbet and smooth the top. You can do this ahead of time and store in the freezer until ready to serve.
Coconut Almond Sorbet
1 can (13.5 oz.) coconut milk
1½ c. almond milk
¼ c. sugar- or to taste
2 t. vanilla
Combine all ingredients in bowl and stir until sugar is dissolved. Place in an ice cream maker and freeze according to manufacturer’s instructions. Makes 1 quart.
Note: If you don’t have an ice cream machine, you can freeze the sorbet in a shallow tray. Once frozen, remove from freezer and let it soften a few minutes. Break into chunks and process in a food processor to soften. Return to freezer until ready to use.