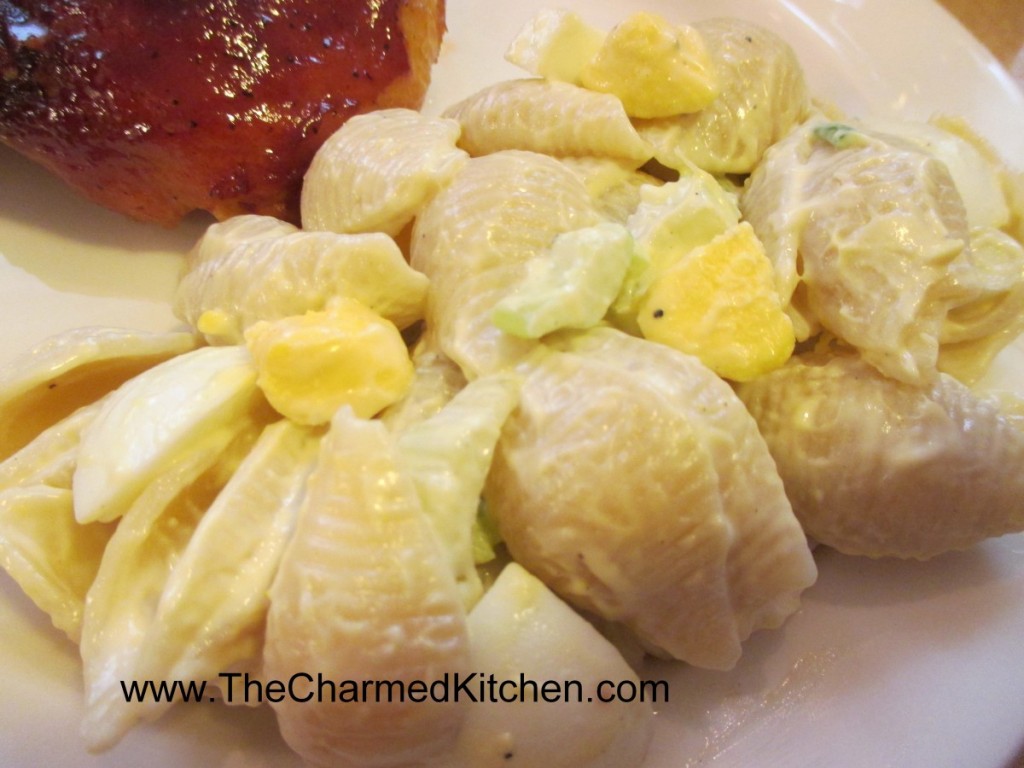
I’ve been in a nostalgic mood this week. Remembering, fondly, the picnics and cookouts from my childhood. For summer cookouts, we always had this salad. Long enough ago that it was called macaroni salad, not pasta salad. I loved it then, and I love it now.
I won’t say I don’t make other pasta salads. I do. I make all sorts of combinations, but this is the salad that brings me home.
Mom used mostly mayo, with a little salad dressing like Spin Blend.
She felt it gave the salad just a little more zing. I use straight mayo,
but that part of the recipe is flexible.
She added quite a few hard cooked eggs and I think they add a
richness to the dish. My dad would cut up the celery and green onions
for her. Mom liked the veggies cut into a fairly small dice in this
dish, and Dad had great knife skills. I love the image of them cooking
together.
So here it is- a family recipe wrapped up nicely with some memories, too.
Mom’s Macaroni Salad
1 lb. uncooked pasta, shells are preferred
Salt and pepper
Mayonnaise, about 1 cup
Salad dressing, like Miracle Whip, about ½ cup or more mayo
3-4 ribs celery, sliced thin
4-5 green onions, trimmed and sliced thin
8-12 hard-cooked eggs, cooled and peeled
Cook pasta according to package directions, but do not overcook.
Rinse with cold water and drain well. Place drained pasta in a large
bowl and sprinkle with salt and pepper to taste. Add dressings and
vegetables and stir until well mixed. You may want to add more dressing
to suit your taste. Chop eggs and stir into salad. Adjust seasonings if
needed and chill before serving. Serves 8-10.
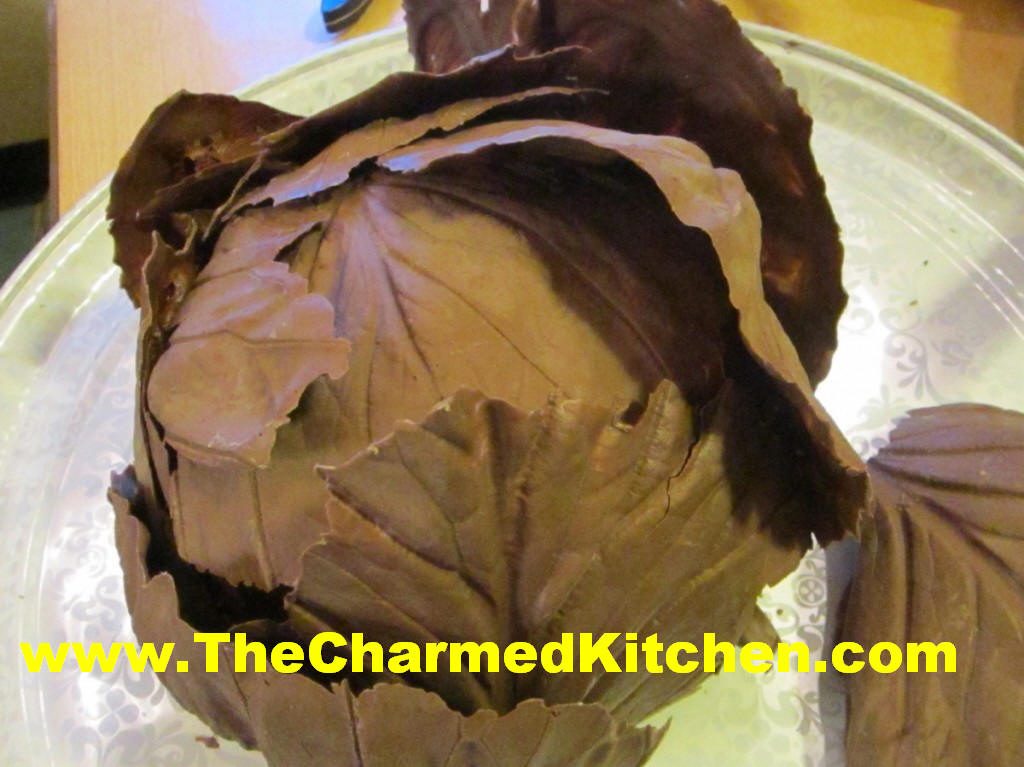
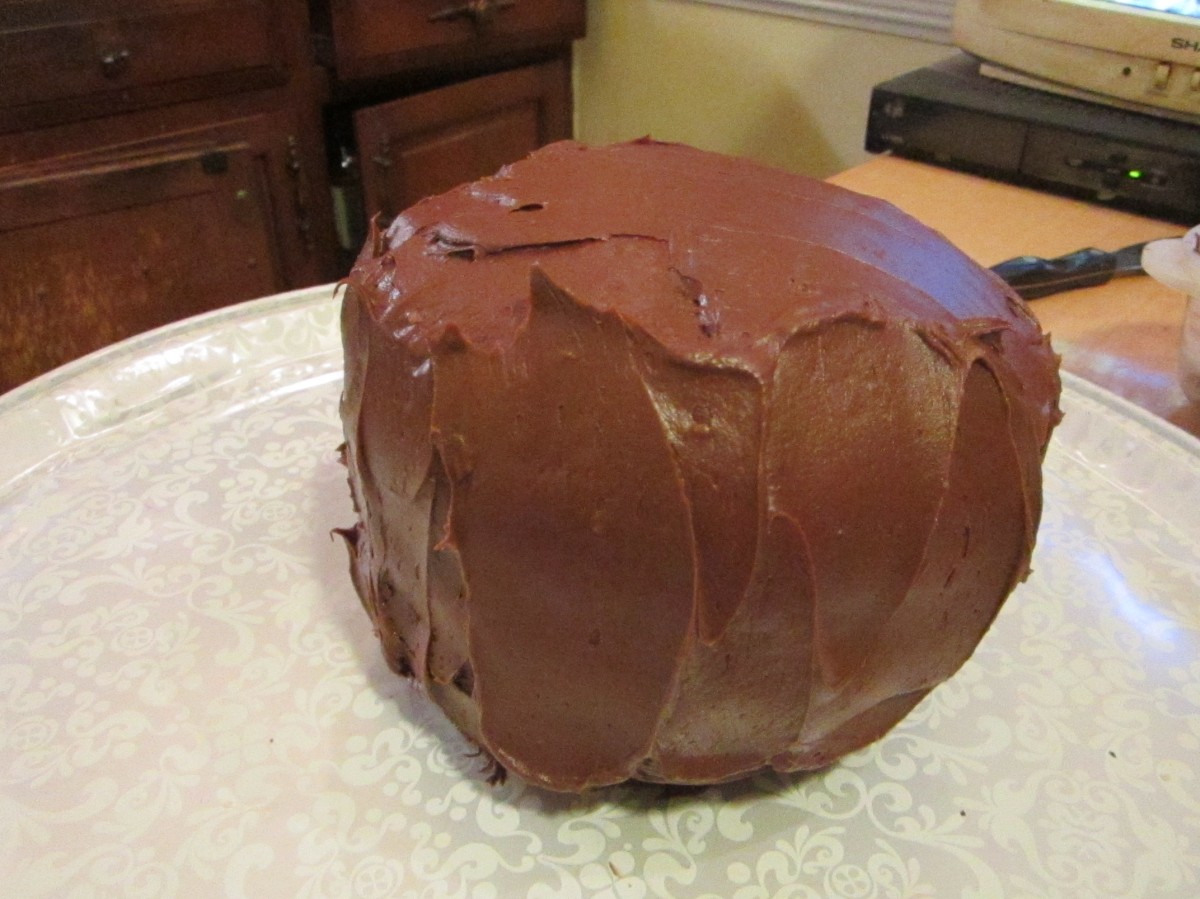
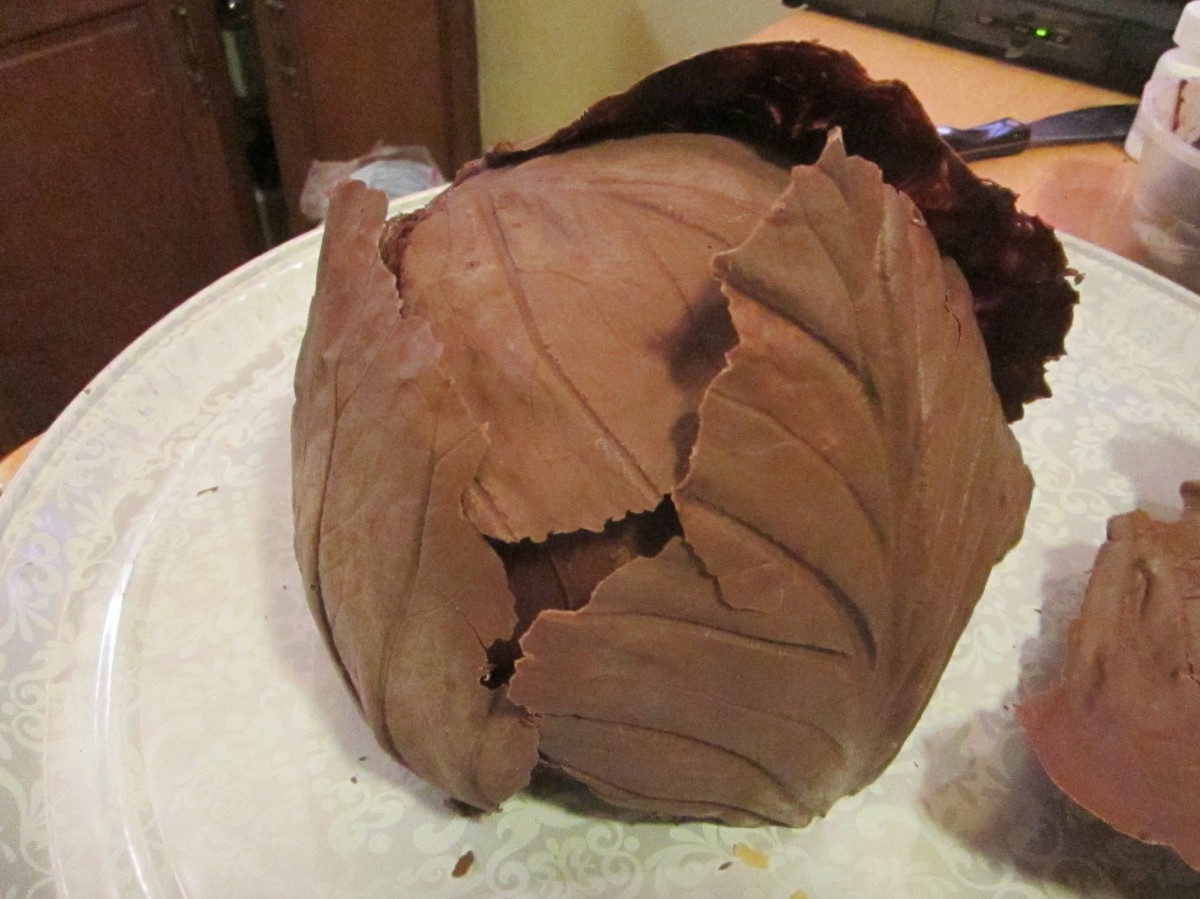
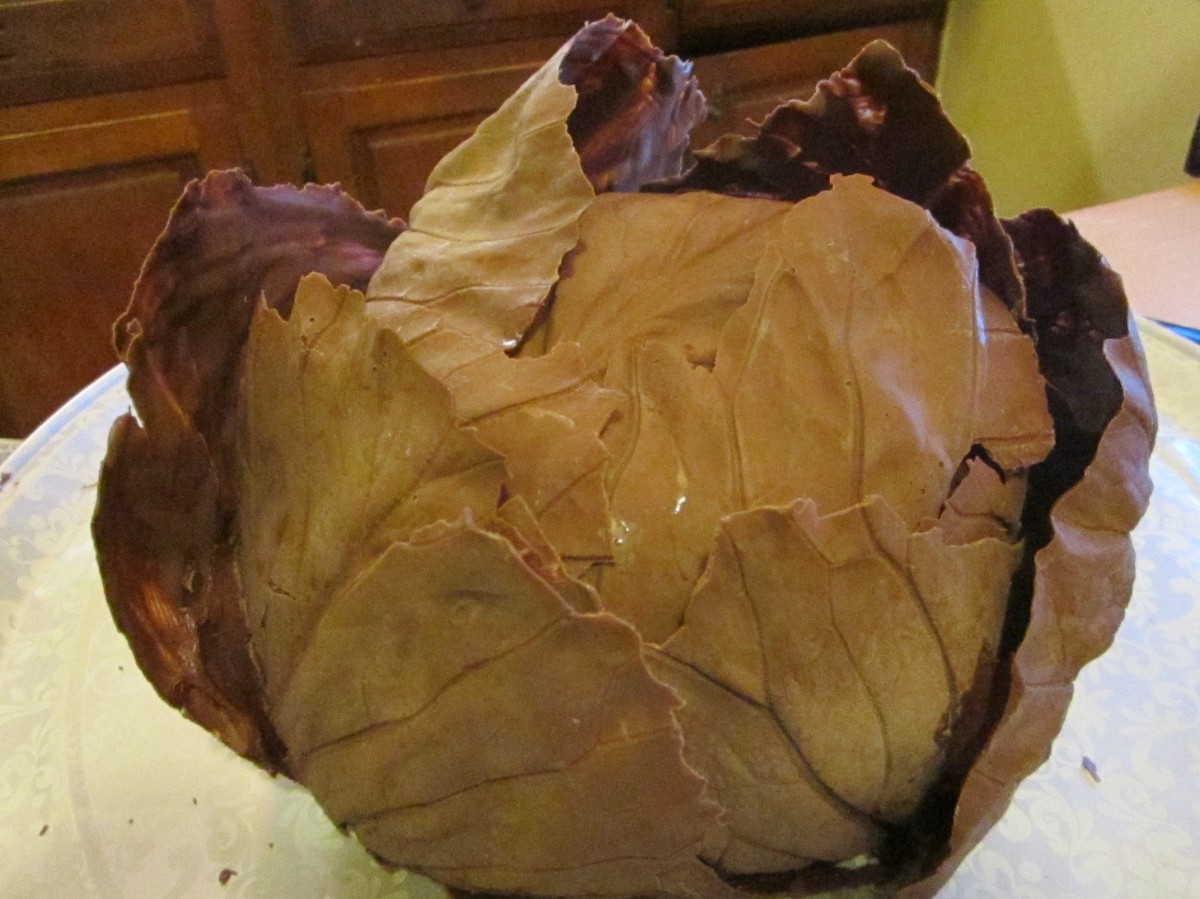
When you make a cake that looks like a giant head of cabbage- people are going to notice. We were celebrating a friend’s birthday and I wanted to bring a special cake for the occasion. While the cake looks like a head of cabbage- there is no cabbage in the cake.
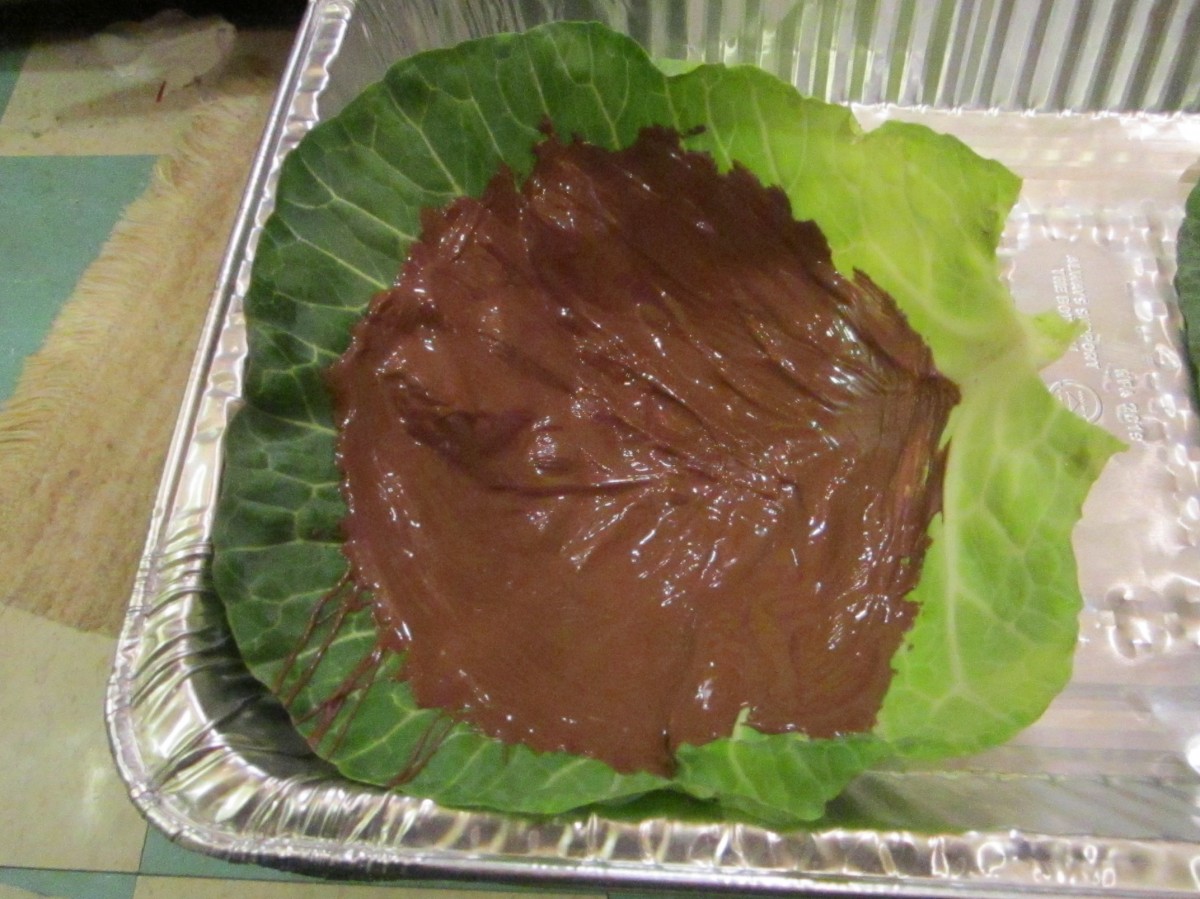
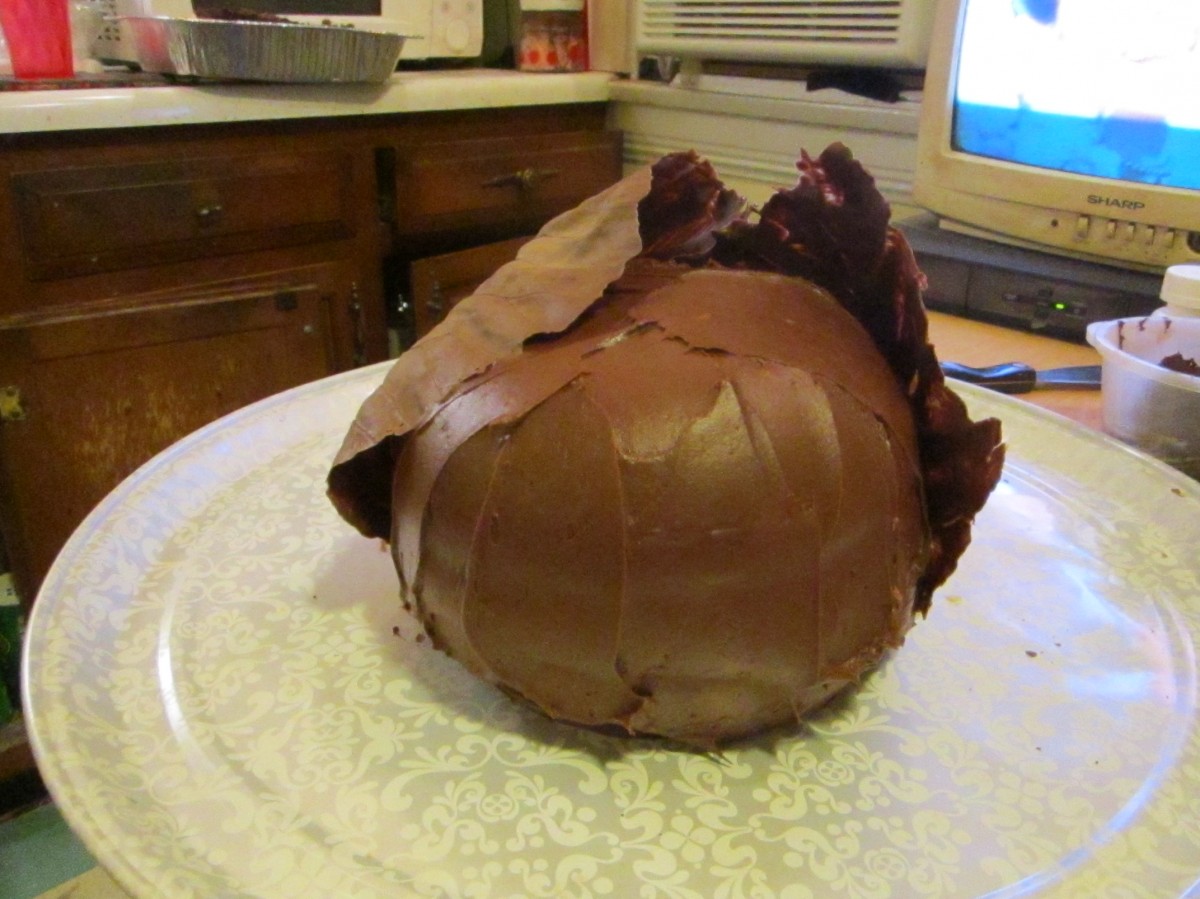
The cake is a round, chocolate cake covered in chocolate leaves. To make the leaves, melted chocolate is painted on cabbage leaves, cooled and then the leaves are peeled off.
While it takes some work, the cake is not as hard to make as you might think. You just have to be patient.
Start by making a round cake. Use 2 stainless steel bowls that are the same size. Bake them and after they are cooled, frost them together into a round cake. Recipe for cake and frosting follow.
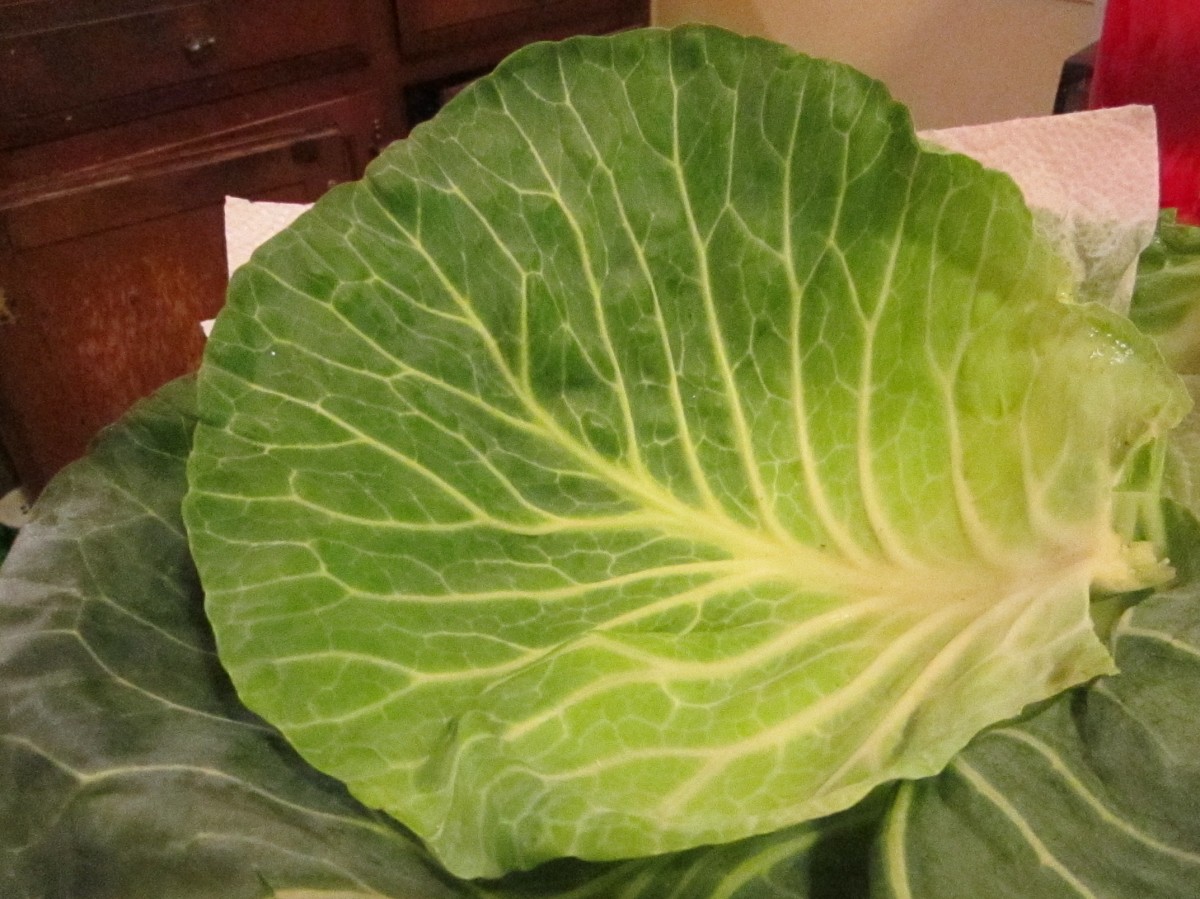
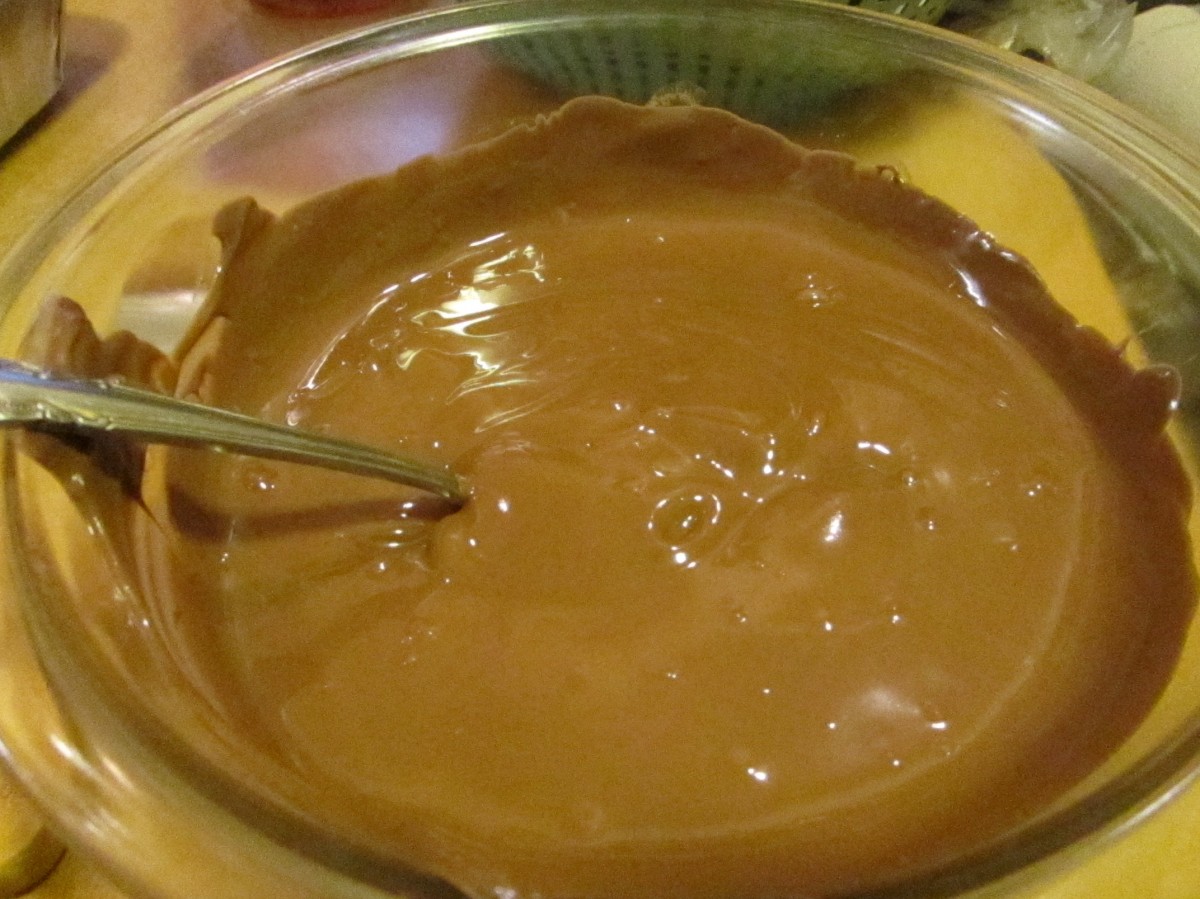
The fun starts when you paint large, clean cabbage leaves with melted chocolate. You will need a pound of chocolate. Maybe more. Ok, for sure more than a pound. I melt my chocolate in the microwave. Double boiler works , too.
Once the chocolate is painted on the leaves, I put the leaves in the fridge to set the chocolate faster. Hint: Leave a little leaf showing all around the edges. Easier to remove later. After they are cooled, I carefully peel off and discard the cabbage leaves. What I am left with are chocolate “leaves”. Press the chocolate leaves all around the cake until it is covered. Make a few extra leaves to decorate the plate and to allow for breakage and the chocolate you are going to eat. Also keep extra frosting on hand to use to affix the leaves.
Old-Fashioned Chocolate Cake
2 c. sugar
1¾ c. all-purpose flour
¾ c. cocoa
1½ t. baking powder
1½ t. baking soda
1 t. salt
2 eggs
1 c. milk
½ c. oil – I like avocado or olive oil
2 t. vanilla
1 c. boiling water
Heat oven to 350°F. Grease and flour two (1 qt.) metal bowls. Set aside. Stir together sugar, flour, cocoa, baking powder, baking soda and salt in large bowl. Add eggs, milk, oil and vanilla; beat on medium speed of mixer 2 minutes. Stir in boiling water (batter will be thin). Pour batter into prepared pans. Bake 35 to 40 minutes or until wooden pick inserted in center comes out clean. Cool 10 minutes; remove from pans to wire racks. Cool completely.
Chocolate Butter Cream
12 T. butter, softened
1½ c. cocoa, or more, depending on how dark you want your frosting.
5 c. powdered sugar
¼ c. milk
1 T. vanilla
Cream butter. Combine cocoa and sugar. Beat cocoa mixture
in alternately with the milk until frosting is spreading consistency. Beat in
vanilla. You may need an additional tablespoon of milk. Makes about 4 cups. You
need a good amount of frosting for the cabbage cake. You should have frosting
left over.
You can never have too many zucchini recipes. Especially this time of year. This simple recipe uses zucchini to make tender and flavorful pancakes.
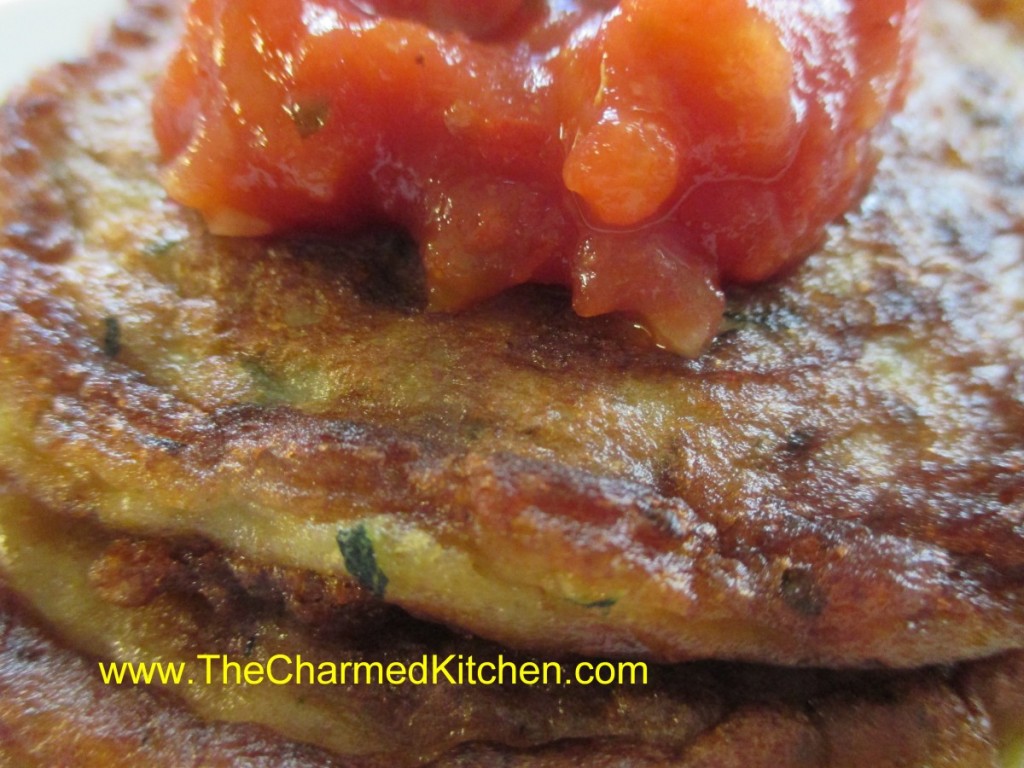
They aren’t the type of pancake you would pour maple syrup over. They are wonderful topped with some fresh salsa, though. I would- and have- eaten them for breakfast. These pancakes make a nice lunch or main dish meal. They can also be served as a side dish. Similar to potato pancakes.
I think they taste best when golden on the outside, a little crisp. They will still be tender inside.
So if you have more zucchini than you know what to do with, and you don’t want to bake zucchini bread, here is a recipe you might want to try.
Zucchini Pancakes
2 c. shredded zucchini
1 medium onion, diced
2 eggs
1/2 c. flour- you made need a little more or less depending on how moist your zucchini is
2 t. hot pepper sauce, or to taste
1 t. baking soda
salt to taste
oil for cooking
Combine all ingredients, except the oil, in a medium bowl. Heat oil
in skillet and spoon batter in. I used a little over 1/4 cup for each.
Cook over medium heat until lightly browned around the edges. Flip and
cook until golden on both sides and pancake springs back when touched
lightly. Remove to platter and keep warm. Repeat with remaining batter.
Serve with salsa or sour cream. Makes 8.
If you are looking for a side dish for Labor Day, why not bring a potato salad? Everybody loves potato salad. I love potato salad.
Actually, I love potatoes pretty much any way they are prepared. With
so many cookouts and picnics, you can never have enough potato salad
recipes, right? I am sharing three of my favorite potato salad recipes.
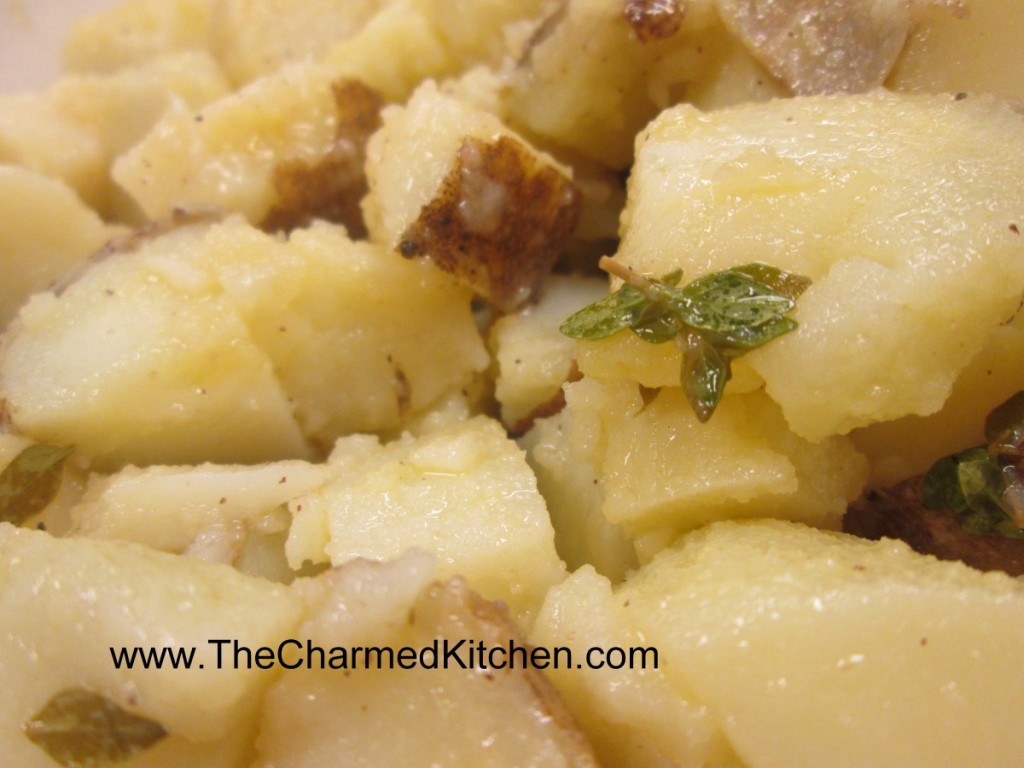
The first one is really simple, enhanced with fresh thyme leaves. Thyme
really pairs well with the potatoes. The second one uses some of my
fresh basil in a pesto sauce that is tossed with the potatoes. Who says
pesto is just for pasta? The third salad is the way I remember my Mom
making potato salad. She never wrote down her recipe, but I think I got
it right.
Just in Thyme Potato Salad
With my herb garden growing like crazy right now I thought this was
the perfect dish to make. This salad can be served warm or cold and goes
well with so many dishes. I find when I have leftovers, I’ll even brown
it in a skillet and serve it like hash browns with eggs for breakfast.
2 lbs. boiling potatoes, cut into bite sized pieces*
½ c. olive oil
¼ c. red wine vinegar
1 T. fresh lemon juice
2 t. fresh thyme leaves
Salt and pepper to taste
Cook potatoes until tender. Drain and toss with the rest of the
ingredients and serve right away or chill to serve later. Serves 6-8.
* You can really use any potato you like. I often bake the potatoes
whole and then peel and cut up. Cook them any way you prefer.
Pesto Potato Salad
This salad always makes me think of a warm summer day. I think it’s
because of the basil. During the summer, my driveway is lined with pots
of basil. I cook with it almost every day. Pesto can be used in a lot of
different dishes beyond pasta. Here I’ve paired it up with potatoes.
The combination works great together. I always freeze extra basil so I
can enjoy it year round.
2 lbs. Boiling potatoes, cut into bite sized pieces
1 c. basil leaves
3 T. pine nuts
3 T. olive oil
2 garlic cloves, minced
1/3 c. Parmesan cheese
Salt to taste
Cook potatoes until tender. Cool. In blender combine remaining
ingredients, except 1 tablespoon of the pine nuts. Pour blended mixture
over potatoes and sprinkle with the reserved nuts. Chill. Serves 6-8.
Mom’s Mustard Potato Salad
When I was a kid I did not like the taste of mustard- except in this recipe. It adds such a wonderful flavor.
4 lbs. potatoes- I used Klondike Rose and I did not peel them
4 hard cooked eggs, peeled and chopped
1 sweet pepper, seeded and chopped, optional
1 c. mayo- maybe a little less
1/4 c. prepared mustard- I like a grainy brown mustard
salt and pepper to taste
dash of hot sauce
Bake whole potatoes until tender and allow to cool. Cube potatoes
into large bowl and combine with remaining ingredients. Chill until
ready to serve. Serves 8.
I would never have thought that combining tequila and wine would
taste so good, but it really is a great drink for summer parties. I had a
request for this recipe, and I am going to share it with you, the best
that I can.
I normally am pretty good about measuring ingredients and writing things down, but a friend actually made it.
My friend Sue, is a very good cook. She has great instincts when it
comes to flavors. She is also lovingly known as the Queen of
Substitutions. She will start with a recipe and then just add what she
has on hand. Often things work out, sometimes, not.
This is one of those times when things worked out very well, indeed. She was watching TV and saw a recipe for a tequila and wine punch. She had the tequila and wine, but not quite all of the other ingredients, so she kind of made it up as she went along. The end result was a drink that was not too sweet and very refreshing. This would be fun to make for a Labor Day party.
So here is the recipe.
Sue’s Wine and Tequila Punch
1 1/2 c. tequila
1/2 bottle of wine, use what you have on hand, Sue did
1 c. margarita mix
1 c. orange juice
1 or 2 oranges, sliced thin
ice
In pitcher, combine tequila with wine, mix, juice and oranges. Add lots of ice, stir and serve.
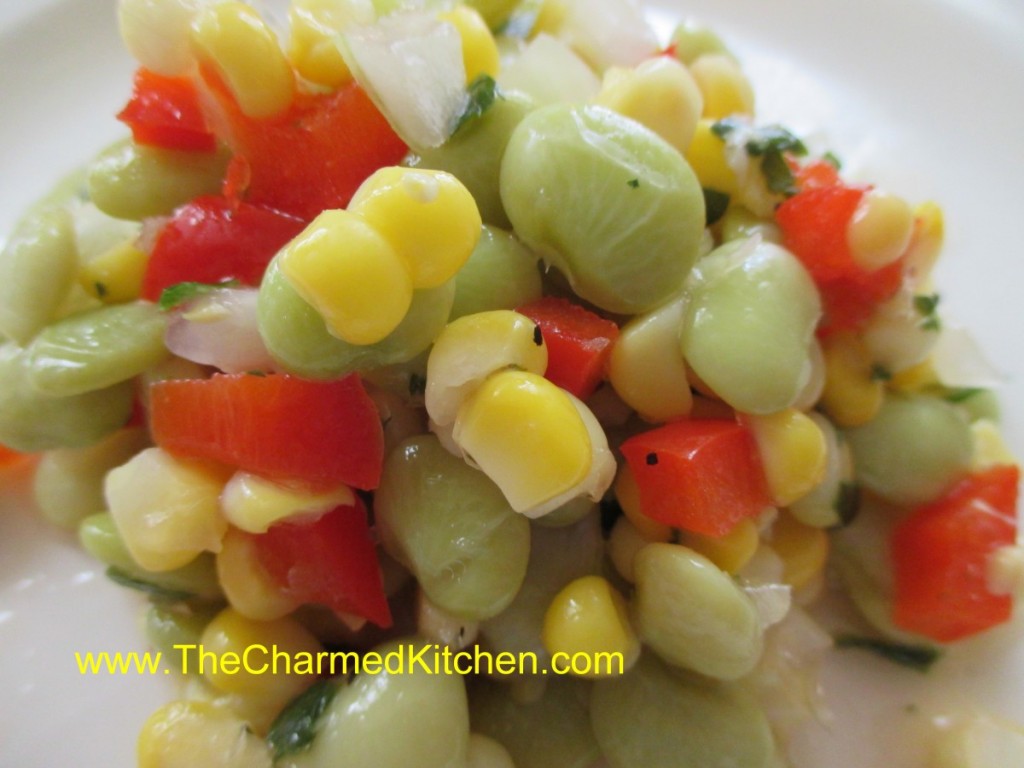
I remember having succotash a few times when I was a kid. I didn’t like Lima beans all that much- but I did like saying succotash.
I like Lima beans now, and use them often in soups and stews. I had several ears of sweet corn and a bag of Lima beans in the freezer so it seemed natural to make this salad. The addition of sweet pepper, sweet onion, fresh chopped parsley and a simple apple cider vinegar dressing and it was good to go.
Here is the recipe. This might be a fun salad for your Labor Day picnic.
Succotash Salad
1 lb. lima beans, cooked and cooled
4 ears of corn, cooked, and kernels cut off the cobs
1 sweet pepper, seeded and diced
1 small sweet onion, diced
3-4 T. chopped fresh parsley
Dressing:
2/3 c. apple cider vinegar
1/3 c. oil
1/4 c. honey
1 t. cumin
dash of hot sauce
salt and pepper to taste
Combine veggies and parsley in a medium bowl. In small bowl whisk
together dressing ingredients. Adjust seasonings and pour over the Lima
bean mixture. Cover and chill for at least several hours before serving.
Serves 6-8.
I taught a class on Coffeehouse Treats last week. One of the favorites that night were the Easy Bear Claws.
While not a true classic version of a bear claw, these pastries are pretty close. They are pretty tasty, too.
The secret is to start with prepared puff pastry dough. The dough is thawed, filled and sliced. Then it is baked until crispy and golden brown. Once the bear claws cool down a bit, the “toes” are dipped in melted chocolate.
These make a great dessert. I almost always have puff pastry dough in the freezer, so a nice option if you need dessert in a hurry.
Easy Bear Claws
1
package frozen puff pastry (2 sheets) thawed
1 can or
jar (10-12 oz.) almond filling
1 c.
chocolate chips
1 T. shortening or coconut oil
Open one
pastry sheet onto lightly floured surface and spread with half of the filling.
Roll up loosely, jelly roll fashion, leaving seam side down on surface. Cut
roll in half and each half into thirds. You will have 6 pieces total. On one
closed edge of each pastry use scissors (preferred) or a sharp knife to cut 3
“toes”. Do not make cuts on open filling sides. Pull apart slightly.
Place 2 inches apart on ungreased baking sheet. Repeat with remaining dough and
filling. Bake in a preheated 425-degree oven until golden, about 20-25 minutes.
Cool on wire rack. Melt together chocolate and shortening in microwave-safe
bowl in microwave. Stir to smooth and dip top of each “claw into
chocolate. Set on rack or wax paper to set up chocolate. You can also put in
the fridge for a few minutes to harden chocolate quicker. Makes 12.
Variations:
For filling you can use cinnamon sugar in stead of almond filling or even use
another filling flavor like poppy seed.
For topping you can use a powdered sugar glaze or even just powdered sugar.
Fresh from the ovenCooling downFreshly dipped in chocolate
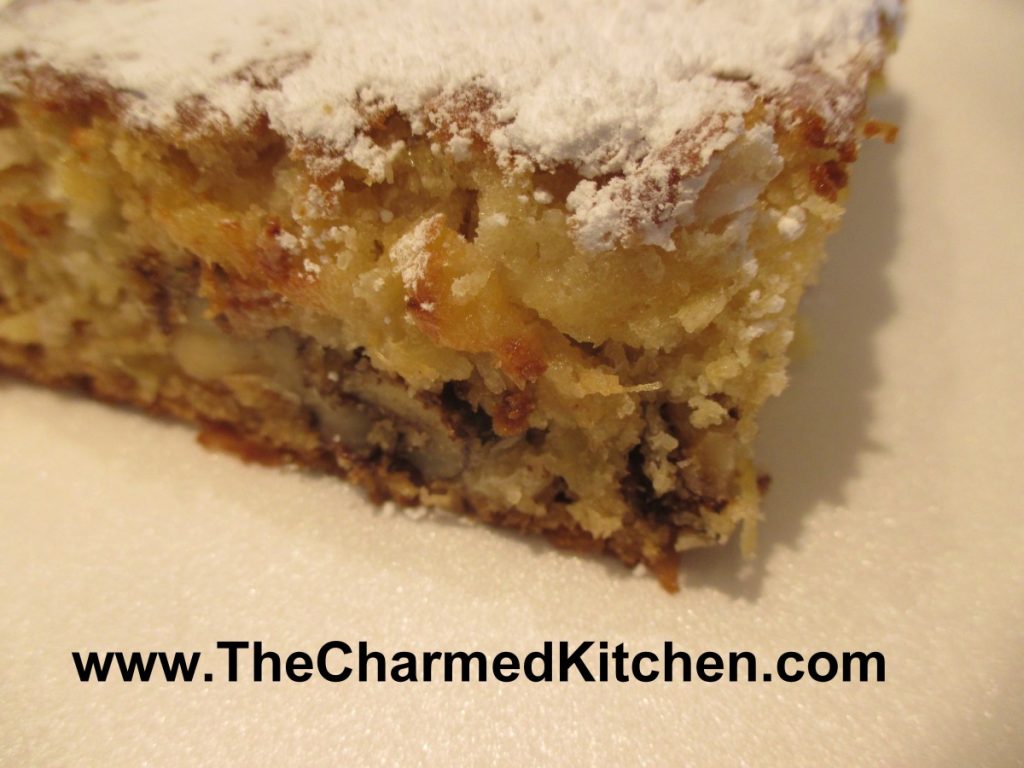
I get a little nostalgic when I make
Hawaiian Wedding Cake. This recipe was very popular when I was a kid. I
don’t know a lot of people making it anymore- and that is a shame. The
cake is very tasty and quite easy to make.
This recipe proves that you don’t always need a lot of time, to bake a
homemade dessert. You can make this moist and tasty cake in less time
than it takes to make a box mix cake. Really. The ingredients are all
combined at once in a mixing bowl, and stirred by hand until mixed.
Of course, time saving means nothing if the dessert doesn’t taste
good. The cake is really good. It is studded with nuts, coconut and has
plenty of pineapple in it, too. Once baked and cooled, it can be topped
with cream cheese frosting, powdered sugar or cinnamon sugar. You can
even leave it plain.
The cake can make a nice gift, too. Use small foil loaf pans- and
divide the batter among them, filling half way. Bake at the same
temperature, but for a shorter time.
The mix of tropical ingredients certainly inspired the name of this
cake. I don’t really know if people in Hawaii actually ever serve this
cake at weddings. I like to think that they did. I do know how much I
like it. I think you will, too.
Hawaiian Wedding Cake
2 c. flour
2 eggs
1 (20oz.) can crushed pineapple in its own juice, undrained
1 c. shredded coconut
1 c. sugar
1 c. chopped walnuts
2 t. baking soda
Preheat oven to 350 degrees. Grease a 9×13 inch pan. Combine all
ingredients in a bowl and mix well. Pour into prepared pan and bake 35
minutes or until golden brown on top. Cool and dust with cinnamon sugar,
powdered sugar, or frost. Serves 12.
Frosting recipe:
8 oz. Cream cheese, softened
3/4 c. powdered sugar
1 stick butter, room temperature
Beat all together until fluffy. Frost cake and refrigerate until ready to eat.
I love basil so much I once owned a cat named Basil. I make pesto and use basil in almost every tomato dish I make.
This time of year, I am also freezing and drying basil, so I will have it year round.
You don’t always have to use basil in savory dishes. Its flavor actually compliments sweet dishes, too.
I used dried basil in these butter cookies and the flavor is
wonderful. You could use fresh basil, too. Just increase the amount to 3
tablespoons of fresh basil. Chop the fresh basil finely, just before
adding it to the dough.
To add a little extra pop of flavor, I finished the cookies with a lemon glaze.
Here is the recipe. I hope you like it.
Basil Butter Cookies with Lemon Glaze
1 c. butter
1 c. sugar
1 egg
1 t. vanilla
2 ¼ c. flour
1 T. dried basil
1 t. baking powder
¼ t. salt
Glaze
2 c. powdered sugar
2-3 T. lemon juice- or enough to make a thin glaze.
Beat sugar and butter together until fluffy and then beat in egg and vanilla. Combine dry ingredients and stir into butter mixture. Chill dough at least a couple of hours. Roll dough into ¾-1 inch balls. Place 2 inches apart on ungreased baking sheet and bake in a preheated 375 –degree oven for 8-10 minutes. Cookies will flatten somewhat. Make glaze and dip the top of the cooled cookies in the glaze. Glaze will harden a little as the cookies set. Makes about 6 dozen cookies.
I have dehydrating on my mind this week. I was canning tomatoes a few
days ago. I saved the tomato skins and dried them. This morning I
ground them up into a powder in my spice mill. Now I have this wonderful
ingredient to add to sauces, pasta, baked goods and more.
I preserve a lot of food by dehydrating it. Once you get over the
initial investment in a dehydrator, the cost to dry food and to store
dried food is pretty minimal. I just got a very nice dehydrator for $30.
Not a big investment at all.
Dried fruits are probably the most common home dried foods. Apples,
grapes, pineapple, strawberries and cherries are among my favorites. But
the dried vegetables are so useful and versatile, I enjoy them as much
as dried fruits. I think you will, too.
Drying Vegetables
Most vegetables should be dried at the lower range if you have an
adjustable thermometer on your dehydrator-around 125-degrees. The big
thing to know with vegetables is that some of them need to be blanched
first. Blanching is just steaming the vegetables for a few minutes and
draining, if needed, before drying. Blanching kills certain enzymes,
prevents browning and assures a better end product.
Vegetables that need blanching include green beans, cabbage, carrots,
potatoes, greens, winter squash, corn and beets; this is not a complete
list, but a good start.
Vegetables that do not require blanching include onions, celery,
mushrooms, peppers, tomatoes, spinach, zucchini, cucumbers and garlic
and also herbs.
Broccoli and cauliflower do not dehydrate well.
Tomatoes are probably the best vegetable to dry for the home gardener
and cook. They are so easy to make and so tasty. Just cut plum tomatoes
in half and scoop out the seeds. Lightly spray the trays with non-stick
spray and place the tomatoes cut side up for the first 12 hours. Turn
them over after that until they are dried. I like them pretty crispy,
but keep them in the freezer to keep their color and flavor longer.
After a year they will turn black if stored at room temperature. Larger
tomatoes can also be dried. Just cut them in slices and squeeze out the
seeds. Cherry tomatoes are just cut in half and squeezed to get out the
seeds. With small cherry tomatoes I just make a cut large enough to get
out the seeds and leave them whole.
How do I use them?
Veggie chips-zucchini and cucumber slices can be used instead of chips in dip.
Powders- Tomatoes, celery, onion, pumpkin and garlic can all be
powdered and used to flavor soups, stews sauces, cheeses, dips and more.
I add powdered veggies to pasta dough. Mushroom powder is one of my
favorite ingredients.
Reconstituted as fresh- potatoes in casseroles are wonderful.
Dips- Peppers, onion and celery all add great flavor.
To thicken sauces- Shredded zucchini, peppers, onions celery and tomatoes all work well this way.
Soups and Stews- most any dried vegetable is most often used this
way. Easy to just let them simmer together until tender and all their
flavors will enrich your stock
Chowders- Corn and potatoes are great in these dishes
Dried vegetables are best stored in a cool, dry place- I often freeze them for best shelf life.
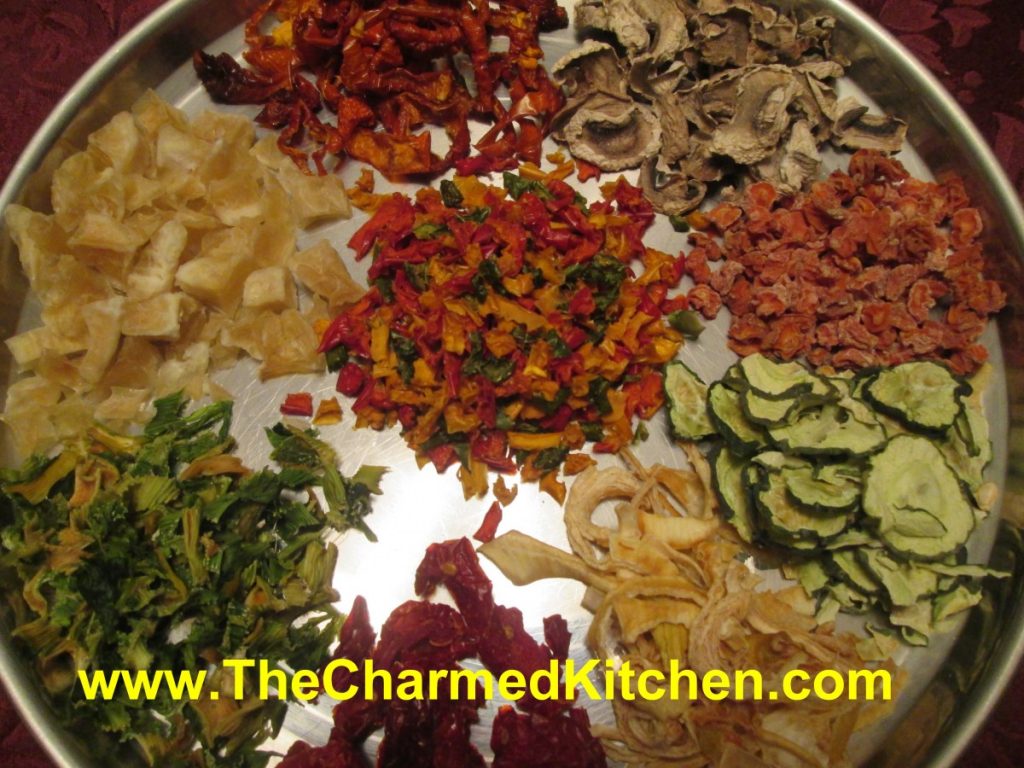
Vegetables in photo: Starting left with bright green and going
clockwise: Celery, potatoes, red peppers, mushrooms, carrots, cucumbers,
onions and tomatoes. In the center- mixed sweet peppers.