Homemade Apple Pie Filling
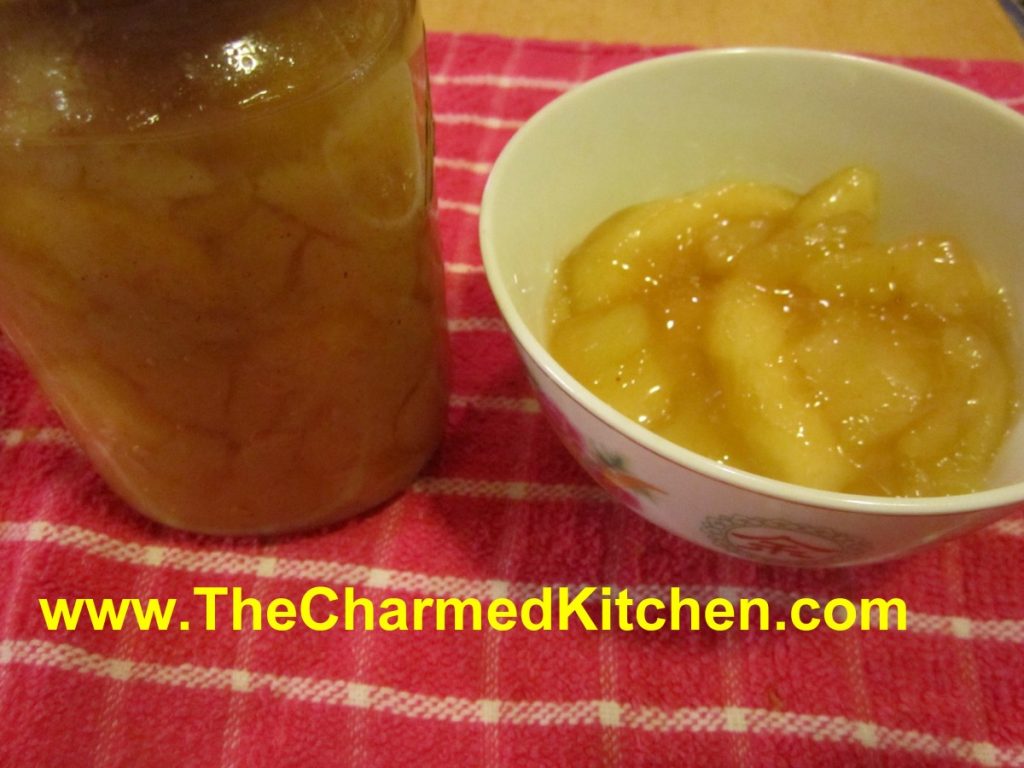
While I think the best pie is made with fresh apples, I also like making and canning my own apple pie filling. It is a handy way for me to enjoy local apples throughout the year. It is also a whole lot better than any commercial pie filling I have tried. Loaded with plenty of big chunks of apples and seasoned with cinnamon and nutmeg- I think it the next best thing to fresh apples for baking.
I use my canned pie filling to make pies, but I also use it for kolachy, blintzes, cakes and more.
The hard part, for some, is getting a hold of Clear Gel. It is a special type of modified cornstarch. I buy mine online, but you can find it in stores where the Amish shop. Clear Gel stays thick, even if it is reheated. Regular cornstarch will not. Don’t use Instant Clear Gel, either.
Here is the recipe I use. You can tweak the seasonings to suit your own taste, but keep in mind that spices sometimes get stronger when canned, so don’t go too crazy!! You can always add more spices when you use your pie filling.
Apple Pie Filling
6 qts. apples, sliced and blanched
5 1/2 c. sugar
1 1/2 c. Clear Gel- modified cornstarch available on line and in Amish stores
1 T. cinnamon
1 t. nutmeg
2 1/2 c. cold water
5 c. apple juice
3/4 c. lemon juice
If apples lack tartness, use an additional 1/4 cup of lemon juice. Wash, peel and core apples and cut into 1/2 thick slices. Place in water treated with either lemon juice, citric acid or ascorbic acid to prevent darkening. Remove from solution and drain well. Blanch in boiling water- 2 quarts at a time- for 1 minute. As you finish each batch place in a bowl and cover to keep warm. In large pot combine sugar, Clear Gel, cinnamon, nutmeg, water and apple juice. Stir over medium heat until mixture begins to bubble and thicken. Add lemon juice and boil 1 minute. Add drained apples and stir gently to combine. Ladle into hot, clean jars leaving 1 1/2 inches of headspace. Remove air bubbles. Wipe rims and adjust lids. Process in a boiling water bath- pints or quarts for 25 minutes. After the time is up, turn off canner and let jars sit in water bath for 5 minutes before removing. This will reduce the chance of siphoning. Makes 7 quarts or 14 pints.
For only 1 quart
3 1/2 c. apples
3/4 plus 2 T. sugar
1/4 c. Clear Gel
1/2 t. cinnamon
1/8 t. nutmeg
1/2 c. cold water
3/4 c. apple juice
2 T. lemon juice
The Science of Creamy Mac and Cheese
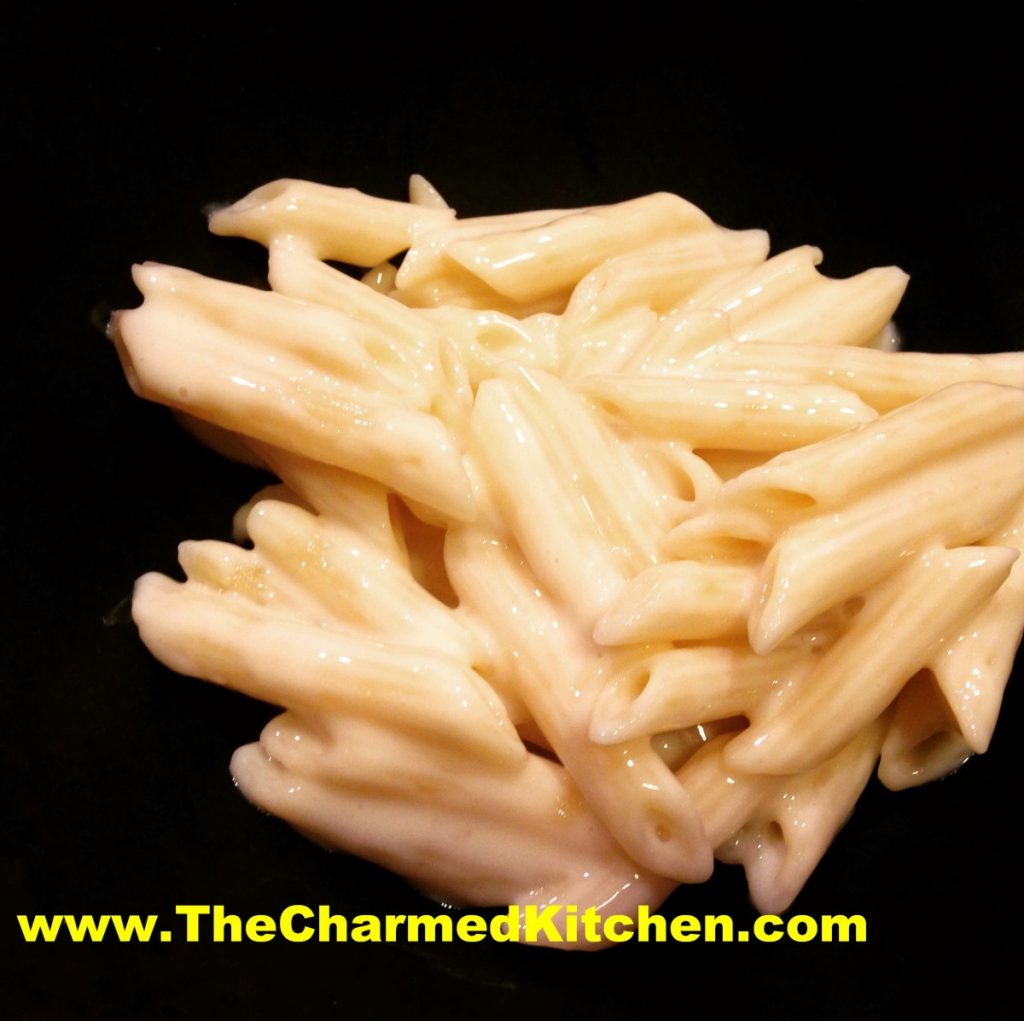
I knew about sodium citrate and its effects on cheese sauces. It took me a while to try it myself. The end result was the creamiest cheese sauce ever. Now I use it all the time when I want a really creamy cheese sauce.
I made two versions of mac and cheese with friends yesterday, using a sharp havarti cheese. I made the traditional roux-based recipe and the less traditional sodium citrate version. Both versions tasted fine, but the textures were different. Generally, the sodium citrate version was preferred, but not unanimously. A couple of friends preferred to mix the two versions together.
Sodium citrate is the natural salt of citric acid. It has a sour taste, and is used as a preservative and food additive. It is also used in sour candies.
For a lot of us, making a cheese sauce involves making a classic white sauce, or béchamel. Flour and butter are combined in a saucepan, then heated together until the butter melts and the mixture is smooth. Then you add milk, cream or half and half. Once the mixture thickens, you add the cheese and end up with a cheese sauce. Wonderful and classic, but some cheeses don’t melt that well. You end up with a tasty, but somewhat un-creamy end product.
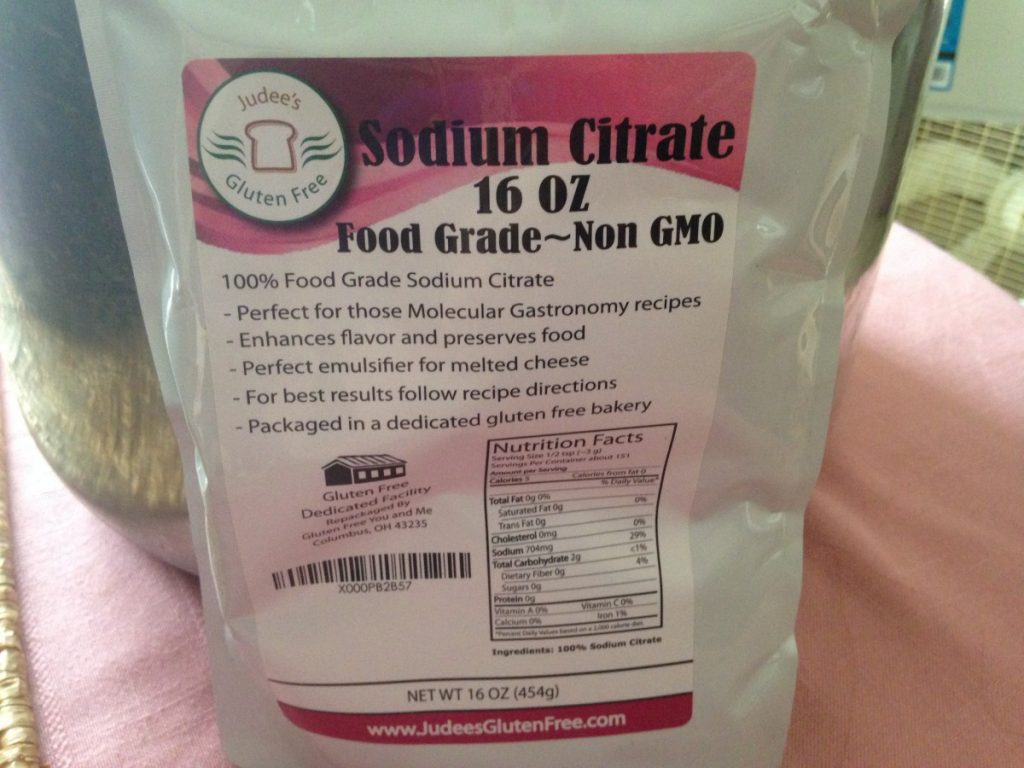
There is a way to make the creamiest cheese sauce ever and it involves a little science. When you make a cheese sauce, the cheese will melt, but sometimes has a grainy texture. That is because of the way the proteins bond with calcium in the cheese. When you combine warmed liquid with a little sodium citrate, then add the cheese, the sodium substitutes for some of the calcium and the cheese breaks down better. The end result is a really creamy sauce.
The liquid you use can be water or milk. I like half and half. I found several recipes on line. I played around, and ended up with the recipe below. Some directions said you have to use an immersion blender to get a creamy result. I did that the first time and the sauce was very creamy. I used a whisk the next time. I found whisking worked just fine.
You want to be sure to use food grade sodium citrate.
Super Creamy Mac and Cheese
12 oz. dry pasta
2 T. butter
1¼ c. half and half – you can also use water, milk, broth
2½ t. sodium citrate
12 oz. finely shredded cheese- I used sharp havarti, but cheddar, Muenster or any cheese that melts well, will work
Salt and pepper to taste
Cook pasta according to package directions. Drain, place in bowl and toss with the butter. Set aside. Heat half and half in a saucepan, over medium heat. Stir in the sodium citrate and bring to a simmer. Add the cheese slowly, about ¼ cup at a time, whisking well until melted before adding more. Sauce will become thick and creamy. Once all the cheese has been added, stir in the prepared pasta, adjust seasonings and serve. If you like, you can place mac and cheese in a casserole, top with buttered bread crumbs and bake until bread crumbs are toasted, about 20 minutes at 350 degrees. Serves 4.
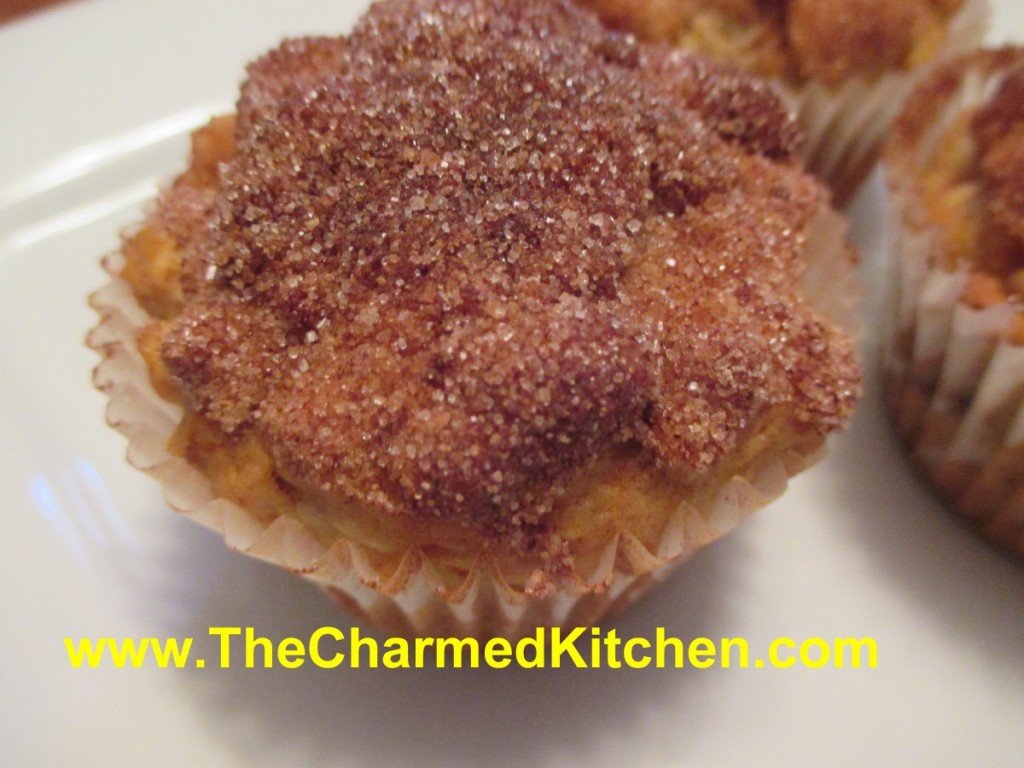
Pear and Oatmeal Muffins
It is pear season. While apples seem to get more attention, pears are a wonderful, versatile fruit.
Pears will ripen off the tree and are often picked unripe and allowed to ripen after harvest. Unlike a lot of other fruits, pears do not suffer from being picked before they are ripe. As they ripen, pears become very sweet.
I like to pick out both ripe and unripe pears at the local market. That way, I’ll have ripe pears over a longer period of time.
I had some ripe pears and wanted to do something with them. Since I had a friend coming for over breakfast, I thought muffins. It’s always nice to have an easy breakfast option on hand.
I started with a basic muffin recipe, and added some diced pears, cinnamon, orange zest, nutmeg and a cinnamon sugar topping, to make them special. And yes, you could substitute apples for the pears!!!
I was really happy with how they turned out. Not overly sweet, moist and tender. Here is the recipe.
Pear and Oatmeal Muffins
1 ½ c. flour
1 c. rolled oats
1 T. grated orange peel
2 t. baking powder
1 t. cinnamon
½ t. each nutmeg and salt
½ t. baking soda
1 egg, beaten
1/3 c. honey
1/3 c. oil
¼ c. orange juice
1½ cups of peeled, diced pears – 2 or 3 pears should do it
2 T. melted butter, optional
cinnamon sugar, optional
Combine flour with the dry ingredients. Set aside. Combine egg with the honey, oil and juice. Add egg mixture to flour mixture and stir until flour is just moistened. Fold in pears. Batter will be thick. Divide batter among 12 greased muffin cups. Bake in a preheated 375- degree oven for 20-25 minutes. While the muffins are warm, dip tops in melted butter and then dip in the cinnamon sugar, if you like. They are tasty, with or without the cinnamon sugar topping, but I like to add this last step. Makes 12.
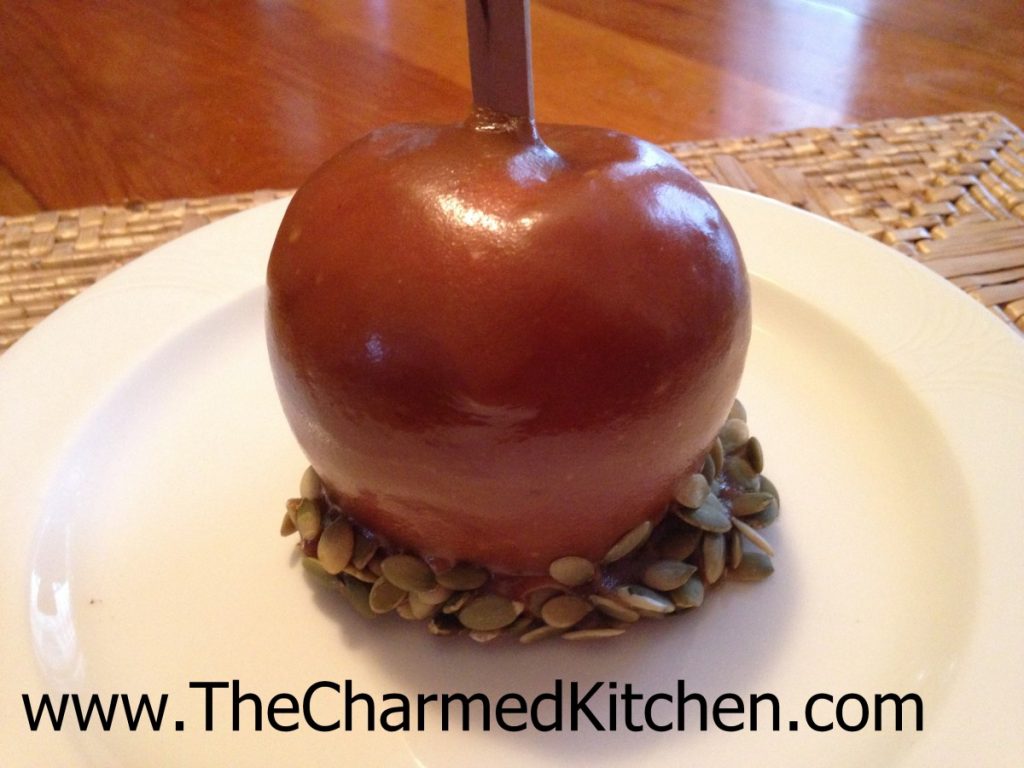
Caramel Apples
Making caramel apples is a wonderful childhood memory for me. Every Autumn, we would make a batch. We used those little store-bought caramels. I was often the one tasked with unwrapping them. I can remember unwrapping one after the other. It seemed to take forever.
I wanted to make my own caramel, so that is what I did. It is so much better than the store-bought version.
Caramel is not that hard to make. You do need to keep an eye on it. Stir constantly. Just a hint, be sure your candy thermometer is really secure. Mine was a little slippy on the pan I was using. At one point the thermometer slid into the caramel. Not what you want to have happen!!!
Once dipped in the caramel, you can dip the bottom of the apples in nuts, pumpkin seeds, sprinkles, cereal, or even popcorn.
Homemade Caramel Apples
1/2 c. butter, cut in cubes
2 c. packed brown sugar
1 c. corn syrup*
pinch of salt
1 can sweetened condensed milk
2 t. vanilla
8-12 apples
chopped nuts, pumpkin seeds, cereal, sprinkles, popcorn for dipping the bottoms of the caramel apples, optional
In heavy saucepan, combine the butter, sugar, syrup and salt. Bring mixture to a boil, stirring constantly. This will take about 10 minutes. Add milk and bring mixture up to 248 degrees. Remove from heat. Stir in vanilla. Place a Popsicle stick, skewer or chopstick down the center of each apple. Dip apples in the caramel, allowing excess to drip off- or not. Dip bottoms of apples into nuts, seeds or whatever ingredient you picked. Place on wax paper and allow to set up. If you don’t want to dip the bottoms in anything, place the dipped apples on lightly buttered wax paper. Cool before serving. Makes 8-12 caramel apples.
Note: You could also use pears in the recipe.
*If you don’t have corn syrup- or don’t want to use it here is a way to make a substitute for it.
Sugar Syrup- corn syrup substitute
3 cups granulated sugar
1 cup Water
1/2 tsp. Cream of Tartar
1/4 t. salt
Combine ingredients in a large saucepan. Bring to a boil and cover the pot. Reduce to a simmer and cook covered for 5 minutes. Uncover and cook to soft-ball stage. Stir frequently.
Soft ball stage occurs at 235-245 degrees. This stage can be determined by dropping a spoonful of hot syrup into a bowl of very cold water. In the water, use your fingers to gather the cooled syrup into a ball. If it has reached soft-ball stage, the syrup easily forms a ball while in the cold water, but flattens once removed from the water.
Remove from heat. Cool and store at room temperature. It will keep well for a month or two.
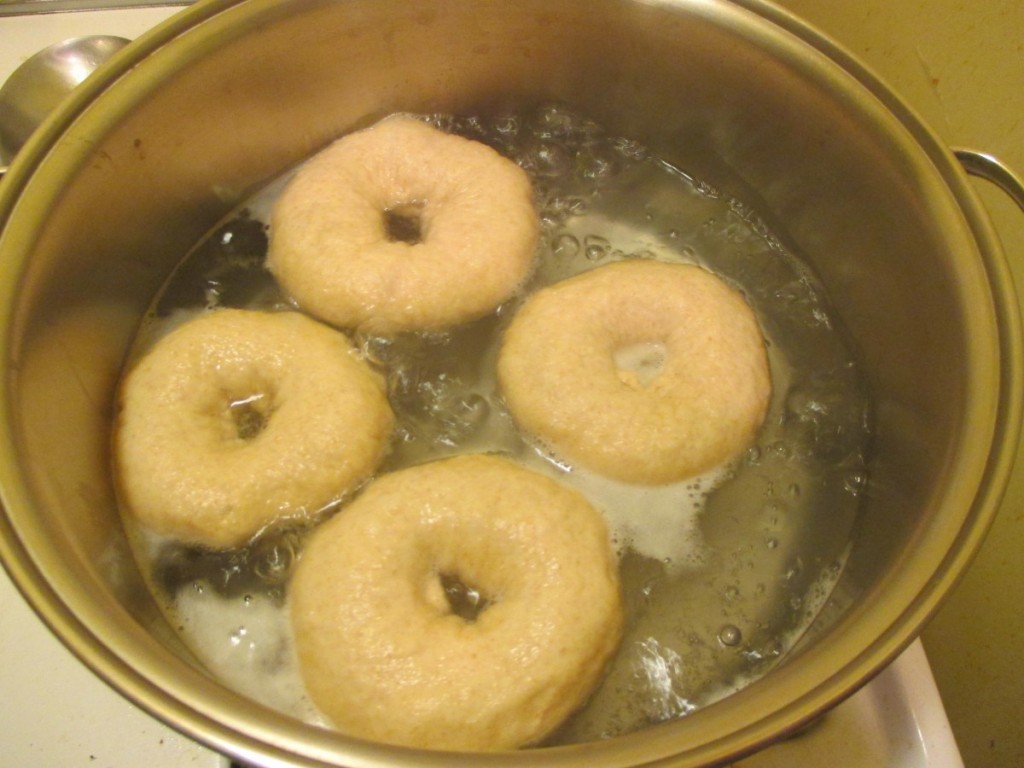
Homemade Bagels
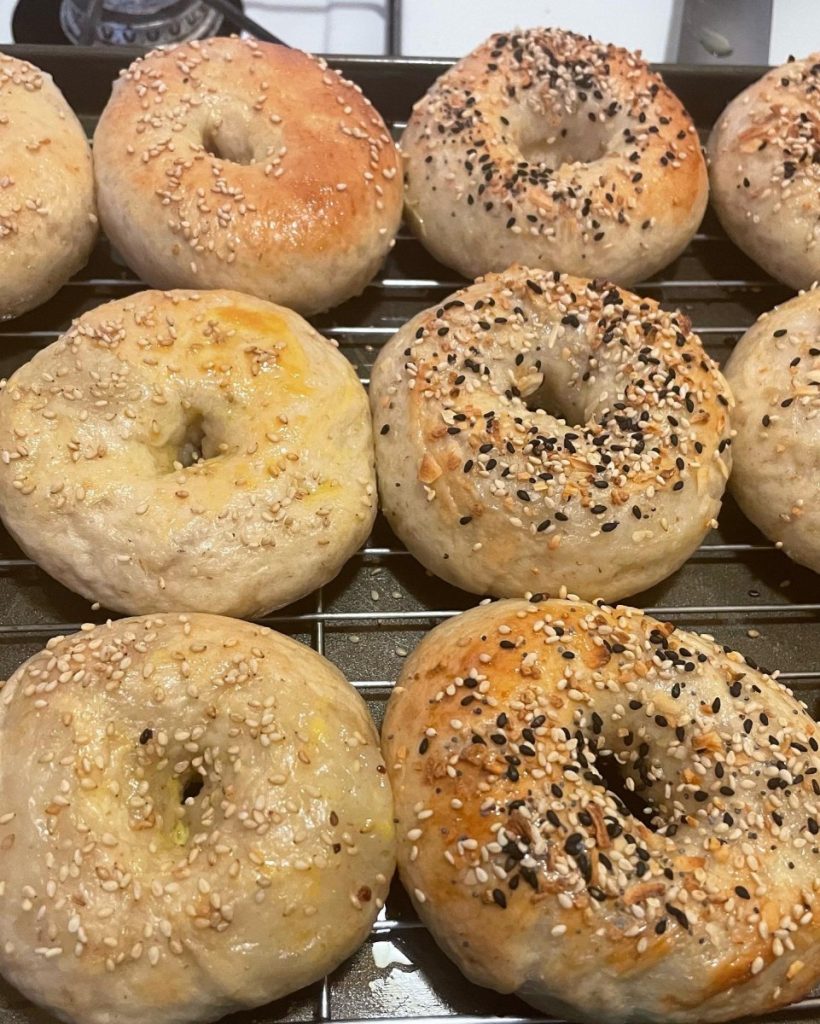
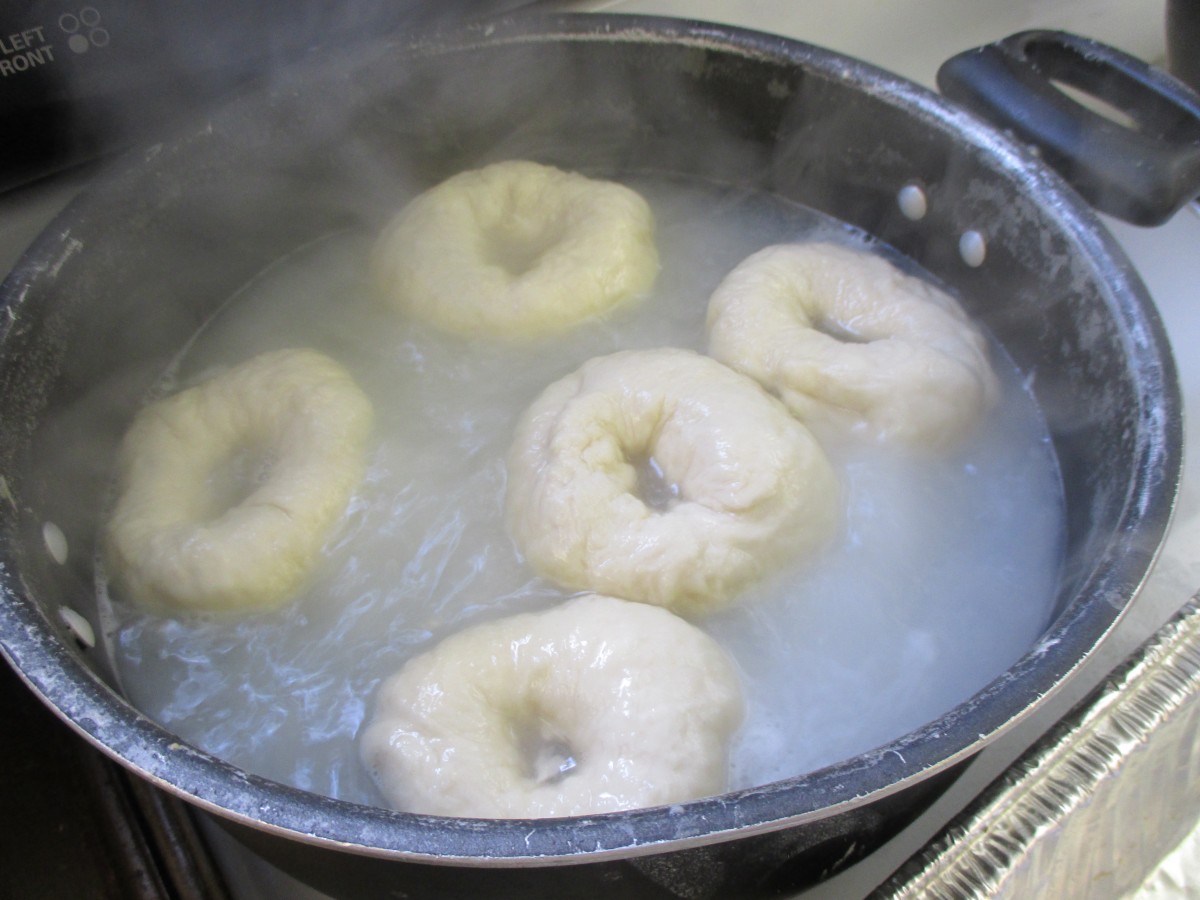
I taught a class last week on making bagels. It was a lot of fun. I think people were surprised on how easy they are to make. The chewy texture in bagels comes from boiling the bagels before baking them. In class we made plain bagels, Parmesan, Rye and cinnamon raisin. Such a fun evening.
Bagel History
Bagels began in Austria when a baker in Vienna in 1683 wanted to honor the visiting president of Poland. He created a roll that was round, or shaped like the stirrup on the King’s saddle. The new creation was called beugel, which was a variation of the German word for stirrup. Over time the word evolved into bagel. Because they were made with white flour, everyone, other than the rich considered bagels a special treat for special occasions. Today bagels are found in almost every grocery store throughout the country.
Lox and Cream Cheese
Probably the most traditional way to top a bagel. A toasted bagel is spread with cream cheese and then a few thin slices of lox (salt cured salmon). Some people like to also add thin slices of sweet onion. I do. I also like to add a few capers. Years ago this became a tradition in my family. My niece and I always have bagels with lox on Thanksgiving morning.
Bagels
4 ½ -5 c. flour
3 T. sugar
1 T. salt
2 pkgs. Yeast
1 1/2 c. water
2 t. butter
1 T. sugar
2 t. salt
1 egg white
Mix 1 ½ cups flour, 3 tablespoons sugar, 1-tablespoon salt and yeast in a medium bowl. Heat 1½-cup water with butter and add to flour mixture. Beat 2 minutes at medium speed. Add ½ c. flour and beat 1 minute. Stir in enough flour to make a soft dough. Turn onto a floured surface and knead until smooth and elastic, about 8-10 minutes. Set in greased bowl and turn to grease top. Cover and allow to rise in a warm place 1 hour. Punch dough down cover and let rest 15 minutes. Divide dough into 12 pieces and form into smooth balls. Cover with towel and let rest 10 minutes. In large skillet heat 1 inch of water to a simmer. Add remaining sugar and salt to water. With floured finger poke a hole in the center of three of the dough balls. Drop into simmering water cooking 3 minutes. Turn over and cook 2 minutes. Turn to first side and simmer 1 more minute. Remove to greased baking sheet and repeat with remaining dough. Mix egg white with 1 tablespoon of water and brush tops of bagels. Sprinkle with seeds if desired. Bake in a 375 –degree oven for 20 –25 minutes. Makes 12.
Variations:
Light Rye: Prepare as above except substitute 1¼ c. rye flour for 1¼ c. of the regular flour.
Whole Wheat: Substitute 1 ¼ c. whole wheat flour for 1 ¼ c. of the regular flour
Herb: Use ½ tablespoon dried marjoram or parsley or 1 teaspoon dried dill. You can also add ½ teaspoon of garlic powder. Add herbs to flour/ yeast mixture.
Parmesan: Add ¼ c. grated Parmesan cheese to flour/ yeast mixture.
Onion Bagels: Cook ½ cup finely chopped onion in 3 tablespoons butter until tender. Brush onion mixture over the tops of the bagels after they have been baking for 15 minutes.
Sesame or Poppy Seed: Just before baking brush tops of bagels with beaten eggs and sprinkling with sesame seeds or poppy seeds.
Extra crusty: Place under boiler (4-5 inches away) for 3-4 minutes, turning once just before boiling. Bagels should not brown.
More Variations
Blueberry: Prepare dough as usual. When you first start to knead the dough add 1 cup of fresh or frozen (thawed) blueberries and knead as usual. You will need a little more flour.
Cinnamon-Raisin: Add 1-2 T. cinnamon to flour/yeast mixture. Add ½ cup raisins when you start to knead dough.
Multigrain: To flour and yeast mixture add ¼ c. each wheat germ, oat bran and cracked wheat. You’ll need a little less flour.
Super seedy: To flour and yeast mixture add ¼ cup each pumpkin seeds, sunflower seeds and sesame seeds. Also add 2 tablespoons poppy seeds and 1 tablespoon fennel or caraway seeds. You will need a little less flour.
Cocoa: Add ½ cup cocoa powder to flour and yeast mixture. You will need a little less flour. These are great with cream cheese and fruit preserves.
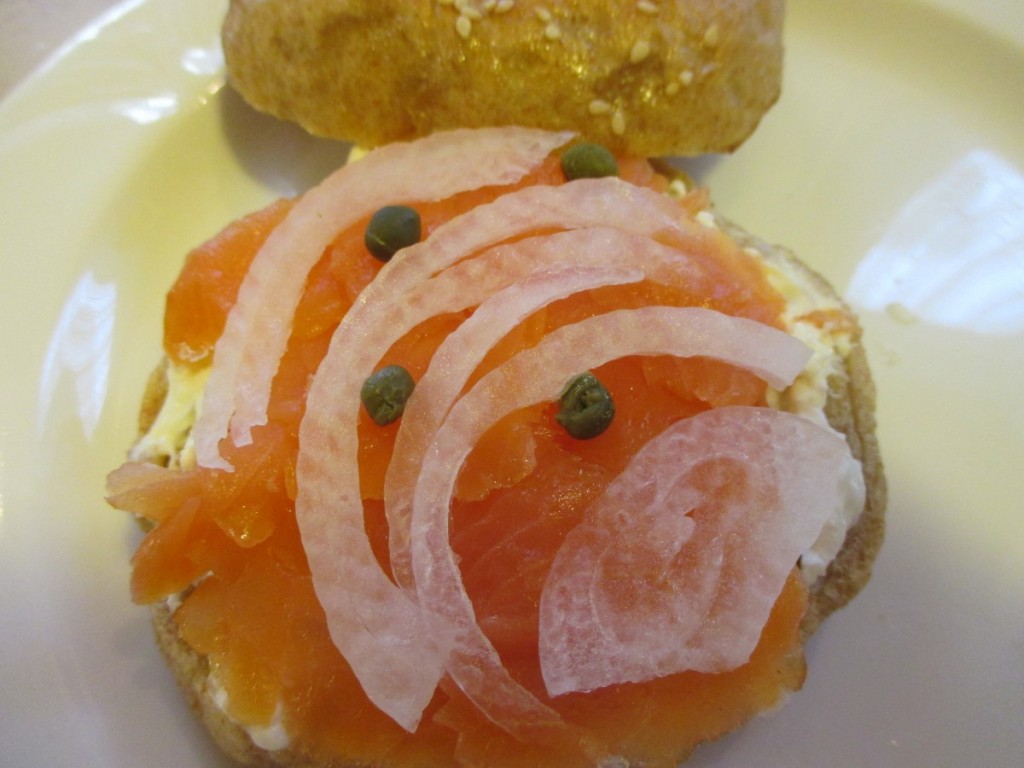
With cream cheese, lox, sweet onion and capers.
Braised Lamb Shanks
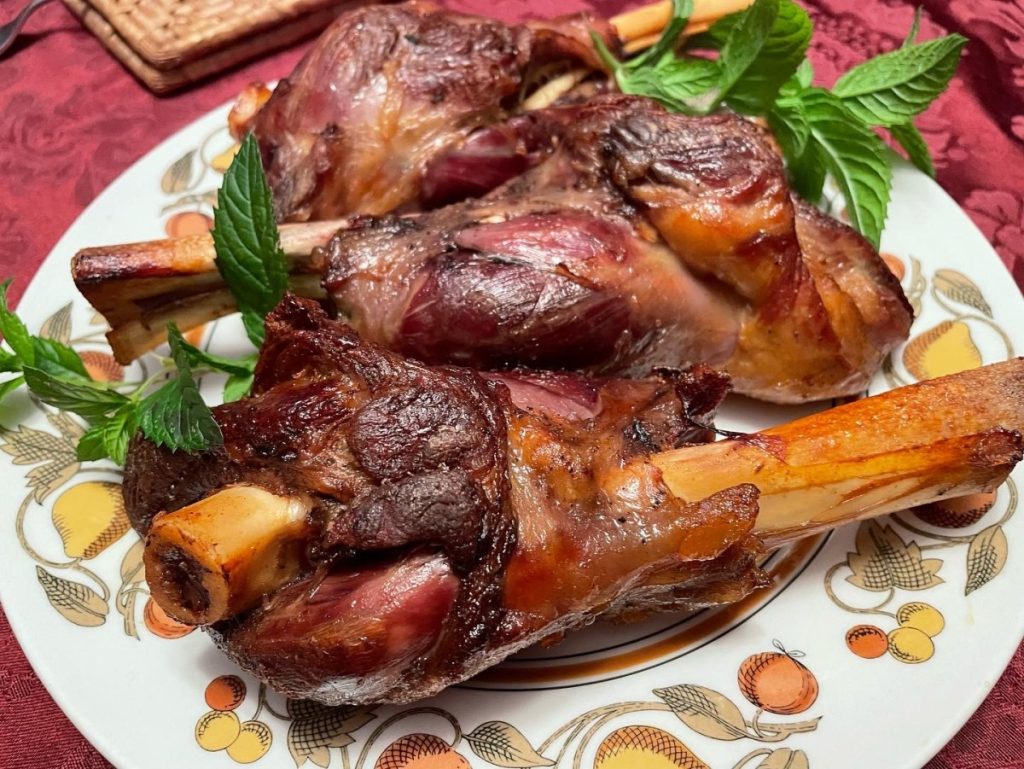
This might be one of my favorite meals. Braised lamb shanks are tender, full of flavor and the perfect comfort food for a chilly evening. They are also reasonably priced. Because the shanks can be tough, they need a longer cook, with liquid, to get really tender. That is what braising is. They can be cooked faster in a pressure cooker, when time is an issue.
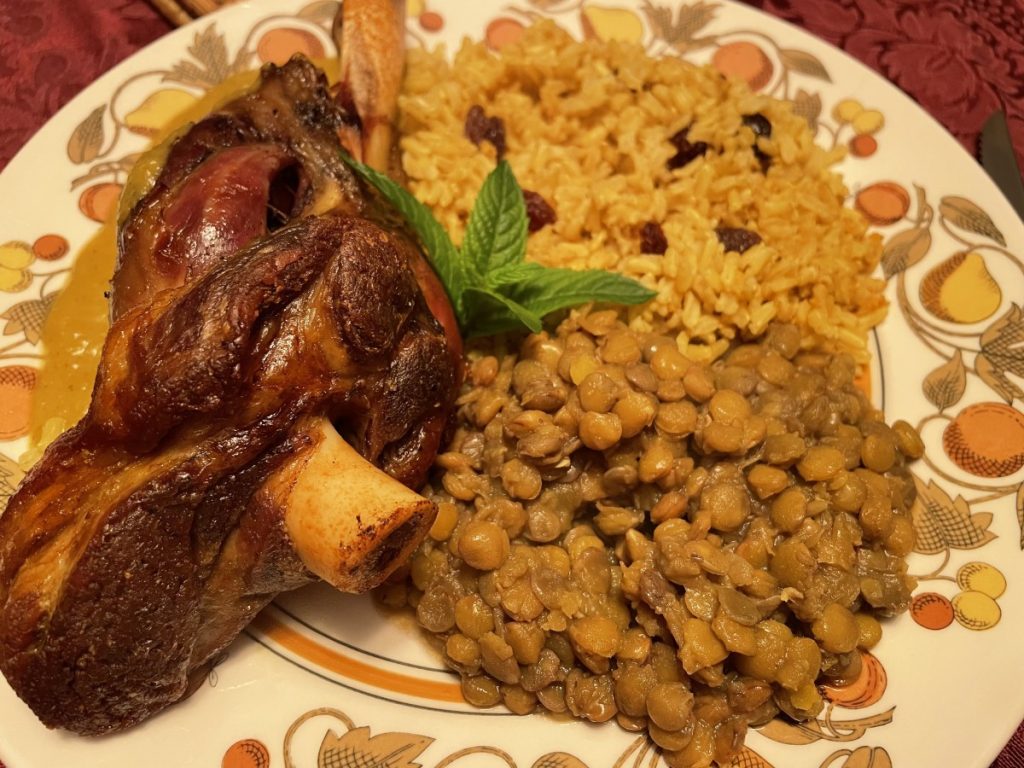
Recently a friend and I decided to make them for dinner. We ended up cooking them for about 2½ hours. They were perfectly tender. You can cook them longer, if you like. They really are simple to make. Yes, they take a while to cook, but once in the oven you don’t need to do anything but wait. We ended up using the cooking liquid to make a sauce. I just used an immersion blender to puree the veggies and cooking liquid. It tasted so good.
So here is the recipe for lamb shanks.
Braised Lamb Shanks
3 lamb shanks
2 T. oil
2 large onions, chopped
2 large carrots, chopped
1 rib celery, chopped
4-5 cloves of garlic, chopped
4 cups stock- lamb or beef preferred
½ c. sherry or red wine
2 T. curry powder
Salt and pepper
Cayenne pepper to taste
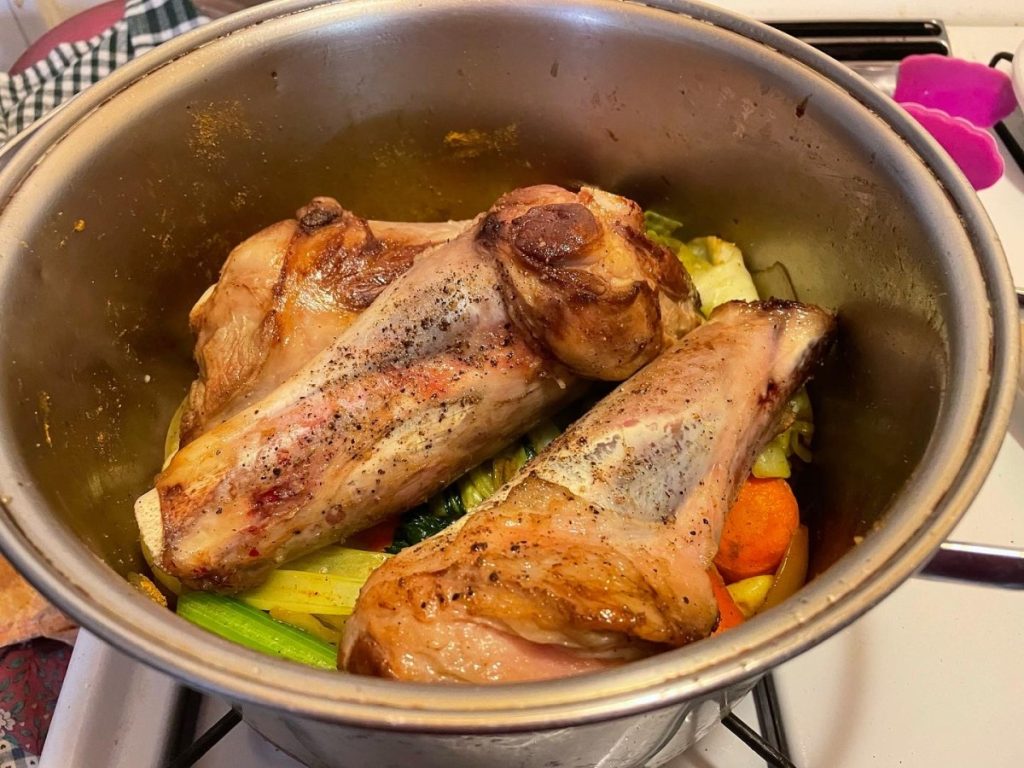
In Dutch oven brown the lamb shanks in oil until browned. Remove from the pan, add the vegetables and brown them for about five minutes. Return shanks to the pot. Add the stock and bring to a boil. Add sherry and seasonings. Place lid on pot and place in a preheated 350-degree oven for 2½- 3 hours. Check them after 90 minutes and add a little more stock, if needed. It is normal for some of the stock to cook down. I did not add more stock. Remove pan from the oven. Remove shanks and keep warm. Puree the vegetable mixture to make a gravy. Adjust seasonings. Serves 2-3.
Pink Applesauce
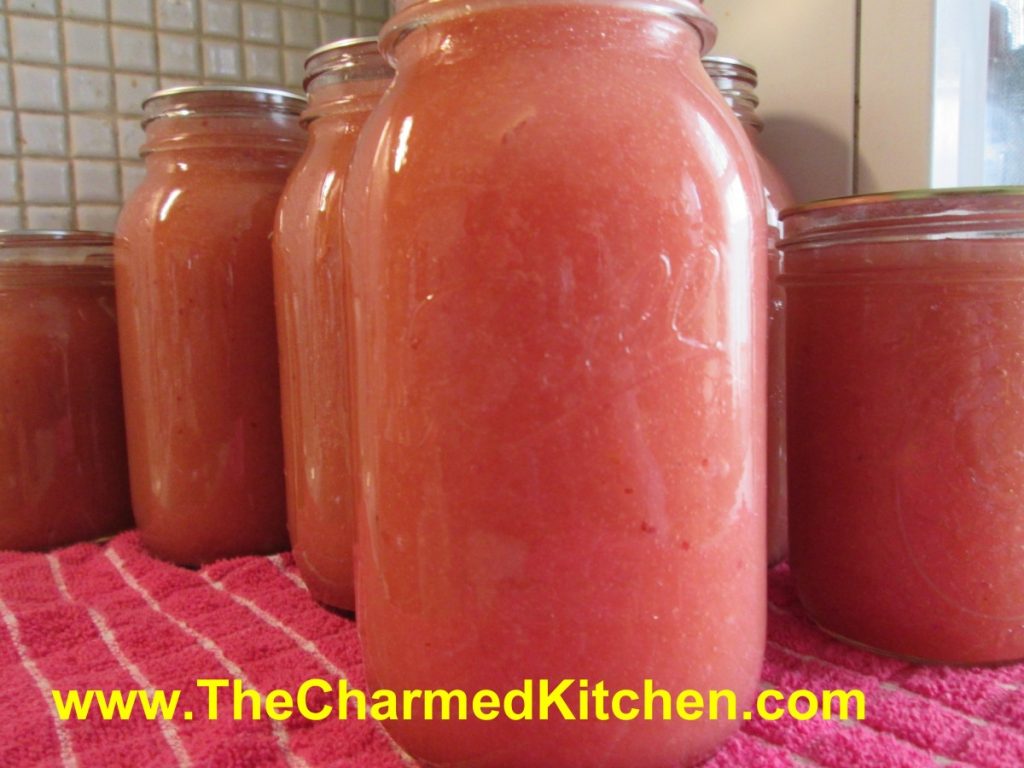
I really enjoy the flavor of homemade applesauce. I try to can at least a few batches this time of year.
I decided to mix things up a little by making a batch of applesauce with cranberries. It came out a pretty shade of pink. The cranberries also added a nice tartness to the mix.
You don’t have to add sugar, if you don’t want to. You add the amount of sugar you like, or leave it out completely. I like to mix different varieties of apples, for different flavor in your sauce.
You can also freeze the mixture if you don’t want to can it.
Pink Applesauce
60 medium apples, I used mostly Melrose and some Jonathans
12 oz. cranberries
water*
1 c. lemon juice
sugar to taste
Peel and core apples. Put in water with some ascorbic acid, citric acid or lemon juice to prevent discoloration. Place apples in a pot with enough water* to prevent sticking and add the cranberries and lemon juice. Cook over medium high heat until soft. I wanted smooth applesauce, so I ran the cooked apple mixture through a food mill on the medium blade. Return apple mixture to pan and bring to a boil. Sweeten with sugar, if you like, or leave unsweetened. Have water bath full of boiling water and have hot, clean canning jars and lids and rings ready. Ladle hot applesauce into hot jars, leaving 1/2 inch of headspace. Wipe rims and apply lids. Process in a boiling water bath for 20 minutes for pints or quarts. Turn off heat and let jars stand in water bath 5 minutes before removing. Set in a draft free area to cool down. Yield: 8 quarts or 16 pints.
*rather than add water, to prevent the apples from sticking, you can use cider instead.
Pork with Plum Chutney
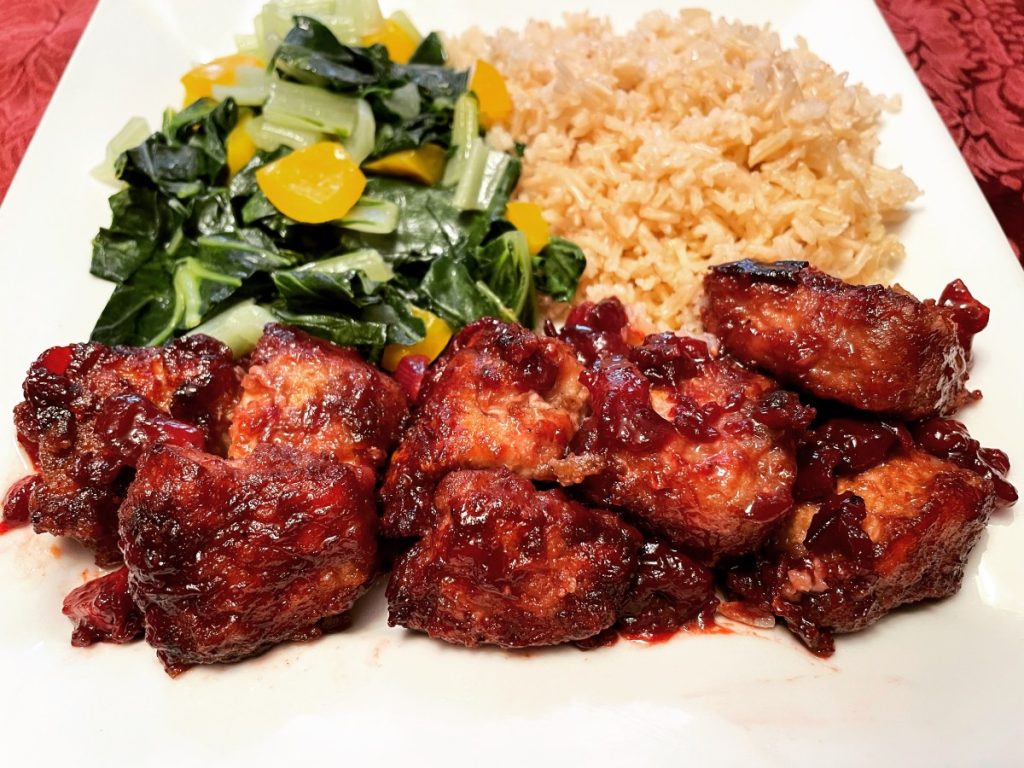
I had very ripe plums and wanted to use them in a savory dish rather than a dessert. We had made a pear chutney in cooking class a few days before, so that gave me the idea of using the plums in a chutney. I had some pork loin defrosted and I thought they would work well together. I was not disappointed.
I started by pitting and chopping up the plums. They were very ripe. I say in the recipe it was 2 cups, but let’s say a generous 2 cups. You can be off a little bit here. A few more plums aren’t going the hurt anything. I threw everything in a pot and let it cook until the mixture thickened. After it was finished I added a little honey because it seemed too tart. Trust your taste here for how much sweetening it needs.
Here is the recipe for the chutney and for the pork.
Plum Chutney
2 c. pitted chopped plums
1 small onion, minced
4 cloves garlic, sliced thin
¼ c. balsamic vinegar
¼ c. brown sugar
2 T. honey
1 t. cinnamon
Salt, pepper and cayenne to taste
Combine all ingredients, except the seasonings in a medium saucepan and s= cook over medium heat until thickened. This took about 20 minutes, maybe a bit longer. As the mixture gets thicker, stir more often to prevent sticking. I added the honey later as the chutney seemed too tart when it was finished. That is partly based on how sweet the fruit is and your personal taste. Makes about 2 cups. Will keep in fridge for weeks. Great on pork, duck and chicken or served with cheese and crackers as an appetizer.
Pork with Plum Chutney
1 lb. boneless pork, cubed
2 T. cornstarch
2 T. sherry, not cooking sherry
1 T. soy sauce
Oil
Additional cornstarch for dredging
Salt and pepper
About ¾ c. plum chutney
Place cubed pork in a small bowl and combine with the cornstarch, sherry and oil. Chill several hours, if possible. Heat oil in skillet. Dredge the pork in cornstarch and sauté until cooked through. Season with salt and pepper and spoon any excess oil out of the pan. Add the chutney and simmer until heated through. Serves 3-4.

Spiced Pear Chutney
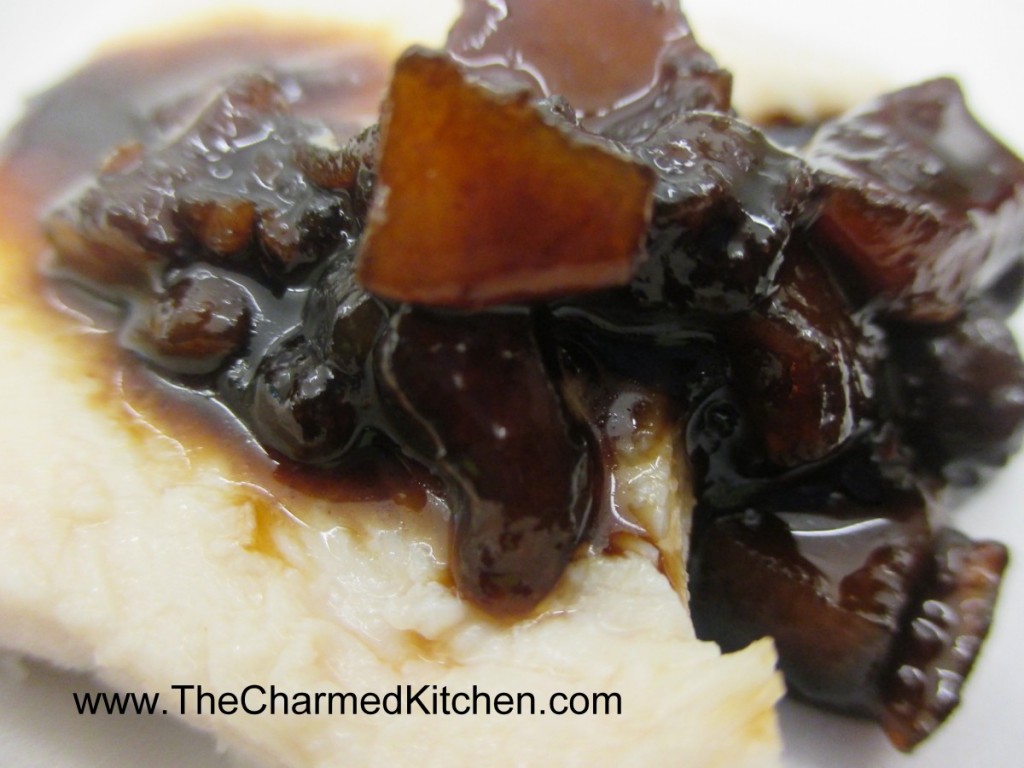
I call this dish by a couple of names. It was given to me as a pear sauce. I think it makes people think of apple sauce and that is misleading. This flavorful sauce is more like a glaze or chutney. A mix of savory and sweet flavors it is great served on the side with various dishes and can be used as a glaze. The picture does not do it justice.
I have served it with turkey and chicken. It goes well with pork and duck, too. I always make a double batch and freeze some for later use. The recipe follows, along with a recipe using the chutney with pork. I think you will be surprised at just how tasty this stuff is. It makes a nice appetizer with cheese and crackers, too.
Spiced Pear Chutney
½ c. sugar
½ c. balsamic vinegar
1 lb. Pears, cored, peeled and diced
1/4 c. minced onion
1 t. minced garlic
1 t. hot sauce – or more to taste
½ t. allspice
½ t. cinnamon
½ t. ginger
Pinch of cloves
Salt and pepper to taste
Combine all ingredients in a saucepan and cook over medium heat until thickened, about 20 minutes. Stir often to avoid burning. Serve with pork or lamb roasts. Also great with turkey or duck. It is also nice with cheesesand crackers and an appetizer. Makes about 2 cups.
Pork with Spiced Pear Chutney
1 lb. Pork loin. Sliced or 4 pork chops
oil
1 large onion, sliced
salt and pepper to taste
1 recipe spiced pear chutney, See above
In skillet, cook pork in oil, turning to brown evenly until juices run clear when meat is pierced. Remove meat and add onions, sautéing until onions are browned. Return pork to pan, adjust seasonings and add 1 cup of the pear chutney. Cook 10 minutes, or until heated through and bubbly. Serves 4.
Aunt Josie’s Clam Chowder

It is clambake season around here and it seemed like a great time to share this recipe. Aunt Josie’s clam chowder is a favorite of mine. I have loved it from the first time I had it. It is pretty easy to make and full of flavor. We have it at every family clambake.
You have the option of adding some stock or water at one point. I sometimes have seafood stock in the freezer, but a bottle of clam juice would work great, too.
So here is the recipe. I hope you enjoy it as much as I do.
Aunt Josie’s Clam Chowder
2 T. butter
1 onion, chopped
1 rib celery, chopped
2-3 small potatoes, cubed
1 c. water or stock
2 (10 oz.) cans clams, undrained*
1 T. butter
2 T. flour
2 c. milk – I use half and half
salt and pepper to taste
Sauté onions and celery in butter until tender, but not browned. Add potatoes and water or stock and cook, covered until potatoes are tender. Stir in clams and set aside. In another saucepan, combine butter and flour over low heat and stir in milk, stirring to make a white sauce. Cook mixture until it thickens and starts to bubble. Add it to the clam mixture and adjust seasonings. Bring to a gentle simmer. I added some parsley right before serving. Serves 4.
* You can also add clam meat and a little extra stock. I often buy frozen clam meat.
This post is dedicated, with love, to Aunt Josie.


