Green Beans in Herb Butter Sauce
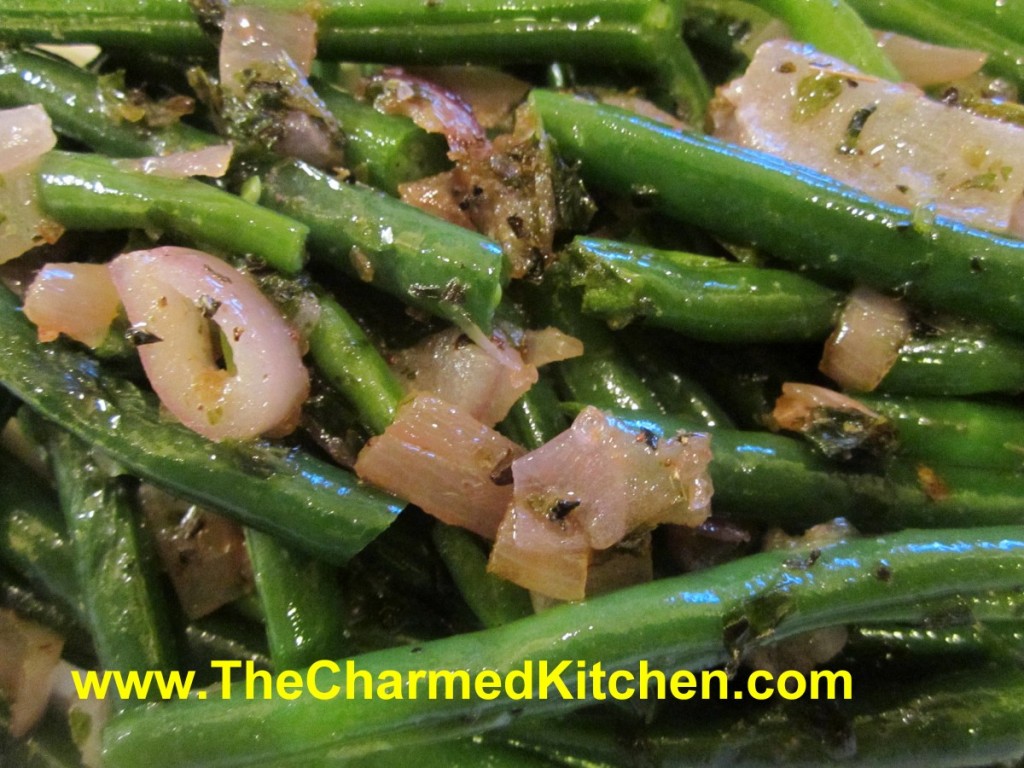
If you are looking for a nice green bean side dish- I think you will really like this one. The sauce, made from a mix of herbs, onions (or shallots), sesame seeds and butter make these special. With green beans in season now, you might be harvesting from your garden, or picking them up at your local farm market. This is one of my favorite recipes for fresh green beans. I hope you give it a try,
Green Beans in Herb Butter Sauce
1 lb. Green beans, washed and trimmed
¼ c. butter
¾ c. minced onion or shallots
1 clove garlic, minced
¼ c. minced celery
2 T. sesame seeds
2 T. chopped parsley
¾ t. salt
¼ t. each rosemary and basil
Boil or steam beans until tender, about 8 minutes. Drain and set aside. Meanwhile, start sauce. Heat butter in skillet and add onion, garlic, celery and sesame seeds. Cook 5 minutes then add seasonings and cook, covered, 5 minutes more. Toss beans with sauce. Serves 4-6.
Note: If you want to make these the day ahead, make the sauce and cook beans until almost tender. Combine beans and sauce and place in casserole dish. Chill until ready to use. When ready to serve, just place bean mixture in oven or microwave and cook until heated through and beans are tender.
Lavender – How to Grow and Recipes
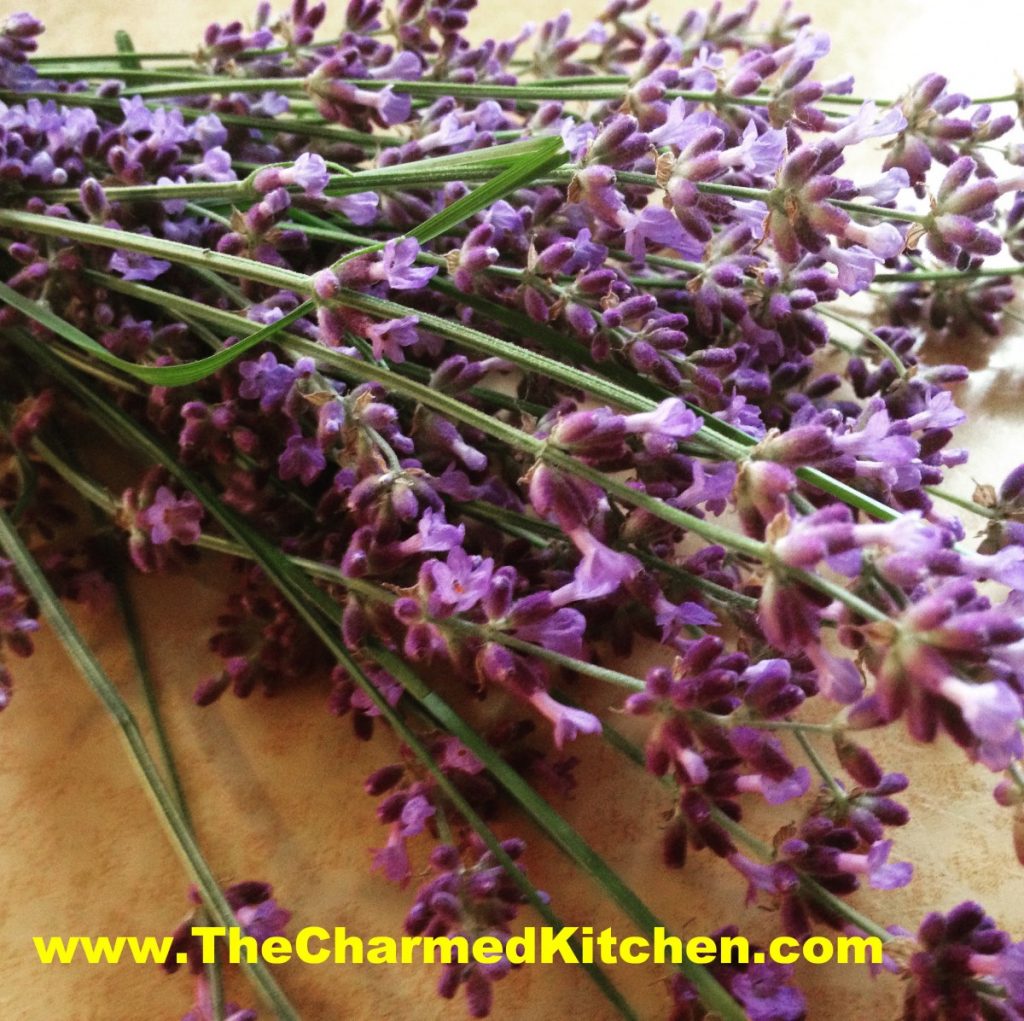
Lavender is such a joy to grow. Besides being a pretty plant, it attracts bees and deer don’t eat it! There are 2 main types of lavender you can grow in your garden, English or French. English lavender is a perennial; in northern climates, French lavender is grown as an annual. You can also bring French Lavender inside for the winter. Both require full sun and good drainage. Both can be started from seed, although English lavender is slow to germinate and can be a little tricky. Both types can also be started from cuttings and layering. There are many cultivars of both lavenders, although some may be difficult to find. An English lavender variety you may wish to try is Munstead, which grows to a height of 2′ and bears true lavender-colored flowers. Other varieties include Hidcote, with dark purple spikes; Alba, with white blooms; Jean Davis, with pink flowers; and Dutch with deep blue flowers. All are wonderfully scented. The foliage of French lavenders is greener than that of English types.
Lavender grows quickly once it is established, and can get quite tall in mild climates. French lavender can also be grown as a houseplant during cold winter months, and moved outdoors during the summer.
Lavenders are grown for their intoxicating fragrance. Some say that the smell of lavender can reduce headaches. The flowers are harvested just as they begin to open, and are dried on the stalk. These dried blooms can then be used in arrangements, or the blooms can be stripped from the stem and used in potpourri and sachet.
While the fragrance of lavender lends itself to all sorts of cosmetic uses, it is a wonderful ingredient to cook with, too. The secret is to use enough lavender to impart flavor, without having your food taste like soap. That can be a tricky balance.
Lavender is a traditional ingredient in Herbes de Provence, a French seasoning blend, often used with meats like lamb or pork. Lavender can be used for so much more. I love using lavender is sweet dishes, like shortbread and in syrups that can be added to cocktails. All the recipes are using lavender blossoms that have been harvested and then allowed to dry. You can use fresh blossoms, too.
Harvest blossoms before they are fully open, if you can. Cut them with at least a few inches of their stems attached. I tie them together in small bunches, hang them up. and allow them to air dry. Once dry, I strip the blossoms off the stems and store in an airtight jar. Store in a reasonably cool location.
So here is a compilation of some of my favorite lavender recipes. I hope you enjoy them as much as I do.
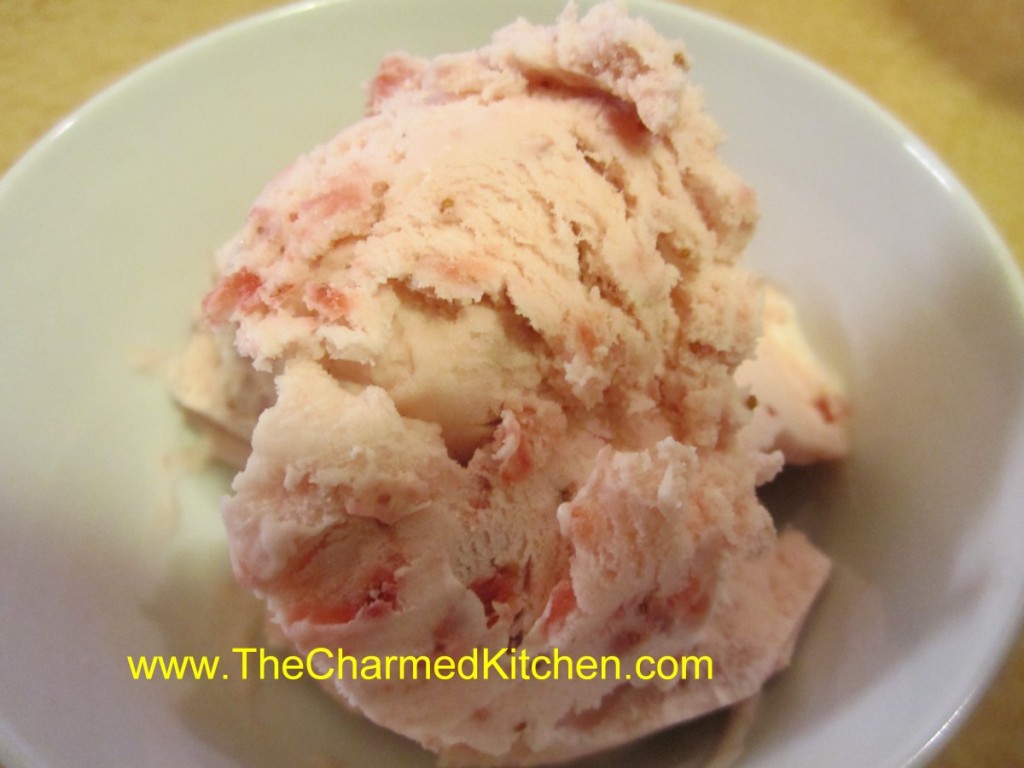
Strawberry and Lavender Ice Cream
2 c. chopped strawberries
1 c. sugar
1 T. lavender blossoms
1 T. vanilla
2 c. cream or half and half or a combination. You can also use some milk or even almond or rice milk.
Additional sugar to taste
Place strawberries, lavender, vanilla and sugar in saucepan and bring to a simmer, stirring occasionally. Remove from heat and chill. Combine chilled berry mixture with cream. Add additional sugar if you like. Remember that once it is frozen the ice cream will not taste as sweet so make this mixture a little sweeter than you want the final product to be. How much sugar you add varies with personal taste and how sweet the berries are. Place in an ice cream maker and process according to manufacturer’s directions. Once finished put in an sir- tight container and place in freezer. Makes about 1 quart.
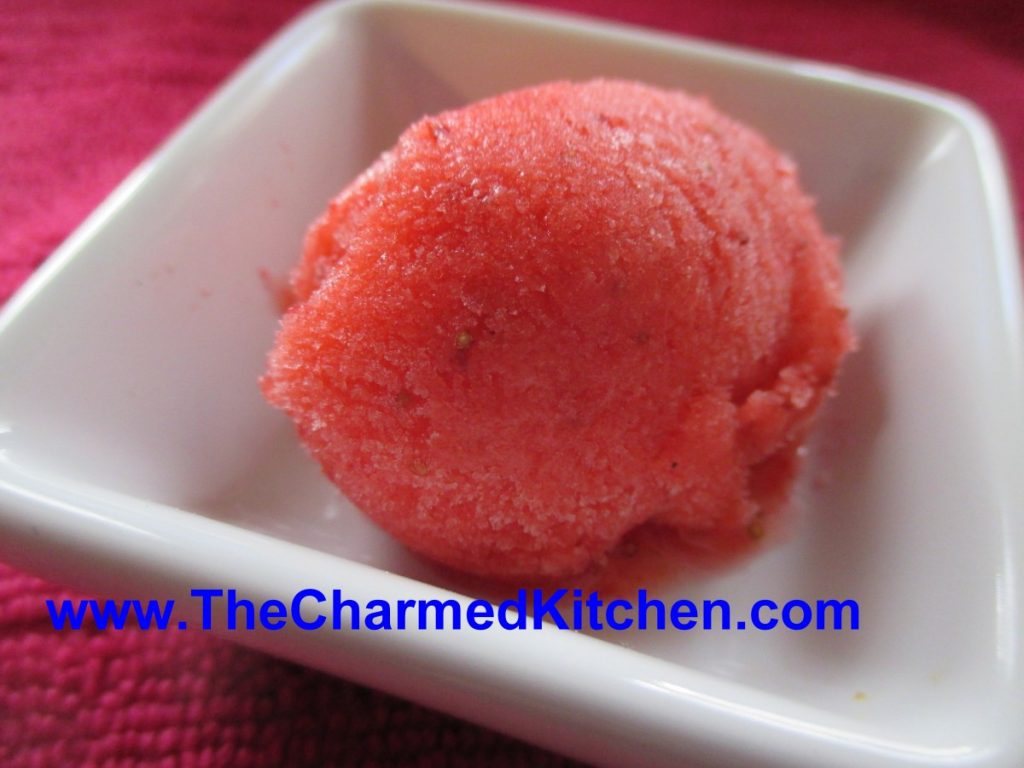
Strawberry- Lavender Sorbet
1 1/2 lbs strawberries
1/2 c. sugar, or to taste – you could also sweeten with honey, if you prefer, or use no sweetener
2-3 T. lavender syrup- recipe follows
Wash and stem berries. Place in food processor and blend until smooth. Sweeten to taste, stirring until sugar is dissolved. Place in a container with a lid and freeze. Once frozen, remove strawberry mix from freezer and sit it on the counter to soften a little bit. This is really the important part. You don’t want it to thaw, but you do want it soft just enough to break into chunks. Place chunks in food processor and blend it again, adding lavender syrup to taste. The liquid of the syrup also helps the sorbet to blend better. It will actually start to look a little creamy and lighter in color. You can serve it right away- or put it back in the freezer to serve later. At this point the sorbet is ready- but you can repeat the soften/process step once more, if you like, for even creamier sorbet. Makes 3-4 cups.
Lavender Syrup
¾ c. water
¾ c. sugar
1 tablespoon dried lavender buds
Combine sugar and water in a small saucepan. Add lavender and cook on low heat until sugar is dissolved. Bring to a boil and cook for 2-3 minutes, just until it starts to thicken a bit. Then set to the side to cool. Strain out the lavender and refrigerate. Yields just under a cup of syrup. Will keep in the fridge for weeks and weeks.
Another recipe using lavender syrup
Lemon Lavender Cocktail
2 oz. gin
1 ½ oz. lemon juice
1 ½ oz. lavender syrup (recipe above)
splash of club soda
some ice
one lemon slice, for garnish
Pour gin, lemon juice and lavender syrup into a glass and stir. Top with club soda, add some ice and garnish with a lemon slice.
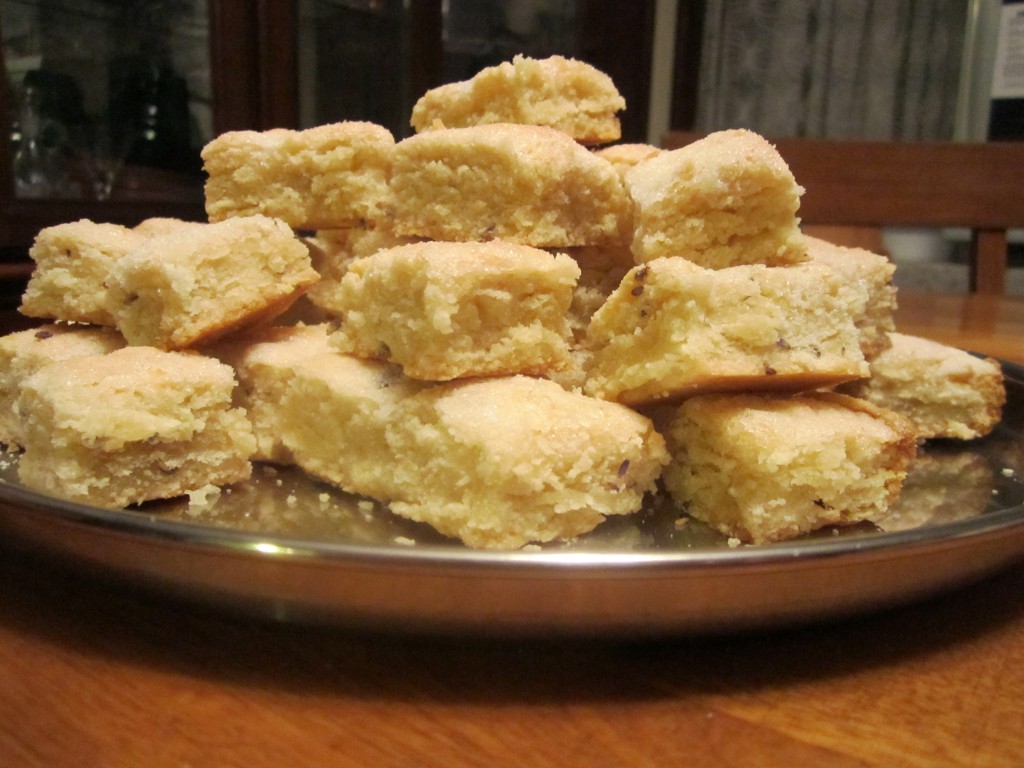
Lavender and Vanilla Shortbread
1 c. vanilla sugar, plus extra for sprinkling*
2 c. butter
4 c. flour
2-3 T. lavender blossoms
Cream together the one-cup of sugar and butter. Stir in the flour and lavender blossoms. Press mixture in to a greased 9×13 inch-baking dish. Cut or score into small squares, or on the diagonal for diamond shapes. Sprinkle with extra sugar and bake in a preheated 300-degree oven for 50-55 minutes or until lightly browned around the edges. Re-cut the squares as soon as you remove the shortbread from the oven. Cool before removing from pan. Make about 100 small squares.
* If you don’t have vanilla sugar just use granulated sugar and add 2 teaspoons of vanilla extract to the dough.
Making Vanilla Sugar
Some specialty stores sell vanilla sugar and it is expensive. I find it easy to just make my own. Vanilla sugar can be used in baking or to top desserts, in tea, and other drinks. I love to sprinkle vanilla sugar on sugar cookies and on muffins, too.
I buy vanilla beans by the pound online and use them in cooking and to make my own vanilla extract.
To make vanilla sugar just cut vanilla beans in half lengthwise and then into 1 inch pieces. Place granulated sugar in a jar and add the vanilla beans. Cover jar and shake once in awhile. The sugar is fragrant in about a week but will get stronger the longer it sits. I use one vanilla bean per cup of sugar. You can add more sugar to the jar as you use it. The beans will continue to flavor new sugar added to the jar for some time.
Herbes de Provence
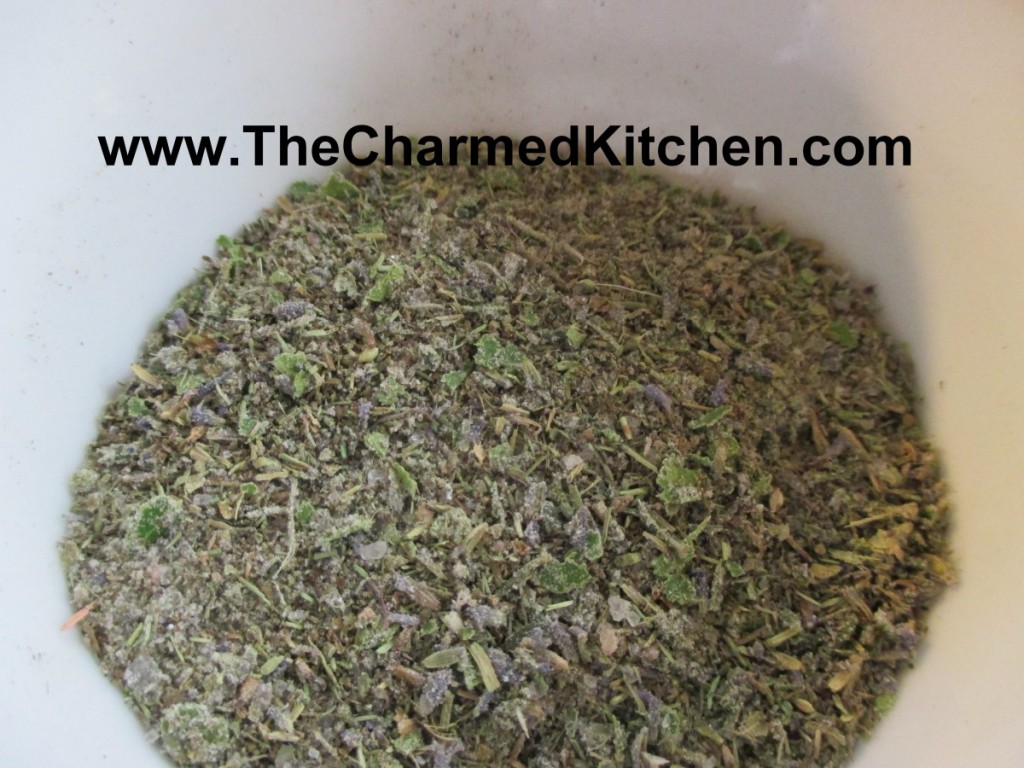
I make my own herb and spice blends often, because it gives me control over what I put in it. I also grow a lot of herbs, so it just makes sense. You can use dried or fresh herbs in this recipe. If you are using any fresh herbs, then store your mix in the freezer.
1 T. thyme, or 2 T. fresh
1 T. rosemary or 2 T. fresh
1 T. savory or 2 T. fresh
2 t. basil or 2 T. fresh
1 t. lavender or 1 T. fresh
2 bay leaves
Blend fresh or dried herbs until bay leaves are powdered. Rub this mixture on grilled meats, roasts, chicken, or fish. If using fresh herbs, make small amounts and freeze what is unused.
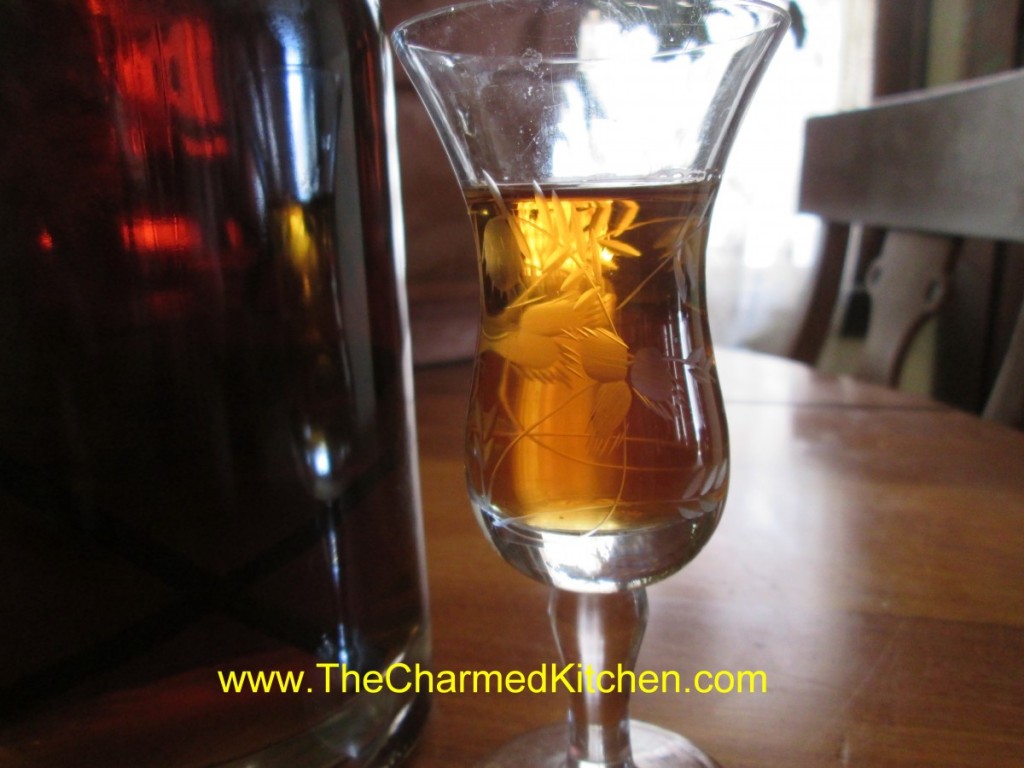
Lavender Liqueur
I started by combining 2 cups of lavender blossoms with about 4 cups of vodka in a large Mason jar. These were dried blossoms from last year’s harvest. I put the lid on the jar and let it steep together for a few weeks. After a few weeks I strained out the blossoms. Then I poured the mixture through a strainer lined with a coffee filter to get out any fine particles so my end product would be clear. I had expected the mixture to be a lavender color. It ended up a pretty honey brown color instead. It also had a very strong fragrance and flavor of lavender. Quite pleasant.
After tasting the lavender vodka I decided to add sugar to the mixture. I made a cup of sugar syrup by combining one cup of sugar with 1/2 cup of water in a small pot and brought it to a boil. This gave me a cup of sugar syrup. Once the sugar syrup cooled to room temp I added it to the lavender vodka and allowed this to mellow for another week.
The odd thing was that at first the sugar syrup and lavender vodka would not blend. The sugar syrup settled to the bottom of the bottle. No amount of stirring and shaking seemed to matter. I’d all but given up when a friend was over and tipped the bottle a few times. Amazingly it finally combined. On the advice of another friend I decided to add a couple of vanilla beans as well. The flavor is pretty interesting.
Lavender Vinegar
It’s easy to make. Just add 2 cups of vinegar for every cup of blossoms. If you are using dried flowers use 1/3 cup for every 2 cups of vinegar. Store in a cool, dark place in a container with a tight-fitting lid.Steep for at least 2 weeks- or longer.
Be sure to use vinegar that is 5% acidity- it will say that on the label. I like to use white wine vinegar, red wine vinegar or cider vinegar.
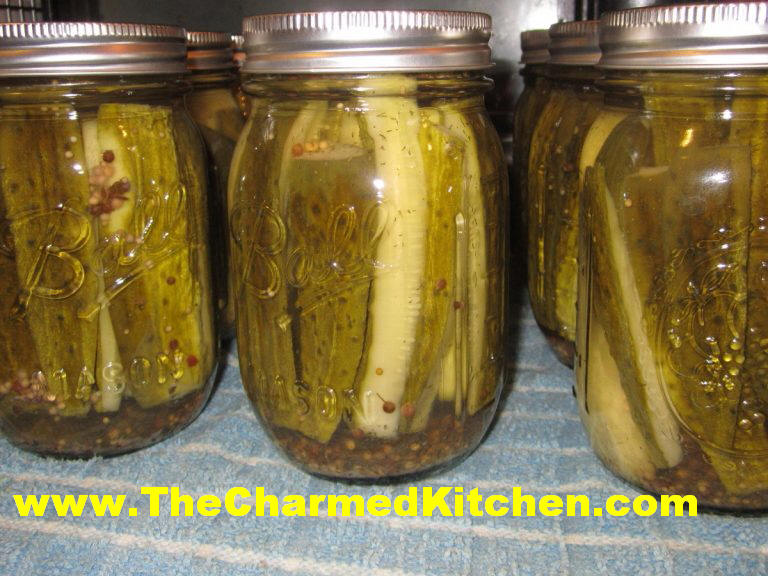
Dilly Beans
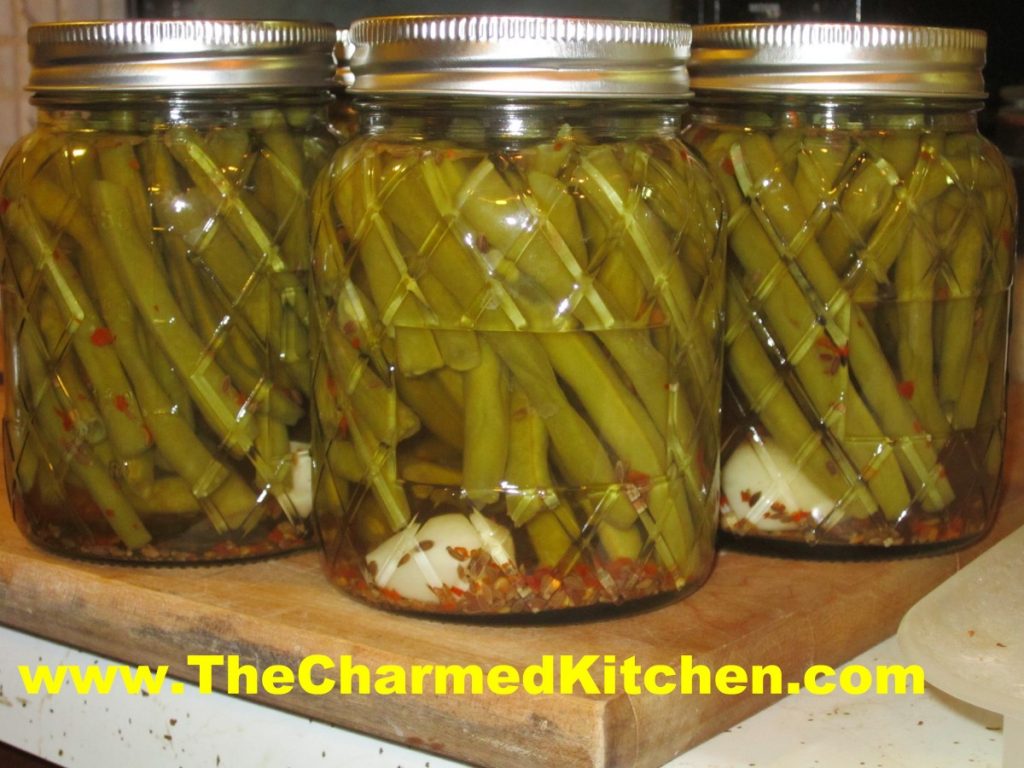
These are one of my favorite pickled veggies. I like pretty much any type of pickle, and I love green beans, so no surprises there. They have a great, tart flavor.
If you have an abundance of green beans, you might consider making a batch of these to enjoy year round. Green beans are also at local farm markets now, and are at their peak.
These are great just eaten like other pickles, as a side. But they are also a fun addition to a Bloody Mary- or so I am told. I also like to serve them as an appetizer with cheeses, crackers and olives. Who am I kidding? I eat them right out of the jar.
While the recipe calls for 1/4 teaspoon of red pepper flakes per jar- feel free to add more, for a spicier version.
Dilly Green Beans
4 lbs. table‑perfect whole green beans
1 3/4 t. crushed dried hot red pepper
3 1/2 t. dried dill seed or seven fresh dill heads
7 cloves of fresh garlic, peeled
5 c. vinegar
5 c. water
1/2 c. less 1 T. pickling salt
Wash beans thoroughly. Remove stems and tips, and cut them as much as possible in uniform lengths to allow them to stand upright in canning jar, coming to the shoulder of the jar. have jars clean and very hot, and lids and sealers ready in scalding water. In each jar place one dill head or 1/2 t. dill seed, add one garlic clove, and 1/4 t. crushed hot red pepper. Pack beans upright in jars, leaving 1 inch of head room. Heat together the water, vinegar and salt. When the mixture boils, pour it over the beans, filling each jar to 1/2 inch from the top. Run a plastic knife down and around to remove trapped air. Adjust lids, and process in a boiling water bath for 10 minutes, start timing after the water in the canner returns to a boil. Remove jars. …Wait at least 2 weeks for these beans to develop their flavor. Yield: 7 pints
Source: Putting Food By
Homemade Dill Pickles
People think homemade pickles are difficult to make. They really aren’t. These dill pickles are easier than most.
To make them, you start by putting dill and garlic in clean jars. Then you add the cukes, cover them with the brine, and process. Can’t get much simpler.
You can play around with the seasonings a bit. To make the dill pickles a little more fun, I added 1 teaspoon of red pepper flakes to about half of the jars, for a spicy version.
To make the pickles crisper, you can add a fresh grape leaf to each jar with the spices. For best results, use really fresh cucumbers. Pickle them as soon after harvest as possible.
If you didn’t grow pickling cucumbers, they are available at most farm markets. Buying from a local farmer means you are likely to get a fresher product than what might be at the grocery store.
Easy Dill Pickles
30-40 pickling cucumbers, 5 inches long, scrubbed and ends trimmed off
¾ c. sugar
¾ c. canning or pickling salt (non-iodized)
1 quart vinegar, 5% acidity
1 quart water
7 fresh dill heads
3 T. pickling spice
7 garlic cloves, peeled, optional
Mix together the sugar, salt, vinegar, water and pickling spices and bring to a boil. Cook 10 minutes. Place a dill head in the bottom of seven clean, hot pint jars. Add the garlic, if using. Meanwhile cut trimmed and washed cucumbers into halves or quarters lengthwise and pack upright into the jars. Trim the length, if needed to fit no higher than to the shoulder of the jar. Pour over the hot brine leaving ½ -inch of headspace. Wipe rims and screw on lids. Place in a simmering water bath and bring to a boil. Process for 10 minutes. Remove and cool. Makes 7 pints.
Zucchini Brownies – Gluten Free
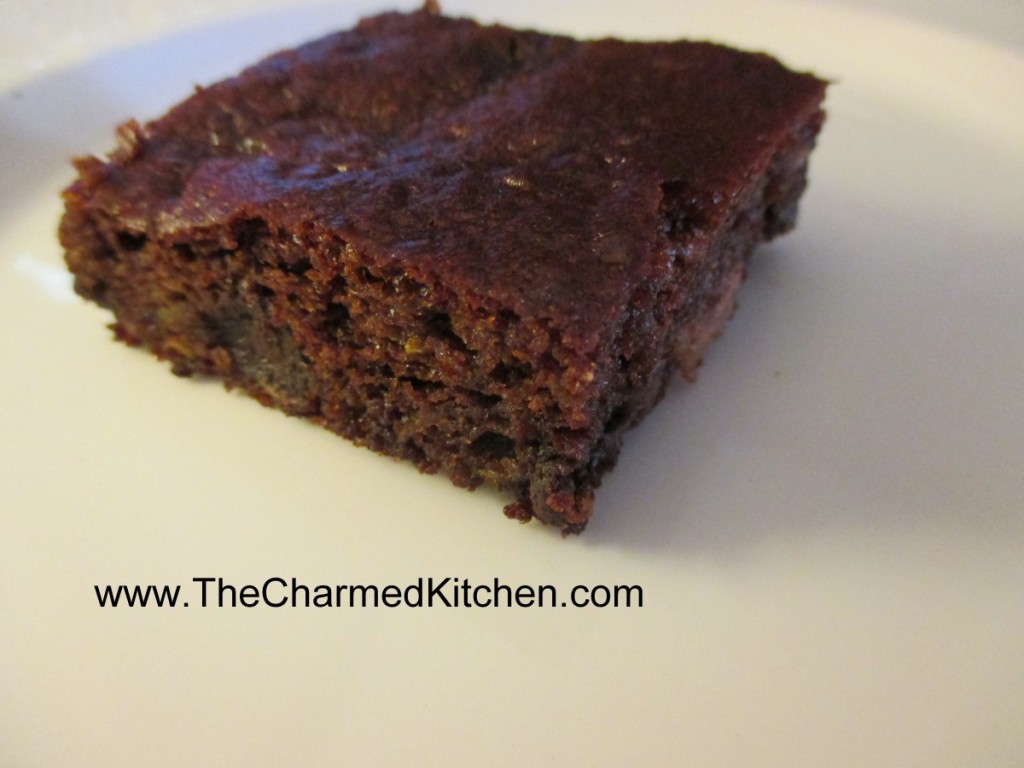
These brownies are everything you want in a brownie. Sweet, moist and very tender. The fact they are also flour and gluten-free is a nice bonus for those who can’t have gluten.
You might think, when you read the ingredients, that I left something out. I didn’t. They baked up beautifully and had a wonderful texture. I think the next time I make them, I might also add some chopped nuts.
Gluten-Free Zucchini Brownies
1½ c. shredded zucchini
1 c. almond butter- but you could use peanut butter instead
1 c. chocolate chips
1/3 c. honey – but you can use 1/2 cup if you want a sweeter brownie
¼ c. unsweetened cocoa powder
1 egg
1 t. vanilla
1 t. baking soda
1 t. cinnamon
½ t. allspice
Preheat oven to 350 degrees. Grease a 9×9 inch pan, set aside. Combine all ingredients in a medium bowl and stir until well blended. Pour batter into pan and spread evenly. Bake 25-30 minutes, or until toothpick inserted comes out clean. Cool before cutting. Makes 16.
“Cheeseburger” Cookies
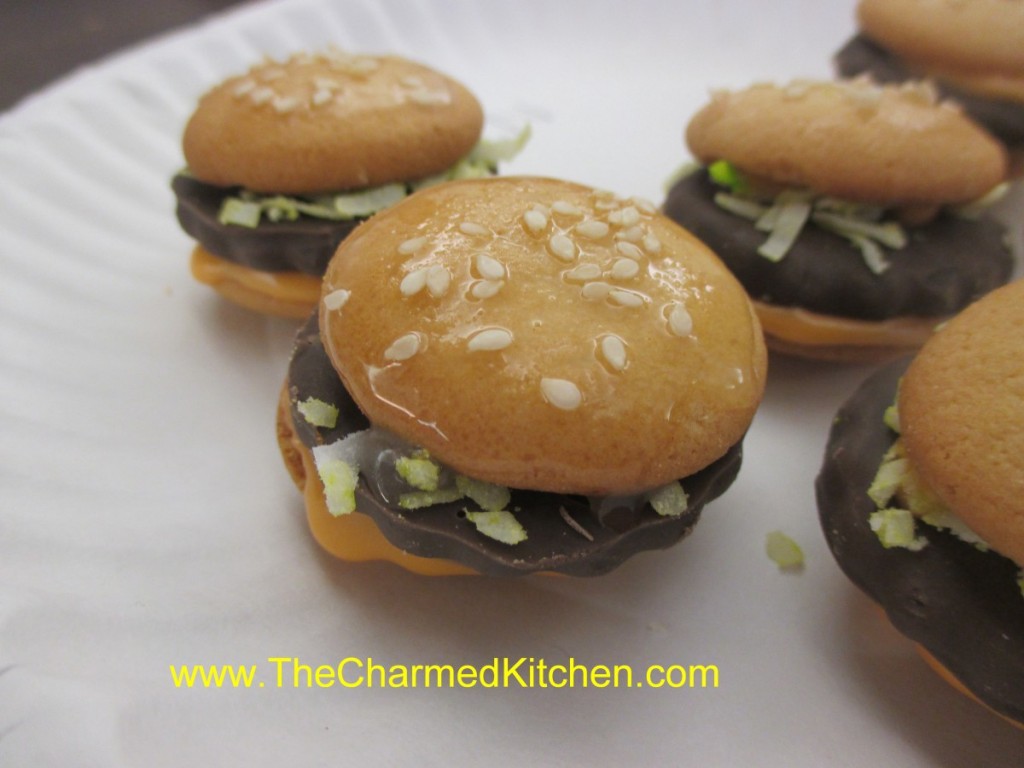
I have been doing a cooking camp in Mentor this week. We have made all sorts of dishes including these darling cheeseburgers cookies. I know, I normally cook everything from scratch, but these are so fun. Also a nice thing to make when it is too hot to be baking. They are just assembled, not baked, and even younger kids can make them.
Cheeseburger Cookies
1 package vanilla wafer cookies
1 package Keebler Fudge N Caramel or Grasshopper cookies, or other small chocolate cookies
2 c. powdered sugar
1- 2 T. milk
few drops of yellow and red food coloring
1 c. coconut, optional
several drops of green food coloring, optional
1/4 c. powder sugar
1 T. milk
sesame seeds
Combine 2 cups of powder sugar with the milk and red and yellow food coloring. This should be the color of cheese. Place the coconut in a small bag and add a few drops of green food coloring. Close the bag and shake well to evenly color. This will be the ‘lettuce’.
To assemble cookies use 2 vanilla wafers (the bun) and one Keebler cookie (the burger). The orange frosting works as the cheese and glue. The coconut is the lettuce. Place a vanilla wafer flat side up on work surface. Place a little dab of “cheese” on the cookie and then a Keebler cookie. Sprinkle a little coconut on the burger, then some more cheese and the top bun, flat side down. Combine the remaining powder sugar and milk. You should have a thin glaze. Brush this lightly on the top of the finished “burgers” and sprinkle with a few sesame seeds. Makes about 2 dozen cookies.
Tomato Salads
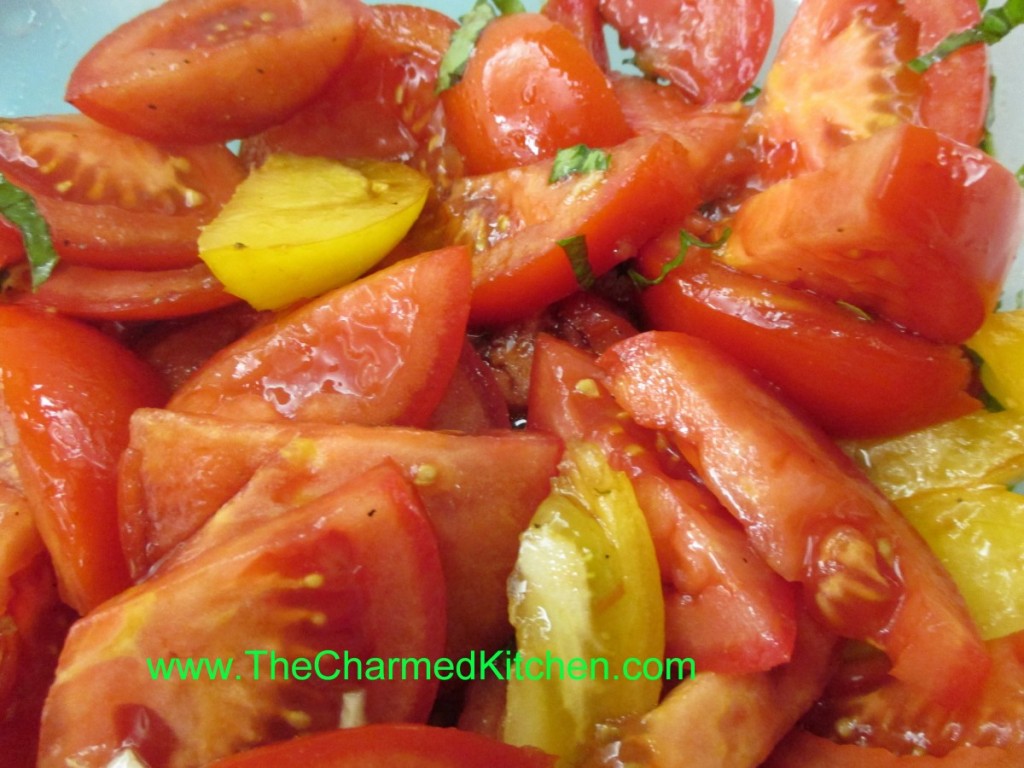
Tomato season is too short around here. I can never get enough of what my mom called “real tomatoes”. The first few tomatoes never made it in the house. Warm from the sun, they were too tempting. We would pick them right off the plant and eat them. Deer have made it pretty impossible for me to grow tomatoes right now. Luckily, local farm markets have many beautiful tomatoes.
I am enjoying eating fresh tomatoes right now. Later in the season, I will purchase enough tomatoes to can and dehydrate to enjoy once the season is over.
I thought I would share a few of my favorite tomato salad recipes with you.
They are pretty simple. I think that is how it should be. When you have something as close to perfection as a ripe tomato, little more is needed.
Marinated Tomato Salad
3 large tomatoes, cut in wedges, or 2 pints cherry tomatoes, halved
1 T. olive oil
1 clove garlic, minced
2-3 basil leaves, cut into thin strips
2 T. balsamic vinegar
salt and pepper to taste
Combine ingredients and serve at room temperature. Serves 4-6.
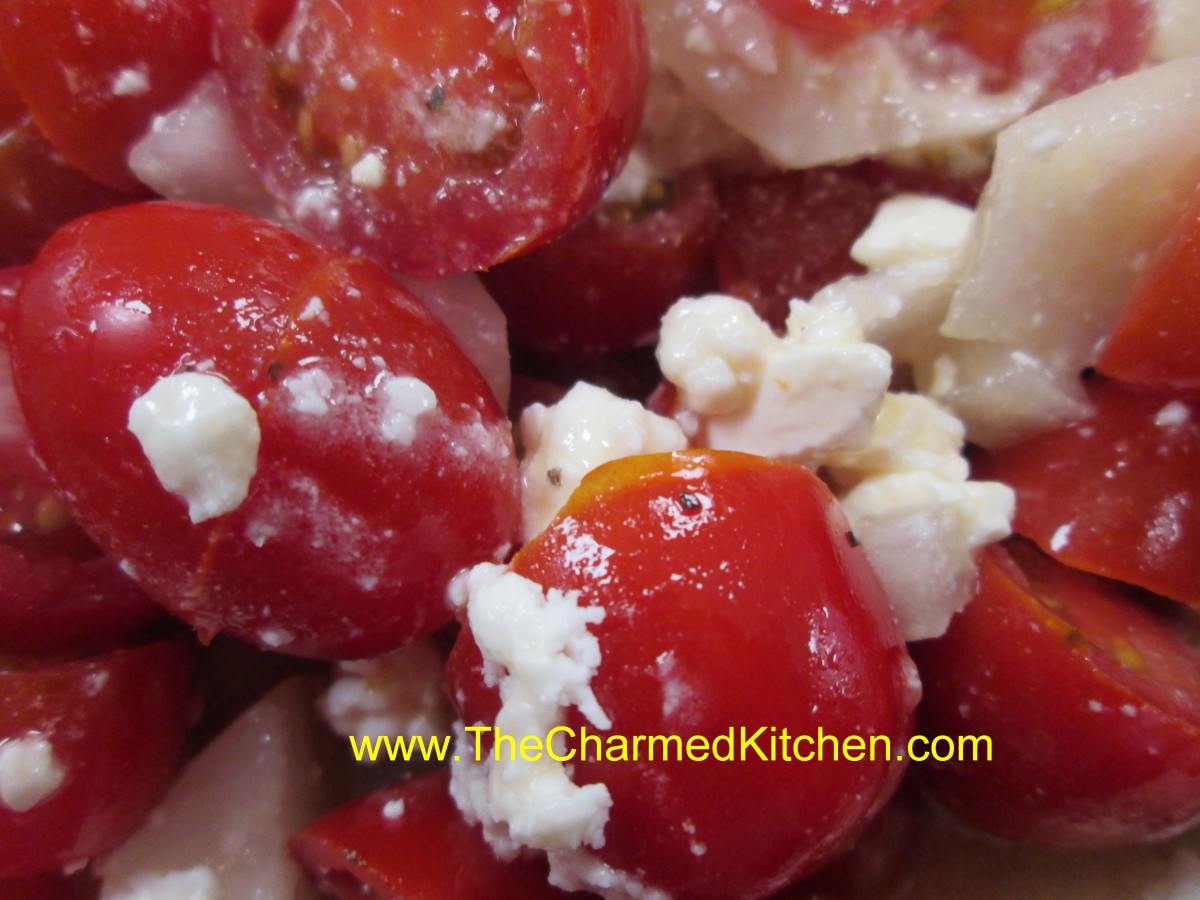
Tomato and Feta Salad
3 tablespoons crumbled feta cheese
12 cherry tomatoes, thinly sliced
1/2 sweet onion, diced
1 tablespoon olive oil -I used a lemon infused olive oil
1 tablespoon lemon juice
Salt and pepper to taste
In a bowl, mix the feta cheese, cherry tomatoes, onion, olive oil, and lemon juice. Add salt and pepper to taste. Serve immediately. Serves 2.
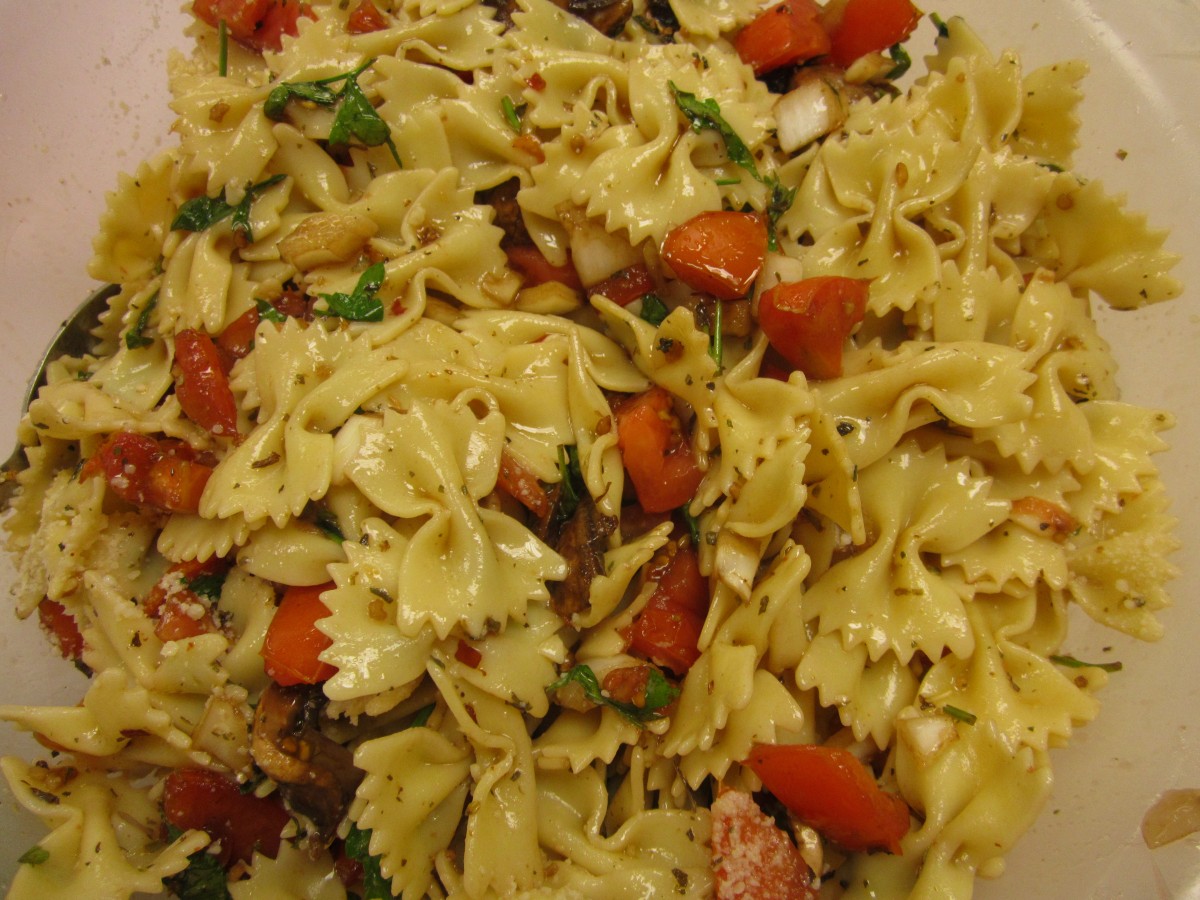
Warm Pasta Salad
1 lb. Plum tomatoes, chopped
1 medium sweet onion, chopped
4 oz. Fresh mushrooms, sliced
2 cloves garlic, minced
¼ c. fresh parsley, chopped
1 T. dried basil or 1/4 c. chopped fresh basil
1 T. capers, optional
1 t. dried oregano
½ c. olive oil
¼ c. red wine vinegar
3 T. balsamic vinegar
Dash of hot red pepper flakes
Salt to taste
1 lb. Uncooked pasta
Combine all ingredients, except pasta and chill overnight. Cook pasta, drain and toss with tomato mixture. Mixture should be served right away . Serves 6.
BLT Salad
6-8 slices bacon
2 slices rye bread
2 slices Swiss cheese
5 c. torn up lettuce or mixed greens
3 T. olive oil
2 T. apple cider vinegar
1 T. balsamic vinegar
Salt and fresh ground pepper
2-3 tomatoes, diced
Cook bacon until crisp. Remove from pan, drain and crumble. Remove most of the bacon grease from the pan. Make a sandwich with the rye bread and the Swiss cheese. Toast in the skillet over medium heat until golden brown and cheese is melted. Set aside. Place lettuce in bowl and toss with the oil to coat the leaves. Toss with the vinegars and season with salt and pepper to taste. Add the tomatoes and the bacon and toss. Cut the sandwich into cubes and place on the top of the salad. Serves 2.
Note: you can make two sandwiches if you want more bread and cheese in the salad.
Tomato Feta Salad
Warm Pasta Salad

BLT Salad
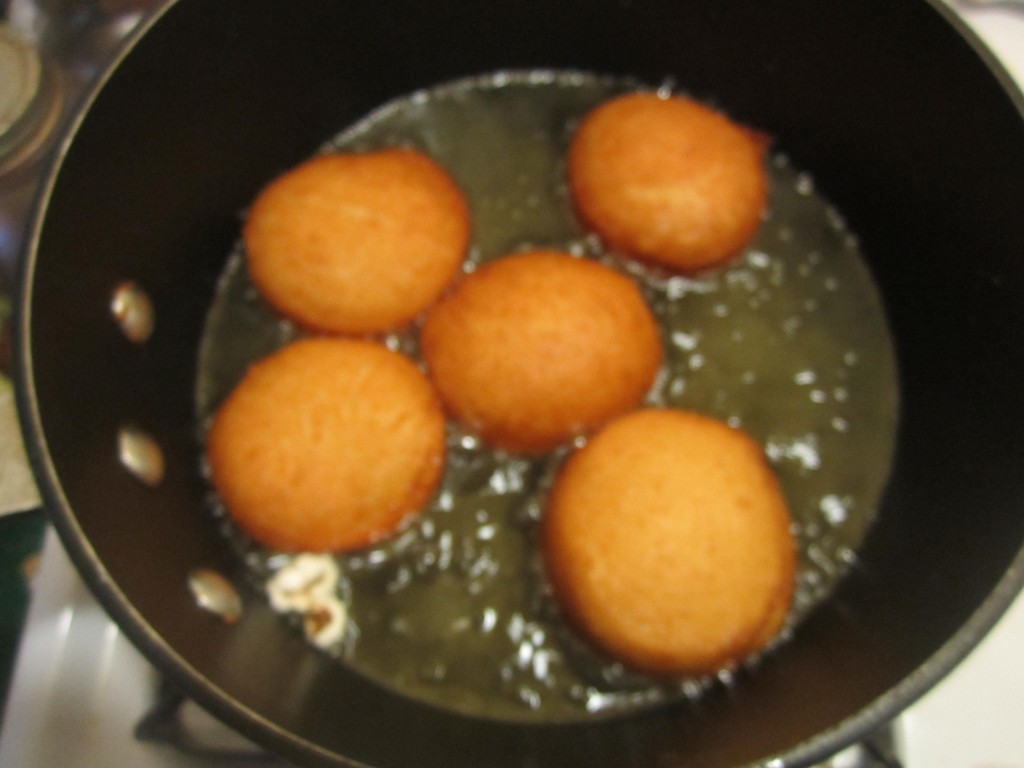
Cooking Camp – Biscuit Doughnuts
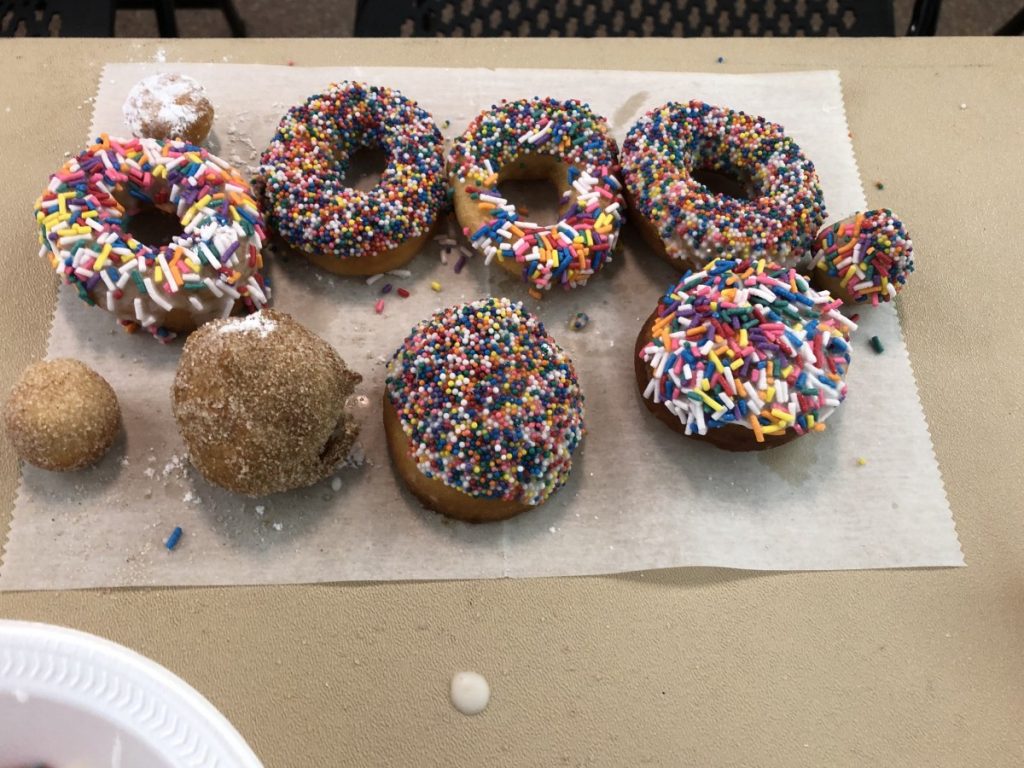
I always feel like I am cheating when I make these doughnuts. As most people know, I am all about making stuff from scratch. I also live in the real world and I know people just don’t always have time to make everything from scratch.
These doughnuts are made from refrigerator biscuits. Yes, those little blue tubes of dough in the dairy counter at the store.
We made these in cooking camp yesterday. The kids loved making them. Some were left whole, others had holes poked in them, so we had doughnuts and doughnut holes.
Here is how to make them.
I heated up oil in a mini deep fryer. You want to heat the oil to 350-360 degrees. If you don’t have a fryer with a built in thermometer, you can heat up oil in a deep pan and toss in a kernel or two of popcorn as the oil is heating up. Popcorn pops at 350 degrees so when it pops you will know the oil is hot enough. I fried the biscuits, 6-7 at a time, for a minute or so per side, or until they were golden brown. Then I drained them on paper towels.
The kids had three options for finishing the doughnuts. We mixed a couple of cups of powdered sugar with some water and vanilla to make the glaze. We also had a bag of powdered sugar and a bag with cinnamon sugar. They could either dip the warm doughnuts in the glaze or roll them in the sugars. They were a big hit.
If you don’t have biscuits laying around- I normally don’t have them- you can make biscuits from scratch and do the same thing. Great when you have unexpected guests- or just a taste for a warm doughnut.
Note: Additional options. We could have melted chocolate chips with a little milk and made a chocolate glaze. I have made these before where I use a small cake decorating tip to insert jelly. Sprinkles can be used on the glazed doughnuts, if you like.
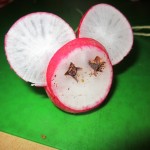
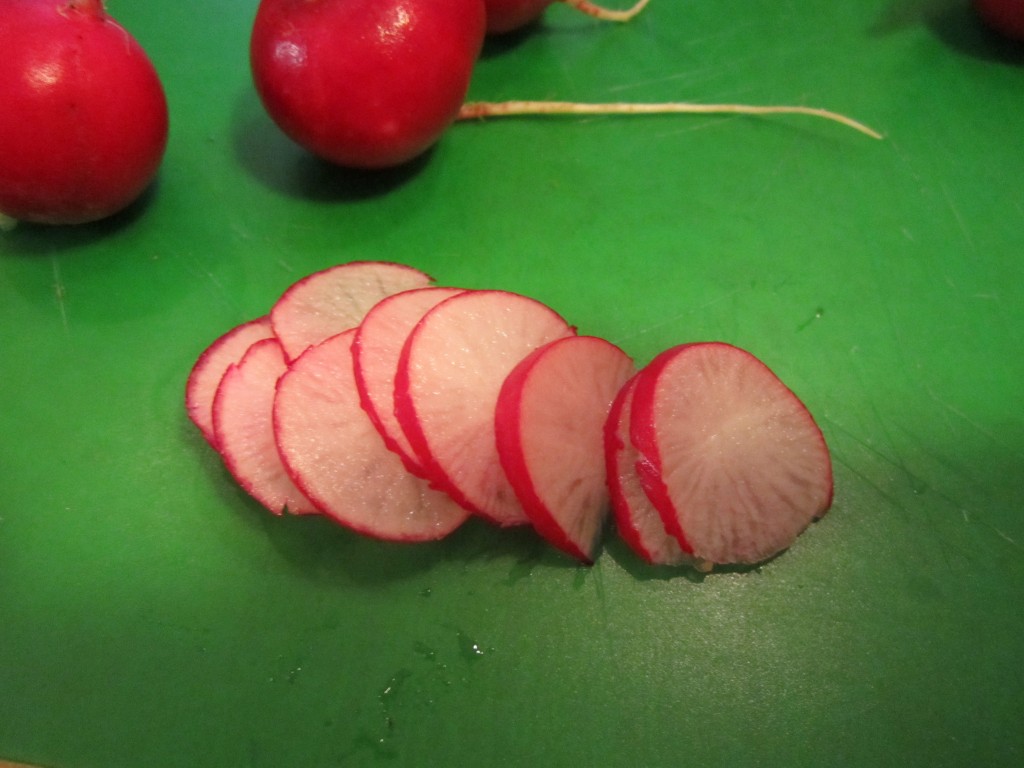
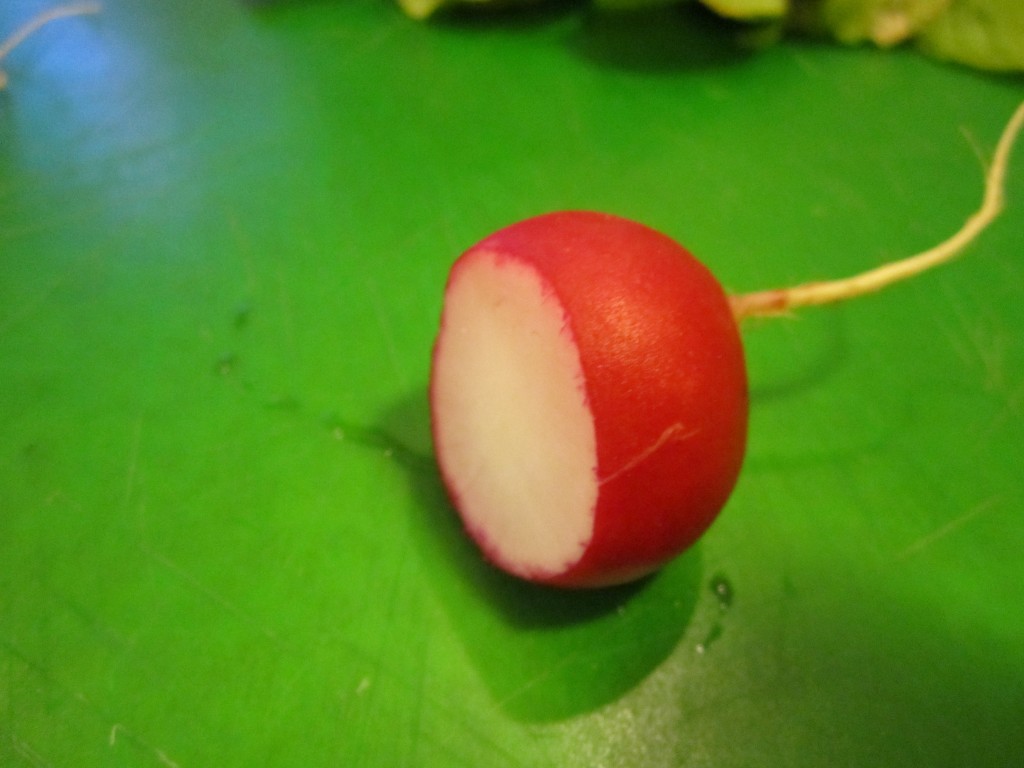
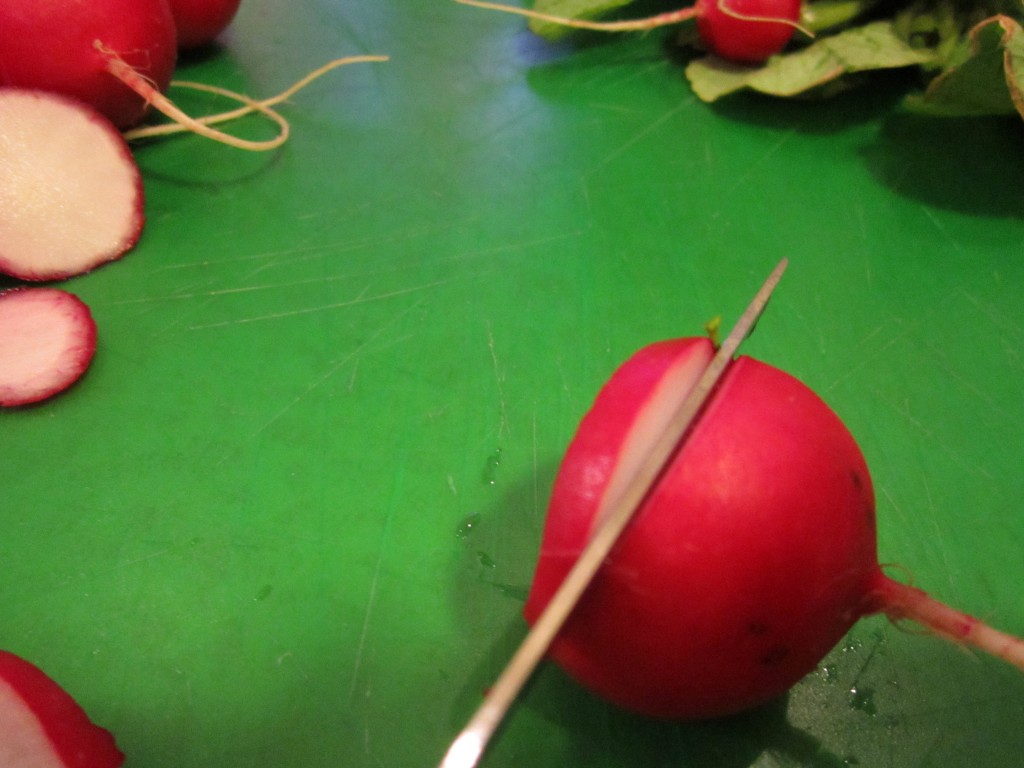
Radish Mice
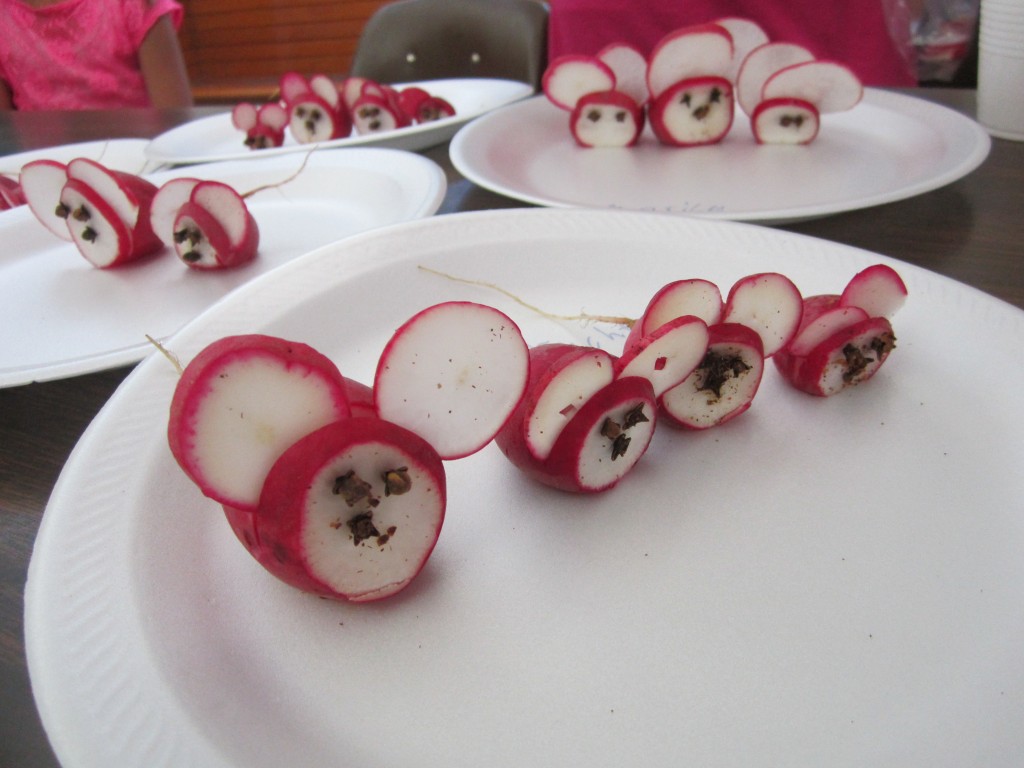
Started cooking camp with kids this week. It’s been extra busy, so I haven’t taken as many pictures as usual. The kids have made salads and giant baked sandwiches and more. We did have a few minutes the other day to make these “mice”. They are easy to make and kids love them. Just make sure someone who is old enough to handle a knife does the slicing part of this activity. It is not a job for younger kids. They can, however, do all the assemble parts. You can add cloves for eyes, if you like.
Radish Mice
Radishes
Cloves
Choose radishes with the longest root pieces to be your mice. The roots will be the tails. Set them aside cut thin slices from the extra radishes. These will be the ears. You will need 2 per mouse. In the mouse radishes cut a small slice off one side so the “mouse” will lie on its side. Cut a slit in the top of the radish near the non-root side. Slip in the thin slices to form the ears. Add cloves for eyes and nose. Use these to decorate salad plates and party trays but don’t give them to little children because they could choke on small pieces.
Cherry and Blueberry Clafoutis
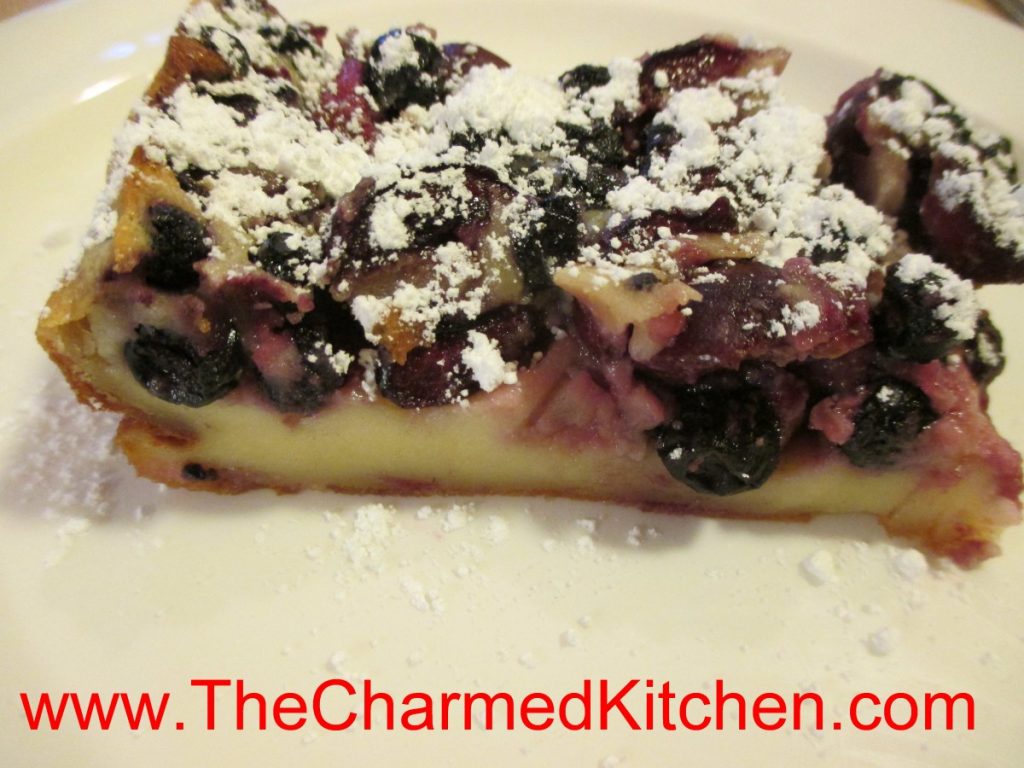
So what is clafoutis? Clafoutis is a sort of pancake, sort of custard, sort of quiche. It is a lovely dessert for fresh fruit, for sure.
You can serve clafoutis plain, or topped with powdered sugar or whipped cream. On a hot day, I like to serve it with a scoop of ice cream.
Clafoutis is really simple to make, too. You start by putting the fruit in a prepared pan. The batter is made in a blender, and takes just a couple of minutes to prepare. You pour the batter over the fruit- and bake.
I used cherries and blueberries in this one, but you can use all sorts of fruits- peaches, plums, raspberries…..
Most people enjoy it as a dessert, but it is also nice with that morning cup of coffee.
I used a combination I thought would make a nice dessert for summer.
Cherry and Blueberry Clafoutis
2 c. pitted cherries, I cut them in half, but you can leave whole
1 c. blueberries
3 eggs
1 c. sugar
3 T. melted butter
½ c. flour
2 t. vanilla extract
1 t. almond extract
pinch of salt
1 c. half and half
powdered sugar, optional
Grease a 9×9-inch baking dish or pie pan. Preheat oven to 350 degrees. Place cherries and blueberries in the prepared pan. In blender, combine eggs, sugar, butter, flour, flavorings and salt.* Blend until smooth. Add half and half and blend again until smooth. Pour batter over the cherries and blueberries. Bake for 45-50 minutes or until clafoutis is browned around edges and puffed up. Allow to cool and dust with powdered sugar, if you like. It will deflate as it cools. Serves 6.
* You can whisk the ingredients together by hand, if you prefer.


