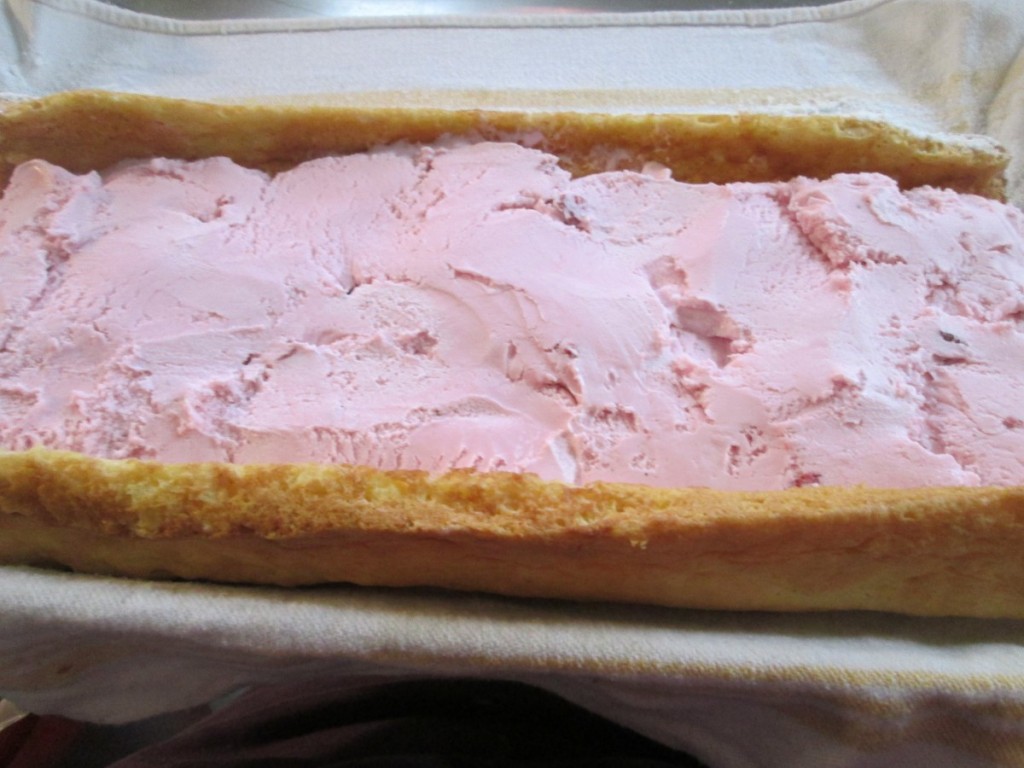
Strawberry Ice Cream Cake Roll

This is the perfect summer dessert. Fresh berries, a light, citrus-scented cake and ice cream. What more could you want?
When you say cake roll, I think a lot of people first think of a pumpkin roll or perhaps a Buche de Noel (yule log). There are so many more desserts you can make with them. Cake rolls can be made in many flavors and they can be filled with custard, frosting, fruit, ice cream and more.
For this sponge cake roll, I used homemade strawberry ice cream to fill it, recipe follows. You could use store bought ice cream, if you prefer.
Start with the sponge cake roll recipe below, and use whatever flavor ice cream you like. You’ll need about a quart of ice cream- or a little more.
Once finished, you just wrap it up and pop the cake in the freezer until needed. Great to have on hand for summer parties and cook outs. You can decorate with fresh berries when serving. Blueberries would make this a fun red, white and blue dessert for Memorial Day or the 4th of July.
Sponge Cake Roll
This sponge cake roll can be filled with whipped cream or ice cream, or use your favorite filling.
5 eggs, separated
2/3 cup granulated sugar
1 teaspoon lemon juice
1/2 teaspoon finely grated lemon zest
2/3 cup cake flour*
1/4 teaspoon salt
1 teaspoon baking soda
3 tablespoons melted butter
Beat egg yolks until thicken and lemon colored; gradually add 1/3 cup of the granulated sugar, the lemon juice and the lemon zest. Beat egg whites until almost stiff then gradually beat in the remaining 1/3 cup sugar. Beat until stiff peaks form. Fold yolk mixture into whites. Sift dry ingredients into a separate container; add to egg mixture, folding in carefully. Fold in melted butter. Pour batter into waxed paper-lined 10x15x1-inch jelly roll pan. Bake at 375° for 12 minutes. Sprinkle with confectioners’ sugar. Turn onto a clean kitchen towel which has been generously dusted with confectioners’ sugar. Trim edges, if necessary; roll cake up, towel and all, while still warm. Let cool completely. Unroll and fill with whipped cream or ice cream then re-roll cake. The trick is to let the ice cream soften up a few minutes before spreading it on the cake. But don’t wait too long. Rather than trying to let the ice cream get soft enough to spread I used a spatula to sort of cut slices of ice cream and place them on the cake. Store ice cream cake roll in freezer until ready to slice and serve.
*If you don’t have cake flour you can make your own. Measure out a cup of all purpose flour, remove 2 tablespoons of flour and replace them with 2 tablespoons of cornstarch. For larger amounts place 7 cups of flour in a bowl and combine with 1 cup of cornstarch. Mix well or even sift together. Store in an airtight container.
Strawberry Ice Cream
2 c. chopped strawberries
1 c. sugar
1 T. vanilla
2 c. cream or half and half or a combination. You can also use some milk or even almond or rice milk.
Additional sugar to taste
Place strawberries, vanilla and sugar in saucepan and bring to a simmer, stirring occasionally. Remove from heat and chill. Combine chilled berry mixture with cream. Add additional sugar if you like. Remember that once it is frozen the ice cream will not taste as sweet so make this mixture a little sweeter than you want the final product to be. How much sugar you add varies with personal taste, and how sweet the berries are. Place in an ice cream maker and process according to manufacturer’s directions. Once finished put in an air- tight container and place in freezer. Makes about 1 quart.
Homemade Calzones
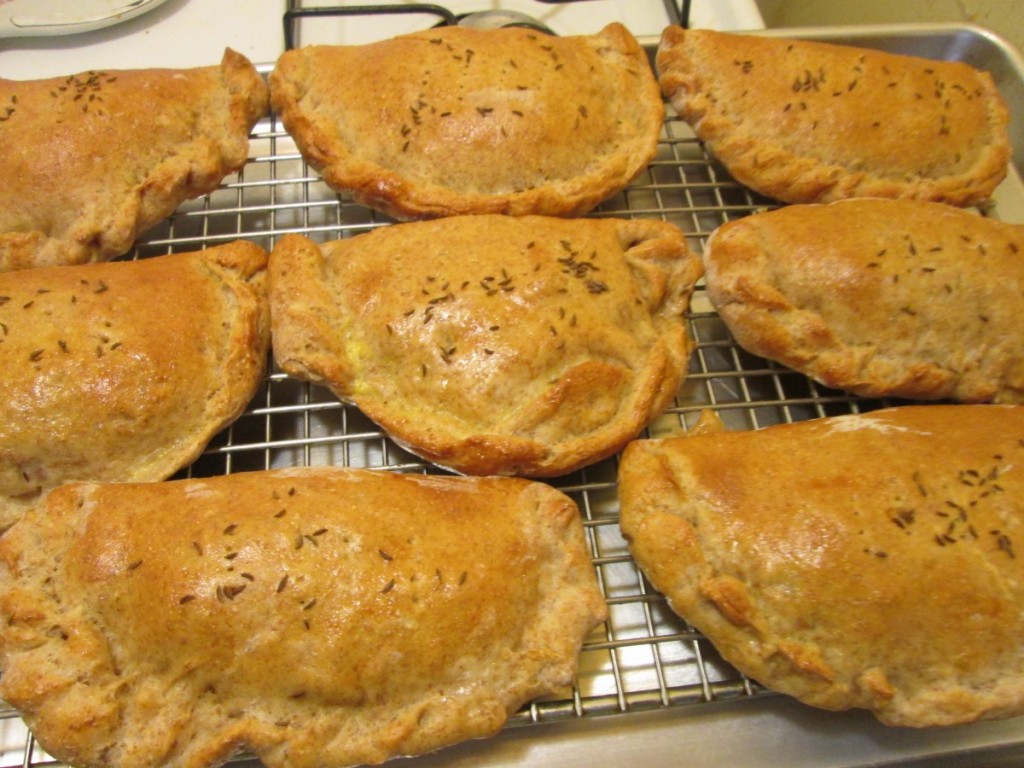
Calzones are traditionally made with Italian/pizza type fillings, but you can fill them with all sorts of other ingredients. They are kind of a cross between a sandwich and a pizza.
I like to get creative when making calzones. I often use what I have on hand. I think about what ingredients would go well together.
Calzones are wonderfully portable, and great to pack for lunch. They are also great food to serve at parties.
I like to make a batch and freeze some of them. I use one of three recipes for dough, listed below, then swap out fillings depending on what I am in the mood for. Get creative and have fun.
Basic Homemade Dough
This recipe is enough for 8 large calzones, more if you make them smaller.
1 packet active dry yeast
1 t. sugar
1 2/3 c. warm water
4-4½ c. flour
2 t. salt
In mixing bowl combine yeast with 3 cups of flour, sugar and the salt. Add the warm water and stir together, mixing well. Gradually add more flour until soft dough forms. Place dough on floured surface and knead until stretchy and smooth, about 10 minutes. Allow dough to rest 3 minutes and knead a few more times. Place in bowl and cover. Let rise until doubled in bulk, about 45 minutes. Punch dough down.
Assembly: Divide into 8 or more pieces. Cover pieces until ready to roll out. Roll out a piece of dough into an 8-inch circle. Add fillings to half of the dough and wet edges with water. Fold over and press edges firmly to seal. Cut a couple of slits in top of calzone to allow steam to vent. Repeat with remaining dough.
Finishing /Baking: Place calzones on greased baking sheets. Cover calzones and allow to rise 30 minutes or so. Bake in a 400-degree oven for 20-25 minutes or until golden brown.
Variations:
Whole Wheat: You can add 1-2 cups whole wheat or spelt flour to replace the same amount of white flour for a whole grain calzone.
Rye: Add 1-2 cups of rye flour to replace the same amount of white flour. This is great for the Reuben calzones.
Fillings: Traditional fillings could include shredded mozzarella cheese, mushrooms, pepperoni, cooked sausage, chopped onions or peppers, pizza sauce (some prefer to serve sauce on the side) olives or anything you might top a pizza with.
Note: For any filling, use ingredients that are cold or at room temperature. Meats should be cooked as they won’t cook in the baking process. Vegetables should be cooked as raw veggies will give off water and may make your calzone soggy. If using a sauce, make sure it is on the thick side. Sometimes I brush the dough with a little oil first to keep the dough from getting soggy.
Toppings: You can brush the top of the calzones with an egg wash if you like for a shinier top. Apply just before baking. If you want, you can also sprinkle the tops with seeds- but use an egg wash to make sure the seeds will stick.
Ham and Swiss Calzones
1 recipe calzone dough, rye variation preferred
1 1/2 -2 lb. thin sliced ham- more or less
3/4 lb. sliced Swiss cheese
Thousand island dressing- recipe follows
1 egg , beaten
In the middle of the dough place 1 1/2 ounces of the Swiss cheese, a spoonful of the dressing and 2-3 ounces of the ham. Brush the edge of the dough with water. Fold over the dough in half and press the edges to seal. Brush the edge again with water and roll the edge over again. It will give you a prettier look and seal the calzone better. Repeat with remaining dough and fillings. Place calzones on greased baking sheets- or on a baking sheet with a silicone liner or parchment paper liner. You will end up with 8 calzones in all. Only put 4 on one baking sheet. Cover and let rest 15 minutes while preheating the oven to 400 degrees. Before placing calzones in the oven brush with beaten egg and make a few slashes with a knife to help steam to escape while baking. I put 2 baking sheets in the oven at the same time and switch them halfway through baking. Bake in a preheated 400-degree for 20-25 minutes or until golden brown. If baking 2 at once switch them after 10 minutes or so. Cool slightly before eating. Serve warm and refrigerate leftovers. Makes 8.
Thousand Island Dressing
Combine equal parts of ketchup, mayo and sweet pickle relish. You likely need at least a cup for this recipe. I made extra so the sandwiches could be dipped in extra dressing, if desired.
Reuben Calzones
1 recipe homemade dough, rye version
1½ -2 lbs. sliced corned beef
½ lb. sliced Swiss cheese
2 c. rinsed and drained sauerkraut
Thousand Island dressing
Caraway seeds, optional
Make dough and assemble 8 calzones dividing the ingredients among them. Dressing can be added in the calzones or served on the side. Use an egg wash and sprinkle on a few caraway seeds , if desired. Makes 8.

Curried Vegetable Calzones
1 recipe calzone dough
2 T. oil
1 onion, sliced
1 c. sliced carrots
1c. chopped cauliflower
1 c. green beans, sliced
1-2 T. curry powder, or to taste
Salt and pepper to taste
Heat oil in skillet and sauté onion until tender. Add the rest of the veggies and cook until tender. Sometimes I cover the pan and turn down the heat to steam them. Once veggies are tender drain and set aside to cool. Season to taste with curry powder and salt and pepper. Divide mixture among 8 calzones. Makes 8.
Spinach and Artichoke Calzones
1 recipe calzone dough, whole wheat works well in this recipe.
1 can (about 15 oz.) artichoke hearts, drained well and chopped
1 package (10 oz.) frozen spinach, thawed, and drained well
2 c. shredded mild cheese or 1c. crumbled feta cheese
1 T. lemon juice
Salt and hot pepper sauce to taste
Combine ingredients and mix well. Divide among 8 calzones. Makes 8.
Freezing Calzones: Note: you can freeze them baked or unbaked. Just place calzones on wax paper on a baking sheet and place in the freezer until frozen. Remove from baking sheet and wrap in plastic wrap, foil or wax paper and place in freezer bags. Label and place back in the freezer.
If you froze them unbaked- thaw in fridge overnight- unwrap but cover loosely with plastic wrap and a towel. Thaw in fridge at least 8- 12 hours. Place on greased baking sheet and place on counter at room temperature for another hour or two, covered with a towel. Bake in oven as normal.
If you froze them baked- you can heat up in a microwave- about 3 minutes per calzone. You can also warm them in a conventional oven. Place on baking sheet and bake in a preheated 350-degree oven for 20-25 minutes. Cover with foil if it starts to get too brown.

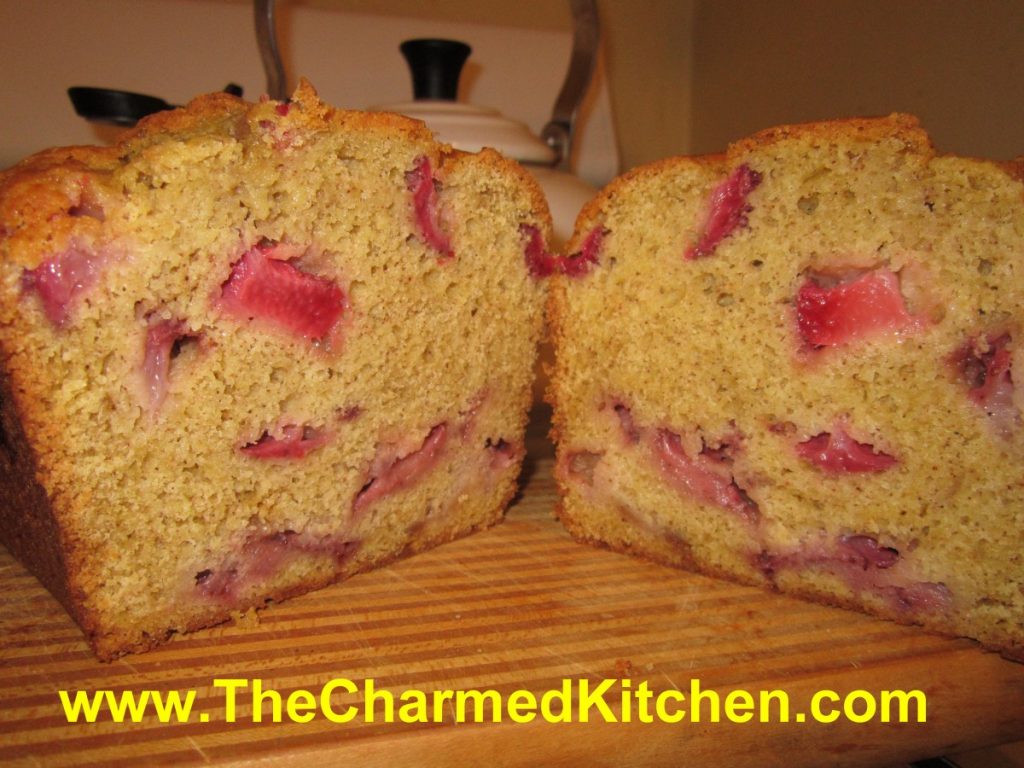
Strawberries and Cream Bread
I have posted this recipe before, but have been getting requests for it, so I thought it was worth sharing again. Since strawberries are in season, it seemed like the right time to post this recipe.
This is one of my favorite quick breads. The bread is tender and full of the sweet taste of fresh strawberries.
The batter will be very thick- don’t worry- it is supposed to be that way. When it bakes, the juices from the fresh berries keeps it moist.
I always end up making a double batch, one loaf to eat fresh, and one to give as a gift, or freeze.
This bread is fine just the way it is for dessert, or you can top with sliced strawberries, ice cream, whipped cream or some melted chocolate. Or top it with all of them!!
Here is the recipe. Enjoy!!
Strawberries and Cream Bread
1 ¾ c. flour
½ t. baking powder
½ t. baking soda
½ t. salt
½ t. each cinnamon and nutmeg
½ c. butter, at room temperature
¾ c. sugar
2 eggs, room temperature
½ c. sour cream, room temperature
1 t. vanilla
1 c. fresh strawberries, coarsely chopped*
¾ c. chopped nuts, optional
Grease an 8×4 inch loaf pan and preheat oven to 350 degrees. In a large bowl combine dry ingredients. Set aside. In small bowl beat butter until creamy. Add sugar and beat 1 minute. Beat in eggs one at a time. Beat in sour cream and vanilla. Stir in flour mixture until just moistened. Fold in strawberries and nuts and place batter in prepared pan. Bake 60-65 minutes, or until toothpick inserted in center comes out clean. Let stand in pan 10 minutes. Remove from pan and cool on wire rack. Makes 1 loaf. Freezes well.
* frozen berries are not recommended in this bread.
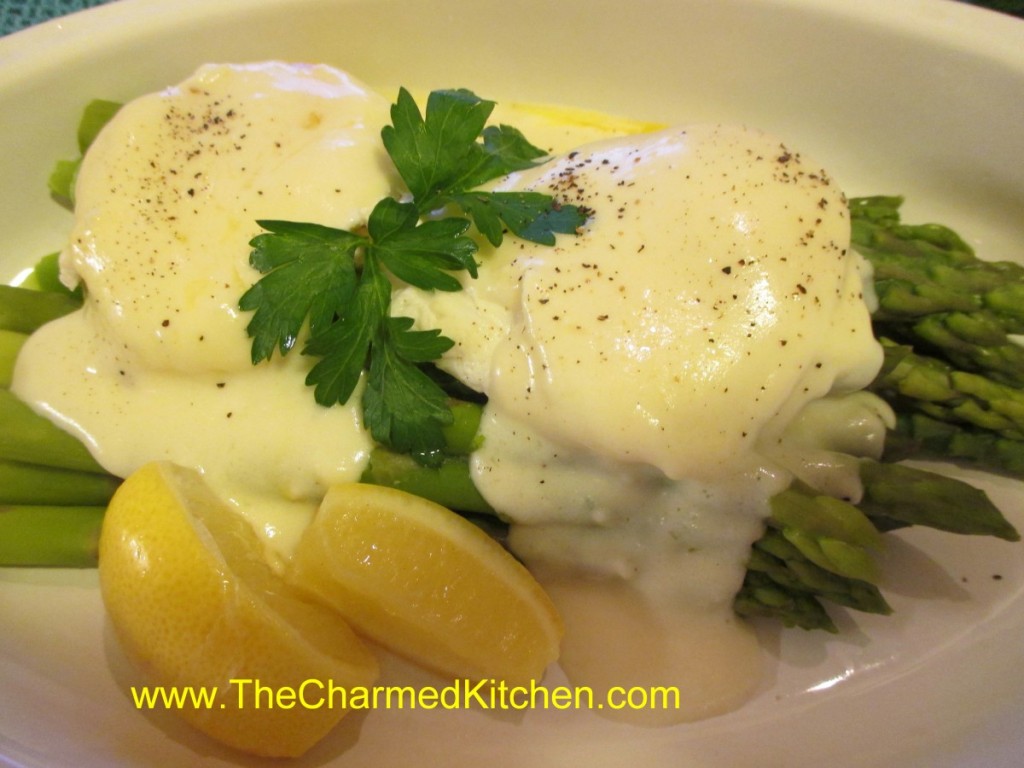
Asparagus Irene
Asparagus will always be one of my favorite vegetables. I just love it. As I started writing out the recipe for this dish, I was thinking about my Mom and how much she loved asparagus. She always wanted the bigger asparagus spears- she said they had more flavor.
I remember her showing me how to break the bottom of the stalks off and how she would cook them until they were just done- but not mushy. She wouldn’t consider eating canned asparagus- only fresh- so the season was short. It was something to be savored while it lasted.
Most times she just placed the cooked asparagus on a plate, topped with a pat of butter and a sprinkle of salt. One time, though, she made a white sauce and poured it over the asparagus. It was bliss. For this version I used a white sauce, and topped the asparagus with 2 poached eggs, too. It is a lovely breakfast or brunch dish. Makes a great dinner, too. I named the dish after her.
Here is the recipe.
Asparagus Irene
1 lb. fresh asparagus, washed and stems trimmed
white sauce- recipe follows
fresh lemon, cut in wedges
2 eggs
vinegar- for the poaching water
salt and pepper to taste
Put the asparagus in a steamer and cook for about 5 minutes- or until almost done. Set aside. Make white sauce, but add some lemon juice to it. I just kept squeezing lemon wedges in until it tasted right to me. Set sauce aside. Boil some water in a shallow pan and add a tablespoon of vinegar to the water. Drop the two eggs in and simmer, covered until the whites are opaque and the yolks are still runny. While the eggs are cooking return the asparagus to the heat and cook until just tender. Place asparagus on a serving dish. Sprinkle with a little salt. Gently place the eggs on top of the asparagus. Spoon some of the white sauce over the eggs. You will have more sauce than you need. Save it for another use. Garnish with lemon wedges and parsley, if you like. Finish with some salt and fresh ground pepper. Serves 2.
Basic White Sauce (Bechamel)
The start of many a classic dish.
2 T. butter or oil
2 T. flour
1 1/4 c. warmed milk
salt and pepper to taste
In saucepan melt butter or heat oil and add flour, stirring until smooth. Slowly whisk in milk, stirring constantly until thickened and bubbly. Turn heat down and continue to cook, stirring constantly for a couple minutes longer. Season to taste. If you are going to store the sauce for later use place a layer of wax paper on top, store in a container with a lid or pour a little milk over the top to prevent a skin from forming. Makes about 1 c.
Lemon: Add zest of a lemon, 2 T. lemon juice and 2 T. butter just before serving.
Strawberry Liqueur

This strawberry liqueur is like summer in a bottle. I make a lot of different liqueurs and strawberry is one of my absolute favorites. It is wonderful for sipping or over ice. It is also a fun addition to any number of cocktails. A friend adds it to ice cream with extra berries and blends it up for an adult strawberry milkshake.
With strawberries in season, this is the time of year to enjoy them. I want to preserve some for later, too. I made strawberry jam and dehydrated some. I will also freeze some.
Another way to preserve strawberries, is by making a liqueur with them. It is pretty simple. Just combine berries with vodka and a small amount of powdered sugar. I use half gallon canning jars for this, but you could use any food safe container with a tight fitting lid.
Let the mixture steep long enough for the berries to infuse the alcohol with their flavor. You can sweeten it later on, or even leave it unsweetened, if you prefer. I like to sip the liqueur as is, or serve on the rocks with a splash of club soda.
Strawberry Liqueur
3 cups fresh strawberries, sliced
3 T. powdered sugar
3 c. vodka
1 c. simple syrup*
Sprinkle powdered sugar over berries and let dissolve. Pour over vodka and let steep 2 weeks. Crush berries and strain then filter. Add sugar syrup and mature 1 week. Makes 5 cups.
*Simple syrup is made from 1 cup of sugar and ½ cup of water. Bring to a boil, then cool. You will have 1 cup of syrup. You can sweeten your liqueur with honey, if you prefer. Watch when you substitute honey for sugar, as it is sweeter and stronger flavored. Better to use orange or clover honey. Add to suit your taste.
Velvet Crumb Cake
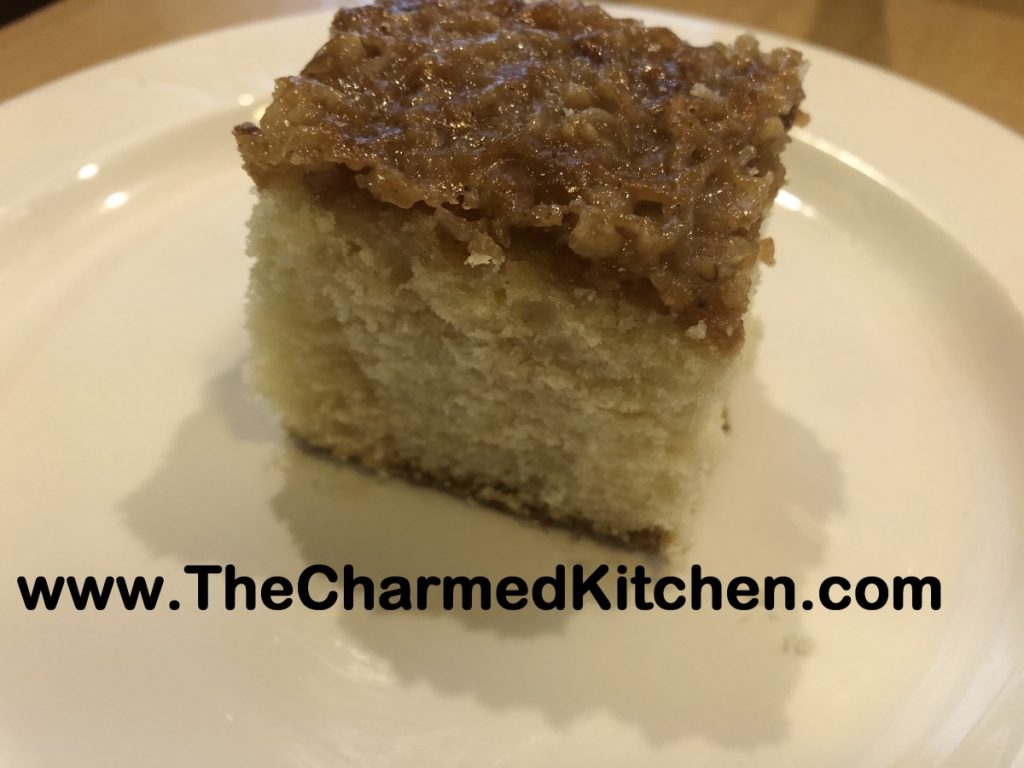
This cake has a soft, delicate texture and a crunchy, coconut-nut topping. For added fun- the cake is finished under the broiler to toast the topping. Probably not the way you finish most cakes!
When I was a child, my Mom made this cake pretty often. I am not sure I ever remember having it as an adult. It was probably the only way I would eat anything coconut as a kid. I had a couple of friends over for dinner last night and decided to make it for dessert. They loved it. One friend said she wasn’t a big coconut fan, but loved it on this cake. The cake is not overly sweet and could easily be served at breakfast or brunch as a coffee cake.
I found the recipe in a Bisquick cookbook. I tweaked it a little from the original. I wondered if I would like it as much as I did when I was a child. I was not disappointed. It was every bit as good as I remember.
Here is the recipe.
Velvet Crumb Cake
Cake:
1½ c. baking mix- like Bisquick or Jiffy Mix
½ c. sugar
½ c. milk or half and half
2 T. butter, softened
1 t. vanilla
1 egg
Topping:
½ c. flaked coconut
1/3 c. brown sugar
¼ c. finely chopped nuts
3 T. butter, softened
2 T. milk or half and half
1 t. cinnamon
Preheat oven to 350 degrees. Grease an 8×8-inch baking pan or 9-inch cake pan. Set aside. In medium bowl, combine all of the cake ingredients. Combine with electric mixer for 30 seconds on low to mix. Then bring speed up to medium and continue beating batter for 4 minutes. Pour batter into prepared pan and bake 30-35 minutes or until wooden pick comes out clean when inserted into cake. While cake is baking, combine topping ingredients in small bowl, mixing until well mixed. Let cake cool a few minutes before spreading topping over the cake. Place cake under the broiler- about 4 inches away, until topping gets golden brown. This only takes 3-4 minutes. Watch carefully. Remove from broiler and cool cake before slicing.
Picnic Mini Quiches

These tiny quiches pack a lot of flavor. They are also a great take along for picnics and cook outs. Since you can eat them hot or cold, they make a nice food for road trips, too.
The quiche recipe is made up of three parts- the crust, the filling and the custard. They are baked in muffins tins and each recipe makes a dozen. I have two crust recipes- including a gluten free crust that is made from rice and zucchini. There are three filling choices, but you can get creative and make a number of different variations. The custard is pretty straightforward- half and half, eggs and seasonings. I make a couple of batches at a time and then freeze some for later.
Picnic Quiches
Crust Options:
Rice Zucchini Crust (Gluten free)
1½ c. shredded zucchini
1¼ c. cooked rice (white or brown)
1 egg
¼ c. Parmesan cheese
Crouton Crust
3½ c. garlic-cheese croutons, about 5 oz., ground
1/3 c. melted butter
Fillings:
Mushroom and Onion
1 medium onion, chopped
Oil
8 oz. mushrooms, cleaned and chopped
3-4 oz. cheddar cheese, shredded or cubed fine
In skillet cook onion in oil until lightly browned. Add mushroom and cook until mushrooms are golden. Cool and combine with cheese before using.
Spinach and Bacon
12 oz. bacon, cooked and crumbled
10 oz. package of frozen spinach, thawed and squeezed dry
4 oz. Swiss cheese, shredded
Combine all ingredients. Set aside until ready to use.
Confetti
1 ear corn, cooked and kernel cut off the cob- about ½ cup
½ c. mined fresh sweet pepper
¼ c. chopped green onion
4 oz. shredded cheese- I like a sharp cheddar in this filling
Custard:
1c. half and half
3 eggs
½ t. each basil and salt
1/8 t. each garlic powder, pepper and paprika
Directions
Grease 12 muffin cups (3 inch). Prepare crust of your choice by mixing crust ingredients together. Pat 2 tablespoons of the crust mixture into each muffin cup. Bake in a 350 degree oven for 10-12 minutes. Cool before filling. While baking and cooling crusts, prepare filling of your choice and make the custard.
Spoon 2 tablespoons of filling over each cooled crust. Spoon about 3-4 tablespoons of the custard over the filling. Bake in a 375 degree oven for 15-20 minutes. Cool on wire racks, chill completely before packing for your picnic.
Cooking with Rosemary
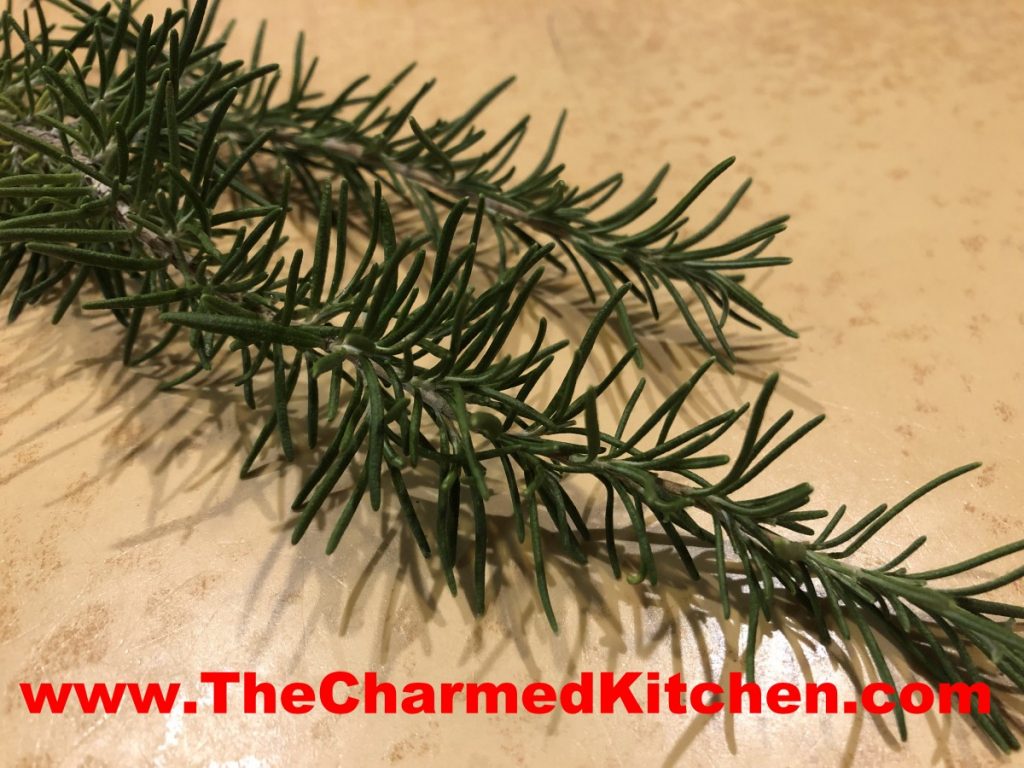
I love cooking with rosemary. It adds such a wonderful, unique taste to foods. Rosemary has a spicy flavor with pine notes. It is a strong flavor, though, and needs to be used with a light hand. Subtle is the key to successfully cooking with this herb.
I must admit, I had to learn to love rosemary. The first time I cooked with fresh rosemary, I used too much. I ended up with lamb chops that tasted like menthol cough drops. I decided I didn’t like rosemary. Eventually, I tried it again and decided I had been too quick to dismiss rosemary.
Rosemary pairs well with lamb and pork. I like it in tomato sauce and it goes great in breads and baked goods. It also goes well with poultry and is an ingredient in poultry seasoning.
I grow rosemary in pots and bring the pots in for the winter. I live in a climate where rosemary may- or may not- survive winter. I don’t take the chance. It is easier to just bring the potted plants in for winter. I keep them in the basement, under grow lights. That way I have the added bonus of enjoying fresh rosemary year round. If you live in a more temperate area, you can plant rosemary right in the ground. It needs a fair amount of sunlight and well drained soil. Rosemary really is easy to grow.
So here are a few of my favorite rosemary recipes.
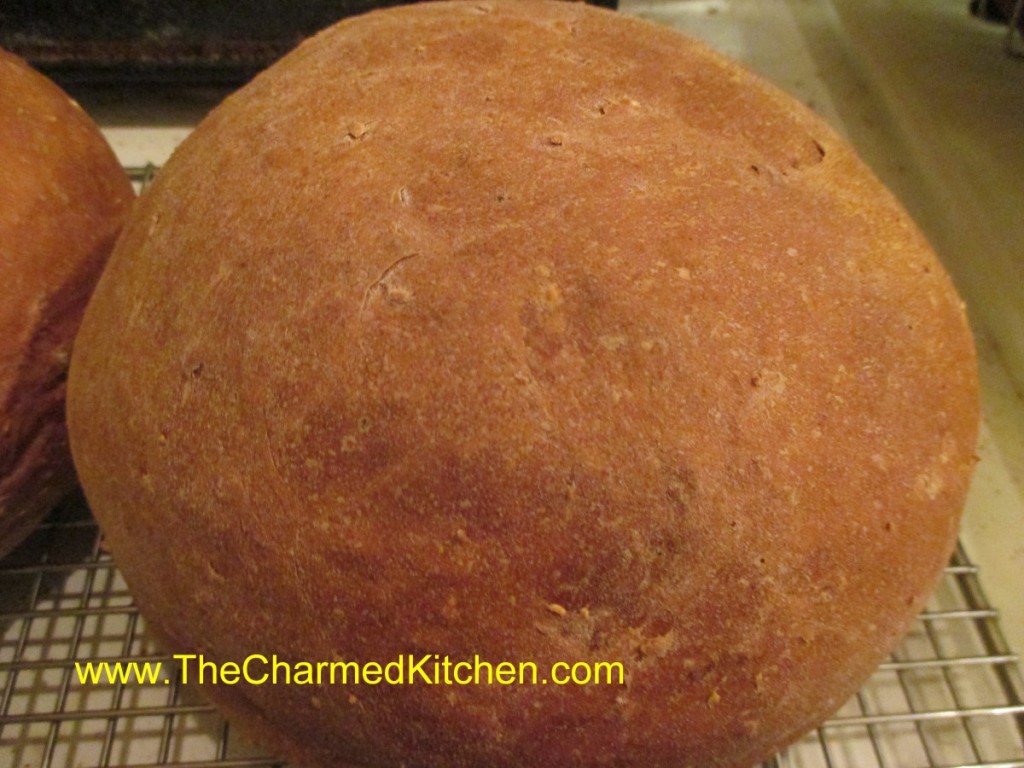
Rosemary Oatmeal Bread
5-5 ½ c. flour
1 package active dry yeast
3 T. fresh rosemary or 1 T. dried, chopped
1 ½ t. salt
1 1/3 c. water
¼ c. milk
¼ c. molasses
¼ c. butter
1 egg
1 c. old fashioned oatmeal
In large bowl mix 1 cup of the flour with yeast and salt. In small pan heat together next 4 ingredients until warm. Pour into bowl with flour mixture and beat 2 minutes. Stir in 1 cup additional flour and egg and beat 2 minutes longer. Stir in oatmeal and 1 cup more flour and stir, adding enough flour to form soft dough. Turn onto lightly floured surface and knead, adding flour as needed until dough is smooth and elastic. Place dough on a greased bowl, turning to grease top and cover, allowing to rise in warm place until doubled in bulk, about 1 hour.
Grease a large baking sheet and set aside. Punch dough down and divide in half. Shape each half into a ball and place on prepared sheet. Cover with towel and allow to rise until doubled, about 1 hour. Bake in a preheated 375 degree oven for 30 minutes or until done. Loaves are done when they sound hollow when tapped lightly. Makes 2 loaves.
This versatile dough can also be shaped into loaves and places in 8×4-inch greased loaf pans. Baking time will remain the same. Dough can also be divided into 24 equal pieces and shaped into dinner rolls. Bake rolls at 375 for 15 minutes.
Rosemary Biscuits
3 oz. cream cheese, cubed
1 ¾ c. biscuit mix, like Bisquick, I use homemade.
½ c. milk
2 t. minced fresh rosemary or ¾ t. dried
In mixing bowl cut cream cheese into biscuit mix until it resembles coarse crumbs. Stir in milk and rosemary and stir until soft dough forms. Turn dough onto lightly floured surface and knead until dough holds together, about ten times. Shape dough into a 6-inch square and cut into 4 3-inch squares. Cut each square in half diagonally and place on a lightly greased baking sheet. Bake in a preheated 400-degree oven for 10-12 minutes or until light brown. Makes 8.
Cranberry-Rosemary Vinegar
This is a favorite food gift of mine. It is so festive and it tastes good, too.
All you need are bottles with corks or screw top lids. If using corks, be sure they are food grade. You’ll also need cranberries, bamboo skewers, fresh rosemary and vinegar- 5% acidity. I use red wine vinegar. Other vinegar will work, too. If you use white vinegar or cider vinegar they will pick up color from the berries and turn a pretty reddish shade. Not as red as with the wine vinegar, but still very pretty.
Since I bring my rosemary plants inside for the winter, I have access to fresh rosemary. Your local grocery store probably has some in the produce department. You can use other herbs, if you can’t find rosemary.
Make sure the skewers will fit in the bottles. Cut them down to fit, if needed. Skewer the berries on the skewers leaving a little room on the top of the skewer. If your cranberries are really big, test to make sure they will fit the neck of the bottle. The skewers keep the berries from floating around.
Place a few sprigs of rosemary in each bottle and then add the berry- filled skewers. Pour in the vinegar, leaving a little room for the cork. Sometimes you need to add a little more vinegar the next day as some will absorb into the cranberries and the skewers. I make decorative labels and give them as gifts. Ready to use in a week.
Poultry Seasoning
¼ c. dried parsley
3 T. dried marjoram
3 T. dried rosemary
3 T. dried thyme
2 T. dried savory
1 T. celery seed
1 T. dried sage
2 t. dried oregano
2 t. dried basil
1 t. ground allspice
1 t. fresh ground pepper
Combine all ingredients in a blender. Store in a cool, dry place to maintain freshness.
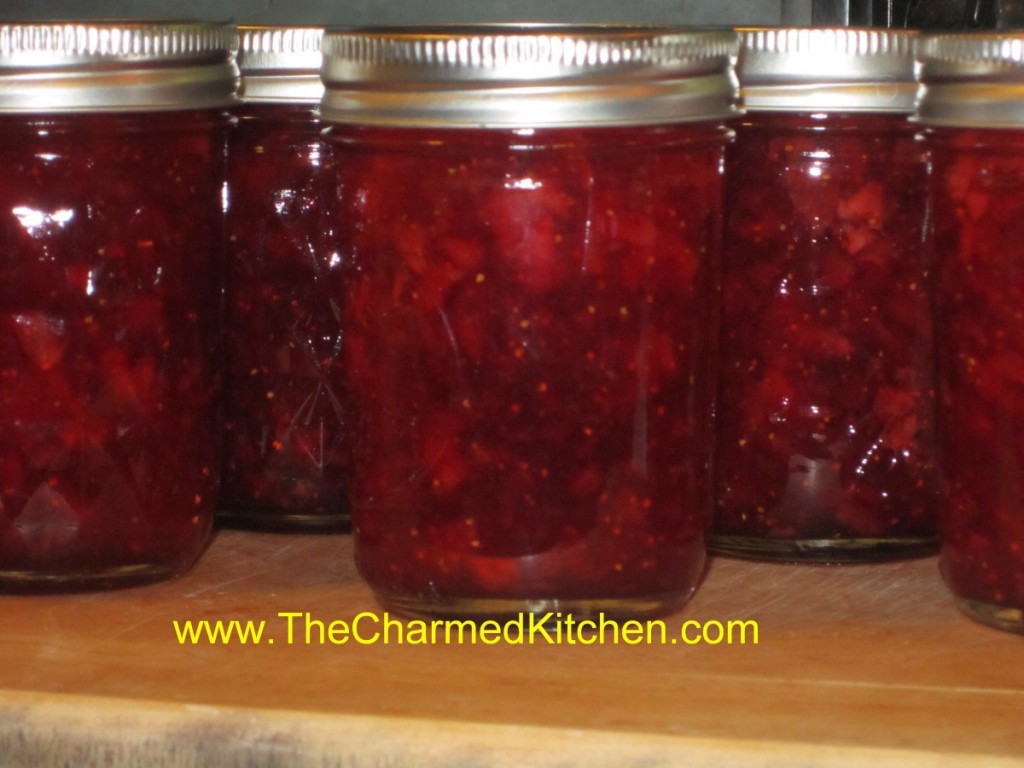
Strawberry Vanilla Jam
Once you taste homemade jam, you will understand why it is worth the effort to make your own. Homemade jams, preserves and jellies are a great way to save seasonal fruits to enjoy all year. They also make nice gifts.
One of my favorite homemade jams is strawberry. I like the addition of a little vanilla to my strawberry jam. I think it adds an additional layer of flavor, without covering up the natural beauty of the berries. Of course, you can omit the vanilla, if you prefer.
I try to make enough to last all year, but I end up running out quickly. This jam is great on toast, but also a nice addition to several desserts I make.
With local berries in season now, it is a perfect time to make a batch, or two.
In grocery stores, berries are often sold in one pound packages, not in quarts. A quart of strawberries should weigh 1 1/4 pounds. That should help you figure out how many berries you will need.
Here is the recipe.
Strawberry-Vanilla Jam
2 qts. strawberries, stemmed, washed and crushed (2 1/2 lbs.)
2 T. pure vanilla
1 package powdered pectin, (1.75 oz.)
1/4 c. lemon juice
7 cups sugar
Combine berries, vanilla, pectin and lemon juice in large saucepan and bring to a boil over medium heat, stirring often. Add sugar and turn heat up to high. Stir often until mixture comes to a boil. Boil hard one minute stirring constantly. Ladle hot jam in to jars leaving 1/4 inch headspace. Wipe rims and screw on lids comfortably tight. Place in boiling water bath and process 10 minutes. Remove to cooling rack, towel or wooden surface to cool. Makes 8-9 half pints.
Lovage: Growing and Using

Lovage is one of my favorite herbs. I feel like it doesn’t get enough attention. So many people have never even heard of lovage. Its leaves taste just like celery leaves, so it is very useful in the kitchen. As an added bonus, lovage is easy to grow- and it is a perennial.
I love celery in so many foods. I don’t think you can make a decent stock without it. I especially like using celery leaves. Problem is, often the celery I see in the store has few, if any, really nice leaves. The solution? Lovage.
Lovage leaves can be used in any dish you would use celery leaves: soups, stews, stocks and salads. The seeds can also be used as a substitute for celery seeds in recipes.
Lovage grows to a height of 2-3 feet, except when it is in bloom. When blooming, lovage sends up stems that can reach 6 feet!
The stems of lovage are tough, almost woody. While they can’t be used chopped like celery, the stems are hollow and can be cut to size and used as straws in drinks like Bloody Marys or vegetable juices.
I’ve never seen lovage sold as a fresh herb. As far as I know, the only way you can enjoy this lovely plant is to grow it yourself. It thrives in sun, but will tolerate some shade. For a little effort you can have fresh “celery” leaves whenever you want. I also freeze plenty for use throughout the year.
Here is a favorite recipe of mine using lovage. Perfect for Spring.
Fresh Pea Soup with Lovage
2 T. butter or oil
1 medium onion, chopped
2 c. fresh English peas, pea pods (sliced), or sugar snaps (sliced)
¼ –½ c. fresh lovage leaves, chopped fine
3 c. chicken stock or veggie stock
salt and pepper to taste
1 c. sour cream
Heat butter or oil in medium saucepan. Sauté onion until tender. Add peas, lovage, stock, and salt and pepper. Cook until peas are the desired tenderness, about 3 – 7 minutes. Puree soup in batches until smooth. Place sour cream in a small bowl. Ladle 1 cup of hot soup into the sour cream, and stir to smooth. Pour this mixture into the soup and cook, barely simmering, until soup is heated through, about 2 minutes. To serve, ladle into bowls and garnish with lovage sprigs. Serves 3 – 4.
Note: You can also serve this soup cold.