Hazel’s Sweet Potato Pie
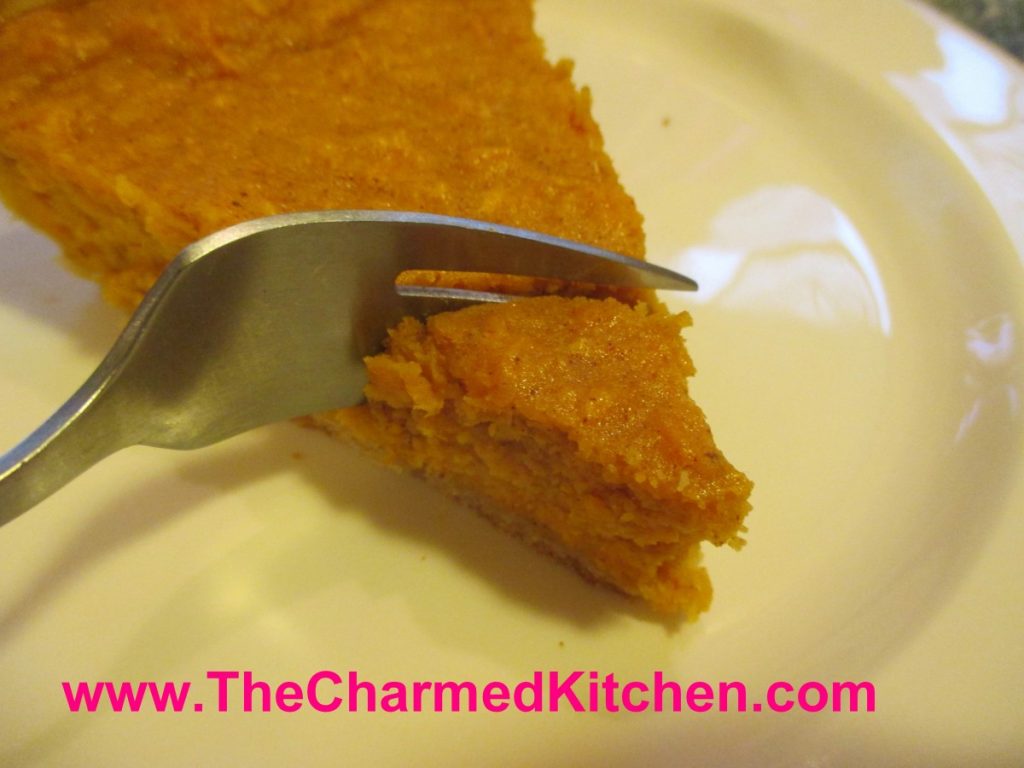
I love sweet potato pie. I am always surprised when someone tells me they have never had it. Maybe it is a north/south thing? I have made it for friends several times, and there is always someone who says they never had a sweet potato pie before. Once they taste it, they love it.
I used to work with a wonderful woman named Hazel Pruitt. She grew up in Alabama and taught me so much about southern cooking. I first made collard greens with Hazel. She also taught me how to make sweet potato pie. This is her recipe and I want to share it with you. I think of her every time I make it.
I used Martha Stewart’s recipe for the crust, but use whatever crust you like. Her recipe makes two crusts, so I will use the other half of the dough for another pie.
Hazel’s Sweet Potato Pie
½ c. sugar
1 t. cinnamon
½ t. allspice
½ t. salt
¼ t. cloves
1 ½ c. cooked, mashed sweet potato
2 eggs, beaten
1 c. milk or almond milk
2 T. melted butter or 2 T. olive oil
1 (9-inch) unbaked pie crust
Combine sugar with seasonings. Stir in remaining ingredients and combine until smooth. Pour into pie crust and bake in a preheated 400 degree oven for 40 minutes, or until filling is set.
Martha Stewart’s Pie Crust Recipe
2½ c. flour
1 t. salt
1 t. sugar
2 sticks (1 cup) butter, very cold
About 6 T. ice water
Combine dry ingredients and cut in butter to resemble coarse crumbs. Using a fork to mix the dough start to add the ice water a tablespoon or 2 at a time until mixture just holds together. Wrap and chill until ready to use. Makes 2.
Homemade Rye Crackers
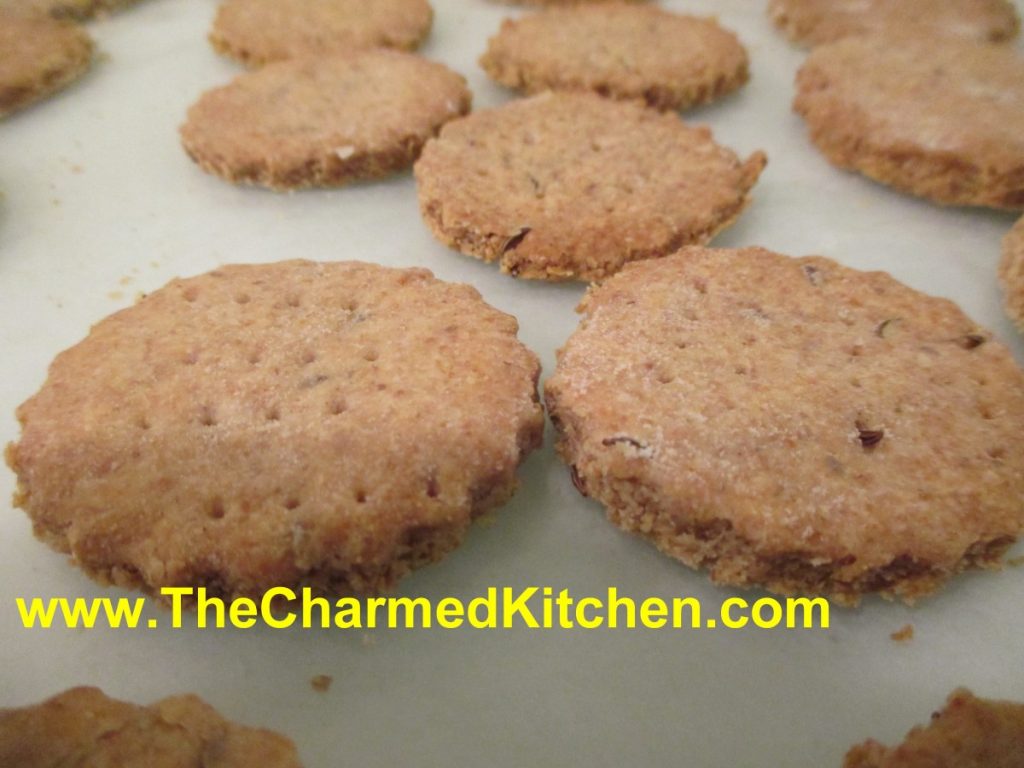
Making crackers is fun, and actually pretty easy. These rye crackers are as simple to make as a batch of cookies. They are crisp and full of flavor. The thinner you roll them out, the crisper they will be.
I am a big fan of rye bread and a fan of these rye crackers, too. I just love the flavor of rye flour. I think it pairs so well with any number of toppings. These are great with a little Swiss cheese melted on the top. You can also cut the crackers out in fun shapes.
So here is the recipe for rye crackers. I hope you’ll give cracker making a try.
Rye Crackers
1 c. rye flour
1 c. all-purpose flour
1 T. caraway seed
1½ t. salt
1 t. onion powder
1 t. garlic powder
1/3 cup oil
1 t. honey
¼ c. water, or as needed
Combine the rye flour, all-purpose flour, caraway seed, salt, onion powder, and garlic powder in a bowl. Stir in the oil and honey. While stirring with a fork, slowly add the water until the dough comes together in a ball. Cover and rest for 10 minutes. Preheat oven to 375 degrees. Divide the dough into 4 sections, rolling each piece out on parchment paper to 1/8 inch thick. Cut into desired shapes, then place on a baking sheet. Prick each cracker a few times with a fork. Bake until the edges are brown and the crackers are crisp, 10 to 12 minutes. Remove immediately to a cooling rack.
Wonton Soup
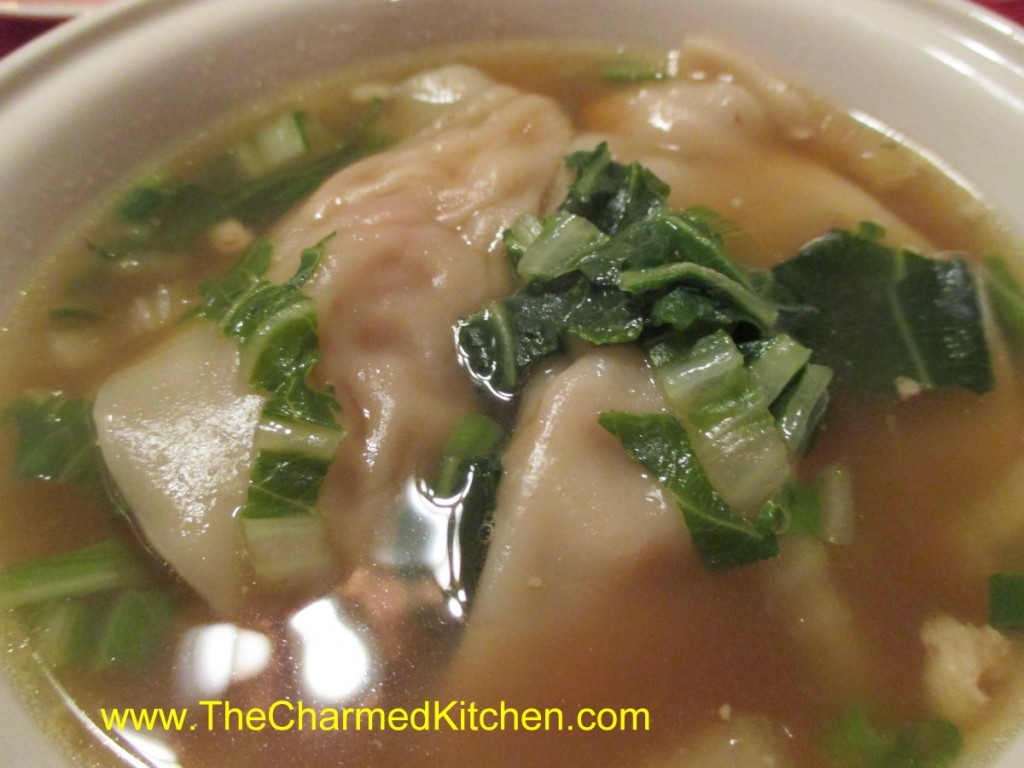
With a chill in the air today, I decided to make wonton soup. It is one of my childhood favorites. Wonton soup is actually not that hard to make, and everyone seems to like it.
For me, Wonton soup always brings back memories of going out for Chinese food with my family, when I was a kid. The restaurant would serve it family style, and my mom or dad would ladle out everyone’s soup. It always looked and smelled wonderful. Tasted wonderful, too. Even more special, because we only had it when we out to dinner.
The one problem I find when trying to make this soup at home is finding wonton wrappers that are thick enough. The square ones I find at the neighborhood grocery store are OK, but thinner than the ones in Wonton Soup at a restaurant. At a local Asian grocery I have found round wrappers that are labelled for dumplings and are thicker. That is what I used. They worked out better. I normally add strips of roast pork to wonton soup, but one of my friends doesn’t eat pork, so the use of chicken thighs was a great substitute. You can play around with fillings, too. I often add shrimp as both a filling, and to the soup itself.
Wonton Soup
1½ lb. chicken
1 head bok choy, or 4-5 baby bok choy
3 T. hoisen sauce
1 clove garlic, minced
24 won ton wrappers
2 qts. chicken stock
1 t. ginger
1 t. hot pepper sauce
Chopped green onions
Sesame oil
Bake the chicken until cooked. I used boneless chicken thighs, but even leftover roasted chicken would work. Once cooled, I minced enough of the chicken to give me 1 cup of meat. The rest I cut into thin strips. I then took stems from the bok choy and minced enough of them to make 1 cup. Combine the minced chicken with minced bok choy, the hoisen and the garlic. This is the filling for your wontons. Slice more of the bok choy- using mainly the leaves, into thin shreds. This will go into the soup later, along with the strips of chicken. You should have at least a couple of cups of the shredded bok choy, but more is OK, too. To make the wontons place one on your work surface and spoon a rounded teaspoon of the filling into the middle of it. Moisten edge with water, fold in half and press to seal. I used round wrappers, but square wrappers are fine, too. Repeat with remaining wontons and fillings until done. Bring stock to a boil and add the ginger and hot sauce. Add the wontons to the simmering stock. Simmer gently for 3-4 minutes, stirring occasionally, then add the strips of chicken and the shredded bok choy greens. Cook about 5-6 minutes longer. Finish soup with chopped green onions and a drizzle of sesame oil. Serves 6-8.
Swedish Limpa Bread
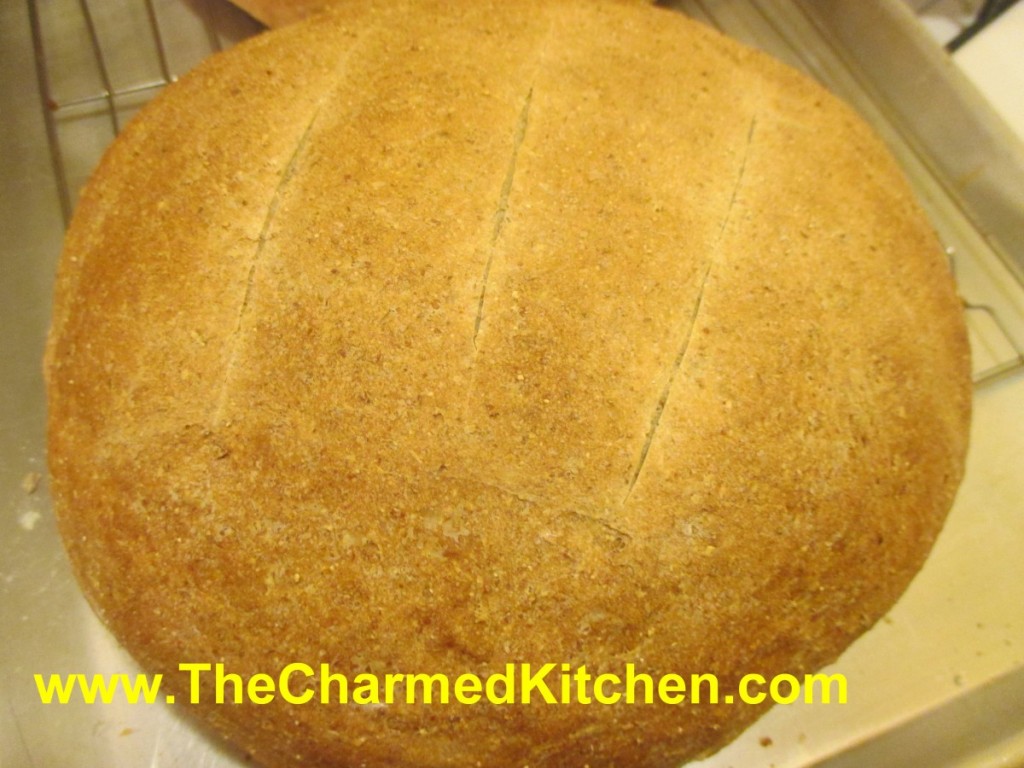
There is nothing better than the smell of fresh baked bread. This Swedish rye bread is a favorite of mine. It has a soft texture and makes great sandwiches. It also makes the house smell wonderful as it bakes.
The flavor in enhanced by a combination of caraway seeds and a little orange zest. It even makes wonderful French toast. My brother-in-law says it is just like the bread his Swedish mother made.
It is not like rye breads you might traditionally think of. Limpa is lighter in color and texture. It makes really great French toast, too.
I shape mine in two round loaves, but you can also bake this bread in loaf pans, if you prefer. If you want to use it for sandwiches, the loaf pans are probably a good idea. You can also shape the dough into dinner rolls, if you like. You will get 2-3 dozen rolls out of this recipe, depending on how big you make your rolls.
Swedish Limpa
6 ½ c. flour
2 c. rye flour
¼ c. brown sugar
2 t. salt
2-t. caraway seeds
2 t. grated orange peel
2 pkt. Active dry yeast
2 T. butter, softened
2 2/3 c. hot water (125-130 degrees)
Set aside 1-cup flour. Mix remaining flours and other dry ingredients in a large bowl. Add butter and water to flour mixture and stir to blend. Mix in enough additional flour to make a soft dough. Knead on a floured surface until smooth about 8-10 minutes. Place dough in oiled bowl turning to oil top. Cover and let rest in a draft free area until doubled, about 30 –40 minutes. Punch down. Divide dough in half and form into 2 balls. Place on greased baking sheet and cover until doubled in bulk, about 30 –40 minutes. Bake in a preheated 400-degree oven for 30 minutes or until bread sounds hollow when tapped lightly. Makes 2 loaves.
Note: you can also divide the dough and place in 2 (9×5-inch) greased loaf pans.
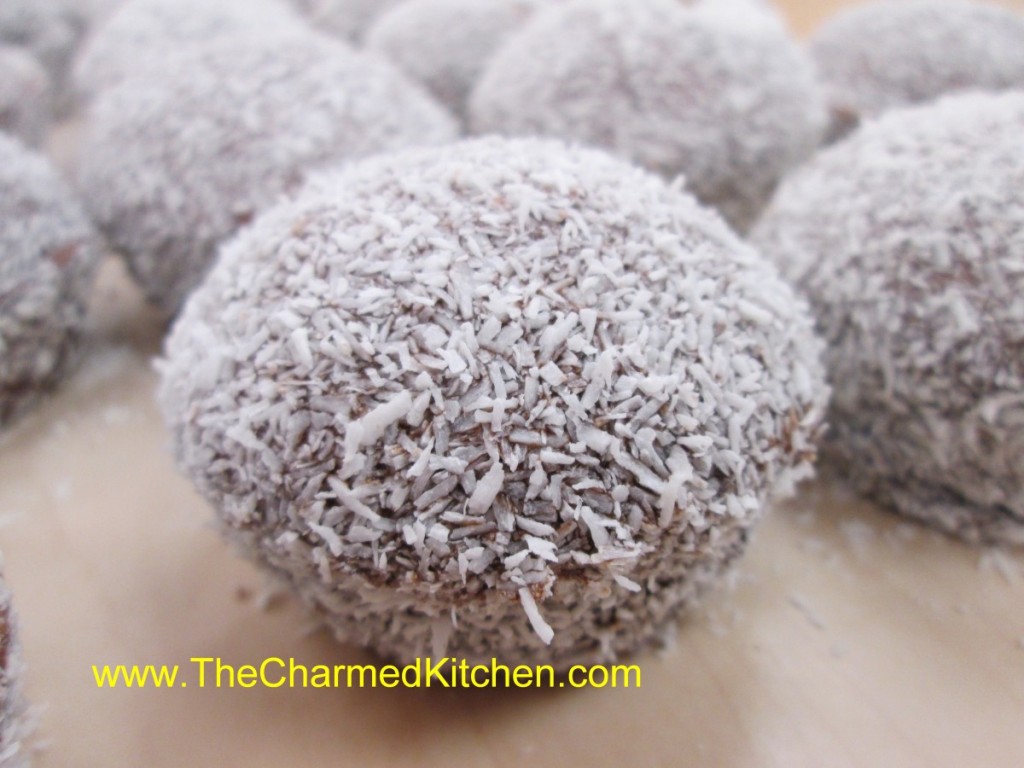
Coconut “Snowballs”
I have wonderful memories of my Aunt Josie making these for every family gathering. Aunt Josie cut the cake into squares. They were all perfectly even. I asked her how she did that. She told me that she used her cooling racks to get the lines even. She would set the cooling racks on her cake and use the wires as guides. So clever.
I never could seem to get them even, so I bake my cake in cupcake tins and call then snowballs. Whatever the shape, these little cakes are a favorite treat in my family.
In bakeries, you’ll find them in squares or rectangles. She shared her recipe with me a long time ago, and I am sharing it with you.
You can bake the batter in mini muffin pans or standard muffin pans. It just depends on what size you want your snowballs to be. After the cupcakes are baked, freeze them. The frozen cakes are dipped in a chocolate sauce and then rolled in desiccated coconut.
Desiccated coconut is dried and unsweetened. It looks like coarse, white bread crumbs. You can find it in stores that carry baking supplies and at Asian markets. It is the same kind of coconut used to make coconut shrimp.
Here is the recipe for making the “snowballs”. The recipe for the cupcakes is listed below, as well. I just doubled my classic white cupcake recipe, but you could use a box mix, if you prefer.
Aunt Josie’s Coconut Cake Squares aka “Snowballs”
1 white cake, prepared and frozen solid*
Chocolate Sauce
1 c. unsweetened cocoa
1 1/4 c. sugar
2 c. water
1 t. vanilla
1 c. desiccated coconut (available at cake supply stores and some health food stores)
Cut frozen cake into small squares, or cake can be baked in regular or mini cupcake tins. Keep cake frozen until ready to use. Meanwhile, make the chocolate dipping sauce. Combine remaining ingredients, except coconut, in a medium saucepan. Bring to a boil then simmer 5 minutes. Remove from heat and cool completely.
Using toothpicks or fondue forks, dip frozen cake in sauce let drain a few seconds, then roll in the coconut. Can be enjoyed right away or frozen again for later use.
*If you make the cake in muffin tins you’ll get 24 cupcakes or about 60 mini cupcakes.
Classic White Cupcakes
1 cup sugar
1/2 cup butter
2 eggs
2 teaspoons vanilla extract
1 1/2 cups all-purpose flour
1 3/4 teaspoons baking powder
1/2 cup milk
Preheat oven to 350 degrees. Line a muffin pan with 12paper liners. In a medium bowl, cream together the sugar and butter. Beat in the eggs, one at a time, then stir in the vanilla. Combine flour and baking powder, add to the creamed mixture and mix well. Finally stir in the milk until batter is smooth. Pour or spoon batter into the prepared pan. Bake 20 to 25 minutes. Cupcakes are done when they springs back to the touch. Makes 12.
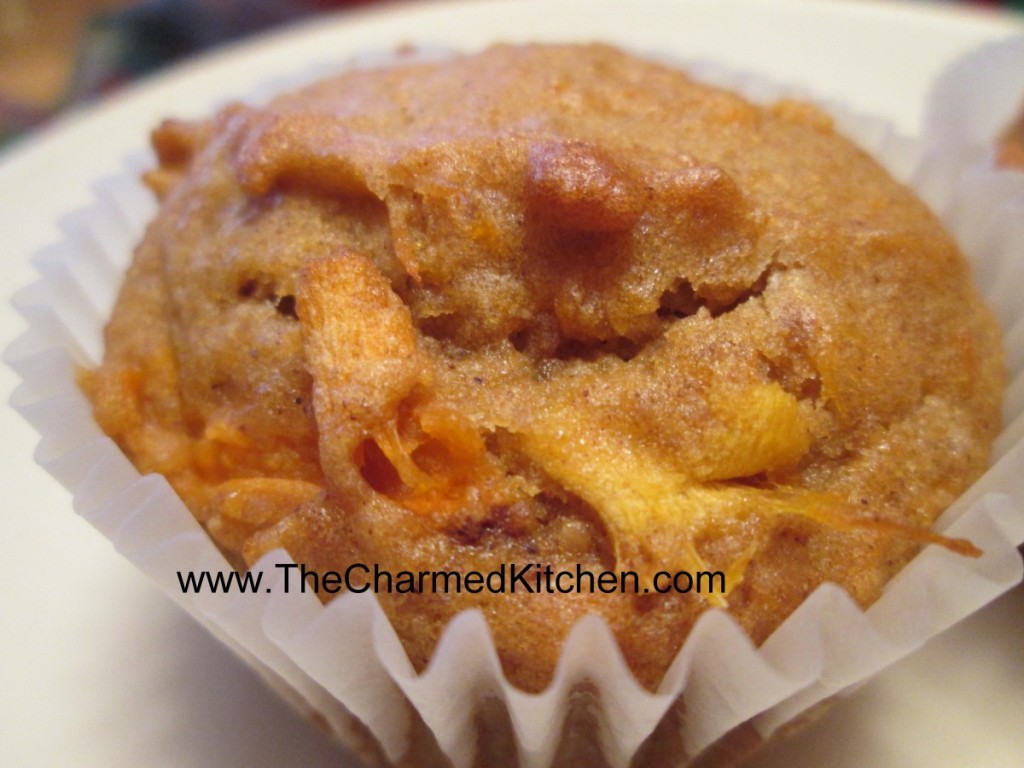
Sweet Potato Muffins- Gluten Free
When a family member was diagnosed with Celiac disease years ago, the selection of gluten free foods was pretty limited. Happily, today going gluten free is much easier. I buy a gluten free flour at Costco that can be used in any recipe that calls for all purpose flour. Gluten free flour is available in many grocery stores, too.
Gluten free flour seems to bake, or at least brown, a little faster, so you have to keep an eye on what you use it in. It doesn’t get much easier than that. In this recipe you could also use all purpose flour, if that is what you prefer. Just increase baking time 3-5 minutes.
The muffins are moist and not too sweet. They are great for breakfast, snacks or even as a dessert. They could also be served with lunch or dinner in places of rolls.
They freeze well so you can make a batch and freeze the extras for later. Wonderful for busy days when you don’t have time to make them.
Sweet Potato Muffins- Gluten Free
4 eggs, slightly beaten
3/4 c. oil
1 c. sugar
2 c. cooked sweet potatoes, mashed
1 3/4 c. gluten-free flour
1 T. cinnamon
1 t. nutmeg
2 t. baking powder
1 t. baking soda
3/4 t. salt
Blend together in large bowl eggs, sugar, sweet potatoes and oil and set aside. In another bowl combine dry ingredients. Add dry ingredients to egg mixture and stir until well blended. Pour into paper-lined muffin tins, filling about 2/3 full. Bake in a preheated 350-degree oven for 20-25 minutes or until muffins spring bake when touched lightly. Makes 30-36.
These freeze well.
Extra Crispy Chicken Wings

I like a wing with very crispy skin. These wings are super crispy, even though they are baked in the oven, not fried. It may have to do with a rather unusual ingredient.
I got this recipe from a local television show and have made it a couple of times now. Thanks, David Moss, for this one. The wings are coated with a little salt and baking powder.
Yes, baking powder. I am not sure how it works, but the combination leaves you with wings that are super crisp on the outside and juicy inside. The only thing I changed from the original recipe, is that I use a little less salt.
Once the wings are done cooking, you can toss them in whatever sauce you like.
Extra Crispy Chicken Wings
3-4 lbs. chicken wings
2 T. baking powder
1 t. salt
Hot sauce and butter- or assorted dipping sauces
Cut wings into three pieces- discard tips, or use to make stock. Pat the wings dry. This step is important. The dry skin helps them to get crisp. Place baking powder and salt in a plastic bag and add the wing pieces, a few at a time, shaking to coat evenly. Continue until all the wings are coated. Place wings on a rack that is placed on a baking sheet. Bake wings in a preheated 250 degree oven for 30 minutes. Turn the heat up to 425 and continue cooking 45 minutes more. Remove wings from oven. You can melt butter, mix with some hot sauce and toss the wings in that mixture, or just serve the wings with your favorite sauce.
Smoky Tomato Soup

This tomato soup is easy to make and tastes wonderful. The use of a ham bone gives the soup a smoky flavor. If you don’t have a ham bone, you could use other smoked meats or even liquid smoke.
I wanted to make tomato soup, but also wanted something different. I used what was in my pantry, fridge and freezer for inspiration. The flavors worked well together. I really like what the cinnamon did for the soup, too.
At the end, almost as an afterthought, I added the half and half. It added just a little extra richness to the soup. It was a good decision.
So here is the recipe. I served it with quiche, but it would go well with a grilled cheese sandwich.
Smoky Tomato Soup
3 T. oil or butter
1 c. chopped onion
1 (28 oz.) can crushed tomatoes
1 or 2 medium carrots, peeled and sliced
1 c. chopped celery, some leaves included, if possible
3 c. water or stock (low sodium)
1 ham bone
2-3 T. parsley
1 t. cinnamon
1 c. half and half
Salt and pepper to taste
In soup pot, heat oil or butter and saute onions until tender. Add the rest of the ingredients, except the half and half, salt and pepper. Bring to a boil, then turn down to a simmer. Simmer for at least an hour- even a couple of hours. I partially covered the pot while the soup simmered. Remove ham bone. Add the half and half. Puree soup until smooth. I use an immersion blender so I can puree in the soup pot. If pureeing in a blender, do the soup in batches. Better if you cool the soup a little first. When you put the hot liquid in the blender, remove the middle part of the blender lid and cover with a folded towel. The liquid will splash up a little and the towel keeps you from getting splashed/burned. Once the soup is nice and smooth, adjust seasonings to taste. Depending on how large the ham bone is, you might not need salt at all. The soups will serve about 6-8. I like to serve it with croutons.
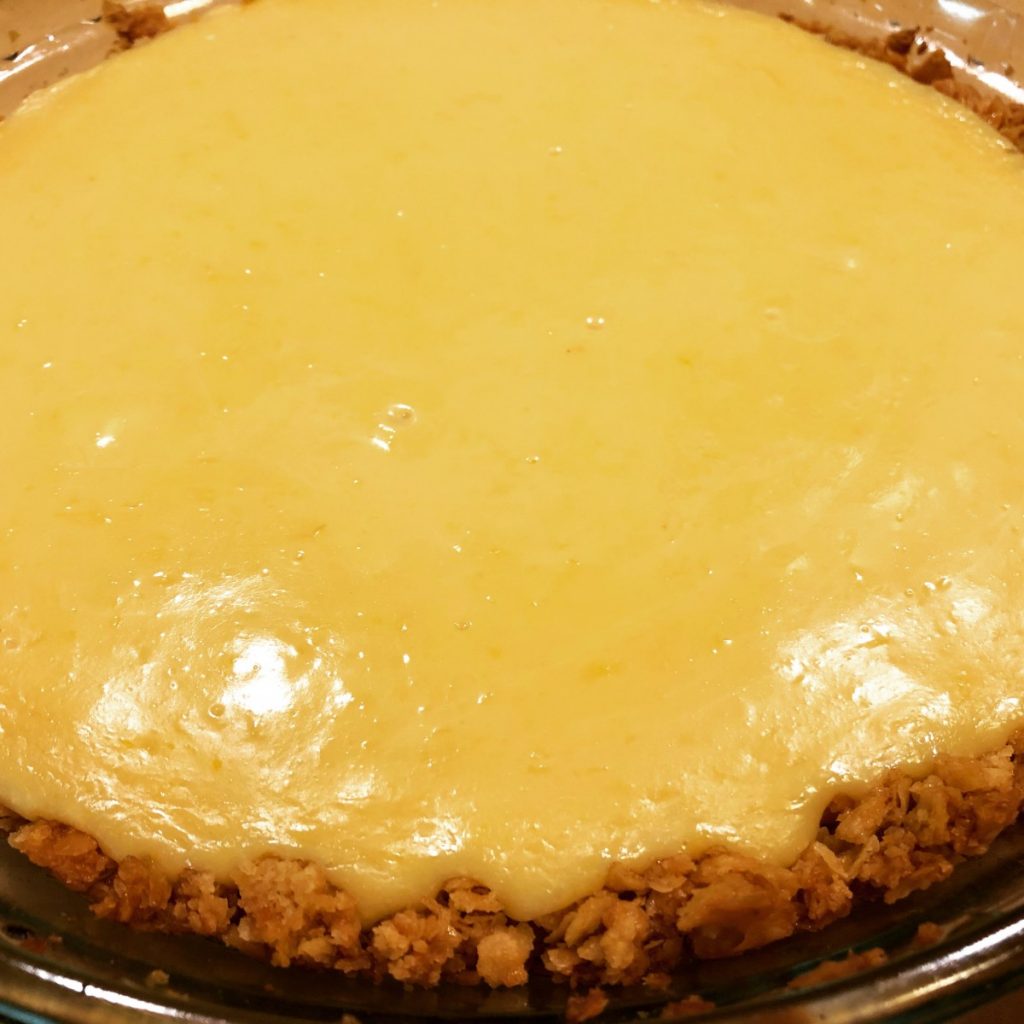
North Carolina Lemon Pie
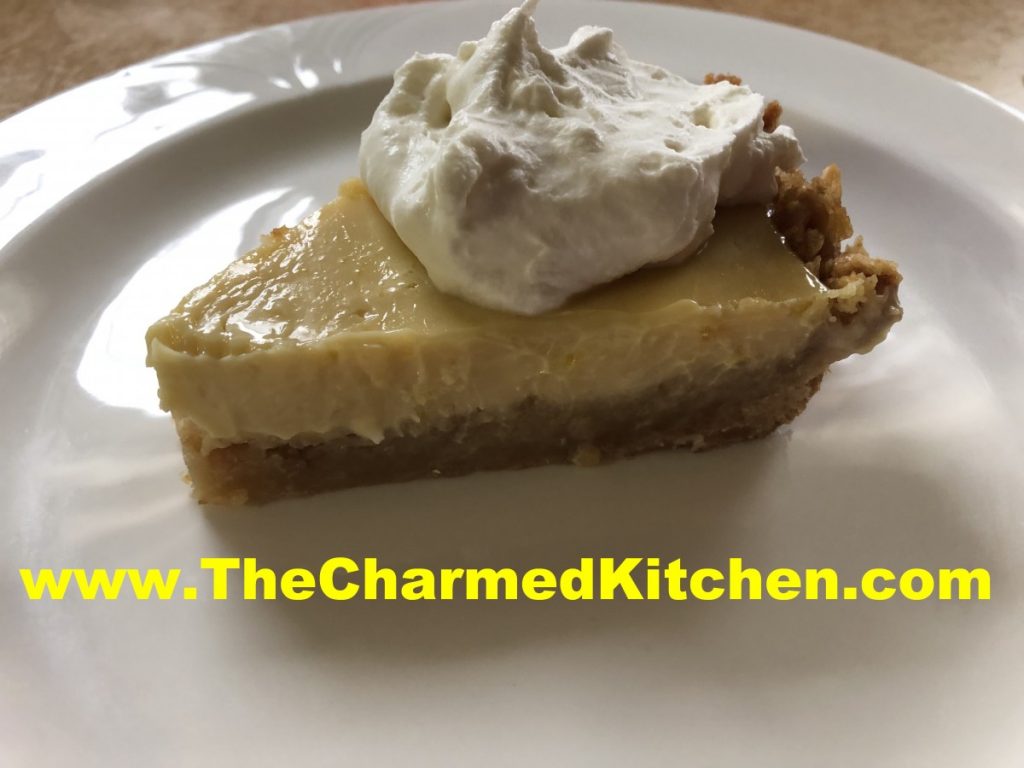
This might be one of the best lemon pies I have ever had. It was simple to make, with a surprise ingredient in the crust. That ingredient is saltine crackers! They work so well in this crunchy and slightly salty/slightly sweet crust. Perfect with the lemon filling.
I first heard about this pie in one of my cooking classes. A woman mentioned it to me after class. Said she saw it on a TV show. I looked for it online. Odd thing was that every recipe was exactly the same. Even down to the wording in the directions.
I found one reference to the recipe first showing up in Cook’s Country Magazine about 6 years ago. I prefer to credit the source of a recipe, when possible.
I did change a couple of things from the original recipe. I added more lemon zest- from 1 tablespoon to 2. What can I say? I like a zesty pie.
I also thought it was odd to make so little whipped cream for the topping. Assuming you had a cup of whipping cream to start with, you use 1/4 cup in the pie filling. That leaves you with 3/4 cup of whipping cream. The recipe only calls for whipping up 1/2 a cup of whipping cream. I rounded it up in the recipe to 3/4 cup. Honestly, I would make even more topping the next time.
I really enjoyed the pie. I think you will, too.
North Carolina Lemon Pie
Crust
6 oz. saltine crackers (about 1½ sleeves)
1/8 teaspoon salt
10 tablespoons unsalted butter, melted
1/4 cup light corn syrup
Filling
1 can sweetened condensed milk (14-ounce)
4 large egg yolks
¼ cup heavy cream
1-2 T. grated lemon zest- I used 2 tablespoons
½ cup lemon juice
Topping
¾ c. heavy cream, chilled- increase from original recipe. I think even more whipped cream would be better. Just my preference.
1 T. sugar
1 t. vanilla extract
Preheat your oven to 350 degrees. Add the saltines and salt to the food processor and pulse until you have coarse crumbs (about 15 pulses). Add the melted butter and corn syrup and pulse until the crumbs are well combined.* Add the cracker mixture to a greased 9-inch pie plate. Use the bottom of a dry measuring cup or glass and press the crumbs into an even layer on the bottom and up the sides of the dish. Place the pie plate on a baking sheet and bake until light golden brown, 17 to 19 minutes. Prepare filling while the crust is baking. Whisk the sweetened condensed milk, egg yolks, cream, and lemon zest together in a bowl, add the lemon juice and whisk until well combined. With the pie plate on the baking sheet, remove it from the oven and pour in the filling (the crust does not need to be cooled) and place it back in the hot oven. Bake until the edges of the pie are set but the center still jiggles, 15 to 17 minutes. Place the pie on a wire rack and let it cool completely. Refrigerate the pie until completely chilled.
For the topping, use a stand mixer fitted with a whisk and whipped the cream, sugar, and vanilla on medium low until foamy (about a minute). Increase the mixer speed to high and whip until stiff peaks form, 1 to 3 minutes. Spread the whipped cream over the top of the pie and serve cold.
*Note: I will admit to just crushing up the crackers by putting them in a bag and using a rolling pin. I had a few larger pieces. Still worked. I think it gave the crust a crunchier texture. Although it sank down into the pie pan when I baked it- so maybe next time I will crush the crackers a little more.
Orange Tea Bread
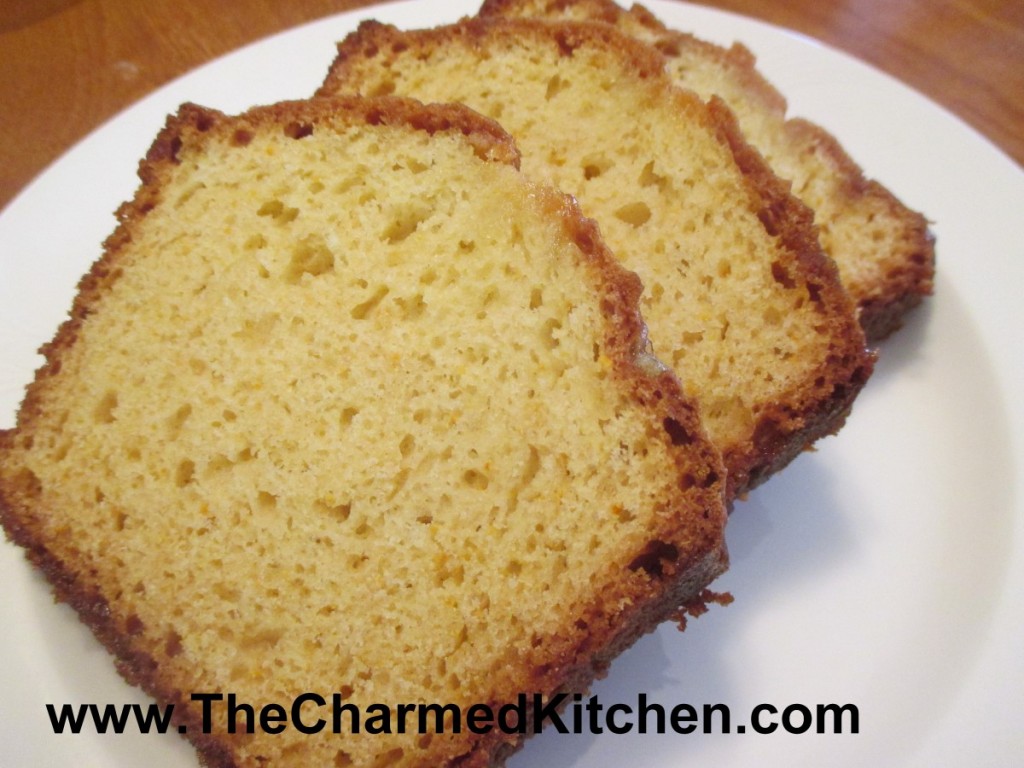
Winter is citrus season and I have been eating a lot of oranges lately. Besides eating them fresh, I also like to cook with oranges. If you are looking for a new recipe for a quick bread, I would recommend trying this one.
The bread is flavored with orange zest in the batter, then a warm orange syrup is drizzled over the bread, right out of the oven. This makes for a bread that is flavorful and moist. It can be breakfast, a brunch dish or even a dessert, when topped with ice cream or whipped cream. The recipe makes one loaf, but I often double the recipe and make two. It seems to disappear around here pretty quickly. The bread freezes well, too.
Orange Tea Bread
2 cups all-purpose flour
1-1/2 teaspoons baking powder
1 teaspoon baking soda
1/2 teaspoon salt
2/3 cup Greek yogurt or sour cream
2/3 cup sugar
2 large eggs
3 tablespoons melted unsalted butter
1 tablespoon grated orange zest
Syrup:
1/2 cup orange juice
1/4 cup sugar
Preheat oven to 350 degrees. Grease an 8×4″ loaf pan. Line pan with wax paper or parchment and set aside. Sift flour, baking powder, baking soda and salt into a bowl. In a separate bowl, whisk together yogurt, sugar, eggs, butter and orange zest. Add liquid ingredients to dry ingredients, and stir mixture until well combined. Transfer batter to loaf pan, smoothing top, and bake in oven for 45 to 50 minutes, or until skewer inserted in middle comes out clean. While the bread is baking, combine orange juice and sugar in a saucepan. Bring mixture to a boil over moderate heat while stirring, and simmer for 1 minute. Keep syrup warm. Make holes in top of bread with a thin wooden skewer and drizzle with syrup. Let stand in pan until cool. Makes 1 loaf.


