Mom’s Polish Mushroom Soup
Since I decided to share some of my Mother’s favorite recipes this week, I had to include this soup. Sharing this family recipe with other people makes me happy. My Busha (Polish Grandmother) and my Mother both made this soup. They would be pleased to know that someone is still making it.
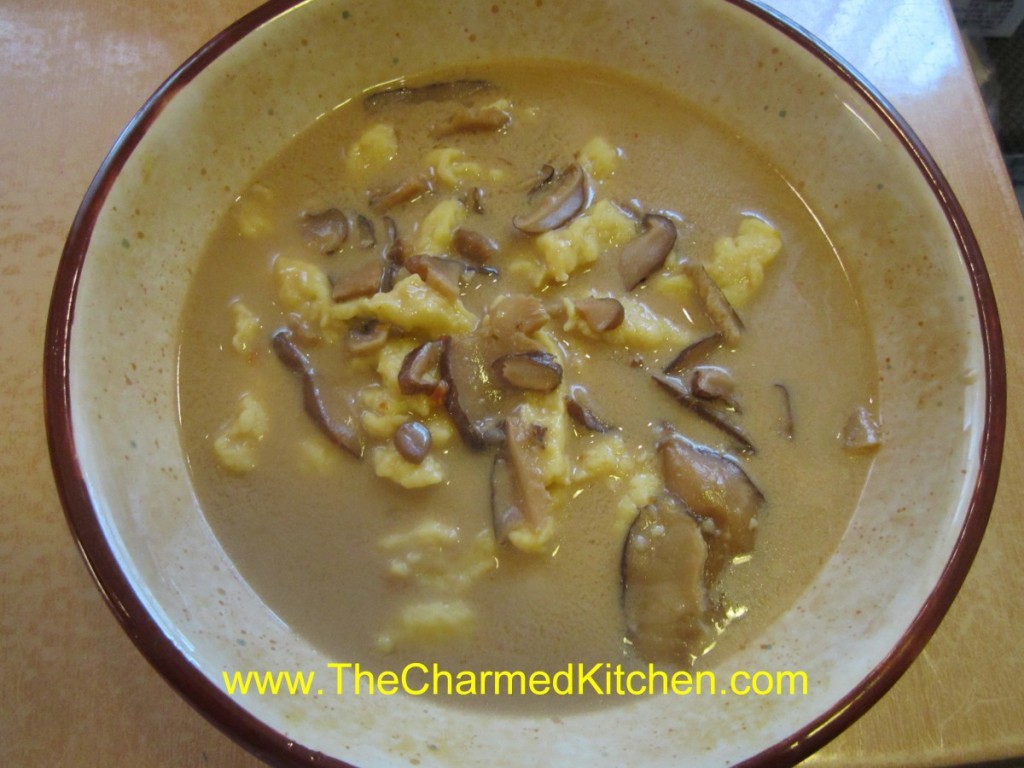
There are many variations of mushroom soup in Eastern European culture. Some have barley, others add sauerkraut. This is my family’s version. Plenty of mushrooms in rich stock, slightly thickened, and made creamy with the addition of sour cream. Ours is served with kluski noodles.
This soup is a tradition in my family. When I was a kid, my Busha would make it every Easter. My Mom made it for Christmas Eve. Now my niece makes it, and we have it the day before Thanksgiving.
It is one of those dishes that brings back so many wonderful childhood memories. I love the rich, earthy flavor of the mushrooms, and the slightly sweet/sour flavor of the broth. It is made with dried mushrooms, usually. I can remember watching my mom get out a big bowl and soaking the mushrooms to get them clean, and to soften them, before starting the soup.
I use dried shiitake mushrooms, but often add fresh mushrooms as well. Sometimes I use other dried mushrooms, too. I like to have a variety of mushrooms in the soup. I use chicken stock. If made with vegetable stock, it could make a great meatless meal.
Polish Mushroom Soup
4 qt. Chicken, beef or vegetable stock
5 c. dried mushrooms, about 4 0z. I use Shiitake.*
Water for soaking
½ c. flour
1 pint sour cream
¼ c. balsamic vinegar
2 T. sugar
1 Lb. Kluski-style noodles, cooked and drained
Soak mushrooms in water for 1-2 hours. Lift mushrooms carefully out to leave any sand in the bowl of water. Rinse and drain. Set aside. Bring stock to a boil and add the mushrooms. Simmer, covered for about 1½ hours, or until mushrooms reach desired tenderness. Mushrooms will retain some “chewiness”. In medium bowl whisk sour cream into flour gradually until smooth. Stir in vinegar and sugar until smooth. Add a small amount of the hot soup to the sour cream mixture, whisking until smooth. Continue adding hot soup to the sour cream mixture until sour cream mixture is warm. Add the warm mixture to the pot of soup and stir to combine. Return to simmer and simmer 1 minute, stirring continuously. Place desired amount of kluski into bowls and ladle over the hot soup. Serves12.
Note: You can add a variety of fresh mushrooms to the soup to make it even more special. You might use portabellas; crimini, button or whatever mushrooms are at the store that day. Add in addition to the dry mushrooms; don’t reduce the amount of shiitakes.
You can use other cooked pasta. You could try spaetzle or even gnocchi. You might also need more than one pound of kluski, depending on how much pasta your family likes in their soup.
*The dried shiitake mushrooms can be found at specialty grocery stores, some larger grocery stores and at Asian markets.
Pumpkin Chiffon- Gluten Free
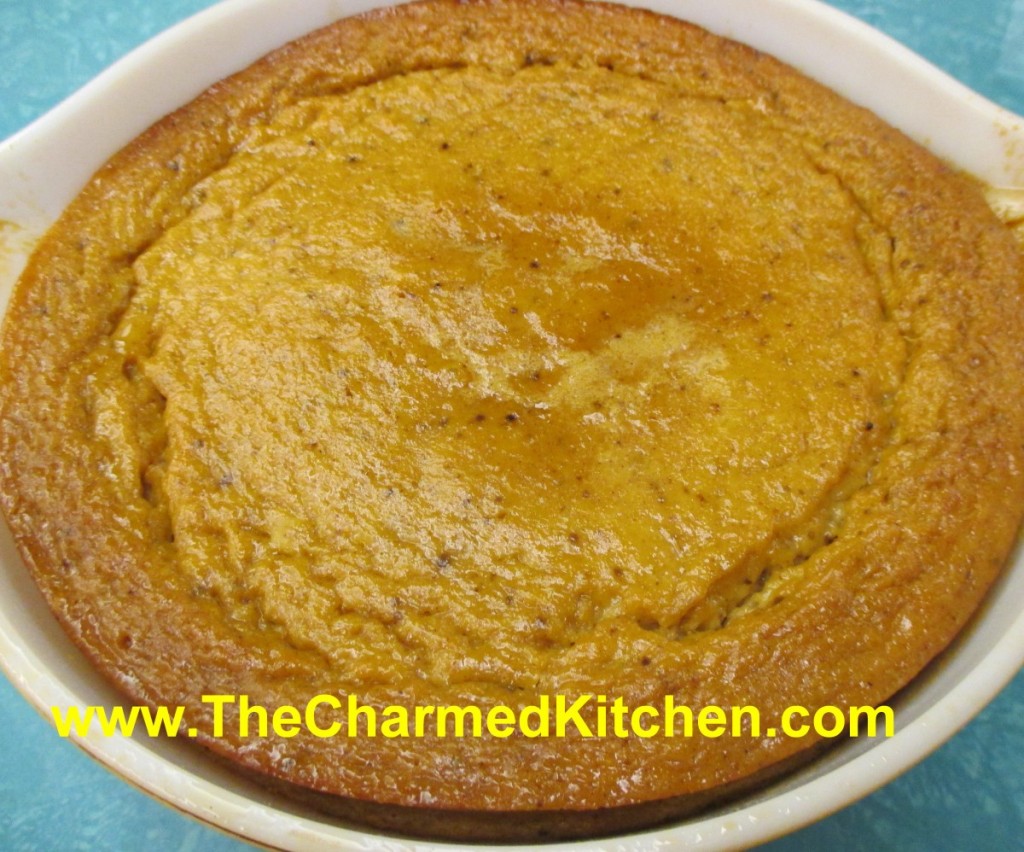
I fondly remember when my Mom used to make this dessert. I think of her whenever I make it. From a technical cooking standpoint, it’s not really a chiffon, but that is what my Mom called it, so I will leave it as Pumpkin Chiffon.
It’s more like a pumpkin pie, without the crust. Super easy to make and quite tasty. I bake it in a casserole dish but you could also make it in individual ramekins. This recipe is always a big hit when I make it for friends.
You could use canned or fresh cooked pumpkin or winter squash, like butternut or Hubbard. I always cook up and freeze pumpkin and squash for later use, so frozen would work, too. Because there is no crust, it is also gluten-free. I sometimes serve it with gingersnaps and whipped cream. It is a lovely Fall dessert. Perfect for Thanksgiving, too.
Mom’s Pumpkin Chiffon
½ c. applesauce
1 c. cooked or canned pumpkin or squash
¾ c. brown sugar
1 t. cinnamon
½ t. salt
½ t. nutmeg
1/8 t. cloves
4 eggs, well beaten
1 c. half and half or evaporated milk
Stir together first seven ingredients. Beat in eggs and stir in milk. Place mixture in 1 ½ quart casserole and bake in a 350-degree oven for 1 hour and 15 minutes. Serve alone or with cookies. Serves 6-8.
Mom’s Homemade Kielbasa

I can remember my parents making homemade sausage. As a kid, I thought a lot of parents did that. I don’t think I really appreciated how special that was. When my parents got older, one of my cousins ( Jim) started making the sausage.
The sausage they made was kielbasa. Kielbasa is a Polish sausage. It was something we ate every Easter, Thanksgiving, Christmas. Well, you name a holiday, we would be eating kielbasa. Somewhere, there is even a film of my mom making kielbasa for Christmas. My dad was filming as my sister and brother watched. I wasn’t born yet.
Today would be my Mom’s birthday. I try to post one of her recipes on her birthday every year. I share a lot of my Mom’s recipes, I thought it was time to share this one. I don’t know how many people would go to the bother of making their own sausage, but I am hoping even a few people will make the kielbasa. It is a way of her kind of living on.
So here is her recipe. Enjoy!!
A bit of work, but the end result is divine. Make and freeze or share with friends and family.
Irene’s Polish Sausage/ Kielbasa
10 lbs. Pork butts
5 T. salt
1 T. pepper
1 T. marjoram
1 t. thyme
2 cloves garlic or more to taste, minced
1 ½ c. water
Grind pork then combine with seasonings and water. The water helps the ingredients to blend. If you have a sausage maker, you can stuff the sausage into casings. Sausage can also be formed into patties or links. To cook sausages in casings, boil until cooked through. You can then serve them as is, on buns with bread or on a plate with mustard or ketchup and horseradish. You can also take boiled sausages and brown them in a skillet or under the broiler.
Patties and links made without casings can be pan fried until cooked through. You can add a little water and cover the pan allowing them to cook through without getting too brown. Without casings, they will fall apart in a big pot of boiling water. Sausages can be frozen cooked or uncooked, but uncooked is preferred.
Cindy’s Rich Squash Rolls

I love these dinner rolls. I think you will, too. The addition of squash is what makes them so special. The squash adds beautiful color to the rolls. It also creates a soft texture and an earthy sweetness.
These rolls are wonderful for any fall or winter dinner or holiday. They are especially nice for Thanksgiving.
We have them every Thanksgiving. My sister Cindy always makes them, and has been making them for years. They are rich, soft and sweet and make a perfect addition to the dinner table. Even with all the other foods at Thanksgiving dinner- you always save room for these dinner rolls.
While I use cooked butternut squash in mine, pumpkin could be used, as well as other winter squashes.
The recipe makes a pretty big batch. You can bake them, then freeze some for later use.
I love slicing them in half, and making mini turkey sandwiches with them the day after Thanksgiving.
Cindy’s Squash Rolls
1 c. milk
4 T. butter
½ c. sugar
¼ c. brown sugar
1 t. salt
1 pkt. Yeast
4-5 c. flour
1 ½ c. cooked butternut squash, strained, or 1 (16oz.) can squash or pumpkin
2 eggs, room temperature
Scald milk and butter. Place sugar and salt in large bowl and pour in milk mixture. Cool to lukewarm. Add yeast and 2 cups of flour. Beat at medium speed with mixer for 2 minutes. Add squash and eggs and mix until smooth. Add flour gradually to form a stiff dough. Knead on floured board for 7-8 minutes. Place in a greased bowl, turning dough to coat evenly. Cover with a towel and allow to rise until doubled. Punch dough down and shape into rolls. Dough can be placed in a greased cake pan where they will touch each other as they rise making softer rolls. You can also place them in muffin tins, or shape into rolls and place on greased baking sheet for crispier rolls. Cover and let rise until doubled. Bake at 375 degrees for about 25 minutes. Butter tops while warm. Makes 2 ½ -3 dozen.
Variation: you can also add ½ t. ground nutmeg, 1-2 T. chopped chives, or 1T. parsley flakes for a little different flavor.
Amaretto Pear Blintzes with Candied Almonds
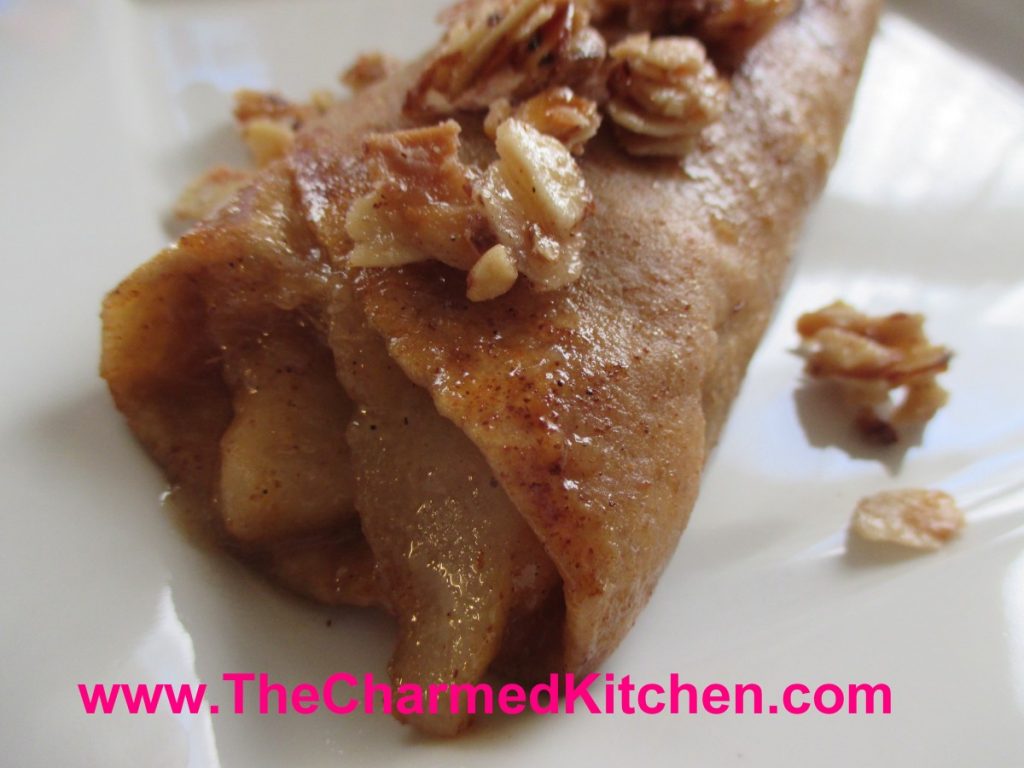
Sometimes you can start with the simplest ingredients and end up with something special. This recipe is a perfect example. I had fresh pears and flour tortillas. I wanted to make a brunch dish for a friend so I added a few more ingredients and ended up with these pear blintzes. I make fruit blintzes with tortillas pretty often. I wanted these to be different. I added Amaretto to the pears and made candied almonds as a topper.
They look like a lot more work than they are. They were simple to make.
My friend said they reminded her of apple pie. In fact, she didn’t believe me at first, when I said they were pears. If you like the taste of homemade fruit pie, but don’t have the time to bake, these are a nice option. Because they are barely cooked, the pears retain some shape. In a pie, pears tend to fall apart.
Since we had them for brunch, I left them plain, but these would make a great dessert topped with whipped cream or ice cream. Even a dusting of powdered sugar or a drizzle of caramel. Simple and quite flavorful.
Amaretto Pear Blintzes with Candied Almonds
Blintzes:
4 (8-inch) flour tortillas, I used whole wheat
2 oz. milk
2 T. butter
Filling:
4 pears, peeled, cored and sliced
½ c. brown sugar
2 T. butter
2 T. Amaretto
1 t. cinnamon
1 t. vanilla
Pinch of salt
Candied Almonds
¾ c. sliced almonds
½ c. sugar
¼ c. water
½ t. cinnamon
Place tortillas in shallow dish and drizzle the milk over them. Try to get some milk on each of the tortillas to soften them. While the tortillas are softening, prepare the filling. In medium skillet, combine pears with the rest of the filling ingredients and bring to a simmer. Cook on low heat for 3-4 minutes. Set aside. Combine almonds with the sugar, water and cinnamon in medium skillet. Bring mixture to a boil, stirring often. Cook until liquid is evaporated, about 5 minutes. Pour almonds onto a baking sheet lined with a silicone baking sheet or foil. Spread out and allow nuts to cool.
Place butter in skillet and start to heat up the pan. While pan is heating, divide pear filling among the 4 tortillas. Place filling along center of tortilla and fold up edges over, to cover the filling. Heat the tortillas, seam side down, in the pan until golden, turning to toast evenly on both sides. Remove from pan and place on serving plate. Top with some of the candied almonds. Serves 4.
Apple Cinnamon Cupcakes
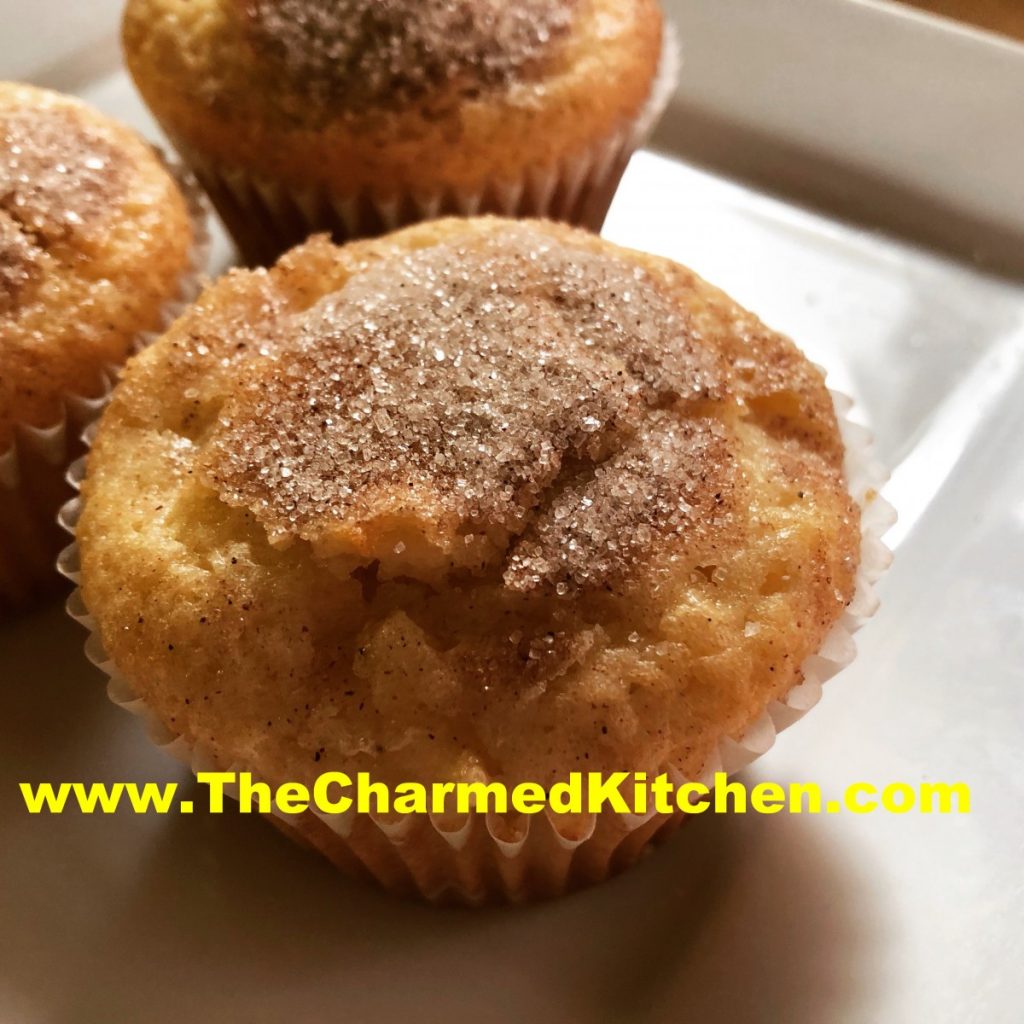
These tasty little cakes are actually a revision of a favorite apple cake recipe. I wanted cupcakes and made a few changes, so it would work in cupcake form. I was pretty happy with how they came out.
I sprinkled cinnamon sugar on top of the cupcakes right before baking. It worked fine. I thought I might try baking them plain on top next time- then dipping the tops in melted butter and cinnamon sugar after baking. I make French Breakfast Puff muffins that way, and it works well.
I also chose not to frost them. I could see using a cream cheese frosting, or perhaps a drizzle of caramel, if you like a sweeter dessert. These would also be great served with ice cream. Of course, since they aren’t frosted, you could always call them muffins and eat them for breakfast!!
Apple Cinnamon Cupcakes
1 c. oil
4 eggs
1 t. vanilla
1/3 c. lemon juice
3 c. flour
2 c. sugar
3 t. baking powder
¼ t. salt
4 medium apples
Topping:
½ c. sugar
2 t. cinnamon
Preheat oven to 325. Combine oil, eggs, vanilla and lemon juice. Beat until smooth and set aside. In medium bowl, combine flour, sugar, baking powder and salt. Make a well in the middle and add the egg mixture. Beat by hand until smooth. Batter will be very thick. Peel, core and dice the apples. Add apples to the batter and stir until well blended. Line 24 muffin tins with paper liners- or grease. Spoon the batter into the muffin pans, filling almost to the top. Combine cinnamon and sugar and sprinkle over the tops of the cupcakes. Bake for 22-24 minutes, or until golden and toothpick, inserted in cupcakes comes out clean. Makes 24.
Pear Sweet and Sour Sauce

I love sweet and sour sauce. I have made many versions over the years and have used different fruits in them. I decided to try to make sweet and sour sauce with a ripe pear. It worked out wonderfully. Even better than I expected, actually. The sweetness of the pear was a great addition to the sauce. It came out a rich, mahogany color and is full of flavor. I will make a double batch the next time. I have already enjoyed it with egg rolls. Thinking of making sweet and sour chicken next.
I try to be as exact in measuring as I can. I had a pretty big Bartlett pear, but use 2 small pears, if that is what you have. Any pear will work in this recipe- just be sure it is ripe. As the sauce cooks the pear pretty much falls apart and disappears into the sauce. I also used Sriracha sauce, which is hot, but not as hot as some other hot sauces. Depending on the brand you are using, you might want to add less. Then again, heat is a matter of personal preference. Spice it up according to your own taste. That is one of the perks of making it yourself.
When I make a sweet and sour sauce- I use Clear Gel, instead of traditional corn starch. It is modified cornstarch (non-waxy) and when you reheat the sauce, it will stay thick. Regular cornstarch will often thin out when reheated. Clear Gel is used in pie fillings and a lot of frozen foods and condiments. Often listed on the label as modified food starch. It looks just like regular cornstarch. I buy mine online or when I am in stores in Amish communities.
So here is the recipe for a sweet and sour sauce I will surely make again. Planning on making some to freeze, too.
Pear Sweet and Sour Sauce
1 large pear, (about 8 oz.) peeled and diced fine
½ c. cider vinegar
½ c. sugar
3 T. soy sauce
1 T. minced garlic
1 T. Sriracha sauce- or other hot sauce- add to suit your taste
2 t. grated ginger
3 T. water
2 T. cornstarch or Clear Gel*
2 t. sesame oil
In medium saucepan, combine all ingredients, except the water, cornstarch and sesame oil . Simmer mixture, covered about 5-7 minutes, or until pear becomes tender. Stir occasionally. Combine cornstarch with water and stir until smooth. Pour slowly into simmering pear sauce, stirring to prevent sticking. Sauce with thicken. Stir in sesame oil. Makes about 2 cups. Keeps in fridge for weeks.
* If you use a type of cornstarch called Clear Gel, you can reheat the sauce without it becoming runny. Clear Gel, also called modified food starch, or modified cornstarch, is available online and at some specialty food stores. I find it in Amish communities.
Spiced Parsnip Cupcakes
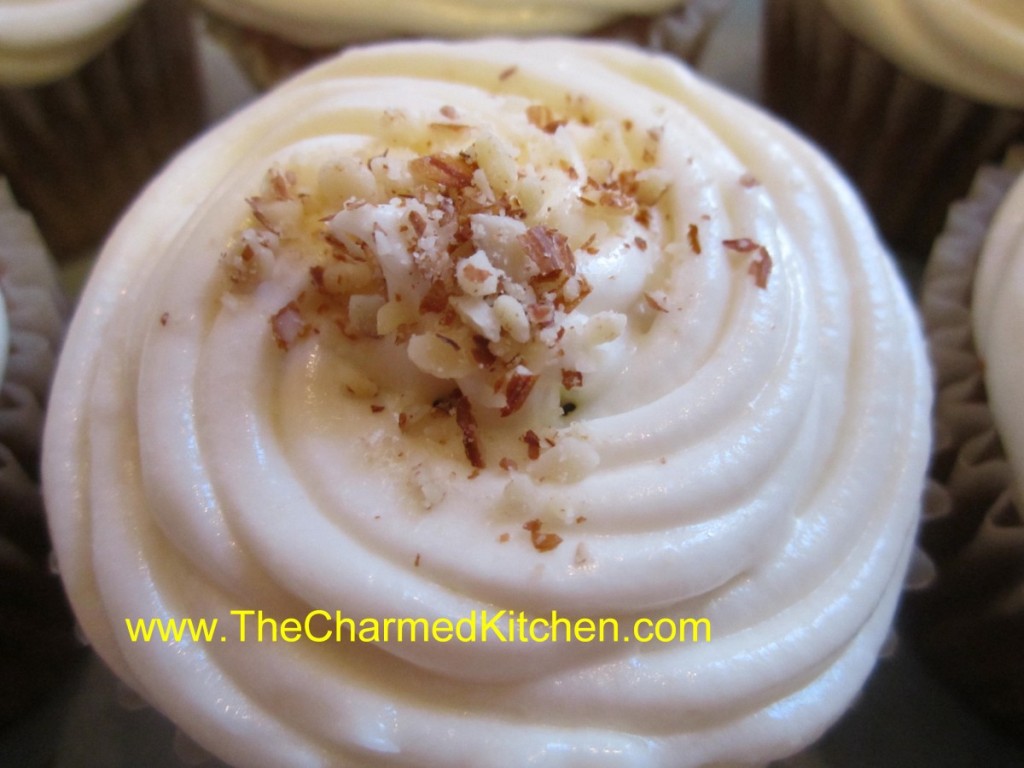
If you only use parsnips in savory dishes (or maybe you never use parsnips at all), you might be surprised to see them used in a dessert.
Truth is, parsnips are similar in flavor to carrots and carrots are used in cake quite successfully. While not exactly the same in flavor, think of parsnips as white carrots.
Combined in a spiced batter, they make wonderful cupcakes. Good any time of the year, they seem especially nice for an Autumn dessert.
I have company coming for dinner later. I had some parsnips, so I decided to make cupcakes for our dessert.
Spiced Parsnip Cupcakes
1 1/2 c. flour
1 c. sugar
1 T. ground ginger
1 T. cinnamon
2 t. baking powder
1 t. nutmeg
1 t. allspice
1 t. salt
1/2 t. cloves
3 eggs
1/2 c. oil
1/2 c. milk or half and half
2 t. vanilla
2 c. packed peeled and shredded fresh parsnips, 2-3 large
1/2 c. chopped nuts, optional plus extra for topping, optional
1 recipe cream cheese frosting- see below
Preheat oven to 350. Line 24 cupcake pans with paper liners- or grease lightly. Combine dry ingredients in a mixing bowl. In smaller bowl combine eggs, oil, milk and vanilla and mix well. Stir egg mixture into flour mixture until smooth. Stir in parsnips and nuts, if adding. Spoon batter into the prepared pans, filling half-full. Bake for 15 minutes – or until toothpick inserted into a cupcake comes out clean. Cool and frost. Sprinkle with fine chopped nuts, if you like. Makes 24.
Cream Cheese Frosting
8 oz. cream cheese, softened
4 0z. (1 stick) butter, softened
1 c. powdered sugar
1 t. vanilla
Beat all ingredients together until fluffy. Frost cupcakes and chill until ready to eat.
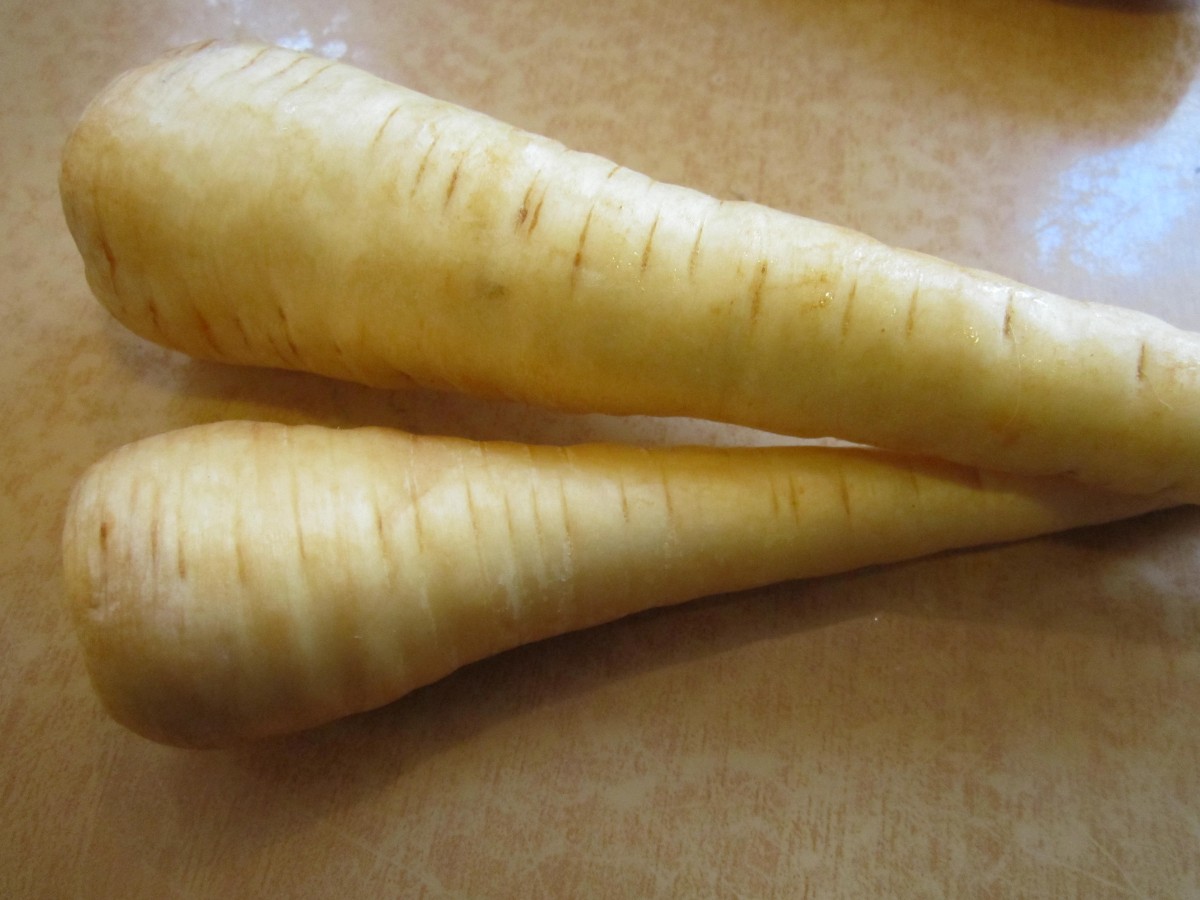
Parsnips
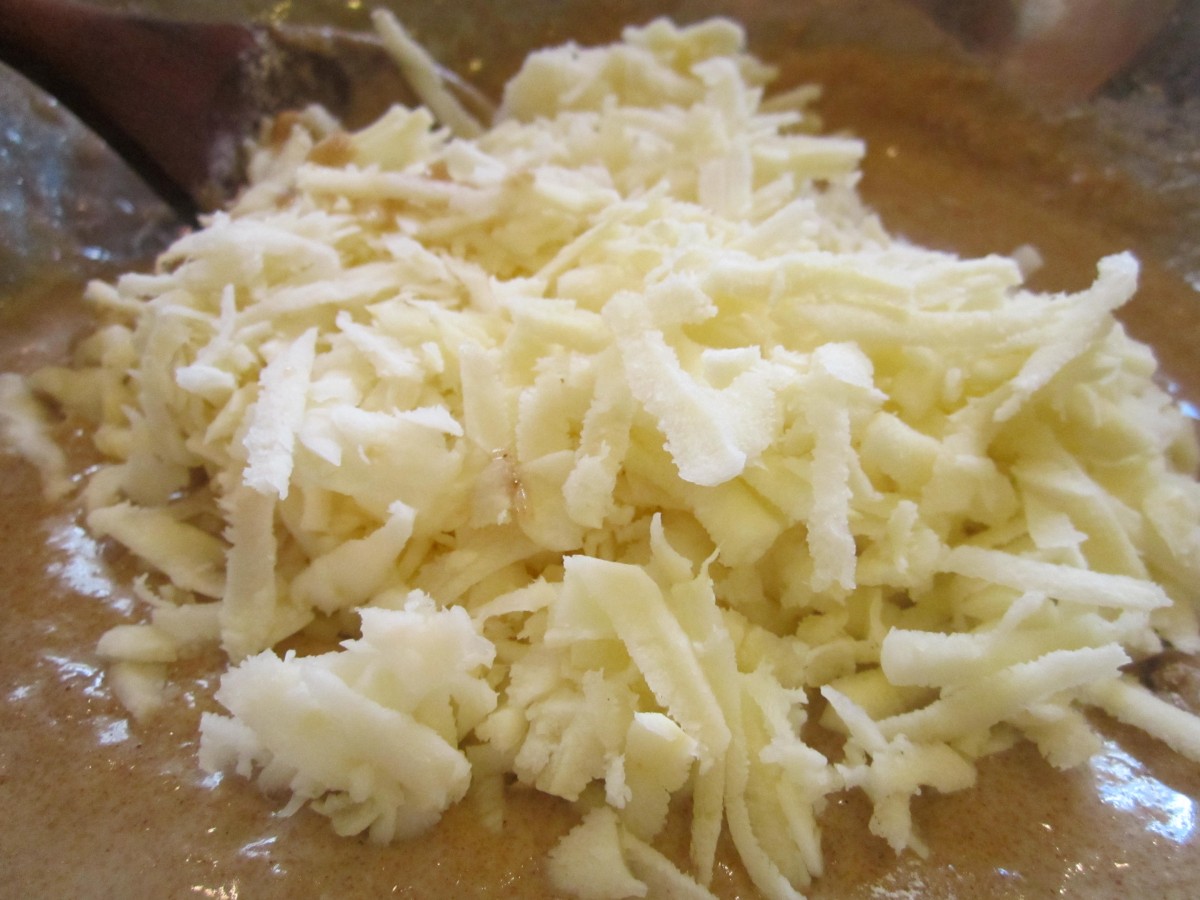
Shredded parsnips
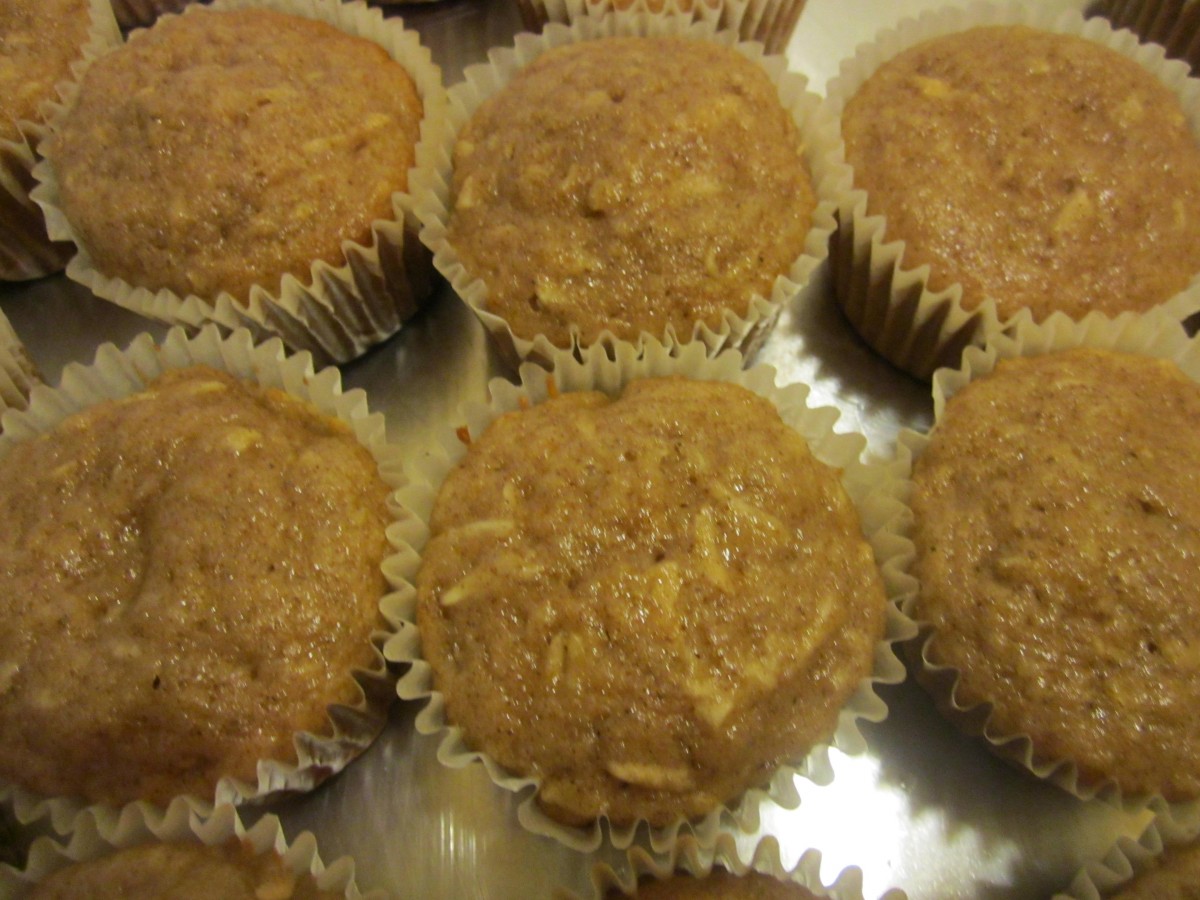
Fresh out of the oven
Spiced Pumpkin Scones

I posted this recipe last year, but it is worth a re-post. These scones are easy to make and not only great for breakfast and snacks- they make a fun base for shortcakes. I am using some for shortcakes tomorrow, with an apple and pear filling.
Once baked, they are drizzled with a vanilla glaze and then a cinnamon glaze. The scones are slightly crisp on the outside, but tender and delicate on the inside.
Spiced Pumpkin Scones
4 c. all purpose flour
1/2 c. sugar
1 T. baking powder
1 t. each salt, cinnamon, allspice, nutmeg and ginger
1/2 t. cloves
1 1/2 sticks cold butter
1 c. cooked pumpkin or winter squash
3 oz. milk
2 eggs
Vanilla glaze
2 c. powdered sugar
1 t. vanilla
4-6 T. milk
Cinnamon Glaze
2 c. powdered sugar
2 t. cinnamon
4 T. milk
Preheat oven to 400. Lightly grease 2 baking sheets or line them with parchment paper. Set aside. Combine flour with sugar, baking powder and spices and stir to blend. Cut in butter until the mixture looks like coarse crumbs. Combine pumpkin or squash with the milk and eggs and stir into the flour mixture. Stir until well mixed. Dough should be just a little sticky. Use an ice cream scoop to scoop dough onto the prepared baking sheets- leaving a couple of inches between them. Hint: If you spray a little non-stick spray on the cookie scoop first the dough will pop out easier. Bake for 15 minutes or until scones are browned on the bottom and just getting golden on the top. If you want to put both baking sheets in the oven at the same time- switch them half way through the baking time and allow a few extra minutes. Remove scones to cooling rack. Meanwhile make both glazes by combining ingredients and stirring until smooth. Drizzle with the vanilla glaze while still warm and allow scones to cool and glaze to harden before drizzling with the cinnamon glaze. Makes about 20-30 depending on the size of the scoop you use.

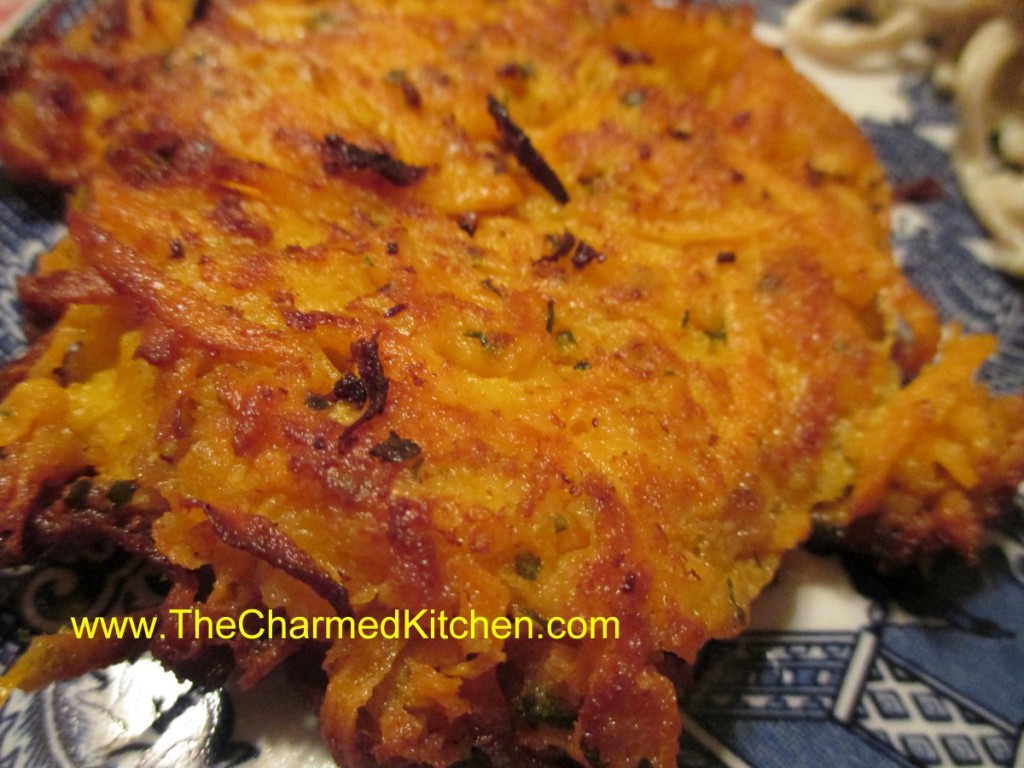
Sweet Potato Pancakes
I am a big fan of sweet potatoes. They are so versatile to cook with. For me, just roasting or steaming a sweet potato, and enjoying with salt, butter and a sprinkle of nutmeg is fine. This time of year, I find myself cooking with sweet potatoes all the time.
I was looking for something different to do with sweet potatoes. I didn’t want to just roast or steam them. I ended up shredded them and making sweet potato pancakes. I had duck fat so that is what we used to fry them in.
They were amazing. Crispy on the outside and tender in the middle. I am definitely going to make them again. I could see making smaller pancakes and serving as an appetizer. Here is the recipe.
Sweet Potato Pancakes
2 small sweet potatoes, peeled and shredded- you want to end up with 3-4 cups of shredded sweet potatoes- 1 medium /large one would also work
2 eggs
½ c. panko bread crumbs
1 T. parsley flakes
1 t. hot pepper sauce, or to taste
½ t. garlic powder
½ t. onion powder
Salt and pepper to taste
Oil for frying- we used duck fat and it was wonderful
Combine all ingredients in a mixing bowl and stir until well mixed. Heat oil or fat in large skillet to 350 degrees.* Spoon batter into skillet in 4-5 pancakes, depending on the size you prefer. Cook until golden on one side- and starting to firm up- about 5 minutes. You might have to cook them in two batches – depending on the size of your pan. Don’t over crowd. They are tricky to turn over. Turn over carefully and cook at least another 5 minutes or until both sides are golden brown and crispy. Makes 4-5
* A little trick to know when your oil is hot enough. Place an un-popped kernel of popcorn in your pan with the oil when you are heating it up. Popcorn pops at 350 degrees. When the popcorn pops – it is time to add the batter.
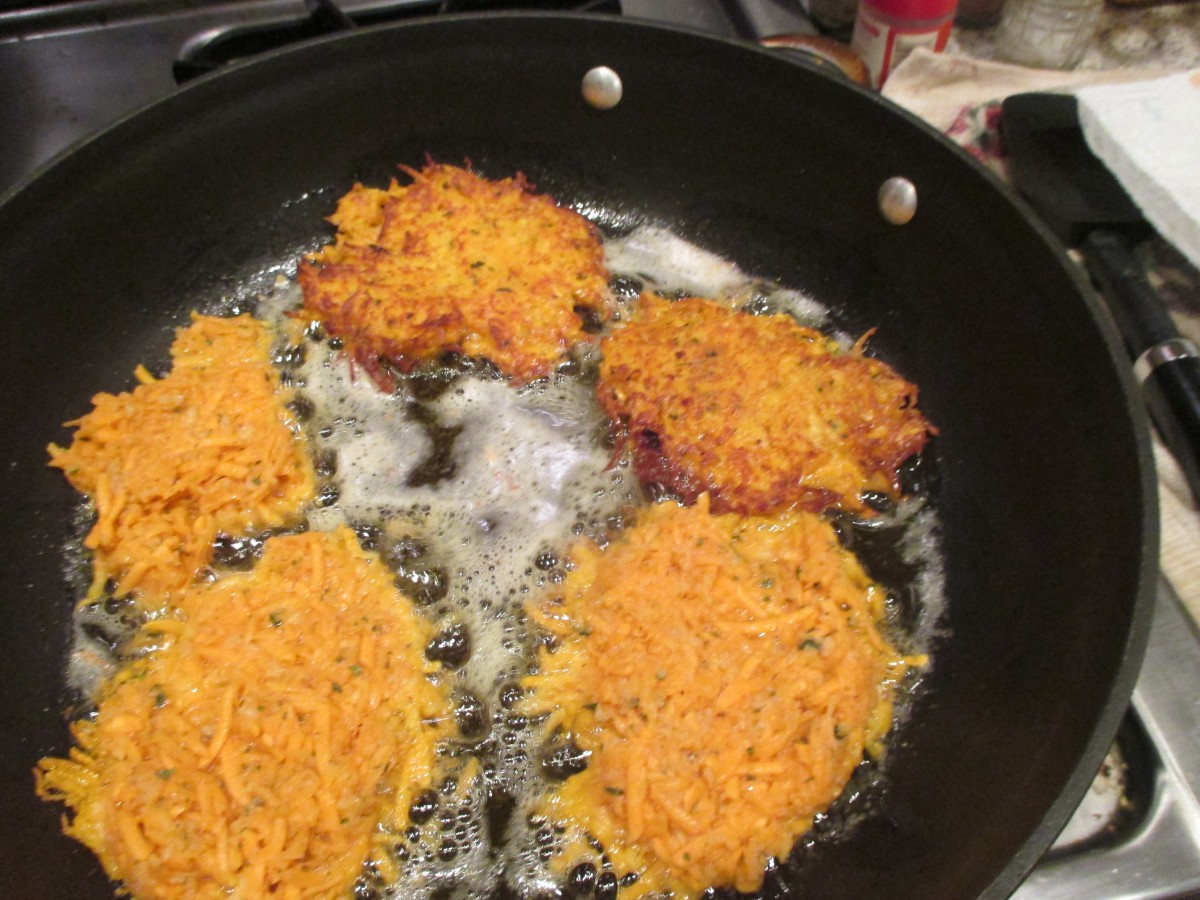
Sweet potato pancakes cooking


