Corn and Barley Salad with Basil
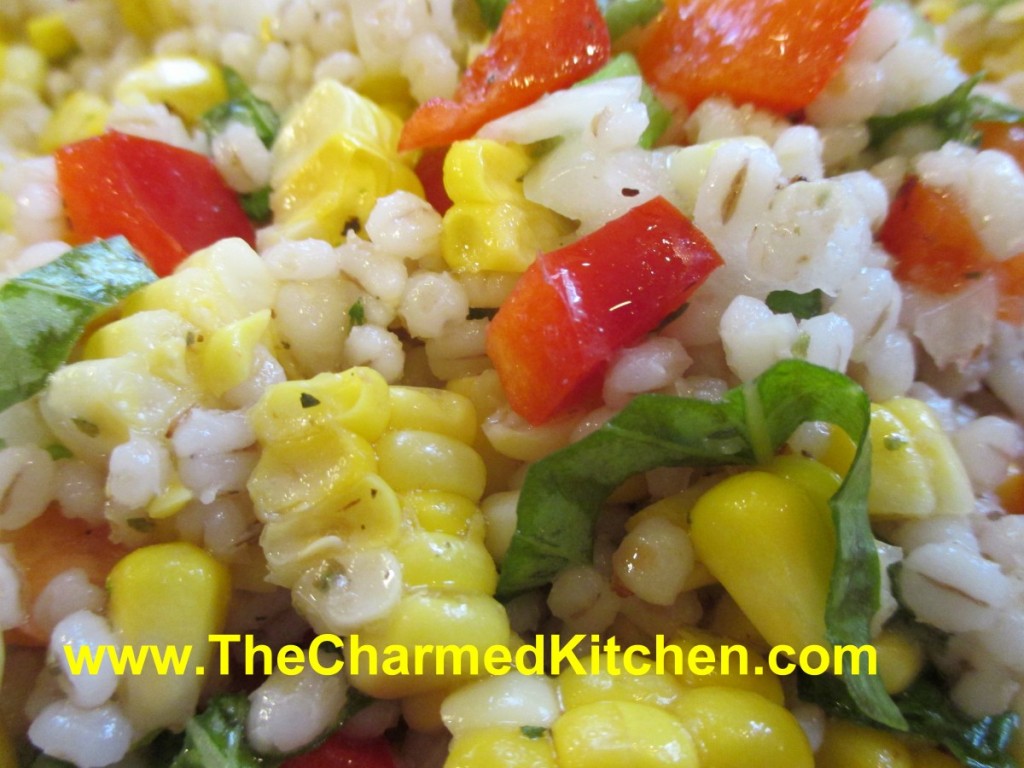
This colorful salad can be a side dish or main dish. I like it as a main dish for these hot, summer days. It somehow manages to be light and filling at the same time. It makes a wonderful lunch, served over a bed of salad greens.
The combination of sweet corn and barley works so well together. I don’t think most people think of salad, when they think of barley. Barley is more commonly used in soups. But this versatile grain can also be a nice ingredient in a salad. Perfect on a hot day, when you want a lighter meal.
I had grilled corn, and had some leftover, so that is what I used. I think the smokiness of the grilled corn added a nice touch. I had some fresh basil so I added that, too.
So, if you are looking for a new salad idea this summer- you might want to try adding barley to your next salad.
Corn and Barley Salad with Basil
½ c. pearl barley
salt
3 T. cider or white wine vinegar
1 t. Dijon mustard
fresh ground pepper
3 T. olive oil
3 T. fresh basil, cut into thin strips
3 c. cooked corn, from about six ears
1 c. diced sweet onion
1 c. diced sweet pepper, any color
¼ c. sliced green onions
Combine barley, 2 cups water and ½ t. salt in saucepan and simmer, covered until barley is tender, about 50 minutes. Drain and rinse under cold water. Combine remaining ingredients and toss with barley in large bowl. Makes 6 servings.
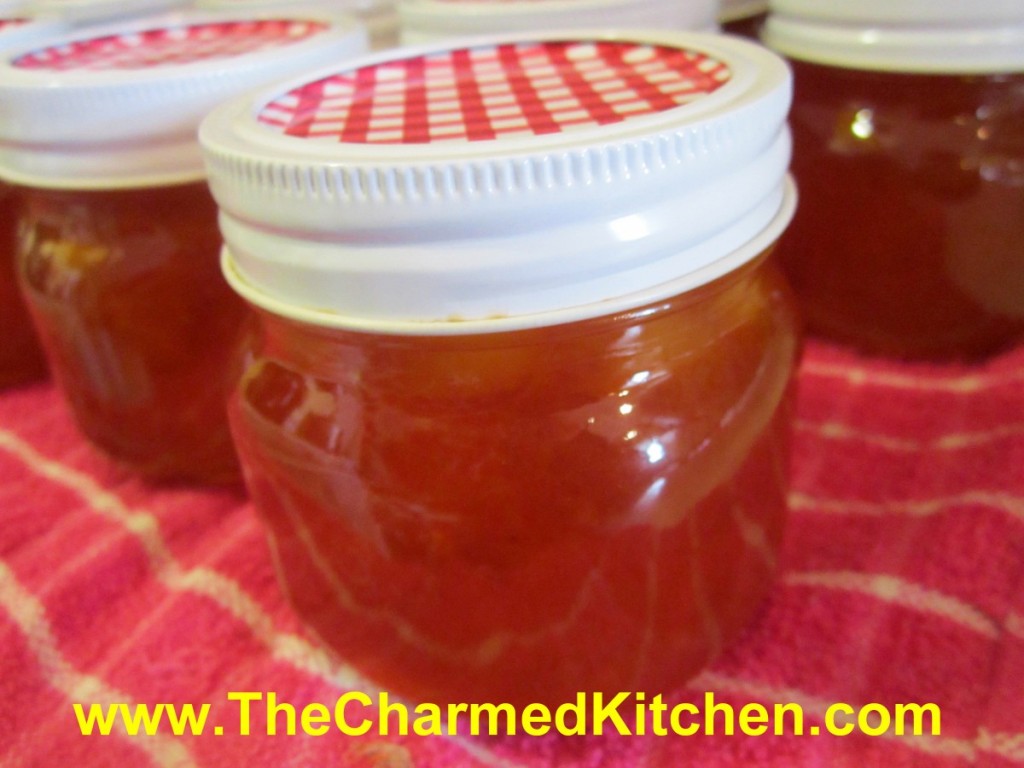
Pineapple Cinnamon Preserves
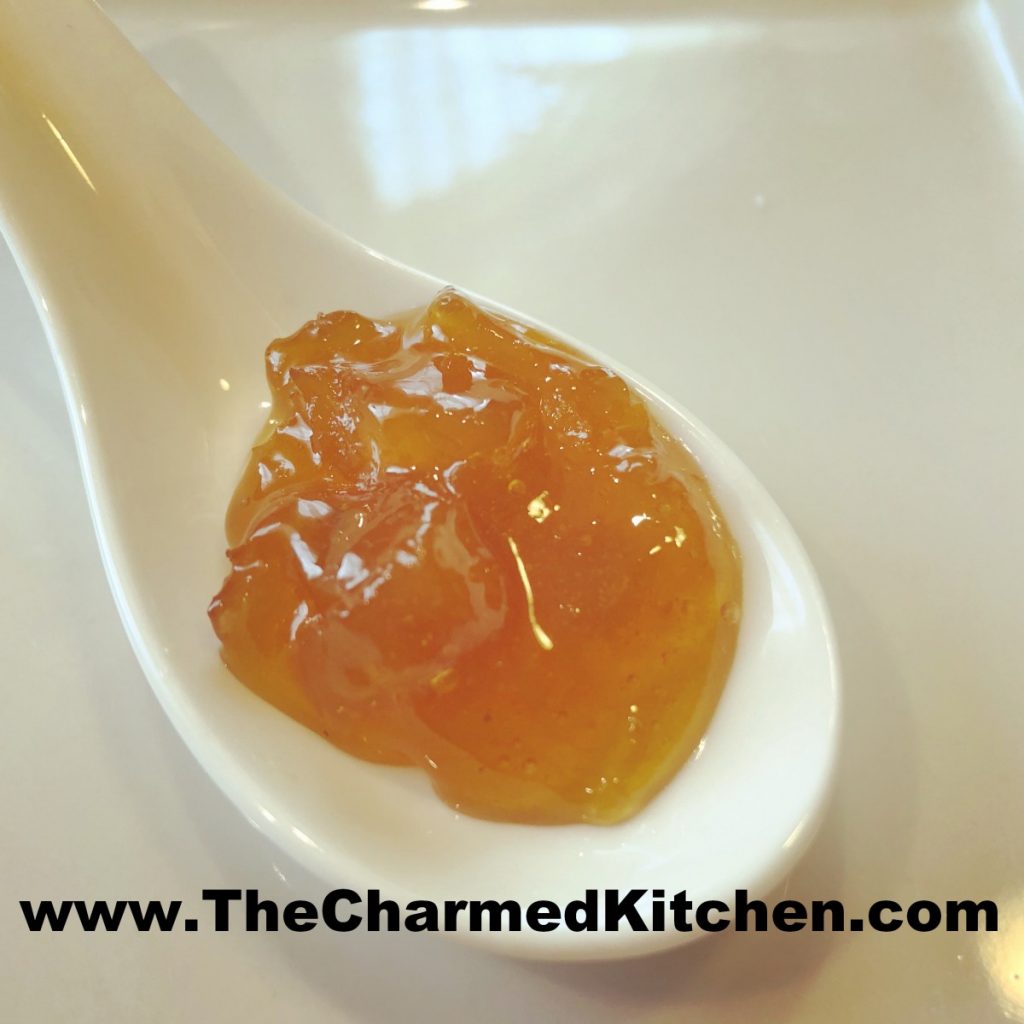
I love pineapple preserves. I make them pretty often. More motivated when I get good price on pineapples, like I did recently. I wanted to change things up a little this time. I decided to add cinnamon to the recipe. It turned out to be a really good idea. Just a touch of spice from the cinnamon to cut through the sweetness of the pineapple. I also added extra lemon juice for tartness. The end result is something special. Thought I would share the recipe with you.
Pineapple-Cinnamon Preserves
8 cups finely diced fresh pineapple, rind and core removed- about 2 pineapples
2 cups water
3/4 c. lemon juice
6 cinnamon sticks- about 4 inches long
6 c. sugar
Place pineapple in a pot with the water, lemon juice and cinnamon sticks and simmer until pineapple is tender, about 15 minutes. Add sugar and bring mixture to a boil. Cook until mixture reaches gel stage ( 220 degrees F).* Stir from time to time. This should take about 20 minutes, but can take longer. Remove cinnamon sticks. Ladle hot preserves into hot half-pint jars leaving 1/4 inch headspace. Wipe rims and adjust lids. Process in a boiling water bath for 15 minutes. Yield about 9 half-pint jars.
*When you are making jelly recipes that will sometimes say to cook to the jelly (gel) stage and I bet you are thinking “and that is….” There are 3 ways you can check to see if you have cooked your recipe long enough.
1. Use a candy thermometer, attached to the side of the pan and down in the jelly far enough to cover the bulb of the thermometer, but not touching the bottom of the pan. This is the most accurate method.
2. Spoon test by using a cool metal spoon dipped in the jelly and held on its side so the jelly can run off the edge. When jelly is not ready the drops will be light and syrupy. As it gets thicker the drops will falls off the spoon 2 at a time. When it has reached the proper stage two drops will form together and sheet off the spoon.
3. Freezer test just involves spooning a small amount of jelly on a plate and placing it in the freezer for a few minutes, to cool it down quickly. If the mixture gels, it should be done. While waiting for jelly test to cool, remove jelly from heat.
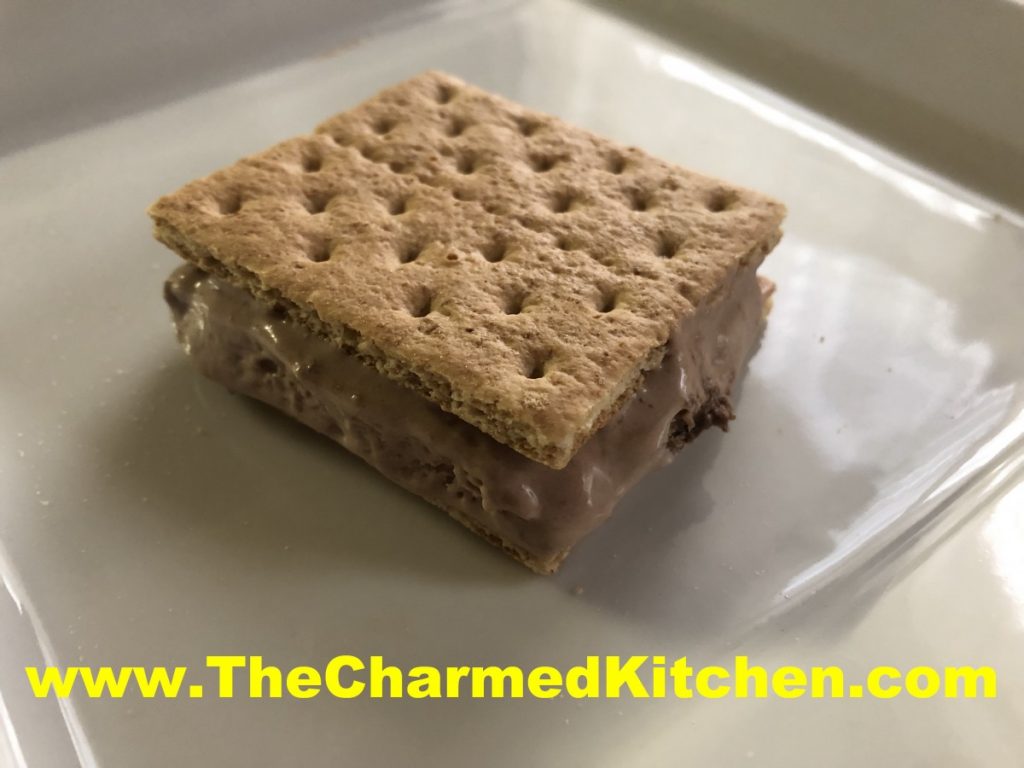
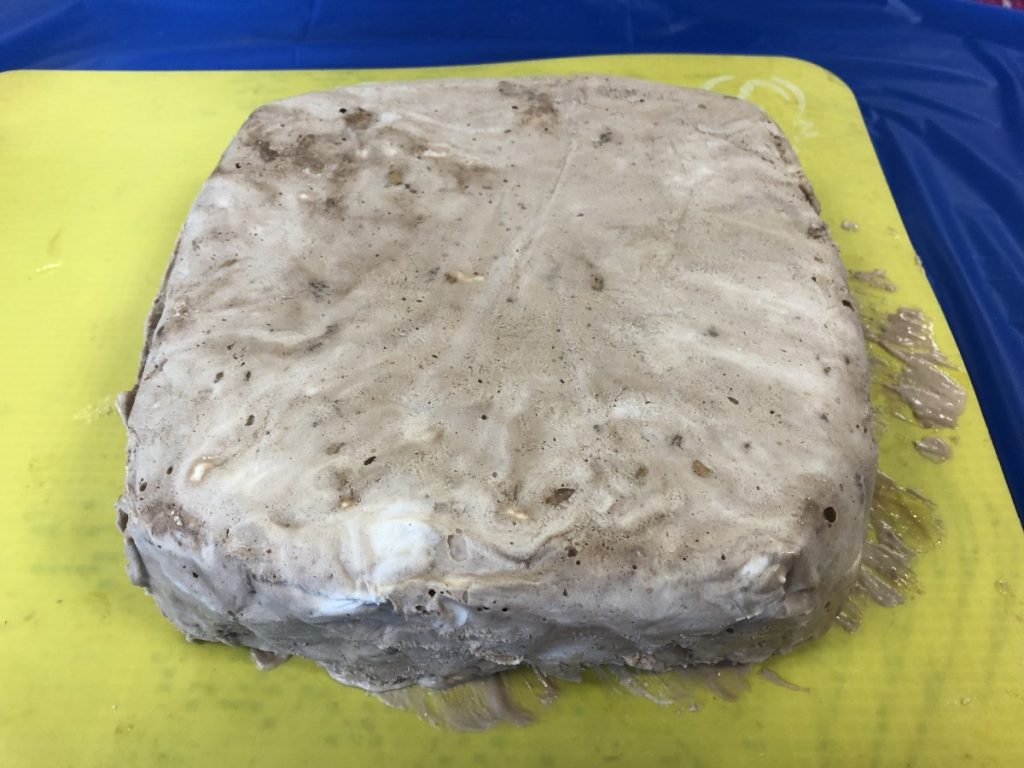
S’Mores Ice Cream Sandwiches
Summer is the time for picnics, campfires and S’Mores. Summer is also the time of year to eat lots of ice cream and other frozen treats.
This dessert combines the ingredients of S’Mores in a frozen treat. How fun is that?
They aren’t hard to make, but you need to allow time for ingredients to freeze. The mixture is frozen, then cut into squares and sandwiched between Graham crackers. They get returned to the freezer to harden up.
We made these in a cooking camp recently. The kids loved them. Of course the we skipped the step where the sandwiches are assembled and put back the freezer to harden. The kids just ate them right away. A little messy, but a LOT of fun.
So here is the recipe.
S’Mores Ice Cream Sandwiches
1 (14 oz.) can sweetened condensed milk
2/3 c. chocolate syrup
1 c. coarsely crushed graham crackers
1 c. mini marshmallows
2 c. whipping cream, whipped
72 graham cracker square halves
In large mixing bowl combine sweetened condensed milk and syrup. Fold in crackers, marshmallows and whipping cream. Pour in foil lined 9×5-inch loaf pan and freeze until firm, about 6 hours, or longer. Remove from pan and peel off foil. Slice loaf in half lengthwise and then each half into 18 (½ inch) slices. Place one slice between two crackers and repeat with rest. Wrap and freeze until ready to eat. Makes 36.
Peach Preserves – with Vanilla and Cinnamon
After getting some peaches from a local market, I decided to make preserves with some of them. The peaches were so juicy and perfectly ripe. They smelled amazing. I knew I would not be able to eat them all. I used a basic preserve recipe, but added some vanilla and cinnamon for added flavor. I also used pectin in this batch.
You can make peach preserves without added pectin, but because these were so ripe, I knew they would set better with the pectin. There is less pectin in very ripe fruit. The end result was just what I was going for. Pieces of peach, suspended in a soft gel, lightly flavored with the vanilla and cinnamon. I may have to make another batch.
Cinnamon-Vanilla Peach Preserves
4 c. sliced peaches, about 2-3 lbs. of fresh
6 T. pectin
2 T. lemon juice
1 T. vanilla extract
3-4 (4-inch) cinnamon sticks
7 c. sugar
Note: Before starting the preserves have your canning supplies ready including clean jars, lids, rings, water bath canner, funnel and ladle.
Prepare peaches by scalding in boiling water for a minute. Place in cold water, then slip off the skins. Cut in half and remove the pits and any fibrous parts near the pits. Slice peaches and place peaches and any juices in a large pot. Add the pectin, juice, vanilla and cinnamon sticks and bring to a boil, stirring often. Add the sugar and cook over high heat, stirring often, until mixture comes to a boil that you can’t stir down. Stir constantly for 1 full minute.
Remove from heat and remove the cinnamon sticks. Skim off any foam, if needed. Ladle hot preserves into clean, hot jars, filling to ¼-inch from the top. Wipe rims and screw on lids until comfortably tight. Repeat until the jars are filled. Place jars in water bath canner filled with boiling water. Water must cover the jars by at least an inch or two. Cover pot. Once water returns to the boil, start timing. Process for 10 minutes, turn off heat and leave jars in pot for 5 minutes longer. Remove jars to counter with a towel on it, or a cooling rack. Keep out of drafts. Allow jars to cool, check seals. Makes about 9 half pint jars.
Adapted from Ball Blue Book
The 4th of July
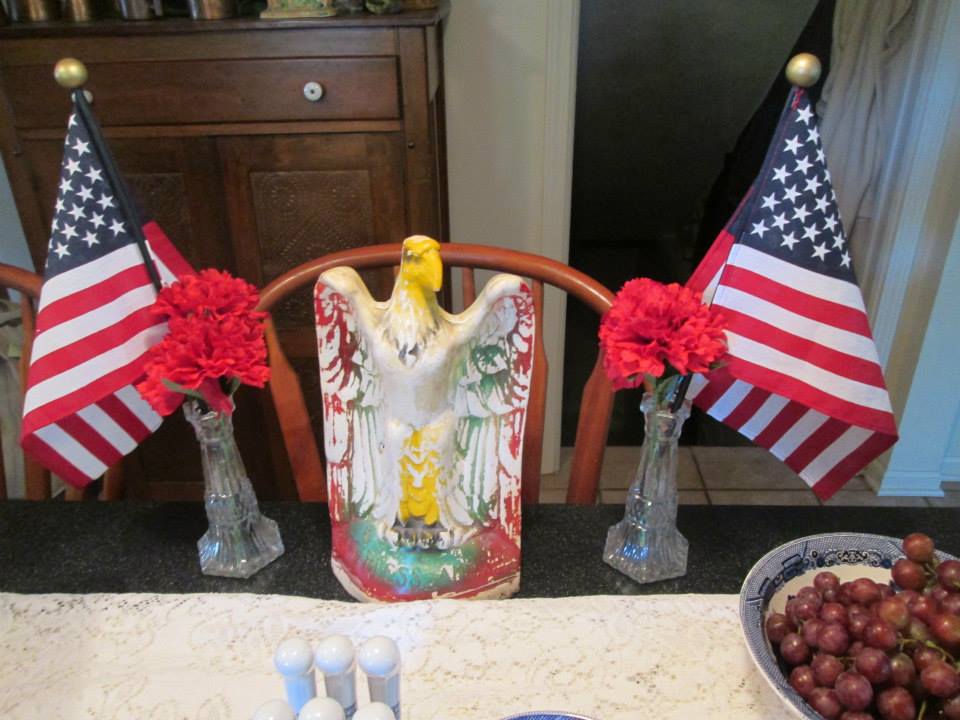
So what is the 4th of July about? Cookouts and noisy celebrations abound, but what is it we are celebrating? We are celebrating revolution, protestors and people who fought their government.
We were a colony, ruled by a monarchy. Had it not been for those who saw injustice, and tried to fix it, we would be bowing to the queen today. They were brave and very forward thinking.
Had the Revolutionary War gone the other way, they certainly would have been hung as traitors. I’m not sure how many of us today would be that brave.
So in your daily life, remember and honor the rebel. If you see an injustice, speak up. Do something to make this country better.
There is always room for improvement, after all. Think about the people who risked death to fight for the freedom we enjoy today. Life, liberty and the pursuit of happiness. Don’t ever take that for granted.
“Cheeseburger” Cookies
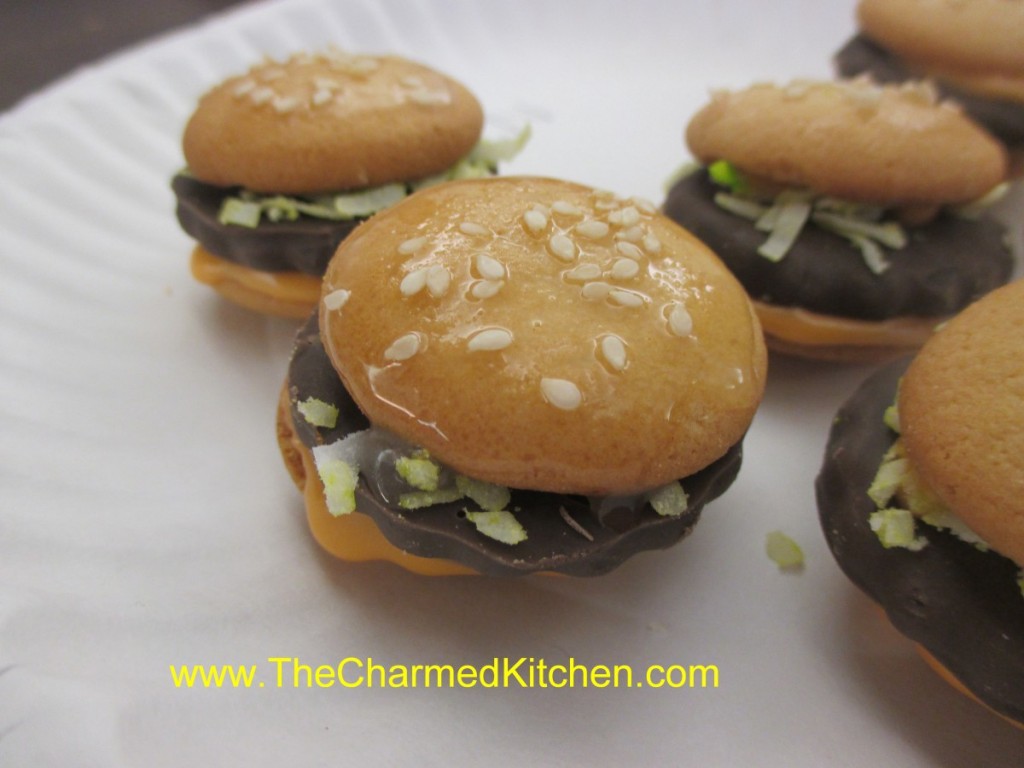
No time to bake? Maybe too hot? Here is a fun and easy no-bake dessert, that is perfect for any picnic or cook out. This is also a nice dessert for kids to make. They are great when you agreed to bring a dessert- and realize you have no time to make something from scratch. Fun dessert for the 4th.
The “burgers” are super fast to assemble. Vanilla wafers are the buns, and small, chocolate cookies are the burgers. I usually use chocolate mint cookies. You can also use thin mints, instead of the cookies. The “cheese” is orange tinted frosting. The “lettuce” is made from tinting coconut green.
To finish off the look, brush the tops of the cookies with a thinned out powdered sugar icing (not tinted), and sprinkle on a few sesame seeds.
They really do look like little burgers.
Cheeseburger Cookies
1 package vanilla wafer cookies
1 package Keebler Grasshopper cookies, or other small chocolate cookies
2 c. powdered sugar
1- 2 T. milk
few drops of yellow and red food coloring
1 c. coconut
several drops of green food coloring
1/4 c. powder sugar
1 T. milk
sesame seeds
Combine 2 cups of powder sugar with the milk and red and yellow food coloring. This should be the color of cheese. Place the coconut in a small bag and add a few drops of green food coloring. Close the bag and shake well to evenly color. This will be the ‘lettuce’.
To assemble cookies use 2 vanilla wafers (the bun) and one chocolate cookie (the burger). The orange frosting works as the cheese and glue. The coconut is the lettuce. Place a vanilla wafer flat side up on work surface. Place a little dab of “cheese” on the vanilla cookie and then a chocolate cookie. Sprinkle a little coconut on the burger, then some more cheese and the top bun, flat side down. Combine the remaining powder sugar and milk. You should have a thin glaze. Brush this lightly on the top of the finished “burgers”. Sprinkle with a few sesame seeds. Makes about 2 dozen cookies.
Cheesy Cherry-Blueberry Coffee Cake
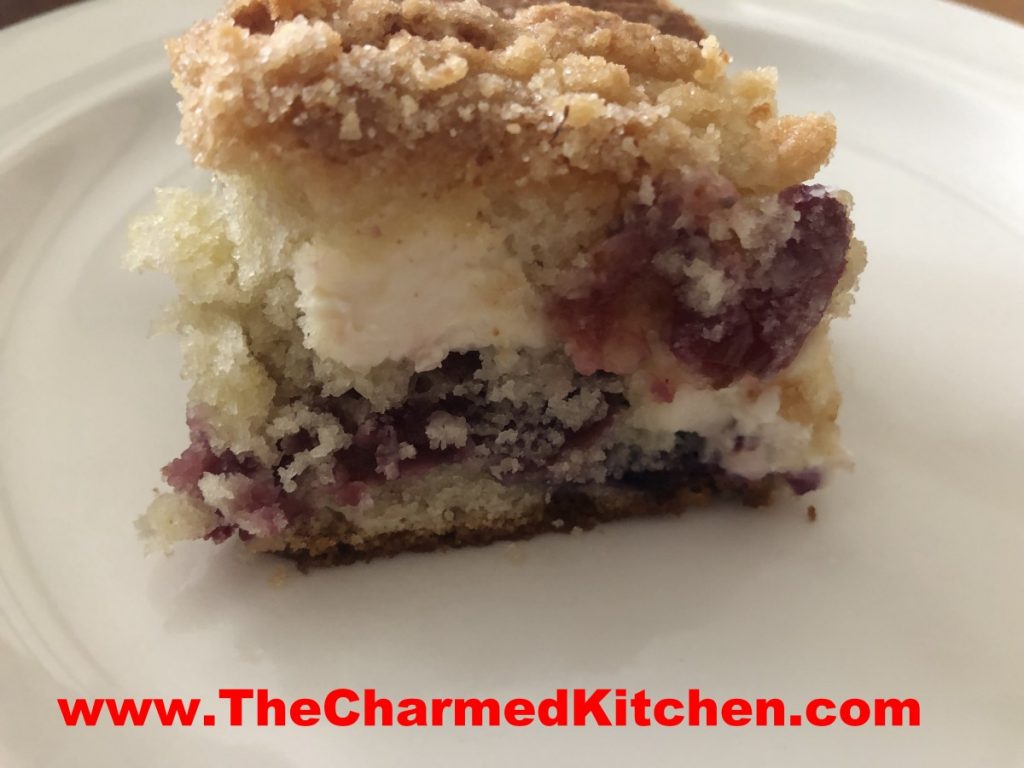
If you need a really special dessert for your next party or cookout, consider making this cheesy cherry blueberry coffee cake. It is one of my favorite coffee cake recipes ever. This is a great dessert for the 4th of July.
The cake is not too sweet, and the combination of cream cheese, with the fruit, reminds me of a cherry-blueberry blintz.
The streusal topping adds a nice little crunch.
It is fine served all on its own. You can also serve it with ice cream or whipped cream. You can also top with more blueberries and cherries.
While I think of this cake as a wonderful dessert, it can be served as a breakfast or brunch dish.
As if this weren’t enough- this cake freezes great. Who are we kidding? There won’t be any leftovers – but you could freeze them, if you had some.
So here is the recipe. Enjoy!!
Cheesy Cherry-Blueberry Coffee Cake
1 1/4 c. sugar
1/2 c. butter
2 eggs
2 1/4 c. flour
1 T. baking powder
1 t. salt
1 c. milk
1 c. fresh or frozen blueberries
1 c. pitted and coarsely chopped cherries
8 oz. cream cheese, cubed
1 t. grated lemon peel
Topping:
1/4 c. sugar
1/4 c. flour
1 t. grated lemon peel
2 T. butter
Preheat oven to 375. Grease and flour a 13×9 inch baking dish. Cream together sugar and butter until fluffy. Beat in eggs. Combine 2 cups of the flour with baking powder and salt and beat into batter alternately with the milk. Toss fruit with the remaining flour and fold into the batter along with the cheese and lemon rind. Pour batter into prepared pan. Combine sugar, flour and lemon peel for topping and cut in butter to resemble coarse crumbs. Sprinkle over batter and bake for about 45 minutes. Use toothpick to test for doneness. Serves 12.

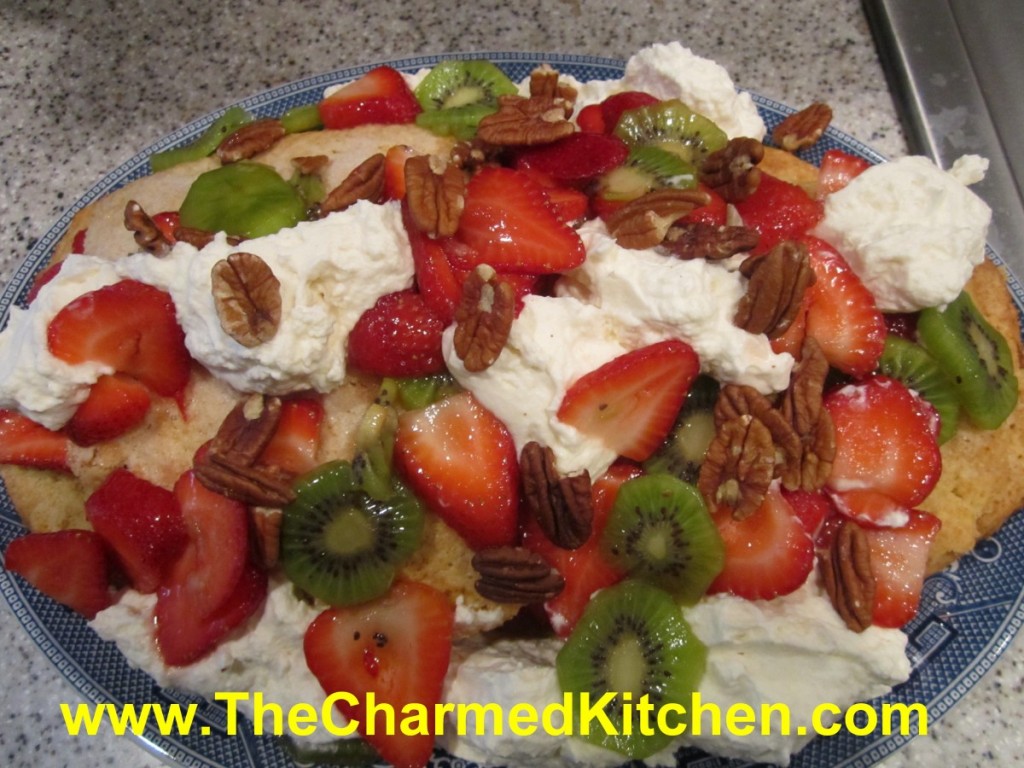
Giant Strawberry Shortcake
A couple of weeks ago, I posted a recipe for mini strawberry shortcakes. Now, we go to the other extreme. One giant shortcake.
Seriously, it is a fun way to make shortcake. You could make one for any special occasion or party.
This is a great dessert for a party, picnic or barbecue. Instead of making a bunch of individual shortcakes, make one really big one. It makes quite an impression.
When ready to serve it, just cut into slices, like cake or pie. I often serve this shortcake with ice cream on the side. Feel free to switch up which fruits you use. I used kiwi fruit with the strawberries, but you can add different fruits. Peaches would go well with the strawberries or blueberries. Just have fun and use fruit combinations you like. For the 4th of July, you could use a combination of strawberries, raspberries and blueberries.
Giant Strawberry Shortcake
1 egg
3/4 c. milk
1/2 t. lemon juice
2 c. flour
1/4 c. brown sugar
1 T. baking powder
1/2 stick cold butter plus 1 T. softened
1/2 c. plus 1 T. sugar
1 qt. strawberries, sliced thin
2 kiwi fruit, peeled and sliced thin
1/4 c. chopped nuts, toasted
whipped cream, optional
In small bowl combine egg, milk and lemon juice and set aside. In larger bowl combine the flour, brown sugar and baking powder. Cut in cold butter to resemble coarse crumbs. Add egg mixture and stir until mixture forms into a soft dough. Knead dough gently on a lightly floured surface about 10 times. On greased baking sheet pat dough into a 15×6-inch oval. Sprinkle dough with the 1 tablespoon of sugar and dot with the softened butter. Bake in a preheated 400 degree oven for 20-25 minutes, or until lightly golden. Place on wire rack to cool. Toss the berries with the remaining 1/2 cup of sugar. Allow to stand 30 minutes. Split the shortcake lengthwise and remove the top. Spoon over the half the berries and replace top of shortcake. Combine the kiwi with the remaining berries.Spoon over the remaining fruit and sprinkle with the nuts. Dot with whipped cream, if desired. Cut in wedges to serve. Serves 8.
Note: you can bake shortcake day ahead and prep the fruit day ahead, keeping it chilled and just assemble when ready to serve.
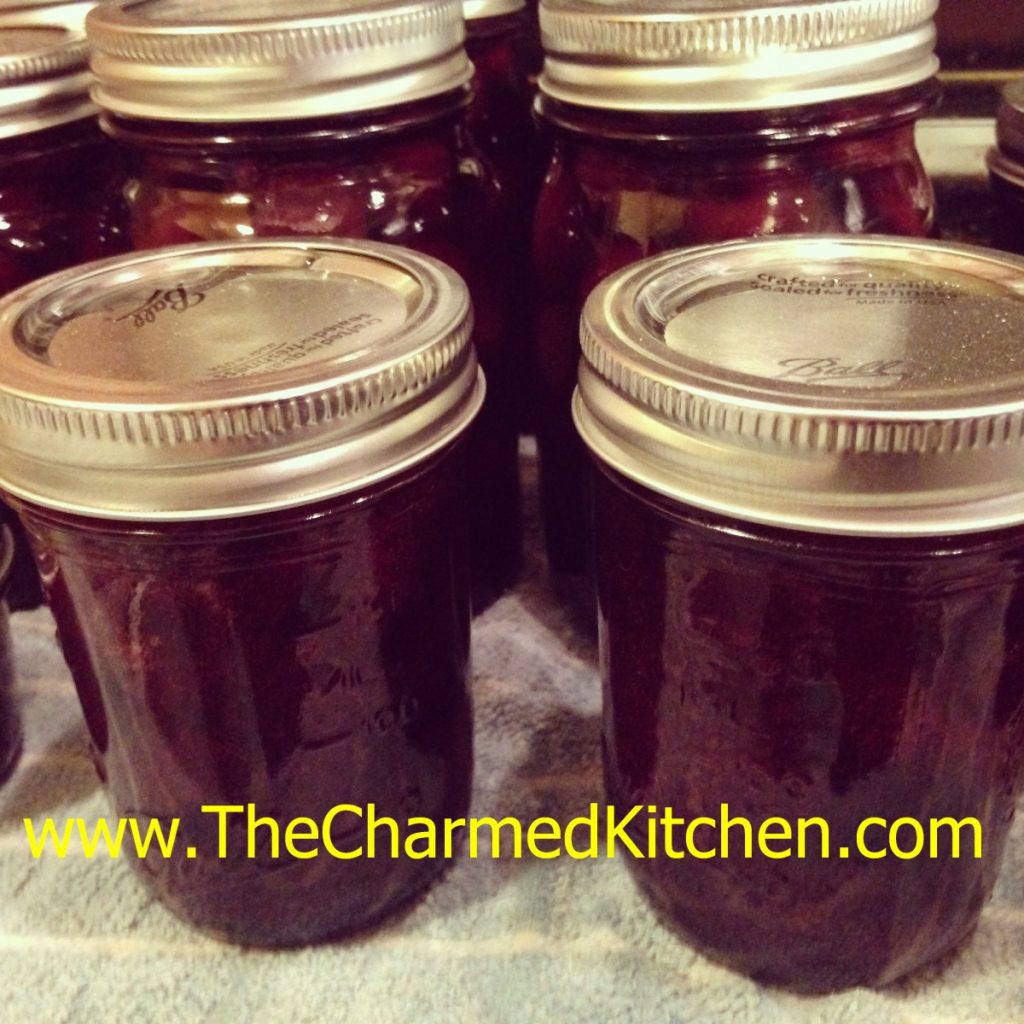
My Favorite Cherry Jam
I look forward to cherry season every year. I love eating fresh cherries, but I also like to preserve them, to enjoy year round. One of my favorite things to make is cherry jam.
This must be a great year for cherries. They seem bigger than usual, and very sweet.
While I normally make jam from sour cherries, I knew the sweet ones would work. Besides the cherries, sugar and pectin, this jam also contains lemon juice, vanilla and cinnamon. Those extra ingredients give the jam a more complex flavor and a little bit of a tang.
This may be one of my favorite jams ever!!! I was worried it would be too sweet, but it isn’t. The flavor of the cherries comes through as well at the flavor of the vanilla and cinnamon. Thinking I made need to buy more cherries and make another batch….
Here is the recipe. Enjoy.
Sweet Cherry Jam
4 c. chopped pitted sweet cherries, about 2 lbs.
6 T. powdered pectin
6 T. lemon juice
2 T. pure vanilla extract
1 t. cinnamon
4½ c. sugar
Wash jelly jars and lids and keep warm until ready to use. Place a large pot of water, with a rack, on to boil for the water bath. In large saucepan combine cherries with pectin, lemon juice, vanilla and cinnamon. Bring to a rolling boil, stirring often. Add the sugar and bring mixture back to a rolling boil, stirring often. Once the mixture gets to a full, rolling boil, cook for one minute longer, stirring constantly. Remove jam from heat and skim off any foam. Ladle hot jam into hot jars, filling to about 1/4 inch from the top. Wipe off rim and screw on the lids. Repeat with remaining jam. Process in a hot water bath for 10 minutes. Turn off heat and let jar sit in canner 5 minutes before removing. Remove from water bath and allow jars to cool. Yield: about 6 half pint jars of jam.
Adapted from The Ball Blue Book
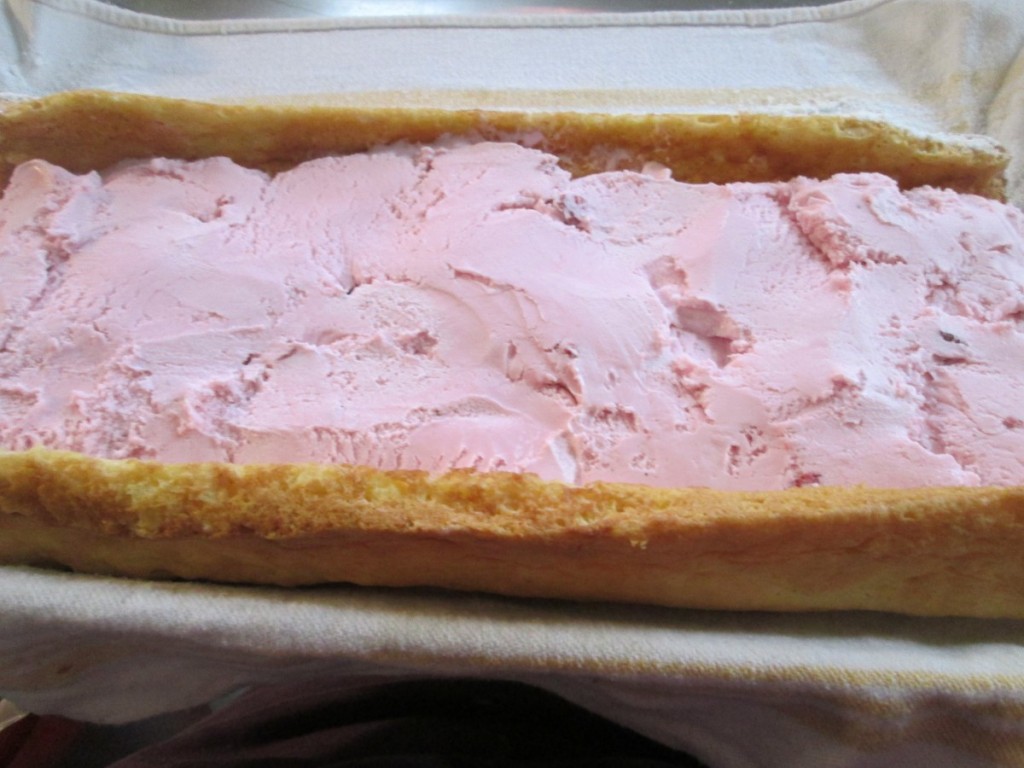
Strawberry Ice Cream Cake Roll
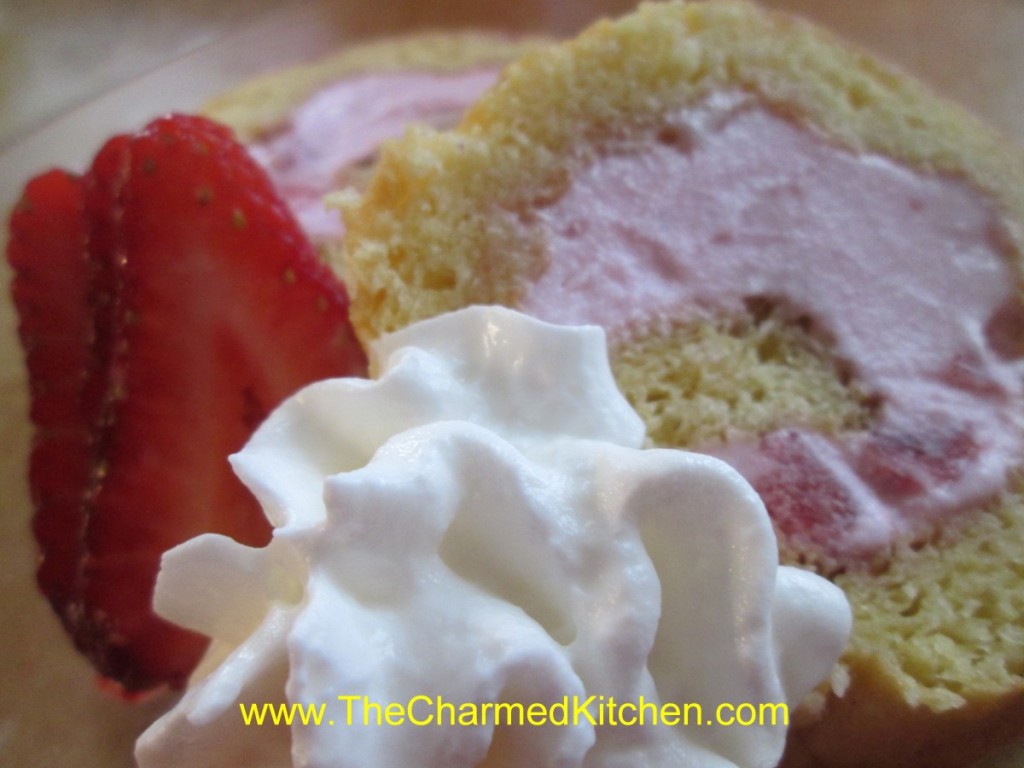
This is the perfect summer dessert. Fresh berries, a light, citrus-scented cake and ice cream. What more could you want?
When you say cake roll, I think a lot of people first think of a pumpkin roll or Buche de Noel (yule log).
There are so many more desserts you can make with them. Cake rolls can be made in many flavors and they can be filled with custard, frosting, fruit, ice cream and more.
For this sponge cake roll, I used homemade strawberry ice cream to fill it, recipe follows. You could use store bought ice cream, if you prefer.
Start with the sponge cake roll recipe below, and use whatever flavor ice cream you like. You’ll need about a quart of ice cream- or a little more.
Once finished, you just wrap it up and pop the cake in the freezer until needed. Great to have on hand for summer parties and cook outs. You can decorate with fresh berries when serving. Blueberries would make this a fun red, white and blue dessert for Memorial Day or the 4th of July.
Sponge Cake Roll
This sponge cake roll can be filled with whipped cream or ice cream, or use your favorite filling.
5 eggs, separated
2/3 cup granulated sugar
1 teaspoon lemon juice
1/2 teaspoon finely grated lemon zest
2/3 cup cake flour*
1/4 teaspoon salt
1 teaspoon baking soda
3 tablespoons melted butter
Beat egg yolks until thicken and lemon colored; gradually add 1/3 cup of
the granulated sugar, the lemon juice and the lemon zest. Beat egg
whites until almost stiff then gradually beat in the remaining 1/3 cup
sugar. Beat until stiff peaks form. Fold yolk mixture into whites. Sift
dry ingredients into a separate container; add to egg mixture, folding
in carefully. Fold in melted butter. Pour batter into waxed paper-lined
10x15x1-inch jelly roll pan. Bake at 375° for 12 minutes. Sprinkle with
confectioners’ sugar. Turn onto a clean kitchen towel which has been
generously dusted with confectioners’ sugar. Trim edges, if necessary;
roll cake up, towel and all, while still warm. Let cool completely.
Unroll and fill with whipped cream or ice cream then re-roll cake. The
trick is to let the ice cream soften up a few minutes before spreading
it on the cake. But don’t wait too long. Rather than trying to let the
ice cream get soft enough to spread I used a spatula to sort of cut
slices of ice cream and place them on the cake. Store ice cream cake
roll in freezer until ready to slice and serve.
*If you don’t have cake flour you can make your own. Measure out a cup of all purpose flour, remove 2 tablespoons of flour and replace them with 2 tablespoons of cornstarch. For larger amounts place 7 cups of flour in a bowl and combine with 1 cup of cornstarch. Mix well or even sift together. Store in an airtight container.
Strawberry Ice Cream
2 c. chopped strawberries
1 c. sugar
1 T. vanilla
2 c. cream or half and half or a combination. You can also use some milk or even almond or rice milk.
Additional sugar to taste
Place strawberries, vanilla and sugar in saucepan and bring to a simmer, stirring occasionally. Remove from heat and chill. Combine chilled berry mixture with cream. Add additional sugar if you like. Remember that once it is frozen the ice cream will not taste as sweet so make this mixture a little sweeter than you want the final product to be. How much sugar you add varies with personal taste, and how sweet the berries are. Place in an ice cream maker and process according to manufacturer’s directions. Once finished put in an air- tight container and place in freezer. Makes about 1 quart.