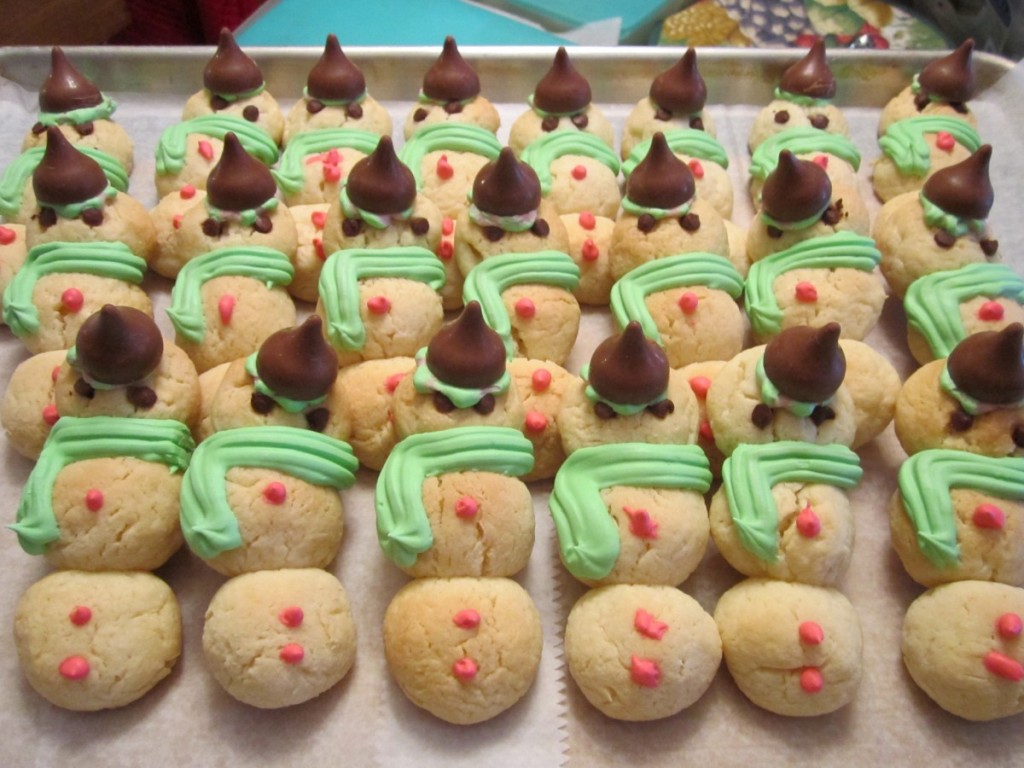
Every year, I spend the day before Thanksgiving making some special treat or craft with my niece, Elia. One year we made these cookie “turkeys”. She liked making them so much we are making them again this year. They are really easy to make, and since there is no baking involved, you don’t tie up the oven if you need it for other things, like maybe a real turkey. Here are the ingredients you will need. We did them sort of assembly line fashion, because Elia wanted one for each person’s place at the table.
Candy Turkeys
chocolate sandwich cookies
candy corn
mini peanut butter cup
malted milk balls
candy pumpkins
melted chocolate
To start, place a cookie on your work surface. Affix a peanut butter cup, for the body. with a little melted chocolate. Place a malted milk ball on top of the peanut butter cup, using a little more melted chocolate to make the head. Once the chocolate hardens a little break off the tip of a candy corn and affix with chocolate to make the beak. Stick a few candy corn between the cookies- into the frosting layer- for the tail. Open up a cookie and use a little more chocolate to stand up your turkey on the frosting surface- Elia wanted them to be standing on snow. Or you can use a whole cookie, if you prefer. Place it off center, so you have room for your pumpkin. Let it harden for a minute, then add a candy pumpkin, using another drop of melted chocolate.

Elia hard at work
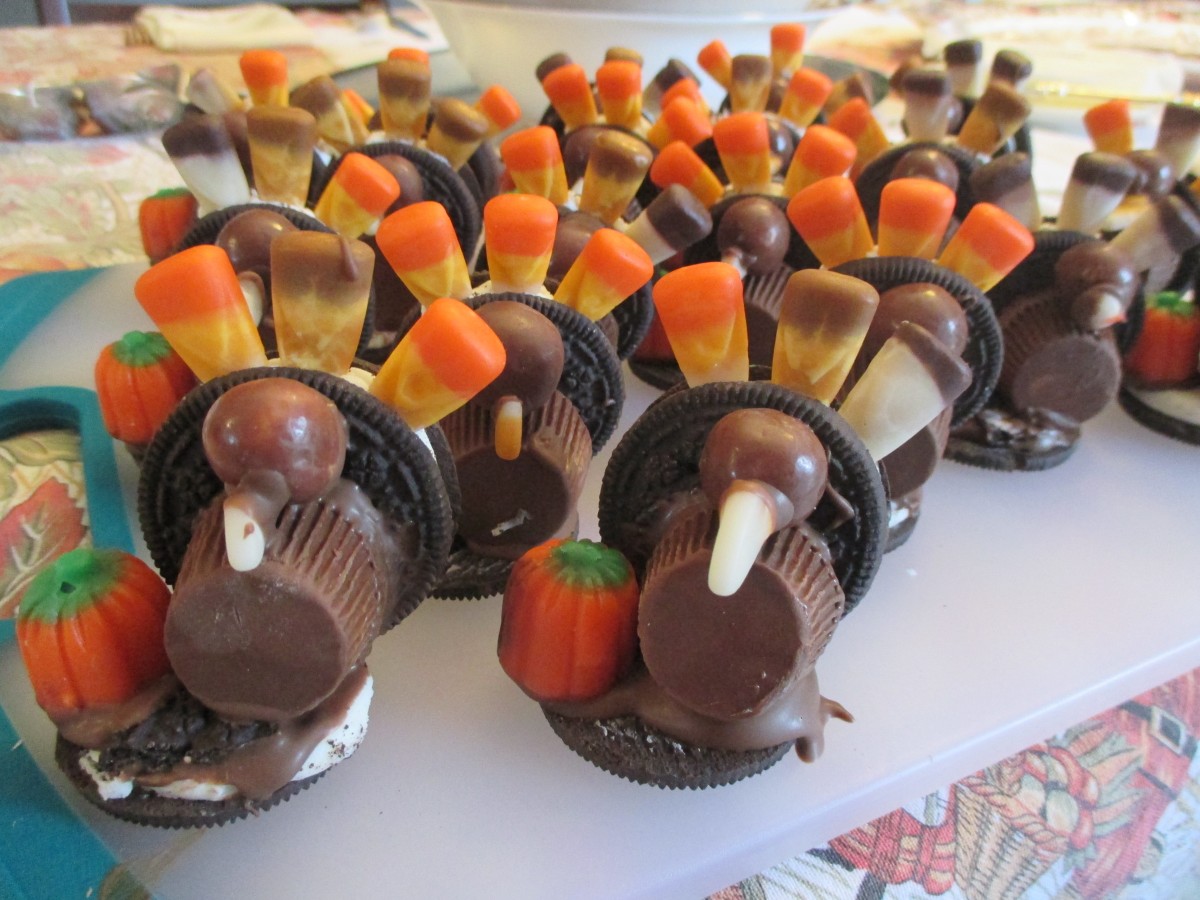
She made quite a few
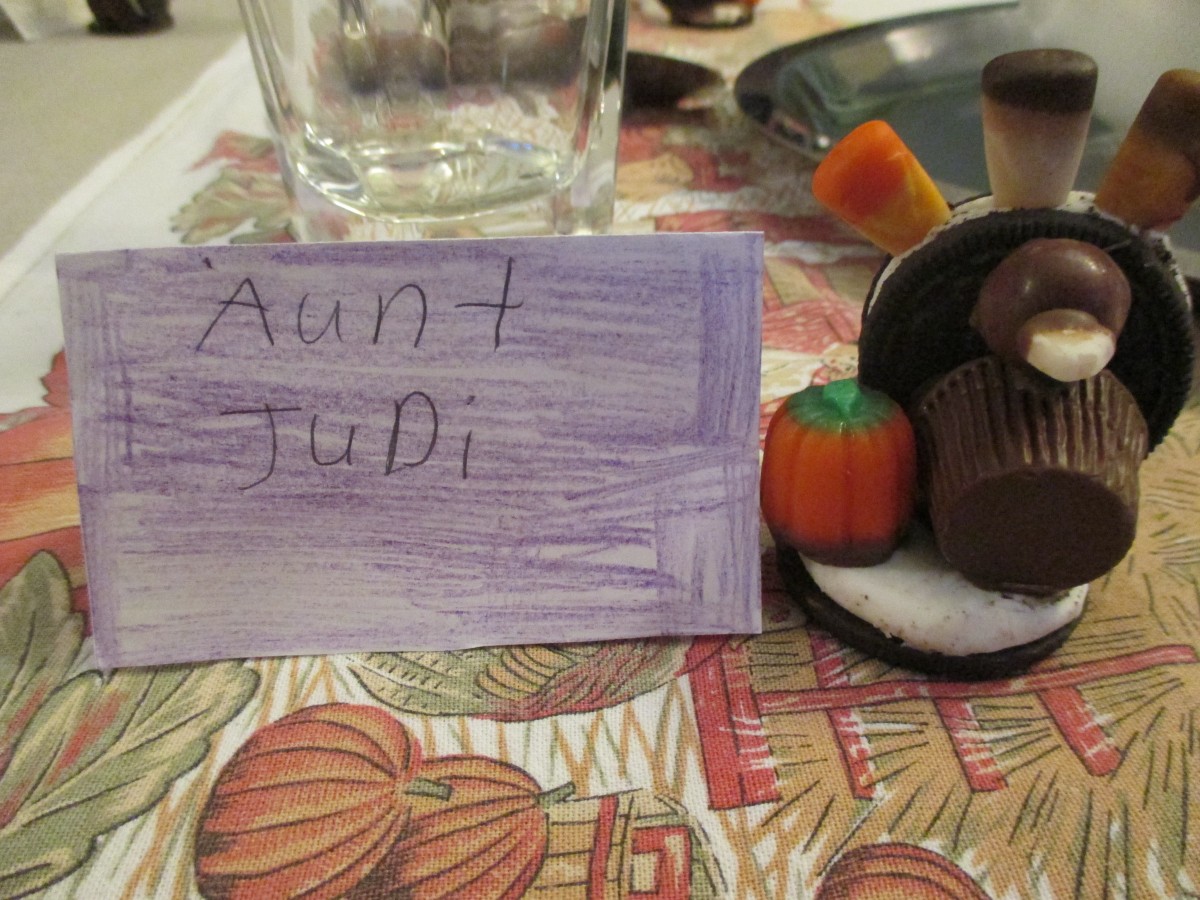
My place at the table