Plum Glazed Wings

I love when local fruit is in season. I found myself with lovely red plums and I decided to use some of them to make a sauce for chicken wings. The sauce came out really nice. I started with onions, garlic and plum puree. I added more ingredients as I went until I felt the sauce had the flavor I was going for. This sauce/glaze would be great on pork or duck, too.
I pan fried my wings, but they could be grilled and basted with the sauce instead, or baked in the oven.
Plum Sauce/Glaze
2 T. oil, butter or bacon fat
1 medium onion, minced
2-3 cloves garlic, minced
1 c. plum puree made from about 1 lb. of plums
¼ c. cider vinegar
2 T. honey
1 T. hot sauce
1 t. fresh grated ginger
Salt to taste
I started by peeling the plums. You could leave the skins on, if you like, but I prefer them off. I put the plums in boiling water for a minute and then in cold water. The skins came right off. I removed the pits and pureed the plums- I ended up with a cup of fresh plum puree. Saute onion in a little oil- you could use butter or even bacon fat. Add garlic once the onions are tender. After that, add the plum puree and the rest of the ingredients. Let it cook for about 10 minutes to thicken and give it a taste. I decided to smooth the sauce out in the blender but it would be fine to leave it chunky. Makes about 1 1/2 cups.
To cook the wings I just pan-fried them. I had just over a pound of wings. I cooked them in a skillet, covered for about 20 minutes, turning a couple of times. I poured the sauce over them and turned the heat down to medium. I let them cook, covered, another 10 or 15 minutes. Once I was sure the wings were cooked through, I uncovered them and let the sauce cook down and thicken a little. It created a nice glaze on the wings. Easy and very tasty. I could also see baking or grilling the wings and just tossing them in the sauce at the end.
I ended up pureeing more plums and tossed them in the freezer so I can make this sauce again when the weather is chilly and no fresh plums are around.
Blueberry Chef Salad
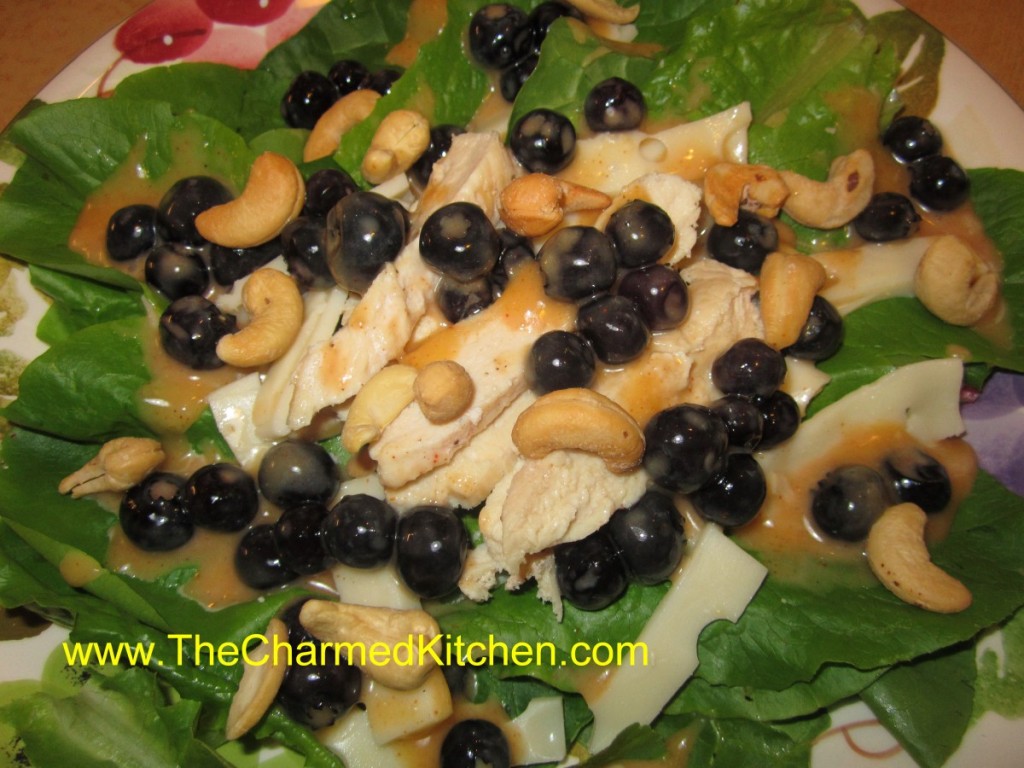
This is one of those salads that is good any time of the year. A local produce market had the most beautiful blueberries this week. I decided to enjoy some of them in this salad. Besides, it was hot today and I didn’t feel like cooking.
The dressing is a honey French type dressing. It really makes the whole salad work. You can add the berries to the dressing, or serve them on top of the salad. I topped it with cashews, but you could add croutons, if you prefer.
Blueberry Chef Salad
Dressing:
1/3 c. honey
1/4 c. white wine vinegar or cider vinegar
1 t. paprika
1 t. dry mustard
1/4 t. salt
1/2 c. olive oil
3 cups blueberries
Salad:
6 c. torn salad greens
12 oz. cooked chicken, turkey, ham etc, cut into strips
1 c. cubed cheese
1/2 c. cashews
In blender, combine first five ingredients and start running machine on high. Add oil in a slow stream until mixture becomes thickened. Pour into bowl and stir in berries and chill, several hours if you can. When ready to serve, arrange greens on one large platter or on smaller salad plates. Arrange meat and cheese on platter or plates. Spoon over the dressing and cashews then serve. Serves 4-6.
Fresh Tomato Pasta
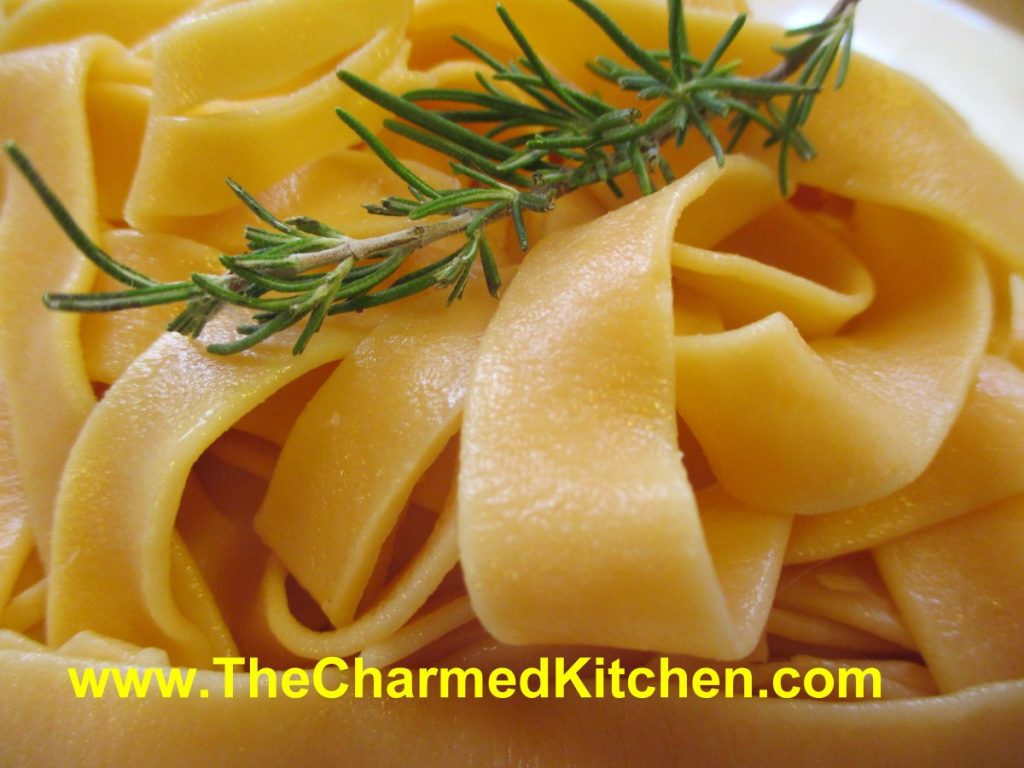
I really enjoy making fresh pasta. I often use vegetables and herbs in homemade pasta for added flavor. I decided to make a fresh tomato pasta today, using, well, a fresh tomato or two. You could use tomato juice in this recipe, but since I had fresh tomatoes, I just used fresh tomato. I also use tomato powder in this recipe sometimes. I make tomato powder out of the skins of the tomatoes I canned. I put them in the dehydrator and powder them up once dried.
I put a medium sized tomato in the blender and pureed it until smooth. I left the skin on and the seeds in. I didn’t have quite enough liquid, so I added a couple cherry tomatoes and blended again.
The pasta might look a little pale to you. I assure you, it was made with tomatoes. The pasta fades a little when cooked. I also used an orange tomato, so it was never going to be a bright red color. The flavor, however is quite nice. Subtle, but definitely tomato. Here is the recipe.
Fresh Tomato Pasta
2 c. flour
1 t. salt
½ -2/3 c. tomato juice- I just pureed a fresh tomato in the blender, seeds, skin and all. You might need a little more.
Fresh minced herbs, like chives, basil, parsley, rosemary, optional
Place flour and salt in bowl and stir to blend. Start adding the tomato juice, stirring to form a firm dough. Knead until smooth and cover dough, allowing to rest at least 20 minutes. I like to mix the dough in a food processor. Just mixes faster. You can also mix in a stand mixer using the dough hook.
Once dough is rested, roll out to desired thickness and cut into noodles or use as the base for ravioli. Fresh pasta cooks in just a couple of minutes. Watch carefully.
Serves 3-4.
Blueberry Sweet Rolls

These sweet rolls are a favorite recipe of mine. They are not too sweet, even with a powdered sugar glaze. Great for brunch or breakfast. Sweet enough to be dessert, too. I am bringing them to a brunch with friends.
The base of the rolls is a rich, yeast dough. The dough is divided in half, rolled out, then brushed with butter. Then the dough is sprinkled with cinnamon sugar and topped with blueberries. The dough is rolled up, jelly roll fashion, then sliced into rolls.
The rolls are baked in 2 (9-inch) cake pans. The recipe makes 24 blueberry rolls. The rolls can be frozen.
I used fresh berries, but frozen work too. A good reason to buy extra berries and freeze them!!
Blueberry Sweet Rolls
3-3 1/2 c. bread flour
1 package active dry yeast
1 1/3 c. evaporated milk
6 T. butter
1/4 c. sugar
1 t. salt
1 egg
6 T. butter, melted
1/2 c. sugar
2 t. cinnamon
1 t. grated lemon or orange peel
2 c. fresh or frozen blueberries
In bowl combine 1 1/2 c. of the flour with the yeast, sugar and salt. Heat together the milk and 2T. of the butter until warm and add to the flour mixture, beating 2 minutes. Add egg and beat 2 minutes longer. By hand stir in enough of the remaining flour to make a soft dough. Turn dough onto a lightly floured surface and knead, adding flour as needed until dough becomes moderately stiff. Place in greased bowl, turning once to coat and cover. Allow to double in bulk, about 1 1/2 hours. Punch dough down, cover, and let rest 10 minutes. Divide dough in half. Roll each half into a 14×8 inch rectangle. Brush dough with the melted butter. Combine the remaining sugar, peel and cinnamon and sprinkle over the dough. Top with the blueberries and press the berries into the dough. Starting at the long side roll up dough jelly roll fashion and seal edge by pinching. Repeat with second roll. Cut each roll into 12 slices and place 12 rolls in greased 9 inch round pans. Cover pans and allow to rise until doubled, about 30 minutes. Bake in a 375 degree oven for 20-25 minutes. While rolls are warm, you can top with a powder sugar glaze, if desired. Makes 24.
Creamy Fresh Tomato Soup

Tomatoes are in season and I am loving it. I have been enjoying tomato sandwiches, tomato salad and fresh tomato sauce.
This is a great recipe for some of those tomatoes. A simple soup, with lots of flavor, it is a favorite of mine. So much better than the canned tomato soup of my childhood.
I enjoy it served hot, but this soup can also be served cold. On a hot day, this soup, served chilled, is a wonderful change from a salad with dinner.
I prefer to use fresh tomatoes, but I have used my home canned tomatoes, in a pinch.
If you want a stronger tomato flavor- use a couple extra tomatoes.
Creamy Fresh Tomato Soup
3 medium-sized ripe tomatoes
1 small onion, chopped fine
1 rib celery, chopped fine
1/4 t. ground cloves
1 small bay leaf
3 T. butter
3 T. flour
1 t. salt
3 c. milk or half and half
Peel and chop tomatoes. Place tomatoes in saucepan with onion, celery, cloves and bay leaf. Bring mixture to a boil; reduce heat and cover, simmering 15 minutes. Melt butter in a large saucepan then stir in flour and salt. Cook mixture until bubbly. Add milk and cook until thickened, stirring constantly. Remove bay leaf. Puree tomato mixture through a strainer, food mill or in a blender or processor. Add to milk mixture and heat through. Serves 6.
Zucchini Pancakes
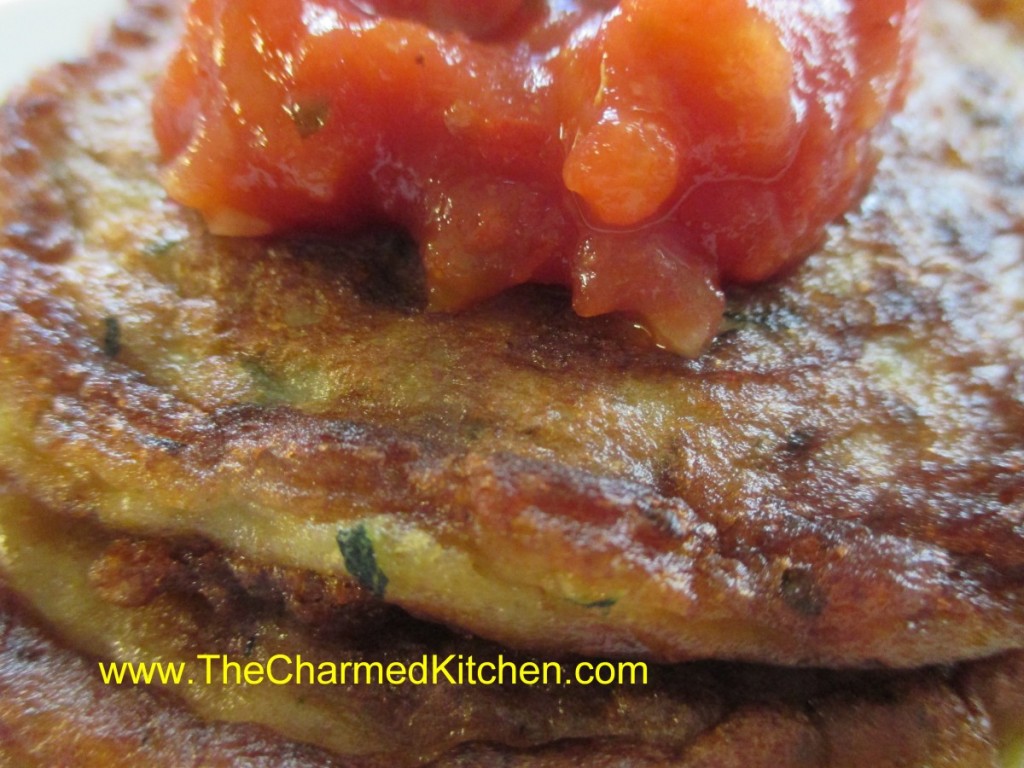
You can never have too many zucchini recipes. Especially this time of year. This simple recipe uses zucchini to make tender and flavorful pancakes.
They aren’t the type of pancake you would pour maple syrup over. They are wonderful topped with some fresh salsa, though. These pancakes make a nice lunch or main dish meal. They can also be served as a side dish. Similar to potato pancakes. I have been known to have them for breakfast.
I think they taste best when golden on the outside, a little crisp. They will still be tender inside.
So if you have more zucchini than you know what to do with, and you don’t want to bake zucchini bread, here is a recipe you might want to try.
Zucchini Pancakes
2 c. shredded zucchini
1 medium onion, diced
2 eggs
1/2 c. flour- you made need a little more or less depending on how moist your zucchini is
2 t. hot pepper sauce, or to taste
1 t. baking soda
salt to taste
oil for cooking
Combine all ingredients, except the oil, in a medium bowl. Heat oil in skillet and spoon batter in. I used a little over 1/4 cup for each. Cook over medium heat until lightly browned around the edges. Flip and cook until golden on both sides and pancake springs back when touched lightly. Remove to platter and keep warm. Repeat with remaining batter. Serve with salsa or sour cream. Makes 8.
Peaches and Cream Crepes
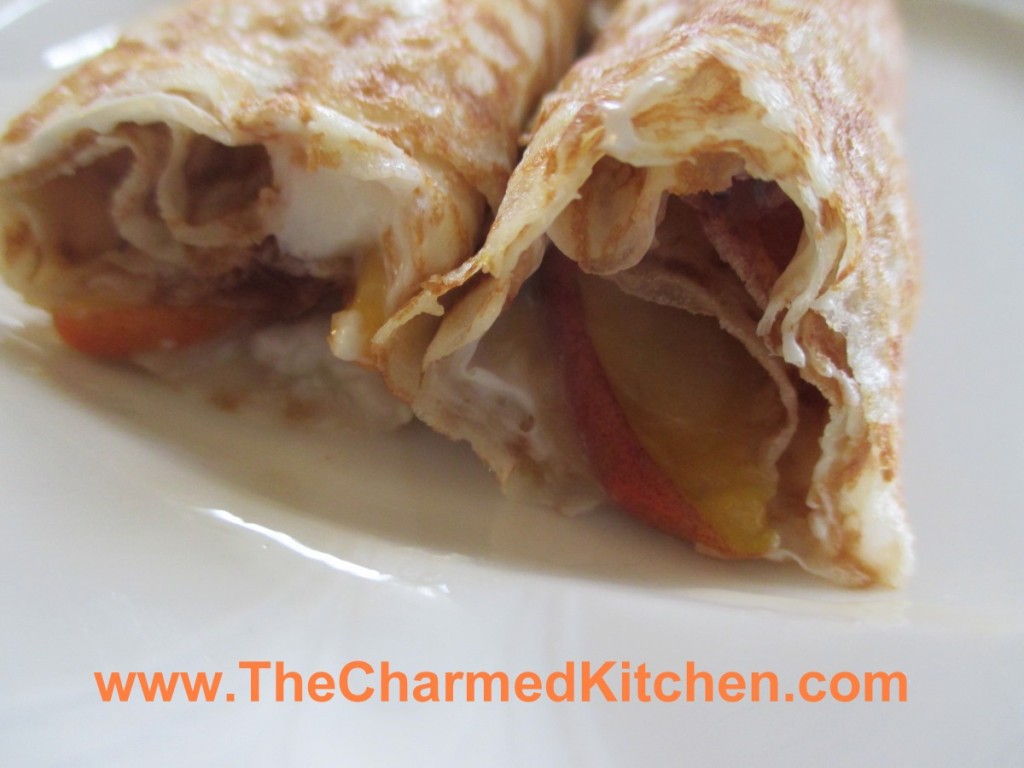
Peaches are such a natural addition to any summer dessert. I decided to use some of my fresh peaches in crepes. Crepes are a nice dessert any time of the year. I think especially nice in summer, using fresh, seasonal fruit.
The crepes were filled with unpeeled, sliced peaches that had been tossed with sugar ahead of time. The sugar softens the peaches a little. I also added some sweetened cream cheese and a little strawberry jam to the filling. We loved them.
They can be assembled ahead of time, and just kept chilled until ready to serve. Serve as is, with a dusting of powdered sugar or even a vanilla caramel drizzle- recipe follows.
Peaches and Cream Crepes
1 recipe basic crepes- recipe follows
2-3 peaches, pitted and sliced thin
¼ c. sugar
1 t. vanilla
1 t. cinnamon
8 oz. cream cheese, softened
¼ c. powdered sugar
Strawberry jam, optional
Make a batch of basic crepes and set aside until ready to use. Place sliced peaches in a bowl with sugar, vanilla and cinnamon and stir until sugar is dissolved. Best to do this at least a couple of hours before you want to use them. This softens the peaches and allows juices to come out of the peaches. You need the juices for the cream cheese. You can do this the day before, then just finish the cream cheese and assemble.
Place cream cheese in a bowl and start beating with an electric mixer. Drain juices off the peaches and add the juice to the cream cheese. Add the powdered sugar, too. Beat until cream cheese is fluffy.
To assemble the crepes: Place a crepe on work surface. Spread with some of the cream cheese. Along one side of the crepe place a small amount of strawberry jam, like a stripe. Place several slices of peach in a row, on top of the strawberry jam. Starting on the side of the crepe with the peaches gently roll up the crepe. Repeat with remaining ingredients. You will have 12. Serve as is, or you can top with powdered sugar, peach slices, warm jam, whipped or caramel sauce – recipe follows.
Basic Crepes
3/4 c. flour
1/8 t. salt
3 eggs, beaten
2 T. melted butter
3/4 c. milk, approximately
Butter or oil for pan
Beat together flour, salt and eggs until smooth. Stir in melted butter and then stir in milk until batter consistency is that of cream. Let stand for 30 minutes before using, or can be refrigerated, covered, overnight. Beat again, just before using.
Heat 6 or 7 inch skillet. Brush with butter or oil and pour in about 2 teaspoons of batter, tipping pan to cover bottom of pan completely with batter. Cook until edges start to brown, turn over and cook until lightly browned (about 2 minutes per side.)
Crepes can be made day ahead or even frozen between sheets of waxed paper and frozen. Makes 12.
Vanilla Caramel
I made a light caramel sauce for the crepes. I just put 1/4 cup of water in a small saucepan with a cup of sugar. Boiled it all together for about 3 minutes. Removed from the heat and added a teaspoon of vanilla, 4 tablespoons of butter and a 1/4 cup of half and half. Stirred until smooth, then added a pinch of salt, for extra flavor.

Zucchini Brownies – Gluten Free
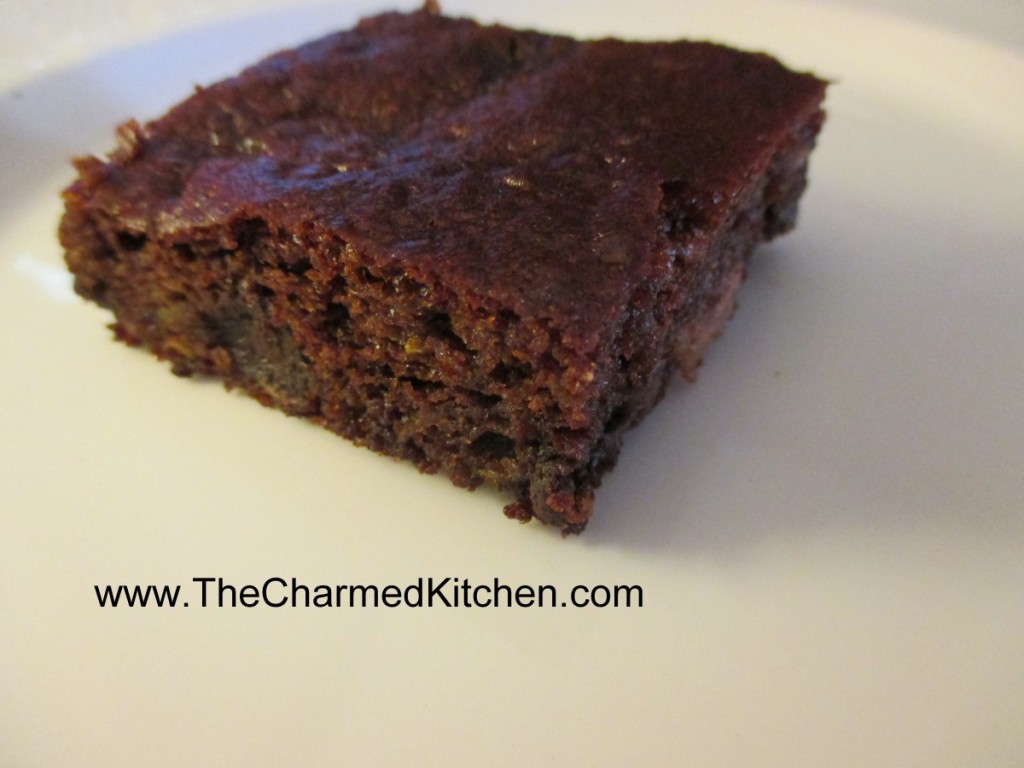
These brownies are everything you want in a brownie. Sweet, moist and very tender. The fact they are also flour and gluten-free is a nice bonus for those who can’t have gluten.
You might think, when you read the ingredients, that I left something out. I didn’t. They baked up beautifully and had a wonderful texture. I think the next time I make them, I might also add some chopped nuts.
Gluten-Free Zucchini Brownies
1½ c. shredded zucchini
1 c. almond butter- but you could use peanut butter instead
1 c. chocolate chips
1/3 c. honey – but you can use 1/2 cup if you want a sweeter brownie
¼ c. unsweetened cocoa powder
1 egg
1 t. vanilla
1 t. baking soda
1 t. cinnamon
½ t. allspice
Preheat oven to 350 degrees. Grease a 9×9 inch pan, set aside. Combine all ingredients in a medium bowl and stir until well blended. Pour batter into pan and spread evenly. Bake 25-30 minutes, or until toothpick inserted comes out clean. Cool before cutting. Makes 16.
Creamy Zucchini Soup – Hot or Cold

You can never have enough recipes for zucchini. If you have ever planted zucchini, you know what I mean. I decided to post a number of my favorite zucchini recipes all week.
This is a recipe I’ve had for ages, but had not made in a while. I forgot how much I liked it. As an added bonus, it can be served hot or cold.
I leave the skins on my zucchini, I like the way the little green flecks look in the soup, but you can peel, if you prefer. You can also use a combo of green and yellow summer squash.
Here is the recipe.
Creamy Zucchini Soup
1 medium onion, chopped
2 T. butter
4-6 medium zucchini, sliced
1 large potato, peeled and diced
1 T. chopped parsley
½ t. each basil, marjoram and thyme
1 t. hot sauce, or to taste
salt and pepper to taste
6 c. chicken or veggie broth
1 c. milk or half and half- I prefer the half and half
In Dutch oven cook onions in butter until tender. Add vegetables and seasonings and cook until hot. Add broth, heat to a simmer and cook 15 minutes. Puree mixture in blender in batches and return to pot. Add milk and heat through. Adjust seasonings. Serve hot or cold. I topped mine with some fresh chopped parsley and a little hot sauce. Serves 6-8.
Zucchini and Carrot Cupcakes
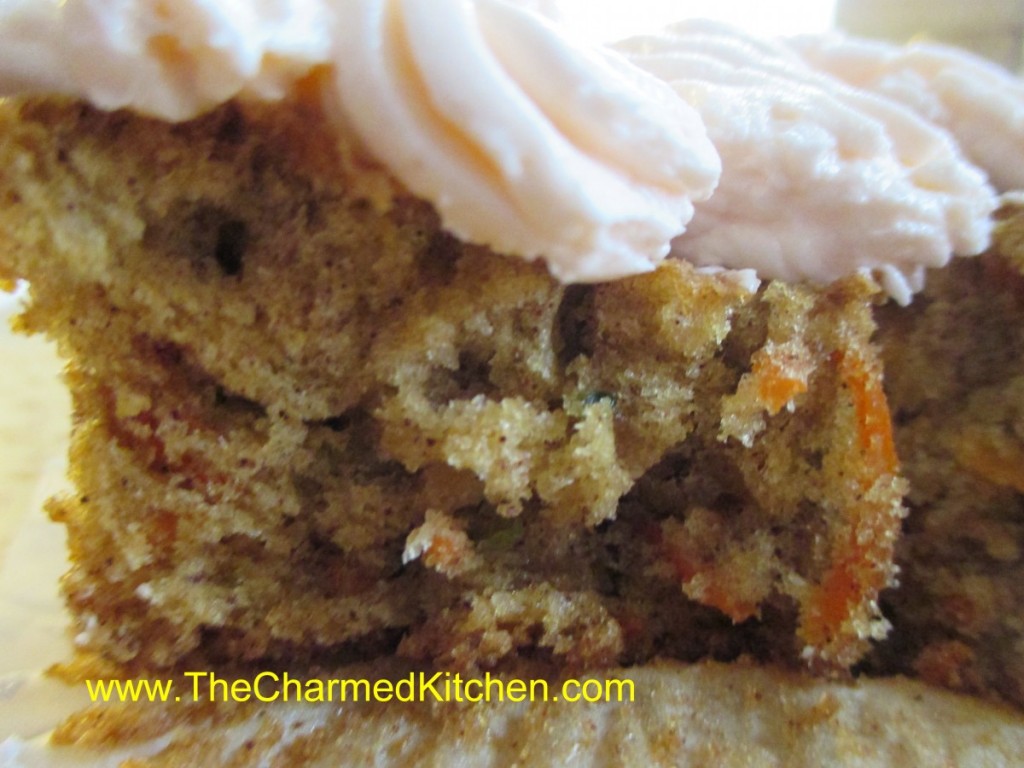
These are really good cupcakes. They are moist and not too sweet with a slightly dense texture. Sort of a cross between carrot cake and zucchini bread, they have more texture than a traditional cupcake and plenty of flavor. I had an abundance of zucchini and carrots and figured they might play well together.
I got 24 cupcakes out of the recipe but they were a little small. Perhaps 18 would be a better way to go. I used simple vanilla buttercream to finish them off. I whipped the frosting a long time so it was extra fluffy. Here are the recipes for both the cupcakes and the frosting.
Zucchini Carrot Cupcakes
2 eggs
1 c. sugar
2/3 c. oil
1¼ c. flour
1 t. baking powder
1 t. baking soda
1 t. cinnamon- I think I would use a little more next time
½ t. salt
1 c. grated carrot
1 c. grated zucchini, squeezed dry and packed tightly
½ c. chopped nuts, optional
Beat eggs with sugar until frothy. Beat in oil then add dry ingredients. Beat on high for 4 minutes. Stir in veggies and nuts. Pour batter into 18- 24 paper lined muffin tins, filling them 2/3 full. Bake in a 350-degree oven for about 15 minutes or until top springs back when lightly touched. Cool and frost. Makes 24.
Note: These cupcakes deflate a little while cooling.
Classic Vanilla Buttercream
3/4 cup butter
6 cups confectioners’ sugar
1/3 cup milk
1 1/2 teaspoons vanilla extract
1/4 teaspoon salt
2 tablespoons milk
Beat butter in a large bowl until fluffy. Gradually add 3 cups of the sifted confectioners’ sugar, beating well. Slowly beat in the vanilla, salt, and 1/3 cup of the milk. Gradually beat in the 3 remaining cups of confectioner’s sugar. Beat in additional milk (1 to 2 tablespoons) if needed, to make frosting of spreading consistency. You can also tint the frosting with juice (like pomegranate or raspberry) or food coloring.


